# Wajub, Developer Documentation
> Payment orchestration for Africa: API, SDKs, webhooks, Mobile Money, marketplaces and routing.
Every page of the documentation as Markdown, then the API reference. Each page starts with its title and the URL it lives at. Append `.md` to any page URL for that page alone.
# Account activation & KYC
URL: https://docs.wajub.com/getting-started/account-activation
> The dossier that unlocks live payments, how review works, and what it changes.
Sandbox needs nothing from you beyond an email address. Production needs a verified identity,
because moving other people's money is regulated everywhere Wajub operates.
Until your compliance record is `verified`, your team stays in sandbox. The Dashboard refuses to
switch to live, so no live key can be created, not even by `wajub login`. Verification is what flips
your team to live.
## Start by choosing what you are
The first decision shapes the whole dossier, so make it deliberately. Wajub recognises eight legal
entity types: **individual**, **company**, **NGO**, **educational institution**, **religious
organisation**, **political organisation**, **government entity** and **other**. Each carries its
own subtypes, an LLC and an SA being two shapes of the same company type.
The split that matters for your workload is individual against everything else. An individual, a
freelancer or a sole proprietor, files no company documents at all. Every other type files four.
The type changes in one direction only. Once verified as an individual, you can move to
another type from **Settings → Compliance**. Your dossier goes back to `unverified` and asks for
what the new type requires on top of what you already filed. No other change of type is offered.
The dashboard guide shows [how to switch](https://docs.wajub.com/dashboard/activation/switch-to-business).
## The six steps
Verification lives in the Dashboard under **Settings → Compliance**, a wizard of six steps where each
step unlocks the next. The dashboard guide walks through it screen by screen: [verify your
business](https://docs.wajub.com/dashboard/activation/verify-business) for the dossier, [verify a person's
identity](https://docs.wajub.com/dashboard/activation/verify-identity) for each person on it, then [track the
verification](https://docs.wajub.com/dashboard/activation/track-verification) once it is submitted.
## What Submit for verification actually checks
The button stays inert until the dossier is complete, and the rules are exact rather than
indicative. Reading them now is faster than discovering them one refusal at a time.
Everyone must have a business category, a product description, a legal name with a full address, a
verified company email, a verified company phone, and at least one online presence.
**If you are a company, an NGO or any other organisation**, you upload four documents at the
company level, and the fourth is waived only for government entities.
| Document | What it is |
| --------------------------------- | ----------------------------------------------------------------------- |
| Business registration certificate | Proof that the entity is legally registered. |
| Articles of association | The founding document describing structure and rules. |
| Location plan | A map or plan showing where the business physically operates. |
| Tax certificate | Confirmation of tax registration. Not required for government entities. |
You also register at least one person marked as the legal representative, and that person needs an
identity document on file. Passport, national ID card or residence permit all count. The legal
representative also records a liveness check, the same real-time session an individual does
(described below), and can do it through a link you send them.
**If you are an individual**, there are no company documents. You register yourself and provide
three things: an identity document, a proof of address, and a liveness check. The liveness check is
a real-time session, done in the Dashboard or through a link you send, which is the easier route
when the person to verify is not the one sitting at the keyboard. A video file you upload yourself
does not count as one.
**If your activity is regulated**, and payment processing, money transfer, lending, crypto
exchange, investment, gambling, lottery, telemedicine and online pharmacy all are, you must attach
a valid licence on top of everything above. A licence that is expired or already rejected does not
count, and the dossier will not submit without one.
## File rules
Documents are accepted as PDF, JPG, JPEG or PNG, up to 10 MB each.
Scan legibly. An unreadable document is the cheapest possible rejection, and it costs you a full
review cycle.
## After you submit
Your record moves to `pending` and the Dashboard tells you to expect an answer within 48 hours. You
receive a confirmation email immediately, and the compliance team works from there.
While you wait, the dossier is read only: you cannot edit fields or add people until a decision
comes back.
Your sandbox integration is untouched. This is the right window to finish it, exercise the failure
paths, and work through the [Going Live checklist](https://docs.wajub.com/getting-started/going-live) so that approval is
the only thing standing between you and your first real payment.
## Watch the outcome from your own code
Compliance emits webhooks, so your application can react to a decision without anyone refreshing a
Dashboard tab. Subscribe an endpoint to the events you care about and they arrive in the usual
signed envelope.
| Event | Fires when |
| ------------------------------ | --------------------------------------------------------- |
| `compliance.submitted` | Your dossier enters review. |
| `compliance.verified` | You are approved and live opens. |
| `compliance.rejected` | The dossier is refused, with a reason. |
| `compliance.changes_requested` | Something specific needs fixing before a decision. |
| `compliance.inquiry.created` | Compliance opens a follow-up question after verification. |
| `compliance.inquiry.resolved` | That question is closed. |
The payload carries the new status, the one it came from, and the rejection reason when there is
one, which is enough to route an alert to the right person on your side.
```json title="compliance.verified"
{
"id": "evt_7Yh2Mp4kQ9vB5nL6hR1cY8dF",
"event": "compliance.verified",
"livemode": true,
"api_version": "2026-10-11",
"created": "2026-05-24T10:21:08+00:00",
"data": {
"legal_name": "Boutique Amina SARL",
"type": "company",
"status": "verified",
"previous_status": "pending",
"rejection_reason": null,
"submitted_at": "2026-05-22T09:04:11+00:00",
"verified_at": "2026-05-24T10:21:08+00:00"
}
}
```
These events only reach **live** endpoints that list them by name. A sandbox endpoint never
receives them, and an endpoint subscribed to `*` does not either, so add them to your live endpoint
configuration explicitly.
## When you are approved
Your compliance record becomes `verified`, your team switches to live, and your live limits are
set.
Live keys are then created the same way sandbox keys were, by switching the environment in the
Dashboard and minting a new one. See [Setup your account](https://docs.wajub.com/getting-started/dashboard-setup) for
where that lives. A sandbox key is never promoted into a live one.
Your limits, single, daily and monthly, for both collection and payout, depend on your business and
its activity, and the Dashboard shows them.
Verification is not permanent. Wajub sets a re-verification date twelve months out and warns you
thirty days before it falls due, so plan on refreshing documents once a year.
## When it comes back for changes
A refusal is not final. `rejected` comes with a written reason, and `changes_requested` means
something specific is missing or unreadable. Either way the dossier reopens for editing and you
resubmit the same record.
These are the causes that actually recur.
| Cause | What to do |
| ----------------------------------------------------------- | ---------------------------------------------------------------------------- |
| Unreadable or partial scan | Rescan the full page, all four corners visible. |
| Name on the document does not match the declared legal name | Use documents in the exact registered name, or correct the legal name. |
| Online presence is a placeholder or an offline URL | Publish something real before resubmitting, the URL is opened. |
| Product description too vague | Say what you sell, to whom, and at what typical amount. |
| Regulated activity declared with no licence | Attach the licence, or correct the activity if it was mis-selected. |
| Beneficial owners missing | Register every owner, with their identity document and ownership percentage. |
Once you are verified, further questions arrive through **compliance inquiries** rather than
through a new review. Those live in the Dashboard next to your dossier, they thread like a
conversation, and you can attach files to a reply. They are the normal channel for ongoing AML
follow-ups and they do not suspend your account by themselves. The dashboard guide shows [how to
answer one](https://docs.wajub.com/dashboard/activation/track-verification#answer-an-inquiry).
> [!WARNING]
> **Some activities are never eligible**
>
> Weapons, illegal substances, and unlicensed gambling are refused whatever the dossier looks like,
> as is anything unlawful in the countries you operate in. If your activity is regulated and you
> hold the licence, declare it at step one rather than hoping the question does not come up.
- [Going Live](https://docs.wajub.com/getting-started/going-live): The checklist to run before you switch keys.
- [Setup your account](https://docs.wajub.com/getting-started/dashboard-setup): Where live keys are minted once you are approved.
- [Compliance & security](https://docs.wajub.com/resources/compliance): PCI-DSS, data protection, regional regulation.
- [Limits & quotas](https://docs.wajub.com/resources/limits): Amount ceilings, rate limits, webhook delivery.
---
# Response structure
URL: https://docs.wajub.com/getting-started/api-structure
> The JSON envelope, list format, error shape and identifiers shared by every endpoint.
Every endpoint answers with the same JSON envelope, successes and failures alike. Three keys are
always present, so one response handler covers the whole API and you only branch on the parts that
change.
## The three keys you always get
`code` repeats the HTTP status in the body, for clients that cannot easily read headers. `status`
is the HTTP reason phrase for that code, `OK`, `Created`, `Not Found`, `Unprocessable Content`, and
never the literal string `error`. `message` is a short sentence describing what happened, meant for
your logs rather than for your customers.
Everything else in the body depends on what you asked for.
## One resource
When you fetch or create a single object, it arrives under a key named after its type. A payment
comes back as `transaction`, a customer as `customer`, a transfer as `transfer`. There is no
generic `data` wrapper to unwrap.
A field with no value may be left out or sent as `null`. Treat every optional field as possibly
absent and possibly `null`, and read it with a default.
```json title="GET /payments/{id} · 200 OK"
{
"code": 200,
"status": "OK",
"message": "Payment retrieved",
"transaction": {
"id": "trx_test_CSUGajfv9xh0XQ5wu2lx",
"reference": "order-4172",
"status": "succeeded",
"amount": 5000,
"currency": "XAF",
"created_at": "2026-05-24T10:21:08+00:00"
}
}
```
An endpoint may add its own top-level keys next to the resource when they are not properties of it.
Creating a payment is the case you will meet first: the hosted page URL describes the session you
just opened, not the payment itself, so it sits beside it rather than inside it. The token has no
type prefix: a random string, preceded by `test_` in the sandbox.
```json title="POST /payments · 201 Created"
{
"code": 201,
"status": "Created",
"message": "Payment initiated",
"authorization_url": "https://pay.wajub.com/test_7Yh2Mp4kQ9xL4vR8tB3nW6yC1dF5sJ0aG…",
"authorization_token": "test_7Yh2Mp4kQ9xL4vR8tB3nW6yC1dF5sJ0aG…",
"transaction": {
"id": "trx_test_CSUGajfv9xh0XQ5wu2lx",
"status": "pending",
"amount": 25000,
"currency": "XAF"
}
}
```
## Several resources
List endpoints break the naming rule on purpose. The array is called `items`, whatever it
contains, and a `meta` object carries the paging state. Writing one list helper that works across
payments, customers, transfers and the other resources is therefore worth doing once. The one
exception is `GET /events`: its array is called `events`, and it pages by number only.
```json title="GET /payments · 200 OK"
{
"code": 200,
"status": "OK",
"message": "Payments retrieved",
"items": [
{ "id": "trx_test_CSUGajfv9xh0XQ5wu2lx", "status": "succeeded", "amount": 5000 },
{ "id": "trx_test_9Wm4Kd2pR7vB5nL6hY1c", "status": "pending", "amount": 12000 }
],
"meta": {
"current_page": 1,
"last_page": 4,
"per_page": 25,
"total": 87,
"next_cursor": "Q2t9mVxL4pRw8nZs...",
"has_more": true
}
}
```
`meta` comes in two shapes, and which one you get depends on how you asked. By default you page by
number and `meta` tells you where you are in the total. On the lists that support cursors it also
carries `next_cursor` and `has_more`. Send that `next_cursor` back as the `cursor` parameter and
the API switches to cursor paging, which is what you want for a large export or a backfill because
it stays correct while new objects arrive.
```json title="meta, cursor mode"
{
"per_page": 25,
"next_cursor": "Hj4kP9wQx2LmV7tRb3NcY6sD",
"prev_cursor": null,
"has_more": true
}
```
Page size defaults to 25 and caps at 100. [Pagination](https://docs.wajub.com/api/pagination) covers how to walk a
collection from end to end.
## Errors
An error keeps the same three keys. The HTTP code is in the `4xx` or `5xx` range, `status` is that
code's reason phrase, and `message` says what went wrong. Because the envelope does not change, a
failed call parses with the same code that parses a successful one.
```json title="422 Unprocessable Content"
{
"code": 422,
"status": "Unprocessable Content",
"message": "The amount field is required. (and 1 more error)",
"errors": {
"amount": ["The amount field is required."],
"currency": ["The selected currency is invalid."]
}
}
```
Two error classes add a field worth handling explicitly. A `422` carries `errors`, an object keyed
by field name whose values are arrays of messages, so a field can fail several rules at once; a
refusal that concerns no single field puts its message under `errors.request`. The top-level
`message` is the first of them, followed by `(and 1 more error)` when there are more. A
rate-limited response carries `retry_after`, the number of seconds to wait, which saves you
guessing a backoff.
A `409 Conflict` carrying `errors.idempotency_key` means you reused an `Idempotency-Key` whose
first request is still running: send it again a moment later to get the stored response. A
`reference` is never checked for uniqueness, so reusing one is not a conflict. The other `409`s
say the resource is not in a state that allows the call. `payment_in_progress`, on a charge or a
cancel, means a charge is under way: wait for its outcome, by webhook or by reading the payment,
then call again if you still need to. A prepared payment that was activated, cancelled or has
expired, the cancel of a payment whose instalments were partly paid (`payment_partly_paid`), and a
few Sync and CLI cases their pages cover do not change by waiting: read the resource, then decide.
A `404` tells you which resource was missing, `Payment Not Found` rather than a generic message, so
the `message` field is enough to route the error without inspecting the URL you called. The full
catalogue of codes lives in the [API reference](https://docs.wajub.com/api/errors).
> [!WARNING]
> **Do not parse the message**
>
> `message` is prose and it changes. Branch on `code`, and on the keys inside `errors` when you
> need field-level detail.
## Payment statuses
A transaction's `status` is one of nine values. The transitions between them, and which ones are
terminal, are in [Key Concepts](https://docs.wajub.com/getting-started/concepts#payment-lifecycle).
| Status | Meaning |
| -------------------- | ---------------------------------------------------- |
| `pending` | Created, waiting for the customer to act. |
| `processing` | Confirmed with the provider, settlement in progress. |
| `succeeded` | Funds received. Safe to fulfil. |
| `failed` | Declined by the provider or the wallet. |
| `cancelled` | Cancelled by the customer or by you. |
| `expired` | The payment window closed before completion. |
| `partial` | Part of the amount was captured, on a split payment. |
| `refunded` | Fully refunded after succeeding. |
| `partially_refunded` | Partly refunded after succeeding. |
## Identifiers
Every object carries an `id` built the same way: a prefix naming the type, then `test_` when the
object lives in the sandbox, then a random string. The prefix tells you what you are holding
without a lookup, and the `test_` segment makes a sandbox id impossible to mistake for a live one
in a log or a support ticket.
| Prefix | Object | Random part |
| ------ | ------------------ | ------------- |
| `trx_` | Payment | 20 characters |
| `po_` | Transfer, outgoing | 20 characters |
| `rfd_` | Refund | 20 characters |
| `dsp_` | Dispute | 20 characters |
| `ben_` | Beneficiary | 20 characters |
| `acc_` | Sync subaccount | 20 characters |
| `cus_` | Customer | 24 characters |
| `evt_` | Webhook event | 24 characters |
So a sandbox payment reads `trx_test_CSUGajfv9xh0XQ5wu2lx` and its production twin
`trx_CSUGajfv9xh0XQ5wu2lx`. Store ids as text of unbounded length, never in a fixed 24 or 32
character column. Invoices and payment links follow their own rules, listed in
[Key Concepts](https://docs.wajub.com/getting-started/concepts#resource-identifiers).
## Dates
Every timestamp is ISO 8601 in UTC, with an explicit offset rather than a `Z` suffix.
```json title="Timestamp format"
"created_at": "2026-05-24T10:21:08+00:00"
```
Both spellings mean the same instant and any ISO 8601 parser handles them, but if you compare
timestamps as strings, which you should not, that offset is the form you will actually receive.
## Amounts
Amounts are expressed in the major unit of the currency. `5000` in a response means 5 000 XAF, not
50 XAF, which is the opposite of what most payment APIs do. The CFA franc has no subunit in daily
use, so a minor-unit convention would be inventing a denomination that does not exist.
Values come back as numbers rounded to two decimals. What you can charge is bounded per currency:
from 25 to 2 000 000 in XAF and XOF, from 100 in NGN, from 0.50 in USD and EUR. An amount outside
those bounds is refused with a `422` whose message states them. Read the `currency` field before
doing arithmetic, since the same figure means very different things in XAF and in USD.
---
# Key Concepts
URL: https://docs.wajub.com/getting-started/concepts
> Payment lifecycle, environments, session tokens, keys and the orchestration model.
Before writing code, take a few minutes to understand the core concepts. They'll make
every API call and webhook event immediately clear.
## Payment lifecycle
A payment is a conversation between three parties: your server, Wajub, and the person paying.
Every state change comes from one of them acting, so the fastest way to learn the lifecycle is to
watch who does what, in order.
### The path a successful payment takes
Six movements, and only two of them are yours. You open the payment, you redirect, then you wait.
Wajub picks a provider, collects the money and tells you how it ended.
1. Your server → Wajub: You declare the intent to collect (`POST /payments`, `pending`)
2. Wajub → Customer: You redirect the payer to the hosted page (`authorization_url`)
3. Customer → Wajub: The payer picks an operator and confirms on their phone (`processing`)
4. Wajub → Wajub: Wajub routes to a provider and the funds land (`succeeded`)
5. Wajub → Your server: Wajub delivers the event to your endpoint (`payment.succeeded`)
6. Your server → Wajub: You confirm the outcome before fulfilling the order (`GET /payments/{id}`)
### When it does not succeed
The same three parties, the same order, but the payment leaves the happy path. Each exit produces
its own event, so your endpoint learns about it exactly the way it learns about a success.
1. Customer → Wajub: The payer walks away and the window closes (`expired`)
2. Customer → Wajub: The payer cancels, or you void the payment yourself (`cancelled`)
3. Wajub → Wajub: The provider declines the charge or times out (`failed`)
4. Wajub → Wajub: Only part of the amount settles, the rest is still moving (`partial`)
5. Wajub → Wajub: The remainder settles, so the payment still lands (`succeeded`)
6. Wajub → Your server: Wajub delivers the matching event (`payment.failed`)
Four states end the attempt: `succeeded`, `failed`, `cancelled` and `expired`. Nothing the customer
does moves a payment out of them. `pending`, `processing` and `partial` are still in flight, so
treat them as open, never as a failure. Two things can still move after the end. A provider that
confirms a charge late turns a `failed`, `cancelled` or `expired` payment into `succeeded`, because
the money was taken. And a `succeeded` payment can still read `refunded` or `partially_refunded`
days later.
| State | Meaning | Next action |
| -------------------- | ----------------------------------------------------- | ---------------------------------------------------- |
| `pending` | Initialized, waiting for the customer to act. | Redirect the customer to the payment page. |
| `processing` | The provider is processing the charge. | Wait. The `payment.*` webhook tells you how it ends. |
| `succeeded` | Funds received. You can fulfill the order. | Deliver the product or service. |
| `failed` | Declined, timed out, or never reached a provider. | Show an error, offer to retry. |
| `cancelled` | Cancelled by the customer or merchant. | No action needed. |
| `expired` | The payment window closed before completion. | Re-initiate if needed. |
| `partial` | Part of the amount settled, the rest is still moving. | Keep the order open. It can still reach `succeeded`. |
| `refunded` | A succeeded payment was fully refunded. | Handle the return. |
| `partially_refunded` | A partial refund was applied. | Track the remaining amount. |
### How payments move through states
1. **You** call `POST /payments`, creates a transaction in `pending`.
2. **The customer** completes the payment on the hosted page (`pay.wajub.com`).
3. **Wajub** processes the charge with the best available provider (see [Orchestration](https://docs.wajub.com/orchestration)).
4. **Wajub** sends a `payment.succeeded` webhook to your server.
5. **You** verify the status via `GET /payments/{id}` and fulfill.
Step 4 is where the state machine reaches you. Every transition Wajub records emits an event, and
an event delivered to your endpoint looks like this. The type is in `event`, and `data` carries the
payment exactly as `GET /payments/{id}` would return it:
```json title="payment.succeeded"
{
"id": "evt_test_aio5DpN577tNU2vOxdmu",
"event": "payment.succeeded",
"data": {
"id": "trx_test_CSUGajfv9xh0XQ5wu2lx",
"amount": 5000,
"amount_paid": 5000,
"currency": "XAF",
"status": "succeeded",
"channel": "cm.mtn",
"customer": {
"id": "cus_test_sAaim5apjocIgtlhzJY3",
"email": "amina@example.com"
},
"sandbox": true,
"created_at": "2026-09-11T10:24:00+00:00"
},
"livemode": false,
"pending_webhooks": 1,
"api_version": "2026-10-11",
"request": {
"id": null,
"idempotency_key": "idem_4kQ9xL2mR7vB5nW8tY3cZ6hJ1dF0sGaP"
},
"created": "2026-09-11T10:26:13+00:00"
}
```
## Sandbox vs Live
Wajub provides two completely isolated environments. A single base URL serves both.
The environment is determined by the API key you use.
| | Sandbox | Live |
| ------------- | -------------------------------------------------------------------------------- | ----------------------------------------------------- |
| **Keys** | `pk_test.…` / `sk_test.…` | `pk.…` / `sk.…` |
| **Money** | No real fund movement | Real payments |
| **Test data** | [Test phone numbers](https://docs.wajub.com/getting-started/quickstart#4-pay-it-with-a-sandbox-number) | Real customer data |
| **Scope** | Payments, refunds, transfers, customers, webhooks | Everything, including links, invoices, tax and Shield |
> [!WARNING]
> **Never mix environments**
>
> A sandbox key cannot access live data, and vice versa. Store keys in separate environment
> variables per environment.
## API keys
Three key types, each with a specific purpose:
- `Public key (pk.… / pk_test.…)` (client-safe): Initialize payments from the browser or mobile app. Cannot access sensitive operations.
- `Private key (sk.… / sk_test.…)` (server only): Full API access, payments, transfers, refunds, balance. Must never leave your backend.
- `Restricted key (rk.… / rk_test.…)` (server only): Scoped to specific resources (e.g. payment.read). Ideal for third-party integrations or least-privilege services.
> [!CAUTION]
> **Private keys are blocked in browsers**
>
> Never use a private `sk` key from a browser or a mobile app. When Wajub detects a private key used
> from a browser, it refuses the request and emails you about it. This is a safety net, not a
> guarantee. Store `sk.…` in environment variables. Never in client-side code.
## Session tokens
`POST /payments` returns a **session token**, `authorization_token`, already embedded in the
`authorization_url` you redirect to. The token is scoped to one payment, it can do nothing but pay
that payment, and it is safe to hand to a browser.
Its lifetime follows the payment. The payment window is 24 hours by default, adjustable from 5
minutes to 30 days with `expires.in`.
You only handle the token yourself when you embed checkout in your own page rather than redirecting.
Your server creates the payment as usual:
```typescript title="Server, create the payment"
import { Wajub } from '@wajub/node';
const wajub = new Wajub({ apiKey: process.env.WAJUB_API_KEY! });
const payment = await wajub.payments.create({
amount: 5000,
currency: 'XAF',
customer: { email: 'amina@example.com' },
});
// Send payment.authorization_token to your frontend.
```
Your frontend passes that token to the browser SDK, which is a different package and never sees your
API key:
```typescript title="Browser, mount the checkout"
import { mount } from '@wajub/js';
await mount('#checkout', { sessionId: authorizationToken });
```
See [Wajub Components](https://docs.wajub.com/libraries/components) for the full embedded checkout.
## Orchestration model
Wajub routes each payment to a provider for its channel, country and amount, following your routing
rules, and falls back to the next one if the first fails. You just create a payment and listen for
the webhook.
> [!TIP]
> **See each routing decision**
>
> Once you are live, open [Konsole → Routing Log](https://docs.wajub.com/developer-tools/konsole/routing-log) to see the
> routing decision and the providers tried for each payment. It does not exist in the sandbox.
## Resource identifiers
Every resource id is a prefix, then `test_` when the object lives in the sandbox, then 20 to 24
random characters depending on the resource. An id therefore tells you two things at a glance: what
it is, and which environment produced it. Store ids as text with room for 40 characters.
| Prefix | Resource | Live | Sandbox |
| ------ | ------------------- | ------------------------------ | ----------------------------------- |
| `trx_` | Payment transaction | `trx_CSUGajfv9xh0XQ5wu2lx` | `trx_test_CSUGajfv9xh0XQ5wu2lx` |
| `po_` | Transfer (payout) | `po_225KMKULRQqYvlhrgUOE` | `po_test_225KMKULRQqYvlhrgUOE` |
| `rfd_` | Refund | `rfd_9xh0XQ5wu2lxCSUGajfv` | `rfd_test_9xh0XQ5wu2lxCSUGajfv` |
| `ben_` | Beneficiary | `ben_LRQqYvlhrgUOE225KMKU` | `ben_test_LRQqYvlhrgUOE225KMKU` |
| `dsp_` | Dispute | `dsp_hrgUOE225KMKULRQqYvlh` | `dsp_test_hrgUOE225KMKULRQqYvlh` |
| `pm_` | Payment method | `pm_sAaim5apjocIgtlhzJY3x` | `pm_test_sAaim5apjocIgtlhzJY3x` |
| `cus_` | Customer | `cus_sAaim5apjocIgtlhzJY3wQ8s` | `cus_test_sAaim5apjocIgtlhzJY3wQ8s` |
| `evt_` | Webhook event | `evt_aio5DpN577tNU2vOxdmuZGhT` | `evt_test_aio5DpN577tNU2vOxdmuZGhT` |
Three resources follow their own rule. An invoice is always `inv_` with no environment infix. A
payment link has no prefix at all, its id is nine characters such as `kQ7vB4nL6`, because it is also
the public URL people receive. A dispute message is a UUID.
> [!TIP]
> **Use the prefix as a guard rail**
>
> A `test_` id reaching your production database is a configuration bug, not a payment. Checking the
> prefix before you fulfill an order catches a mixed-up API key long before your accountant does.
## Amounts
Unlike many payment providers, Wajub expresses amounts in the **major unit** of the
currency (e.g. `5000` = 5 000 XAF, not 500 000 centimes). CFA franc currencies have no
common subunit, so this avoids confusion.
## "Payment" vs "transaction"
Wajub uses both terms, and they refer to the same object:
- **Payment**. The business concept. You create a payment, a customer pays, you fulfill.
- **Transaction**. The name the API gives the payment object. The API response uses
`"transaction": {...}` as the root key, and the `id` field is prefixed `trx_`.
In practice: you call `POST /payments`, receive `transaction.id = "trx_xxx"`, and listen for
`payment.succeeded` webhooks. The terms are interchangeable in this documentation.
## Next steps
- [Quickstart](https://docs.wajub.com/getting-started/quickstart), code your first payment.
- [Orchestration](https://docs.wajub.com/orchestration), how routing and fallback work.
- [Webhooks](https://docs.wajub.com/developer-tools/webhooks/quickstart), receive `payment.succeeded` reliably.
---
# Setup your account
URL: https://docs.wajub.com/getting-started/dashboard-setup
> Create your account, mint an API key in the right environment, and wire it into your SDK.
Every call to the Wajub API is authenticated by a key, and a key belongs to one account and one
environment. This page takes you from no account at all to an SDK that authenticates, which is the
state the [Quickstart](https://docs.wajub.com/getting-started/quickstart) assumes you are already in.
## 1. Create your account
Sign up at **[dashboard.wajub.com](https://dashboard.wajub.com)** with your name, email and a
password, then confirm the email we send you. Nothing is payable at this stage, a new account lands
on the free **Pay as you go** plan.
Your user account comes first and your business second. Right after confirming your email, the
Dashboard asks you to create your first merchant account, on a screen titled **Tell us about your
Business**:
| Field | Required | What it is for |
| -------------- | -------- | ---------------------------------------------------------------------------------------------------------- |
| Merchant Name | Yes | Your company, project or application name. |
| Business Email | No | Printed on the invoices and emails your customers receive. Your own email is used when you leave it empty. |
| Business Phone | No | Shown to your customers next to that email, so they can reach you. |
You are the owner of that account. The Dashboard stays on this screen until it exists, and you can
create other merchant accounts later from the same user.
Your team is created in **sandbox**, and it stays there until your business verification is
approved. Nothing you do now can move real money, which is the point: build and break things freely
before [activation](https://docs.wajub.com/getting-started/account-activation) opens production.
The Dashboard home shows a setup checklist tailored to what you said you were building. It tracks
the same milestones this page covers, so you can follow either one.
## 2. Select the environment before you mint a key
This is the step people skip. A key is minted for whichever environment the Dashboard is currently
showing. Flip the environment switch to sandbox or to live **first**, then create the key. Create it in the wrong environment and it will authenticate
fine while returning data from an environment you did not mean to touch.
Live stays unavailable until your account is verified, so until then every key you create is a
`_test` key whatever you do.
Switching environment is itself a permission. The account owner can always do it, other members need
a role that may do it, **Administrator** or **Developer** by default, and a member with the
**Sandbox User** role can never switch to live.
## 3. Create your first API key
Open **Settings → Developers → API keys** and create a key. You pick
the type, and the prefix follows from that choice and from the environment you selected in step 2.
| Type | Sandbox prefix | Production prefix | Use it for |
| ---------- | -------------- | ----------------- | ----------------------------------------------------------------------------- |
| Public | `pk_test.` | `pk.` | Browser and mobile code, to create a payment. Holding it is not a permission. |
| Private | `sk_test.` | `sk.` | Your server. Full access to the API. |
| Restricted | `rk_test.` | `rk.` | Your server, limited to the scopes you grant. |
Start with a private key. A restricted key is worth the extra step once you know which endpoints
you actually call, and [Environments & API keys](https://docs.wajub.com/getting-started/environments) covers the scopes,
the IP allow-list and the expiry date you can attach to any of them.
> [!CAUTION]
> **Copy the value right away**
>
> The full value appears in the banner right after creation. Copy it into your secrets manager
> before you leave the page. The key list then shows only its first characters. You can display a
> private or restricted key again with **Reveal**, which asks for a security verification code, is
> rate limited and is recorded in the audit log. A public key stays copyable from the list.
If you have the [CLI](https://docs.wajub.com/developer-tools/cli/installation) installed, `wajub login` does this for
you: it pairs the terminal with your account through the browser, and the owner, an
Administrator or a Developer (a Sandbox User too, for a sandbox key) approves the request and
picks the environment, Sandbox unless they choose Live. The CLI stores the key in a local profile.
That key expires after 90 days, and `wajub login` gives you a new one. The WordPress plugin's
**Connect with Wajub** asks for a key the same way, and its key lasts 90 days unless the approver
picks **No expiry**. Each key a pairing creates sends the owner and every Administrator an email.
## 4. Put the key in your environment
Keys belong in the environment, never in the code and never in the repository. Create a `.env` file
at the root of your project and keep it out of git.
```bash title=".env"
WAJUB_API_KEY=sk_test.xxxxxxxxxxxxxxxx…
WAJUB_WEBHOOK_SECRET=whsec_test_xxxxxxxxxxxxxxxx
```
`WAJUB_API_KEY` is the name every SDK recognises, so use it rather than inventing your own.
`WAJUB_WEBHOOK_SECRET` is the signing secret of a webhook endpoint, a different credential
entirely, and step 6 is where you get one.
## 5. Point the SDK at the key
Two of the SDKs read `WAJUB_API_KEY` from the environment on their own. Python and Go construct a
working client from an empty configuration, so the snippets below pass nothing.
Node and PHP do not read the environment, they raise on an empty configuration, so you hand them
the value yourself.
**Authenticate the SDK**
```javascript
import { Wajub } from '@wajub/node';
const wajub = new Wajub({ apiKey: process.env.WAJUB_API_KEY });
```
```python
from wajub import Wajub
wajub = Wajub()
```
```php
getenv('WAJUB_API_KEY'),
]);
```
```go
package main
import (
"log"
"github.com/wajubhq/wajub-go"
)
func main() {
client, err := wajub.New(wajub.Config{})
if err != nil {
log.Fatal(err)
}
_ = client
}
```
Whichever SDK you use, all four read `WAJUB_WEBHOOK_SECRET` on their own for signature
verification, so once that variable is set you never pass the secret explicitly.
## 6. Register a webhook endpoint
A payment confirms asynchronously, so your server learns the outcome from a webhook rather than
from the response to the call that created it. Register the endpoint now, while you are in the
Dashboard, so the [Quickstart](https://docs.wajub.com/getting-started/quickstart) has somewhere to deliver to.
Open **Konsole → Webhooks → Endpoints**, add your URL, and copy the signing secret shown on the
endpoint. It looks like `whsec_test_` followed by 32 characters in sandbox, and `whsec_` followed
by 32 characters in production.
That secret is per endpoint and per environment. Registering the same URL again in live gives you a
different secret, which is why going to production means copying a new one rather than reusing what
you have. Use it to [verify every incoming
signature](https://docs.wajub.com/developer-tools/webhooks/signature-verification) before you trust a payload.
## 7. Roll a key that leaked
Rolling replaces the value in place. The name, the scopes and the IP allow-list survive, the old
value stops authenticating the moment you confirm, and there is no grace window where both work. So
have the new value ready to deploy before you click, or you take an outage between the roll and the
release.
Because it is destructive, rolling asks for a security verification code if you have not entered
one recently. Deleting a key asks the same.
## 8. Who on your team can do this
API keys are visible only to the account owner and to members whose role lets them manage API keys:
**Administrator**, **Developer** and **Sandbox User**. Any other member still finds
**Settings → Developers → API keys** in the menu, but the page answers "You do not have the required
permission to perform this action.": ask an admin to change your role.
The dashboard guide's [roles table](https://docs.wajub.com/dashboard#roles) lists what each role can do.
## 9. When production opens
Verified accounts get live keys the same way, by switching the environment and creating a key. Live
keys are separate objects, a sandbox key is never promoted. Plan on swapping the key, the webhook
URL and its new signing secret together, and walk the [Going Live
checklist](https://docs.wajub.com/getting-started/going-live) before you do.
- [Quickstart](https://docs.wajub.com/getting-started/quickstart): Your first payment, with the key you just created.
- [Environments & API keys](https://docs.wajub.com/getting-started/environments): Key formats, scopes, IP allow-lists, expiry.
- [Account activation & KYC](https://docs.wajub.com/getting-started/account-activation): The documents that unlock production.
- [Security best practices](https://docs.wajub.com/best-practices/security): Storing, rotating and scoping credentials.
---
# Environments & API keys
URL: https://docs.wajub.com/getting-started/environments
> Understand test and production modes, key formats and how to switch safely.
Wajub runs two isolated environments behind one API, with the same base URL, endpoints and
payloads. The key you send decides which one you are talking to, so switching environments means
swapping a credential, never rewriting code.
```bash title="Base URL (test & production)"
https://api.wajub.com
```
## Sandbox
The sandbox is where you build. Mobile Money operators are simulated by
[test numbers](https://docs.wajub.com/getting-started/quickstart#4-pay-it-with-a-sandbox-number) whose last six digits
decide the outcome, webhooks fire exactly as they do in production, and no money ever moves. It
shares no data with live, so a sandbox customer, payment or event never appears in your live
account.
Keys are `pk_test.…` and `sk_test.…`, and every object created there carries `test_` in its id.
## Production
Production moves real money. It opens once your business verification is approved, see
[Account activation & KYC](https://docs.wajub.com/getting-started/account-activation) for the documents and the timeline.
Keys are `pk.…` and `sk.…`.
In the Dashboard, each member works in one environment at a time: the dashboard guide shows [how
to switch to Live](https://docs.wajub.com/dashboard/getting-started/test-and-live) and what changes there.
## What the sandbox does not cover
The sandbox reproduces the payment flow faithfully, but five feature areas are live only. Calling
them with a test key returns `403` with `This feature is only available in live mode.`
| Feature | Endpoints | Sandbox |
| ------------------------------------------------- | ------------------------------------ | --------- |
| Payment links | `/links` | Live only |
| Invoices | `/invoices` | Live only |
| Tax | `/tax` and `/customers/{id}/tax_ids` | Live only |
| Shield | `/shield` | Live only |
| Payments, refunds, transfers, customers, webhooks | | Available |
One more difference is the opposite way round: the sandbox payment page always offers a test card
so you can exercise that code path, while the live page only offers the channels your active
providers cover. A card appears there only once a provider that accepts cards is active on your
account. Build against Mobile Money first.
## Key types
| Type | Prefix | Where it runs | What it can do |
| ---------- | ------------------ | ------------------- | -------------------------------------------------------------------------------------------------------------------------------------------- |
| Public | `pk.` / `pk_test.` | Browser, mobile app | Create a payment from the page. Holding it is not a permission: see [the endpoints that accept it](https://docs.wajub.com/api/authentication#the-three-key-types). |
| Private | `sk.` / `sk_test.` | Your server only | Everything: payments, refunds, transfers, balance. |
| Restricted | `rk.` / `rk_test.` | Your server only | Only the scopes you grant it, one resource at a time. |
A key is a prefix, a dot, then a long random secret. Store keys as text, never in a fixed 32 or 64
character column.
```bash title="Key shape"
sk_test.xxxxxxxxxxxxxxxx…
# prefix "sk_test", a dot, then the random secret
```
> [!CAUTION]
> **Never commit a private key**
>
> Keep `sk.…` in environment variables or a secrets manager. If one leaks, revoke it from
> **Settings → Developers → API keys** in the Dashboard. Rotating a key issues a new value immediately and the
> old one stops working on the next request.
## Narrowing what a key can do
Three controls exist on every key, and they cost nothing to turn on.
**Scopes, on restricted keys.** A restricted key holds an explicit list of
`{resource}.{read|write}` permissions: `payment.read`, `payment.write`, `customer.read`,
`transfer.write`, `refund.write`, `recipient.*`, `invoice.*`, `dispute.*`, `webhook.*`, `event.*`,
`link.*`, `identity.*`, `tax.*`, plus the read-only `balance.read` and `account.read`.
Anything outside the list returns `403`. There is no `balance.write`, but `transfer.write` is
enough to send payouts with `POST /transfers`, so grant it only to a key whose job is to pay
people.
**An IP allow-list.** Each key accepts a list of exact IPv4 or IPv6 addresses, or CIDR ranges in
either family such as `203.0.113.0/24` or `2001:db8::/32`. You enter it when you create the key,
and you can change it later, on every key type. A request from anywhere else is refused
with `403 IP address not allowed for this API key`, whatever the key type. A key
that only works from your production servers is a key that is worthless in a leaked repository.
**An expiry date.** A key can carry `expires_at`. Past that moment it authenticates nothing. Use it
for a contractor, a migration script, or any integration you know is temporary. You set it when you
create the key, change or remove it later, on every key type, and read it next to the
key in the list: **Expires …**, or **Expired …** once the date has passed. A key with no expiry
shows no date.
Editing anything else about a key leaves its expiry as it was. A key created by approving a
pairing, `wajub login` or an app such as the WordPress plugin, expires after 90 days unless the
approver picked **No expiry**, which the approval page never offers for the CLI.
## Environment variables
Three names cover a server integration. Keep them in the environment rather than in code, and
name them exactly like this: the SDKs look for these spellings and no others.
```bash title=".env"
WAJUB_API_KEY=sk_test.xxxxxxxxxxxxxxxx…
WAJUB_WEBHOOK_SECRET=whsec_test_xxxxxxxxxxxxxxxx
WAJUB_PUBLIC_KEY=pk_test.xxxxxxxxxxxxxxxx…
```
`WAJUB_API_KEY` is the authentication credential. The Python and Go SDKs read it from the
environment on their own, so an empty configuration gives you a working client. The Node and PHP
SDKs do not, they throw on an empty configuration and expect you to pass the value, see
[Setup your account](https://docs.wajub.com/getting-started/dashboard-setup#5-point-the-sdk-at-the-key) for the exact
shape in each language.
`WAJUB_WEBHOOK_SECRET` is the one all four read automatically. Set it and signature verification
works without you passing the secret anywhere.
`WAJUB_PUBLIC_KEY` is read by no SDK. It is there for your own frontend code, and only if your
browser or mobile client initializes payments itself.
Production values belong in your secrets manager, never in a committed file. The safest setup keeps
sandbox and production in separate variable sets, so promoting code never means editing a key by
hand.
## Going to production
1. Complete your business verification in the Dashboard. See [Account activation & KYC](https://docs.wajub.com/getting-started/account-activation) for the required documents and the review timeline.
2. Create production keys. Sandbox keys cannot be promoted, they are separate objects.
3. Point your webhook endpoints to their production URLs and copy the new signing secret, it differs per environment.
4. Re-test the features that were live only in the table above. This is the first time your code runs against them.
5. Follow the [Going Live](https://docs.wajub.com/getting-started/going-live) guide for the full checklist.
---
# Going Live
URL: https://docs.wajub.com/getting-started/going-live
> The checklist to run before you switch keys, and what changes in production.
Switching to production is one line of configuration. Everything that makes it safe happens before
that line changes, which is what this page is for: a checklist you can actually tick off, then the
list of things that behave differently in production and could not have been tested in the sandbox.
## Before anything else, get verified
Production opens when your compliance record is approved, and not a moment earlier. Until then
your team stays in sandbox: the Dashboard refuses to switch to live and `wajub login` refuses a live
profile, so no live key can be created. [Account activation &
KYC](https://docs.wajub.com/getting-started/account-activation) covers the dossier and the review.
Submit it early. Review takes up to 48 hours, and your sandbox integration keeps working
throughout, so the sensible order is to file the dossier first and work through the rest of this
page while it is being reviewed.
## Then activate a way to collect
Approving your record opens production, but connects no payment method. Until one provider is
active in production, the payment page offers none and your payers cannot pay, however good your
integration is.
Two ways, from **Orchestration** in the Dashboard, in Live:
- [connect your own provider](https://docs.wajub.com/dashboard/orchestration/connect-provider), with your production
credentials: it collects as soon as it is connected;
- [request the Wajub rail](https://docs.wajub.com/dashboard/orchestration/rail), if you have no contract of your own, to
collect on Wajub's. It is a signed request that Wajub reviews: send it as soon as production
opens.
As long as nothing is active, the Dashboard's home page shows **Activate your payment methods**.
## The checklist
Tick these off in your own environment. Every item is something you can verify by running code, not
something to take on trust. Your progress is kept in this browser, so you can come back to it.
## What is different once you are live
This is the part a sandbox cannot teach you, so read it before you flip rather than after.
**Five feature areas were never available to you.** Payment links, invoices, tax, Shield and
customer tax IDs all refuse sandbox keys with `403 This feature is only available in live mode.` If
your integration touches any of them, production is the first time that code has ever run. Plan a
narrow rehearsal for those paths specifically.
**Your rate limit changes with your plan, not with your environment.** Pay as you go allows 120
requests per minute, Growth 360, Scale 720, and Enterprise is uncapped. On an uncapped plan the
`X-RateLimit-*` headers are omitted entirely, so any code that reads them must treat their absence
as normal rather than as zero.
**The webhook signing secret is different.** It belongs to an endpoint, and an endpoint belongs to
one environment. Registering the same URL in production gives you a new `whsec_` value. Copying the
sandbox one across is the single most common reason a first live webhook fails signature
verification.
**Identifiers lose their `test_` segment.** A sandbox payment is `trx_test_…` and its production
equivalent is `trx_…`. Nothing in your code should depend on that segment, and anything that
pattern-matches ids should be checked once before you switch.
**Money can actually run out.** A payout fails on an insufficient balance, a wallet has its own
daily ceiling below yours, and a customer can simply not confirm. None of these happen in a sandbox
where the outcome is decided by the test number you dialled.
## Making the switch
Do these four in one deployment rather than spread across an afternoon. A half-switched integration
sends live payments to a sandbox webhook, and you will not notice until reconciliation.
1. Register your production webhook endpoints and copy each new signing secret.
2. Put the production key and those secrets in your production environment.
3. Deploy. The SDK needs no other change, the key alone decides the environment.
4. Confirm in Konsole that your first production request was authenticated as live.
> [!CAUTION]
> **Never run one environment against the other**
>
> A sandbox id does not exist in production and the reverse is equally true. Keep the two sets of
> variables entirely separate, and never let a fallback in your configuration quietly reach for the
> test key when the live one is missing. Failing loudly is the correct behaviour there.
## Your first real payment
Pay yourself. Take the smallest amount your operator accepts, usually 100 XAF, and run the whole
path with your own phone.
Four things have to be true before you open the doors. The transaction reaches `succeeded`. Your
production endpoint received `payment.succeeded` and the signature verified. The amount appears in
your balance. And your own database recorded the order as paid, through the same code path a
customer would trigger.
Then refund it. A refund is the one flow nobody tests before they need it, and the day you need it
is never a calm one.
## If something is wrong
Rolling back is redeploying your sandbox key. No data is lost and nothing needs undoing on Wajub's
side, because the two environments never shared anything. Payments already taken stay where they
are, and you can inspect every one of them in Konsole while you fix whatever broke.
- [Account activation & KYC](https://docs.wajub.com/getting-started/account-activation): The dossier that opens production.
- [Verify webhook signatures](https://docs.wajub.com/developer-tools/webhooks/signature-verification): The check that must pass on the first live delivery.
- [Security best practices](https://docs.wajub.com/best-practices/security): Storing, scoping and rotating credentials.
- [Monitoring & observability](https://docs.wajub.com/resources/monitoring): What to watch once real money is moving.
---
# Introduction
URL: https://docs.wajub.com/getting-started
> The payment orchestrator unifying Mobile Money, cards and transfers behind one API.
Wajub is a **payment orchestration platform** designed for Africa. Instead of integrating each
Mobile Money operator, bank or aggregator separately, you integrate **a single API** and one set of
webhooks.
> [!NOTE]
> **New to African payments?**
>
> Terms like Mobile Money, USSD, MTN MoMo, Orange Money, channel, and settlement may be unfamiliar.
> Read the [Glossary](https://docs.wajub.com/resources/glossary) first. It defines every term in plain language before you
> write a line of code.
## Before you start
To follow any example on this site you need three things.
1. **A Wajub account.** Create one for free at [dashboard.wajub.com](https://dashboard.wajub.com).
2. **An API key.** Once logged in, open **Settings → Developers → API keys** and create one.
3. **An HTTP client**, curl, or a server SDK (Node.js, Python, PHP, Go, Ruby, Java, C#).
A new account holds no key at all. You create the ones you need, one at a time, in the environment
the Dashboard is showing. Production keys can only be created once your account is verified.
| Key | Environment | Where it belongs |
| ----------- | ----------- | -------------------------------------------------------------- |
| `pk_test.…` | Sandbox | Public. Safe in a browser, initializes payments client-side. |
| `sk_test.…` | Sandbox | Private. Server-side only, no real money moves. |
| `rk_test.…` | Sandbox | Restricted. Server-side only, limited to the scopes you grant. |
| `pk.…` | Production | Public. Same client-side role, on real funds. |
| `sk.…` | Production | Private. Server-side only, moves real money. |
| `rk.…` | Production | Restricted. Server-side only, on real funds. |
See [Setup your account](https://docs.wajub.com/getting-started/dashboard-setup) for a step-by-step walkthrough of the Dashboard.
## What you can build
- **Collect** payments via Mobile Money (MTN MoMo, Orange Money, Wave, Airtel), card and bank transfer.
- **Pay out** funds to Mobile Money wallets via the [Transfers API](https://docs.wajub.com/payouts/transfers) or manage [Beneficiaries](https://docs.wajub.com/api/beneficiaries).
- **Embed checkout** directly in your app with [Wajub Components](https://docs.wajub.com/libraries/components), React, Vue, Svelte, Angular or vanilla JS.
- **Orchestrate** your providers intelligently with routing and fallback ([Orchestration](https://docs.wajub.com/orchestration)).
## How the API works
The Wajub API is organized around REST. It uses predictable URLs, accepts JSON-encoded
request bodies, returns JSON responses and relies on standard HTTP codes.
All requests go through a single base URL:
```bash title="Base URL"
https://api.wajub.com
```
## Your first call
A payment starts with one request. You send the amount, the currency, who is paying, and the page
you want that person sent back to once they are done. Wajub creates the payment, keeps it `pending`
and answers with a hosted page where the customer picks their operator and confirms. Nobody is
charged at this point.
Describe the payer inside the `customer` object: it carries `email`, `name`, `phone`, `address` and
`metadata`. The `callback` is where Wajub returns the customer once the payment page is done with
them.
Run it from your server or your terminal with your **private sandbox key** (`sk_test.…`). Never put
that key in a browser or a mobile app. Wajub also issues a public key (`pk_test.…`), meant for
creating a payment from the browser. See
[Key Concepts → API keys](https://docs.wajub.com/getting-started/concepts#api-keys) for the full breakdown.
`POST /payments`
**Create a payment**
```bash
curl https://api.wajub.com/payments \
-H "Authorization: sk_test.xxxxxxxxxxxxxxxx…" \
-H "Content-Type: application/json" \
-d '{
"amount": 25000,
"currency": "XAF",
"customer": { "email": "amina@example.com" },
"description": "Order #4172",
"callback": "https://shop.example.com/order/complete"
}'
```
```javascript
import { Wajub } from '@wajub/node';
const wajub = new Wajub({ apiKey: process.env.WAJUB_API_KEY });
const payment = await wajub.payments.create({
amount: 25000,
currency: 'XAF',
customer: { email: 'amina@example.com' },
description: 'Order #4172',
callback: 'https://shop.example.com/order/complete',
});
console.log('Payment page:', payment.authorization_url);
```
```python
import os
from wajub import Wajub
wajub = Wajub(api_key=os.environ["WAJUB_API_KEY"])
payment = wajub.payments.create({
"amount": 25000,
"currency": "XAF",
"customer": {"email": "amina@example.com"},
"description": "Order #4172",
"callback": "https://shop.example.com/order/complete",
})
print(payment.authorization_url)
```
```php
getenv('WAJUB_API_KEY')]);
$payment = $wajub->payments->create([
'amount' => 25000,
'currency' => 'XAF',
'customer' => [
'email' => 'amina@example.com',
],
'description' => 'Order #4172',
'callback' => 'https://shop.example.com/order/complete',
]);
echo $payment->authorization_url;
```
```go
client, err := wajub.New(wajub.Config{APIKey: os.Getenv("WAJUB_API_KEY")})
if err != nil {
log.Fatal(err)
}
payment, err := client.Payments.Create(context.Background(), map[string]any{
"amount": 25000,
"currency": "XAF",
"customer": map[string]any{"email": "amina@example.com"},
"description": "Order #4172",
"callback": "https://shop.example.com/order/complete",
}, nil)
if err != nil {
log.Fatal(err)
}
log.Println(payment.AuthorizationURL)
```
Wajub answers `201 Created`. The payment now exists on your account, it carries an id you will use
everywhere else, and it holds the two values that drive the rest of your integration:
```json title="Response · 201 Created"
{
"code": 201,
"status": "Created",
"message": "Payment initiated",
"authorization_url": "https://pay.wajub.com/xxxxxxxxxxxxxxxxxxxxxxxxxxxxxxxx",
"authorization_token": "xxxxxxxxxxxxxxxxxxxxxxxxxxxxxxxx",
"transaction": {
"id": "trx_test_CSUGajfv9xh0XQ5wu2lx",
"amount": 25000,
"amount_paid": 0,
"currency": "XAF",
"status": "pending",
"description": "Order #4172",
"customer": {
"id": "cus_test_sAaim5apjocIgtlhzJY3wQ8s",
"email": "amina@example.com"
},
"callback": "https://shop.example.com/order/complete",
"sandbox": true,
"created_at": "2026-09-11T10:24:00+00:00"
}
}
```
Three fields of that response matter right now:
- **`authorization_url`** is the hosted payment page for this payment and nothing else. Redirect
your customer to it. This is the simplest way to integrate Wajub, and the one we recommend.
- **`authorization_token`** is the session token embedded in that URL. It is scoped to this single
payment and safe to hand to a browser, which is what the [Components](https://docs.wajub.com/libraries/components) use
when you prefer to keep the customer on your own page.
- **`transaction.status`** starts at `pending`. It becomes `succeeded` only once the customer has
confirmed on their phone, which happens well after this call has returned.
> [!WARNING]
> **Amounts are in the major unit, never in centimes**
>
> `"amount": 25000` means 25 000 XAF, not 250 XAF. Unlike most payment providers, Wajub never uses
> subunits. Send `500` for 500 NGN and `10.50` for 10.50 USD. See
> [Key Concepts → Amounts](https://docs.wajub.com/getting-started/concepts#amounts).
### "Payment" vs "transaction"
You just saw both words in the same response, and they name **the same object**. "Payment" is the
business concept, so the endpoint is `POST /payments`. "Transaction" is what the API serializes, so
the response nests it under `"transaction"` and prefixes the `id` with `trx_`. The two terms are
interchangeable throughout this documentation. The full explanation lives in
[Key Concepts](https://docs.wajub.com/getting-started/concepts#payment-vs-transaction).
### What happens next
Opening `authorization_url` in your browser puts you on the payment page, where sandbox phone
numbers let you simulate a success, a refusal or a timeout. Your server then confirms the outcome
with `GET /payments/{id}` before shipping anything, because the browser return alone can be forged
or simply never happen. The [Quickstart](https://docs.wajub.com/getting-started/quickstart) walks through both steps with
the test numbers.
> [!TIP]
> **Debug in real time with Konsole**
>
> Inspect every API request, replay your webhooks and observe orchestration decisions live with
> [Konsole →](https://docs.wajub.com/developer-tools/konsole). It's the fastest way to understand what's happening during an
> integration.
## What's next?
### Just getting started
- [Quickstart](https://docs.wajub.com/getting-started/quickstart): process a first payment in 5 minutes.
- [SDK Quickstart](https://docs.wajub.com/libraries/sdks/quickstart): install the SDK for your language (Node.js, Python, PHP, Go).
- [Key Concepts](https://docs.wajub.com/getting-started/concepts): payment lifecycle, sandbox vs live, session tokens.
- [Environments & API keys](https://docs.wajub.com/getting-started/environments): test vs production.
### Ready to build
- [Guides & Tutorials](https://docs.wajub.com/guides): step-by-step integrations for every use case.
- [Payment methods & channels](https://docs.wajub.com/payments/payment-methods): full country × operator coverage.
- [API Reference](https://docs.wajub.com/api): every endpoint with request/response examples.
### Going deeper
- [Best Practices](https://docs.wajub.com/best-practices): idempotency, error handling, security.
- [Going Live](https://docs.wajub.com/getting-started/going-live): production checklist and KYC.
- [All SDKs & Libraries](https://docs.wajub.com/libraries/sdks): Node.js, Python, PHP, Go, mobile, and browser SDKs.
---
# Quickstart
URL: https://docs.wajub.com/getting-started/quickstart
> Your first payment end to end, from API key to verified webhook, in about five minutes.
This guide takes you from an empty account to a verified payment with a working webhook.
You'll need a Wajub account (free) and a few minutes.
## 1. Create your account and get your keys
Create an account on the [Dashboard](https://dashboard.wajub.com). A new account holds no key, so
once logged in, open **Settings → Developers → API keys** and create a **private** key while the
Dashboard shows the sandbox. It comes out as `sk_test.…`.
| Key | Environment | Where it belongs |
| ----------- | ----------- | ------------------------------------------------------------ |
| `pk_test.…` | Sandbox | Public. Safe in a browser, initializes payments client-side. |
| `sk_test.…` | Sandbox | Private. Server-side only, no real money moves. |
| `pk.…` | Production | Public. Same client-side role, on real funds. |
| `sk.…` | Production | Private. Server-side only, moves real money. |
Production keys only become available once your account is verified, and restricted `rk` keys
are covered in [Environments & API keys](https://docs.wajub.com/getting-started/environments).
Everything in this guide runs on your server, so everything here uses the private sandbox key.
The public key exists for the one case where code runs in a browser, initializing a payment from
the page itself. Never use a private key from a browser: when Wajub detects one, it refuses the
request and emails you, so a leaked key does not stay silent.
## 2. Install the SDK for your language
The SDKs wrap the HTTP API with typed resources and webhook signature verification. If you would
rather call the API directly, every example below has a cURL tab.
**Install**
```javascript
npm install @wajub/node
```
```python
pip install "wajub>=1.2.1"
```
```php
composer require wajub/wajub-php
```
```go
go get github.com/wajubhq/wajub-go
```
Ruby, Java, C#, Kotlin, Flutter, React Native and Swift have their own SDKs and their own guides. See
[SDKs](https://docs.wajub.com/libraries/sdks) for the full list and the configuration reference.
## 3. Create a payment
A payment starts with one request. You send the amount, the currency, who is paying, and the page
you want that person sent back to. Wajub creates the payment, keeps it `pending` and answers with a
hosted page where the customer picks their operator and confirms. Nobody is charged yet.
Describe the payer inside the `customer` object: it carries `email`, `name`, `phone`, `address` and
`metadata`.
`POST /payments`
**Create a payment**
```bash
curl https://api.wajub.com/payments \
-H "Authorization: sk_test.xxxxxxxxxxxxxxxx…" \
-H "Content-Type: application/json" \
-d '{
"amount": 5000,
"currency": "XAF",
"customer": { "email": "amina@example.com" },
"callback": "https://shop.example.com/order/complete"
}'
```
```javascript
import { Wajub } from '@wajub/node';
const wajub = new Wajub({ apiKey: process.env.WAJUB_API_KEY });
const payment = await wajub.payments.create({
amount: 5000,
currency: 'XAF',
customer: { email: 'amina@example.com' },
callback: 'https://shop.example.com/order/complete',
});
console.log('Payment page:', payment.authorization_url);
```
```python
import os
from wajub import Wajub
wajub = Wajub(api_key=os.environ["WAJUB_API_KEY"])
payment = wajub.payments.create({
"amount": 5000,
"currency": "XAF",
"customer": {"email": "amina@example.com"},
"callback": "https://shop.example.com/order/complete",
})
print(payment.authorization_url)
```
```php
getenv('WAJUB_API_KEY')]);
$payment = $wajub->payments->create([
'amount' => 5000,
'currency' => 'XAF',
'customer' => [
'email' => 'amina@example.com',
],
'callback' => 'https://shop.example.com/order/complete',
]);
echo $payment->authorization_url;
```
```go
client, err := wajub.New(wajub.Config{APIKey: os.Getenv("WAJUB_API_KEY")})
if err != nil {
log.Fatal(err)
}
payment, err := client.Payments.Create(context.Background(), map[string]any{
"amount": 5000,
"currency": "XAF",
"customer": map[string]any{"email": "amina@example.com"},
"callback": "https://shop.example.com/order/complete",
}, nil)
if err != nil {
log.Fatal(err)
}
log.Println(payment.AuthorizationURL)
```
Wajub answers `201 Created` with the payment, its id, and the page to send the customer to:
```json title="Response · 201 Created"
{
"code": 201,
"status": "Created",
"message": "Payment initiated",
"authorization_url": "https://pay.wajub.com/xxxxxxxxxxxxxxxxxxxxxxxxxxxxxxxx",
"authorization_token": "xxxxxxxxxxxxxxxxxxxxxxxxxxxxxxxx",
"transaction": {
"id": "trx_test_CSUGajfv9xh0XQ5wu2lx",
"amount": 5000,
"amount_paid": 0,
"currency": "XAF",
"status": "pending",
"customer": {
"id": "cus_test_sAaim5apjocIgtlhzJY3wQ8s",
"email": "amina@example.com"
},
"callback": "https://shop.example.com/order/complete",
"sandbox": true,
"created_at": "2026-09-11T10:24:00+00:00"
}
}
```
Store `transaction.id` against your order, then redirect the customer to `authorization_url`.
> [!NOTE]
> **Amounts are in the major unit, never in centimes**
>
> `"amount": 5000` means 5 000 XAF, not 50 XAF. Wajub never uses subunits. Send `500` for 500 NGN
> and `10.50` for 10.50 USD. See [Key Concepts → Amounts](https://docs.wajub.com/getting-started/concepts#amounts).
## 4. Pay it with a sandbox number
Open `authorization_url` in your browser. In test mode the payment page accepts fake Mobile Money
numbers whose **last 6 digits** decide the outcome. The same suffixes work for every operator and
every country:
| Suffix | Result |
| -------- | -------------------------------------------- |
| `000000` | Payment succeeded |
| `000001` | Insufficient funds |
| `000002` | Failure, operator declined |
| `000003` | Timeout |
| `000004` | Pending → cancelled |
| `000009` | Payment succeeds, a later refund on it fails |
Pick a number for the operator you want to exercise:
The sandbox payment page asks for no PIN: the test number alone decides the outcome.
> [!WARNING]
> **Sandbox offers payment methods that production may not**
>
> The sandbox payment page always offers a test card, so you can exercise that code path. **The live
> payment page only offers the channels your active providers cover.** A card appears there only
> once a provider that accepts cards is active on your account. Build and test against Mobile
> Money first.
## 5. Verify the payment server-side
The customer lands back on your `callback` URL, and that return proves nothing. Anyone can open
that URL by hand, and a customer who closes the tab never opens it at all. Before you ship an
order, ask the API what really happened, from your server, with the id you stored in step 3.
`GET /payments/{id}`
**Retrieve a payment**
```bash
curl https://api.wajub.com/payments/trx_test_CSUGajfv9xh0XQ5wu2lx \
-H "Authorization: sk_test.xxxxxxxxxxxxxxxx…"
```
```javascript
const payment = await wajub.payments.retrieve('trx_test_CSUGajfv9xh0XQ5wu2lx');
console.log(payment.status, payment.amount, payment.currency);
```
```python
payment = wajub.payments.retrieve("trx_test_CSUGajfv9xh0XQ5wu2lx")
print(payment.status, payment.amount, payment.currency)
```
```php
$payment = $wajub->payments->retrieve('trx_test_CSUGajfv9xh0XQ5wu2lx');
echo $payment->status;
```
```go
payment, err := client.Payments.Retrieve(context.Background(), "trx_test_CSUGajfv9xh0XQ5wu2lx")
if err != nil {
log.Fatal(err)
}
log.Println(payment.Status, payment.Amount, payment.Currency)
```
The response carries the payment as Wajub knows it, whatever your browser was told:
```json title="Response · 200 OK"
{
"code": 200,
"status": "OK",
"message": "Payment retrieved",
"transaction": {
"id": "trx_test_CSUGajfv9xh0XQ5wu2lx",
"amount": 5000,
"amount_paid": 5000,
"currency": "XAF",
"status": "succeeded",
"channel": "cm.mtn",
"customer": {
"id": "cus_test_sAaim5apjocIgtlhzJY3wQ8s",
"email": "amina@example.com"
},
"sandbox": true,
"created_at": "2026-09-11T10:24:00+00:00"
}
}
```
Fulfill the order only when `status` is `succeeded`, and only after checking that `amount` and
`currency` match what you charged for. A payment that is still `pending` is not a failure, it is a
customer who has not finished yet, so leave the order open and let the webhook in step 6 tell you
when it lands.
> [!TIP]
> **Track the transaction in Konsole**
>
> Open [Konsole → API logs](https://docs.wajub.com/developer-tools/konsole/log-explorer) to see the exact request/response
> Wajub recorded. Once you are live, [Routing Log](https://docs.wajub.com/developer-tools/konsole/routing-log) shows which
> provider was chosen and why. It does not exist in the sandbox.
## 6. Set up a webhook endpoint
Polling the API after every redirect only covers the customers who come back. Webhooks cover the
rest: a payment confirmed ten minutes later on the operator's side, a refund issued from the
Dashboard, a dispute opened by the customer. Set one up now, before you build anything on top.
### Register the endpoint
In **Konsole → Webhooks → Endpoints**:
1. Click **Add Endpoint**.
2. Enter your public URL, for example `https://yourapp.com/webhooks/wajub`.
3. Select the events to receive. Start with every payment event, using **Select all** beside them.
A subscription matches exact names only, so typing `payment.*` would receive nothing.
4. Save, then copy the **Signing Secret** (`whsec_…`) into your environment as `WAJUB_WEBHOOK_SECRET`.
### Give the SDK the signing secret
The client you already built in step 3 also verifies webhooks, once it knows the signing secret.
Add it to the same constructor, next to your API key:
**Configure the client**
```javascript
import { Wajub } from '@wajub/node';
export const wajub = new Wajub({
apiKey: process.env.WAJUB_API_KEY,
webhookSecret: process.env.WAJUB_WEBHOOK_SECRET,
});
```
```python
import os
from wajub import Wajub
wajub = Wajub(
api_key=os.environ["WAJUB_API_KEY"],
webhook_secret=os.environ["WAJUB_WEBHOOK_SECRET"],
)
```
```php
getenv('WAJUB_API_KEY'),
'webhook_secret' => getenv('WAJUB_WEBHOOK_SECRET'),
]);
```
```go
client, err := wajub.New(wajub.Config{
APIKey: os.Getenv("WAJUB_API_KEY"),
WebhookSecret: os.Getenv("WAJUB_WEBHOOK_SECRET"),
})
```
### Write the endpoint
Four rules make a webhook endpoint correct, and the SDK only handles the first one for you.
**Verify the signature, in every environment.** An endpoint that skips verification accepts
anything anyone posts to it, including a forged `payment.succeeded`. `constructEvent` checks the
signature before it parses the JSON. It needs the **raw** body, so disable JSON body parsing on this
route.
**Acknowledge before you work.** Wajub waits 30 seconds for your `2xx`. Past that the delivery
counts as failed and gets retried, so return first and do the slow work afterwards, in a queue or
a goroutine.
**Deduplicate on the event id.** A failed delivery is retried for up to 72 hours, and every
attempt carries the same event `id`. That id is what keeps a retry from shipping the same order
twice.
**Then act on the event.** The type is in `event.event`, and `event.data` holds the object the
event is about, with the same shape the API returns for it. For `payment.succeeded`, `event.data.id`
is the payment id you stored in step 3.
**Webhook endpoint**
```javascript
app.post('/webhooks/wajub', express.raw({ type: '*/*' }), async (req, res) => {
const event = wajub.webhooks.constructEvent(
req.body,
req.headers['x-wajub-signature'],
req.headers['x-wajub-timestamp'],
);
res.sendStatus(200);
if (await alreadyHandled(event.id)) return;
await markHandled(event.id);
if (event.event === 'payment.succeeded') {
await fulfillOrder(event.data.id);
}
});
```
```python
@app.post("/webhooks/wajub")
def wajub_webhook():
event = wajub.webhooks.construct_event(
request.get_data(as_text=True),
request.headers["X-Wajub-Signature"],
request.headers["X-Wajub-Timestamp"],
)
if already_handled(event["id"]):
return "", 200
mark_handled(event["id"])
queue.enqueue(handle_event, event)
return "", 200
```
```php
Route::post('/webhooks/wajub', function (Request $request) use ($wajub) {
$event = $wajub->webhooks->constructEvent(
$request->getContent(),
$request->header('X-Wajub-Signature'),
$request->header('X-Wajub-Timestamp'),
);
if (AlreadyHandled::check($event['id'])) {
return response()->noContent();
}
AlreadyHandled::mark($event['id']);
HandleWajubEvent::dispatch($event);
return response()->noContent();
});
```
```go
http.HandleFunc("/webhooks/wajub", func(w http.ResponseWriter, r *http.Request) {
body, err := io.ReadAll(r.Body)
if err != nil {
w.WriteHeader(http.StatusBadRequest)
return
}
event, err := client.Webhooks.ConstructEvent(
body,
r.Header.Get("X-Wajub-Signature"),
r.Header.Get("X-Wajub-Timestamp"),
0,
)
if err != nil {
w.WriteHeader(http.StatusBadRequest)
return
}
w.WriteHeader(http.StatusOK)
id, _ := event["id"].(string)
go handleEvent(id, event)
})
```
### Receive events on your machine
You do not need a public URL, a deployment or a registered endpoint to start. The CLI forwards
every sandbox event to a local address:
```bash
npm install -g @wajub/cli
wajub listen --forward-to http://localhost:3000/webhooks/wajub
```
Nothing on your machine is exposed to the internet. `wajub listen` prints the secret forwarded
events are signed with, and that is the secret your local `WAJUB_WEBHOOK_SECRET` needs while you
develop. It stays the same between runs, so set it once (`wajub listen --print-secret` prints it
alone); it is not a registered endpoint's secret, each endpoint keeps its own. See the
[CLI listen command](https://docs.wajub.com/developer-tools/cli/listen) for all options.
> [!NOTE]
> **Complete webhook guide**
>
> Signature verification, retry policy, event catalog, and idempotency are all covered in the
> [Webhooks section](https://docs.wajub.com/developer-tools/webhooks).
## What's next?
- [Key Concepts](https://docs.wajub.com/getting-started/concepts): Payment lifecycle, sandbox vs live, session tokens, orchestration.
- [Webhooks](https://docs.wajub.com/developer-tools/webhooks): Signature verification, event catalog, retry policy.
- [Accept a payment, full guide](https://docs.wajub.com/guides/accept-a-payment): Initialize, redirect, verify, and fulfill end-to-end.
- [Go Live](https://docs.wajub.com/getting-started/going-live): The complete checklist before switching to production.
- [Best Practices](https://docs.wajub.com/best-practices): Idempotency, error handling, and security patterns for production.
- [API Reference](https://docs.wajub.com/api): Every endpoint with request/response examples.
---
# Solutions by business
URL: https://docs.wajub.com/getting-started/solutions
> Pick the integration path for your business, with the plan and environment it needs.
The API is the same for everyone; what changes from one business to the next is which products you
assemble and in which order. Each path below lists its products in build order, with the plan it
opens on and whether you can build it against the sandbox or only in production.
## Which path is yours
Answer one question, where does the money end up.
| If | Your path |
| --------------------------------------------------------- | ----------------------------------------------------------- |
| You sell your own goods and you are the one who gets paid | [E-commerce](#e-commerce-and-online-sales) |
| Other sellers get paid through you | [Marketplace](#marketplace-and-platform) |
| You send money out more often than you take it in | [Mass payouts](#mass-payouts-and-gig-economy) |
| The same customer pays you again every cycle | [Subscription billing](#subscription-and-recurring-billing) |
Paths overlap, and that is normal. A marketplace still sells and still refunds, so it reads the
e-commerce path first and adds subaccounts on top.
## What every path starts with
Payments, the hosted checkout page, refunds, customers, webhooks and events are core. No plan gates
them, and they behave identically in the sandbox and in production. Whatever you are building, this
is the ground you stand on, and it is the part you should get working before anything else.
**The foundation**
- [Collect a payment](https://docs.wajub.com/payments/hosted-checkout): Create it, redirect to the hosted page, or embed your own.
- [Receive webhooks](https://docs.wajub.com/developer-tools/webhooks/quickstart): The only reliable signal that a payment succeeded.
## E-commerce and online sales
You sell products or services, and each customer pays once.
Before writing any code, check what your shop already runs on. If it is WordPress, the official
plugin covers WooCommerce, GiveWP, Easy Digital Downloads, Tutor LMS, MemberPress and Gravity
Forms, with a `[wajub_pay]` shortcode for everything else. You paste your keys and you are done,
there is no integration to maintain.
If you are building the shop yourself, three steps are enough. You create the payment when the cart
is validated, you send the customer to the `authorization_url` that comes back, and you fulfil the
order when the `payment.succeeded` webhook arrives. Never fulfil on the redirect alone, a customer
who closes the tab still pays.
Refunds come last on purpose. You need orders flowing before you have anything to refund, and the
refund endpoint needs a payment id you will only have once step one works.
Everything here runs on **Pay as you go**, in the sandbox and in production. The one exception is
Payment Links, which is production only and capped at 25 links on the free plan before it becomes
unlimited on Growth.
**Your path**
- [Start here if you use WordPress](https://docs.wajub.com/libraries/plugins): WooCommerce, GiveWP, EDD, LMS, forms, no API code at all.
- [1. Collect a payment](https://docs.wajub.com/payments/hosted-checkout): Hosted page or your own checkout.
- [2. Fulfil on the webhook](https://docs.wajub.com/developer-tools/webhooks/quickstart): Ship once payment.succeeded lands, not on the redirect.
- [3. Handle refunds](https://docs.wajub.com/payments/refunds): Returns, cancellations, partial refunds.
## Marketplace and platform
You connect sellers and buyers, and the money has to reach the seller rather than stopping at you.
That is what Sync does. Each seller becomes a subaccount with its own capabilities, its own pricing
and its own transaction history. You then act on a seller's behalf by adding one header to a call
you already know how to make, `X-Sync: acc_…`, so there is no second API to learn. Onboard the
sellers before you route a single payment through them, since a subaccount has to be accepted and
active before it can transact.
Payouts close the loop. Beneficiaries let you register a seller's wallet once instead of re-sending
the number and the operator on every transfer.
Sync is a **Scale** feature: the Sync pages of the Dashboard, where you create and manage your
connections, open from that plan. It does work in the sandbox, but a subaccount belongs to one
environment: calling a sandbox subaccount with a production key, or the reverse, returns `404`
`Sync account not found.`, the same answer as for an id that does not exist or another platform's
subaccount. Transfers and beneficiaries are available on every plan.
**Your path**
- [1. Collect payments](https://docs.wajub.com/payments/hosted-checkout): The same checkout as any shop.
- [2. Onboard your sellers](https://docs.wajub.com/sync/quickstart): Create subaccounts, set capabilities and pricing.
- [3. Pay out to sellers](https://docs.wajub.com/payouts/transfers): Mobile Money transfers via the API.
- [4. Save the recipients](https://docs.wajub.com/api/beneficiaries): Register a wallet once, reuse it on every payout.
## Mass payouts and gig economy
You distribute funds: salaries, driver earnings, commissions, prize money.
`POST /transfers/batch` takes up to 500 payouts in one call. Its `Idempotency-Key` header is
required and each line carries its own `reference`, so a batch that half fails is sent again as it
is: only the lines that did not go through leave the second time. Each line passes the same checks
as a single payout, and one refused recipient does not stop the others.
Registering your recipients as beneficiaries first is what makes that batch short. Each line pays a
`ben_…` identifier instead of repeating the phone number, operator and country, and a payroll run
becomes a list of identifiers you already hold.
Watch the balance, not the API response. A transfer is refused when the available balance is short,
so a payout run should read the balance before it starts rather than discovering the problem on
recipient forty.
Transfers, batches, beneficiaries and balance are on every plan and work in the sandbox through the
API. In the Dashboard, the button that creates a transfer by hand is production only.
**Your path**
- [1. Send a transfer](https://docs.wajub.com/payouts/transfers): One Mobile Money payout, one call.
- [2. Register your recipients](https://docs.wajub.com/api/beneficiaries): Pay a saved beneficiary instead of repeating wallet details.
- [3. Watch the balance](https://docs.wajub.com/payouts/balance): Available funds, settlement cycles, fees.
- [4. Pace the loop](https://docs.wajub.com/api/rate-limits): Requests per minute allowed on your plan.
## Subscription and recurring billing
You bill the same customer every cycle.
Recurring billing on Wajub is built on invoices, not on a stored mandate. Mobile Money gives you no
way to silently debit a wallet later, so each cycle produces a new invoice with its own payment
link, and the customer approves it. You create the first invoice with `is_recurring` set and a
`recurring_frequency` of `daily`, `weekly`, `monthly`, `quarterly` or `yearly`, and Wajub issues
the following ones on schedule. Changing the amount or the cycle means updating that invoice, and
cancelling it stops the billing.
Reminders are what make the model actually collect. Because every cycle needs a human approval,
an unpaid invoice stays unpaid until someone is nudged, so treat the reminder schedule as part of
the integration rather than a nicety.
There is no products, prices or coupons resource to model your catalogue against. If you need
tiered plans, proration or metered usage, you build that logic on your side on top of the Payments
API, and the recurring billing guide walks through it.
Invoicing is available on every plan, capped at 10 invoices on Pay as you go and unlimited from
Growth. Recurring generation itself needs **Growth** or above, and it fails quietly if you drop
below it: the parent invoice is kept but no new cycle is issued until the plan is restored.
Invoices are production only, so build and test your payment and webhook handling in the sandbox
first, then switch the key before you touch invoicing.
**Your path**
- [1. Issue your first invoice](https://docs.wajub.com/billing/invoice/quickstart): Line items, taxes, due date, hosted payment link.
- [2. Put it on a cycle](https://docs.wajub.com/billing/invoice/recurring): is_recurring, frequency, end conditions.
- [3. Chase the unpaid ones](https://docs.wajub.com/billing/invoice/reminders): Automatic reminders before and after the due date.
- [4. Build plans on top](https://docs.wajub.com/guides/subscription-billing): Tiers, proration and metered usage, in your own code.
> [!TIP]
> **True on every path**
>
> Keep [Konsole](https://docs.wajub.com/developer-tools/konsole) open while you integrate, it shows each request and each
> webhook delivery as it happens. Read [Best Practices](https://docs.wajub.com/best-practices) before you handle real
> money, and walk the [Going Live checklist](https://docs.wajub.com/getting-started/going-live) before you switch keys.
---
# Dashboard guide
URL: https://docs.wajub.com/dashboard
> Run your business from the Wajub dashboard, one task at a time. Who can do what, Sandbox and Live, and the security code.
This guide is for the people who work in the dashboard at
[dashboard.wajub.com](https://dashboard.wajub.com) without writing code: owners, finance, support
and accounting teams. Each page walks through one task, step by step, with what the screen shows
next. If you connect Wajub to your own site or app, start with [Get started](https://docs.wajub.com/getting-started).
To begin, [Get your first payout](https://docs.wajub.com/dashboard/getting-started/first-payout) follows
the whole path, from signing up to the first transfer to your own account.
## How each page reads
Before the steps, every page says who can do the task, which plan it needs when not every plan
has it, whether it only works in Live, and whether the dashboard asks for a security code. The
rules below apply everywhere, so a page only repeats them when it differs.
## Sandbox and Live
The switch at the top right of the dashboard moves between **Sandbox**, where payments are
simulated, and **Live**, where real money moves. The two hold separate data: a customer or a
payment created in Sandbox never shows up in Live. [Environments](https://docs.wajub.com/getting-started/environments)
explains what the sandbox simulates.
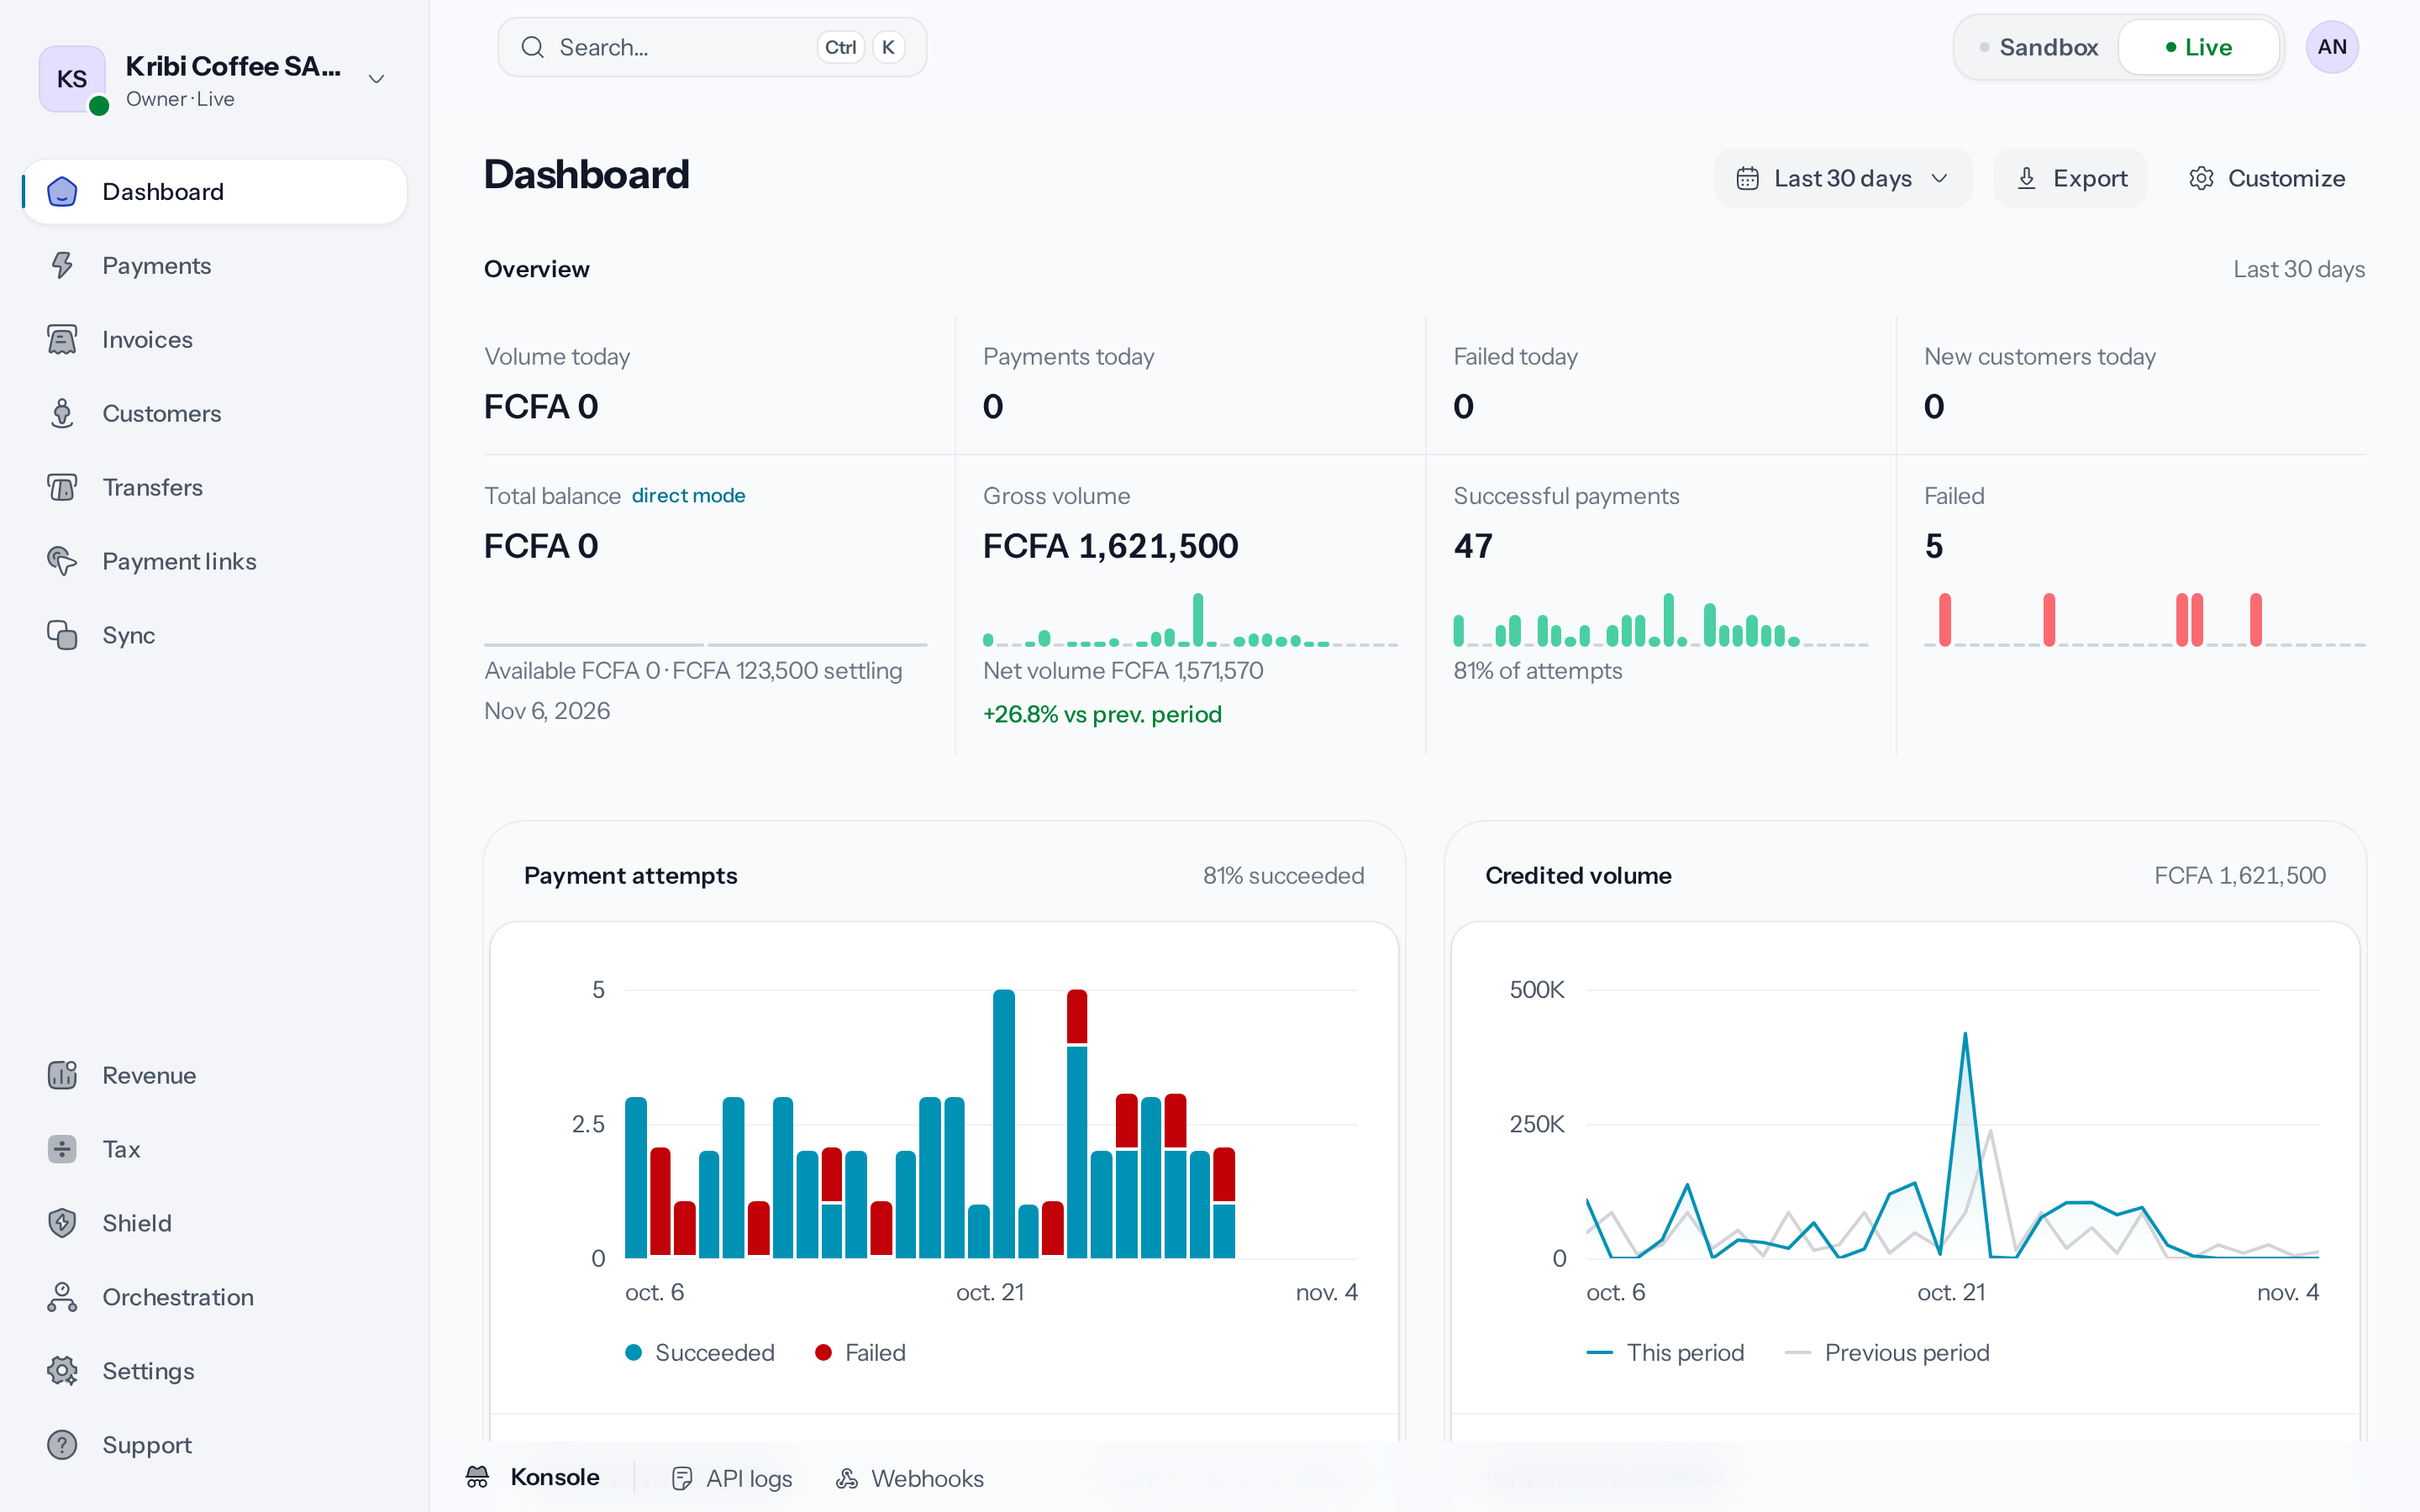
*The switch at the top right shows the environment you are in.*
A new organisation stays in Sandbox until Wajub has approved its
[account activation](https://docs.wajub.com/getting-started/account-activation). After that, the owner, an
Administrator, a Developer, or a custom role with **Manage settings** or **Manage developer
settings** can switch. A Sandbox user always stays in Sandbox.
Six modules only exist in Live and leave the menu in Sandbox: **Invoices**, **Payment links**,
**Revenue**, **Tax**, **Shield** and **Orchestration**. Their keyboard shortcut tells you they are
only available in live mode.
Some actions need Live too: sending a transfer, editing, archiving or deleting a beneficiary,
merging two customers, and every export apart from the Konsole exports and the export of your own
data. In **Settings**, the **Payment links**, **Invoices**, **Transfers** and **Customer merges**
sections stay in the list in Sandbox, marked **Live only**.
## Roles
An organisation has one owner, the person who created it, and the members the owner invites. The
owner can do everything, and is the only one who can close the organisation, hand it over to
someone else, or read the conversations members had with the assistant. Each member holds one of
seven roles.
| Role | What it covers |
| ---------------------- | ------------------------------------------------------------------------------------------------------------------------------------------------------------------------- |
| **Administrator** | Everything the owner can do, apart from the three actions above. |
| **Developer** | API keys, webhooks and Konsole, technical settings, and the switch between Sandbox and Live. Reads payments, customers, invoices and settings, and manages payment links. |
| **Finance** | Payments, without refunds or disputes. Transfers and beneficiaries, invoices, payment links, subscriptions, reports, revenue and tax. Reads customers. |
| **Analyst** | Reads payments, customers, transfers, invoices, payment links, subscriptions, reports, revenue and tax. Changes nothing, apart from opening support tickets. |
| **Support specialist** | Payments, refunds, disputes and customers. Reads invoices. |
| **Viewer** | Reads what an Analyst reads, plus the settings. Changes nothing, apart from opening support tickets. |
| **Sandbox user** | Sandbox only: test payments, API keys and webhooks. Reads customers. |
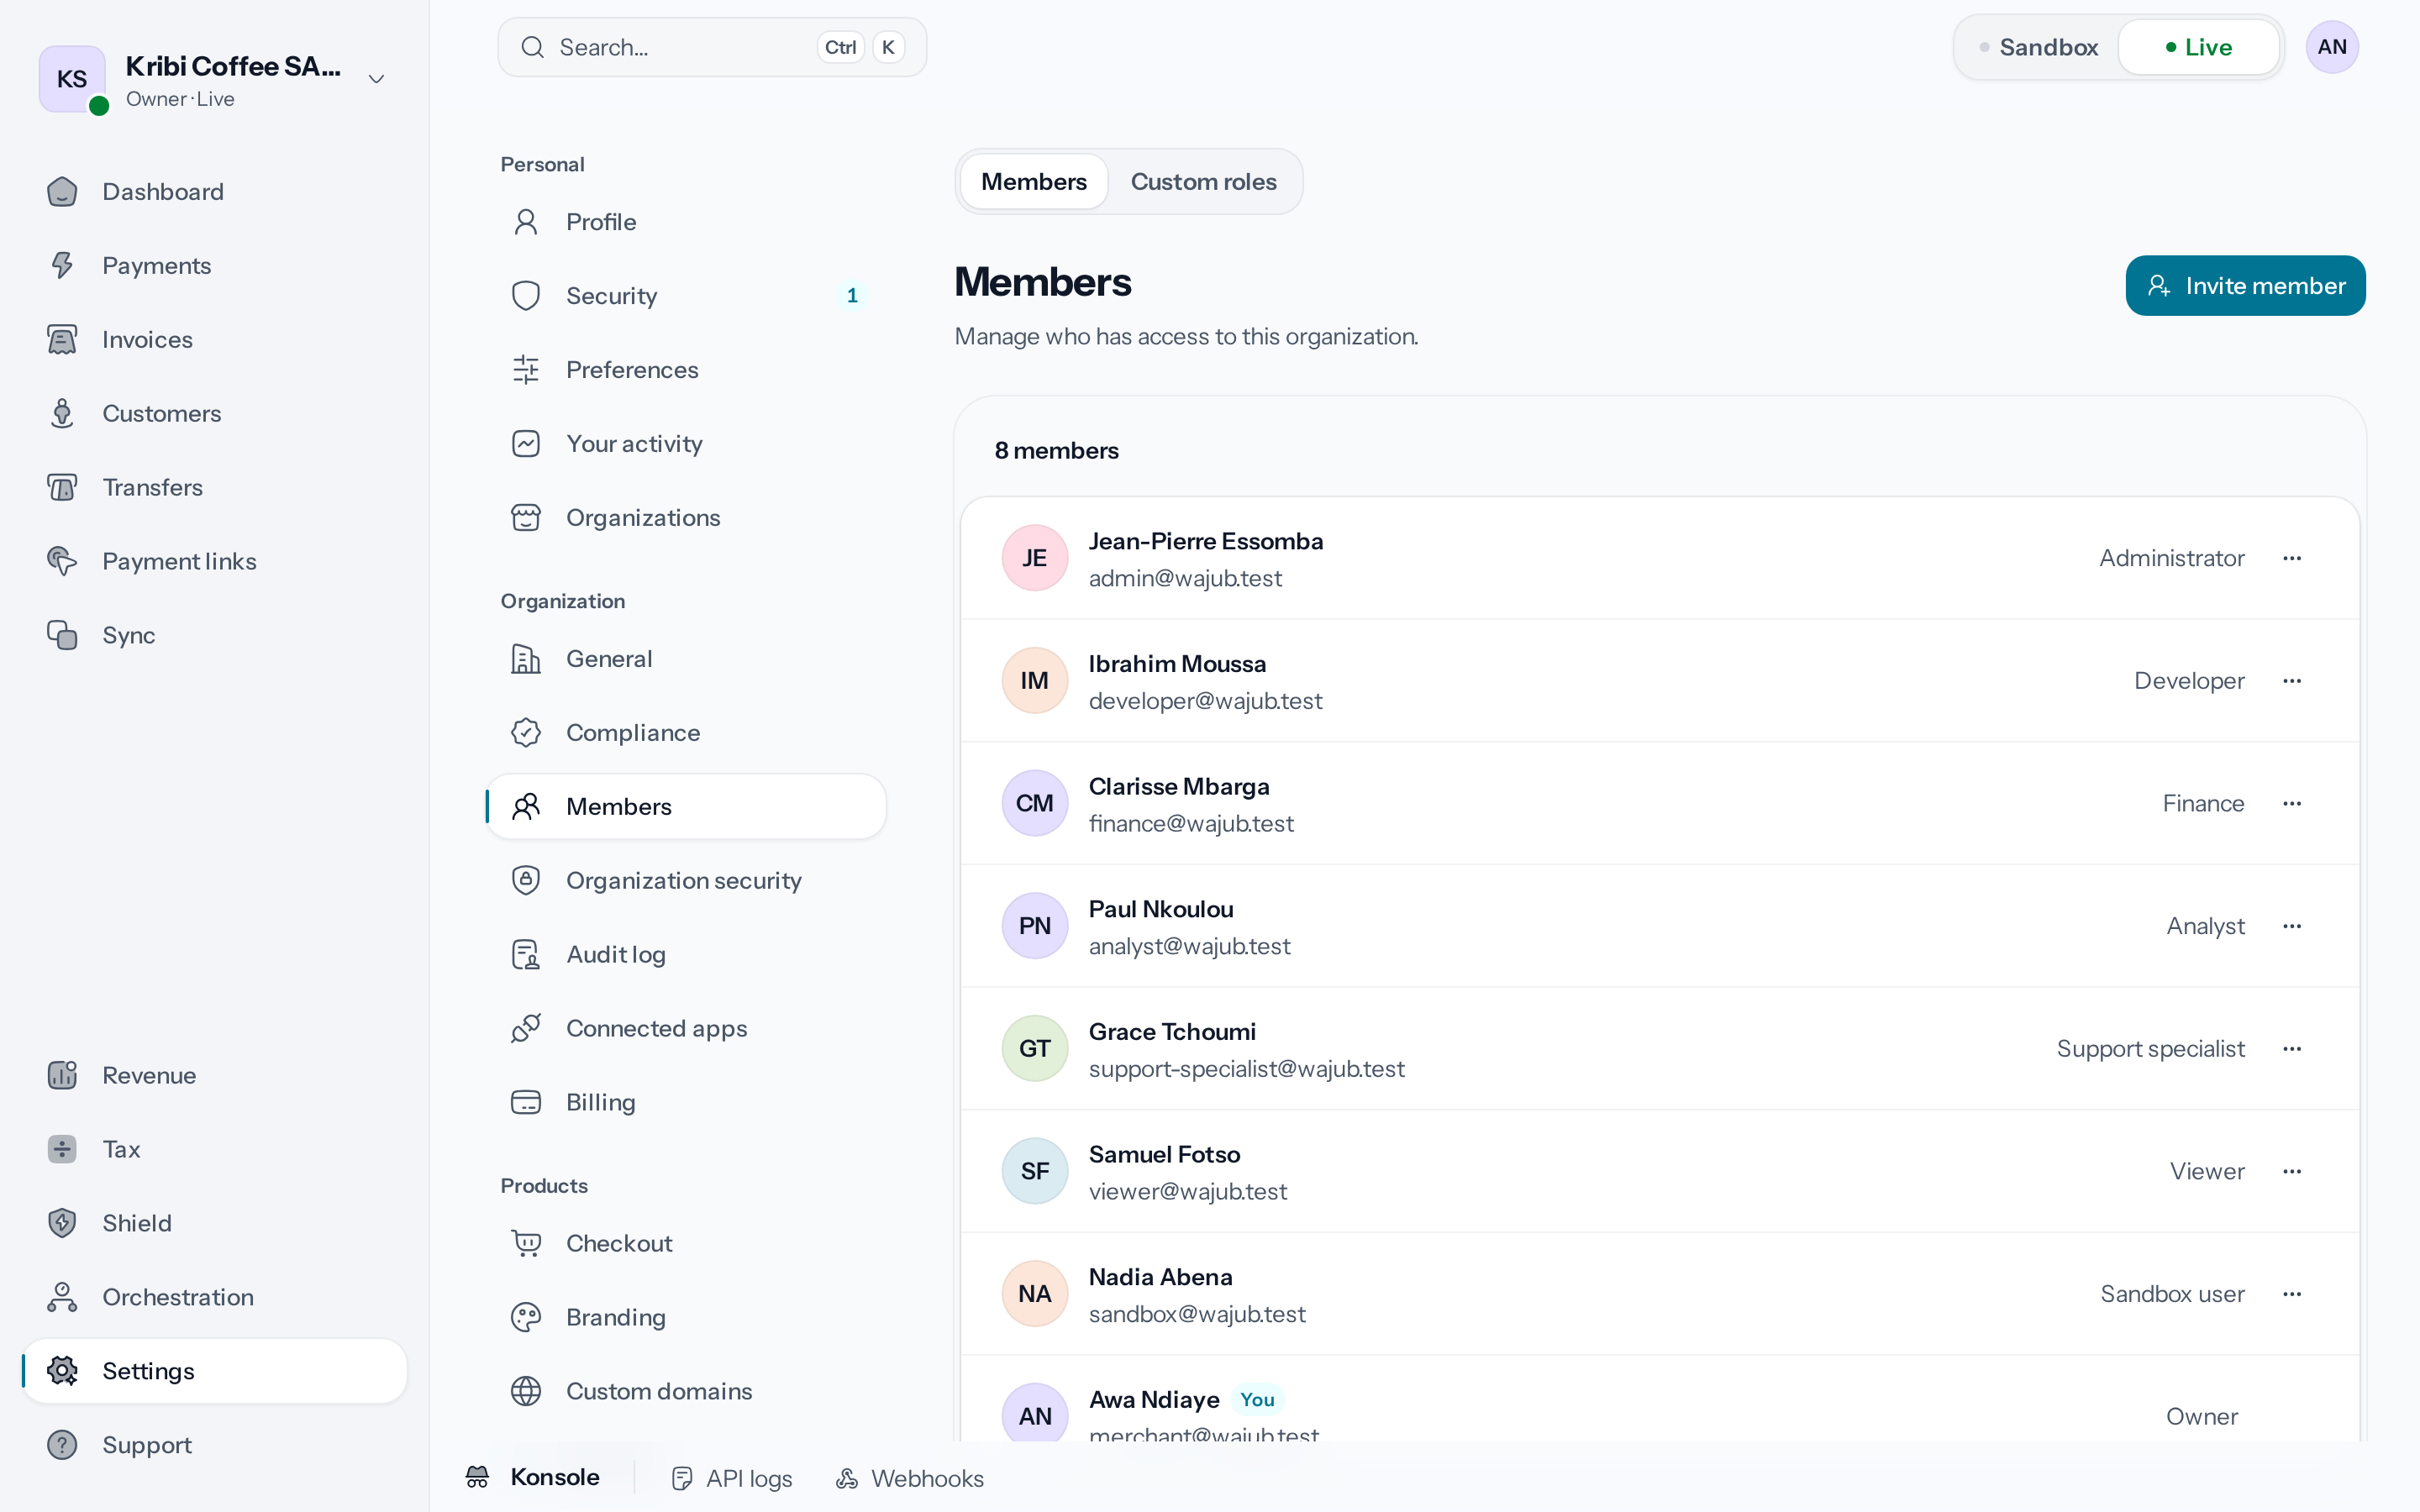
*Settings › Members lists every member with their role.*
Shield is open to the owner, Administrators, and custom roles that include it. When none of the
seven roles fits, the owner, an Administrator or a custom role with **Manage members** can build one
in **Settings › Members › Custom roles**. A custom role can only hold permissions its creator holds.
## The security code
Sensitive changes ask you to prove it is you first: refunding a payment, sending a transfer,
deleting a payment link, creating an API key, accepting a dispute or editing a custom role, among
others. The dashboard opens **Security verification** and asks for a **Verification code**. You
get it by email, by SMS if SMS is your two-factor method and your phone number is saved, or from
your authenticator app if you turned one on.
Once you have typed the code, the dashboard does not ask again for the next 30 minutes. Your
password never replaces it.
## Modules outside your plan
When your plan does not include a module, its menu entry stays, marked **Not in your plan**.
Opening it shows the module's page: what it gives, then the ways to get it, side by side — the
module alone when it is sold as an add-on, and each plan that includes it, with its price and
what it adds to yours.
---
# View your activity
URL: https://docs.wajub.com/dashboard/account/activity-and-data
> Review the sign-ins and security changes on your user account, and export the personal data Wajub keeps about you.
**Your activity** lists the sign-ins and security changes on your user account. **Your data**, on
your profile, exports what Wajub keeps about you.
Each member sees their own activity and exports their own data, whatever their
[role](https://docs.wajub.com/dashboard#roles), [in Sandbox and in Live](https://docs.wajub.com/dashboard#sandbox-and-live), without a
[security code](https://docs.wajub.com/dashboard#the-security-code).
## Read your activity
Open **Settings**, then **Your activity** in the **Personal** group. Each row gives an action and
its date: sign-in, sign-out, password changed or reset, two-factor method changed, passkey added or
removed. **Date** picks a period, of 365 days at most, and **Action** keeps a single action.
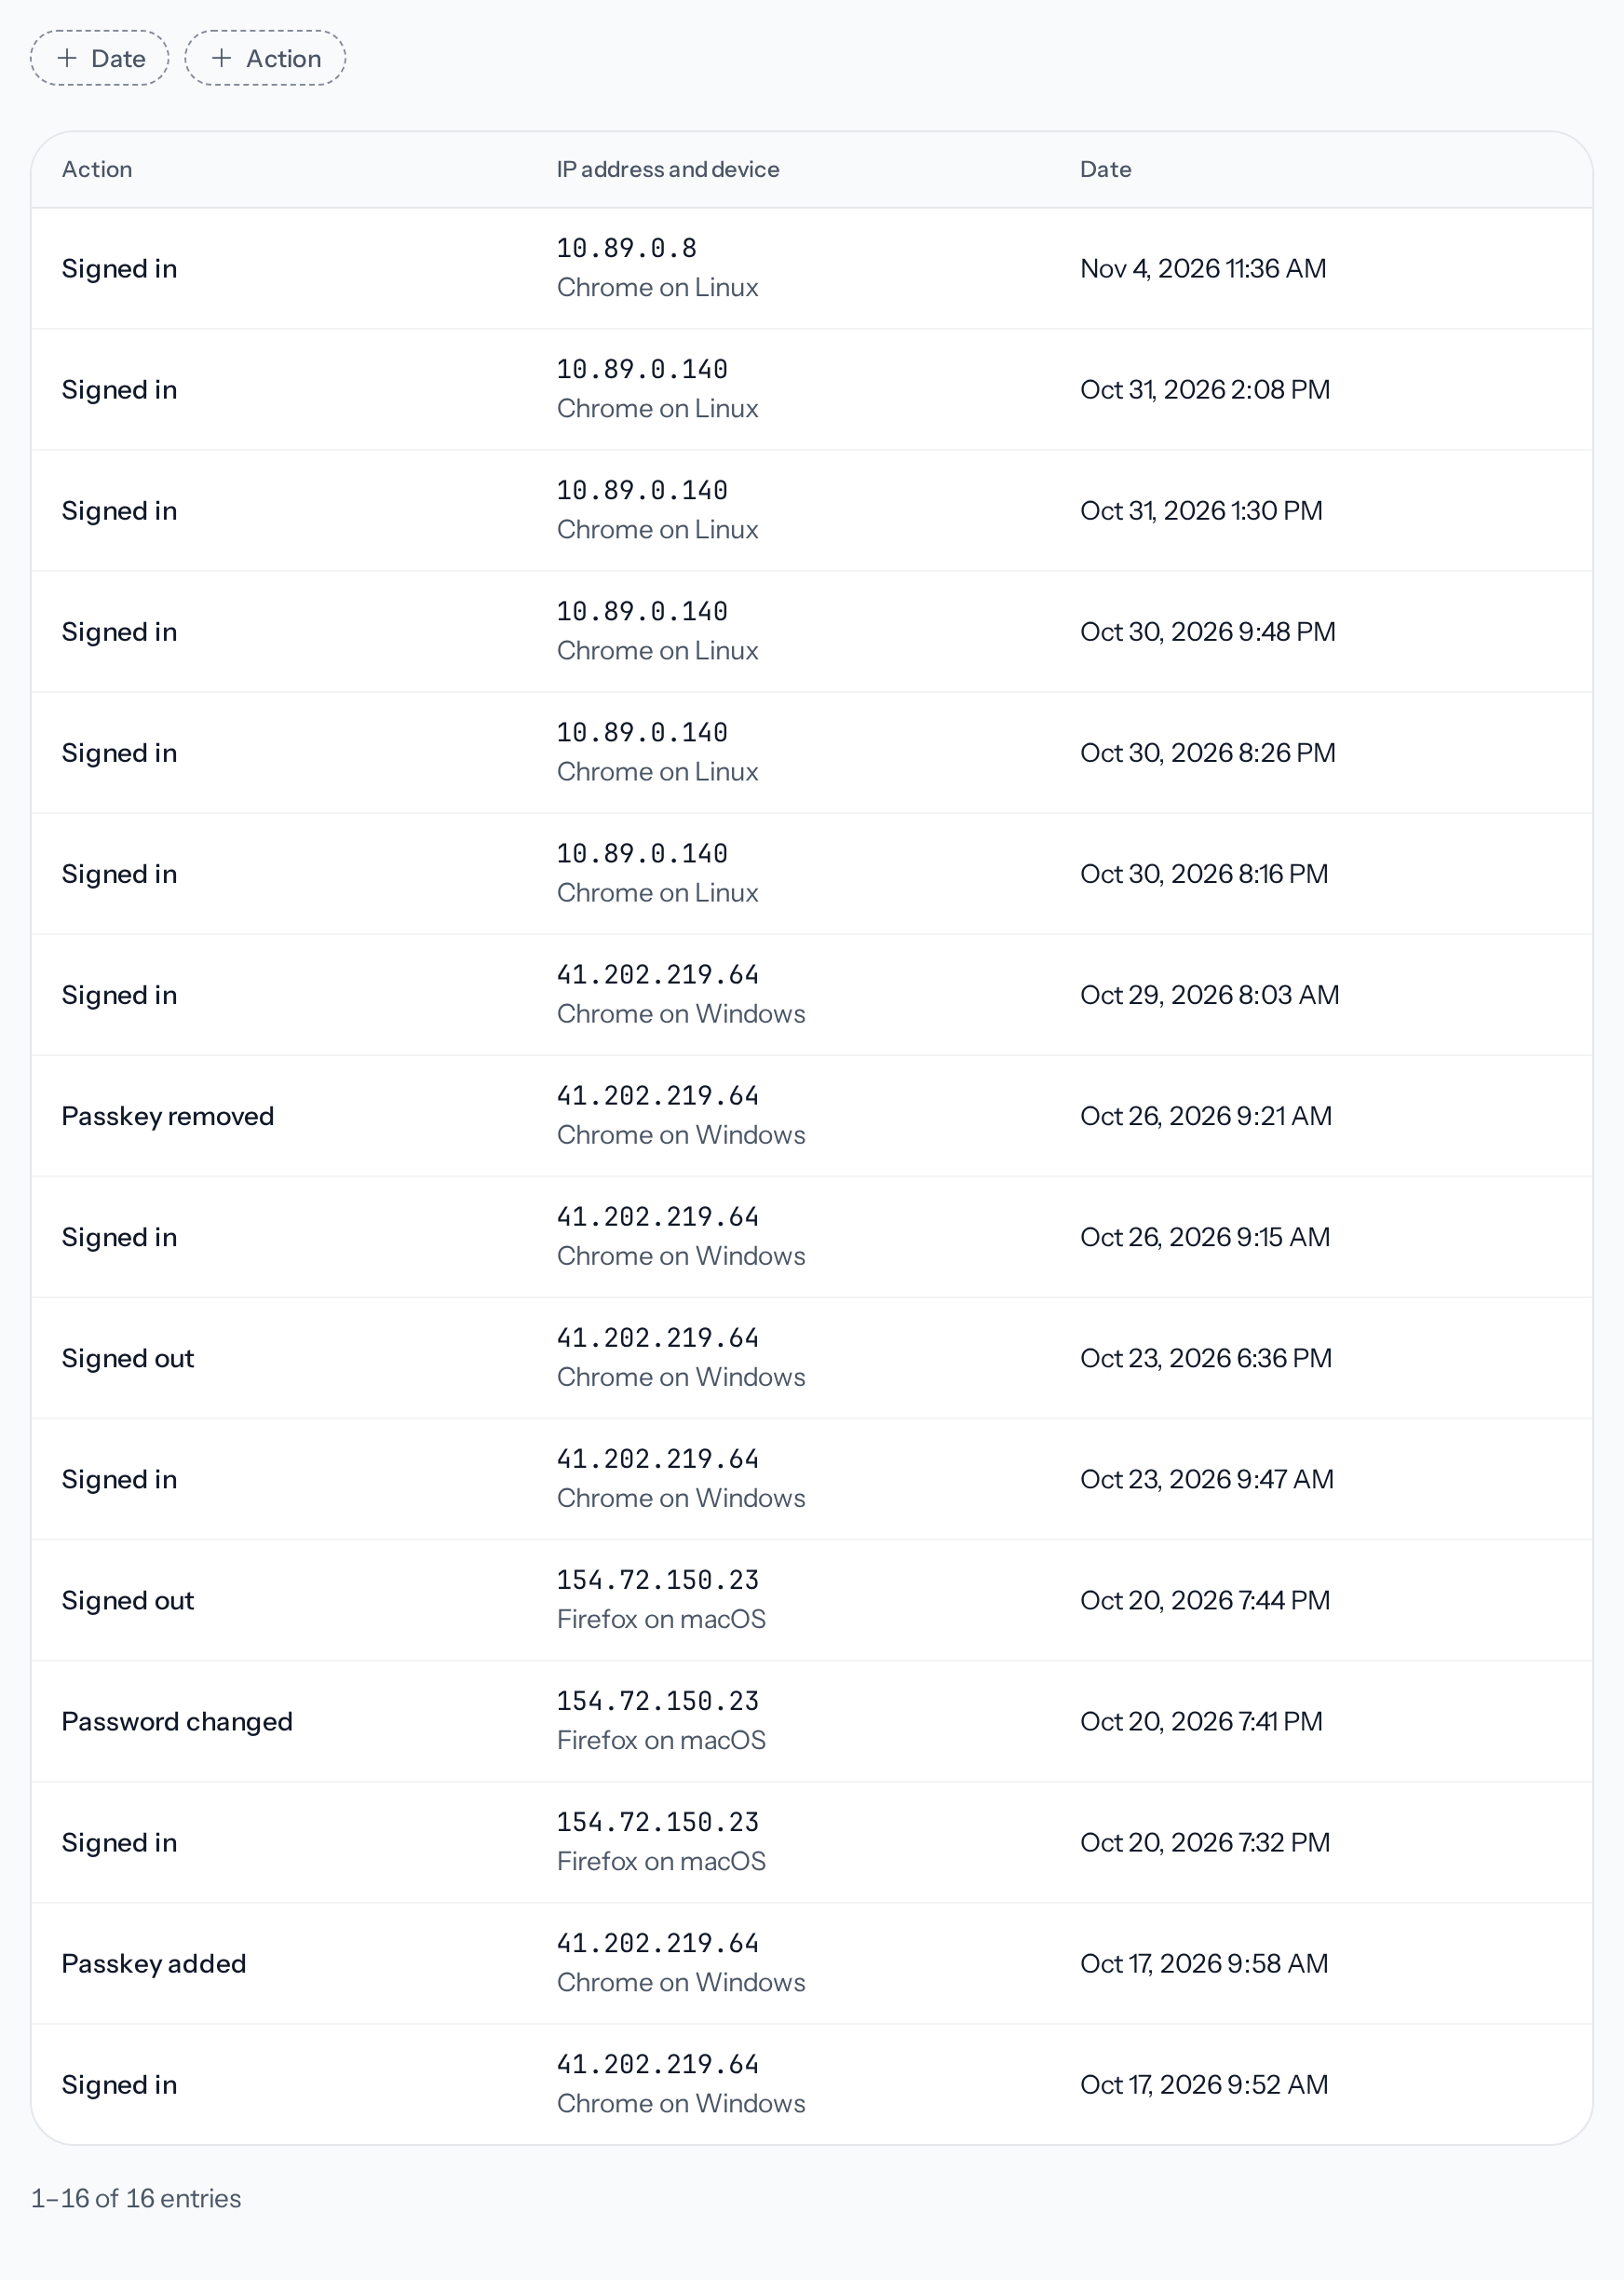
*Only the actions on your user account appear here.*
If you do not recognise a sign-in, sign out of the session and change your password, as described
in [Secure your sign-in](https://docs.wajub.com/dashboard/account/security#sessions). What members do in the
organisation is in the [audit log](https://docs.wajub.com/dashboard/settings/audit-log).
## Export your data
Open **Profile** in the **Personal** group, then, under **Your data**, **Export all my data**. The
dashboard downloads a JSON file with your profile (name, email, phone, language), your
organisations and your role in each, your sessions and the last 500 rows of your activity.
---
# Delete your account
URL: https://docs.wajub.com/dashboard/account/delete
> Delete your Wajub user account, which closes the organisations you own, and what to do if the deletion is refused.
Deleting your user account removes your access to Wajub and closes the organisations you own. It
cannot be undone.
Each member can delete their own account, whatever their [role](https://docs.wajub.com/dashboard#roles), [in Sandbox and
in Live](https://docs.wajub.com/dashboard#sandbox-and-live). Deletion asks for the
[security code](https://docs.wajub.com/dashboard#the-security-code). Before you start, for each organisation you own,
withdraw its balance with a [transfer](https://docs.wajub.com/dashboard/transfers/send) and wait for disputes, refunds
and transfers in progress to finish, or
[hand it over to another member](https://docs.wajub.com/dashboard/settings/organizations#transfer-ownership).
## The steps
1. **Open your profile**
Open **Settings**, then **Profile** in the **Personal** group. **Danger zone** is at the
bottom of the page.
2. **Start the deletion**
**Delete account** opens **Delete your account?**. The dialog names the organisations you own
that will be closed: their API keys stop working, their members lose access, and their records
are kept. The organisations you are only a member of carry on without you.
If an organisation cannot be closed yet, the dialog lists it under **Settle these first, then
delete your account:** and does not offer to delete: see
[If deletion is refused](#if-deletion-is-refused).
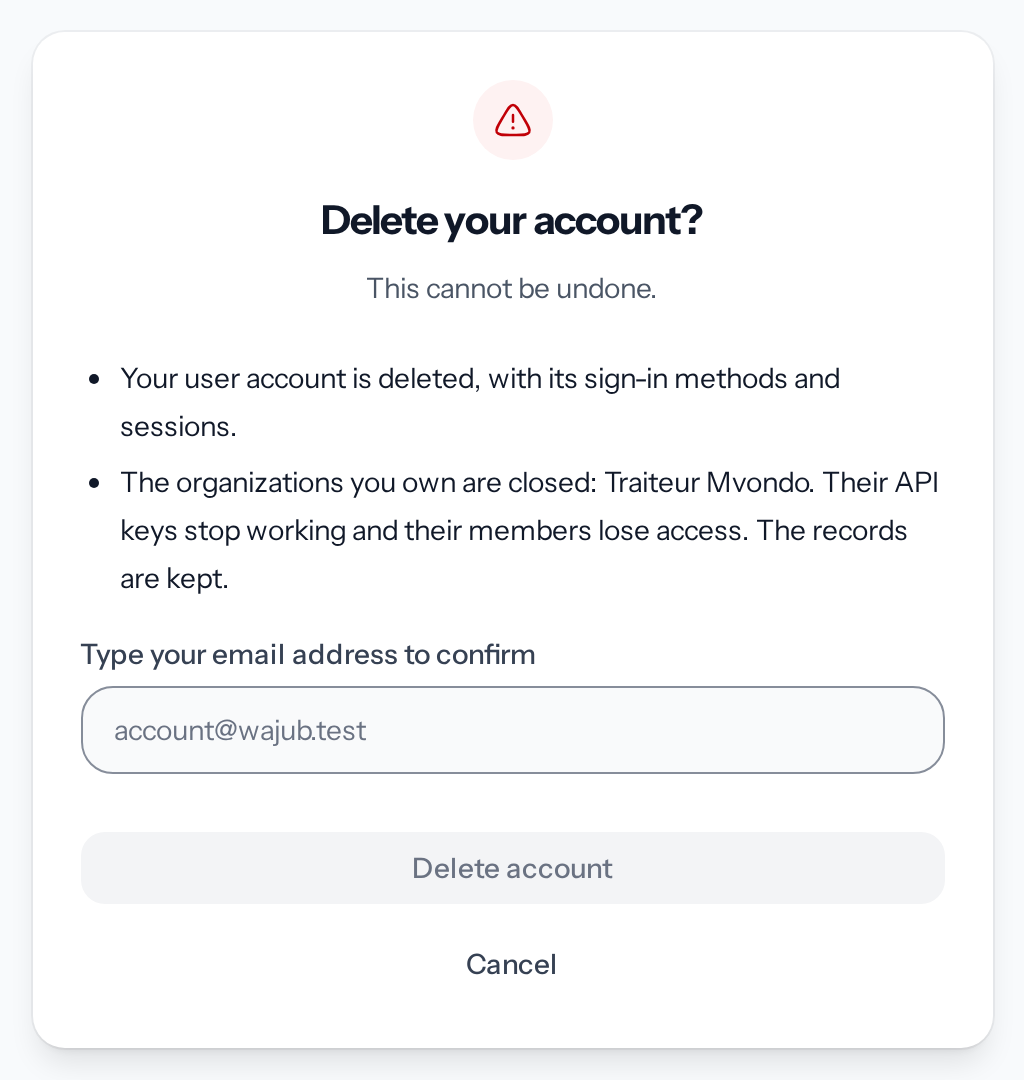
*The dialog names each organisation that will be closed.*
3. **Confirm the deletion**
Type your email address in **Type your email address to confirm**, then choose **Delete
account**, which asks for the security code. The account is deleted, with its sign-in methods
and sessions, and you are signed out.
## If deletion is refused
Under **Settle these first, then delete your account:**, the dialog names each organisation that
cannot be closed yet and says why: a balance to withdraw, or a dispute, a refund or a transfer in
progress. Sort that out, or hand the organisation over, then open the dialog again. If the deletion
is refused once confirmed, **Your account was not deleted** gives the reason the same way.
---
# Set your preferences
URL: https://docs.wajub.com/dashboard/account/preferences
> Choose the dashboard's language, a display currency and the emails you receive, and turn on keyboard shortcuts.
**Preferences**, in the **Personal** group of the settings, sets the dashboard's language, a
display currency and your emails. These choices only apply to you.
Each member sets their own preferences, whatever their [role](https://docs.wajub.com/dashboard#roles), [in Sandbox and
in Live](https://docs.wajub.com/dashboard#sandbox-and-live), without a [security code](https://docs.wajub.com/dashboard#the-security-code).
## Language and currency
Open **Settings**, then **Preferences** in the **Personal** group. **Interface language** switches
the whole dashboard to French or English. **Display currency** adds, beside the main amounts on
the [home page](https://docs.wajub.com/dashboard/home/read), their conversion at the latest exchange rate; the amounts,
settlement and your payment page do not change. The first choice in the list removes the
conversion.
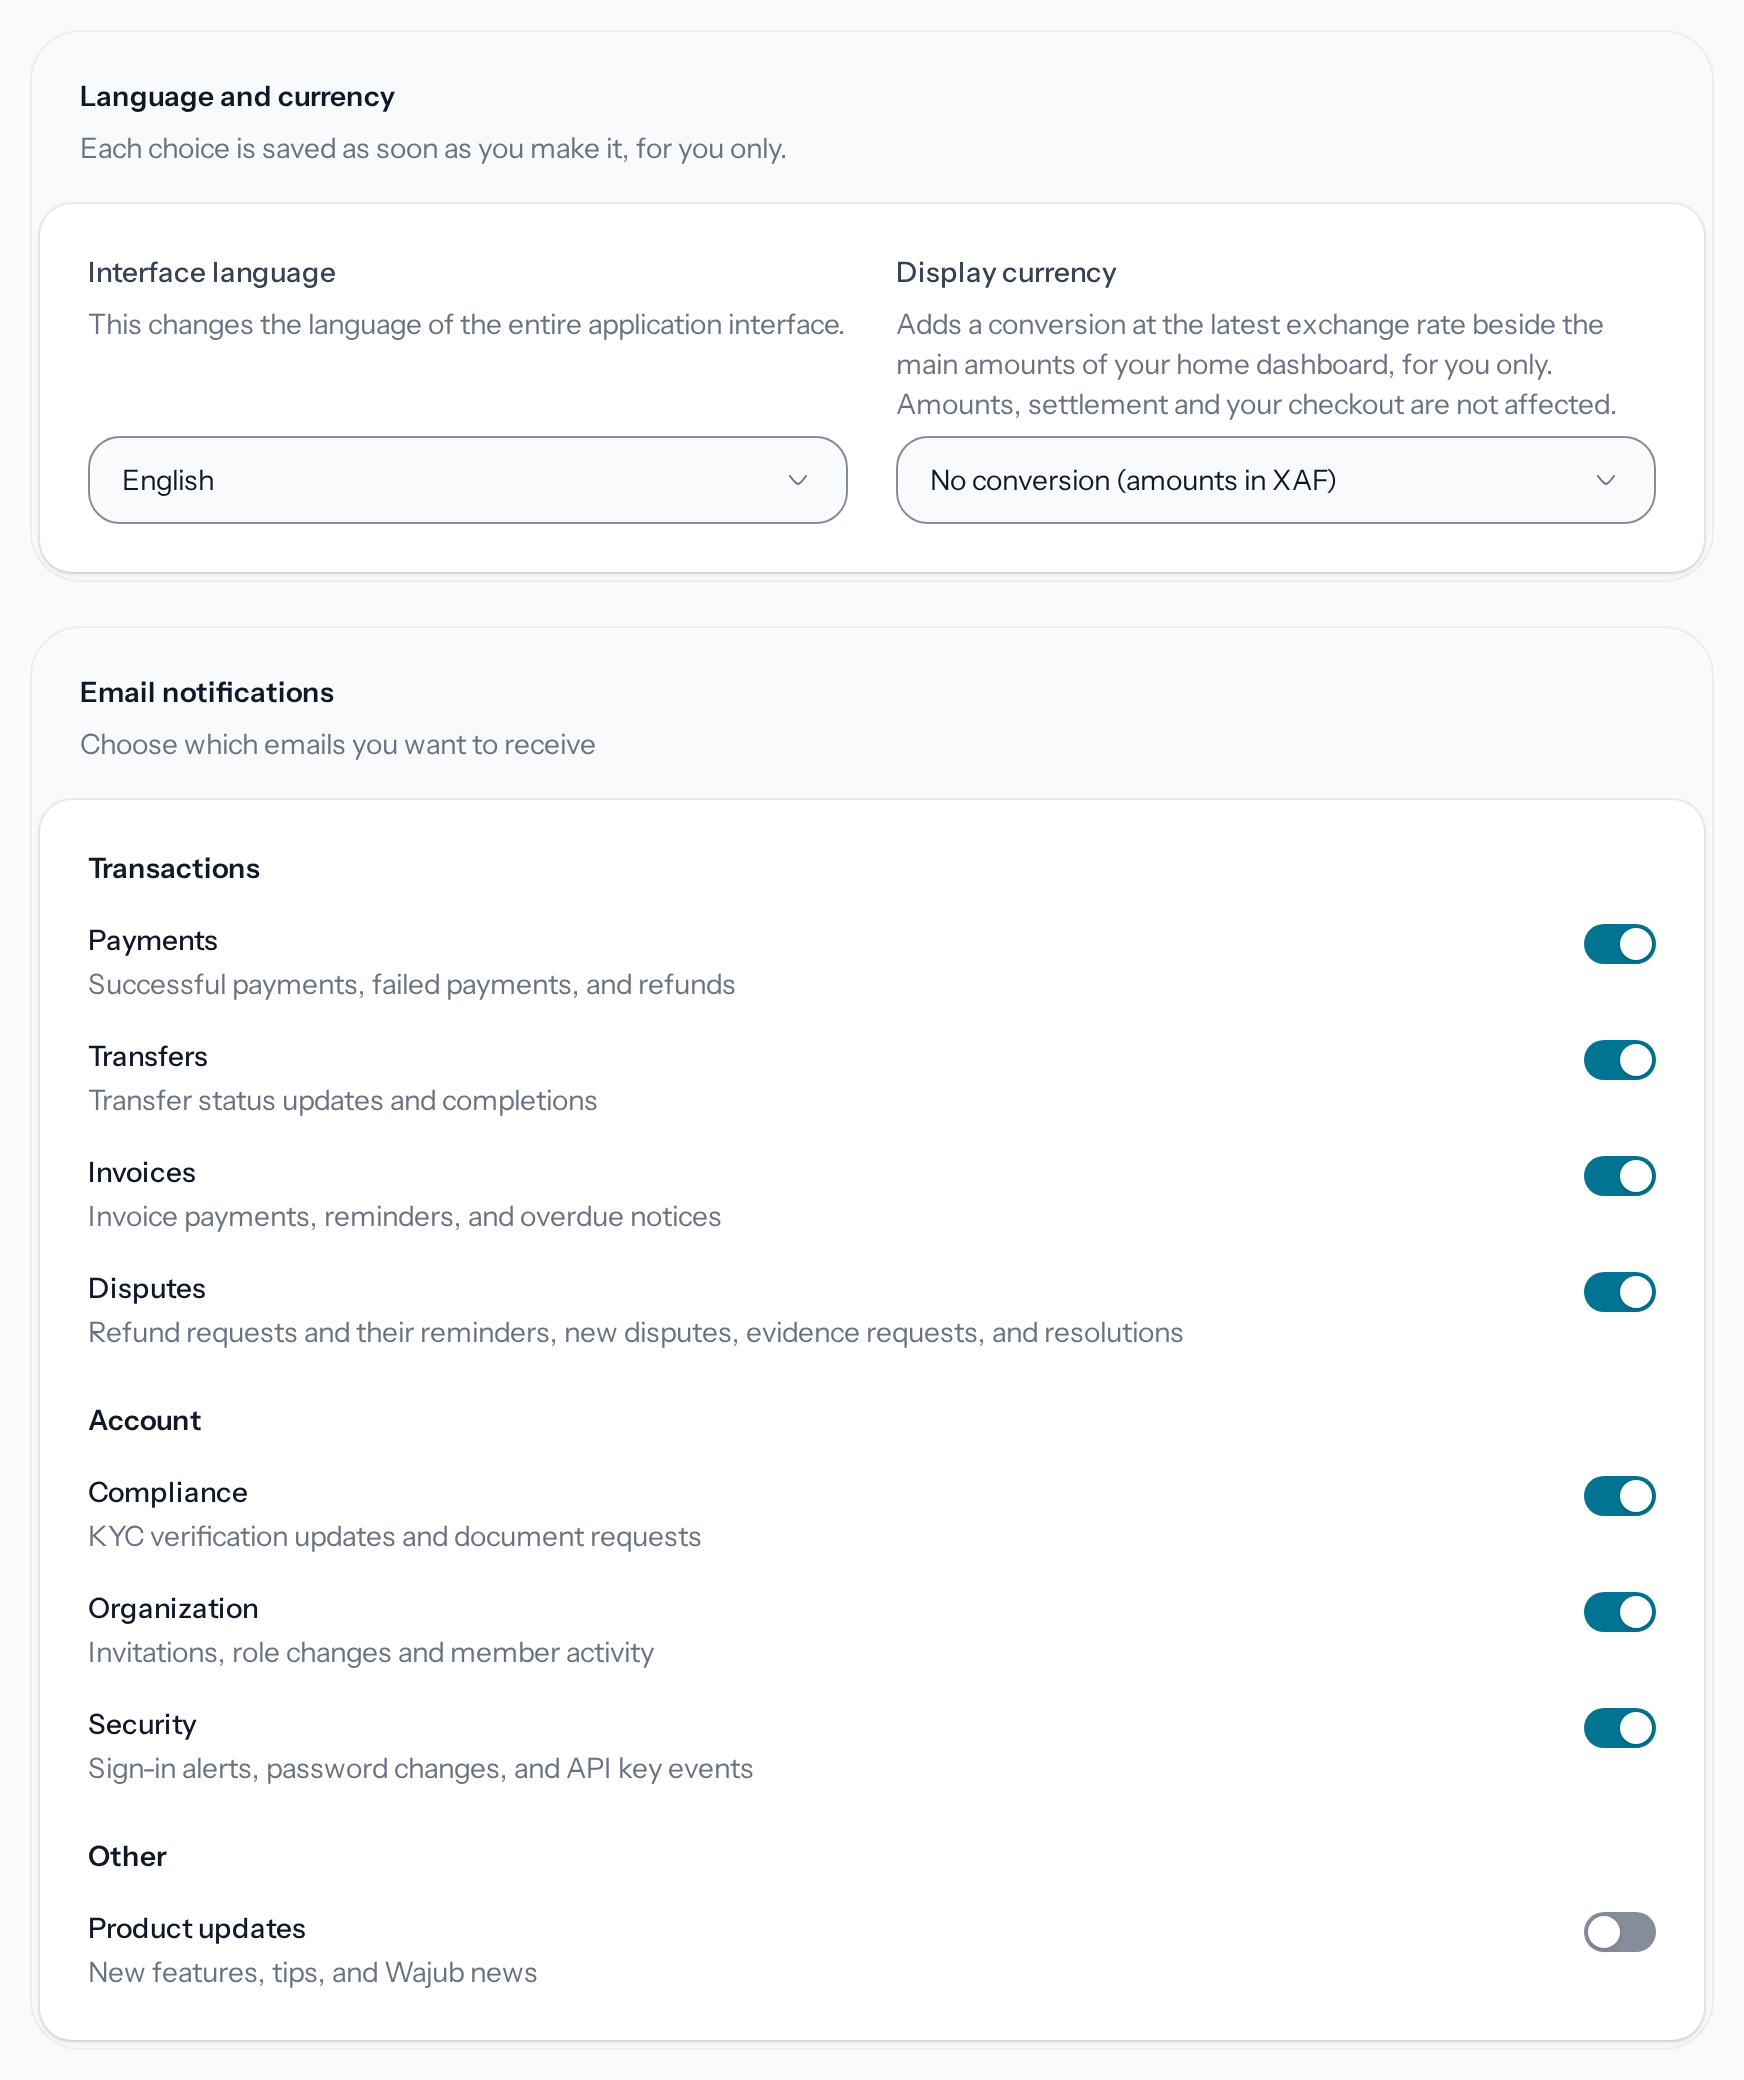
*The language and the currency are saved as soon as you choose them.*
## Emails
**Email notifications** has one switch per topic, grouped into **Transactions** (**Payments**,
**Transfers**, **Invoices**, **Disputes**), **Account** (**Compliance**, **Organization**,
**Security**) and **Other** (**Product updates**, off to begin with). A bar appears at the bottom
of the screen as soon as you change something: **Save changes** applies your choices, **Discard**
cancels them. Wajub only sends a member the emails that concern their role.
## Keyboard shortcuts
Shortcuts are set outside this page. **Keyboard shortcuts**, in your account menu at the top
right, lists them, and **Use single-key shortcuts** turns them on or off. Once they are on, the ?
key also opens this list.
---
# Edit your profile
URL: https://docs.wajub.com/dashboard/account/profile
> Change your name, the email address you sign in with and the phone number where Wajub sends your codes.
**Profile**, in the **Personal** group of the settings, holds your name, and the email address and
phone number where Wajub sends your sign-in and verification codes. They follow your account
across all your organisations.
Each member edits their own profile, whatever their [role](https://docs.wajub.com/dashboard#roles), [in Sandbox and in
Live](https://docs.wajub.com/dashboard#sandbox-and-live). Changing your email address does not ask for the [security
code](https://docs.wajub.com/dashboard#the-security-code) but for a code sent to each address; verifying a phone number
asks for it.
## Change your email address
1. **Open your profile**
Open **Settings**, then **Profile** in the **Personal** group.
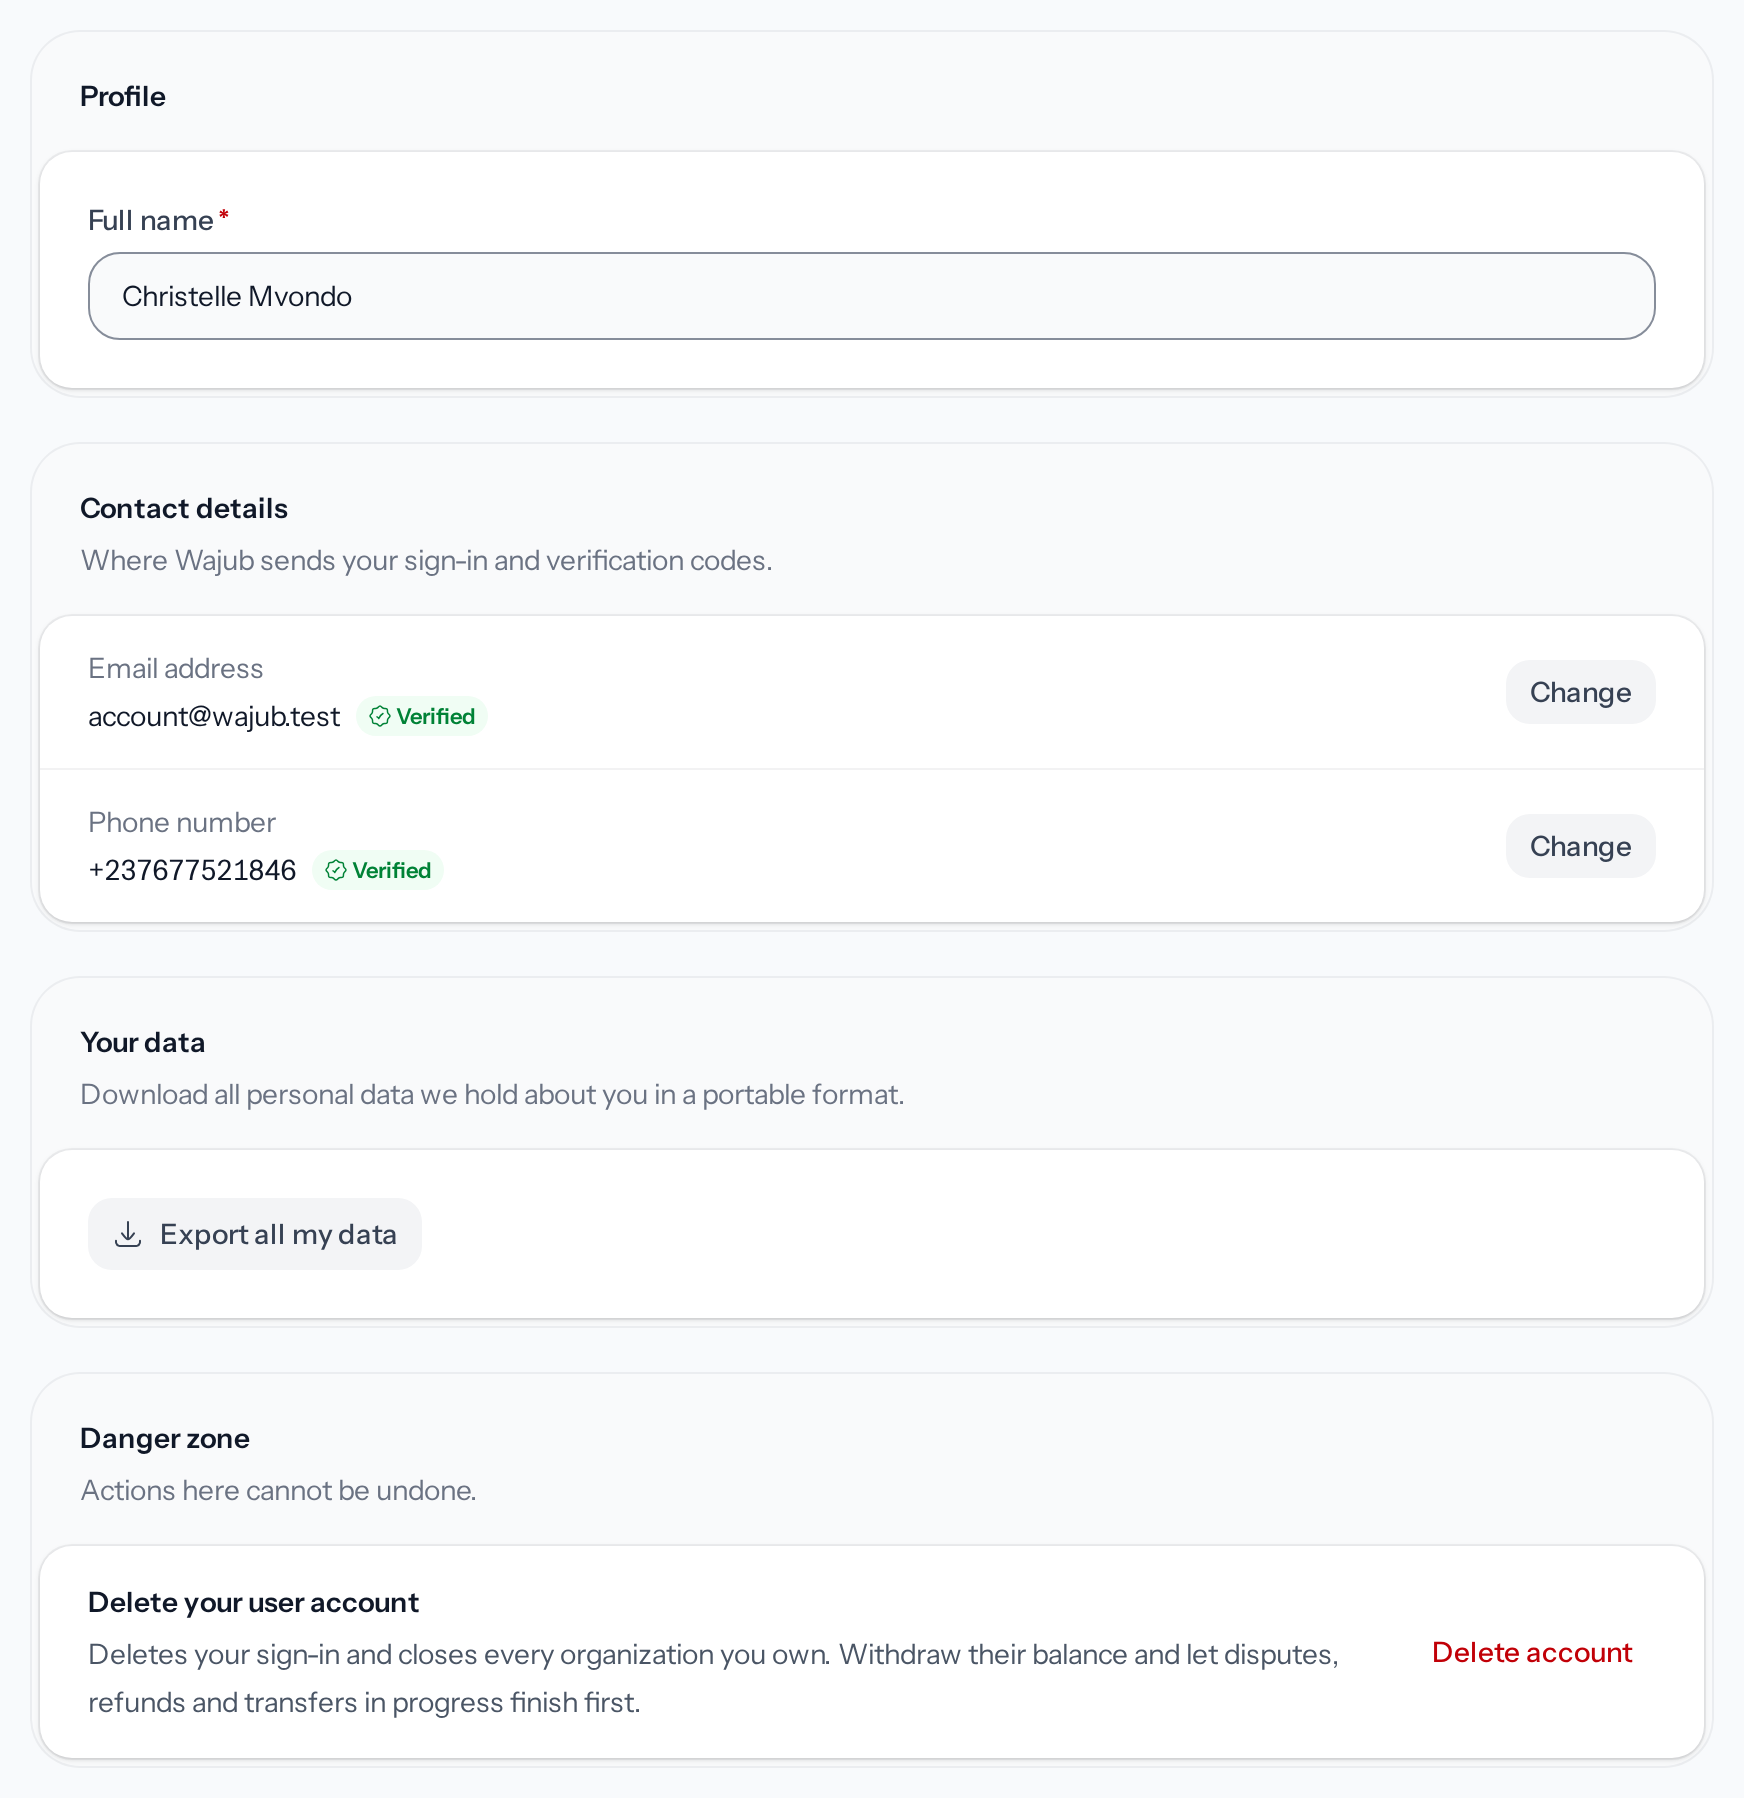
*Contact details brings together the two places where your codes arrive.*
2. **Enter the new address**
In **Contact details**, **Change** opens **Change email address**. Enter the **New email
address**, then **Send verification code**. A disposable address is refused: use a permanent
one.
3. **Verify your current address**
Enter the **Verification code** sent to your current address, then **Verify current email**.
4. **Verify the new address**
Enter the code sent to the new address, then **Complete email change**. From then on, you sign
in with the new address.
Until the change is finished, **Contact details** shows **Pending change to** and the new address.
**Continue** picks up where you left off, and **Cancel email change** keeps the old one.
## Your name
Replace your **Full name**: a bar appears at the bottom of the screen, and **Save name** applies
it.
## Your phone number
In **Contact details**, **Add a phone number** opens a window of the same name. Enter the **Phone
number**, then **Send code**, which asks for the security code. Enter the 6-digit code you receive
by SMS, then **Verify phone number**: the number moves to **Verified**, and can receive your
sign-in codes, as described in [Secure your sign-in](https://docs.wajub.com/dashboard/account/security#other-methods).
A number that is not verified yet has a **Verify** button, which opens **Verify phone number**. A
verified one has a **Change** button, which opens **Change phone number**. Both work the same way.
**Your data**, further down, exports what Wajub keeps about you: see
[Export your data](https://docs.wajub.com/dashboard/account/activity-and-data#export-your-data). **Danger zone** is where
you [delete your account](https://docs.wajub.com/dashboard/account/delete).
---
# Secure your sign-in
URL: https://docs.wajub.com/dashboard/account/security
> Set up an authenticator app, passkeys or codes by email or SMS, change your password and sign out of your sessions.
**Security**, in the **Personal** group of the settings, sets how you sign in: password, passkeys,
two-factor authentication and sessions. Rules imposed on the whole organisation are set in
[Secure the organisation](https://docs.wajub.com/dashboard/settings/security).
Each member secures their own account, whatever their [role](https://docs.wajub.com/dashboard#roles), [in Sandbox and in
Live](https://docs.wajub.com/dashboard#sandbox-and-live). Setting up an authenticator app, adding or removing a passkey,
turning off a method, creating new recovery codes and signing out of a session ask for the
[security code](https://docs.wajub.com/dashboard#the-security-code).
## Set up an authenticator app
1. **Open the Security page**
Open **Settings**, then **Security** in the **Personal** group. As long as you have neither
two-factor authentication nor a passkey, the entry shows **Two-factor authentication is off**.
**Sign-in methods** lists each method with its state, **On** or **Off**.
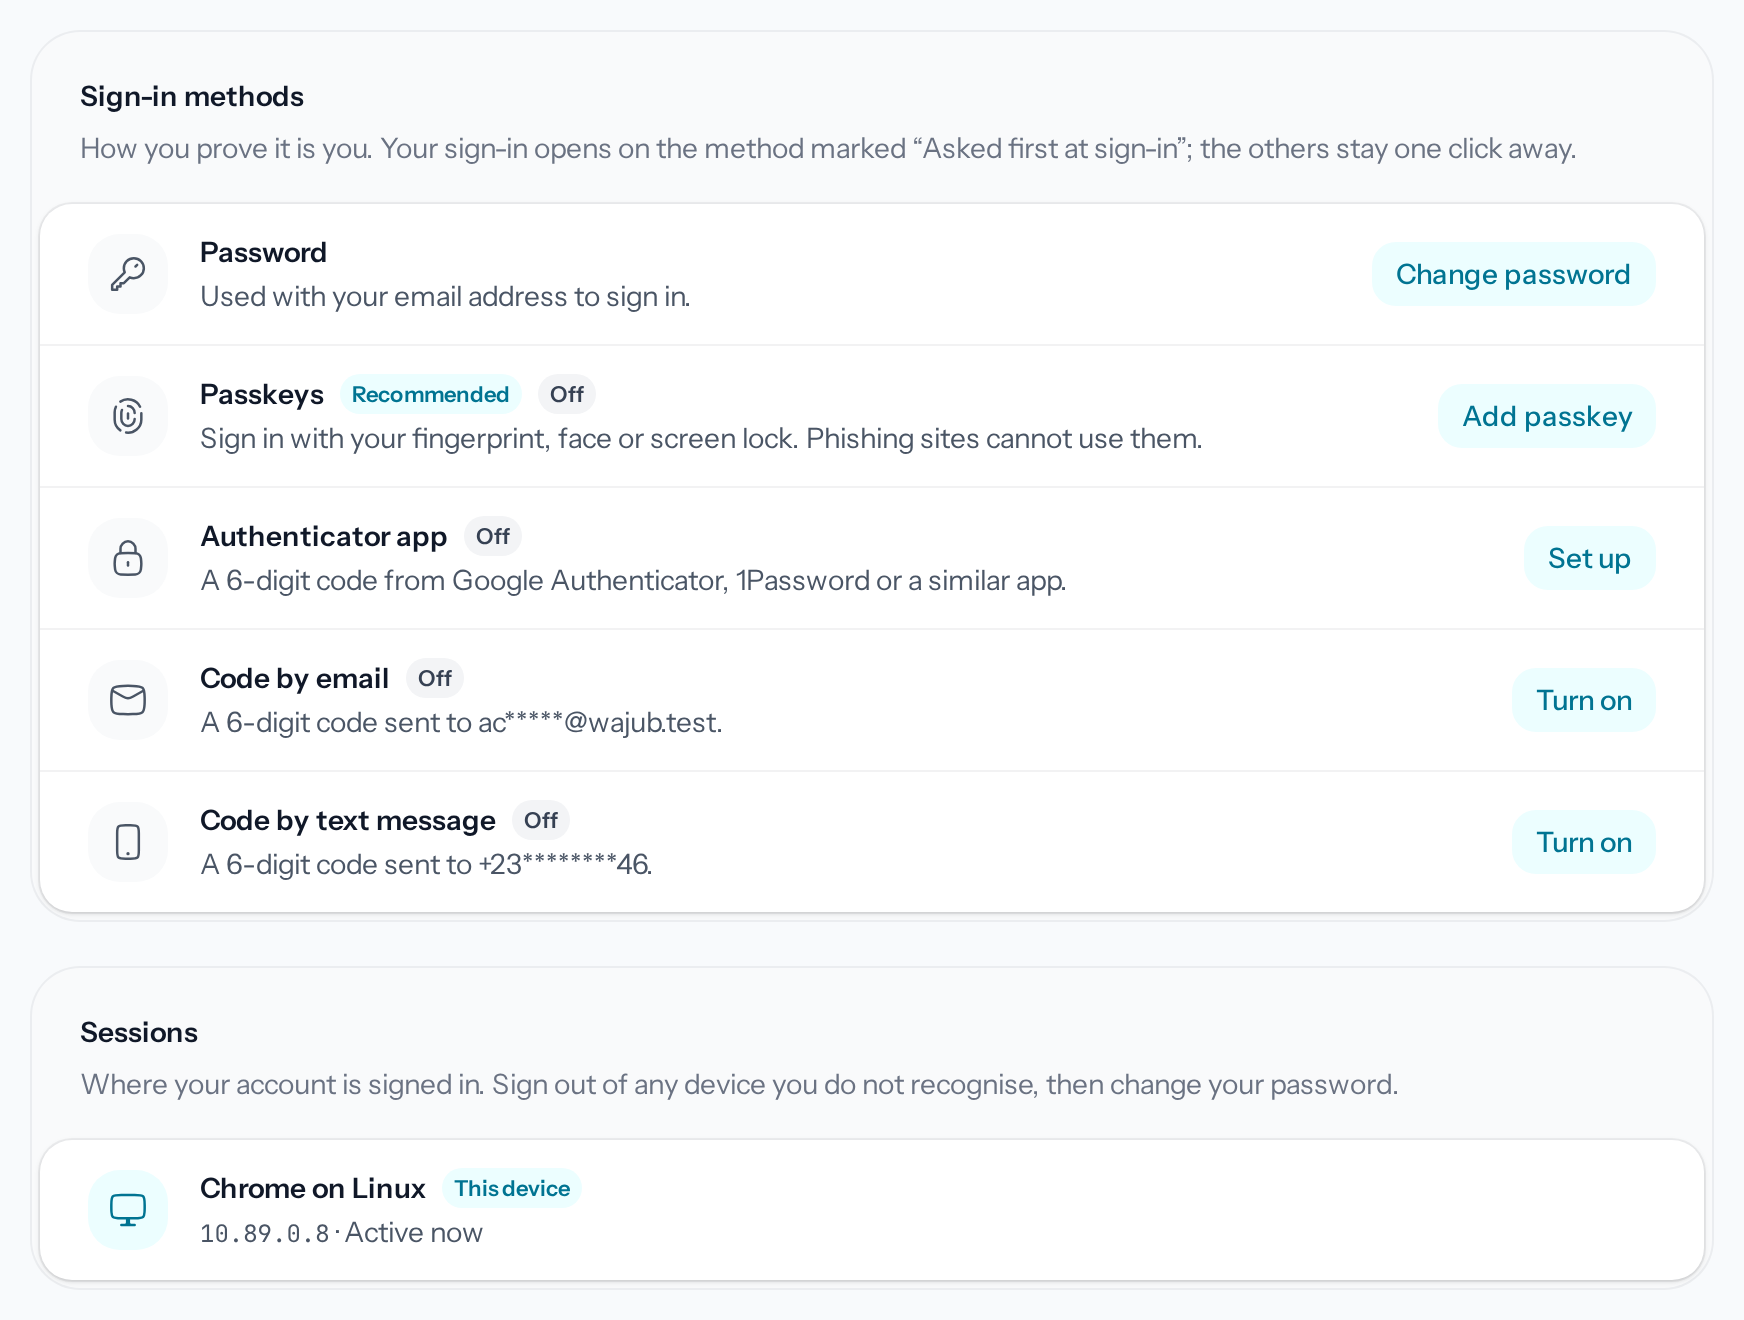
*Without two-factor authentication or a passkey, every method except the password is marked Off.*
2. **Start the setup**
On **Authenticator app**, **Set up** asks for the security code, then opens **Set up
authenticator app**.
3. **Scan the QR code**
Scan the QR code with Google Authenticator, 1Password or a similar app. If you cannot scan it,
enter the **Setup key** in the app.
4. **Confirm with the app's code**
Enter the 6-digit code the app shows in **Code from the app**, then **Turn on authenticator
app**.
5. **Keep your recovery codes**
**Save your recovery codes** shows them only once. **Copy** or **Download** keeps them: each
one signs you in once if you lose your phone.
6. **Finish the setup**
Tick **I've saved these codes**, then **Done**. The app moves to **On**.
## Other methods
**Passkeys**, marked **Recommended**, sign you in with your fingerprint, your face or your screen
lock. **Add passkey** asks for a name, which is optional, then your browser takes over. A passkey
counts as a second step. **Remove** deletes a passkey.
**Code by email** and **Code by text message** send a code at each sign-in. **Turn on** sends you a
first code: enter it, then **Turn on codes by email** or **Turn on codes by text message**. Text
messages need a verified number in your
[profile](https://docs.wajub.com/dashboard/account/profile#your-phone-number).
**Turn off** removes a method, after a confirmation. **Recovery codes** offers **Create new codes**
if you have lost yours: the old ones stop working at once.
## Your password
**Change password** asks for the **Current password**, the **New password** and **Confirm new
password**, then **Update password**. Your other sessions stay signed in: sign them out if you
changed it as a precaution.
## Your sessions
**Sessions** lists the devices where your account is signed in, yours marked **This device**.
**Sign out** closes one session, and **Sign out of all other sessions** closes all the others. Sign
out any device you do not recognise, then change your password.
---
# Add a customer
URL: https://docs.wajub.com/dashboard/customers/add
> Create the profile of an individual or a business from the dashboard, and what the alert does when that customer already exists.
A customer's profile keeps their contact details, their preferences and your tags, then gathers
their payments, refunds and disputes. A customer entered with an email or a phone number on an
[invoice](https://docs.wajub.com/dashboard/invoices/create) also joins your directory.
The owner, an Administrator, a Support specialist or a custom role with **Manage customers** can
add a customer, on every plan, in Sandbox as in Live. No security code is asked for.
## The steps
1. **Open the form**
Open **Customers**, then **Add customer**. The form fits on a single page.
2. **Choose the customer type**
Under **Customer type**, choose **Individual** or **Business**. For an individual, **Personal
information** asks for their **Full name**. For a business, **Business information** asks for
the **Business name**, the only required field of the form, then if needed the **Registration
number**, the **Tax ID** and the name and title of the legal representative.
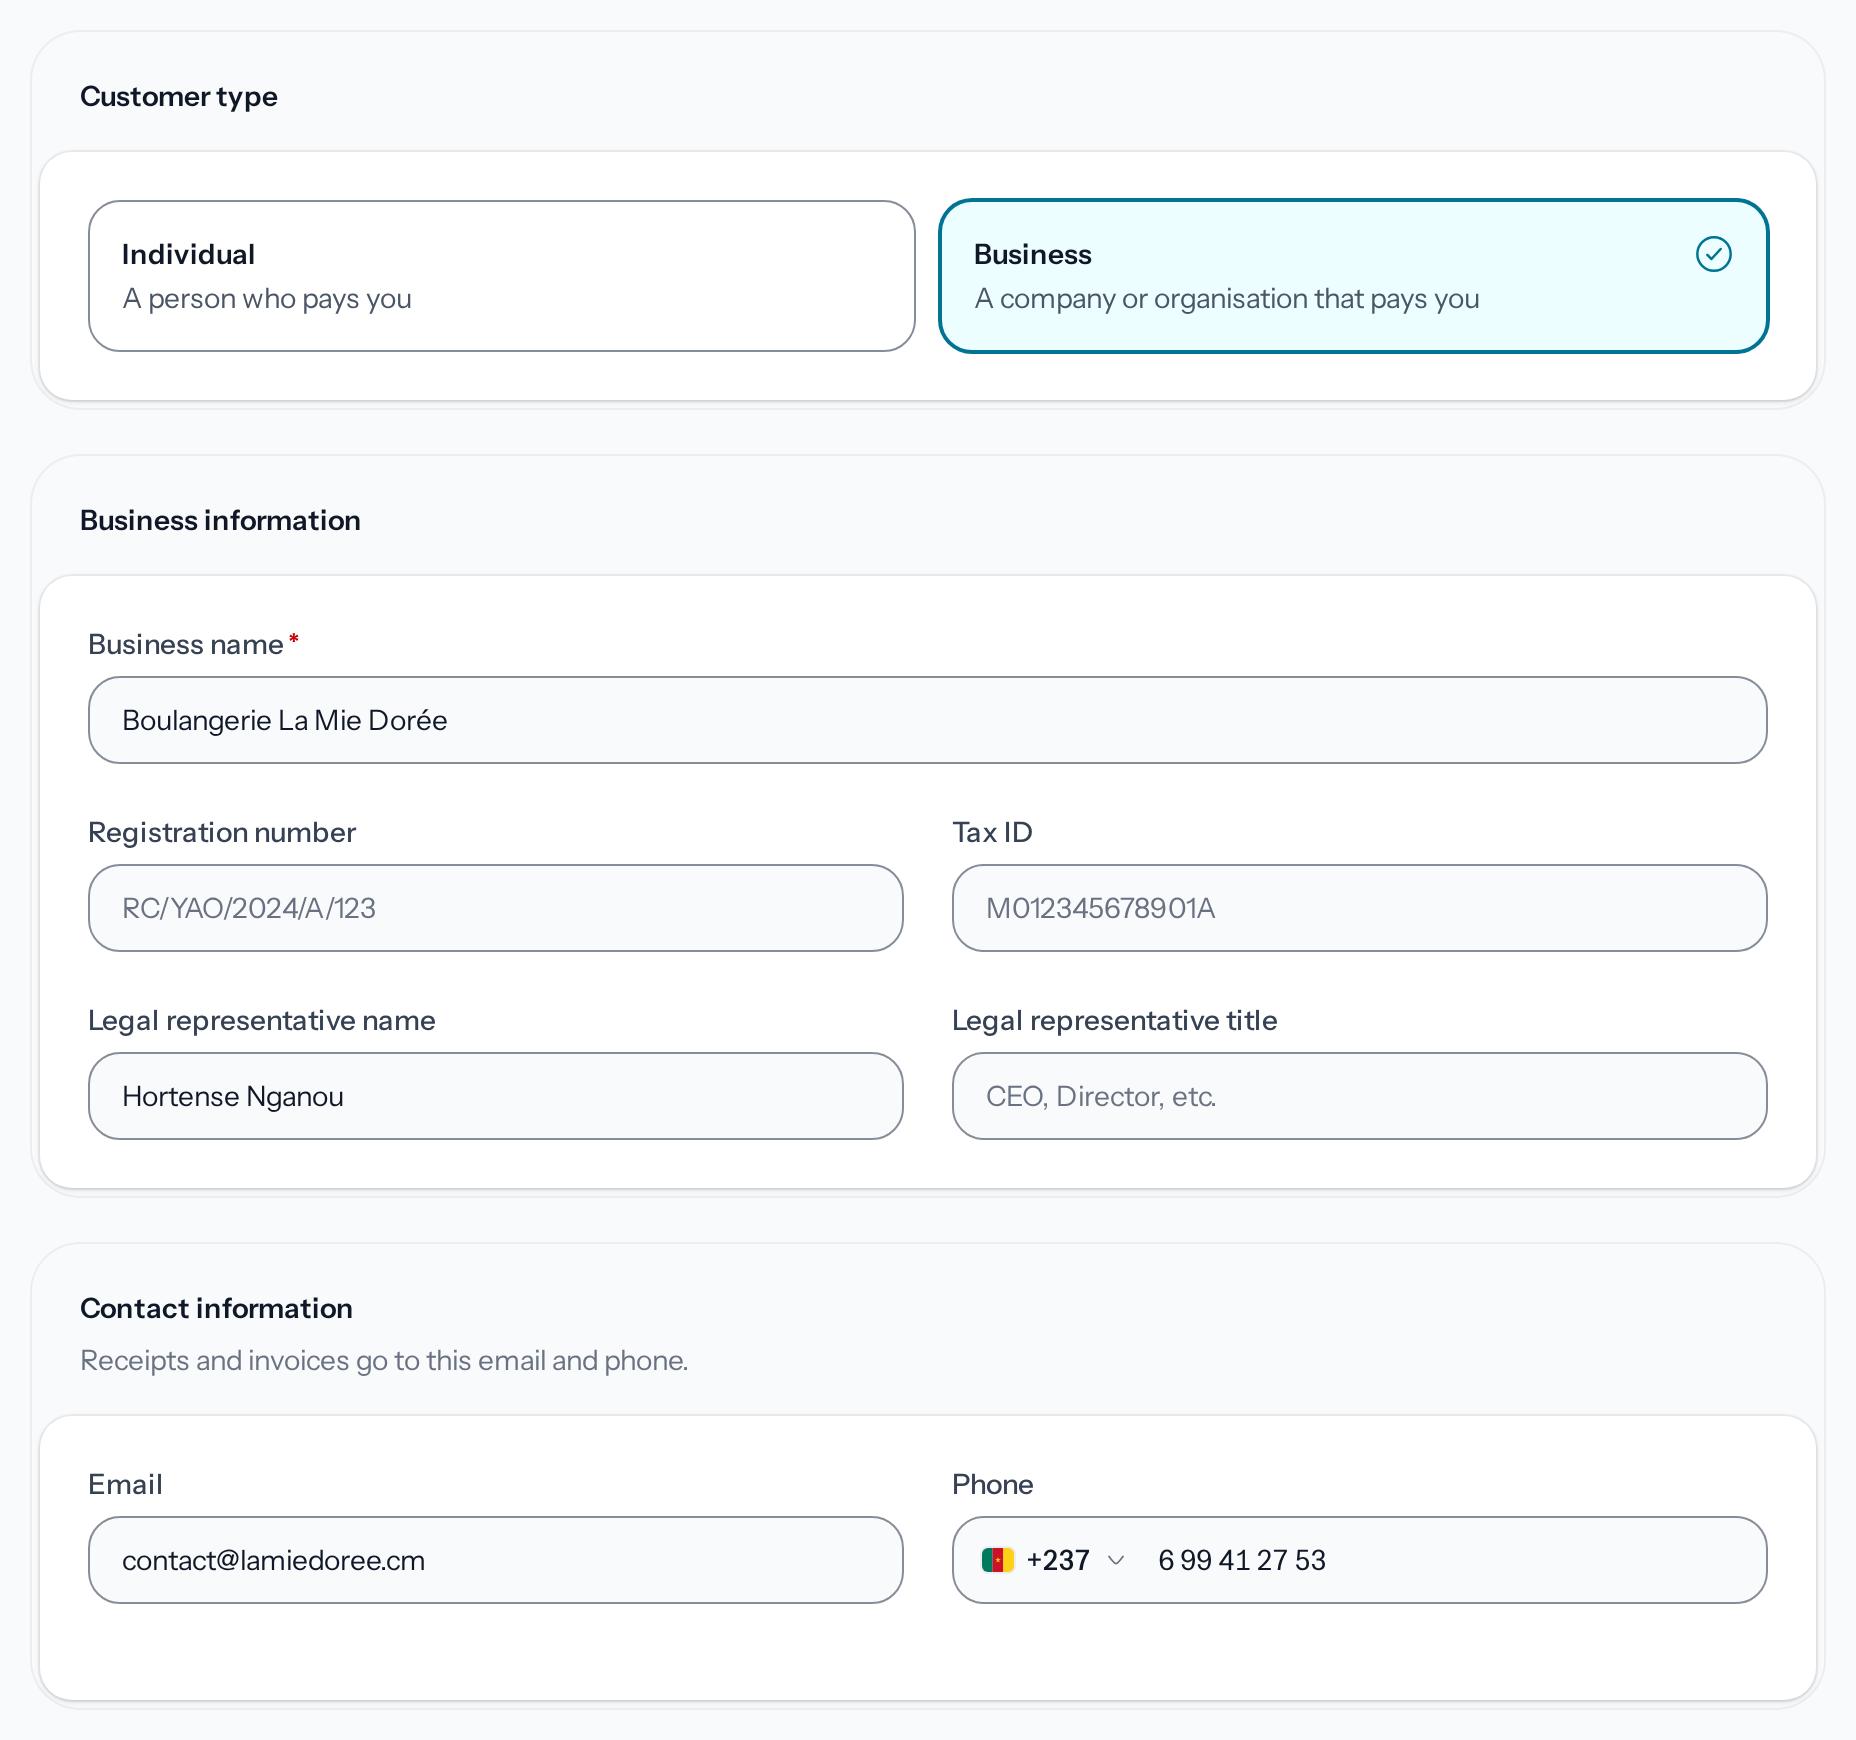
*For a business, only the business name is required.*
3. **Enter their contact details**
Under **Contact information**, enter their **Email** and their **Phone**: their receipts and
invoices go to them. The dashboard checks at once whether they already belong to a customer,
as the next section explains. **Address** is optional.
4. **Set their preferences**
Under **Preferences**, the **Currency** is XAF by default. **Preferred language** sets the
language of their invoices, receipts and emails: English by default, or French. The
**Description** is only visible to your members, and **Tags** are added one at a time with the
Enter key.
5. **Add the customer**
Choose **Add customer**. Their profile opens with **Customer created successfully.** If a field
is refused, the form flags it in red and nothing is created.
## When the customer already exists
Within one environment, two customers cannot have the same email. If the email entered is already
taken, the **This email is already used** alert names the customer who has it and offers to open
their profile: change the email, or complete that profile instead.
A phone number already known shows **This customer may already exist**, without blocking: you can
create the customer anyway, or open the existing profile. If both profiles are the same person,
[merge them](https://docs.wajub.com/dashboard/customers/merge).
## After creating it
The customer's profile opens. [Update a customer profile](https://docs.wajub.com/dashboard/customers/profile) explains
what it shows and how to edit it.
---
# Block or delete a customer
URL: https://docs.wajub.com/dashboard/customers/block-disable-delete
> Block a customer with a reason and unblock them, delete a customer and their personal data, then find or restore a deleted profile.
What blocking does depends on your account's API version: from `2026-11-02`, a blocked customer
can no longer pay you until you unblock them; on earlier versions, the block only marks them for
your members and your routing rules. [Status and blocking](https://docs.wajub.com/payments/customers/manage#status-and-blocking)
says more. Deleting a customer erases their personal data for good and keeps their payments.
The owner, an Administrator, a Support specialist or a custom role with **Manage customers** can do
this, in Sandbox as in Live. Blocking, unblocking and deleting ask for the security code;
restoring a deleted customer does not.
## The steps
1. **Open the customer's menu**
On the customer's profile, open the menu to the right of **Edit**, then choose **Block
customer**. In **Customers**, the menu at the end of their row offers the same action.
2. **Give the reason**
A dialog opens in the customer's name, for example "Block Restaurant Le Bastos?". **Reason
(optional)** keeps the reason for the block for your members, in 500 characters at most: the
customer does not see it.
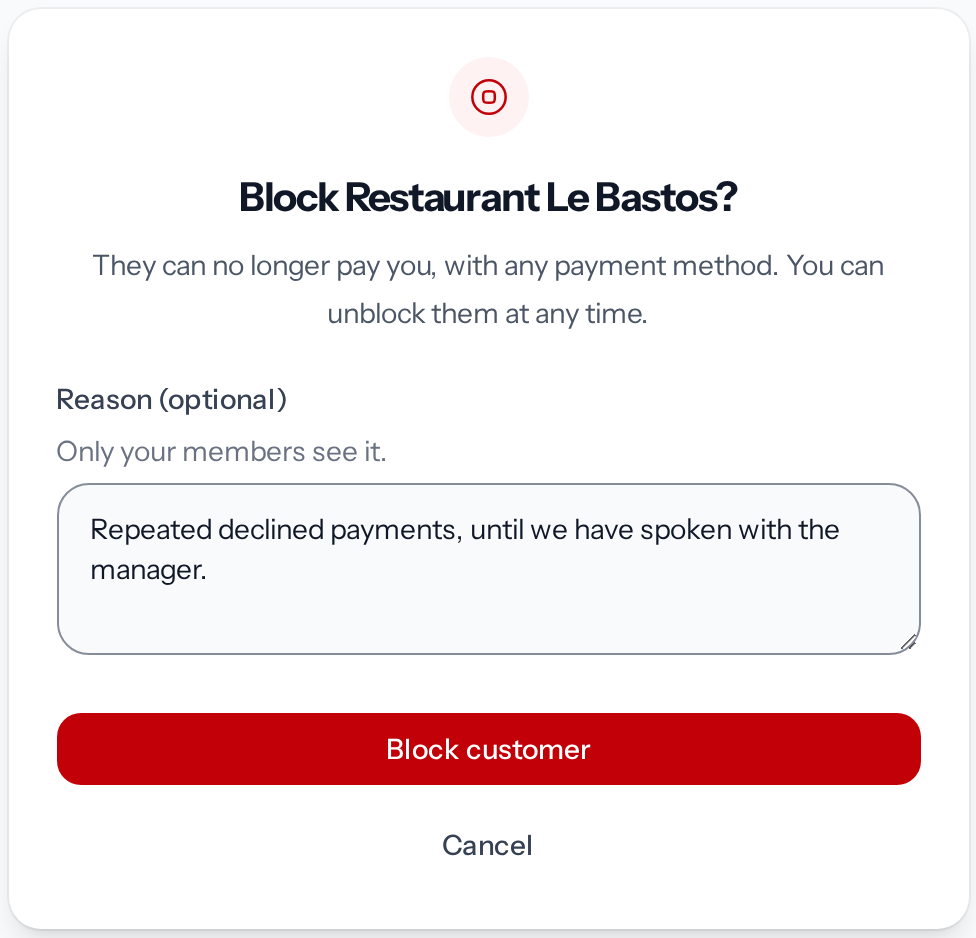
*Only your members see the reason.*
3. **Block the customer**
Choose **Block customer**, then enter the security code. Their profile shows **This customer is
blocked**, with the reason and the date of the block, and their status becomes **Blocked** in
the list.
To lift the block, choose **Unblock customer** in the same menu, then enter the code: the customer
is **Active** again. A blocked customer also falls into the **Blocked customers** segment of
[routing rules](https://docs.wajub.com/dashboard/orchestration/routing-rules).
## Delete a customer
In their profile's menu, or at the end of their row in **Customers**, choose **Delete customer**,
confirm, then enter the security code. The customer leaves your list and can no longer be charged
with their saved payment methods. Their name, email and phone number are erased at once, with no
way back. Their payments stay in your history. [Deletion and erasure](https://docs.wajub.com/payments/customers/delete)
details what is removed.
## Restore a deleted customer
In **Customers**, the **Deleted customers** filter shows deleted profiles. The menu at the end of
a row offers **Restore customer**: the profile comes back to the list, without the personal data
already erased.
> [!NOTE]
> **Several customers at once**
>
> To block, unblock or delete up to 100 customers in one go, select them in the list:
> [Act on several customers](https://docs.wajub.com/dashboard/customers/bulk-actions).
---
# Act on several customers
URL: https://docs.wajub.com/dashboard/customers/bulk-actions
> Select customers in the list to block, unblock, delete or export them in one go, and export the whole filtered list.
From the **Customers** list, you can block, unblock, delete or export up to 100 customers at a time,
or export the whole list with its filters.
The owner, an Administrator, a Support specialist or a custom role with **Manage customers** sees
the selection boxes and the **Export** button. Blocking, unblocking and deleting ask for the
security code. Exporting only exists in Live: the **Pay as you go** plan has 10 exports a month,
counting every export in the dashboard, and **Growth** and the plans above have no limit.
## The steps
1. **Select the customers**
In **Customers**, filter the list if needed, then tick each customer's box. A bar appears at the
bottom of the screen with the number of customers chosen. Beyond 100, it shows "Up to 100 at a
time." and its actions stay greyed out. Deleted customers cannot be selected.
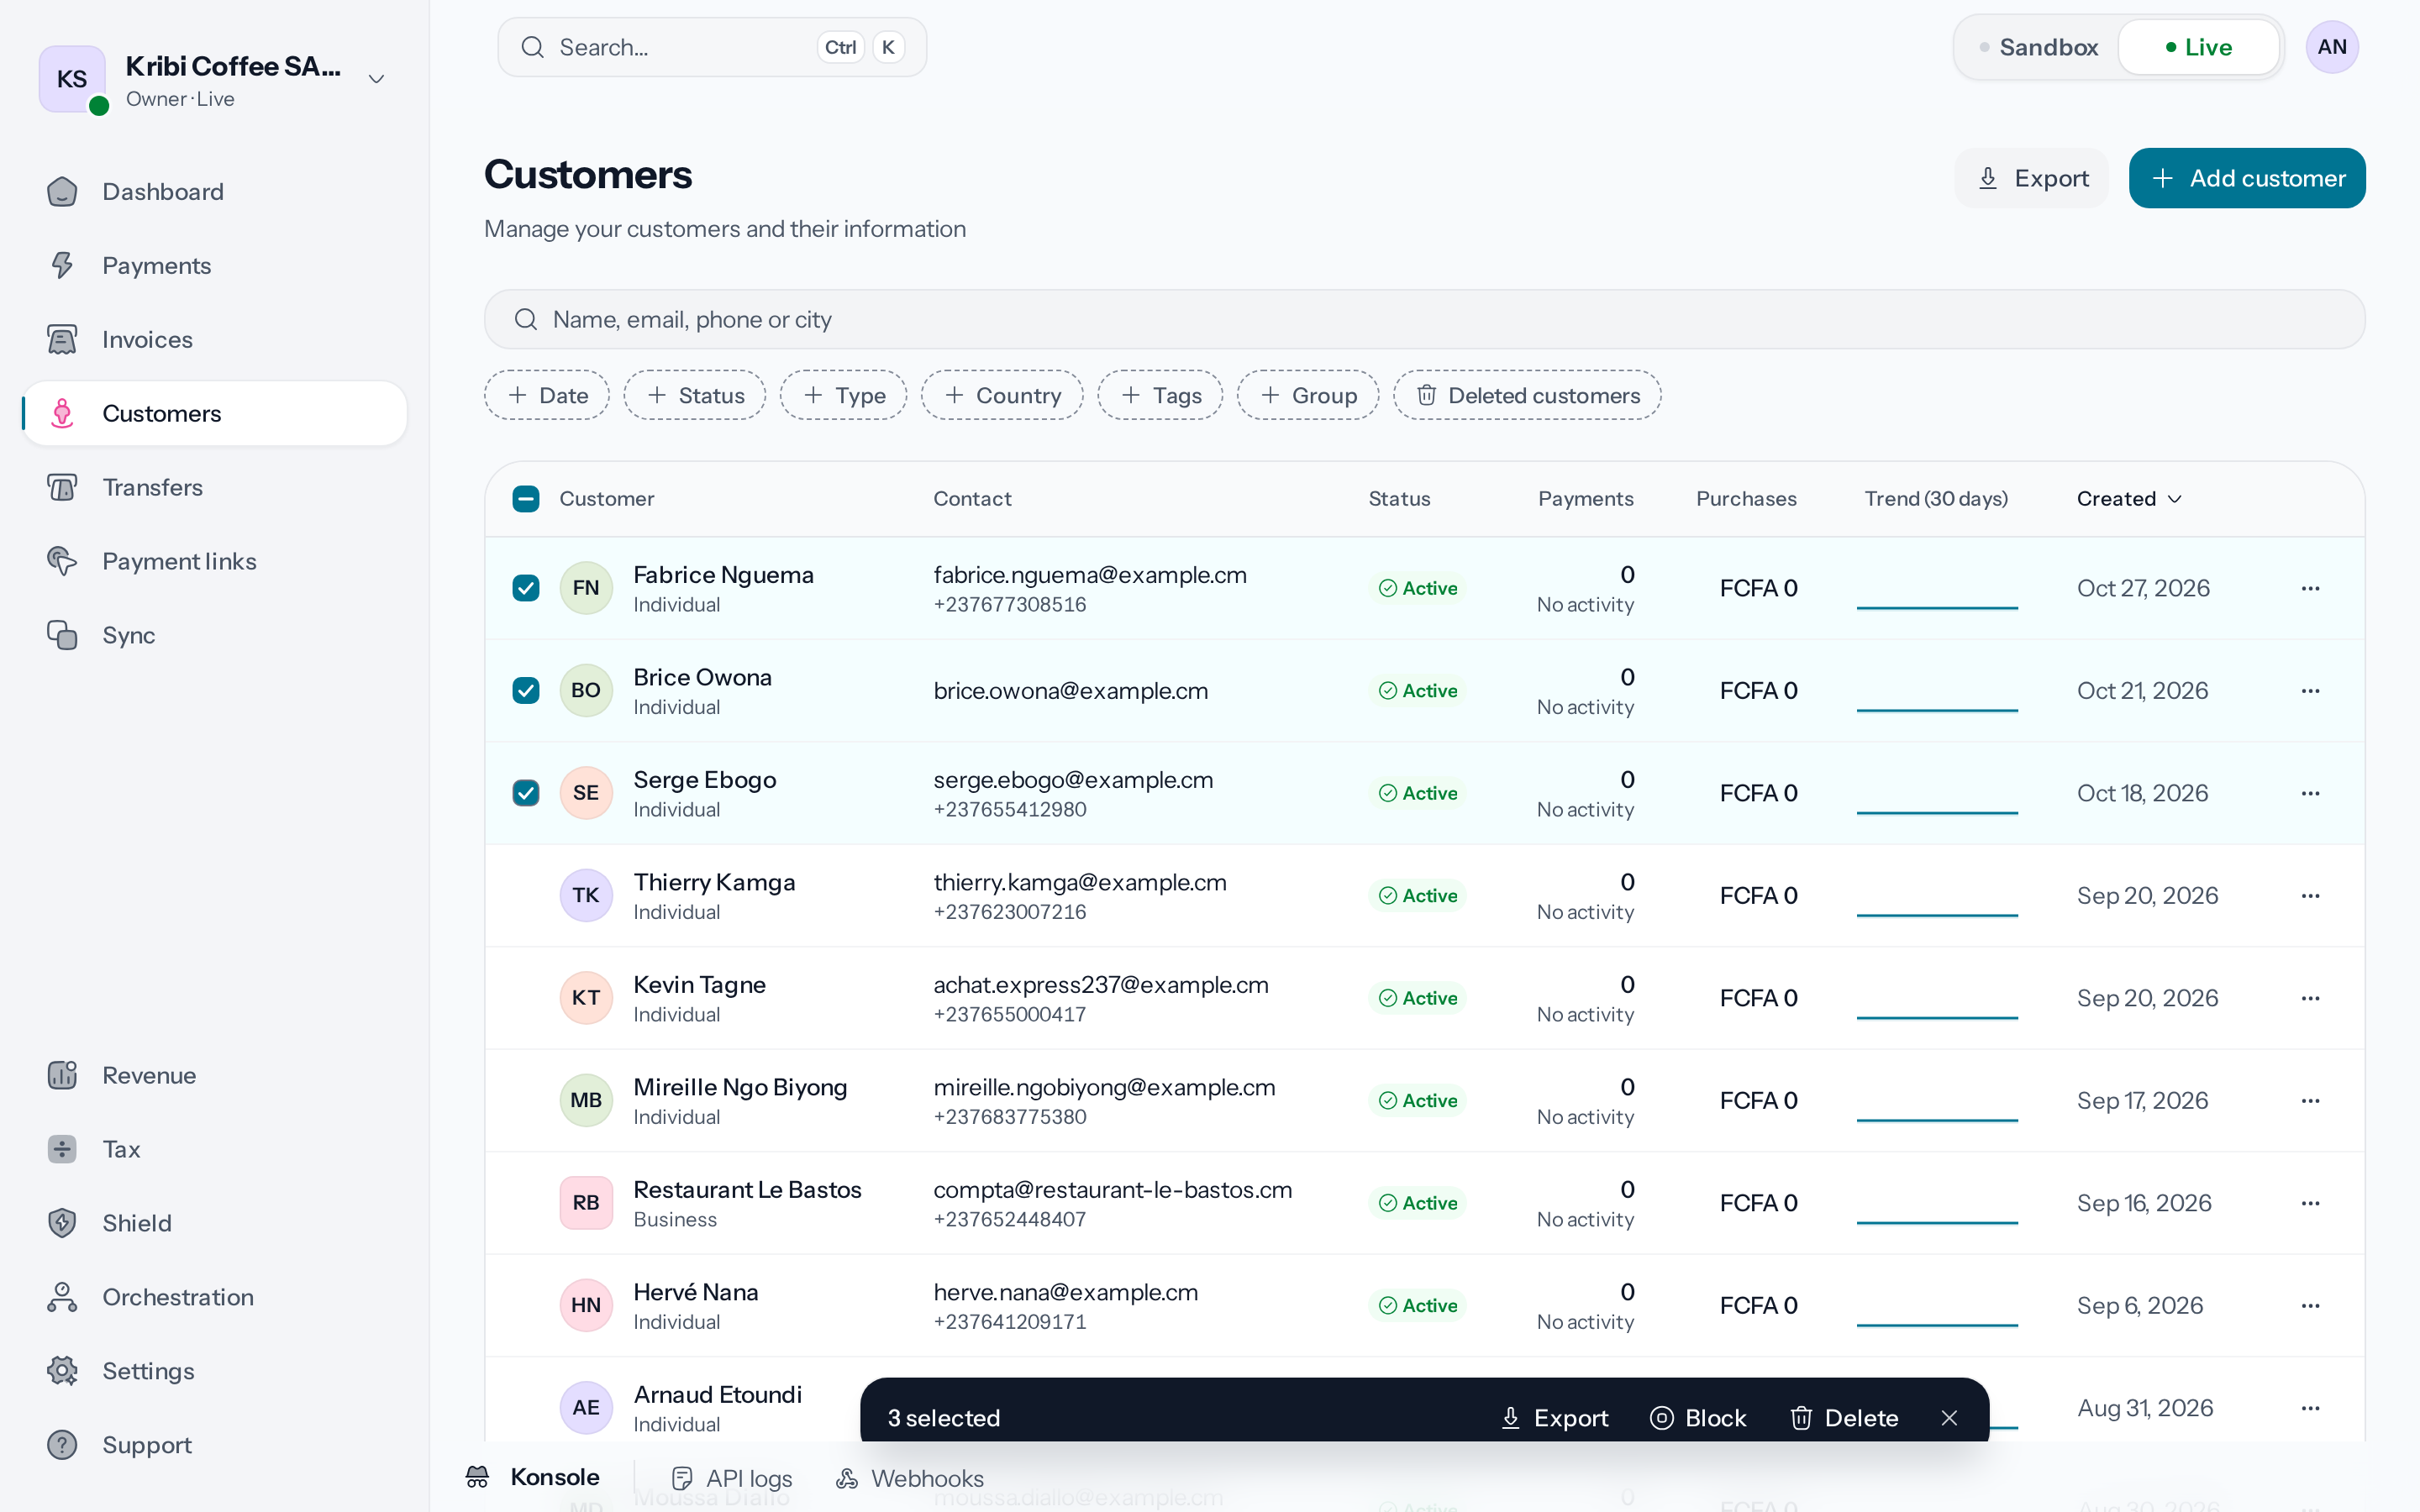
*The bar only offers the actions that apply to the customers chosen.*
2. **Choose the action**
**Block** and **Unblock** only appear if the selection holds customers to block or to unblock.
When it mixes both, the button gives the number concerned, for example "Block 2": a customer
already blocked keeps their reason. **Block** opens the reason dialog, as for
[a single customer](https://docs.wajub.com/dashboard/customers/block-disable-delete), then **Block customers**.
**Delete** asks for confirmation: names, emails and phone numbers are erased, payments stay.
Confirm with **Delete customers**.
3. **Enter the security code**
Once the code is entered, the action applies and a message gives the number of customers
handled, for example "3 customers blocked.". The selection clears.
## Export customers
In Live, **Export**, at the top of the list, opens **Export customers**: the file holds the
customers the list shows with its filters, recalled under **Filters kept**. Choose the **Format**,
**CSV**, **Excel**, **PDF** or **JSON**, and if needed a period with the **Date** button under
**Period**: a preset such as **Last 30 days**, or a **Custom period**. Without a period, every date
is exported. Then **Export CSV**, **Export Excel**, **Export PDF** or **Export JSON**, depending on
the format. The file downloads, and "Your export is ready" gives its name. Exporting does not ask
for the security code.
To export only some customers, select them, then **Export** in the bottom bar: **Export the
selected customers** takes only those, without a period.
> [!NOTE]
> **In Sandbox or out of exports**
>
> In Sandbox, the dialog says that exports only hold live data. Once the month's exports are used
> up, it says so: a member with **Manage account** gets **Upgrade plan**, the others are asked to
> turn to the owner of the organisation.
---
# Merge two customers
URL: https://docs.wajub.com/dashboard/customers/merge
> Bring a customer's two profiles together into one, with a preview of what moves from one profile to the other before you confirm.
When one customer has two profiles, the merge brings their payments, invoices and notes together on
the one you keep, and archives the other.
The owner, an Administrator, a Support specialist or a custom role with **Manage customers** can
merge two customers, on every plan. Merging only exists in Live and asks for the security code.
## The steps
1. **Open the merge tool**
Open **Settings › Customer merges**. From a customer's profile, **Merge with another
customer**, in the menu to the right of **Edit**, opens the tool with that customer already
chosen as the one to keep.
2. **Choose the customer to keep**
Under **Customer to keep**, look them up by name, email, phone or **Customer ID**. This profile
stays and receives everything the other one holds.
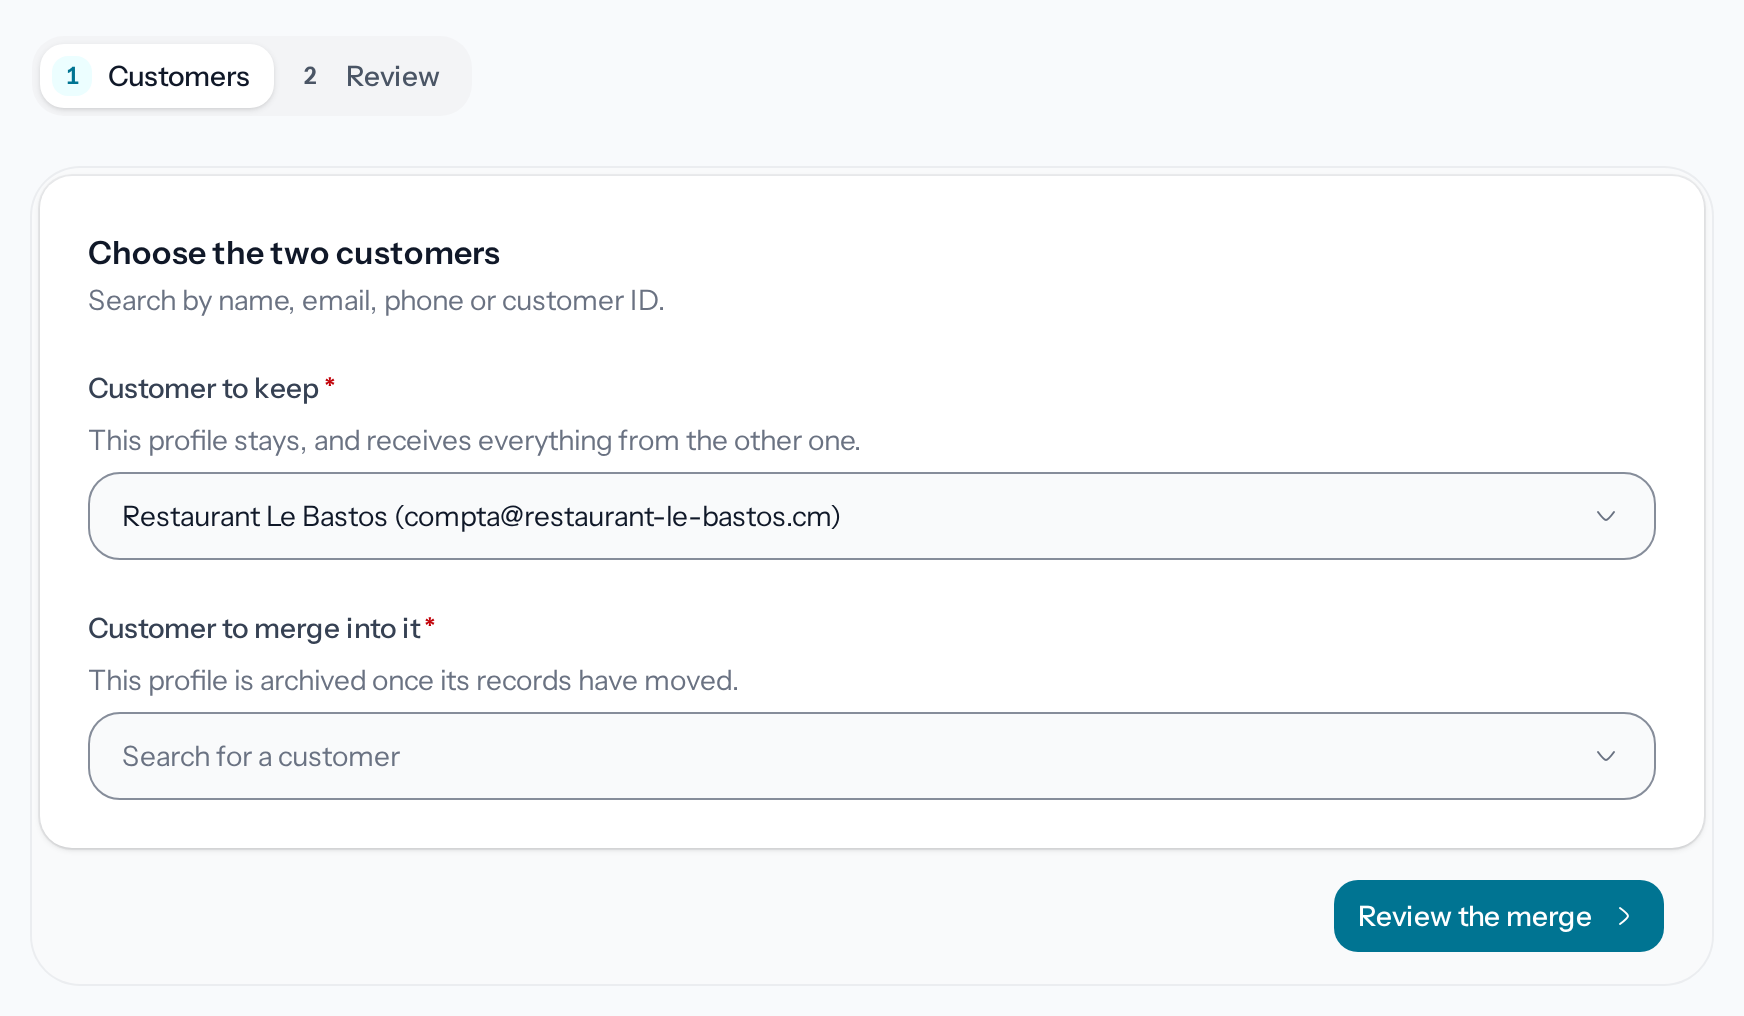
*The profile you keep receives everything the other one holds.*
3. **Choose the customer to merge**
Under **Customer to merge into it**, choose the duplicate profile, which will be archived. Then
**Review the merge**.
4. **Check what will move**
The **Review** step shows both profiles side by side, **Kept** and **Merged in, then
archived**, with their email, their phone and their successful payments. Below, the list of
what changes profile counts payments of every status, disputes, invoices, refund requests,
saved payment methods, payment link records, notes and addresses.
5. **Merge the customers**
Choose **Merge customers**, then enter the security code. **Customers merged** confirms that
everything now belongs to the profile you kept, with a button to open it.
## After merging
The profile you kept also receives the other one's tags, as well as its email, phone, business
name and description when it had none. Their payment totals add up, and its activity keeps a note
that mentions the merge. The merged profile joins the list's **Deleted customers**.
> [!NOTE]
> **A merge cannot be undone**
>
> The data moved to the profile you kept stays there. Before confirming, check at the **Review**
> step that both profiles really are the same person.
---
# Update a customer profile
URL: https://docs.wajub.com/dashboard/customers/profile
> What a customer's profile shows, from their payments to their addresses, and how to edit it, manage their payment methods and leave notes for the team.
A customer's profile brings together what they have paid you, their contact details, their
addresses, their saved payment methods and your team's notes.
Every role opens customer profiles. Editing them, managing addresses and payment methods, writing
a note or using **Recalculate** is reserved for the owner, Administrators, Support specialists and
custom roles with **Manage customers**. Editing the profile asks for the security code, as do
[blocking, unblocking or deleting](https://docs.wajub.com/dashboard/customers/block-disable-delete) the customer and
[merging](https://docs.wajub.com/dashboard/customers/merge) them with another one.
## What the profile shows
Open **Customers**, then the customer's name. The header gives their name, their status, their
type and their **Customer ID**, to copy for support or your technical team. The **Payments**,
**Refunds** and **Disputes** tabs only appear if the customer has some; **Timeline** covers all of
their activity.
On **Overview**, **Total spent** covers the last 12 months in Live and the whole relationship in
Sandbox, next to the number of **Payments** and the **Customer since** date. In Live, **Payment
analytics** sums up the last 30 days: **Successful volume**, **Total payments**, **Success rate**
and **Failed** payments. **Recalculate** updates them. Then come the **Contact details**, the
**Business details** for a business, and the **Preferences**.
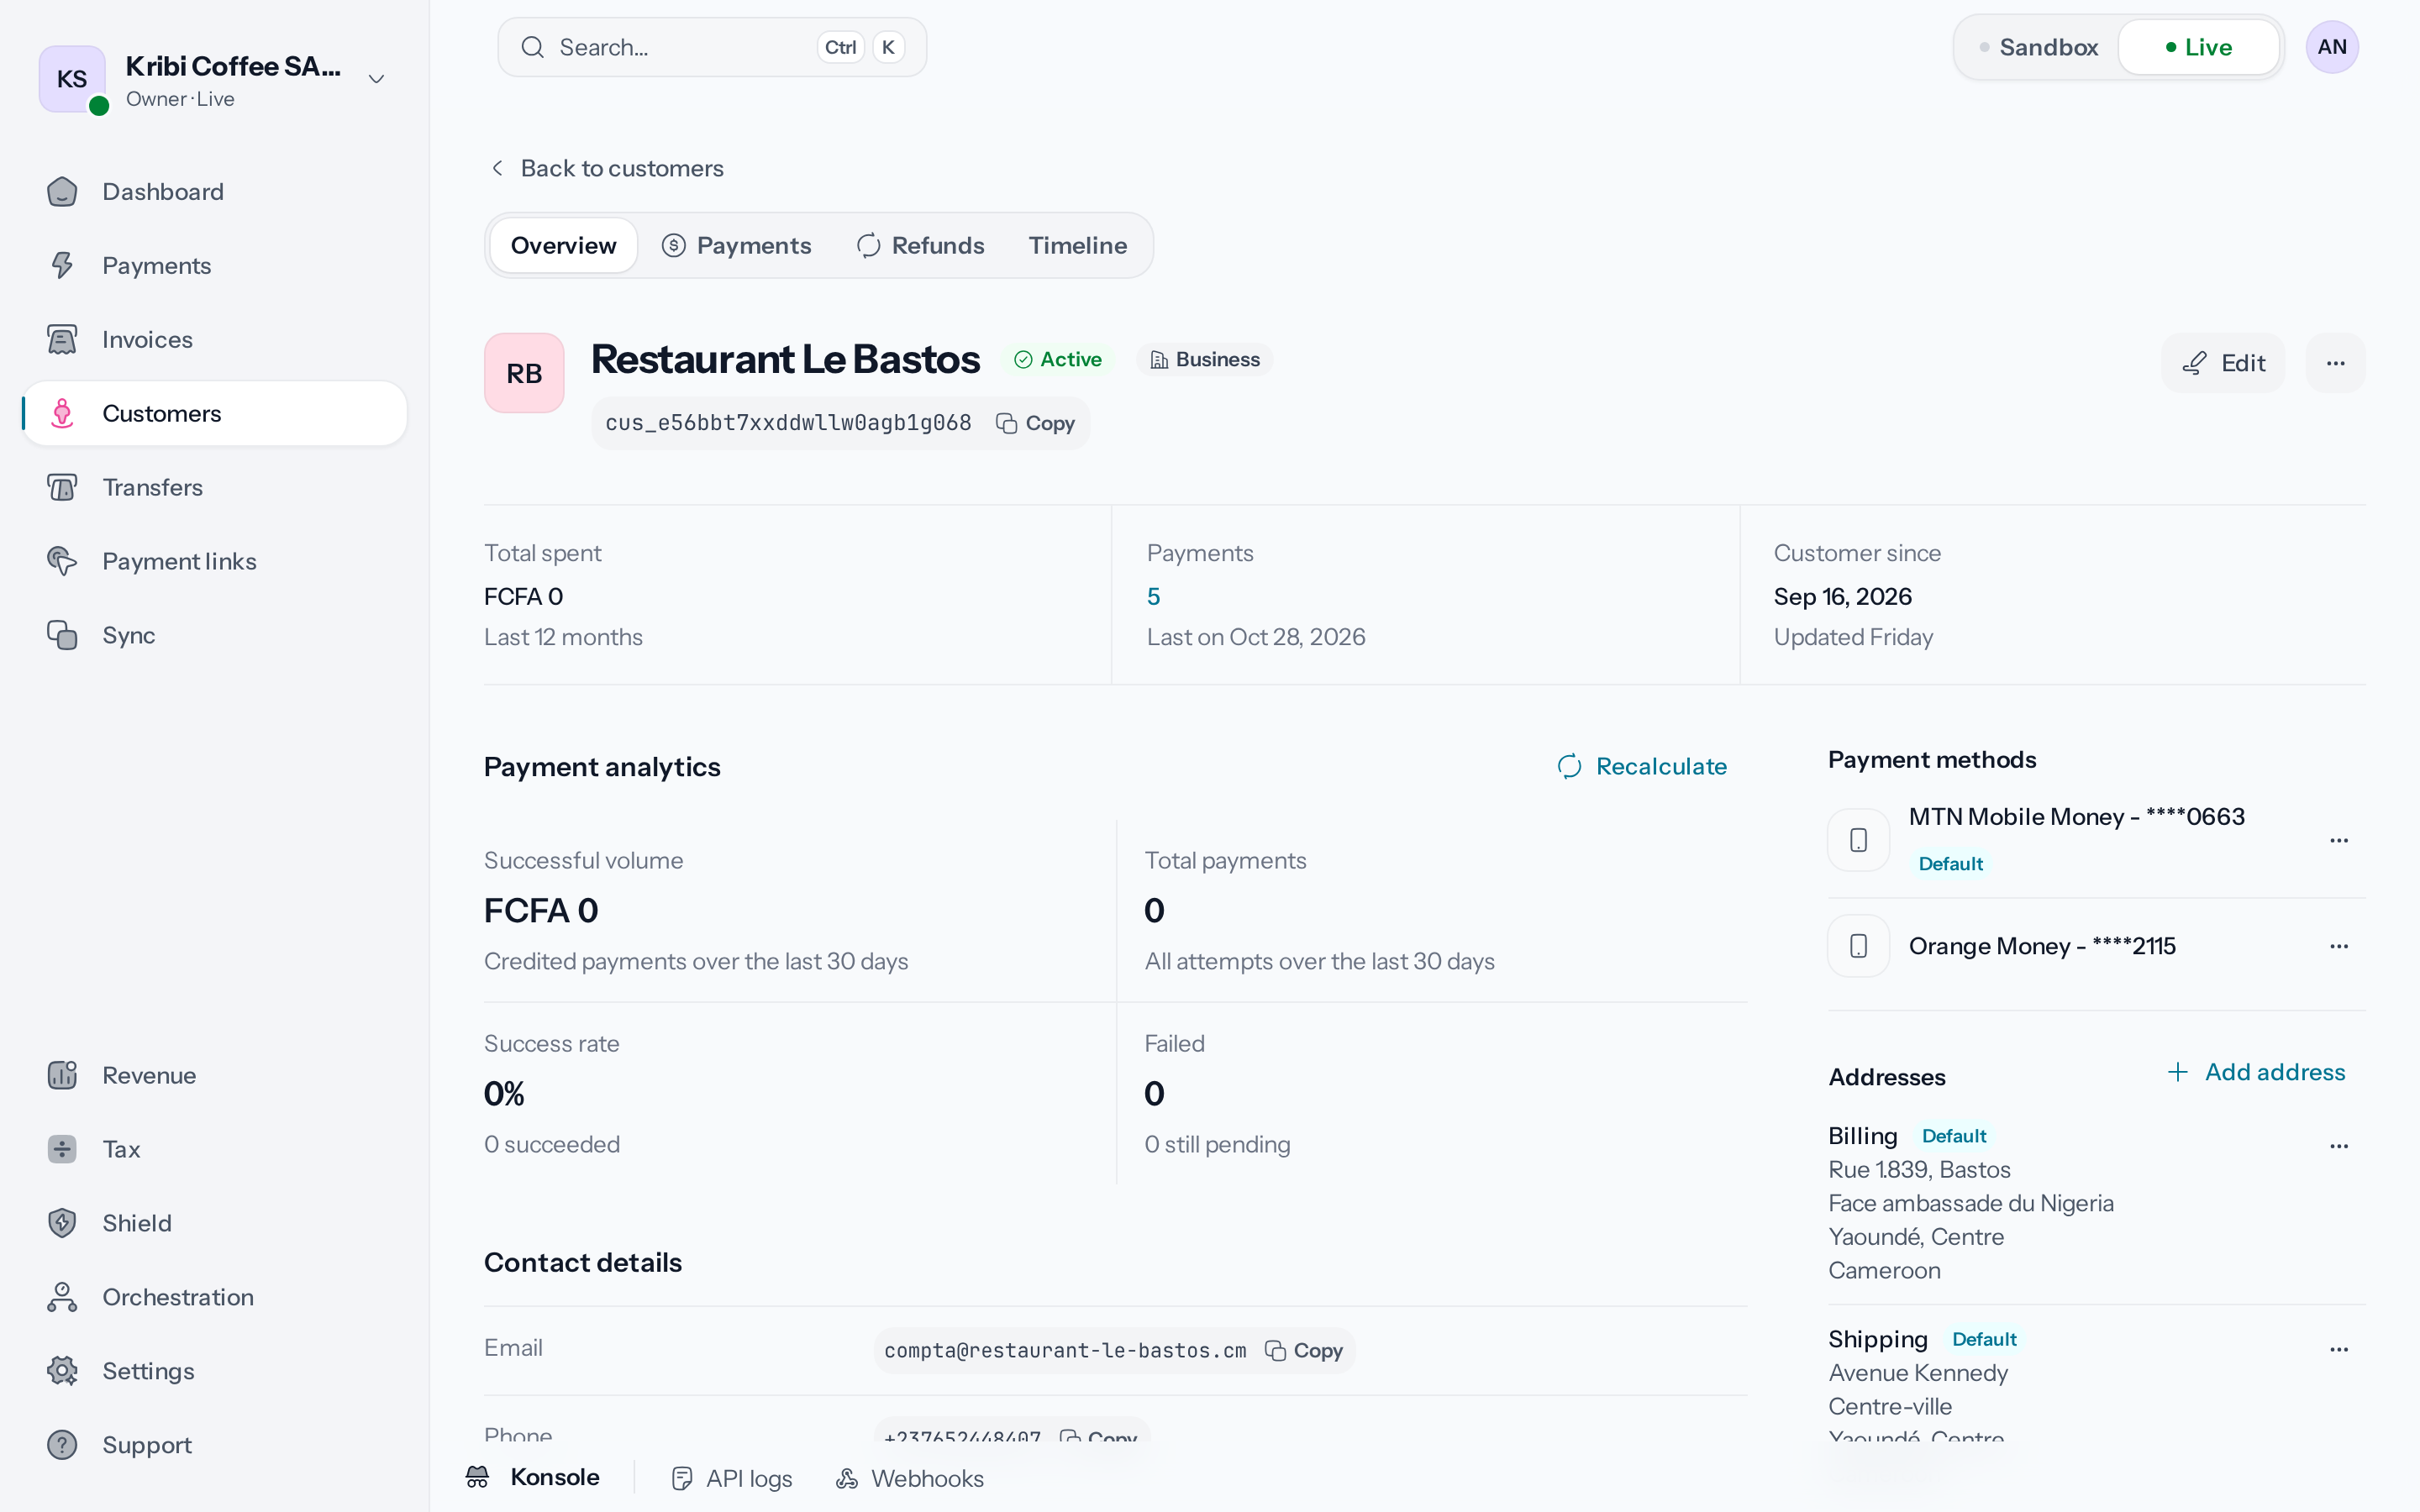
*The payment methods and the addresses are on the right of the profile.*
## Edit the profile
**Edit** opens **Edit customer**, in five tabs: **General** for the name, the contact details, the
currency, the language and the description, then **Address**, **Business**, **Preferences** and
**Tags**. **Save changes** asks for the security code. The changes apply to the customer's next
payments, invoices and receipts, not to those already issued.
## Addresses and payment methods
Under **Payment methods**, the profile lists those the customer saved while paying, with the
**Default** badge. Their menu offers **Make default** or **Remove payment method**: it can no
longer be charged, and the customer can save it again at their next payment. The dashboard cannot
add one.
Under **Addresses**, **Add address** asks for its **Type**, **Billing** or **Shipping**, then at
least **Address line 1**, the **City** and the **Country**. Tick **Make it the default address**
so it replaces the default address of that type. An address's menu offers **Edit address** and
**Delete address**.
## Activity and notes
**Activity and notes** lists the customer's payments, refunds and disputes, newest first, and
**View all activity** opens the **Timeline**. To leave an instruction for the team, write it in the
field at the bottom, then **Add note**: only your members see notes. A note's menu offers **Pin
note**, which keeps it at the top under **Pinned notes**, and **Delete note**.
---
# Switch to a business account
URL: https://docs.wajub.com/dashboard/activation/switch-to-business
> Have a business verified when the organisation was verified as an individual, without interrupting payments.
An organisation verified as **Individual (Self-employed, Freelancer)** can become a company, an
association or another type of organisation. This takes a new file, reviewed by the
compliance team. In the meantime, your current verification stays active: payments and transfers
carry on until the new file is approved.
The owner, an Administrator or a custom role with **Manage account** starts and follows the upgrade
(see [Roles](https://docs.wajub.com/dashboard#roles)). It is open on every plan, in
[Sandbox as in Live](https://docs.wajub.com/dashboard#sandbox-and-live). Starting it and abandoning it ask for the
[security code](https://docs.wajub.com/dashboard#the-security-code) if your last verification has expired.
## The steps
1. **Open the Compliance page**
Open **Settings › Compliance**. Under **Verification complete**, choose **Upgrade to a business
account**. The button only appears if the file in force is that of a verified individual.
2. **Choose the organisation type**
The window sums up what the new file asks for. In **Organization type**, choose for example
**Corporate / Business** or **Non-profit / NGO**, then **Start the upgrade**. If your last
security verification has expired, the security code is asked for first. The business file then
opens at its first step.
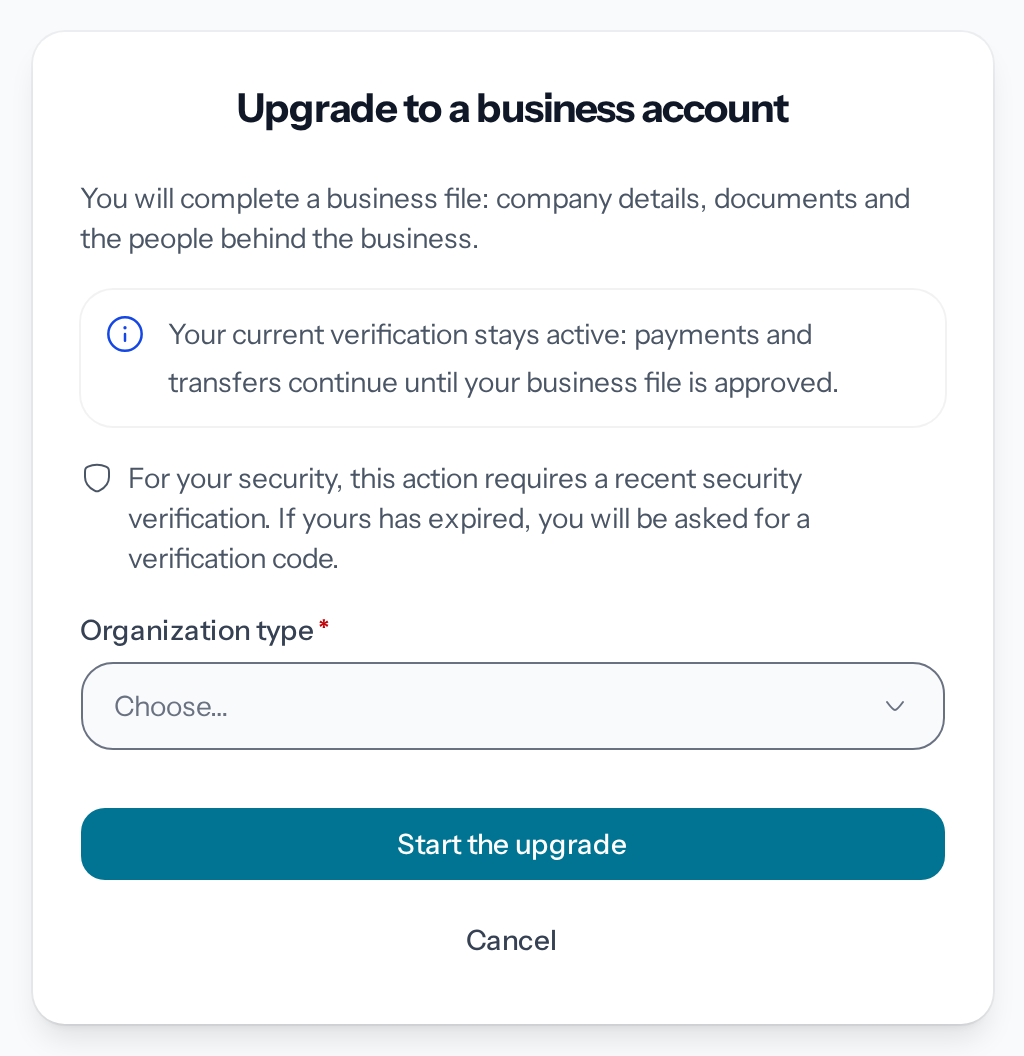
*The type you choose can still change in the Business details step.*
3. **Complete the business file**
The file carries over your individual file: activity, address, online presence, documents and
your record, as you become the legal representative. Everything will be reviewed again. Add
what the new type asks for: the business documents, the beneficial owners if there are any, and
a new liveness check video, because the old one is not carried over. Each step is described in
[Verify your business](https://docs.wajub.com/dashboard/activation/verify-business).
4. **Send it for verification**
At the last step, **Review & submit**, choose **Submit for verification**.
## Follow the new file
On **Settings › Compliance**, the **Business account upgrade** card follows the new file under the
status of the old one, still **Verified**. It shows its status, the date it was sent and
**Continue upgrade** as long as it has not been sent. What the compliance team asks for on this
file appears in **Actions required on your business file**, and is handled as
[Track your verification](https://docs.wajub.com/dashboard/activation/track-verification) explains.
When the business file is approved, it replaces the individual one: the organisation stays in Live
and the new type shows on the page. If it is rejected, your individual verification stays in
force; **Correct and resubmit** reopens it, with the reason given under **Reason**.
## Abandon the upgrade
As long as the business file has not been sent, or after a rejection, the card offers **Abandon the
upgrade**. A window asks for confirmation: the business file is set aside and can no longer be
sent, but the organisation keeps its current verification. You can start a new upgrade later.
During the review, the button no longer appears: the business file can no longer be abandoned.
## If the upgrade does not start
If the compliance team is still waiting for an answer on your current file, the window shows
"Answer the requests open on your file first, then start the upgrade." First provide the items
listed in **Actions required**, then try again once the compliance team has accepted them.
---
# Track your verification
URL: https://docs.wajub.com/dashboard/activation/track-verification
> Read the file's status, answer the required actions and the compliance team's inquiries, and confirm the file every year.
Once the file is sent, **Settings › Compliance** says where it stands. The **Overview** tab shows
the status and what Wajub expects from you; the **Inquiries** tab gathers the compliance team's
questions. The organisation's owner gets an email when the file is approved or rejected, and when
Wajub is waiting for something from you.
The owner, an Administrator or a custom role with **Manage account** sees this page and answers on
it, in Sandbox as in Live, on every plan. A Developer, a Viewer or another
[role](https://docs.wajub.com/dashboard#roles) with **View settings** sees **Settings › Account status**: the status,
**Live mode** and the **Active restrictions**, without the content of the file. Answering does not
ask for a [security code](https://docs.wajub.com/dashboard#the-security-code).
## File statuses
| Status | What it means |
| ------------------- | ------------------------------------------------------------------------------------------------------------------------------ |
| **Not submitted** | The file is started but not sent: **Continue verification** picks up where you left off. |
| **Under review** | The compliance team is reviewing the file, which can no longer be edited. Nothing to do, the page shows the usual review time. |
| **Action required** | The team needs something else before deciding. The file goes back under review once everything is provided. |
| **Verified** | [Live](https://docs.wajub.com/dashboard/getting-started/test-and-live) is unlocked. The page shows **Verified on** with the date. |
| **Rejected** | The file was not approved: see [If the file is rejected](#if-the-file-is-rejected). |
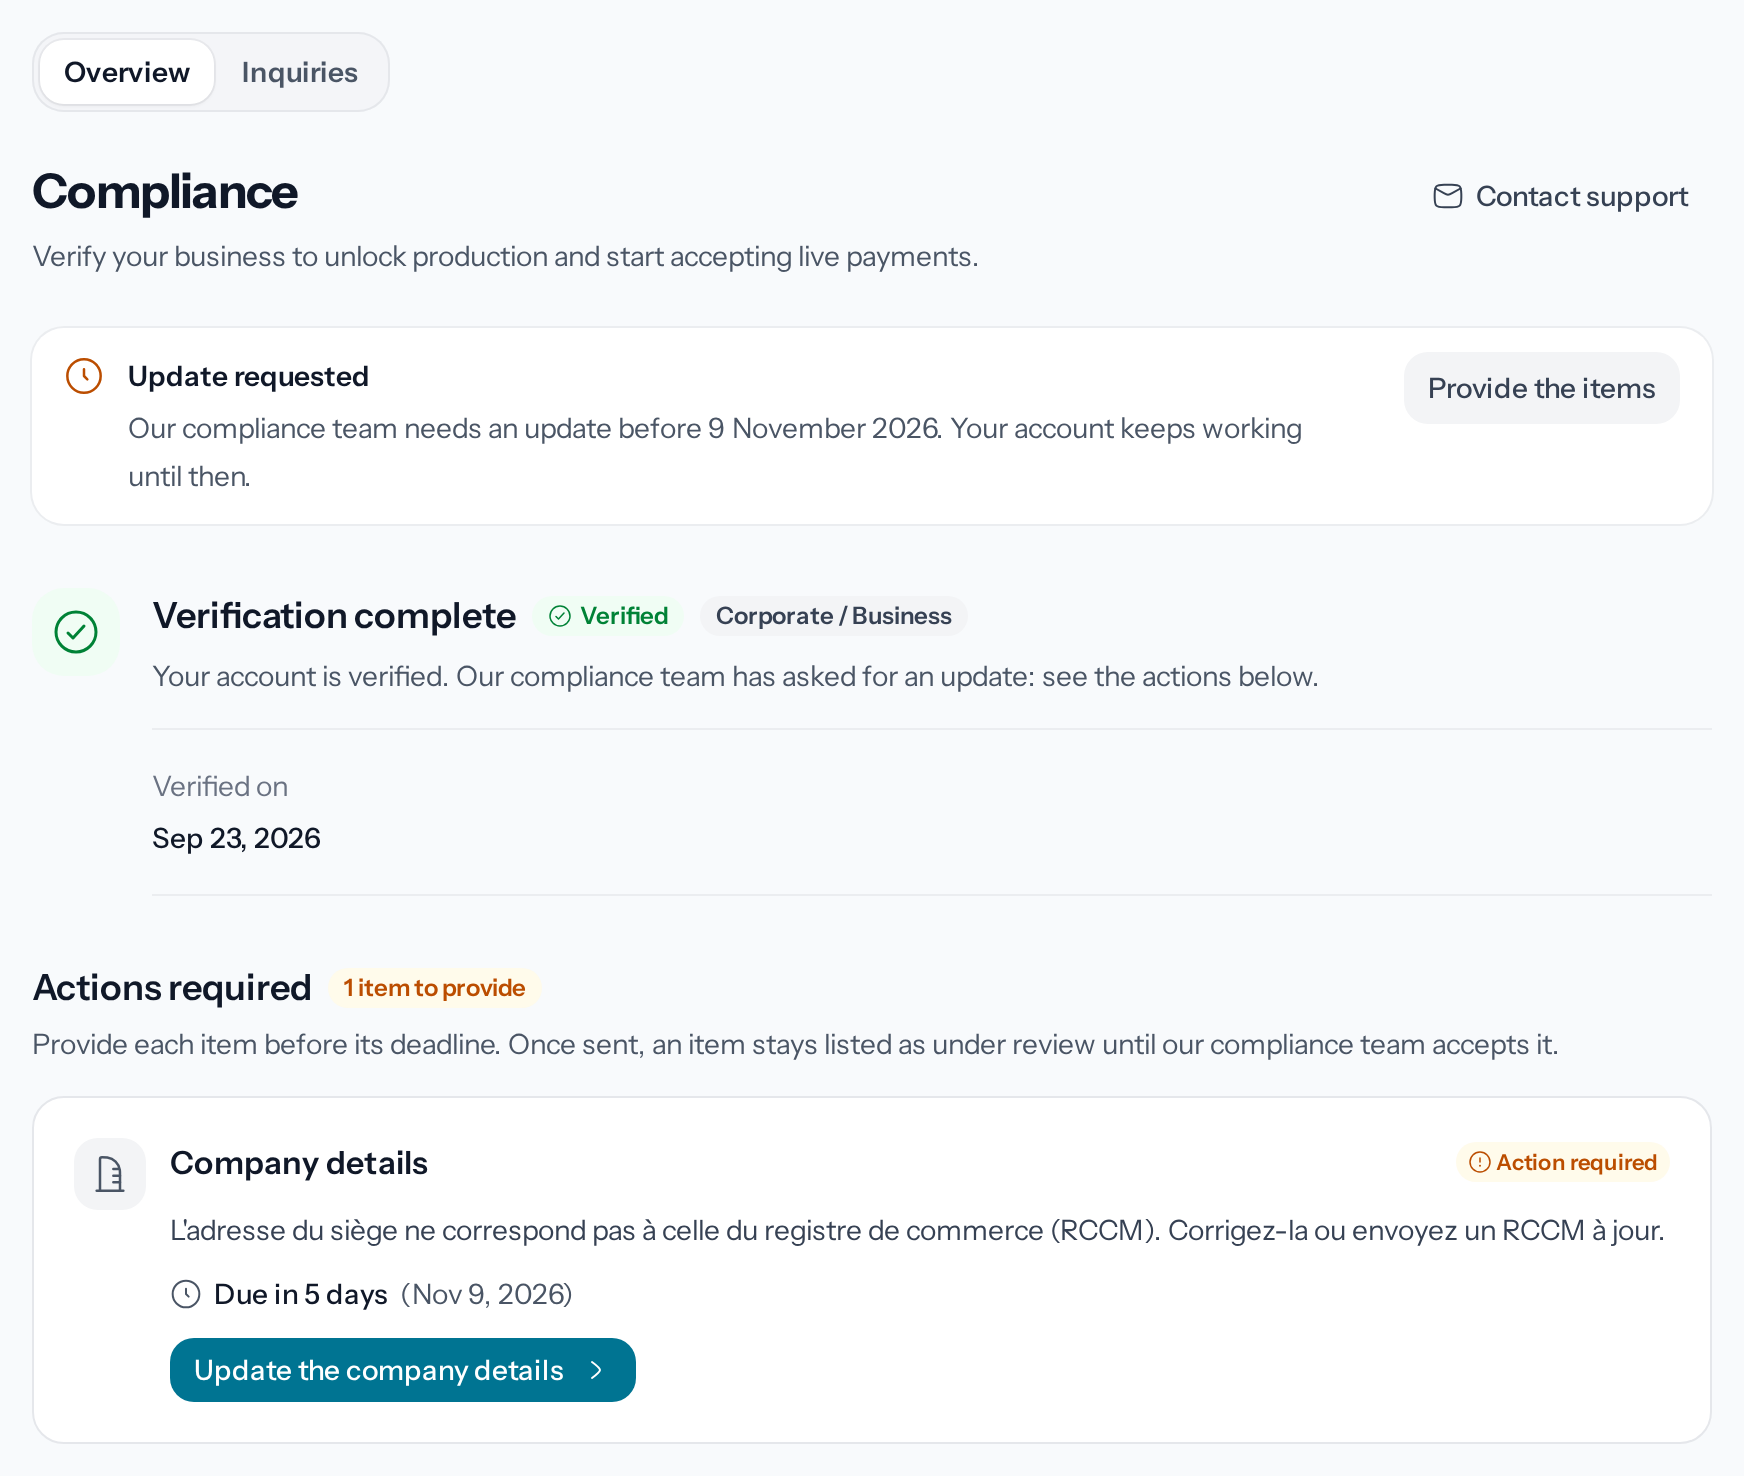
*Each item asked for has its own deadline and its own button.*
## Answer a required action
1. **Open the list of required actions**
Under the status, **Actions required** counts the items to provide. Each one says what is asked
for, the person concerned where relevant, and its deadline.
2. **Provide the item asked for**
A document is uploaded on the spot with **Upload document**. For the rest, the item's button
opens the step of the file concerned, which only shows what is asked for: for example **Update
the company details**, or **Start the liveness check** for a new video, described in
[Verify an identity](https://docs.wajub.com/dashboard/activation/verify-identity).
3. **Wait for your answer to be reviewed**
The item changes to **Under review**, then leaves the list once the compliance team has
accepted it.
## Answer an inquiry
When the compliance team asks a question, it appears in **Inquiries**, with the deadline "Reply by"
followed by the date. Open it, write in **Your reply**, if needed attach up to ten files of 10 MB at
most with **Add a file**, then **Send**. Once the inquiry is dealt with, it shows **This inquiry is
closed. You can no longer reply.**
## When a deadline passes
A late item changes to **Overdue**. If the organisation is already verified, its transfers are
paused too: the item shows **Transfers are paused until this is accepted.** and the pause appears
in **Active restrictions**. Providing the item is not enough: transfers resume once the compliance
team has accepted it. Payments keep coming in.
## The yearly confirmation
One year after verification, Wajub asks you to confirm that the file is still accurate. Ahead
of that date, **Actions required** shows a **Periodic review**. Tick **I confirm that the
information on my file is still accurate**, if needed describe a change of activity, address or
owners in **What changed? (optional)**, then **Send my confirmation**. The organisation keeps
working until the deadline.
An identity document or a license that is about to expire is asked for the same way, in **Actions
required**: the item reads **This document has expired or is about to. Please send a valid one.**
## If the owner's address is disposable
When the organisation's owner signs in with a disposable email address, **Active restrictions**
shows **Account frozen (read-only)**, **API access revoked** and **Webhooks disabled**, each with
"The owner of this organization uses a disposable e-mail address (...). This lifts once they use a
permanent address in their account settings." Payments, transfers and refunds stop, the API keys no
longer work and webhooks are no longer sent. The owner can still sign in: once they
[change their email address](https://docs.wajub.com/dashboard/account/profile#change-your-email) to a permanent one, the
restrictions are lifted.
## If the file is rejected
The page shows **Verification rejected** and, under **Reason**, the reason the compliance team
gave. Choose **Correct and resubmit**: the file reopens, you correct what is pointed out, then you
send it like the first time. If the organisation was already verified, Live locks and every member
goes back to Sandbox until it is approved again.
For a question about your file, **Contact support** at the top of the page writes to the compliance
team.
---
# Verify your business
URL: https://docs.wajub.com/dashboard/activation/verify-business
> Fill in and send the activation file from Settings › Compliance, step by step, to unlock Live.
Before you take real money, Wajub checks who you are and what you sell. The file is filled in
online, in six steps at most, and Live unlocks once Wajub has approved it.
The owner, an Administrator or a custom role with **Manage account** fills in and sends the file; a
Developer, a Viewer or another [role](https://docs.wajub.com/dashboard#roles) with **View settings** only sees where it
stands, in **Settings › Account status**. The file is completed in
[Sandbox](https://docs.wajub.com/dashboard#sandbox-and-live), on every plan. The business's email and phone number are
confirmed with a code sent to them, but the [security code](https://docs.wajub.com/dashboard#the-security-code) is not
asked for.
## The steps
1. **Open the file**
Open **Settings › Compliance**, then **Start verification**. A counter shows the current step;
**Continue** saves it and moves to the next one, **Previous** goes back. You can stop at any
time: the button becomes **Continue verification**.
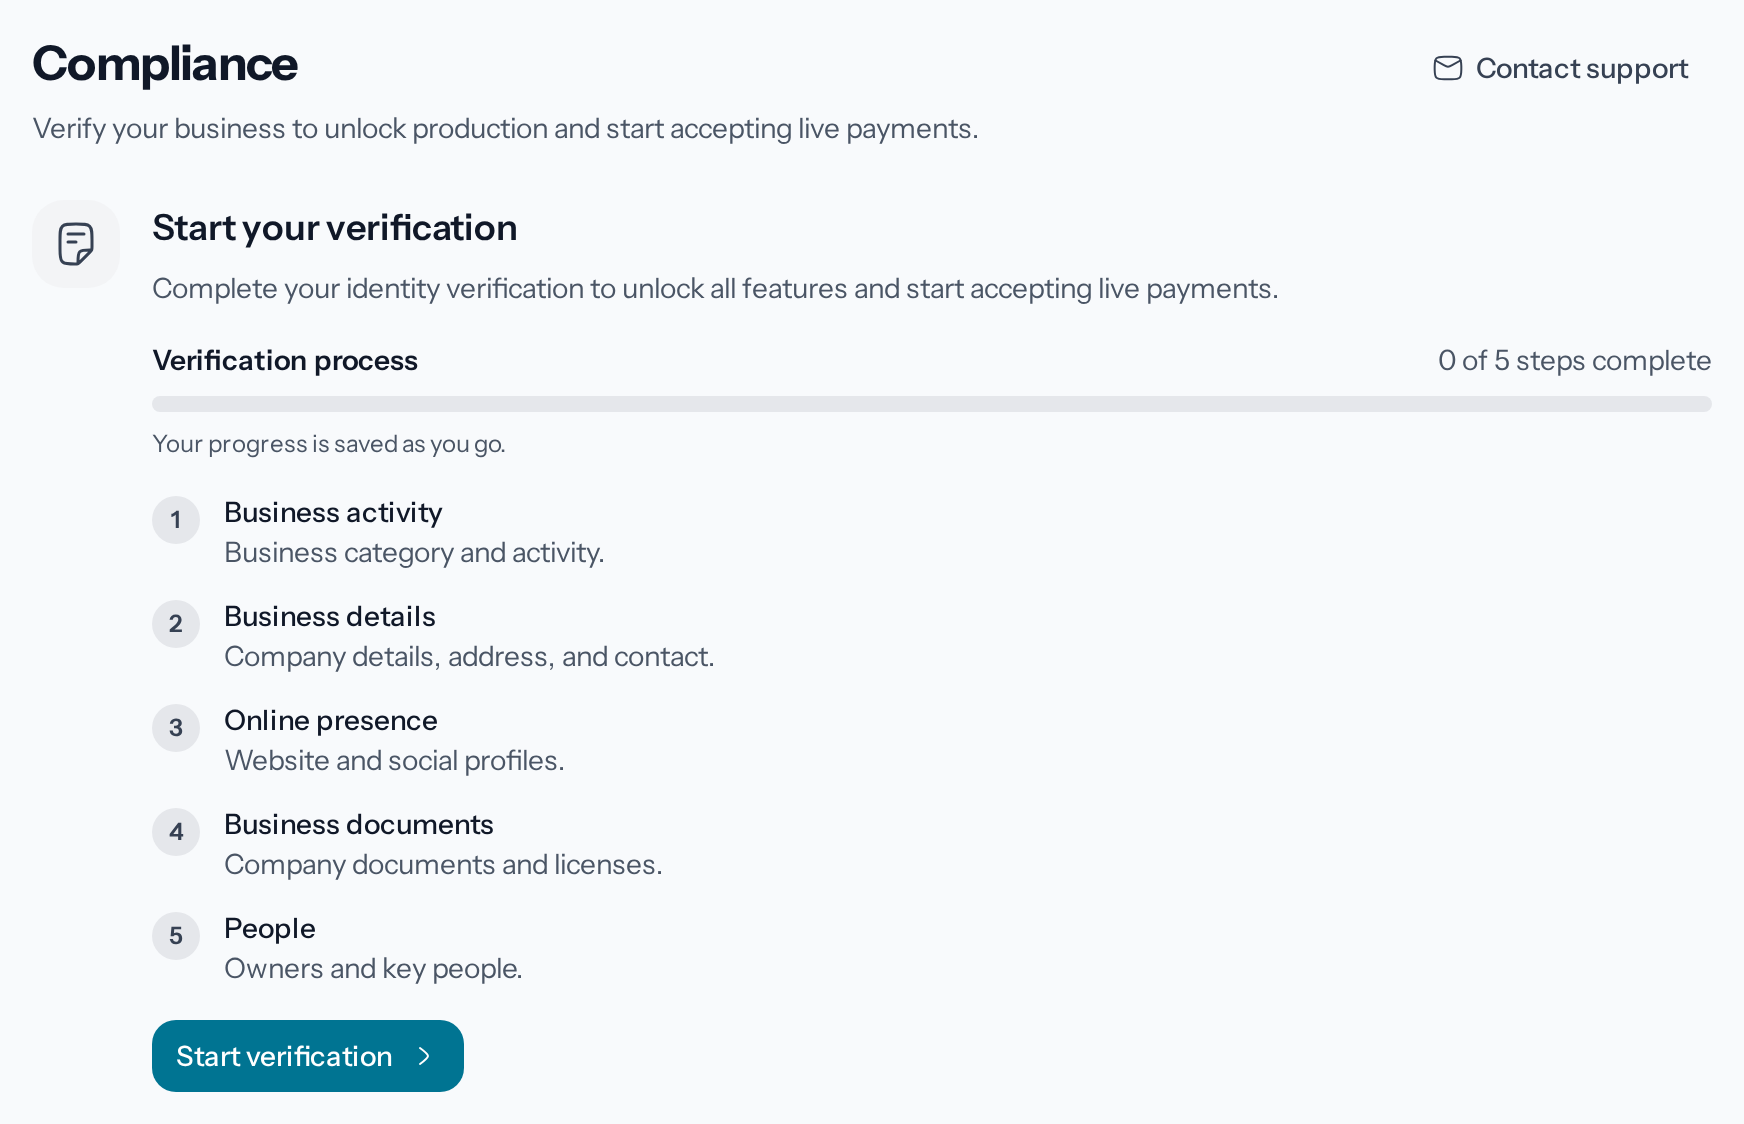
*Until the file is sent, Live stays locked.*
2. **Describe your activity**
In **Business activity**, choose the **Business category** and the **Specific activity**, then
write the **Activity description**, from 10 to 1,000 characters: what you sell and to whom. A
regulated activity shows "This activity is regulated: you will need to provide a license."
3. **Fill in the business details**
In **Business details**, choose the **Organization type** and the **Legal structure**, then
enter the **Legal name** and the **Tax ID or registration number** as they appear on your
official documents, and the **Business address**. If no one holds 25% or more of the business,
tick **No one owns or controls 25% or more of the company**: this choice can no longer change
once the file is sent.
4. **Confirm the business email and phone**
Under **Business contact**, enter the **Business email** and the **Business phone**. For each
one, choose **Send code**, enter the code you receive in **Verification code**, then
**Verify**.
5. **Add your online presence**
In **Online presence**, choose the **Platform** (website, app, social network) and the
**Address (URL)**, then **Add this channel**. At least one presence is required; **Add a
channel** adds another one.
6. **Upload the business documents**
**Business documents** lists the documents asked for your organisation type, as PDF, JPG or
PNG, up to 10 MB each. A company provides for example the **Business registration
certificate**, the **Articles of association**, the **Location plan** and the **Tax
certificate**; an association, its **Registration receipt, approval or authorization** and the
**Appointment of the legal representative**. For a regulated activity, **Add license** asks for
its type, its number, the authority that issued it and the document.
With the **Individual (Self-employed, Freelancer)** type and no regulated activity, you go
straight to the next step.
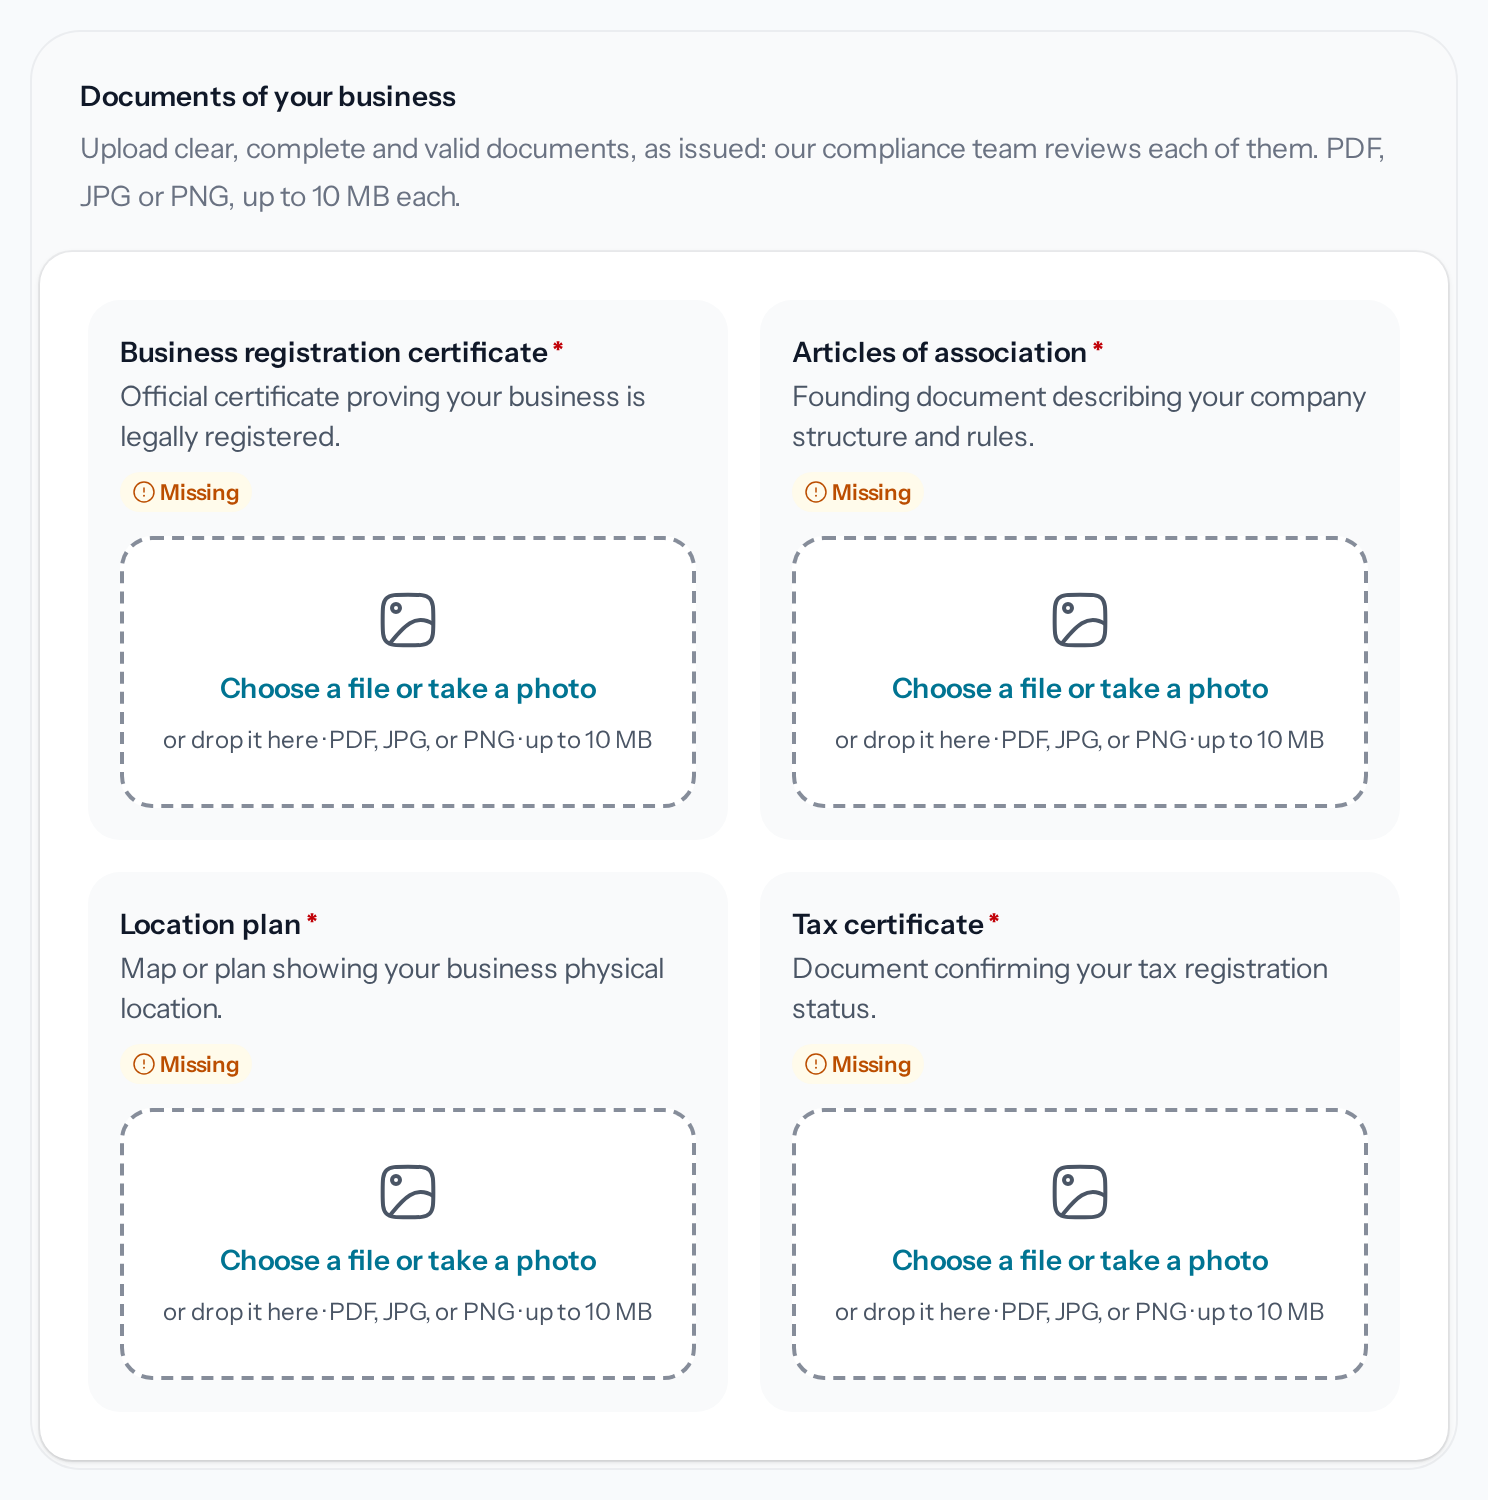
*Each document is reviewed by the Wajub compliance team.*
7. **Add the people**
In **People**, choose **Add person** for the legal representative, then for each **Beneficial
owner**, who holds or controls 25% or more of the business. Tick their **Role**, fill in their
identity, then **Save person**; then upload their identity document, ID card or passport, on
their record. A person with several roles is entered once, with all their roles ticked: a second
entry for the same person is refused.
On the legal representative's record, also upload a **Proof of address** or, if no bill is in
their name, a **Location plan of the home**. With the **Individual (Self-employed, Freelancer)**
type, the step is called **Your identity**: choose **Add my profile**, then provide the same
documents for yourself.
The legal representative (or you, with the Individual type) also records a short video:
[Verify an identity](https://docs.wajub.com/dashboard/activation/verify-identity) explains how.
8. **Send the file**
**Review & submit** sums up the whole file. **Missing information** lists what is left to do,
each section with its own **Edit** button; otherwise, the page shows **Everything is ready**.
Choose **Submit for verification**.
## After submitting
**Settings › Compliance** shows **Your file is under review**, with the usual review time in
business days, and the file can no longer be edited. Wajub writes to the organisation's owner as
soon as the decision is made or if it needs anything else; in the meantime, you can carry on in
Sandbox. [Track your verification](https://docs.wajub.com/dashboard/activation/track-verification) explains each status
and how to answer a request.
---
# Verify an identity
URL: https://docs.wajub.com/dashboard/activation/verify-identity
> Record the legal representative's liveness check, from the computer or by sending a link to their phone.
The **Liveness check** is a short video selfie: it proves that the person on the identity document
exists and is standing in front of the camera. The legal representative records it for a business;
with the **Individual (Self-employed, Freelancer)** type, you record it for yourself. Another person
in the file only records it if Wajub asks them to.
Like the rest of the file, it is started from **Settings › Compliance** by the owner, an
Administrator or a custom role with **Manage account** (see [Roles](https://docs.wajub.com/dashboard#roles)). It is done
in [Sandbox](https://docs.wajub.com/dashboard#sandbox-and-live), on every plan, and does not ask for a
[security code](https://docs.wajub.com/dashboard#the-security-code). The person being filmed does not need a Wajub
account.
## The steps
1. **Open the person's record**
In the file, open the **People** step, or **Your identity** with the Individual type. Under
the legal representative's record, the **Liveness check** block is marked required and offers
two buttons.
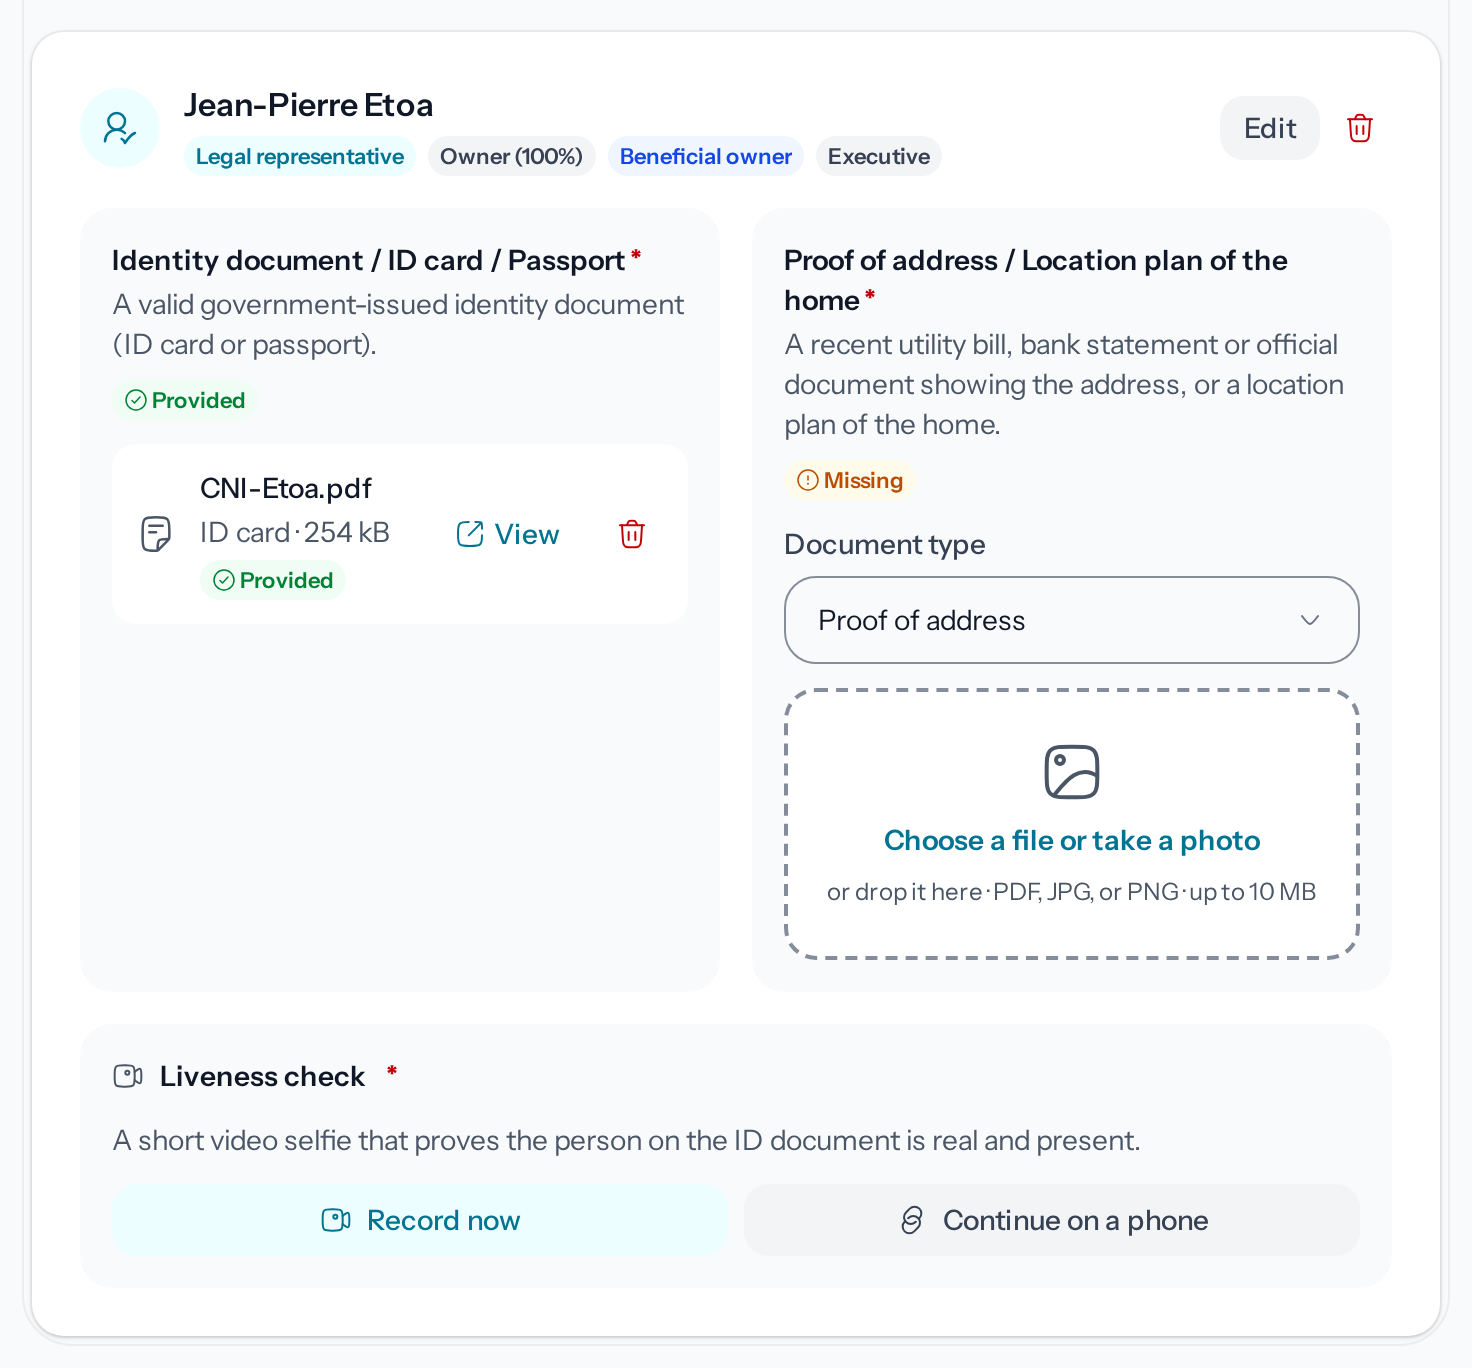
*The block only appears for the person who has to record the video.*
2. **Record the video on this computer**
If the person is in front of your screen, choose **Record now**. They read the **Before you
start** notice, tick the box that gives their consent and allow the camera. They then follow the
instructions on screen, which take about a minute, and send the video. No sound is recorded.
3. **Or send them a link**
If they are somewhere else, or if your computer has no camera, choose **Continue on a phone**.
The window shows a QR code, the **Liveness verification link** to copy and its expiry date. If
the person is next to you, they scan the QR code; otherwise, **Send by WhatsApp** prepares a
message with the link, to send to the right contact.
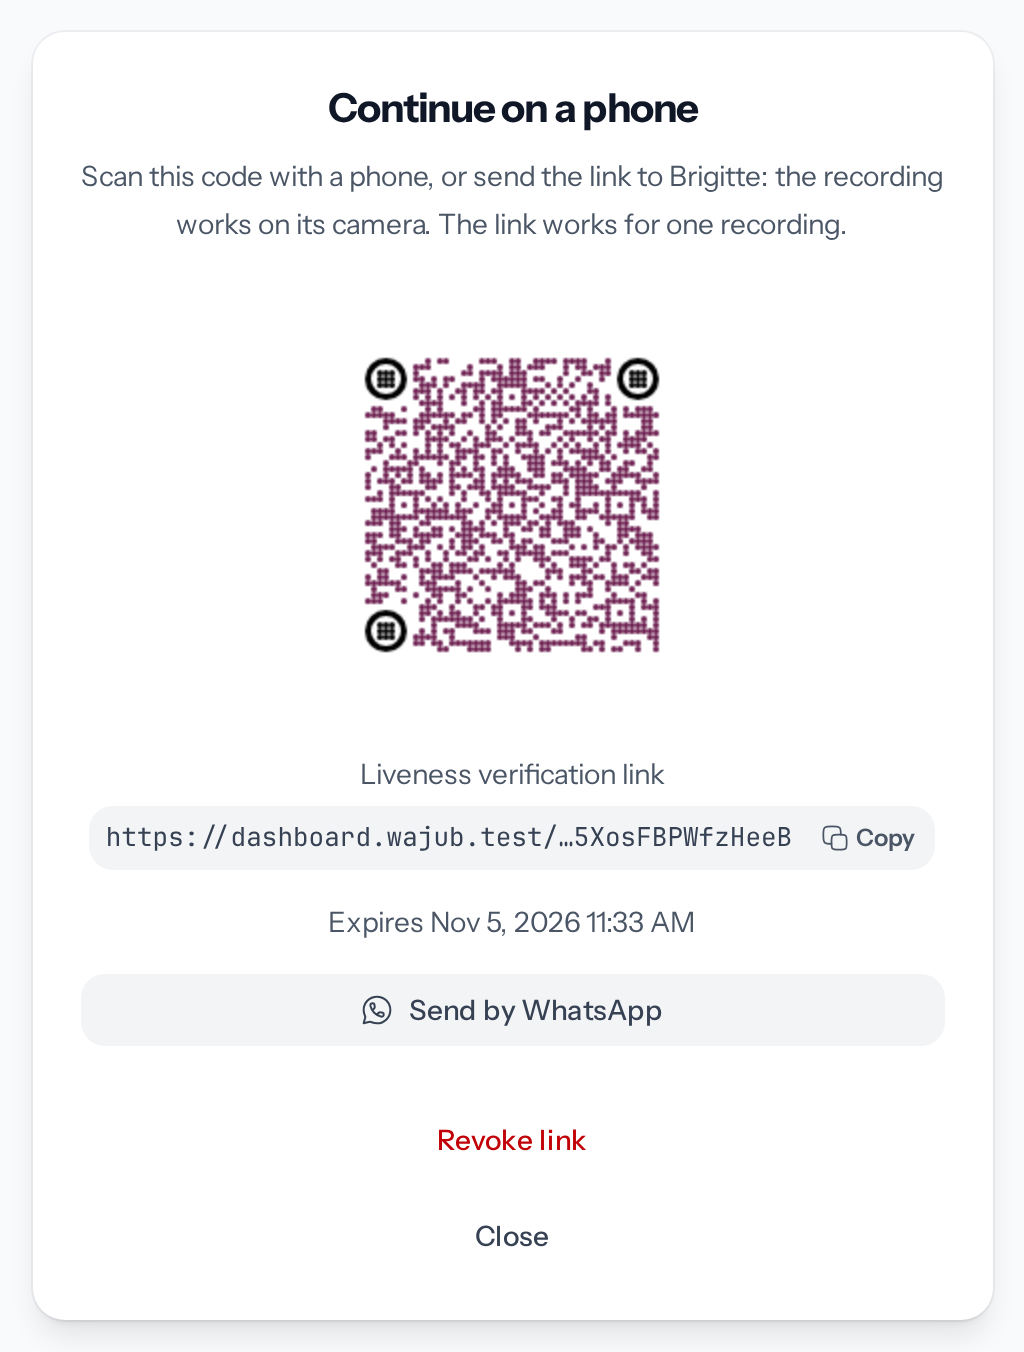
*Creating a new link turns off the previous one.*
On their phone, they land on a Wajub page, in their browser's language, that names your
business and guides them until the video is sent.
4. **Follow the result**
Once the video is sent, the block shows **Under review**, then **Passed** when Wajub has
approved it. You do not need to wait: the file can be sent for verification as soon as the
video is sent.
## Manage the link
While a link can still be used, the record shows the date it is valid until, and **Revoke link**
turns it off at once, for example if you sent it to the wrong number. The link also stops working
when it expires, after a few videos have been sent, when a video is approved or refused by the
Wajub team, or when the file is sent. The page then tells the person to ask you for a new one, or
that they have nothing left to do if their video has already been accepted or is under review. For
a new link, choose **Continue on a phone** again.
## If the video is refused
The block changes to **Failed** and shows **Liveness check rejected** with the reason Wajub gave.
The two buttons come back: record a new video the same way. After several attempts in the same day,
the dashboard answers "Too many liveness attempts. Please try again in 24 hours."
If Wajub asks for a new video after the file is sent, the request appears in **Settings ›
Compliance**, as [Track your verification](https://docs.wajub.com/dashboard/activation/track-verification) explains.
## If the camera does not open
The page says what is blocking and how to fix it. With **Camera access was refused**, allow the
camera for this site from the icon next to the address bar, then try again. With **No camera
found**, go through **Continue on a phone**. A link opened from WhatsApp, Instagram or Facebook
sometimes shows in the app's own browser, which cannot film: the page then asks to open it in
Safari or Chrome.
---
# Find your API keys
URL: https://docs.wajub.com/dashboard/developers/api-keys
> Where the API keys are in the dashboard, who sees them, and where to read how to create, restrict and roll them.
API keys let your site or your app call Wajub. They are in **Settings › Developers › API keys**.
How to create and use them is described in the developer docs; this page only says where to find
them.
The owner, an Administrator, a Developer, a Sandbox user, in Sandbox only, or a custom role with
**Manage API keys** opens this page; for other members, the entry does not appear in the
settings. Every plan has access to it. Creating, editing, revealing, rolling or revoking a key asks
for the [security code](https://docs.wajub.com/dashboard#the-security-code).
## What the page shows
Each [environment](https://docs.wajub.com/dashboard#sandbox-and-live) has its own keys: in Sandbox, the page reminds you
**You are viewing sandbox keys.**, and the Live keys only appear once you have switched to Live.
The page sorts the keys into three groups. The **Publishable key** identifies your account in the
code that runs on the payer's side and can be shared. **Secret keys** give full access and are only
used from your server. **Restricted keys** only open the permissions you choose, for a third-party
tool for example.
**Create API key** opens the creation form. On a key, **Reveal** shows its value again, **Roll**
replaces it, **In 24 hours** or **Now**, and **Revoke key** cuts it off for good. **Quick copy**
gives the publishable key and the first secret key, with **Copy the .env lines** to paste them into
your environment file.
## In the developer docs
| To | Read |
| --------------------------------------------- | -------------------------------------------------------------------------------------- |
| Create your first key and put it in your code | [Set up your account](https://docs.wajub.com/getting-started/dashboard-setup#3-create-your-first-api-key) |
| Understand the key types | [Environments and API keys](https://docs.wajub.com/getting-started/environments#key-types) |
| Limit what a key can do | [Environments and API keys](https://docs.wajub.com/getting-started/environments#narrowing-what-a-key-can-do) |
| Roll a key that leaked | [Set up your account](https://docs.wajub.com/getting-started/dashboard-setup#7-roll-a-key-that-leaked) |
| Webhooks, Konsole and CLI | [Developer tools](https://docs.wajub.com/developer-tools) |
---
# Create your account
URL: https://docs.wajub.com/dashboard/getting-started/create-account
> Sign up to the Wajub dashboard, confirm your email, then create the organisation that will take the payments.
Your account signs you in to the dashboard; the organisation is the business you take payments
for, with its own payments, members and settings. One account can belong to several
organisations.
Anyone can create an account and an organisation, without a bank card. You become the owner of the
organisation, with every right described in [Roles](https://docs.wajub.com/dashboard#roles). The organisation starts in
[Sandbox](https://docs.wajub.com/dashboard#sandbox-and-live), and no [security code](https://docs.wajub.com/dashboard#the-security-code) is
asked for.
## The steps
1. **Fill in the sign-up form**
On **Create your account**, enter your **Full name**, your **Work email** and a **Password**:
at least 12 characters, with uppercase letters, lowercase letters and numbers, and not on any
list of leaked passwords. Accept the terms of use and the privacy policy, then choose **Create
free account**. An address that is already registered is refused: sign in instead. A
disposable address is refused too: use a permanent one.
2. **Confirm your email**
The **Verify your email** screen waits for the six-digit code Wajub has just sent you. Enter it
in **Verification code**, then choose **Verify email**. The code expires after 10 minutes;
**Resend code** sends a new one after a one-minute wait, and **Change email** corrects a
mistyped address.
3. **Name your organisation**
**Create your organization** only asks for the **Organization name**. Your customers see it on
receipts and payment pages, and you can change it later. Choose **Create organization**: the
dashboard home page opens.
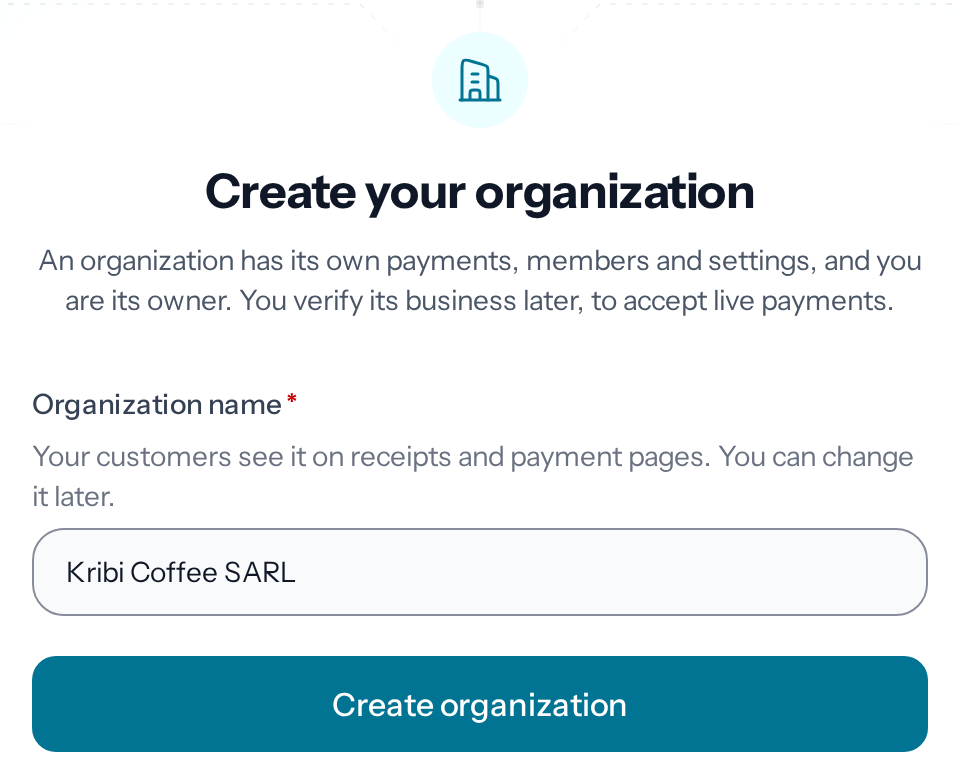
*The business's email and phone number are asked for later, in the activation file.*
4. **Say what you want to do first**
A window asks **What do you want to do first?** and only closes once you answer: **Integrate
via API**, **Accept payments with links**, **In-person or retail** or **Send transfers**. To
take payments without writing code, choose **Accept payments with links**, marked
**Recommended**. The button at the bottom lets you decide later.
Your choice blocks nothing: it only orders the steps of the list the home page shows in Live,
which you can do in any order.
## After creating it
The home page shows **Get ready to go live**. Its first two steps, the API keys and the test
payment, are for people connecting Wajub to a site; the third one, verifying your business,
concerns everyone. Until it is approved, the organisation stays in Sandbox:
[Verify your business](https://docs.wajub.com/dashboard/activation/verify-business) describes the file, and
[Switch to Live](https://docs.wajub.com/dashboard/getting-started/test-and-live) what changes next.
To add another organisation, open the organisation switcher at the top of the menu, then **Create
organization**. Each organisation has its own members, its own data and its own verification.
---
# Explore the dashboard
URL: https://docs.wajub.com/dashboard/getting-started/dashboard-tour
> The menu, the top bar, search, keyboard shortcuts, language and moving from one organisation to another.
The dashboard has three areas: the menu on the left, the top bar and the open page.
Each member sees the menu of their [role](https://docs.wajub.com/dashboard#roles): an entry their role does not open does
not appear. In [Sandbox](https://docs.wajub.com/dashboard#sandbox-and-live), the modules kept for Live leave the menu
too. Changing language, theme or organisation needs no particular plan and no
[security code](https://docs.wajub.com/dashboard#the-security-code).
## The menu
At the top of the menu, the organisation switcher shows the name of the open organisation, your
role and its status. Two lists follow: the first with **Dashboard**, **Payments**, **Invoices**,
**Customers**, **Transfers**, **Payment links** and **Sync**, then the second, at the bottom, with
**Revenue**, **Tax**, **Shield**, **Orchestration**, **Settings** and **Support**.
*An entry with a padlock opens the upgrade page.*
A module your plan does not include stays in the menu, with a padlock:
[Modules outside your plan](https://docs.wajub.com/dashboard#modules-outside-your-plan) says what it shows. On a phone
or a small tablet, the menu becomes a bar at the bottom of the screen with the dashboard and the
open module; **More** opens the other entries.
## The top bar
On the left, the bar shows the page title. The search field opens the command palette. On the
right, the environment switch moves between **Sandbox** and **Live**, as
[Switch to Live](https://docs.wajub.com/dashboard/getting-started/test-and-live) explains. Your avatar opens the account
menu.
In Sandbox, a band at the top of each page reminds you: "Test data only. No real money moves
here."
## The command palette
Ctrl + K, or Cmd + K on a Mac, opens the palette from any page. Type the name of a page, an action
or a customer: the palette suggests the matching pages, settings and data. A first character
narrows the search:
| Type | To search in |
| ---- | ------------------------------------------------------------ |
| `>` | **Actions** |
| `@` | **Members and organizations** |
| `/` | **Search records**: payments, customers, transfers, invoices |
| `?` | **Help**, which lists these prefixes again |
An entry kept for Live or missing from your plan stays visible with the reason: **Live only** or
**Not in your plan**.
## Keyboard shortcuts
Shortcuts are typed one key after another. G then a letter opens a module: G then P for
**Payments**, G then C for **Customers**, G then S for **Settings**. C then a letter creates
something: C then L for **Create payment link**, C then C for **Add customer**, C then I for
**Create invoice**, C then T for **Create transfer**. In the menu, an entry shows its shortcut on
hover, and they all show it as soon as you press G.
The ? key opens **Keyboard shortcuts**, the full list. Shortcuts never fire while you are typing in
a field. If you use voice input, turn off **Use single-key shortcuts** in that same window: your
choice is kept, and Ctrl + K stays active.
In Sandbox, the shortcut of a module kept for Live does not open it: a message says "Only available
in live mode" and what you can do.
## Language, theme and currency
The account menu groups your personal settings. **Language** picks French or English for the
dashboard and for the emails Wajub sends you; the language your customers see at checkout does not
change. Confirm with **Apply**.
**Theme** offers **System**, **Light** or **Dark**. **Display currency** adds, for you alone, a
conversion next to the main amounts on the home page; the amounts themselves do not change.
## Switch organisation
If you are a member of several organisations, click the name at the top of the menu. **Your
organizations** lists them, each with its identifier and its status; beyond eight, a **Search
organizations** field appears. Choose one: the dashboard opens it, in the environment where you
left it. The same menu offers **Create organization** and **Manage organizations**.
---
# Get your first payout
URL: https://docs.wajub.com/dashboard/getting-started/first-payout
> The eight steps between creating your Wajub account and the first transfer to your Mobile Money number or bank account.
This page follows the whole path, from signing up to the first transfer to your own account. Each
step links to the page that covers it in detail.
Anyone can create an account and an organisation. The activation file is sent by the owner, an
Administrator or a custom role with **Manage account**. Payment links, invoices and transfers only
work in Live, so after activation. Adding a payout account and sending a transfer ask for the
[security code](https://docs.wajub.com/dashboard#the-security-code).
## The steps
1. **Create your account**
On **Create your account**, enter your **Full name**, your **Work email** and a **Password**,
accept the terms, then choose **Create free account**. Wajub sends you a six-digit code: enter
it in **Verification code**, on the **Verify your email** screen. The code expires after 10
minutes, and **Resend code** sends a new one after a one-minute wait.
[Create your account](https://docs.wajub.com/dashboard/getting-started/create-account) covers each screen.
2. **Create your organisation**
**Create your organization** only asks for the **Organization name**: your customers see it on
receipts and payment pages, and you can change it later. After **Create organization**, you are
its owner. The dashboard then asks **What do you want to do first?**: to take payments without
writing code, choose **Accept payments with links**.
The organisation starts in **Sandbox**, where payments are simulated, and **Live** stays
locked. The home page shows the **Get ready to go live** list. If you chose links, it is one
step long, the verification of your account; the API keys and the test payment are only asked
of people connecting Wajub to a site.
[Switch to Live](https://docs.wajub.com/dashboard/getting-started/test-and-live) explains the two environments.
3. **Activate your account**
Open **Settings › Compliance**, then **Start verification**. The file goes through your
**Business activity**, the **Business details**, your **Online presence**, the **Business
documents** and the **People** who run the business (**Your identity** with the **Individual
(Self-employed, Freelancer)** type). Once the file is sent, the page shows **Your file is under review** with the usual
review time.
When Wajub approves the file, Live unlocks and the switch at the top right lets you move to it.
If the file is rejected, the page shows what to correct and offers **Correct and resubmit**.
[Verify your business](https://docs.wajub.com/dashboard/activation/verify-business) covers each step of the file, and
[Track your verification](https://docs.wajub.com/dashboard/activation/track-verification) each status. The documents
asked for are listed in [Account activation and KYC](https://docs.wajub.com/getting-started/account-activation).
4. **Activate your payment methods**
Approving your file opens Live, but connects no payment method. As long as none is active, the
home page shows **Activate your payment methods**: a link or an invoice you share cannot be
paid.
Switch to **Live**. If you already have an account with a payment provider, choose **Connect a
provider** and enter your credentials: it collects as soon as it is connected. Otherwise,
choose **Request the Wajub rail** to collect on Wajub's contracts (Mobile Money and more): you
choose your countries and channels, review the pricing and sign. Wajub reviews the request, and
the home page shows **Your payment methods are under review** in the meantime.
[Connect a provider](https://docs.wajub.com/dashboard/orchestration/connect-provider) and
[Request the Wajub rail](https://docs.wajub.com/dashboard/orchestration/rail) cover both ways.
5. **Create a payment link or an invoice**
In **Live**, open **Payment links › Create link** for a payment page to share, or
**Invoices › Create invoice** to bill one particular customer.
[Create a payment link](https://docs.wajub.com/dashboard/payment-links/create) and
[Create and send an invoice](https://docs.wajub.com/dashboard/invoices/create) cover each screen.
6. **Follow the payment**
**Payments** lists each payment with its status. A **Succeeded** payment is collected;
**Pending** and **Processing** are still waiting on the customer or the operator.
[Payment lifecycle](https://docs.wajub.com/payments/lifecycle) explains each status.
7. **Add a payout account**
Open **Settings › Transfers › Payout accounts**, then **Add payout account**: a Mobile Money
number or a bank account. The form goes through **Country**, **Method**, **Details** and
**Review**, and saving asks for the security code. You only do this step once per account.
8. **Send your first transfer**
**Transfers** shows your **Available balance**. Choose **Create transfer**, then the **Payout
account** and the **Amount**, and **Review transfer**. The next button repeats the sum, for
example **Send FCFA 150,000**, and asks for the security code.
A transfer cannot be cancelled once sent, except while its page shows **Waiting for the payment
method**: **Cancel transfer** then gives its amount back to your balance. A transfer is
processed within 1 to 3 business days depending on the payment method. If it is held for review, its page shows **This transfer was flagged and
is awaiting review before it can proceed.**
> [!NOTE]
> **When a payment becomes available**
>
> A successful payment does not reach the **Available balance** straight away: it settles first,
> and the home page shows the date the pending amount will settle on.
> [Balance and settlements](https://docs.wajub.com/payouts/balance) explains this delay.
---
# Switch to Live
URL: https://docs.wajub.com/dashboard/getting-started/test-and-live
> When Live unlocks, how to move from Sandbox to Live and back, and why each member has their own environment.
A new organisation works in **Sandbox**, where payments are simulated. **Live**, where real money
moves, unlocks once Wajub has approved the verification of your business.
The roles that can switch are listed in [Sandbox and Live](https://docs.wajub.com/dashboard#sandbox-and-live), with the
modules and actions that only exist in Live. A Sandbox user, one of the [roles](https://docs.wajub.com/dashboard#roles),
always stays in Sandbox. Both environments come with every plan, and switching does not ask for a
[security code](https://docs.wajub.com/dashboard#the-security-code).
## The steps
1. **Check that Live is unlocked**
At the top right, the environment switch has two buttons, **Sandbox** and **Live**. Until the
organisation is activated, **Live** carries a padlock. Click it: **Live mode locked** says where
the verification stands and offers **Start verification**, **Check verification status** while
it is under review, or **Review verification** if the file was rejected or Wajub is waiting for
an action from you.
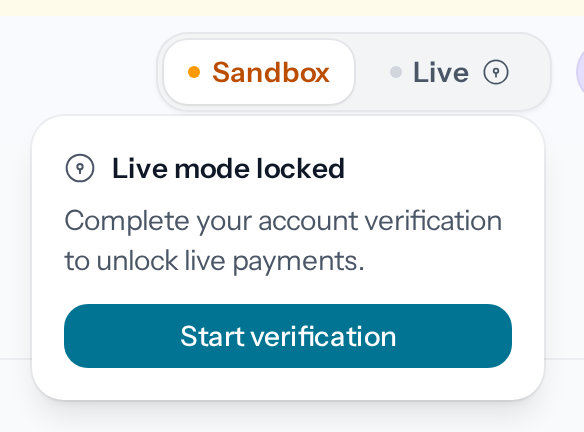
*The button leads to Settings › Compliance, where the activation file lives.*
[Verify your business](https://docs.wajub.com/dashboard/activation/verify-business) describes this file, and
[Track your verification](https://docs.wajub.com/dashboard/activation/track-verification) what happens once it is
sent.
2. **Switch to Live**
Once the organisation is activated, the padlock disappears. Choose **Live** in the switch. If an
open form has unsaved changes, the dashboard first asks **Leave without saving?** The page
reloads in Live: the Sandbox band disappears and the modules kept for Live come back to the
menu.
3. **Go back to Sandbox whenever you like**
Choose **Sandbox** in the same switch. The command palette (Ctrl + K) also offers **Switch to
live** or **Switch to sandbox**, depending on the environment you are in.
## One environment per member
The environment is a personal setting: switching to Live changes nothing for the other members, who
stay where they were. The dashboard remembers it for each organisation, and you find yours in the
environment where you left it.
Someone who joins an organisation that is already activated arrives straight in Live. Those who
were members before activation, you included, stay in Sandbox until they switch.
## When a page is Live only
In Sandbox, a link to a module kept for Live takes you back to the previous page, or to the home
page, with a message such as "Only available in live mode: Invoices." A keyboard shortcut shows the
same message without changing page. The rest of the message says what to do, depending on your
situation:
| Your situation | The message adds |
| ------------------------------------- | -------------------------------------------------------------------- |
| You can switch | "Switch to live to use it." |
| Your role does not allow switching | "Ask an administrator of your account for live access." |
| You are a Sandbox user | "Your role is limited to sandbox." |
| The organisation is not activated yet | "Complete your account verification to go live." |
| The verification is under review | "Your verification is under review. We'll notify you once approved." |
If your file was rejected or Wajub is waiting for an action from you, the message points to
**Compliance**, as [Track your verification](https://docs.wajub.com/dashboard/activation/track-verification) explains.
---
# Find a word you know
URL: https://docs.wajub.com/dashboard/getting-started/vocabulary
> The words you used on another payment platform, what they are called in Wajub and where to find them in the dashboard.
Every payment platform has its own words. If you come from another one, this page matches the
ones you know to the dashboard's, and says where to find them.
Any member can use it, on every plan. Each screen still follows its [role](https://docs.wajub.com/dashboard#roles), and
several only exist in [Live](https://docs.wajub.com/dashboard#sandbox-and-live).
## Search with your own word
The search knows these words. Open it with Ctrl + K, or Cmd + K on a Mac, and type yours, for
example `payout`: the entry found reads **“payout” is called “Transfers” here**, and Enter opens
the page. [Explore the dashboard](https://docs.wajub.com/dashboard/getting-started/dashboard-tour) introduces the search.
## Money coming in
| You used to say | In Wajub | Where |
| --------------------------------------------------------- | -------------------------------------------------------------- | ------------------------------ |
| Transaction, collection, pay-in, cash-in, deposit, charge | A **payment** | **Payments** |
| Payment page, payment button, store | A **payment link** | **Payment links** |
| Payment request, customer bill | An **invoice** | **Invoices** |
| Chargeback | A **dispute** | **Payments › Disputes** |
| Aggregator, gateway, PSP, processor | A **provider** | **Orchestration › Providers** |
| Payment methods, Mobile Money operators | The **channels**, opened by the Wajub rail or by your provider | **Orchestration › Wajub Rail** |
A verified account collects nothing until a provider is active:
[Connect a provider](https://docs.wajub.com/dashboard/orchestration/connect-provider) explains how to plug in your own,
and [Request the Wajub rail](https://docs.wajub.com/dashboard/orchestration/rail) how to collect on Wajub's contracts if
you have none.
## Money going out
| You used to say | In Wajub | Where |
| ------------------------------------------ | ------------------------------------------------- | ------------------------------------------ |
| Payout, withdrawal, disbursement, cash-out | A **transfer** | **Transfers** |
| Withdrawal account, settlement account | A **payout account**: your own | **Settings › Transfers › Payout accounts** |
| Recipient, payee | A **beneficiary**: the account of someone you pay | **Transfers › Beneficiaries** |
| Automatic payout, auto-settlement | **Automatic payouts**, which you turn on yourself | **Settings › Transfers › Payout accounts** |
| Top-up, funding the account | **Funding** | **Revenue › Funding** |
A transfer serves both uses: withdrawing your balance to your own account, or paying someone.
[Send a transfer](https://docs.wajub.com/dashboard/transfers/send) covers the screen.
## The balance
| You used to say | In Wajub | Where |
| --------------------------- | ------------------------------------------------------------------------ | ------------------------------------- |
| Wallet, float | The **Total balance** | **Dashboard**, **Revenue › Balances** |
| Withdrawable balance | The **Available balance**: what a transfer can take out now | **Transfers**, **Revenue › Balances** |
| Settlement, being settled | The **Pending** balance: payments that succeeded and are not settled yet | **Revenue › Balances** |
| Commission, transaction fee | The **Fees** | **Revenue**, and each payment's page |
| Statement, report | **Revenue** and its export | **Revenue** |
Beside these figures, the help button (an i in a circle) opens the definition of the word.
[Read the home page](https://docs.wajub.com/dashboard/home/read) explains each figure of the overview.
## The account and the team
| You used to say | In Wajub | Where |
| ------------------------------------ | ------------------------ | --------------------------------- |
| Merchant, merchant account, business | An **organization** | **Settings › General** |
| KYC, KYB, account activation | **Compliance** | **Settings › Compliance** |
| Team, users | The **members** | **Settings › Members** |
| Subscription, pricing | The **plan** | **Settings › Billing** |
| Test mode, live mode | **Sandbox** and **Live** | The switch at the top of the page |
| Customer service, ticket | **Support** | **Support** |
## Modules with a name of their own
| You used to say | In Wajub | Where |
| ------------------------------------------------------------ | ----------------- | ---------------------------------------- |
| Routing, failover between providers | **Orchestration** | **Orchestration** |
| Subaccounts, connected accounts, marketplace, split payments | **Sync** | **Sync** |
| Fraud protection, blocklist | **Shield** | **Shield** |
| Developer area, logs, console | **Konsole** | **Konsole**, at the bottom of the screen |
| IPN, callback, notification URL | A **webhook** | **Konsole › Webhooks** |
| API key, secret key, API credentials | The **API keys** | **Settings › API keys** |
In the menu, the name of these modules shows on hover a line that says what they do; on a phone,
it is written under the name in **More**.
---
# Contact support
URL: https://docs.wajub.com/dashboard/help/support
> Send a request to the Wajub team from the dashboard, follow its answers, then close it and rate the help you received.
The Wajub team answers in the dashboard: each request becomes a conversation that you follow in
**Support**, at the bottom of the menu (G then H) and in the account menu. **Help center**, at the
top of the page, opens the help centre in a new tab.
Every role except Sandbox user can write to support; a custom role needs **View own support
requests** and **Create support requests**. A member sees their own requests and those of the
colleagues who have the same role; the owner, Administrators and a custom role with **View all
support requests** see them all. Support is open to every plan, and no security code is asked for.
## The steps
1. **Open a new request**
Open **Support** in the menu, then **New request**. The form opens on the **Your request**
section.
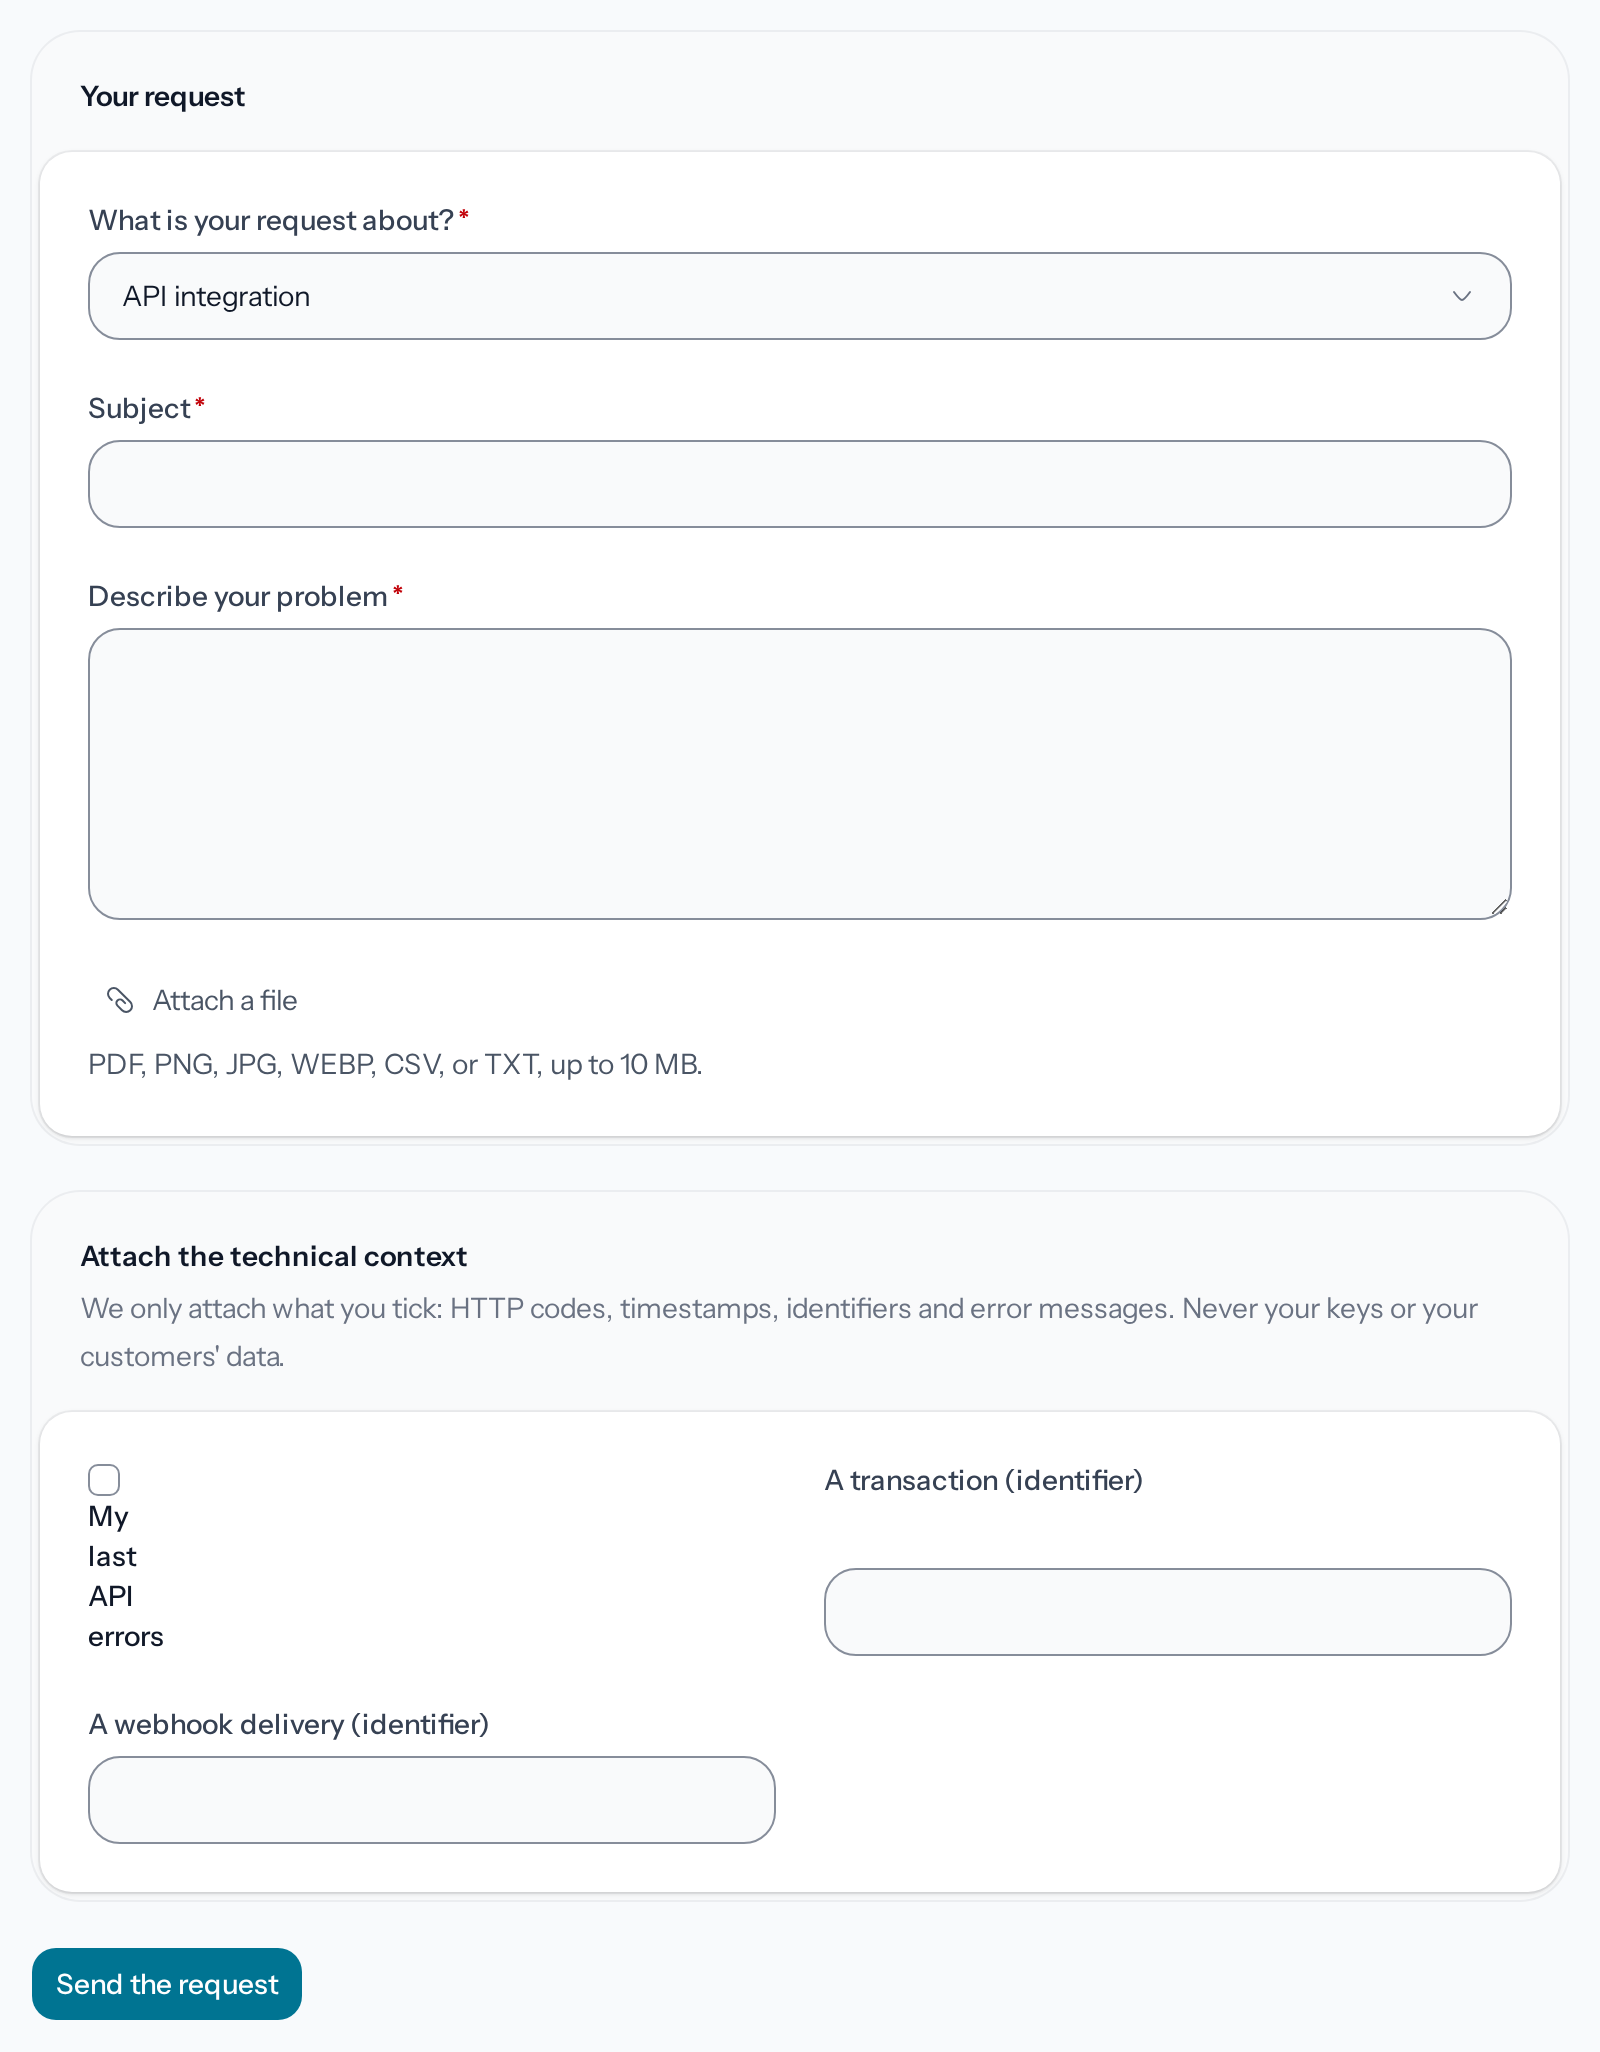
*The Attach the technical context section only appears for technical topics.*
2. **Choose the topic**
In **What is your request about?**, choose what best describes your request, for example
**Payment issue**, **Settlement delay**, **API integration** or **General question**. Then give
a **Subject**, up to 200 characters. As you type it, **This may already answer your
question** suggests articles from the help centre.
3. **Describe the problem**
Under **Describe your problem**, say what you were doing, what you expected and what happened.
**Attach a file**, optional, takes a PDF, an image, a CSV or a text file, up to 10 MB.
4. **Attach the technical context**
For **Payment issue**, **Failed transaction**, **Technical issue**, **API integration** and
**Payment terminal**, the **Attach the technical context** section appears. Tick **My last API
errors**, or give the ID of a transaction or of a webhook delivery. Only what you choose is
sent: HTTP codes, timestamps, IDs and error messages, never your keys or your customers' data.
5. **Send the request**
**Send the request** opens the conversation, with its **Reference** and the expected response
time, in business hours.
## Follow the conversation
Answers arrive in the conversation, and **Support**, in the menu, counts the ones you have not
read. The list of requests has two tabs, **Open** and **Resolved**. Each request shows its
reference, the date of its last message, its unread answers and its status: **Open**, **Waiting
for you** when support needs your answer, or **Resolved**. A request opened in Sandbox carries
**Sandbox**, and a colleague's request **Opened by** followed by their name.
In the conversation, **Support is typing…** appears while an agent writes, and **Seen by support
on** followed by a date tells you when support last read it. To reply, write your message under
the conversation, then **Send**, or Ctrl+Enter (⌘+Enter on a Mac). **Attach a file** takes the
same files as the form. A file shows **Being checked…** until it has been checked, and **Blocked**
if it is refused. A message that could not leave shows **Not sent**: **Send again** sends it
again.
## Answers by email
An answer nobody has read in the dashboard a few minutes later is also sent by email. The author
receives "Support answered your request *reference*"; each colleague who has their role receives
"Support answered *name*'s request *reference*", which says who opened it. The email, in your language, quotes
the start of the answer with the request's subject and reference, and **Read the answer** opens the
conversation in the dashboard, in the right organization. You reply there: the conversation stays
in **Support**.
Seeing every request does not bring every email: the owner and Administrators only receive those
of their own requests and of colleagues who share their role.
## Follow a colleague's request
A colleague who has the same role as the author sees the request, and can reply, mark it as
resolved or reopen it, as on their own: an answer does not wait for someone who is away. A custom
role without **Create support requests** can read a request but not answer it.
## Close and rate
**Mark as resolved** closes the request, and **Reopen** reopens it. A resolved request moves to
**Resolved** and shows **This request is resolved. Reply to reopen it.**: a new message reopens it
too.
Once the request is resolved, **How did it go?** asks you for a rating from 1 to 5, with an
optional comment. **Send my rating** saves it.
---
# Adapt and export the home
URL: https://docs.wajub.com/dashboard/home/customize
> Choose the blocks on your home page, start from a preset, and download the figures for the period as CSV.
Keep the blocks that are useful to you on the home page, then download its figures to reuse them
elsewhere.
Choosing your blocks is open to the owner, Administrators and custom [roles](https://docs.wajub.com/dashboard#roles)
that have **Manage settings**, on every plan. Each person saves their own layout: it does not
change the home page of other members. Every role can export the home page, in
[Live](https://docs.wajub.com/dashboard#sandbox-and-live) only. Neither task asks for the
[security code](https://docs.wajub.com/dashboard#the-security-code).
## The steps
1. **Open Customize**
At the top of the home page, choose **Customize**. **Customize dashboard** opens. The row for
today and the payment figures always stay on display; every other block has its own switch.
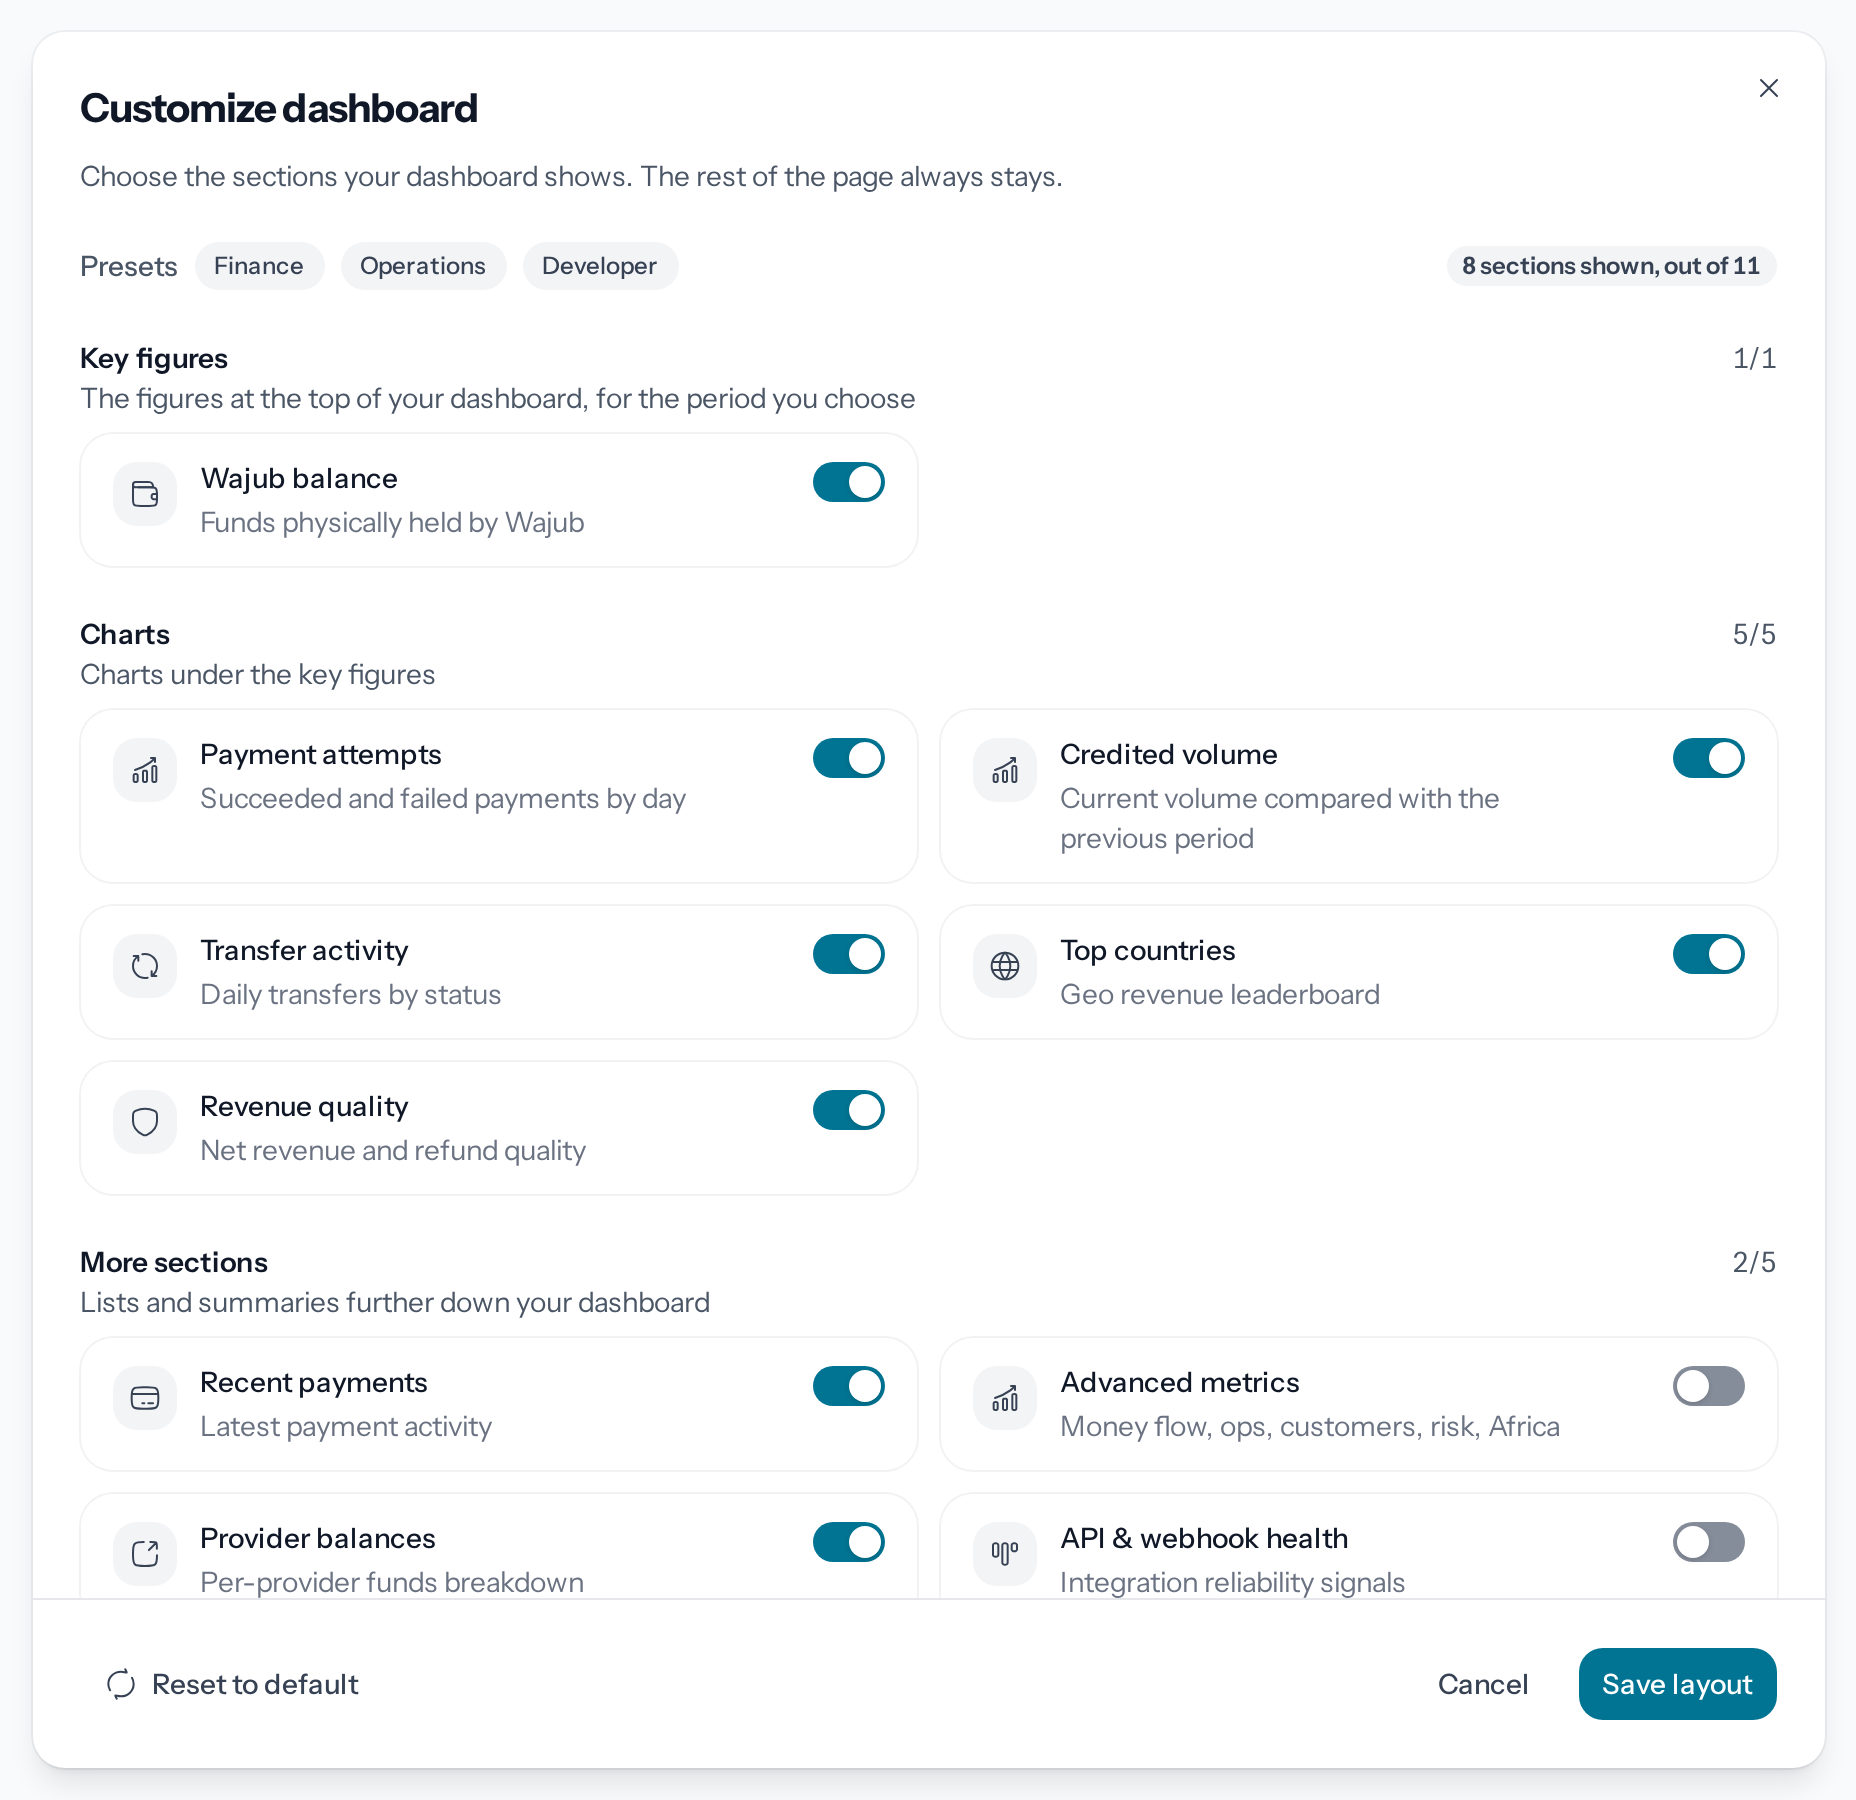
*One switch per block, in three groups.*
2. **Start from a preset**
Under **Presets**, **Finance** keeps the balances, the countries and the revenue quality.
**Operations** keeps the attempts, the credited volume, the transfers, the providers, the
revenue quality and the recent payments. **Developer** keeps the attempts, the credited volume,
the transfers, the providers and the recent payments, with **API & webhook health**, **Routing
intelligence** and **Advanced metrics**. The counter on the right shows how many blocks are
on.
3. **Adjust the blocks**
Turn a block on or off with its switch. **Key figures** holds **Wajub balance**, which shows or
hides **Total balance**. **Charts** and **More sections** hold the blocks described in
[Read the home page](https://docs.wajub.com/dashboard/home/read#the-blocks), including **Provider balances**.
4. **Save**
Choose **Save layout**. The message "Dashboard metrics preferences updated successfully."
appears, and the home page shows your blocks. **Cancel** closes the dialog without changing
anything; if you have changed a switch, **Discard changes?** asks you to confirm first.
To go back to the original home page later, open **Customize** again, choose **Reset to default**,
then **Save layout**.
## Export the home
Choose the period in **Period**, then **Export** › **CSV**. The file downloads, and "Your export
is ready:" appears with its name. For the chosen period, it holds the total, available and
pending balance, the volume, the net volume, the number of payments, the success rate, the
growth, the volume and number of transfers, and the fees. Its headings are in English.
In Sandbox, **Export** does not appear. Each export counts towards your plan's monthly limit:
[Change your plan](https://docs.wajub.com/dashboard/subscription/plans). Once the limit is reached, the menu shows "You
have reached your monthly export limit. Please upgrade your plan." and its formats are greyed out.
---
# Read the home page
URL: https://docs.wajub.com/dashboard/home/read
> What the figures and blocks on the home page say, how to change the period and how to open the payments a figure counts.
The home page sums up your activity in Live: the current day, your balance, your successful and
failed payments over the chosen period, then charts and lists.
Every [role](https://docs.wajub.com/dashboard#roles) can open the home page. Choosing a period needs no particular plan
and no [security code](https://docs.wajub.com/dashboard#the-security-code). In
[Sandbox](https://docs.wajub.com/dashboard#sandbox-and-live), a test home replaces it, described at the bottom of the
page.
## The period
**Period**, at the top of the home page, offers **Today**, **Last 7 days**, **Last 30 days**,
**Last 90 days**, **Last 12 months**, **Month to date**, **Last month** and **Year to date**, or
the days of your choice in the calendar, up to one year back. The home page opens on the last 30
days. The figures and blocks follow the chosen period, except the row for today, the balances,
**Recent payments** and **Transfer activity**, which always covers the last 30 days.
## The overview
Under **Overview**, next to the name of the period, a first row gives the current day: **Volume
today**, **Payments today**, **Failed today** and **New customers today**. It updates by itself
as long as the page stays open.
The next row covers the period:
- **Total balance**: your balance, with the available part, the pending part and the next amount
expected with its date. The **direct mode** label flags funds settled on your own provider
accounts rather than at Wajub.
- **Gross volume**: the payments credited to your balance, with the **Net volume** and the
percentage change "vs prev. period". It also counts your top-ups, and says so under the amount
when there are any.
- **Successful payments**: how many there are, and their share of attempts.
- **Failed**: the payments that failed.

*The row for today, then the figures for the chosen period.*
## Open what a figure counts
One click on a figure in the overview opens the list it counts, over the same period. **Volume
today**, **Payments today**, **Gross volume** and **Successful payments** open **Payments**
filtered on **Credited to balance**. **Failed today** and **Failed** open the failed payments,
**New customers today** the customers who arrived that day. **Total balance** opens
[Revenue](https://docs.wajub.com/dashboard/home/revenue). [Find a payment](https://docs.wajub.com/dashboard/payments/find) explains these
filters.
## The blocks
Under the overview, the home page shows these blocks, from top to bottom:
| Block | What it shows |
| ----------------------------------- | ------------------------------------------------------------------------------------------------------------- |
| **Payment attempts** | Successful and failed payments day by day, and **Where payments stop**: the payments not credited, by status. |
| **Credited volume** | The credited volume day by day, compared with the previous period, and its split **By payment method**. |
| **Transfer activity** | The volume of your transfers day by day, by status, over the last 30 days. |
| **Provider balances & performance** | Where your funds are, and the volume, success rate and cost of each provider. |
| **Top countries** | The countries your payments come from, with their share of the credited volume. |
| **Revenue quality** | The share of revenue from **Returning customers** and **First-time customers**, and the amount **Refunded**. |
| **Recent payments** | Your last five payments, with their status. **View all** opens **Payments**. |
Three blocks stay hidden until you add them: **Advanced metrics**, **API & webhook health** and
**Routing intelligence**. [Adapt and export the home](https://docs.wajub.com/dashboard/home/customize) explains how to
choose your blocks.
Above the period, notices flag what needs your attention, for example an activation file to
complete, or a drop in the success rate or the volume compared with the previous period.
## The home in Sandbox
In Sandbox, the home page shows **Test balance**, the number of **Payments**, **Customers** and
**Webhooks sent**, the **Payments volume** for the last 7 days and **Quick actions** to start an
integration. Once your activation is approved, **Switch to live** takes you there:
[Switch to Live](https://docs.wajub.com/dashboard/getting-started/test-and-live).
In Live, as long as your organisation has no payment, no customer and no transfer yet, the home
page shows the steps to get started instead.
---
# Track your revenue
URL: https://docs.wajub.com/dashboard/home/revenue
> Gross and net revenue, fees and refunds by period, a breakdown of your balances and upcoming settlements, how your balance changed, and exports in Excel or PDF.
**Revenue** shows what your payments brought in, where your money is and how your balance
changed. The amounts count the money collected, on the date it was collected.
The owner, an Administrator, a Finance, Analyst or Viewer member, or a custom
[role](https://docs.wajub.com/dashboard#roles) that has **View revenue** can open **Revenue**, on every plan. As
[Sandbox and Live](https://docs.wajub.com/dashboard#sandbox-and-live) points out, the module only exists in Live.
Reading or exporting it does not ask for a [security code](https://docs.wajub.com/dashboard#the-security-code).
## Overview
Open **Revenue** in the menu: **Overview** appears, over the last 30 days. **Period** offers the
same choices as the home page, or the days of your choice. Four figures sum up the period:
- **Gross revenue**: the payments credited to your balance.
- **Net revenue**: what is left after refunds and fees, with the change compared with the
previous period of the same length.
- **Refunds**: what you gave back to your customers.
- **Fees**: the processing fees for the period.
**Revenue by channel** splits the volume between Mobile Money, cards and bank transfers, with the
number of payments and the share of each channel. **Revenue by currency** follows, with the volume
in each currency. With active subscriptions, **Recurring revenue** gives how many there are, the
**Monthly recurring revenue (MRR)** and the **Annual recurring revenue (ARR)**.
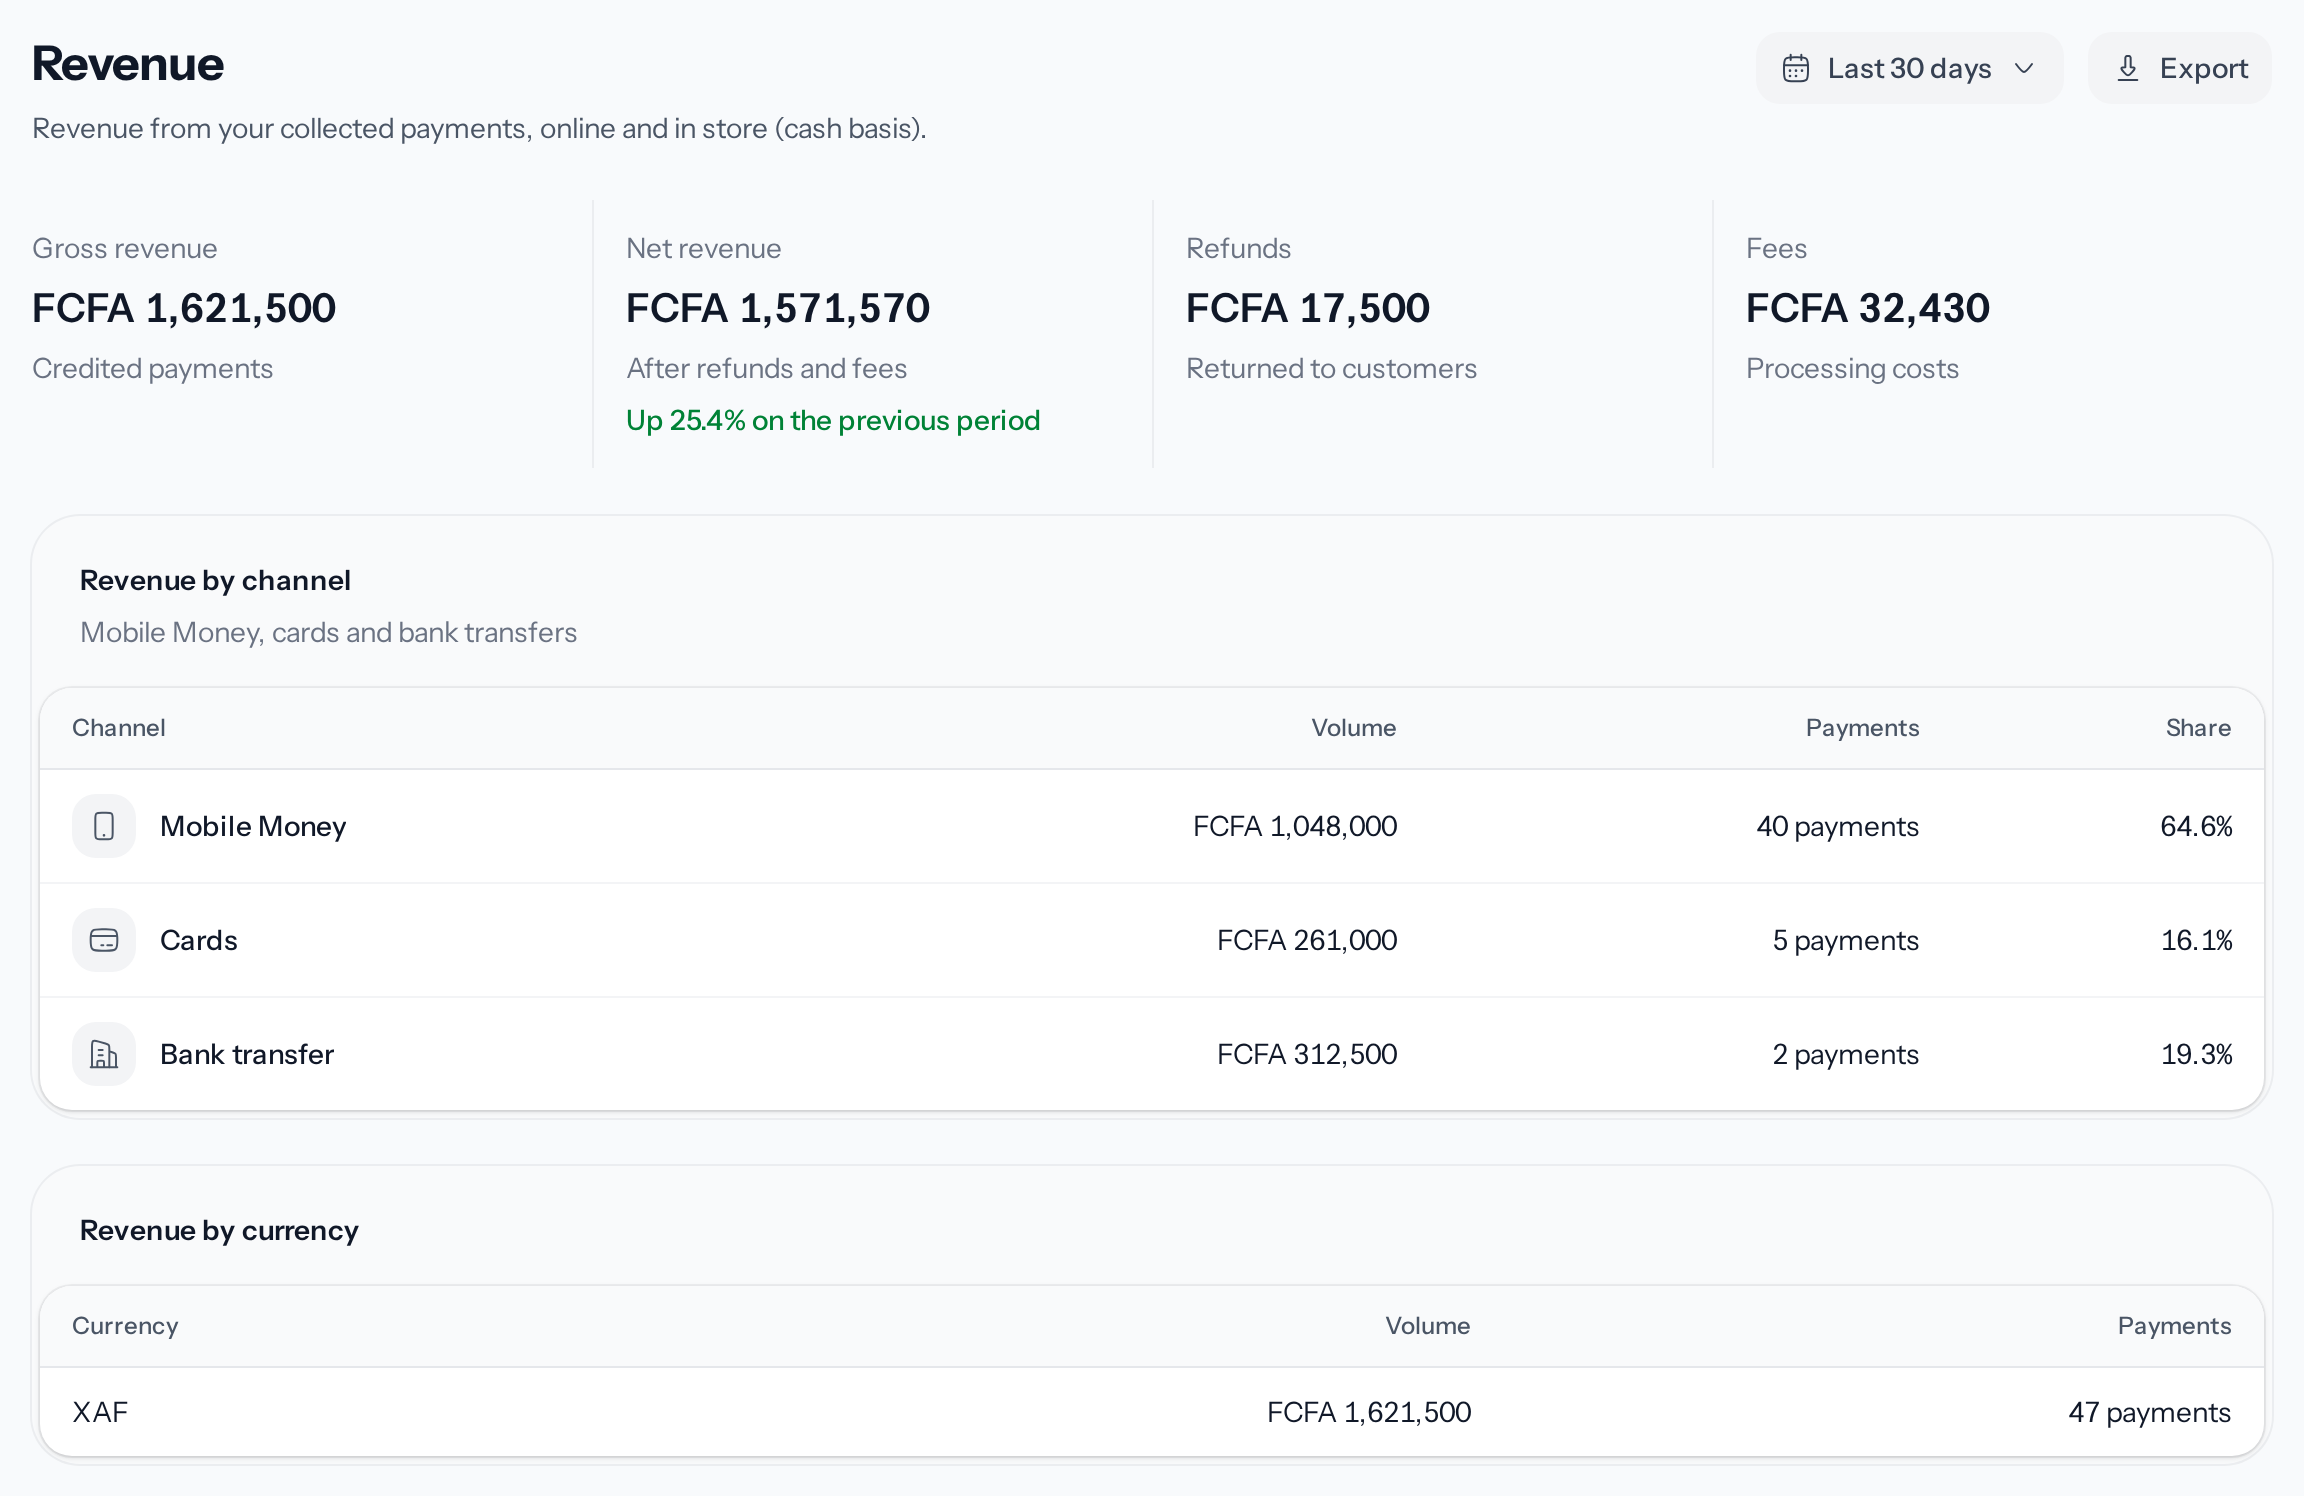
*The four figures for the period, then the volume by channel.*
## Balances
**Balances** describes your money right now, with no period to choose. **Balance summary** gives
the **Total balance**, the part **Available** for a transfer, the part **Pending** settlement and
the part **In transit** in a transfer under way. **Held amounts** sets apart what is **Reserved**
for disputes, temporarily on hold or **Disputed**. When disputes hold back part of the balance,
**Disputes affecting balance** flags it, with **View disputes**.
**Fees by type** and **Fees by provider** cover the last 30 days. **Estimated settlements** lists,
by provider, the funds credited recently that are not settled yet, with the delay and the
**Estimated date** of their settlement.
## Progressions
**Progressions** tracks how your balance changed over the chosen period. **Group by** splits the
**Balance progression** chart by **Day**, **Week** or **Month**. The **By period** table gives,
for each slice, the payments, the refunds, the fees, the **Transfers out**, the **Net change** and
the **Balance at the end**.
## Export a report
On **Overview**, **Balances** and **Progressions**, **Export** offers **Excel** or **PDF**. The
file covers the open page, with its period and, for **Progressions**, its grouping. Each export
counts towards your plan's monthly limit: [Change your plan](https://docs.wajub.com/dashboard/subscription/plans).
The fourth tab, **Funding**, is for crediting your balance:
[Top up your balance](https://docs.wajub.com/dashboard/home/top-up).
---
# Top up your balance
URL: https://docs.wajub.com/dashboard/home/top-up
> Credit your Wajub balance by Mobile Money or bank transfer, send the proof of a transfer and track each top-up.
Topping up your balance adds money to it without going through a customer payment, for example to
send a transfer before your collections are settled.
The roles that open [Revenue](https://docs.wajub.com/dashboard/home/revenue) can top up the balance, on every plan.
Like **Revenue**, top-ups only exist in [Live](https://docs.wajub.com/dashboard#sandbox-and-live). They do not ask for a
[security code](https://docs.wajub.com/dashboard#the-security-code).
## The steps
1. **Open Funding**
Open **Revenue › Funding**, then choose **Add funds**. The page shows your **Current balance**
and three steps: **Method**, **Details** and **Review**.
2. **Choose the method**
Under **Payment method**, choose **Mobile Money** or **Bank transfer**, marked **Manual
validation**: your balance is only credited once Wajub has checked your proof. Bank transfer
only appears when Wajub accepts it. Choose **Continue**.
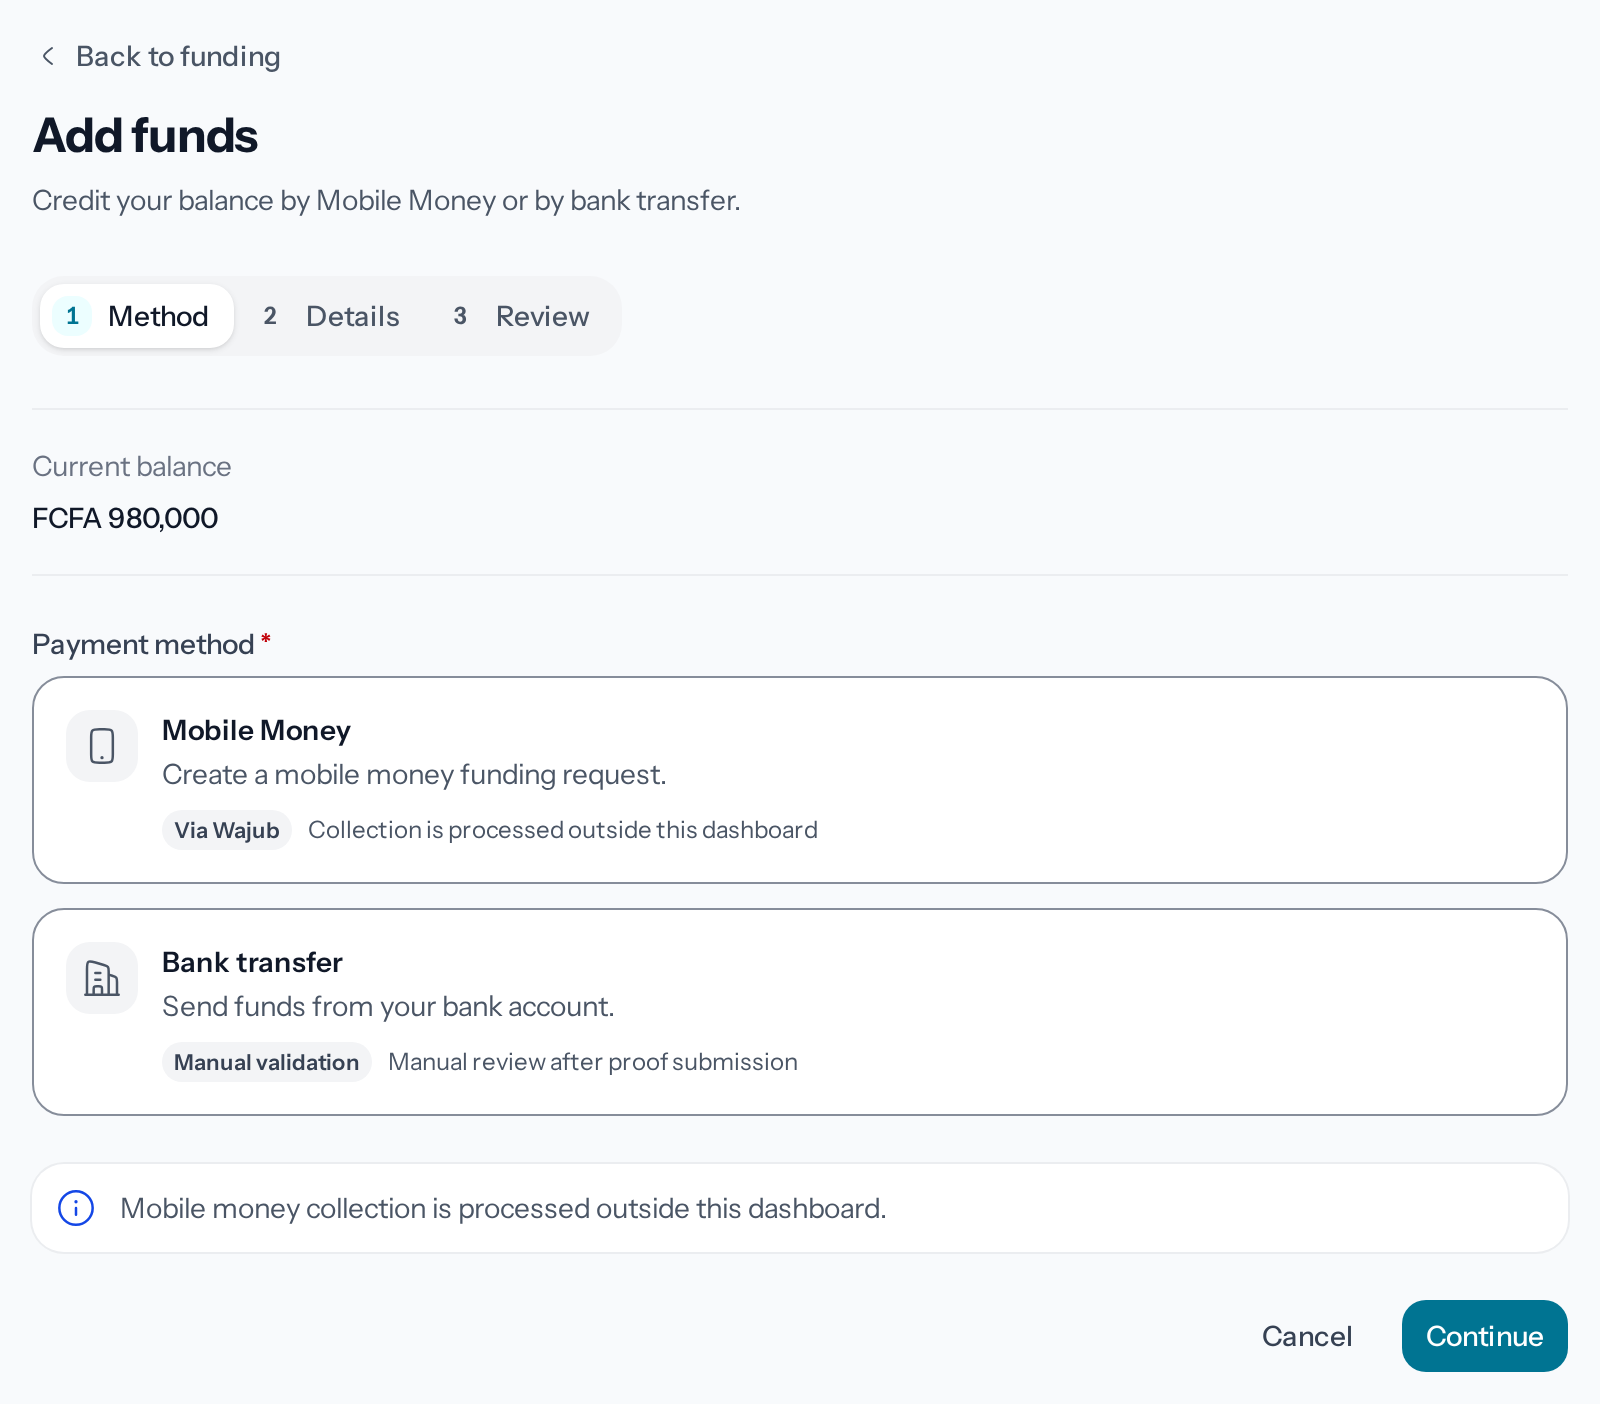
*A bank transfer is only credited once the proof is checked.*
3. **Enter the amount**
For Mobile Money, first choose the **Operator** of the phone that pays, grouped by country.
Enter the **Amount to add**: at least FCFA 1,000, or the equivalent in your currency. In FCFA,
buttons offer ready-made amounts. For Mobile Money, enter the **Phone number** that pays. The
optional **Note** stays attached to the top-up. Choose **Review**.
4. **Check and send**
The summary repeats the method and the amount; **Edit details** goes back. Choose the "Add"
button, followed by the amount. For Mobile Money, the top-up page opens and the phone receives
a payment request from the operator: your balance is credited as soon as the holder of the
number confirms it. For a bank transfer, the top-up page opens on the transfer instructions.
## After a bank transfer
Under **Bank transfer instructions**, the page gives the Wajub account to send the amount to:
**Transfer reason**, **Account name**, **Bank**, **Account number**, then **IBAN** and **SWIFT /
BIC** when the account has them. Each line can be copied, and **Copy all** copies them all. Copy
the reason exactly as it is into your transfer: it is what links the money received to your
top-up.
Once the transfer has gone, fill in **Proof of transfer** on the same page: **Your bank**, **Your
account number or IBAN** and the **Receipt** issued by your bank, as a PDF, JPG or PNG of 10 MB at
most. Choose **Send proof and notify Wajub**: the Wajub team checks the transfer, then credits
your balance.
## Track a top-up
**Revenue › Funding** lists your top-ups with their amount, status, method and date. Above it,
the page gives your **Available balance**, the total **Credited** and the number of top-ups **In
progress** and **Failed**.
On a top-up's page, **Available to send** says when you can transfer the money. When a credited
amount stays blocked for a while, **Funds not yet withdrawable** says so, with the date it is
released. A **Note from Wajub** appears when the team has left one. Once the proof of a transfer
is sent, and as long as the top-up is neither credited nor rejected, **Messages with Wajub** lets
you write to the team and attach files.
---
# Correct or cancel an invoice
URL: https://docs.wajub.com/dashboard/invoices/correct-cancel-refund
> Edit a draft, cancel and duplicate a sent invoice, reduce what the customer owes with a credit note, or refund what they paid.
A draft can be edited freely. A sent invoice keeps its number: to correct it, cancel and duplicate
it, or reduce what the customer owes with a credit note.
The owner, an Administrator, a Finance member or a custom role with **Manage invoices** can do it.
Only the credit note asks for the [security code](https://docs.wajub.com/dashboard#the-security-code).
## Edit a draft
On the page of a draft that has received no payment, **Edit draft** reopens the form. A sent invoice
can no longer be edited. Drafts you do not need are deleted from the list, with
[**Delete drafts**](https://docs.wajub.com/dashboard/invoices/export-and-bulk#bulk-actions).
## Correct a sent invoice
1. **Cancel the invoice**
On the invoice's page, choose **Cancel invoice** in the menu to the right of the buttons. The
**Cancel this invoice?** dialog reminds you that the customer will no longer be able to pay it,
that no reminder will go out and that it keeps its number. What has already been paid is not
refunded. Confirm with **Cancel invoice**: it moves to **Cancelled**, and this is final.
2. **Duplicate it**
In the same menu, **Duplicate as a new draft** creates a draft with the same customer and the
same lines, and opens it for editing with **Invoice duplicated successfully**.
3. **Correct it, then send the draft**
Correct what needs correcting, then [send the invoice](https://docs.wajub.com/dashboard/invoices/create#after-creating-it):
it gets a new number.
## Issue a credit note
A credit note reduces what the customer owes without cancelling the invoice, for example for a
returned item or a discount granted afterwards. It has a number from its own sequence, can be
downloaded as a PDF and cannot be cancelled.
1. **Open Issue a credit note**
On a sent invoice's page, choose **Issue a credit note** in the menu to the right of the
buttons. The dialog opens.
2. **Enter the amount and the reason**
The **Amount to credit** goes up to what the invoice is still worth. The **Reason**, required,
is printed on the credit note. Below the fields, the dialog shows the effect on the invoice:
**Invoice status after**, **Credited in all** and **Amount due after**.
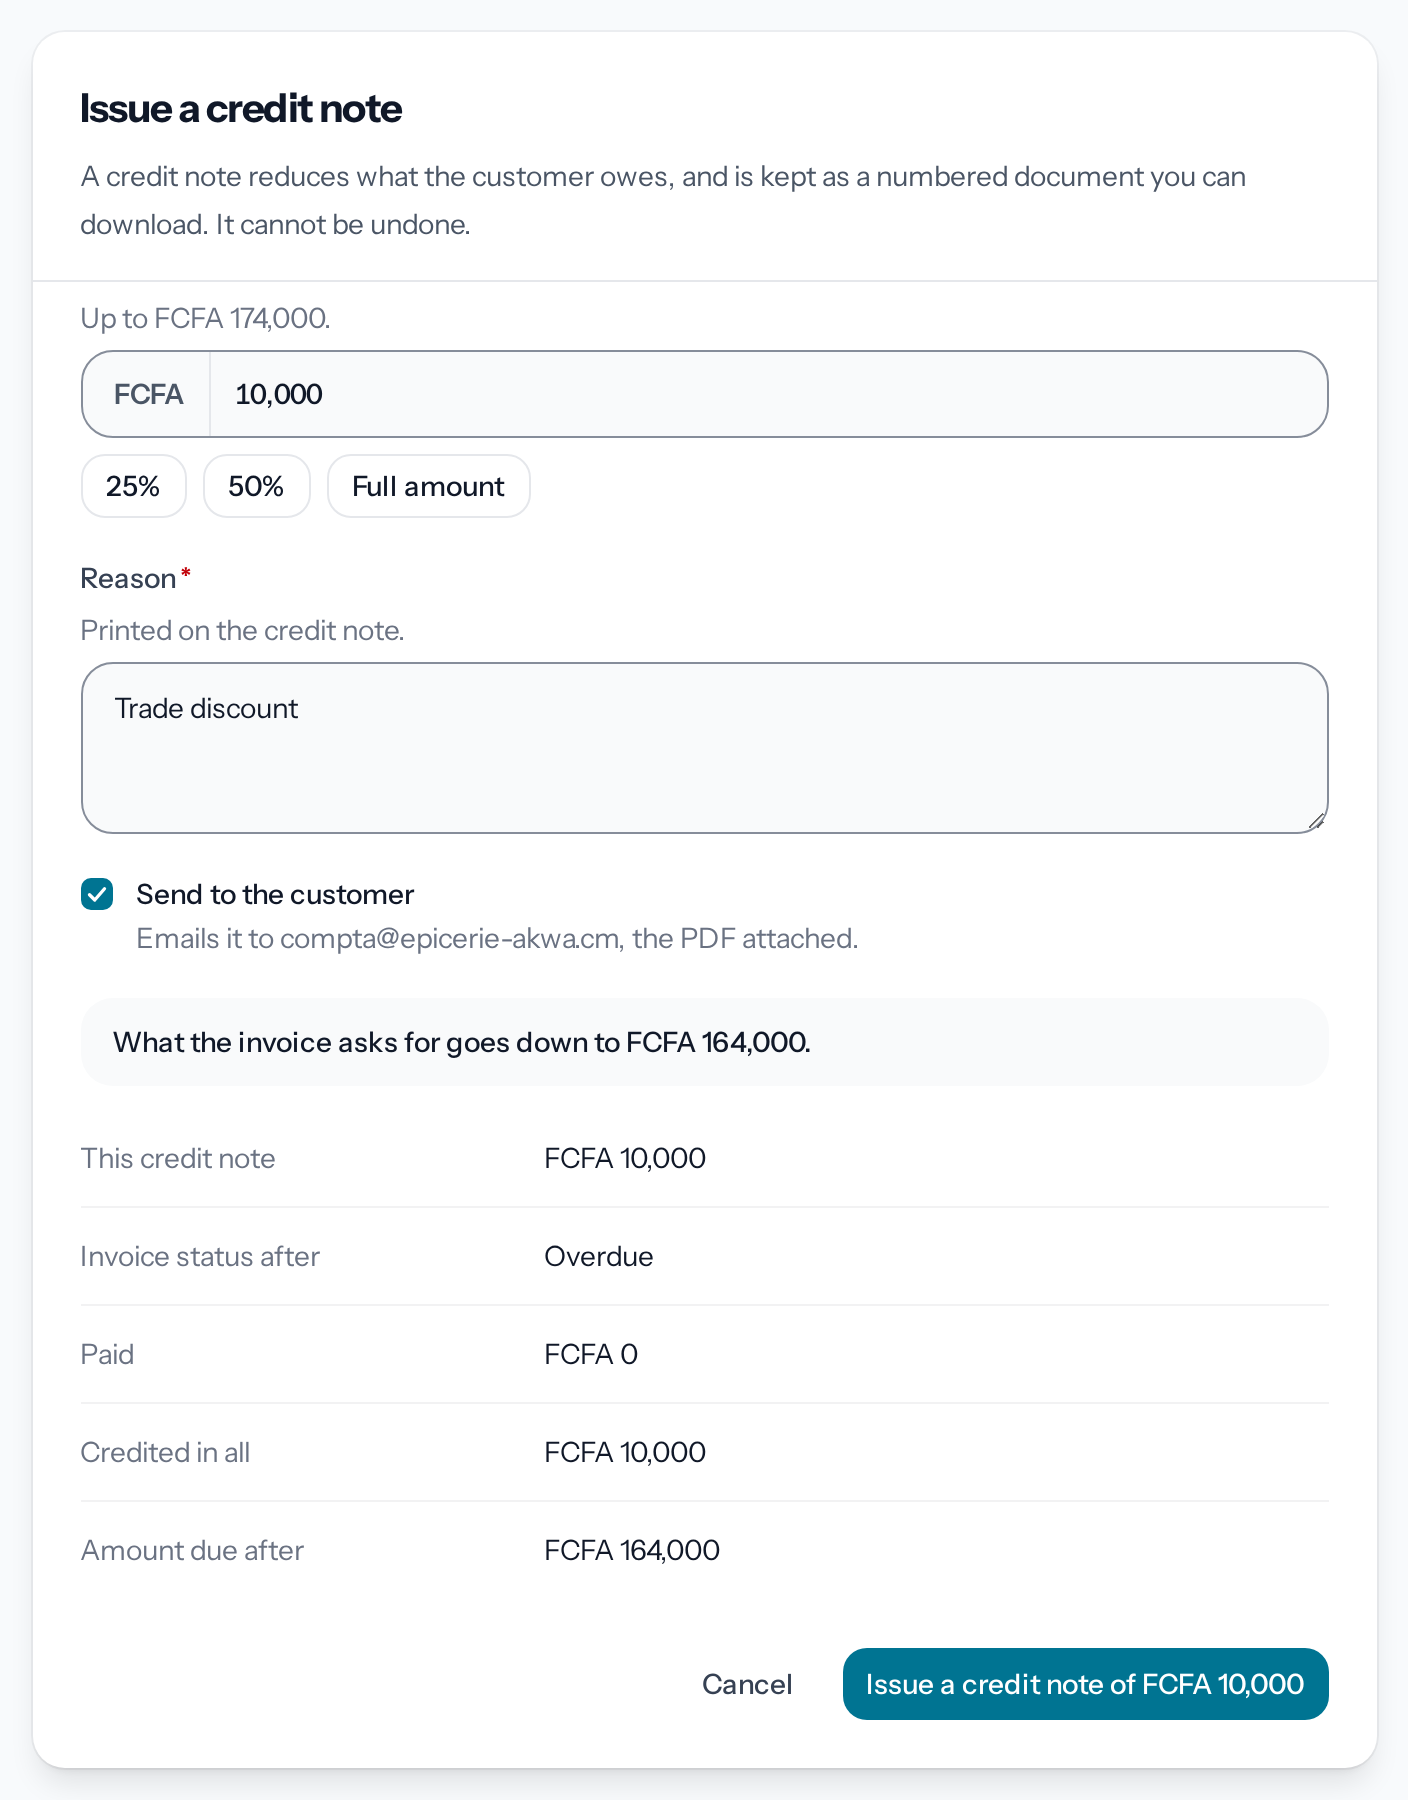
*The dialog shows the credit note's effect before you issue it.*
3. **Choose whether to send it**
**Send to the customer** emails it, with the PDF attached. If the invoice has no email address,
give the customer the credit note's PDF yourself.
4. **Issue the credit note**
Click "Issue a credit note of" followed by the amount, then enter the security code. A message
confirms the credit note's number, which appears under **Credit notes** on the invoice's page,
with its PDF.
The invoice then shows **Partially credited** and only asks for its amount due. If the credit note
covers what was left due after a partial payment, it moves to **Paid**. Credited in full, it moves
to **Cancelled** if nothing had been paid, and to **Refunded** otherwise: then give the money back
to the customer as below.
## Refund the customer
A credit note gives no money back. To give back what the customer paid online, open the payment
from **History** with **Open payment**, then [refund it](https://docs.wajub.com/dashboard/payments/refund). Once its
online payments are refunded in full, the invoice moves to **Refunded**, unless a payment was
recorded on it by hand. A payment received outside Wajub is given back outside Wajub.
---
# Create and send an invoice
URL: https://docs.wajub.com/dashboard/invoices/create
> Bill one customer from the dashboard, from the customer to the lines and the payment terms, then email it with its PDF and its payment link.
An invoice is for one customer: they receive it by email, with the PDF and a link to pay it
online.
The owner, an Administrator, a Finance member or a custom role with **Manage invoices** can create
and send an invoice. The **Pay as you go** plan allows 10 invoices in all; **Growth** and the
plans above have no limit. No security code is asked for, except to issue a credit note.
## The steps
1. **Open the form**
In **Live**, open **Invoices**, then **Create invoice**. The form goes through four steps:
**Customer**, **Lines**, **Payment** and **Review**. **Continue** checks each step before
moving on and points to the field to correct.
2. **Choose the customer**
Under **Who is it for?**, look up an existing customer in **Customer from your directory** by
name or email: choosing one fills in the fields. Otherwise, enter their **Name**, the only
required field, and if needed their **Email**, the **Company name**, their **Phone** and their
**Address**. Without an email, Wajub cannot send them the invoice.
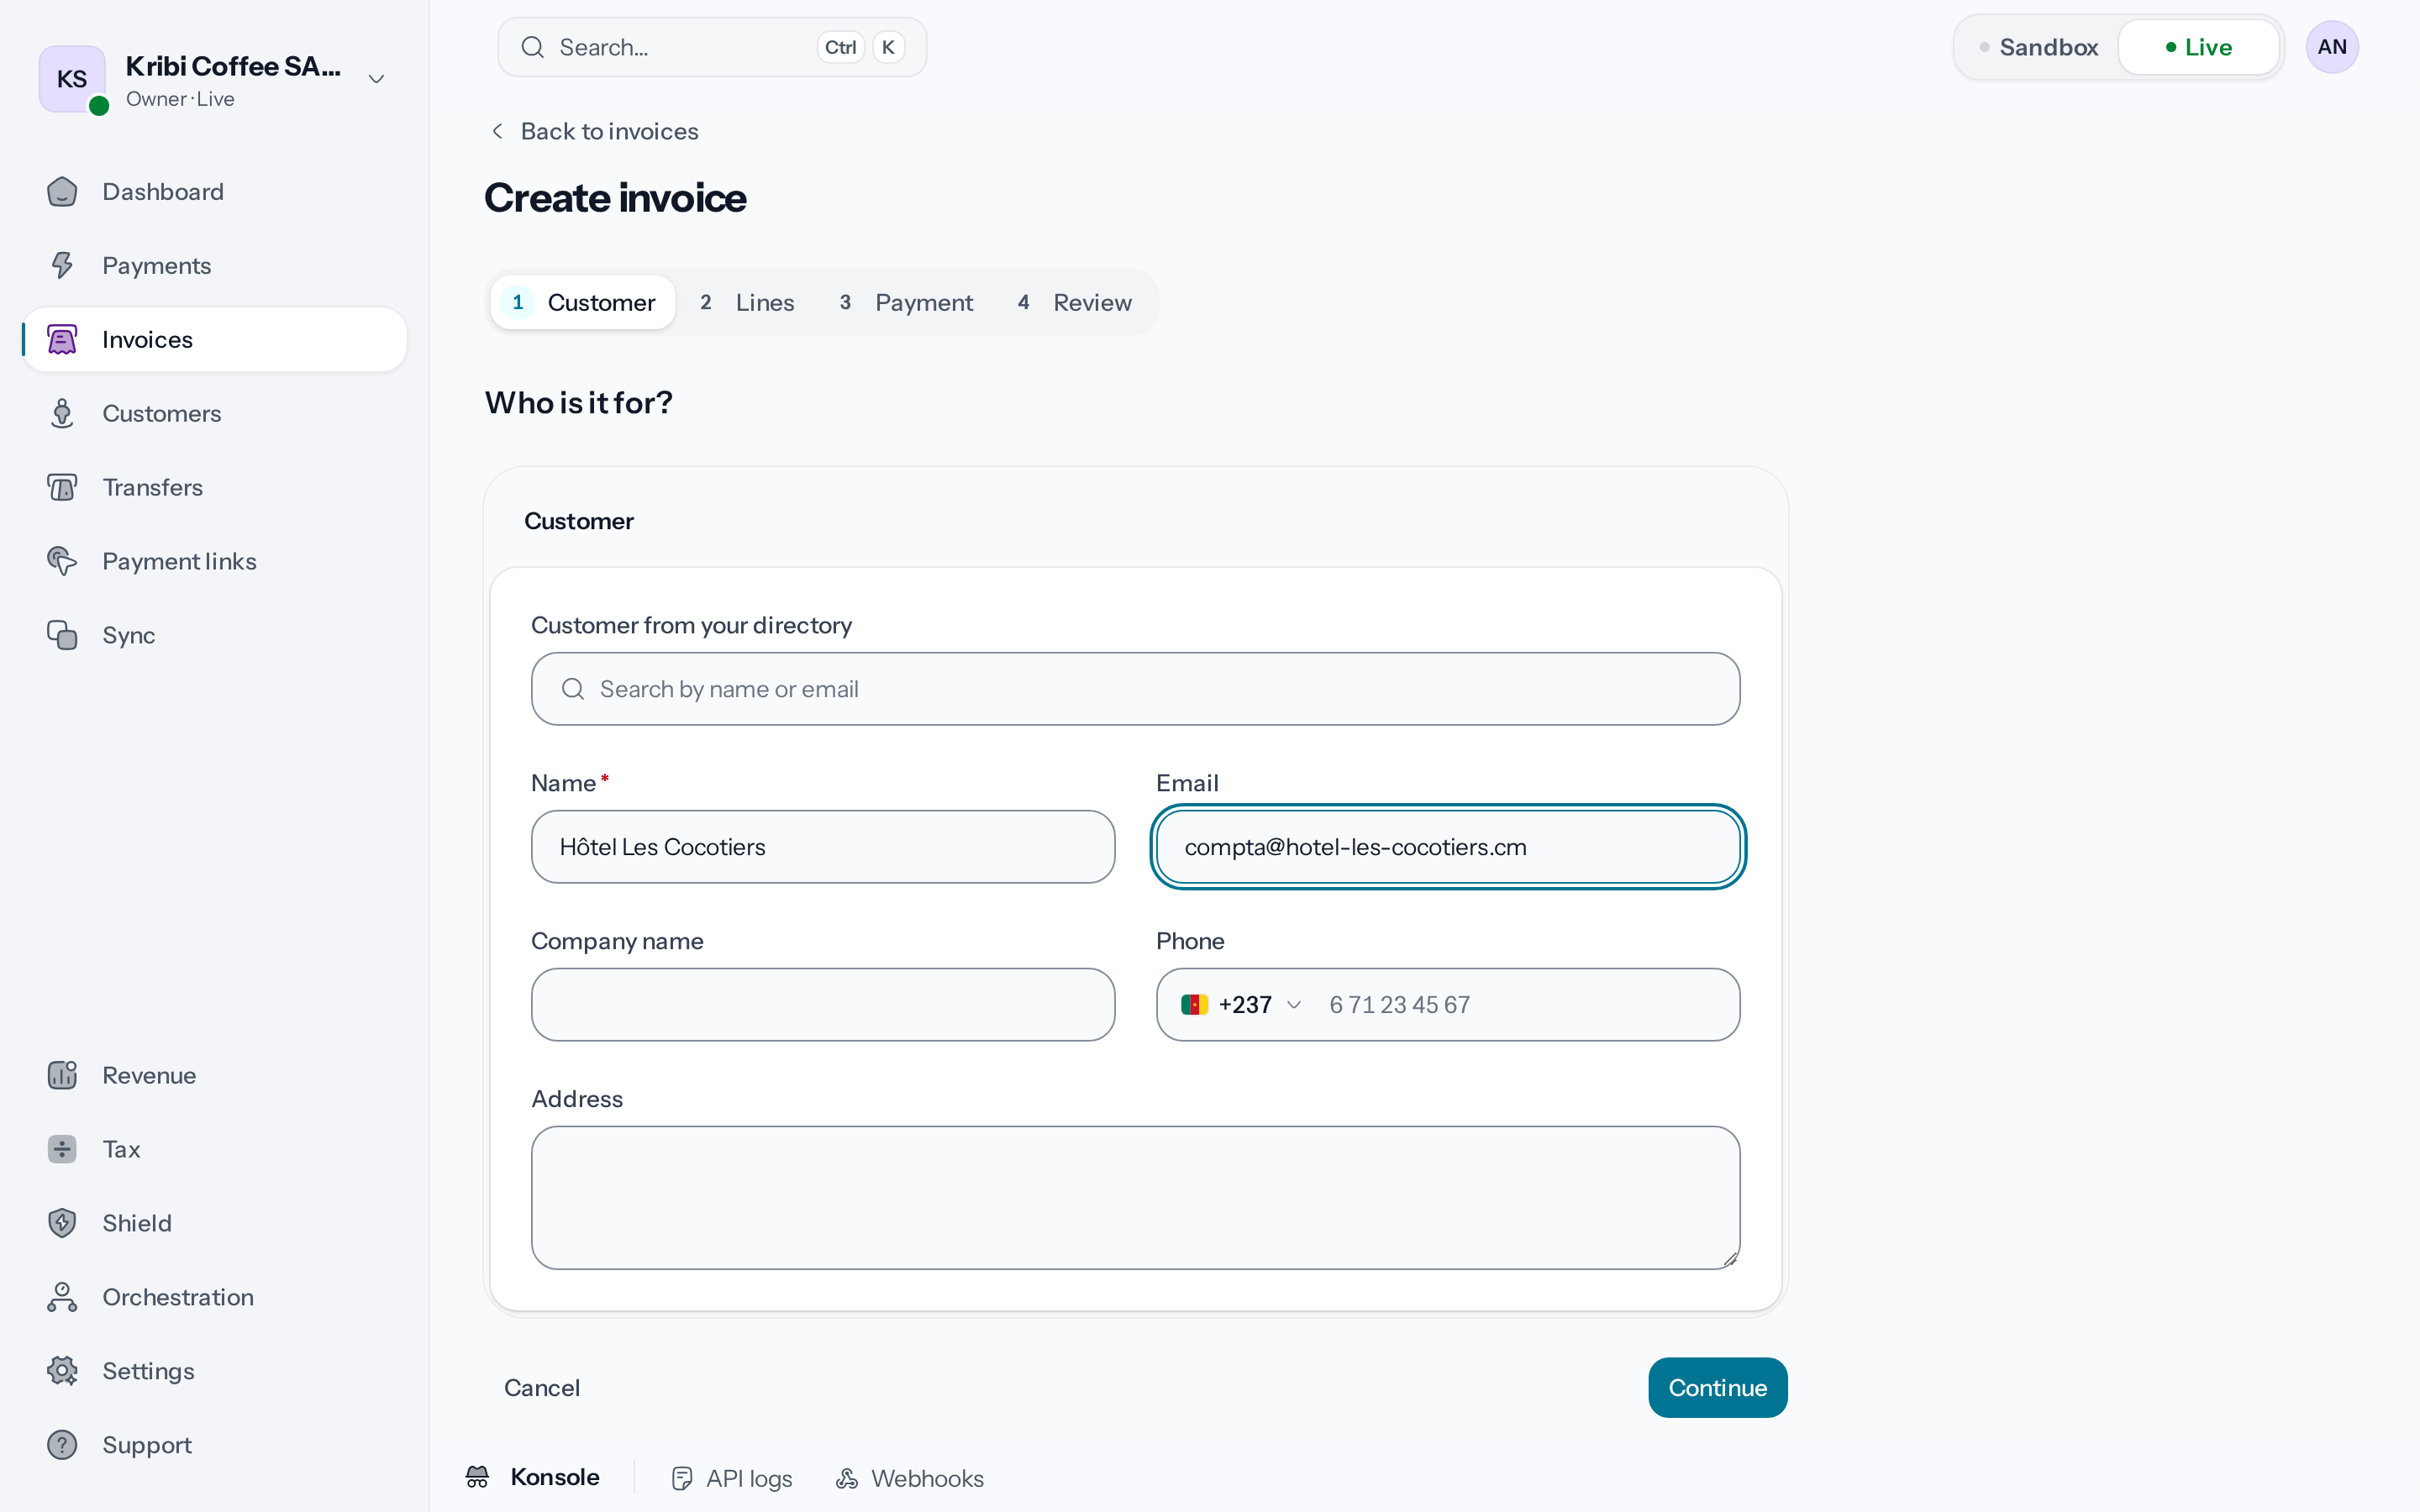
*A customer entered with an email or a phone number joins your directory.*
3. **Add the lines**
Under **What are you invoicing?**, choose the **Currency**, then fill in each line: **Item
name**, **Quantity** and **Unit price** are required, **Description** and **Unit** optional.
**Tax and discount** sets the line's tax and discount, and **Add a line** adds another one.
Below the lines, **Discount on the invoice** and **Shipping** apply to the whole invoice. The
**Summary** on the right follows the total.
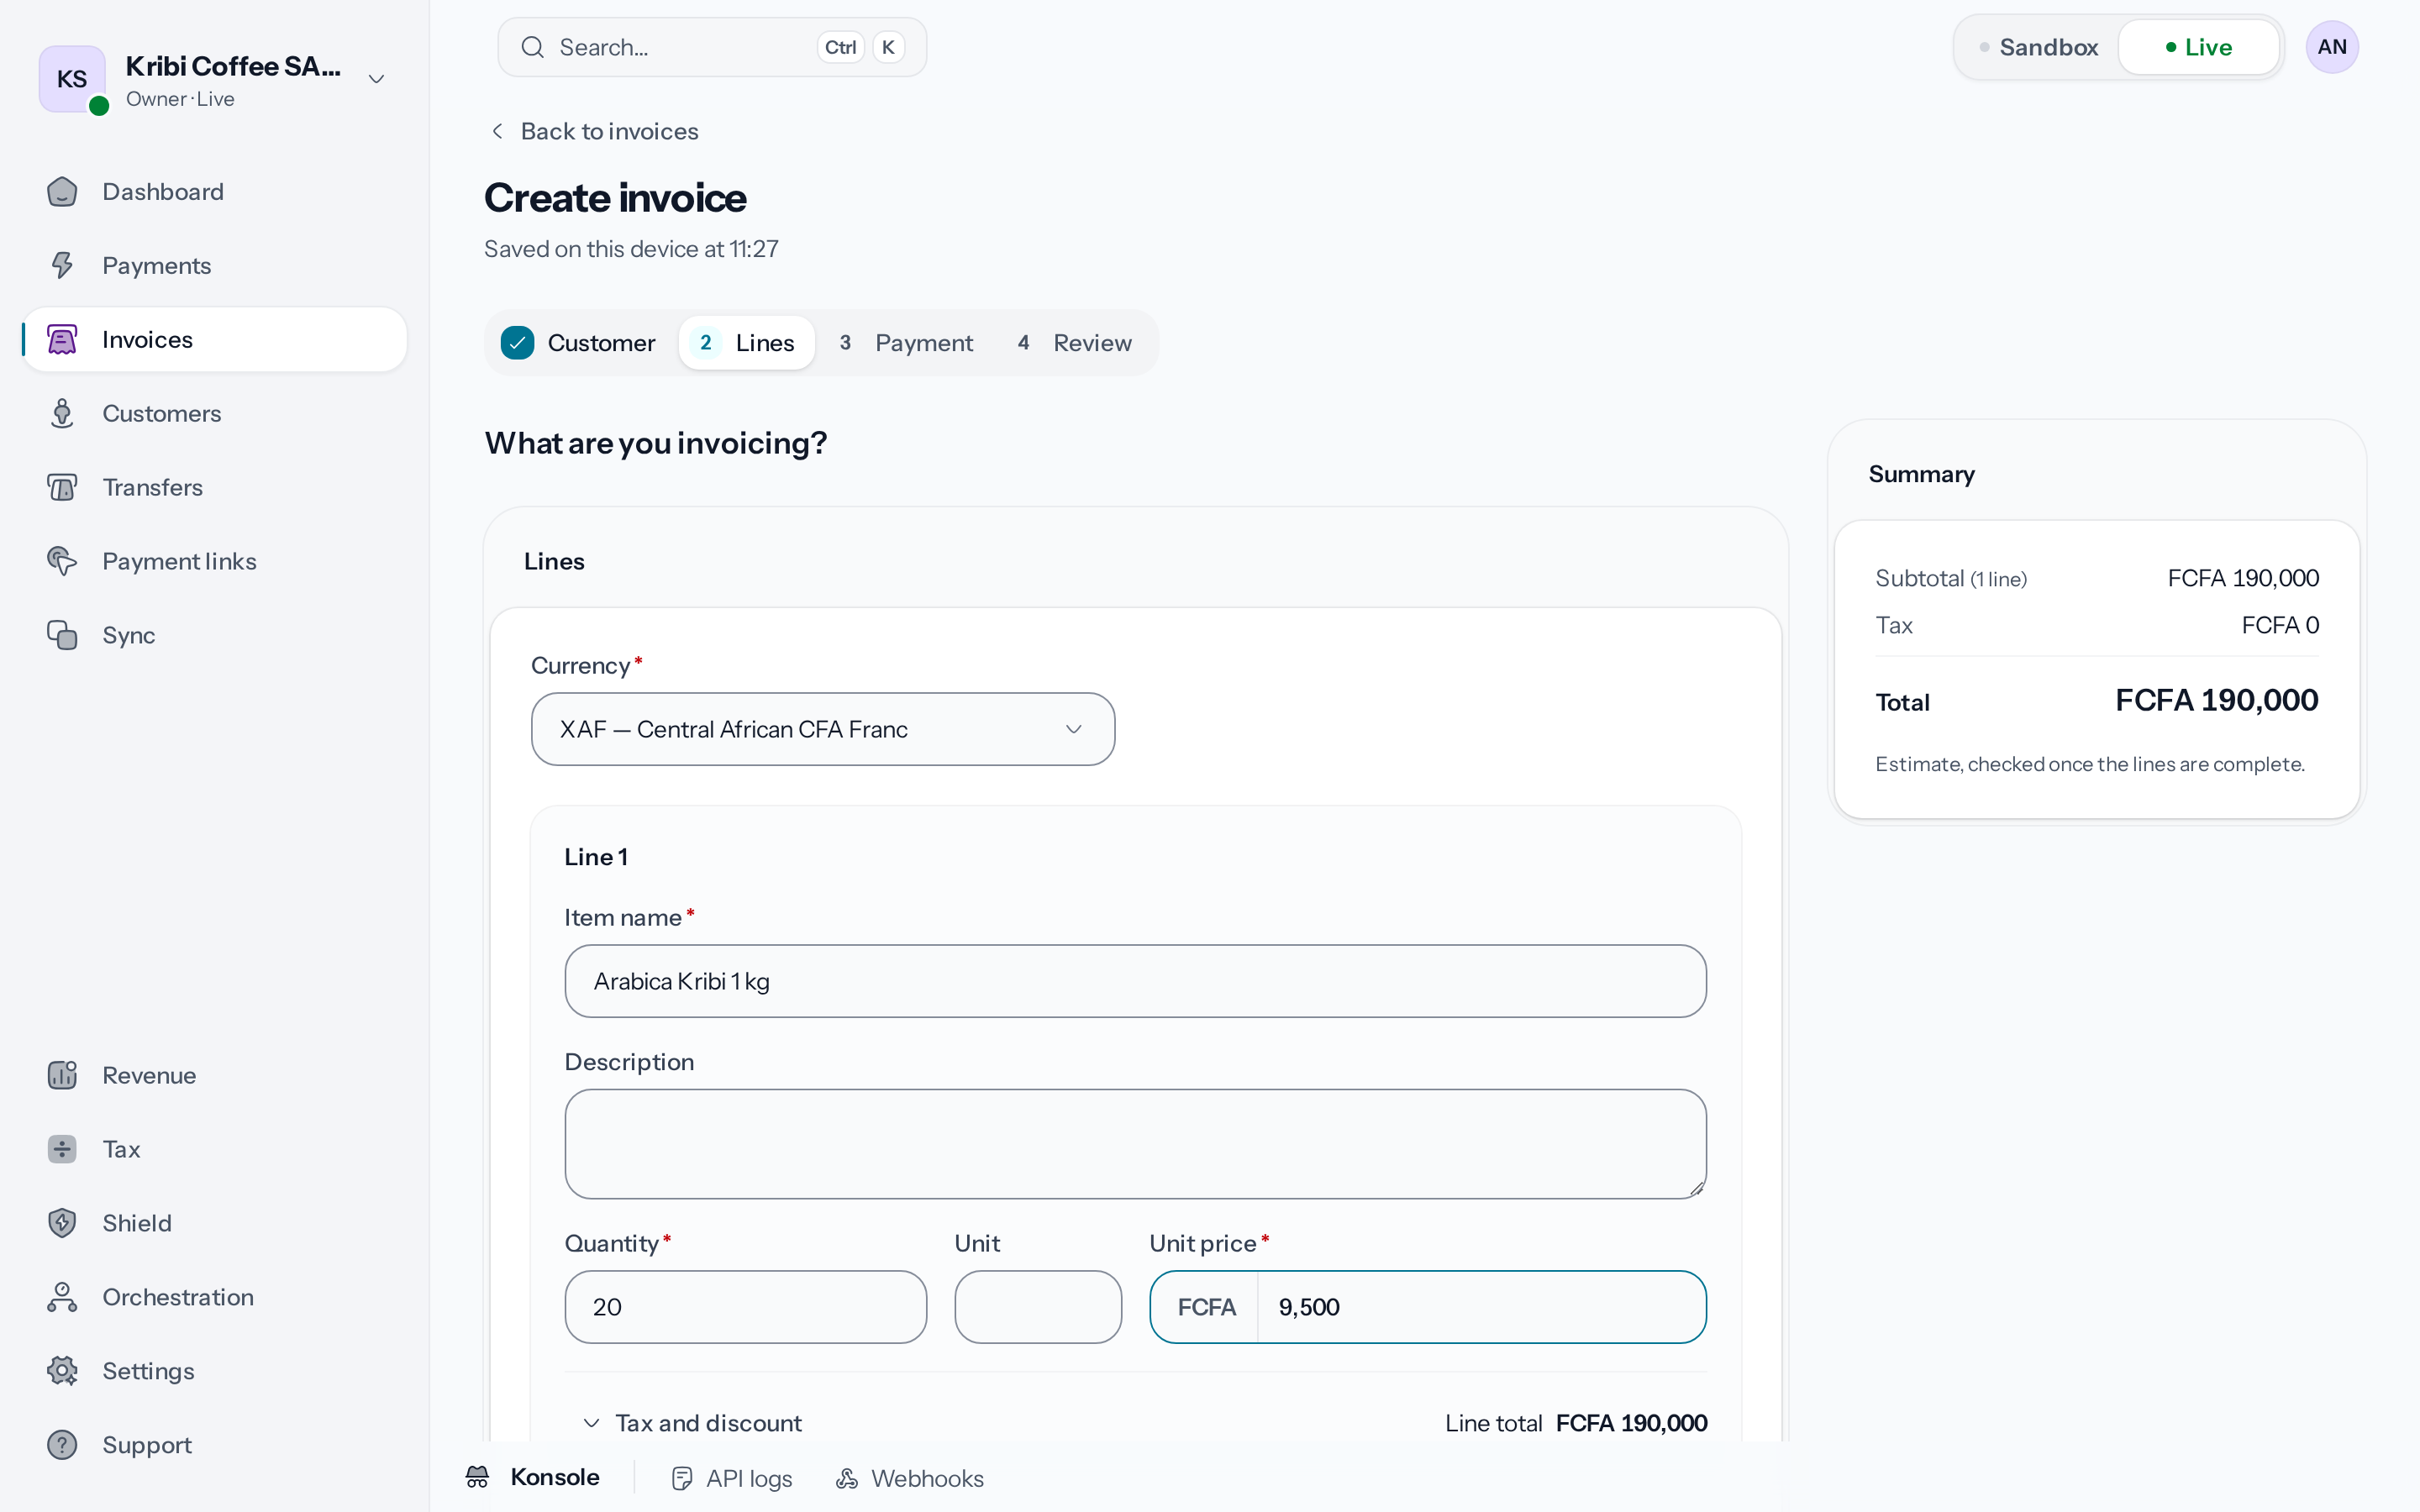
*The Summary updates with each line.*
4. **Set the payment terms**
Under **When and how is it paid?**, leave **Invoice number** empty so the invoice gets the next
number of your sequence when it is sent. The **Payment terms**, from **Due on receipt** to 90
days, work out the **Due date** from the **Invoice date**. Under **How the customer pays**,
choose **In one payment**, or **In installments** to
[split the total over 2 to 12 dates](https://docs.wajub.com/dashboard/invoices/installments).
Further down, **Recurring invoice** [issues a copy of the invoice](https://docs.wajub.com/dashboard/invoices/recurring)
on each date you choose: only the owner and Administrators see it, from the **Growth** plan up.
The **Notes**, the **Terms and conditions** and the **Footer** are printed on the invoice, and
**Payment methods** narrows the ones the customer is offered.
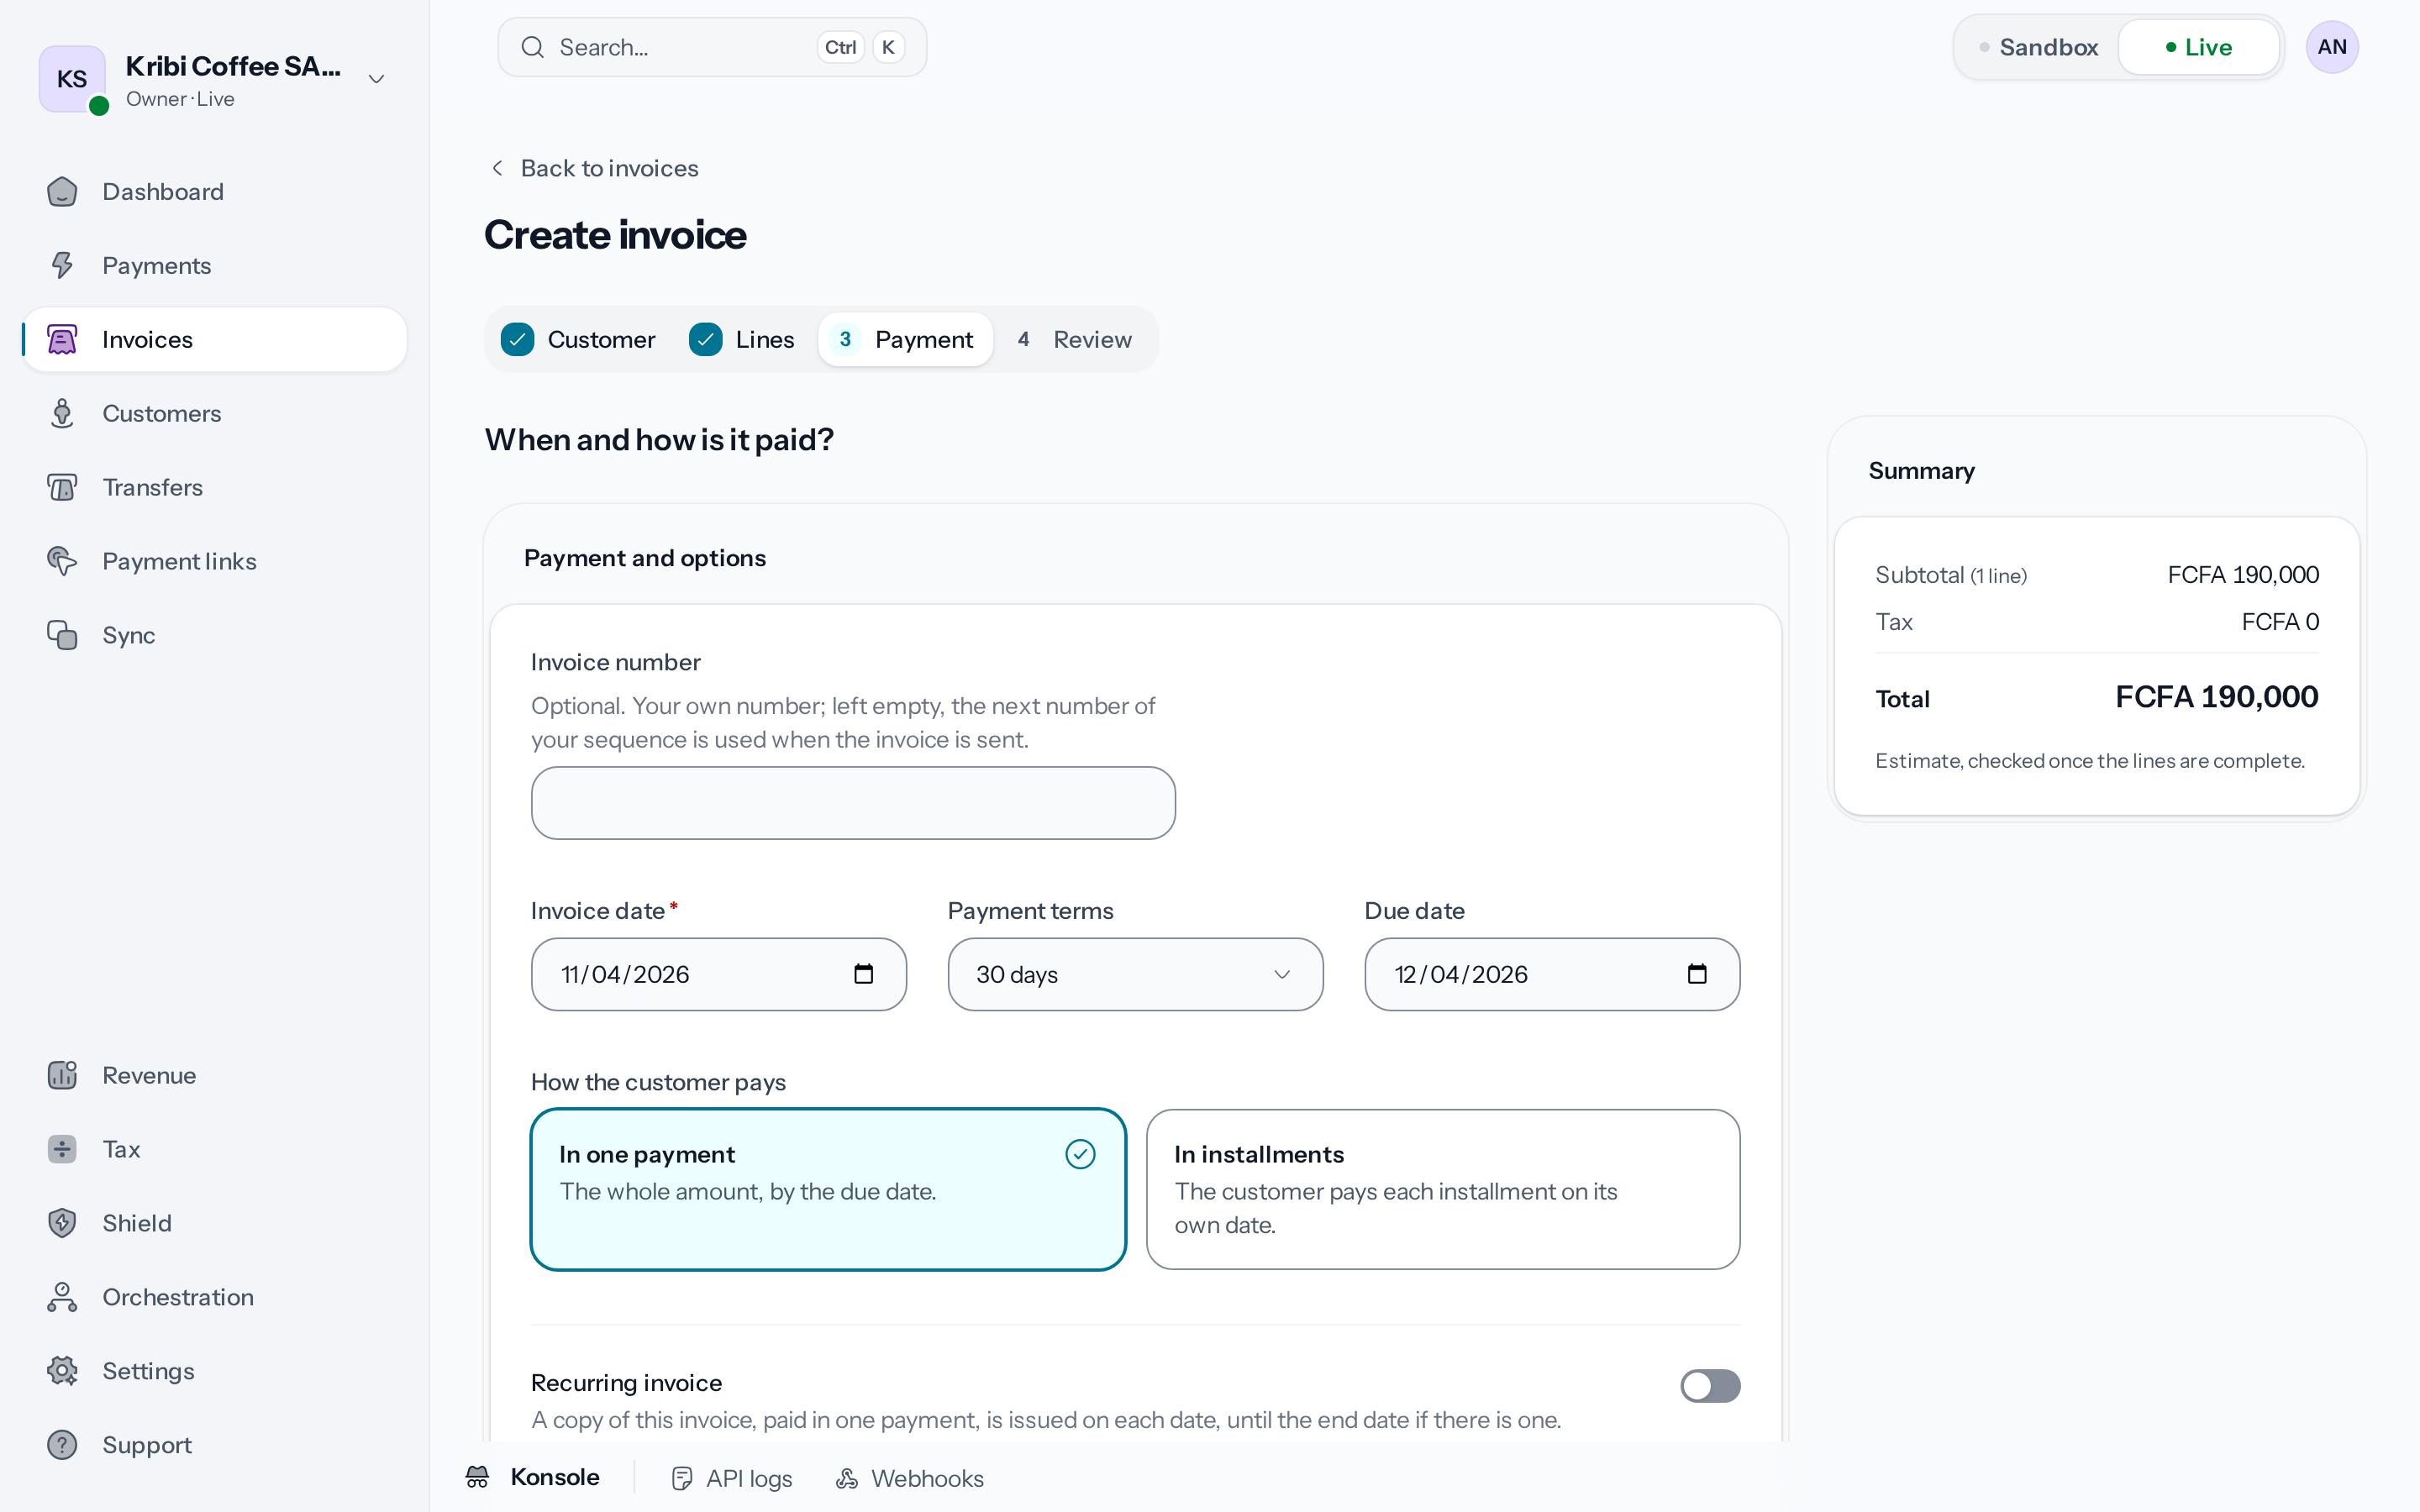
*The due date follows the payment terms.*
5. **Review, then create the invoice**
**Review the invoice** shows the customer, the lines, the payment and the total again. Under
**What happens next**, choose **Save as a draft** to keep it editable, or **Create and email
it** to send it to the customer at once. The button becomes **Save draft** or **Create and
send**.
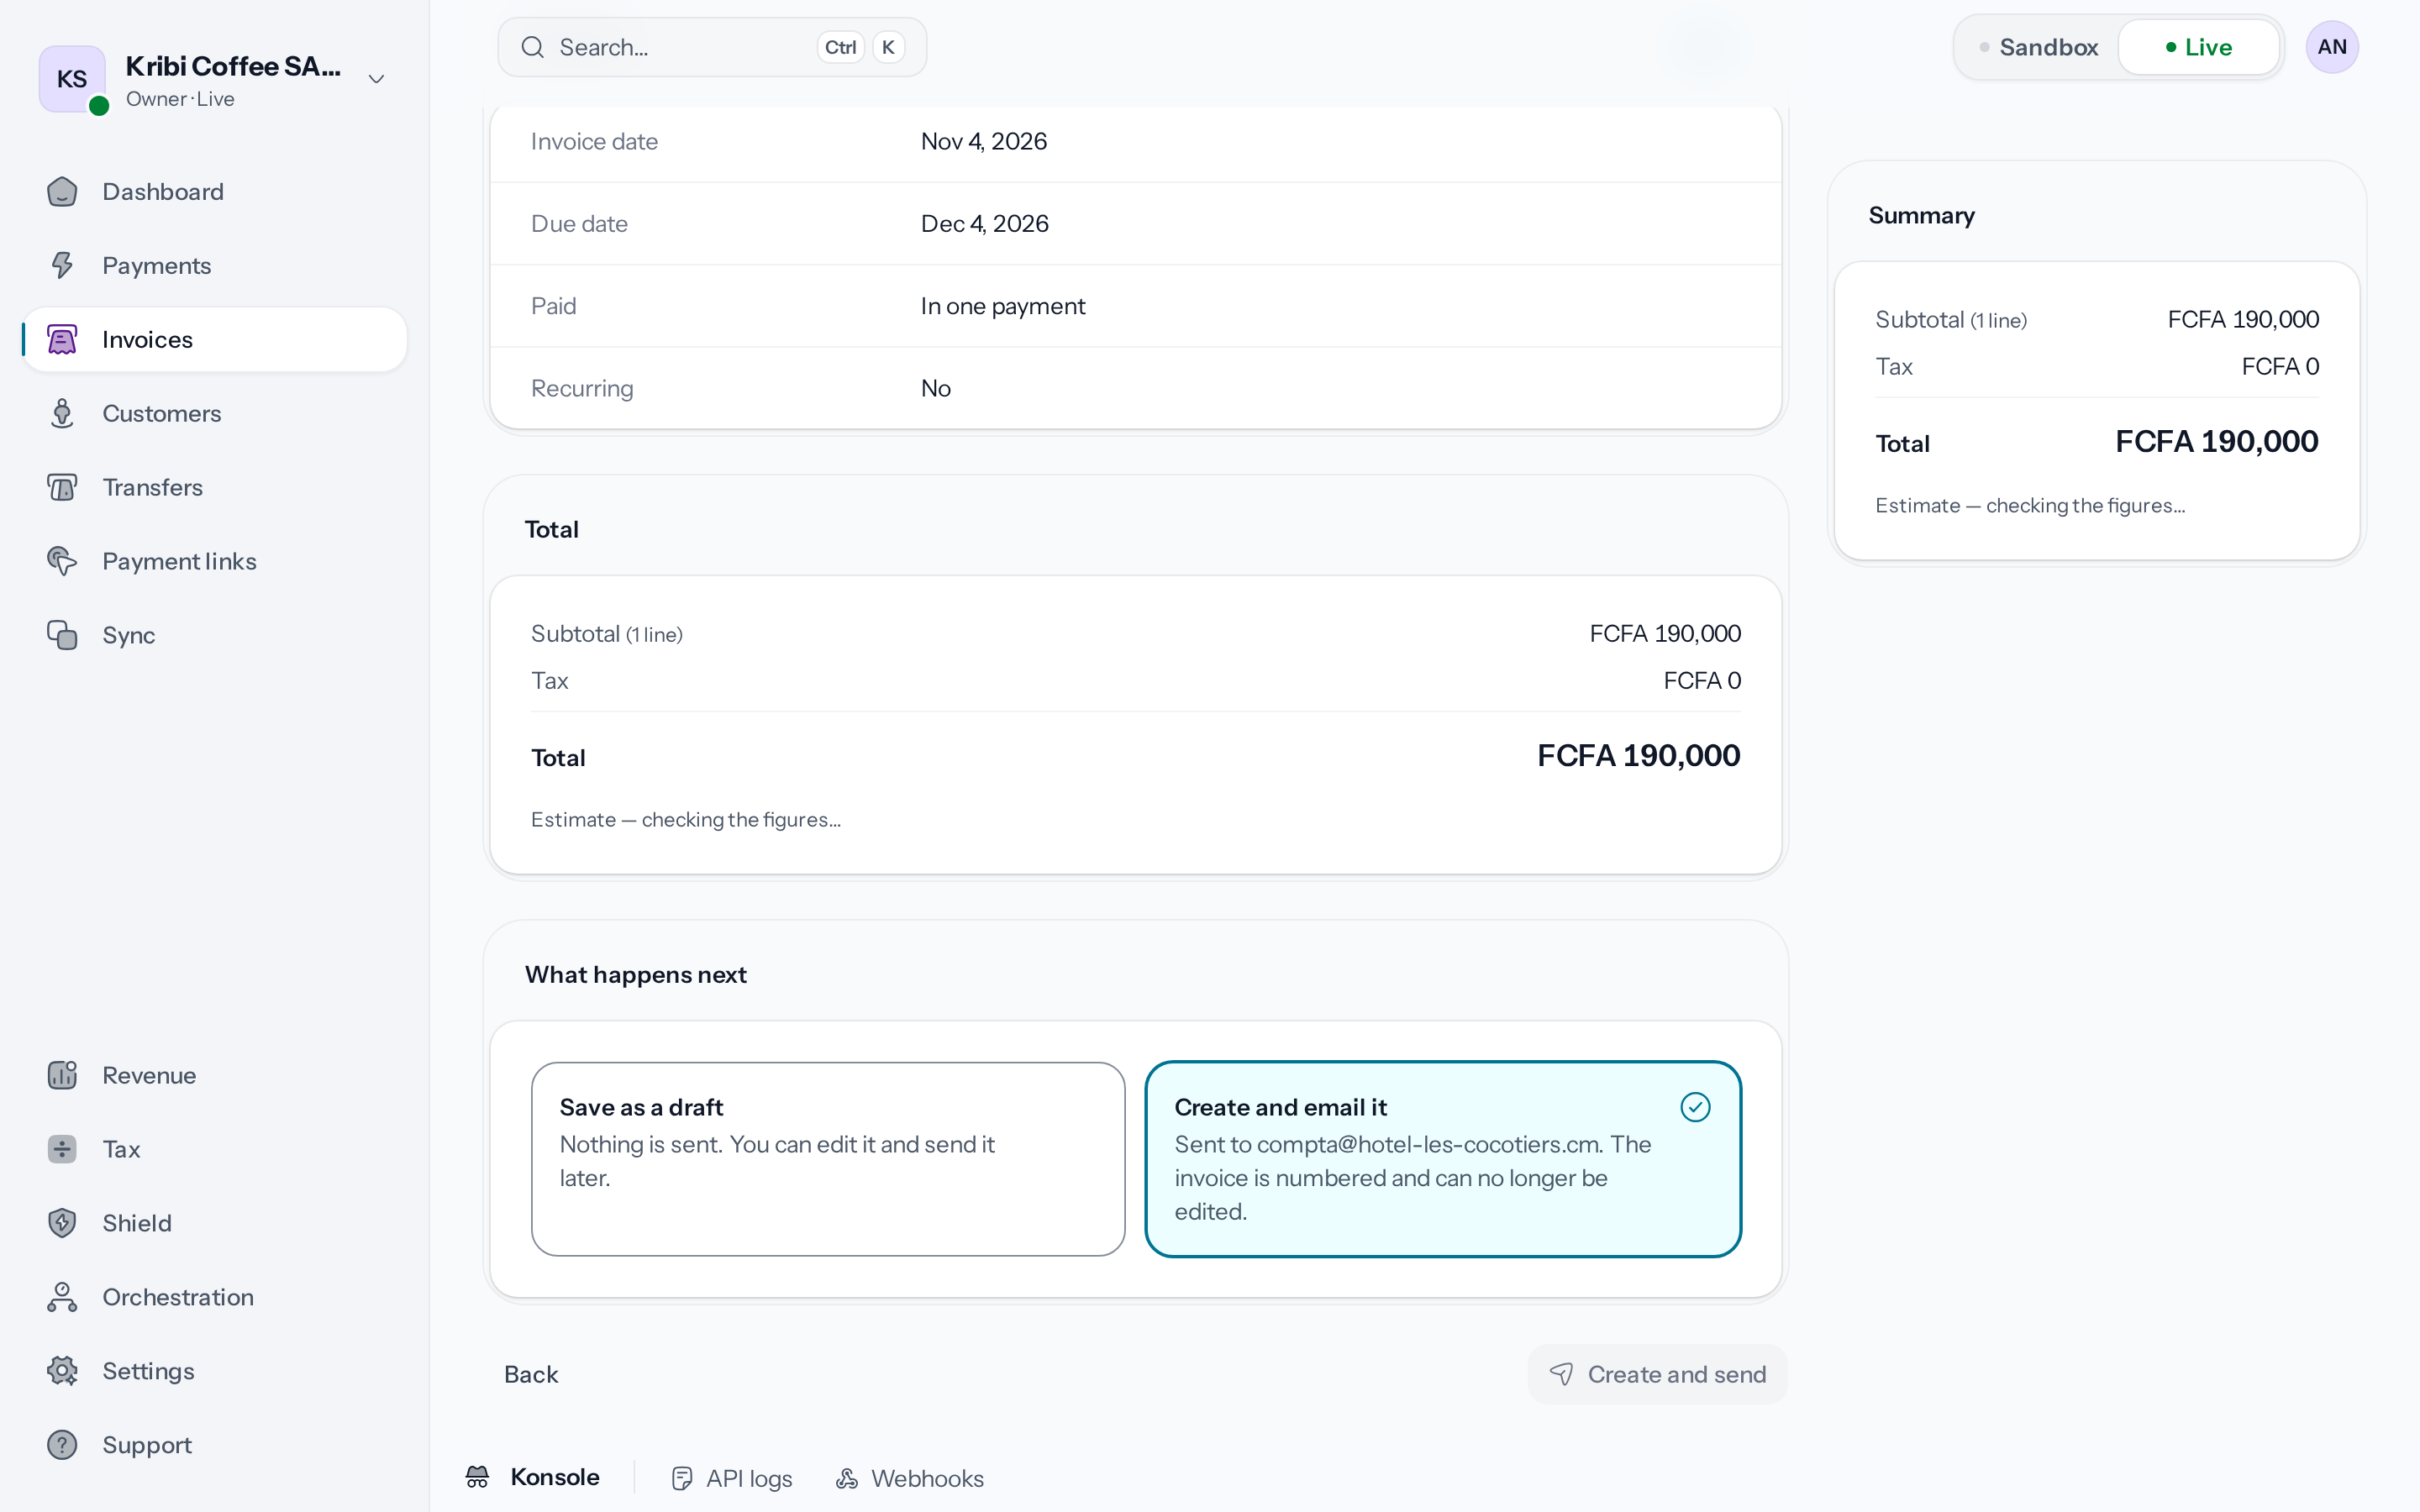
*A sent invoice gets its number and can no longer be edited.*
The invoice's page opens with **Invoice created and sent successfully**, or **Invoice created
successfully** for a draft.
## What the customer receives
The customer receives an email with the invoice as a PDF and a **Pay Online** button, which opens
its payment page on invoice.wajub.com, or on your own domain if you chose one in
[**Settings › Invoices › Invoice address**](https://docs.wajub.com/dashboard/invoices/settings#invoice-address). When
the invoice has a due date, they also receive
[email reminders](https://docs.wajub.com/dashboard/invoices/track-and-remind#automatic-reminders), which stop as soon as
it is paid or cancelled.
## After creating it
On a draft's page, **Send invoice** sends it and **Edit draft** reopens it. If the customer has no
email, **Send invoice** does not appear: edit the draft to add one, or choose **Issue without
emailing** in the menu to the right of the buttons. The invoice is then numbered without sending
anything, and you pass on the PDF or the payment link yourself.
A sent invoice can no longer be edited. **Send again** emails it again, and **Download PDF** or
**Copy payment link** let you pass it on another way. To
[correct a mistake](https://docs.wajub.com/dashboard/invoices/correct-cancel-refund#correct-a-sent-invoice), choose
**Cancel invoice** in the menu, then **Duplicate as a new draft**: an issued invoice keeps its
number and cannot be deleted.
> [!NOTE]
> **An invoice you started stays on this device**
>
> Until the invoice is created, what you enter is kept in this browser. The next time you choose
> **Create invoice**, the form offers **Pick it up** or **Discard it**. Another browser or a
> private window does not find it.
---
# Act on several invoices
URL: https://docs.wajub.com/dashboard/invoices/export-and-bulk
> Select invoices in the list to send them, cancel them, delete drafts or export them in one go, and export the whole filtered list.
From the **Invoices** list, you can send, cancel, delete or export up to 100 invoices at a time, or
export the whole list with its filters.
The owner, an Administrator, a Finance member or a custom role with **Manage invoices** sees the
selection boxes and the **Export** button. No security code is asked for. The **Pay as you go**
plan has 10 exports a month, counting every export in the dashboard, and **Growth** and the plans
above have no limit.
## Bulk actions
1. **Select the invoices**
In **Invoices**, filter the list if needed, then tick each invoice's box. A bar appears at the
bottom of the screen with the number of invoices chosen. Beyond 100, it shows "Up to 100 at a
time." and its actions stay greyed out.
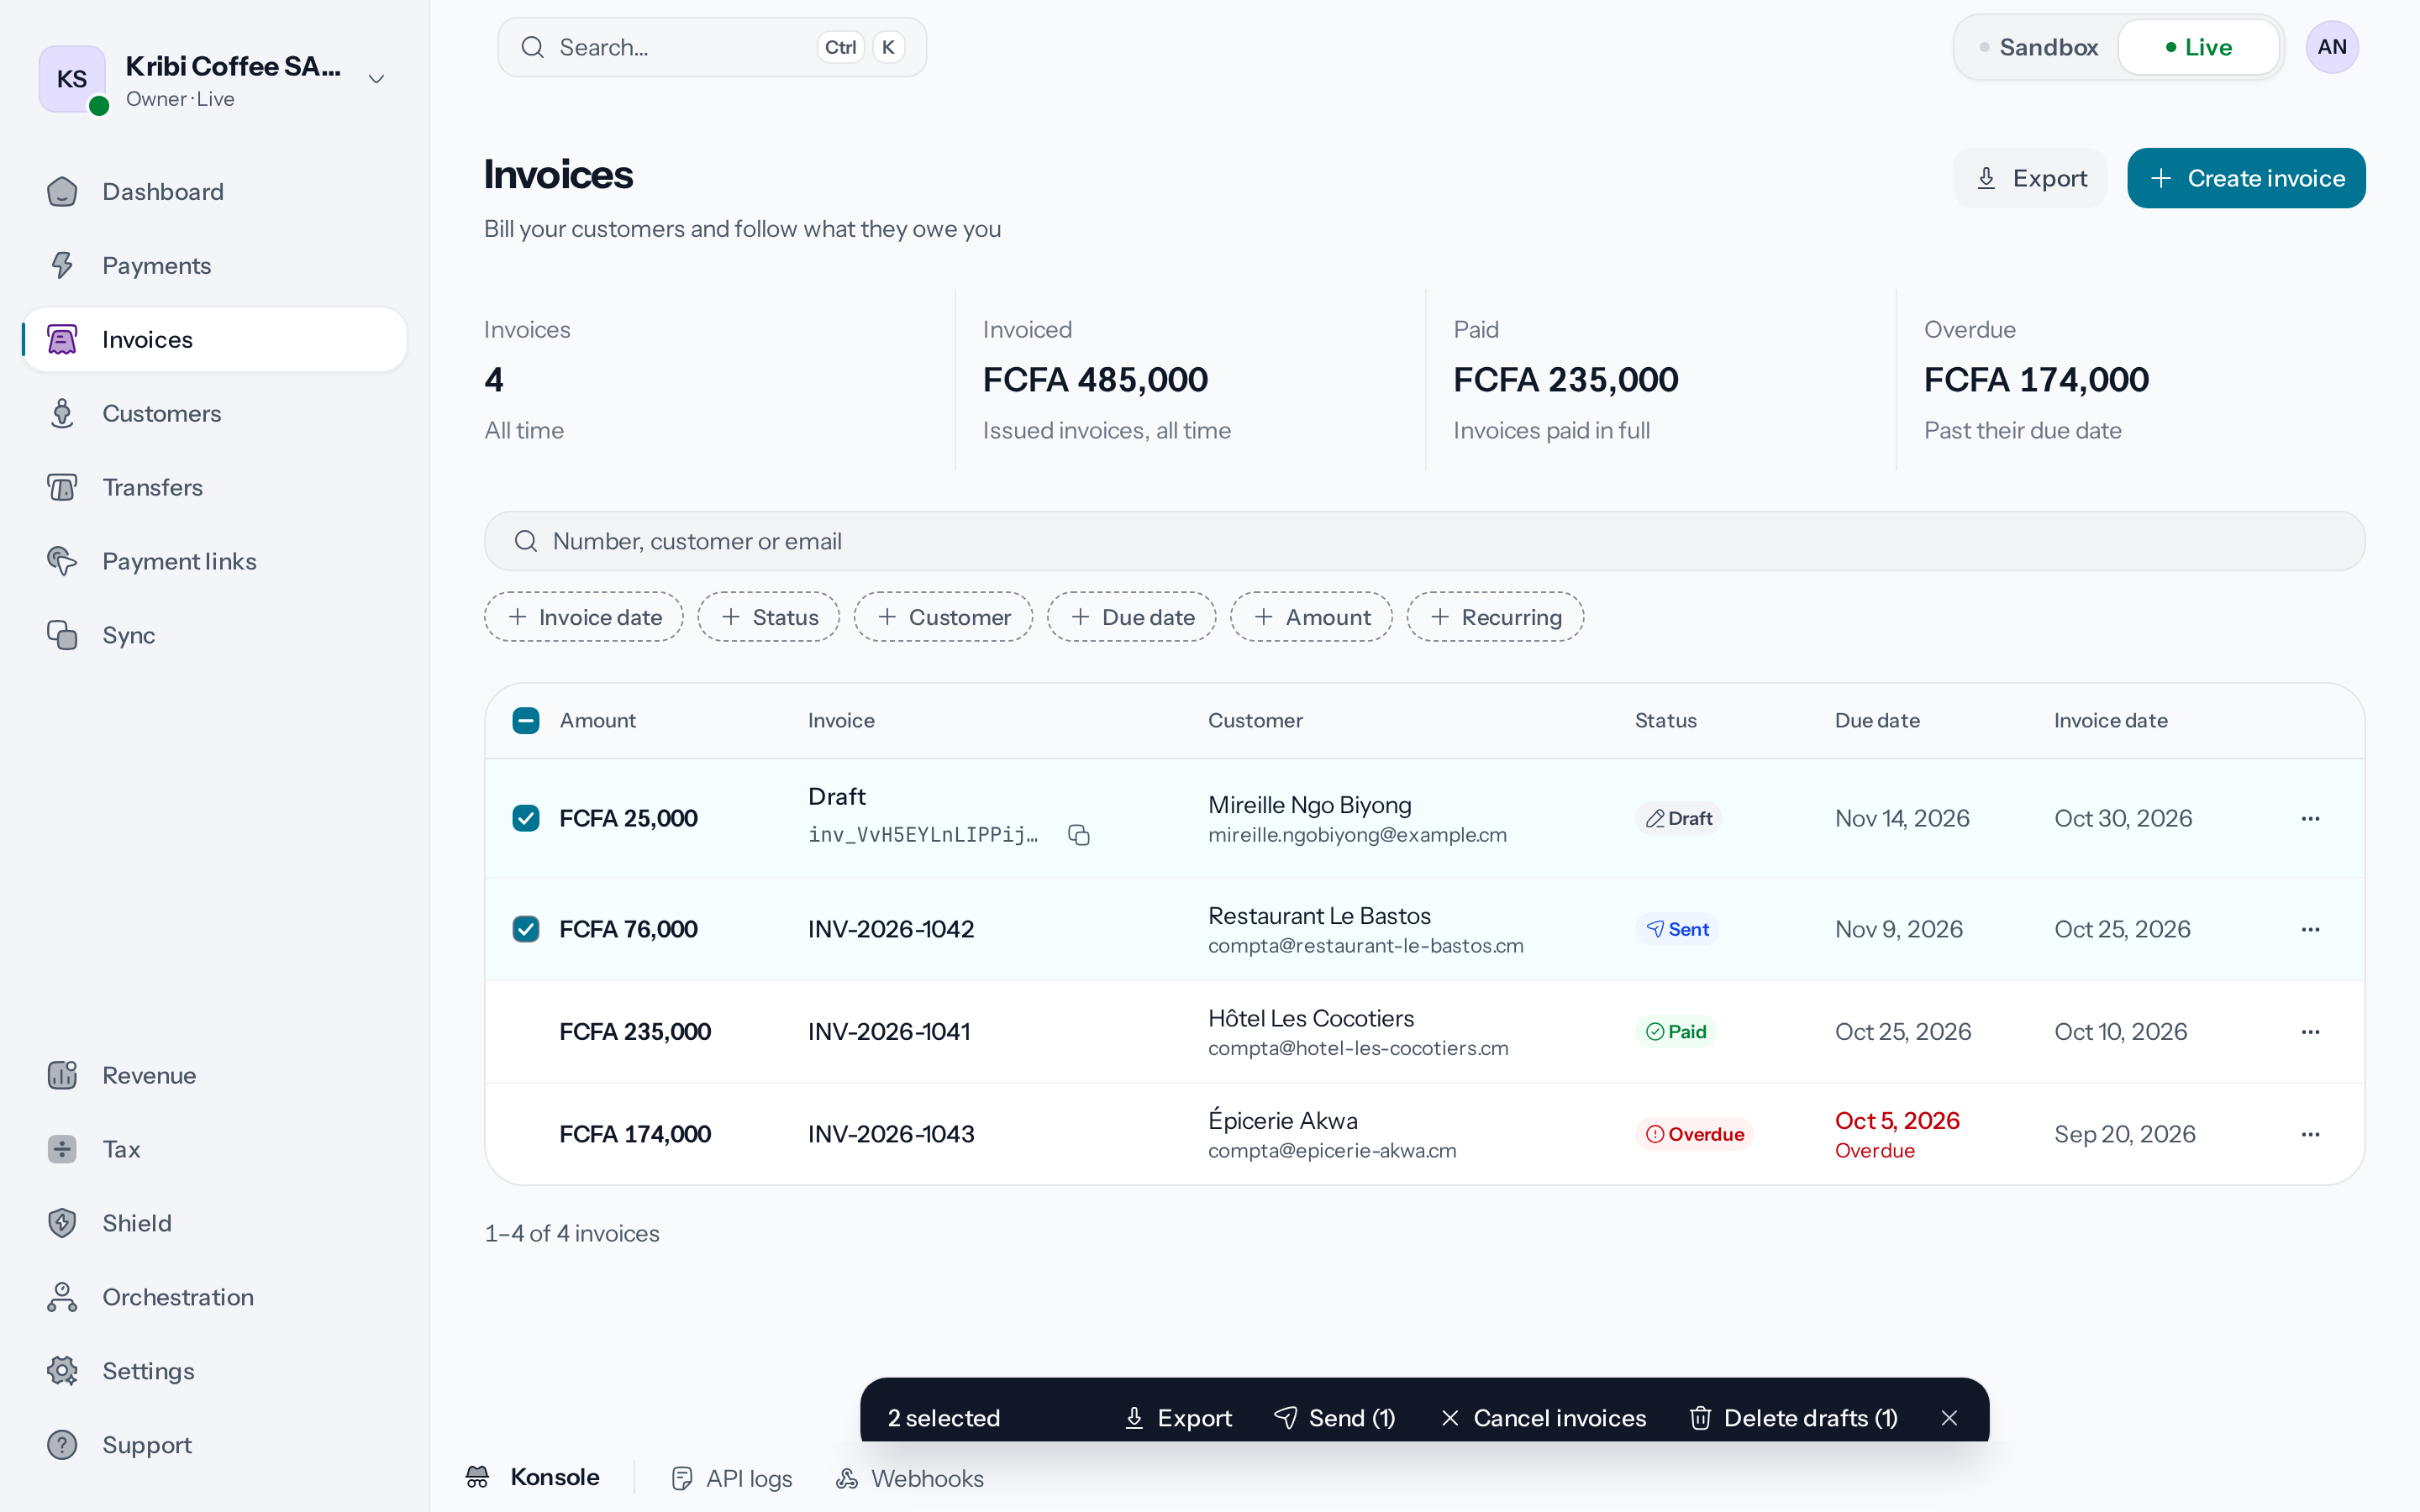
*The number in brackets is how many invoices the action applies to.*
2. **Choose the action**
The bar only offers the actions that apply to the selection, with the number concerned in
brackets when it is not every invoice chosen. **Send** numbers the drafts and emails them to the
customers who have an address, like
[sending one on its own](https://docs.wajub.com/dashboard/invoices/create#after-creating-it). **Cancel invoices**
applies to the ones that are neither paid, cancelled nor refunded: what has already been paid is
not refunded, and this is final. **Delete drafts** removes the drafts that have received no
payment.
3. **Confirm**
The dialog reminds you what the action will do, then confirm with **Send invoices**, **Cancel
invoices** or **Delete drafts**. A message gives the number of invoices processed, for example
"2 invoices processed.", and the selection clears.
## Export invoices
**Export**, at the top of the list, opens **Export invoices**: the file holds the invoices the list
shows with its filters, repeated under **Filters kept**. Choose the **Format**, **CSV**, **Excel**,
**PDF** or **JSON**, and if needed a period of invoice dates with the **Date** button under
**Period**: a preset such as **Last 30 days**, or a **Custom period**. Without a period, every date
is exported. Then **Export CSV**, **Export Excel**, **Export PDF** or **Export JSON**, depending on
the format. The file downloads, and "Your export is ready" gives its name. Credit notes are not
exported.
To export only some invoices, select them, then **Export** in the bottom bar: **Export the selected
invoices** includes only those, without a period.
Once the month's exports are used up, the dialog says so. A member with **Manage account** gets
**Upgrade plan**; the others are asked to turn to the owner of the organisation, and only **Close**
shows.
---
# Get paid in instalments
URL: https://docs.wajub.com/dashboard/invoices/installments
> Split an invoice's total over 2 to 12 instalments, each with its own date and amount, then track the ones the customer has paid.
An invoice in instalments keeps a single total, split over 2 to 12 dates: the customer pays each
instalment on its date.
You set the instalments when you [create an invoice](https://docs.wajub.com/dashboard/invoices/create), with the same
rights: the owner, an Administrator, a Finance member or a custom role with **Manage invoices**.
Every plan offers them, and no security code is asked for. Once the invoice is sent, the schedule
no longer changes.
## The steps
1. **Choose to be paid in instalments**
In the invoice form, at the **Payment** step, choose **In installments** under **How the
customer pays**. Two instalments appear, each with half the total: the first on the **Invoice
date**, the second 30 days later.
2. **Set the number of instalments**
Choose from 2 to 12 instalments in **Number of installments**. Each instalment you add falls 30
days after the one before, and the total is split equally again.
3. **Adjust the dates and amounts**
Change the **Due date** and the **Amount** of each instalment. The last one takes what is left
of the total: its amount is worked out by itself, and **Split equally** brings back equal
amounts. Each instalment falls on or after the invoice date, and not before the one before it.
If the amounts go over the total, a message asks you to lower one.
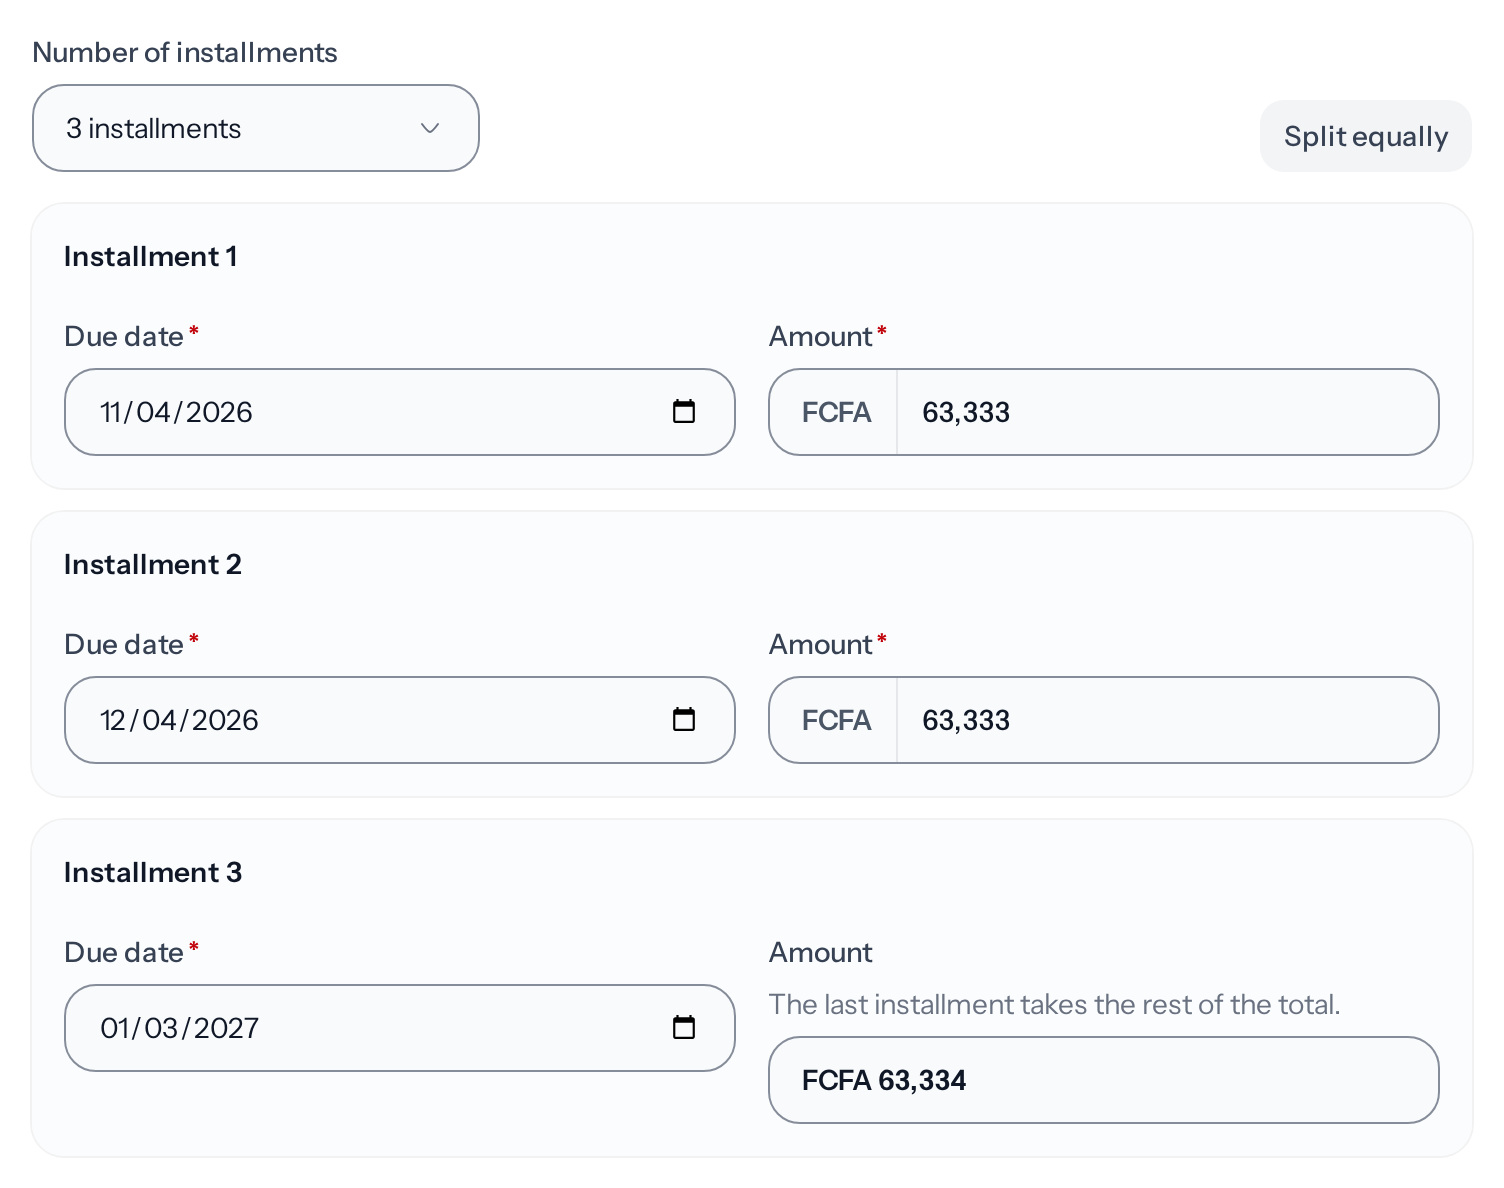
*The last instalment takes what is left of the total.*
4. **Create the invoice**
The invoice's **Due date** becomes the last instalment's: the **Overdue** status and the
reminders follow that date. Continue to **Review**, then save the draft or send the invoice.
## Track the instalments
On the invoice's page, the **Installments** section shows how many are paid, for example "1 of 3
installment paid", then each instalment with its date, its amount and its status: **Paid**,
**Pending** or **Overdue**. As soon as one instalment is paid, the invoice moves to **Partially
paid**, then to **Paid** with the last one.
A payment received outside Wajub and [recorded by hand](https://docs.wajub.com/dashboard/invoices/record-payment) settles
the instalments in order.
## What the customer sees
On their payment page, the customer pays one instalment at a time, the first one still to be paid.
---
# Record a payment received
URL: https://docs.wajub.com/dashboard/invoices/record-payment
> Add a payment received outside Wajub, in cash or by bank transfer, to an invoice, for the whole balance or part of it, or mark the invoice as paid in one click.
When a customer pays you outside Wajub, in cash or by bank transfer, record that payment on their
invoice: the amount due goes down, and nothing is charged to the customer.
The owner, an Administrator, a Finance member or a custom role with **Manage invoices** can record a
payment, on every plan. No security code is asked for.
## The steps
1. **Open the invoice**
In **Invoices**, open the invoice. **Record payment** appears at the top as long as an amount is
still due, even on a draft, for a customer who pays before it is sent.
2. **Choose the amount received**
Click **Record payment**: the **Record a payment** dialog opens. Under **Amount received**,
choose **The whole balance**, or **Part of it** and enter the **Amount**, up to the amount due.
3. **Date the payment**
**Received on** suggests today's date: change it if the money arrived earlier, but not before
the invoice was created. **Payment method** and **Notes** are optional, and only your members
can see the notes.
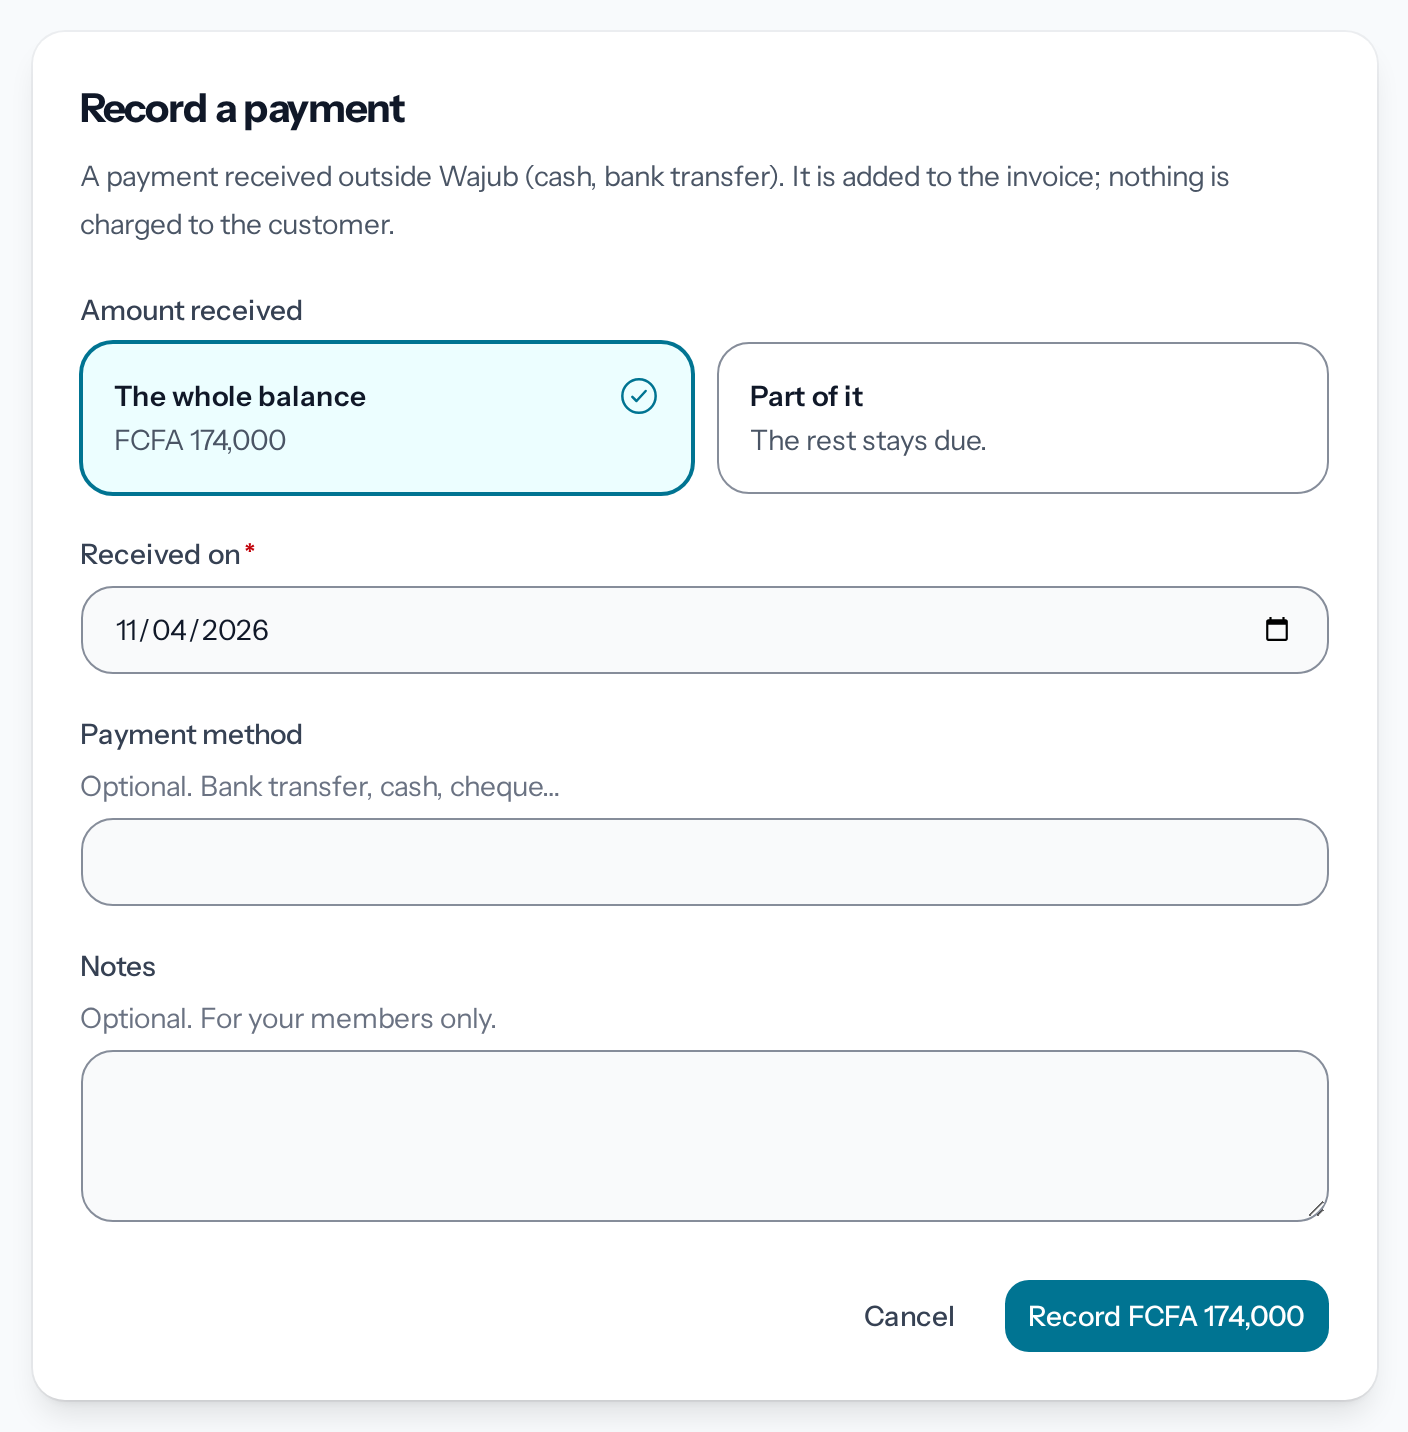
*The button repeats the amount recorded.*
4. **Record the payment**
The button repeats the amount, for example "Record FCFA 174,000". For the whole balance, the
invoice moves to **Paid** with **Invoice marked as paid**. For part of it, it moves to
**Partially paid** with "Payment recorded. The rest of the invoice is still due.". The payment
appears in **History**, with its method and notes.
On an invoice in instalments, the payment settles the
[instalments](https://docs.wajub.com/dashboard/invoices/installments#track-the-installments) in order.
## Mark as paid
On a sent invoice, **Mark as paid** records the whole amount due in one go, received outside Wajub
and dated today. Confirm in **Mark this invoice as paid?**: the invoice moves to **Paid**.
## What the customer sees
The customer receives no message: their payment page only asks them for what is still due.
---
# Create a recurring invoice
URL: https://docs.wajub.com/dashboard/invoices/recurring
> Have a copy of an invoice prepared every day, week, month, quarter or year, send it once checked, and stop the series when it is no longer needed.
A recurring invoice prepares a new invoice for the same customer each period, with the same lines:
you check it, then you send it.
Only the owner and Administrators can make an invoice recurring, from the **Growth** plan up: for
everyone else, the option does not appear in the form. Anyone who can
[create an invoice](https://docs.wajub.com/dashboard/invoices/create) can stop a series. No security code is asked for.
## The steps
1. **Start an invoice**
Open **Invoices**, then **Create invoice**, and fill in the customer and the lines as for
[a one-off invoice](https://docs.wajub.com/dashboard/invoices/create). Enter the customer's **Email**: without it, no
copy can be sent to them. A customer entered with neither an email nor a phone number does not
join your directory, and no copy is prepared.
2. **Turn on Recurring invoice**
At the **Payment** step, further down, turn on **Recurring invoice**. Three fields appear:
**Frequency**, **First copy on** and **Last copy by**.
3. **Choose how often**
Choose the **Frequency**, from **Every day** to **Every year**. Without **First copy on**, the
first copy arrives one period after the **Invoice date**. Without **Last copy by**, the series
goes on until you stop it.
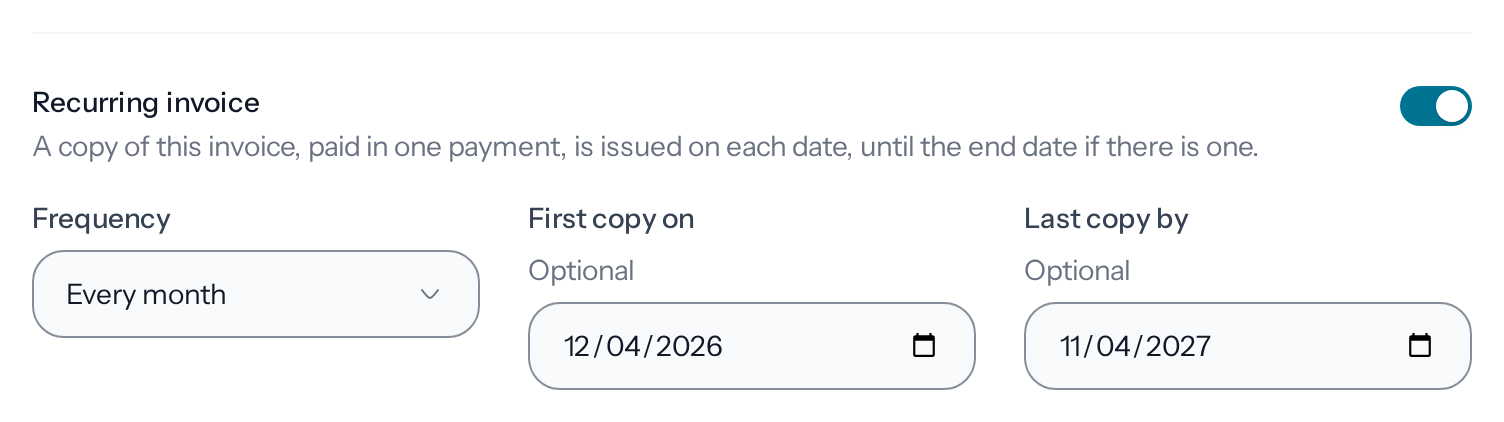
*Both dates are optional.*
4. **Create the invoice**
Finish with **Review**, then create the invoice. On its page, **Invoice details** shows
**Recurring** with the frequency and the date of the next copy.
## Each copy
On each date, a new invoice appears in **Invoices** as a **Draft**, dated that day, with the lines,
the currency and the notes of the original invoice, and the customer as they are in your directory
at that time. Nothing goes out by itself: filter the list on the **Status** **Draft**, check each
copy, then **Send invoice**. If a copy fails to be prepared, a notification lets you know.
If your plan no longer includes recurring invoices, the copies pause, and start again when you move
back to [**Growth** or above](https://docs.wajub.com/dashboard/subscription/plans).
## Stop the series
On the original invoice's page, choose **Stop recurring** in the menu to the right of the buttons,
then confirm. No more copies are prepared, the ones already created stay as they are, and
**Recurring** leaves **Invoice details**. The option only exists on the original invoice, not on
its copies. [Cancelling the original invoice](https://docs.wajub.com/dashboard/invoices/correct-cancel-refund) stops the
series too.
---
# Set up invoices
URL: https://docs.wajub.com/dashboard/invoices/settings
> Choose the address where customers open their invoices, the numbering, and the payment terms, the way to pay and the currency of each new invoice.
**Settings › Invoices** holds your invoices' address, their numbering, what each new invoice
starts with and the reminders sent to your customers.
The owner, an Administrator or a custom role with **Manage settings** changes these settings. No
security code is asked for.
## Invoice address
The **Domain** is the address where your customers open and pay their invoices: by default
"Wajub's address (invoice.wajub.com)". To use your own,
[add and verify a domain](https://docs.wajub.com/dashboard/settings/custom-domains) for invoices, then choose it in the
list.
## Numbering
An invoice gets its number when it is sent: drafts have none. Choose the **Prefix** (letters,
digits, hyphens and underscores), the **Format**, with or without the year, and the **Next
number**. **Next invoice number** shows the result, for example INV-2026-0001. A number already
given is skipped.
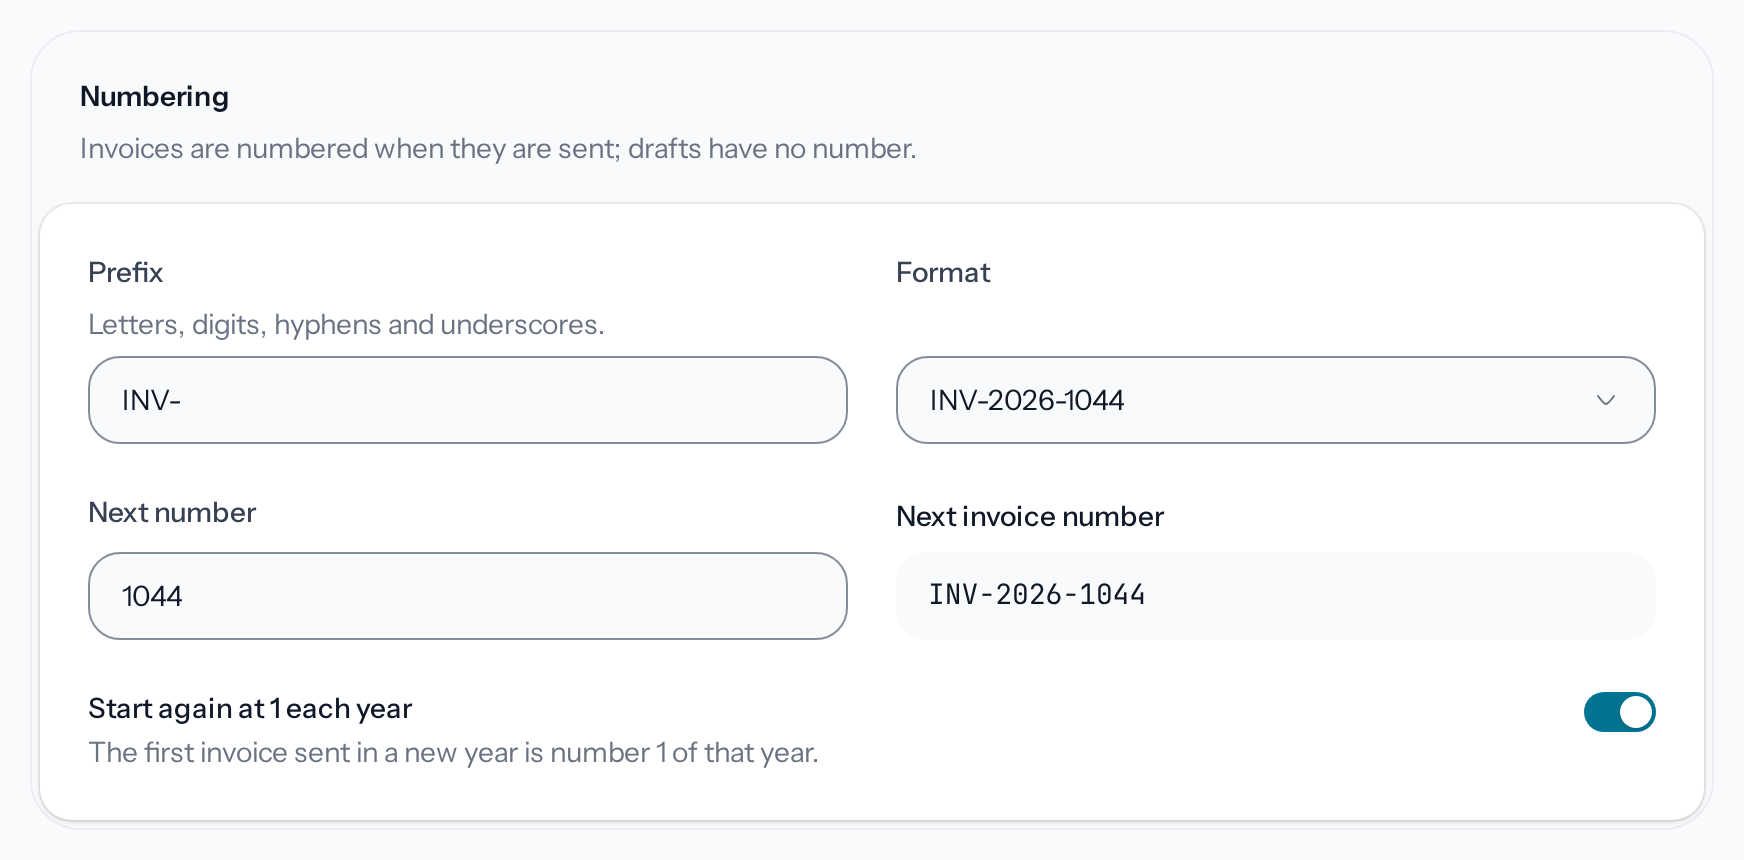
*The preview follows the prefix, the format and the next number.*
With a format that shows the year, **Start again at 1 each year** gives number 1 to the first
invoice sent in a new year. The prefix cannot be the credit notes' one, AV-, so that invoices and
credit notes each keep their own sequence.
## Payment
These values fill in each new invoice, which can change them. The **Payment terms (days)**, from 1
to 365, set the due date after the invoice date. **How customers pay** chooses the way to pay that
is offered, and **Currency** the starting currency.
## Reminders
**Send reminders automatically** emails your customers about their invoices still due, for the
invoices that have a due date, until they are paid in full or cancelled. Once it is on, tick the
days under **Before the due date** and **After the due date**: 1, 3, 7 or 14 days. Until you save
your own choice, the form shows the switch on, with 7, 3 and 1 days before the due date and 1 and 7
days after. Each reminder shows in the invoice's [**History**](https://docs.wajub.com/dashboard/invoices/track-and-remind#automatic-reminders).
## Save
A bar appears at the bottom as soon as a setting changes: **Save changes** saves every section you
changed, and **Discard** puts them back as they were. If a field is refused, it shows in red with
the reason.
---
# Track and chase an invoice
URL: https://docs.wajub.com/dashboard/invoices/track-and-remind
> Find an invoice, read its status and what is left to pay, follow the reminders sent to the customer and send them the invoice again.
The **Invoices** list and each invoice's page show what your customers have paid and what they still
owe. The customer is reminded by email, and you can send them the invoice again at any time.
Every role that reads invoices ([Roles](https://docs.wajub.com/dashboard#roles)) can track their status. **Send again**
needs **Manage invoices**, like [creating one](https://docs.wajub.com/dashboard/invoices/create). No security code is
asked for.
## Find an invoice
At the top of **Invoices**, four figures sum up the activity: **Invoices**, **Invoiced**, **Paid**
and **Overdue**. Look up an invoice in the **Number, customer or email** field,
and filter by **Invoice date**, **Status**, **Customer**, **Due date**, **Amount** or
**Recurring**. Credit notes are not in the list: they are on their invoice's page.
| Status | What it means |
| ------------------ | ------------------------------------------------------------------- |
| **Draft** | Not sent yet: no number, still editable. |
| **Sent** | Numbered and payable, not opened by the customer yet. |
| **Viewed** | The customer opened their payment page. |
| **Partially paid** | Part of it is paid, the rest is due. |
| **Paid** | Paid in full. |
| **Overdue** | The due date has passed and an amount is still due. |
| **Cancelled** | The customer can no longer pay it. |
| **Refunded** | What was paid online is refunded in full, or credit notes cover it. |
## Read the invoice page
At the top, the page gives the customer, the **Due date** and the **Amount due**. An overdue invoice
shows **This invoice is overdue**, with the amount and the date it was due. On the right,
**Payment** splits the total between what is paid, credited and due, and **Payment link** gives the
payment link, with **Copy**.
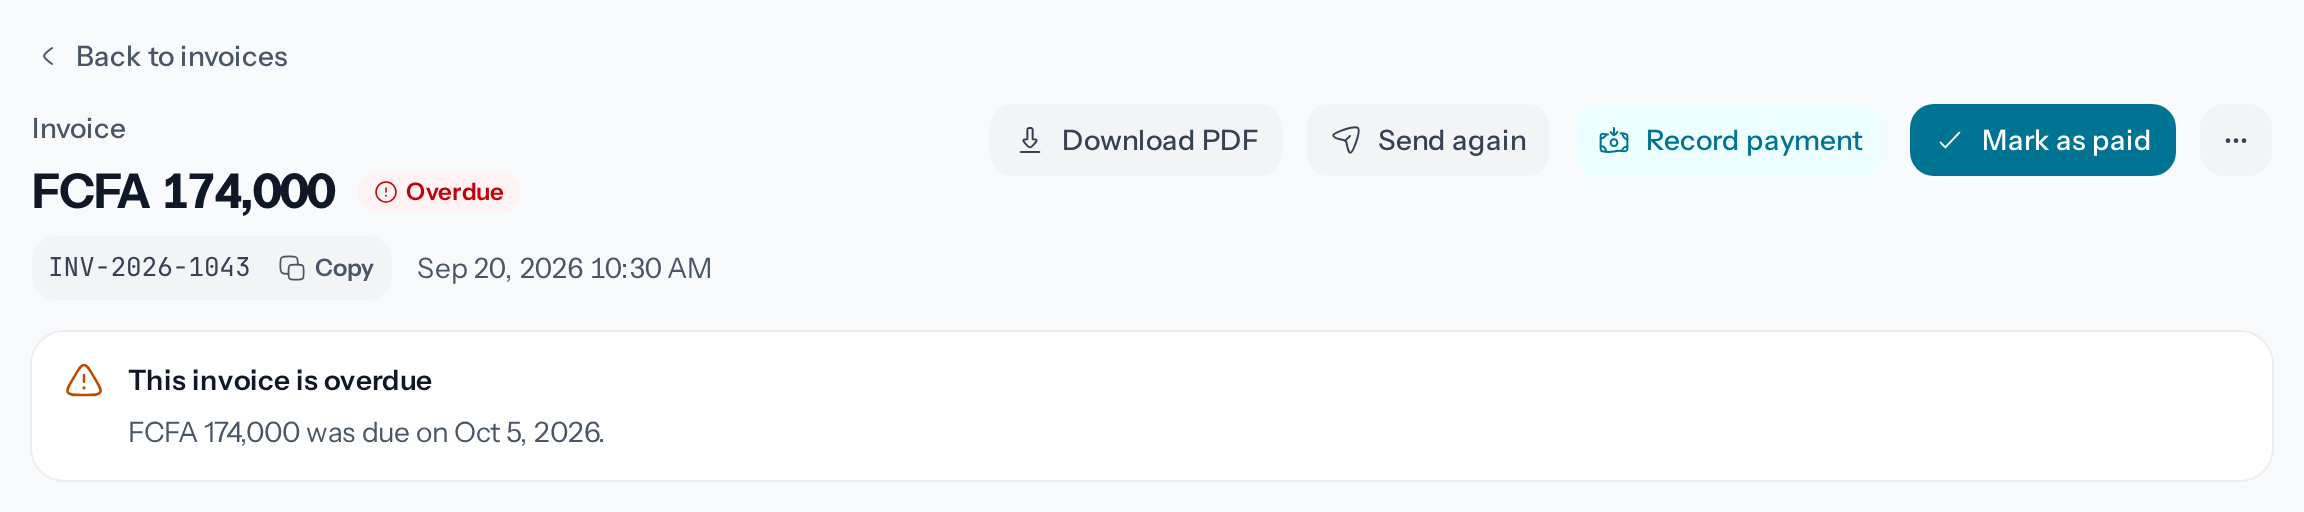
*An overdue invoice says so below its header.*
**History** traces the payments, the reminders and each version of the invoice, from oldest to
newest. **Download CSV** exports its payments.
## Automatic reminders
When a sent invoice has a due date, the customer receives email reminders on the days set under
[**Reminders**](https://docs.wajub.com/dashboard/invoices/settings#reminders) in **Settings › Invoices**, until it is paid
in full or cancelled. After a partial payment, they keep going for what is left to pay. Each
reminder, scheduled or sent, appears in **History** with its type and status. For an invoice in instalments,
the reminders follow the [last instalment](https://docs.wajub.com/dashboard/invoices/installments).
## Send it again
On the page of an invoice that is sent and not yet paid, **Send again** emails the invoice to the
customer once more. The dialog shows their address; confirm with **Send again**, and **Invoice email
resent successfully** appears. Nothing else changes on the invoice.
To pass it on another way, use **Download PDF**, at the top of the page, or **Copy payment link**,
in the menu to the right of the buttons.
---
# Create an alert
URL: https://docs.wajub.com/dashboard/orchestration/alerts
> Warn your members by email when the success rate, volume or webhooks of your payments cross a threshold, or a provider's acceptance falls below its usual level, then follow the alerts that fired.
An alert watches an indicator of your payments and warns your members by email when it crosses a
threshold, for example a drop in the success rate on MTN Mobile Money.
The owner, an Administrator, a Developer or a custom role with **Manage settings** or **Manage
developer settings** creates alerts; **View settings** is enough to read them. Alerts are part of
every plan, except **Acceptance below its usual level**, which comes with the **Growth**, **Scale**
and **Enterprise** plans. They only watch [Live](https://docs.wajub.com/dashboard#sandbox-and-live). No security code is
asked for.
## The steps
1. **Open the dialog**
In **Live**, open **Orchestration**, the **Alerts** tab, then **Create alert**. The **Create
alert** dialog opens.
2. **Name the alert**
Enter a **Name** your members will recognise in the email, for example "MTN Cameroon success
rate".
3. **Choose the indicator**
Under **Metric**, choose what the alert measures, such as the **Success rate**, the **Error
rate**, the **Transaction count**, the **Volume**, the **Webhook delivery rate**, the
**Webhook failure count**, the **Funnel abandonment rate** or **Acceptance below its usual
level**, which warns you when a provider accepts fewer payments on a channel than it usually
does. On another plan, that one shows **Not in your plan**.
4. **Set the threshold**
Set the **Condition**, for example "drops below", the **Threshold**, then the **Window** over
which the indicator is calculated: 5 minutes, 15 minutes, 1 hour or 24 hours. For
**Acceptance below its usual level**, set instead the **Drop of at least**, in points below the
usual level, and the **Minimum attempts** under which nothing is compared.
5. **Choose what it watches**
Under **What it watches**, keep **Every payment**, or limit the alert to **One provider**,
**One channel** or **One routing rule**. Only the success rate, error rate, transaction count
and volume can be limited this way; the webhook and abandonment alerts cover your whole
account. **Acceptance below its usual level** watches **Every provider and channel**, **One
provider** or **One channel**.
6. **Choose the recipients**
Under **Recipients**, you are already listed; click **Add more** to choose other members: only
the members of your organisation can receive the email. With no recipient, the alert is only
recorded on the page. The **Cooldown**, from 5 to 1,440 minutes, keeps it from firing again
too soon; for **Acceptance below its usual level**, it counts for each provider and channel,
once it has recovered.
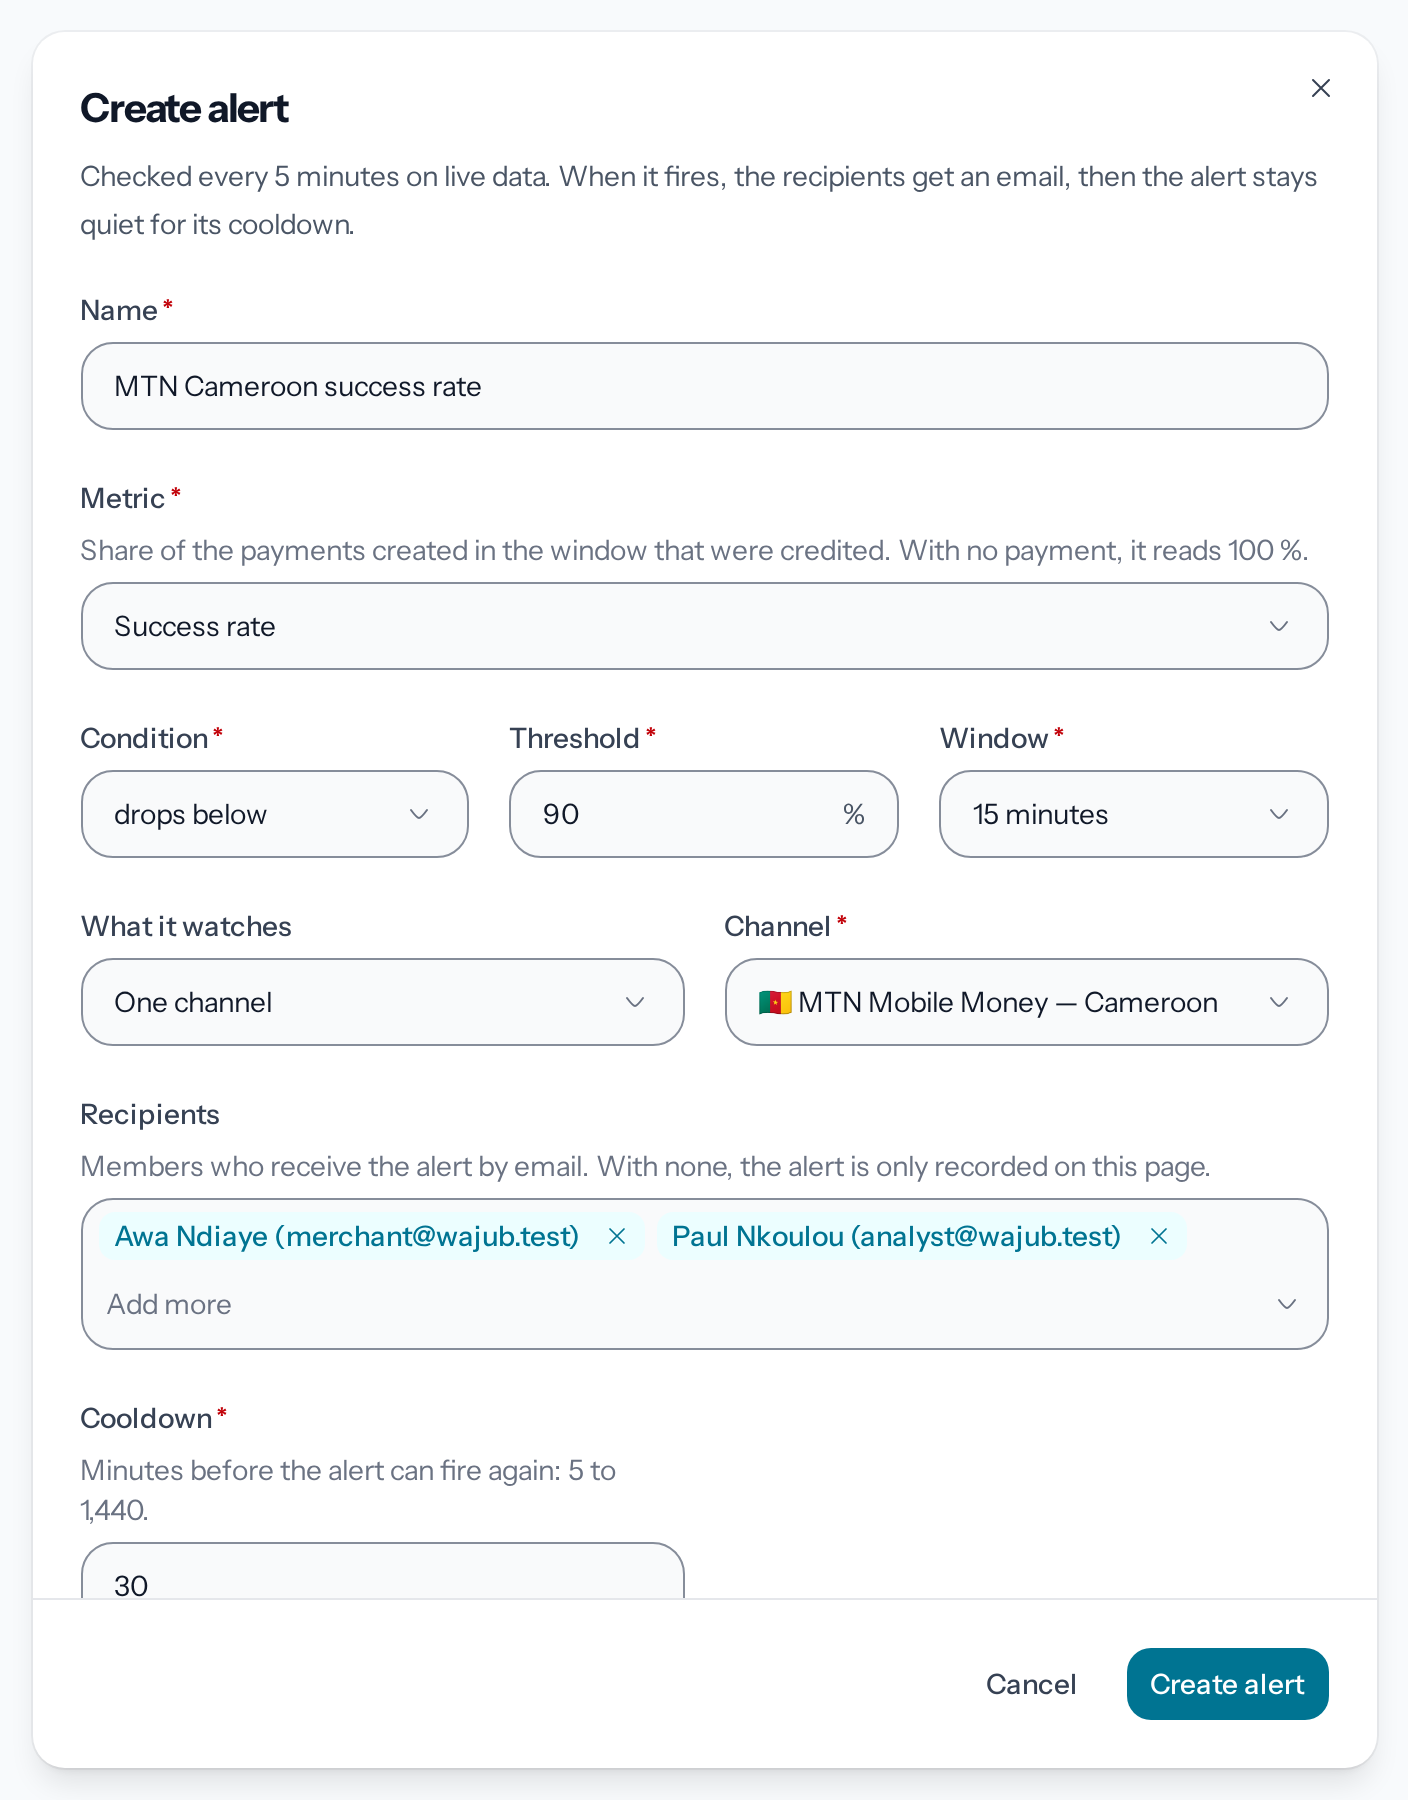
*Only members of the organisation can receive an alert.*
7. **Create the alert**
Leave **Active** on, then click **Create alert**. The message **Alert rule created.** appears,
and the alert joins the **Alert definitions**.
## After creating it
An active alert is checked every 5 minutes. When it crosses its threshold, its recipients receive
an email, then it stays silent for its cooldown. **Recent alerts** lists the latest firings, and
each alert shows when it **Last fired**. If an active alert warns nobody, a warning says so at the
top of the page. [Alerts](https://docs.wajub.com/orchestration/analytics#alerts) explains what each indicator counts.
An **Acceptance below its usual level** alert also shows the providers and channels below their
usual level, and its **Last check**. On a plan without it, the alert is marked **Not in your plan**
and is not checked; you can still turn it off or delete it.
An alert's menu offers **Edit alert**, **Turn off alert**, which keeps it without checking it any
more, and **Delete alert**, which asks for confirmation: its past firings stay listed.
---
# Set a channel policy
URL: https://docs.wajub.com/dashboard/orchestration/channel-policies
> Choose how Wajub ranks your providers on an operator channel, by acceptance, cost or speed, with a fixed order and guardrails, from the routing matrix.
A channel policy ranks your providers on an operator channel, such as MTN Mobile Money in
Cameroon, for every payment that no routing rule catches. Without a policy, the priority of each
connection decides.
The owner, an Administrator, a Developer or a custom role with **Manage settings** or **Manage
developer settings** sets a policy; **View settings** is enough to read the matrix. Policies are
part of every plan and only exist in [Live](https://docs.wajub.com/dashboard#sandbox-and-live). No security code is
asked for.
## The steps
1. **Open the matrix**
In **Live**, open **Orchestration**, then the **Matrix** tab. Under **Operator channels**, each
channel shows its routes, one per provider that serves it. **Global payment methods**, such as
cards, have no policy.
2. **Open the channel's policy**
Click **Set policy** at the end of the channel's row, or **Edit policy** if it already has one.
The **Channel policy** dialog opens, titled with the channel's name, for example MTN CM.
3. **Choose the objective**
In **Routing objective**, **Max acceptance** puts first the provider that succeeds with the
most payments on this operator, **Least cost** the cheapest, based on the fees entered on each
connection, and **Fastest** the one that responds fastest.
4. **Fix an order, if needed**
With at least two connections on the channel, turn on **Fixed cascade order**: the list of
connections appears, and **Move up** and **Move down** set the order in which they are tried,
before the objective ranks the others.
5. **Add guardrails**
Under **Guardrails**, a connection below the **Minimum health**, from 0 to 100%, or above the
**Cost ceiling**, in fees per payment in the payment's currency, goes after the others. It is
never left out.
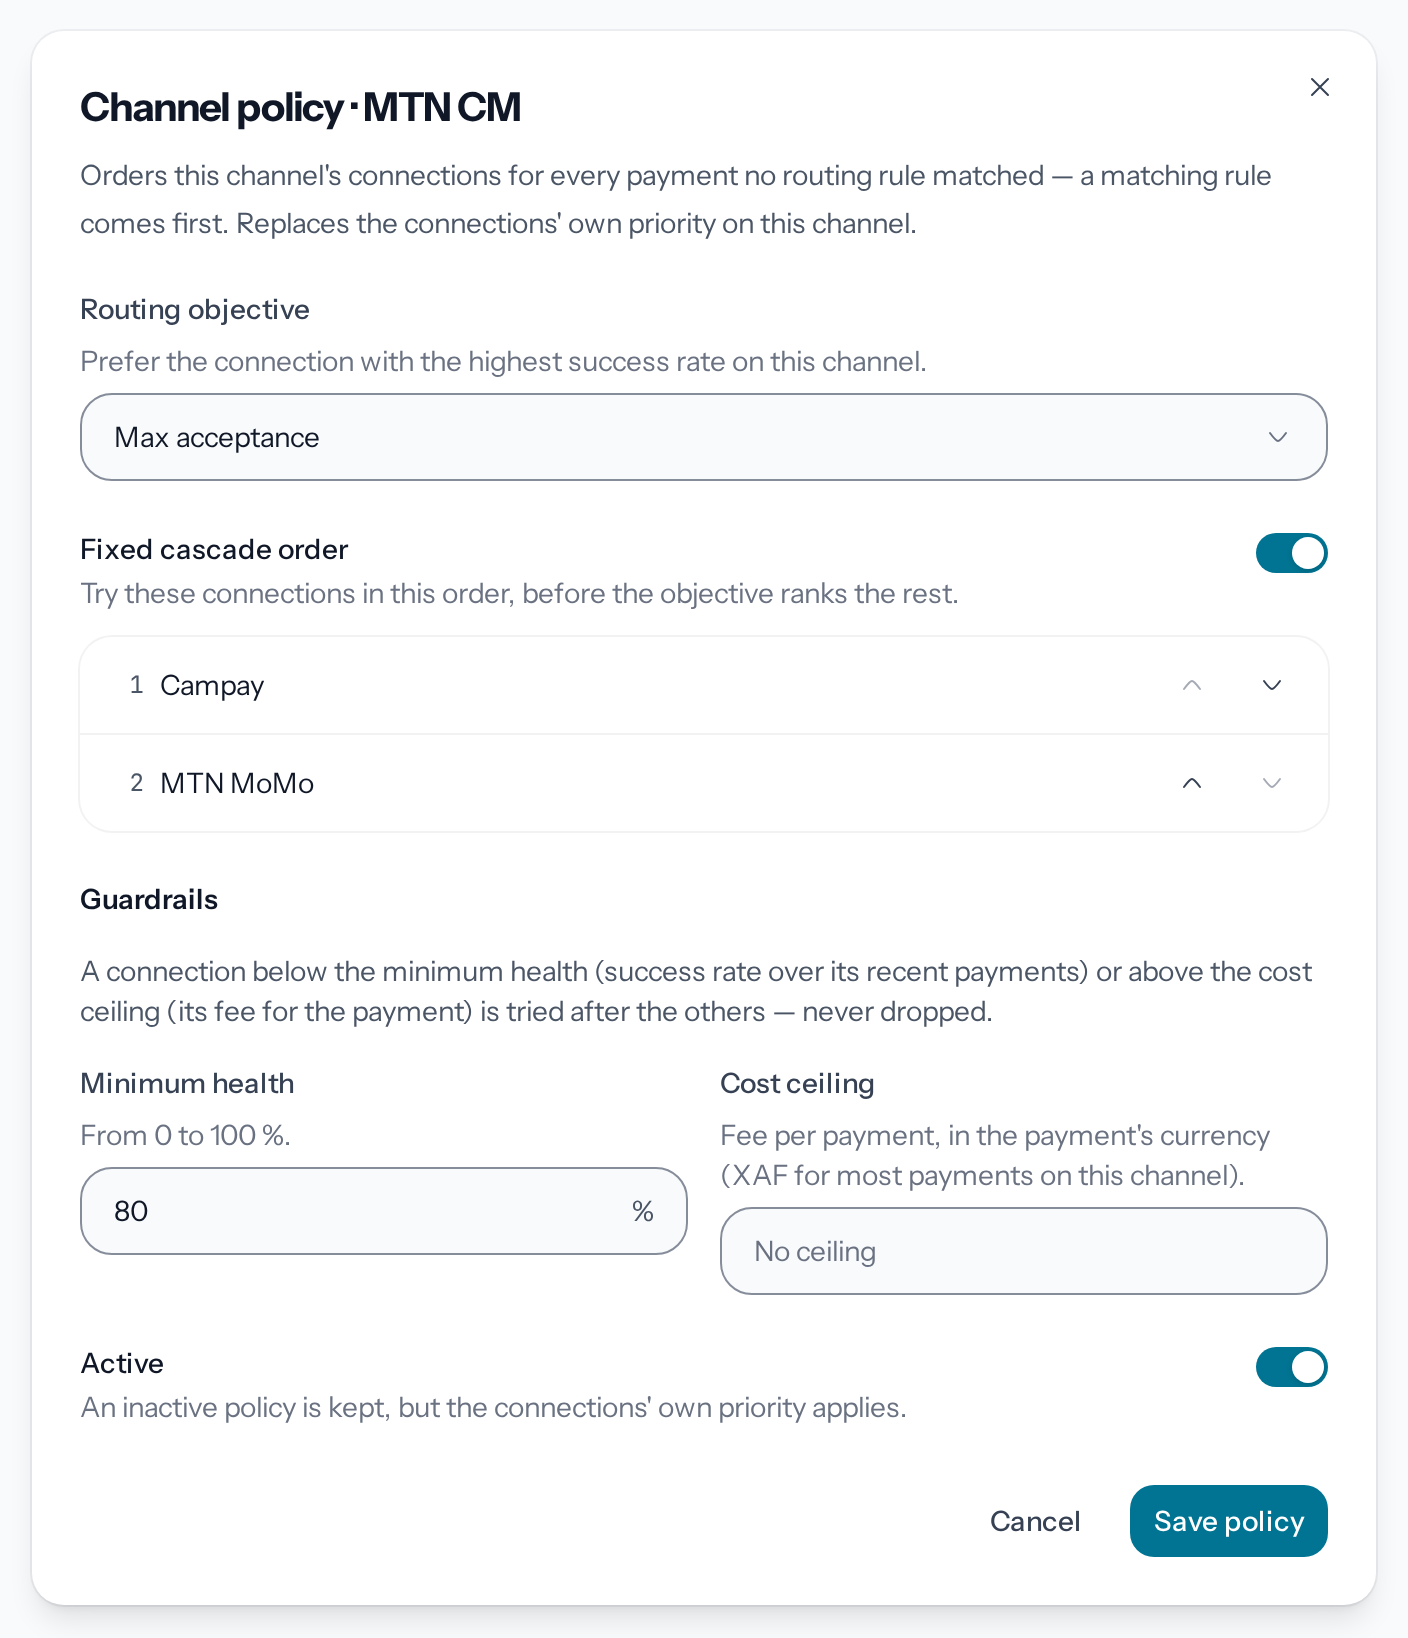
*A routing rule that matches the payment always comes before the policy.*
6. **Save the policy**
Leave **Active** on, then click **Save policy**. A message confirms the save, and the channel's
row shows a badge that sums up the policy.
## What the policy decides
The policy only applies to its channel, and only to the payments that no
[routing rule](https://docs.wajub.com/dashboard/orchestration/routing-rules) caught. There, it replaces the priority of
your connections. A policy whose **Active** you turn off is kept, and the priority takes over
again. [The most specific instruction goes first](https://docs.wajub.com/orchestration#the-most-specific-instruction-goes-first)
explains this order.
To go back to the priority of your connections, open the policy again and click **Remove
policy**, then confirm.
## Reading the matrix
Each row carries a diagnosis, such as **Operational**, **Operator down**, **Aggregator issue**,
**Single path** or **No data**, and each route its success rate and the state of its circuit.
**Collection** and **Payout**, at the top, switch the operation, and **Refresh** reloads the
figures.
[The matrix, and the diagnosis it enables](https://docs.wajub.com/orchestration/analytics#the-matrix-and-the-diagnosis-it-enables)
says what to do with a red row or cell.
---
# Connect a provider
URL: https://docs.wajub.com/dashboard/orchestration/connect-provider
> Connect your own account with a payment provider, set its priority and fees, paste its webhook URL, then pause or disconnect it.
A connection links your own account with a payment provider to Wajub. With two connections or
more, a payment one of them declines can be taken over by another.
The owner, an Administrator, a Developer or a custom role with **Manage settings** or **Manage
developer settings** connects a provider; **Notify me when available** takes **Manage settings**.
The **Pay as you go** plan allows 2 providers, **Growth** 6, **Scale** and **Enterprise** have no
limit, and the Wajub rail does not count. Connections only exist in
[Live](https://docs.wajub.com/dashboard#sandbox-and-live). The [security code](https://docs.wajub.com/dashboard#the-security-code) is only
asked for to regenerate the webhook URL or disconnect a provider.
## The steps
1. **Open the catalogue**
In **Live**, open **Orchestration**, the **Providers** tab, then **Add provider**. The search
and the **Country**, **Region**, **Type** and **Status** filters narrow the catalogue. If your
plan is full, the page shows **Provider limit reached** with **Upgrade plan**.
2. **Choose the provider**
Click **Connect** under its card. A provider that is coming soon offers **Notify me when
available** instead. The Wajub rail is not in the catalogue:
[Apply for the Wajub rail](https://docs.wajub.com/dashboard/orchestration/rail).
3. **Enter the credentials**
Under **API credentials**, fill in the fields this provider asks for, as your dashboard with
that provider shows them. Some providers have credentials per country: fill in at least one
country. Click **Continue**.
4. **Choose the channels**
Under **Payment channels**, tick the channels to hand to this provider, or **Select all**; only
the channels of the countries whose credentials you entered are offered. At least one channel
is needed.
5. **Set the routing**
Under **Routing settings**, the highest **Priority** is tried first, and the **Weight (%)**
splits traffic between providers of the same priority. Turn off **Activate it as soon as it is
connected** to connect it paused. **Fees (for least-cost routing)** is optional: your
**Variable rate (%)**, your **Fixed fee**, the accepted **Currencies** (empty for all) and
**Per-channel overrides**.
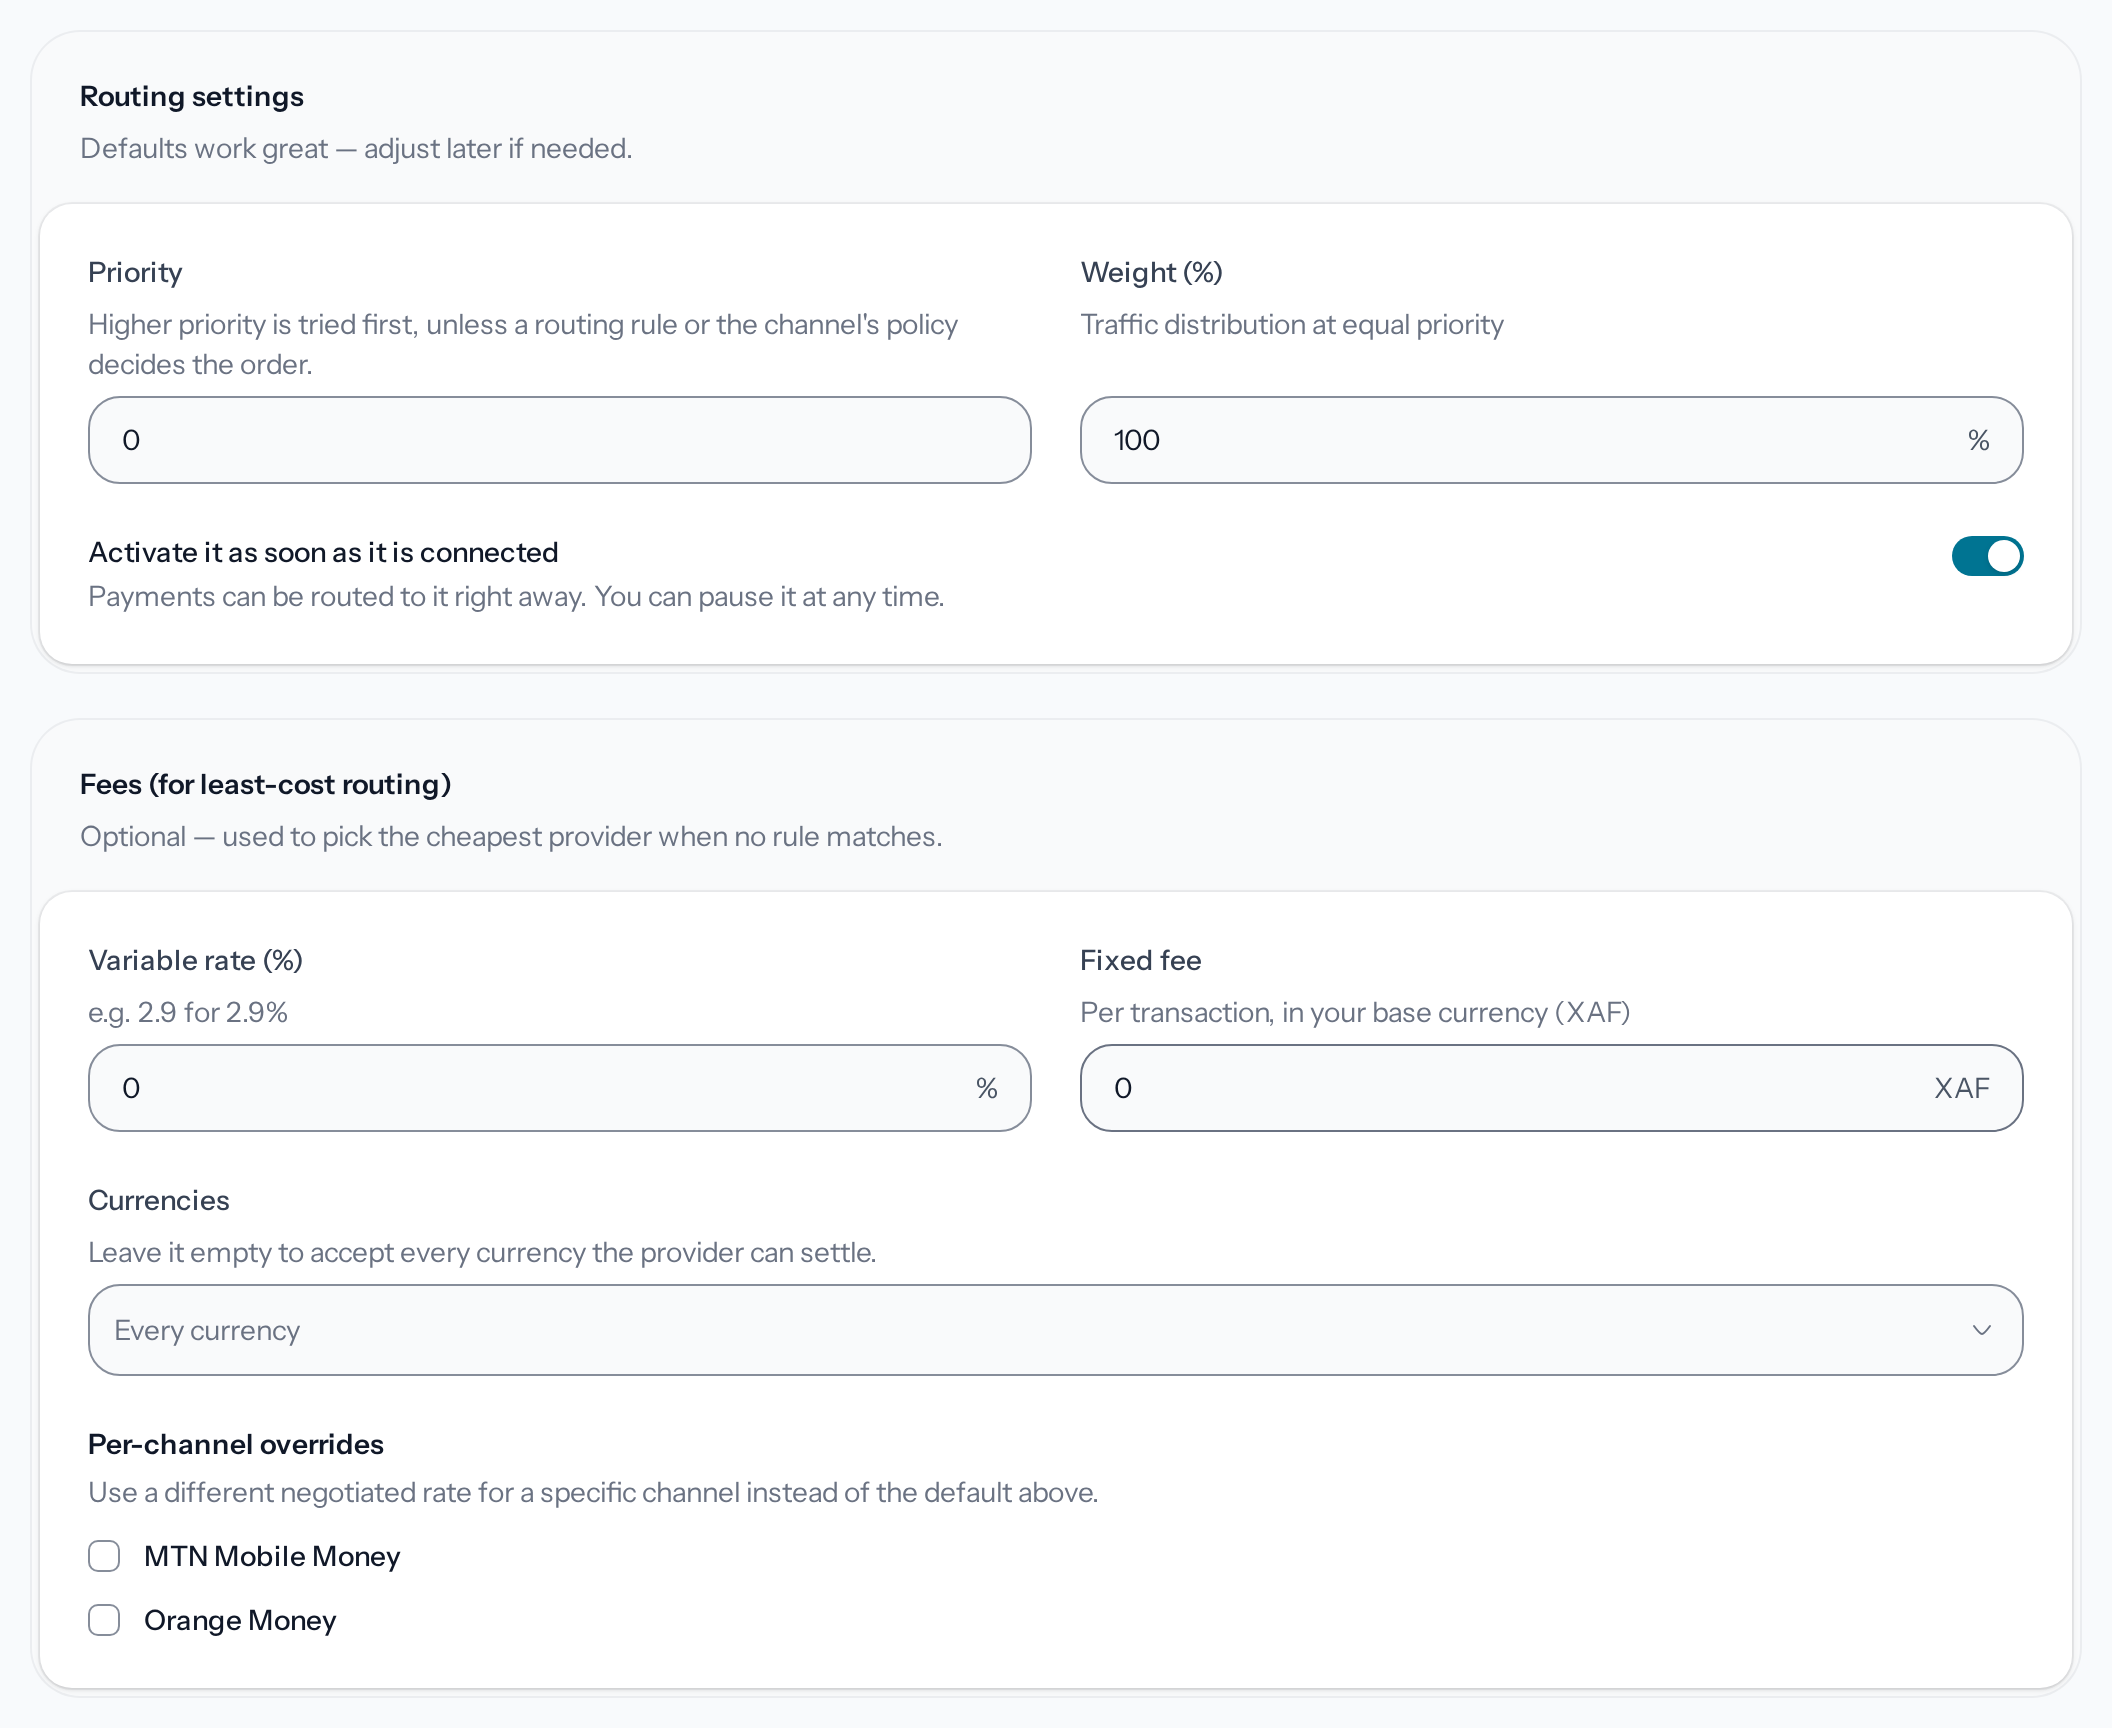
*A routing rule or a channel policy comes before the priority.*
6. **Connect the provider**
The **Review** step sums up your choices and tries your credentials under **Connection
check**. If the check fails, the provider will be connected paused, unless you tick **Activate
it anyway**. Click **Connect provider**: its page opens with the message **Provider enabled
successfully.**
If you leave partway through, the page shows **We restored your unfinished setup** when you come
back in the same tab within 24 hours: your choices come back, the credentials do not. **Start
fresh** clears everything.
## After connecting
On the provider's page, the **Settings** tab shows the **Webhook endpoint**: copy it with **Copy
the webhook URL** and paste it into your dashboard with the provider, so that Wajub learns the
outcome of your payments. **Test connection**, under **Diagnostics**, checks your credentials.
*Without this URL at the provider, Wajub does not learn the outcome of payments.*
The same tab sets the routing, fees, channels and currencies, saved with **Save changes**. The
switch under **Status** pauses the provider straight away, without deleting anything. The
**Credentials** tab replaces a credential with **Update credentials**; saved secrets are never
shown.
**Regenerate URL** asks for the security code. The old URL stops working at once: paste the new
one at the provider. If the provider rejects your credentials, the list shows **Connection
refused** and its page offers **Fix the connection**:
[When a connection goes bad](https://docs.wajub.com/orchestration/providers#when-a-connection-goes-bad).
## Disconnecting a provider
Under **Danger zone**, click **Disconnect provider**, type its name, then the security code. The
connection, its credentials and its settings are deleted, along with the routing rules that send
payments to it; those where it was the fallback provider lose it. The message "Campay
disconnected." confirms it. To connect it again, you will have to enter its credentials again. The
Wajub rail is not disconnected here.
---
# Track routing health
URL: https://docs.wajub.com/dashboard/orchestration/overview
> Read the orchestration overview, its incidents and recommendations, the live status of your routes, the payments of the period and how your providers and operators perform.
Orchestration spreads your payments across the providers you connect. Its overview tells you
whether your payment routes work, what needs fixing, and how your providers did over the period
you choose.
The owner, an Administrator, a Developer, a Viewer or a custom role with **View settings** opens
orchestration. Changing it takes **Manage settings** or **Manage developer settings**: the owner,
an Administrator or a Developer. Orchestration is part of every plan and only exists in
[Live](https://docs.wajub.com/dashboard#sandbox-and-live). No security code is asked for to read it.
## The tabs
In **Live**, open **Orchestration** in the menu. The tabs lead to the other tasks: **Wajub Rail**
([Apply for the Wajub rail](https://docs.wajub.com/dashboard/orchestration/rail)), **Providers**
([Connect a provider](https://docs.wajub.com/dashboard/orchestration/connect-provider)), **Matrix**
([Set a channel policy](https://docs.wajub.com/dashboard/orchestration/channel-policies)), **Routing rules**
([Create a routing rule](https://docs.wajub.com/dashboard/orchestration/routing-rules)) and **Alerts**
([Create an alert](https://docs.wajub.com/dashboard/orchestration/alerts)).
**Channels** compares your providers channel by channel: each channel's **Success rate**,
**Attempts**, **Volume**, **Best provider**, **Worst provider** and the **Spread** between them,
then the same **By country**. A row opens the channel's page, where its providers stand side by
side. The tab comes with the **Growth**, **Scale** and **Enterprise** plans; on another plan, it
shows **Not included in your plan** with **See plans**.
## The period and the filters
At the top, **Period** chooses the days the page covers, and **Compare to** sets what each figure
is compared with: **Previous period**, **Same period last year** or **No comparison**.
**Provider**, **Channel**, **Country** and **Currency** narrow the figures of the period, and
**Clear filters** removes them.
## Incidents and recommendations
**Incidents and recommendations** lists what needs action, each line marked **Critical**,
**Warning** or **Heads up**. An incident on one of your channels offers **Review**, which opens the
matrix. An incident at an operator says that it comes from the operator, not from your setup, and
offers **See the operators' status**. A recommendation offers its own button; you can hide it, and
it stays hidden in this browser.
## Live routing status
**Live routing status** shows **Your payment routes are healthy**, or the number of channels that
need your attention, with **Open routing matrix**. **Providers now** gives each provider's health:
**Healthy**, **Degraded**, **Failing**, **Too little traffic** or **Paused**; a provider opens its
page. Below come the number of channels monitored and of active providers, and **Last updated**,
which tells you how old the latest reading is. The status updates by itself.

*The live status updates by itself.*
## Payments in this period
**Payments in this period** gives the **Success rate**, the **Credited volume**, with the median
time to credit, the **Finished payments**, succeeded and failed, without those still pending, and
the payments **Saved by a fallback**: the ones another provider charged after the first one
failed. Each figure shows its change against the comparison. The success rate, the volume and the
finished payments open the matching payments.
**Acceptance by provider** draws, over the period, the share of each provider's finished attempts
that it accepted.
## Provider performance
**Provider performance** compares your providers: **Acceptance**, **Attempts**, **Provider
failures**, **Charge time**, **Volume** and **Most frequent failure**. A provider with few attempts
is marked **Low sample**. A row opens the provider's page, and **Manage providers** opens the
**Providers** tab. With no attempt in the period, the table shows **No provider attempts in this
period**.
**Providers by channel** shows each provider's acceptance on each channel against the channel's
average; a cell opens the channel. **Where payments fail** splits the failed attempts by where
they stopped, **Provider side**, **Customer side**, **Abandoned** or **Unknown**, then lists the
most frequent reasons; a reason opens its payments.
## Operators' status
**Operators' status** shows the operators you route through, across Wajub: their state now and
their availability over the last 90 days.
---
# Apply for the Wajub rail
URL: https://docs.wajub.com/dashboard/orchestration/rail
> Apply for access to Wajub's payment rail to collect on its partner contracts, sign the agreement, follow the application, then add countries or channels.
The Wajub rail collects your payments on Wajub's partner contracts, with no contract to sign with
each operator. It does not connect like another provider: you send a signed application, and Wajub
reviews it.
The owner, an Administrator or a custom role with **Manage settings** applies and signs; a
Developer, a Viewer or a role with **View settings** follows its status. The rail is open to every
plan and does not count towards their provider limit. It only exists in
[Live](https://docs.wajub.com/dashboard#sandbox-and-live), and no security code is asked for. Your account must be
verified: [Verify your business](https://docs.wajub.com/dashboard/activation/verify-business).
## The steps
1. **Open Wajub Rail**
In **Live**, open **Orchestration**, then the **Wajub Rail** tab. The page presents the
**Available coverage**, country by country. Click **Start application**; as long as the
account is not verified, the button reads **Complete account verification**.
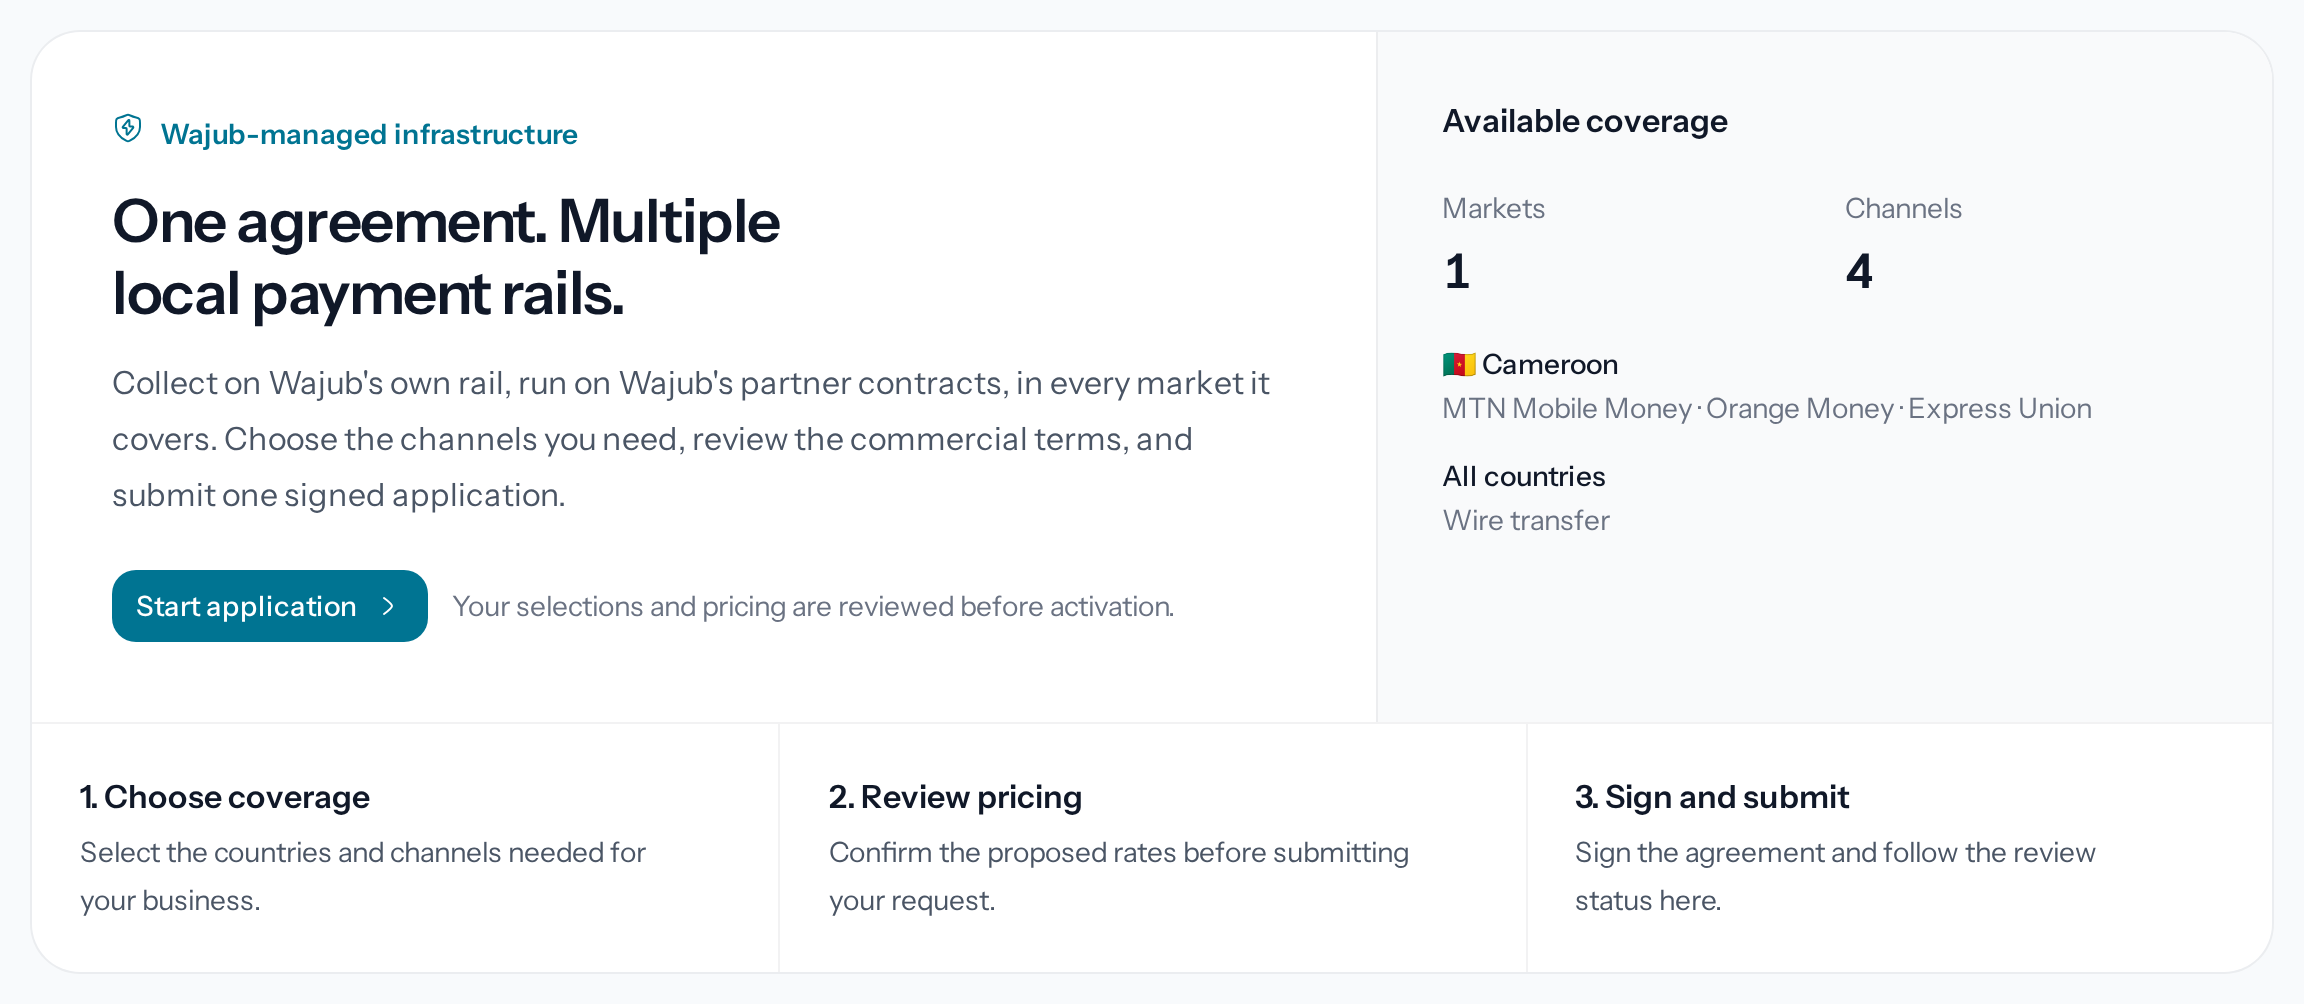
*The coverage shown is what the rail offers today.*
2. **Present your business**
At the **Your business** step, describe your product or service in at least 50 characters,
choose the **Product type** and the **Primary use case**, add the links to your website or
social media, then estimate your monthly activity. Click **Continue**.
3. **Give what the review needs**
At the **For the review** step, **What Wajub needs to review your application**, choose under
**Where do your customers pay?**: **On a website**, **In a mobile app** or **Elsewhere**. The
fields that follow depend on that answer and on what you sell: on a website, your **Terms of sale
page** and **Refund policy page**; elsewhere, **Where customers find you** and **How a customer
buys and pays**; for an app not yet in a store, a **Test build of the app**. Under **Test account
for the review**, give the login and password of an account made for the review, never your own
administrator access. It is optional, unless your product is used behind a login, such as a
mobile app or a subscription. Click **Continue**.
4. **Choose the countries**
At the **Countries** step, tick the countries where you want to collect. Only the countries the
rail covers are offered.
5. **Choose the channels**
At the **Channels** step, tick the operators to apply for. Those your account already has
appear under **Already granted**, with no need to apply for them again.
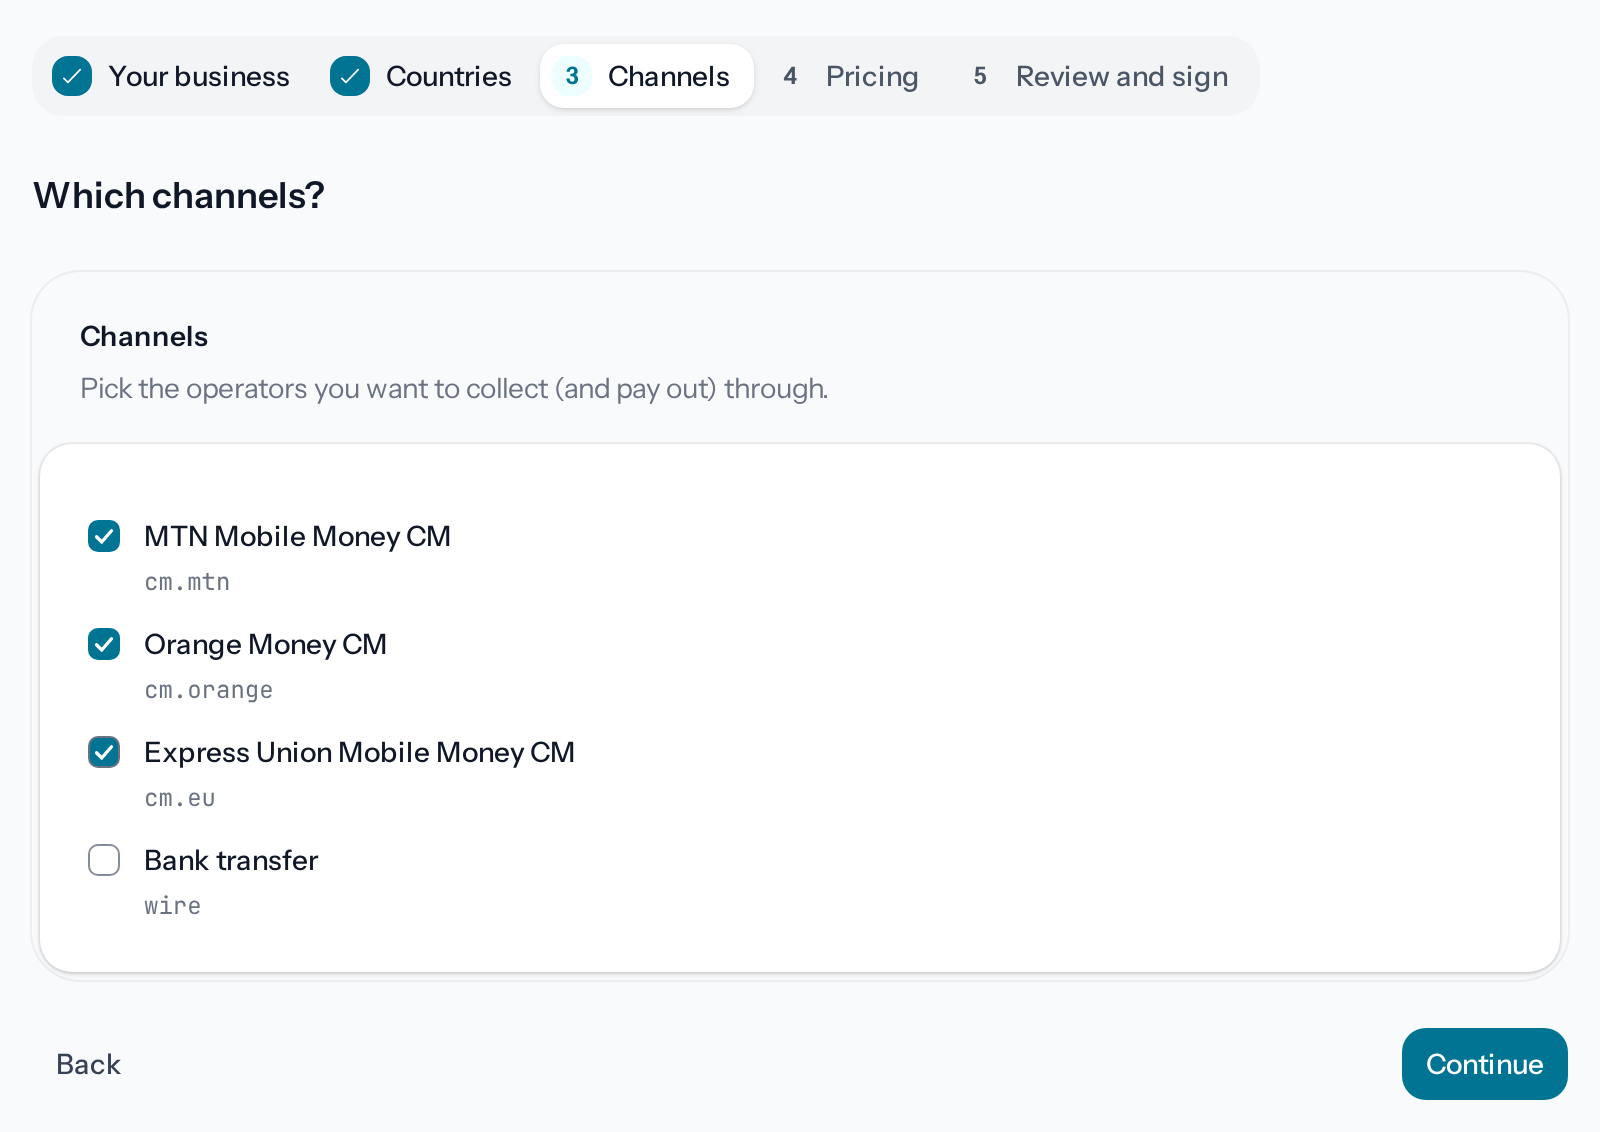
*Wajub may grant only some of the channels applied for.*
6. **Check the pricing**
The **Pricing** step gives, for each channel, the **Reference payment fee** and the **Reference
transfer fee** of your current plan. The final rate may vary with the processing route, and you
know the fees before you confirm a transaction.
7. **Sign and send the application**
At the **Review and sign** step, read the contract under **Read and sign the agreement**, enter
your **Full legal name** as it appears in your verification file, tick the declaration, then
click **Sign and submit**. The message **Your application has been submitted for review.**
appears.
## Tracking the application
**Your application** shows the date it was sent, and Wajub answers you by email. Only one
application can be in progress at a time. **Your applications** lists each one with its status:
**Under review**, **Approved**, **Partially approved**, where the ticked channels are the ones
granted, or **Rejected**. After a refusal, the page shows **Your last application was declined.**,
with the reason when Wajub gave one, and offers **Start a new application**. The contract only
takes effect once the application is accepted.
If your account already used the rail before these applications, the page shows **Sign your Wajub
rail agreement** with a deadline. Enter your **Full legal name**, tick the declaration, then click
**Sign agreement** before that date: after the deadline, Wajub suspends your connection to the
rail, and you have to send a new application.
## After approval
**Your Wajub rail** shows the state of your connection, its **Markets** and its **Active
channels**. **Manage the connection** opens the rail's page among your providers: there you set its
priority, pause it or turn off a granted channel, as for a
[connected provider](https://docs.wajub.com/dashboard/orchestration/connect-provider#after-creating-it).
Below, the page follows the rail over the period you choose, by channel or by country if you want:
**Performance**, **Acceptance over time**, **By channel and operator**, **Where the rail does
better**, **Failure reasons** and **Charge and confirmation times**. **Operator status** gives the
state of the operators the rail serves. **Pricing and fees** puts the price you signed for each
channel beside the fees charged in the period, and **When the money is available** says when the
money of its payments reached your available balance.
To collect in other countries, **Coverage** lists the countries and operators the rail covers:
**Request this country**, on a country's row, or **Request more channels** opens a new
application. **Agreement and requests** gives the signed contract, which **Download agreement**
saves as a PDF, and the history of your requests.
---
# Create a routing rule
URL: https://docs.wajub.com/dashboard/orchestration/routing-rules
> Send certain payments to a provider you choose, with a fallback provider, measure a rule's effect on your latest payments, then test the routing.
A routing rule sends the payments that meet its conditions to the provider of your choice, for
example Orange Money in Cameroon to a cheaper connection.
The owner, an Administrator, a Developer or a custom role with **Manage settings** or **Manage
developer settings** creates rules; **View settings** is enough to read them, not to run the
preview or the simulator. Rules are part of the **Growth**, **Scale** and **Enterprise** plans:
with **Pay as you go**, the tab does not appear. They only exist in
[Live](https://docs.wajub.com/dashboard#sandbox-and-live), and no security code is asked for. You need at least one
[connected provider](https://docs.wajub.com/dashboard/orchestration/connect-provider).
## The steps
1. **Open the dialog**
In **Live**, open **Orchestration**, the **Routing rules** tab, then **Create rule**. With no
connected provider, the page shows **Connect a provider first**.
2. **Name the rule**
Enter a **Rule name** that says what it does: the list and the simulator show it.
3. **Choose the provider**
Under **Route to provider**, choose the connection that will take these payments. The optional
**Fallback provider** is tried right after it if it fails, and in its place when it cannot take
the payment.
4. **Set the conditions**
Under **Conditions**, fill in what matters among **Country**, **Channel**, **Currency**,
**Minimum amount** and **Maximum amount**, the last two in the payment's currency. An empty
condition accepts every value, and the rule only applies when all of them are met.
**Advanced conditions** adds **Time windows**, **Customer segments**, **Metadata filters** and
**Frequency caps**, and **Tags** that only help you find the rule again.
5. **Measure the impact**
Under **Preview impact**, click **Run preview**. Your payments from the last 7 days are
replayed: the panel says how many would have gone to another provider, provider by provider.
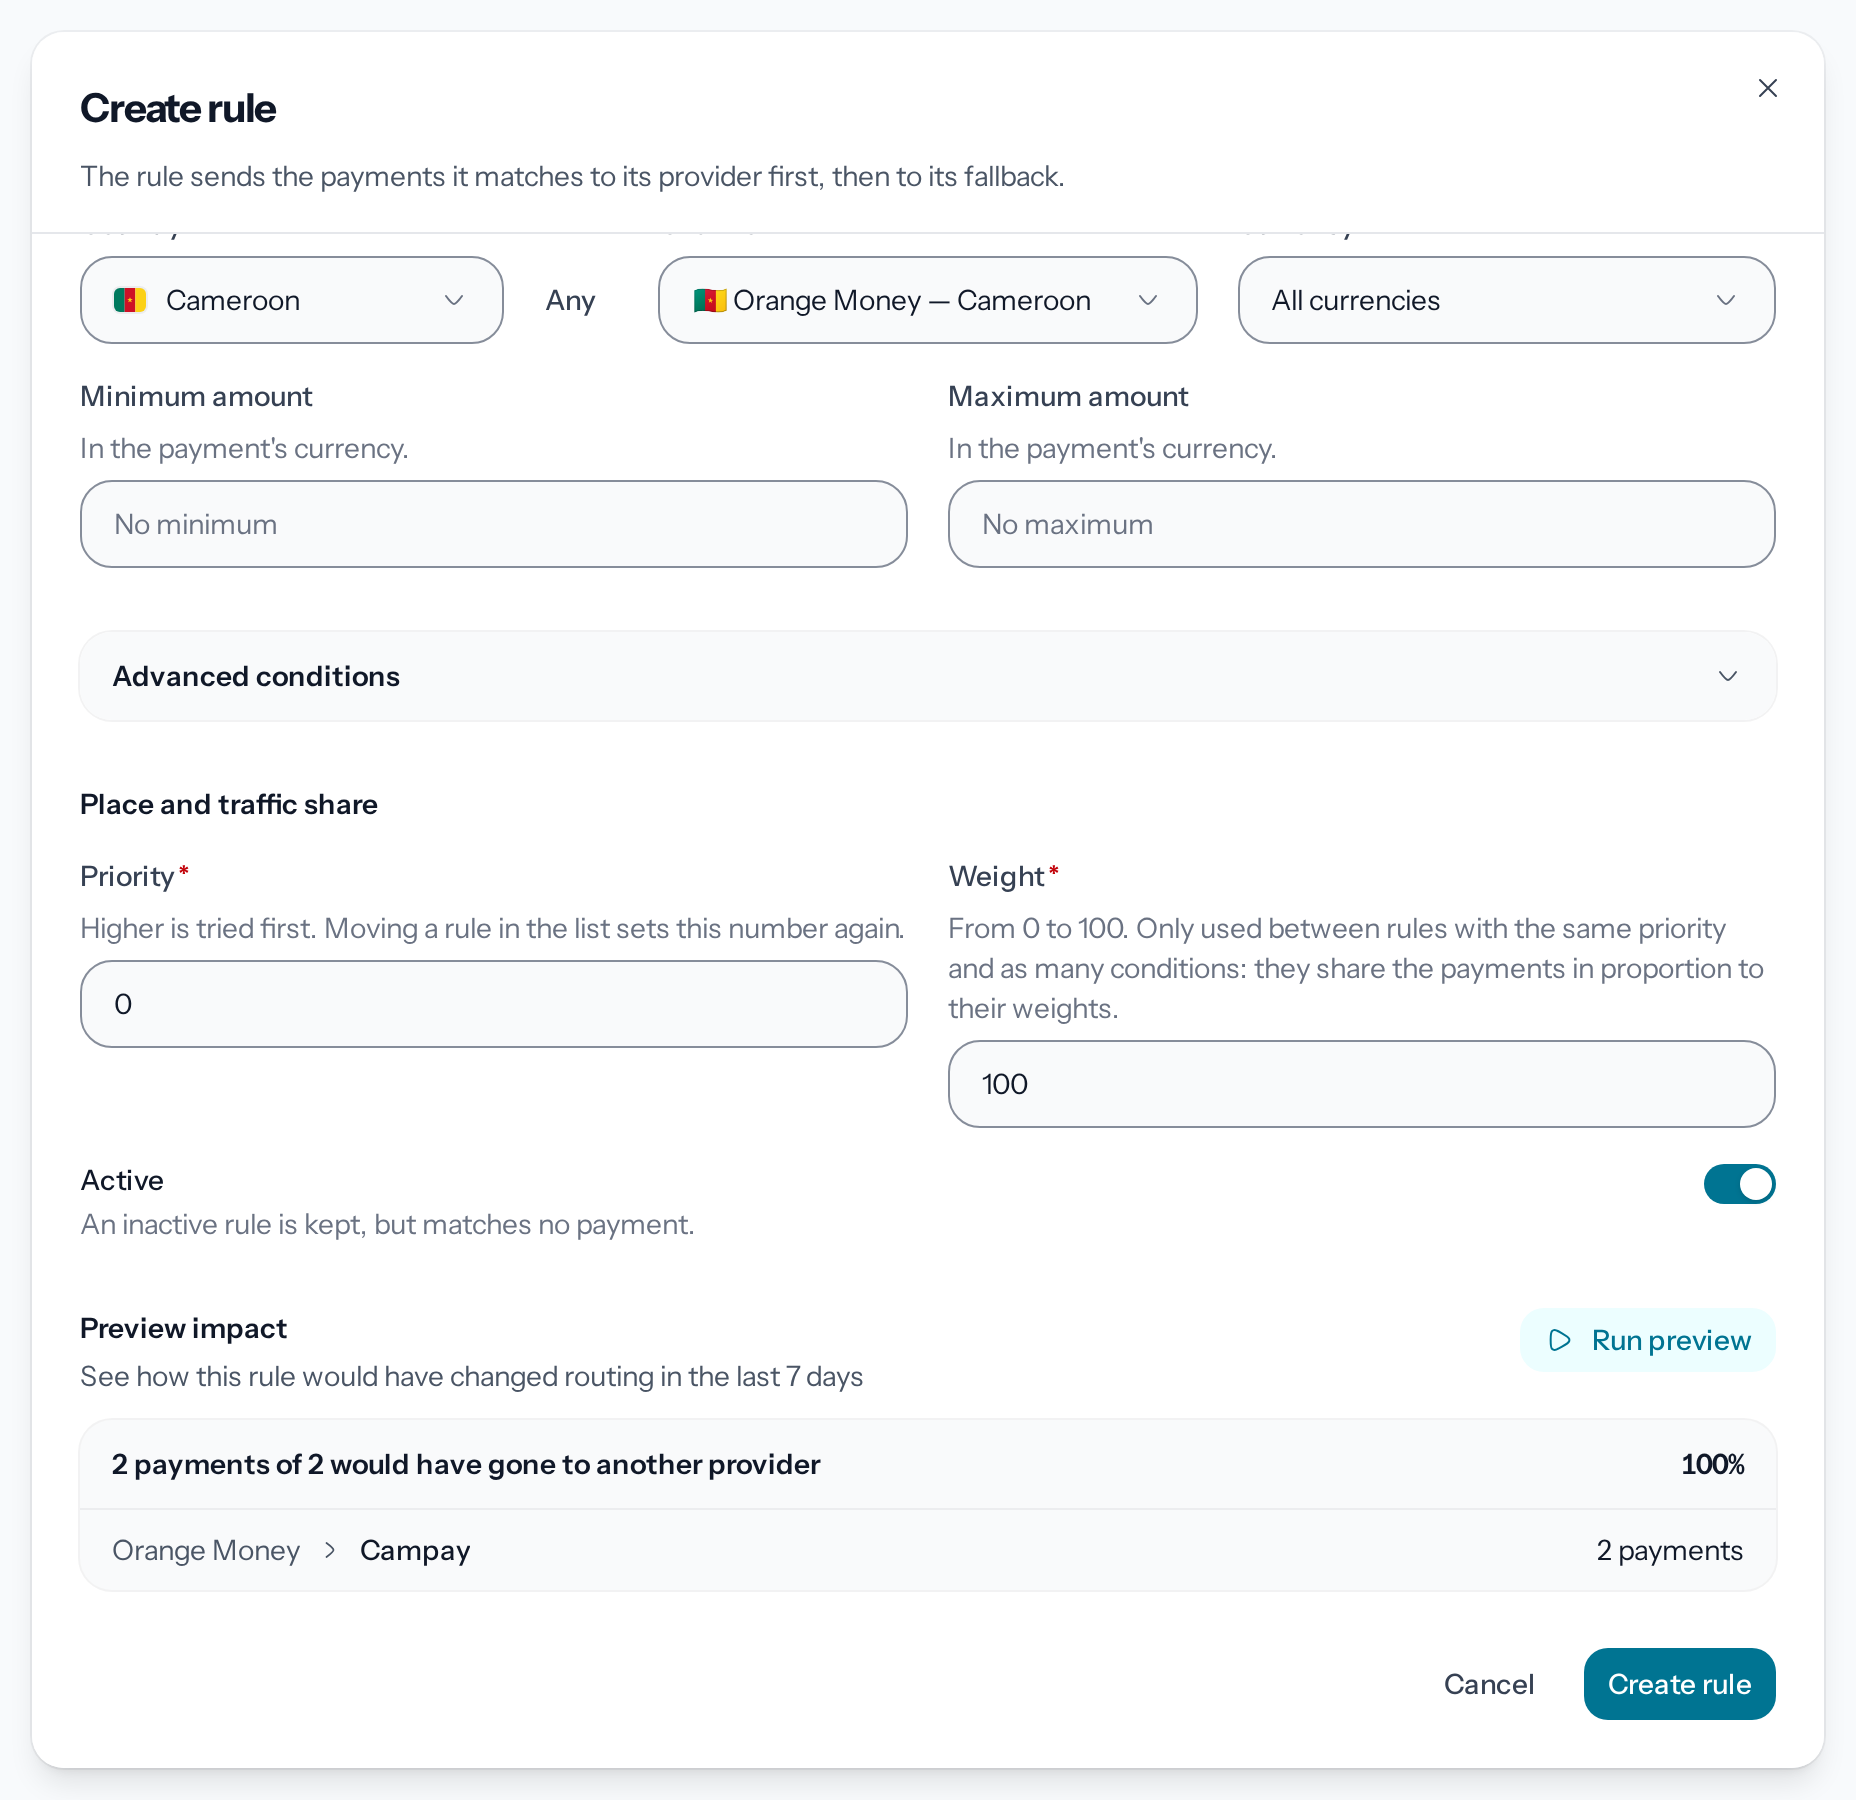
*The preview gives the most the rule can move, not a forecast.*
6. **Create the rule**
Leave **Active** on, then click **Create rule**. The message **Routing rule created
successfully.** appears, and the rule takes its place in the list.
## Rule order
A payment goes to the first rule in the list that matches it: the highest priority first, then,
at equal priority, the one with the most conditions. **Move up** and **Move down** move a rule,
and every priority is then renumbered from the top. Rules with the same priority and as many
conditions share the payments according to their **Weight**.
[Which rule wins](https://docs.wajub.com/orchestration/routing-rules#which-rule-wins) explains the ranking, and
[The most specific instruction goes first](https://docs.wajub.com/orchestration#the-most-specific-instruction-goes-first)
says what decides when no rule matches.
Each row shows the matching payments over 30 days and their acceptance rate. Its menu offers
**Edit rule** and **Delete rule**: the payments it targeted then follow your other rules, then the
channel's policy, then the priority of your connections.
## Testing the routing
**Test routing** opens the **Routing simulator**. Choose one of the **Quick scenarios**, or a
**Payment channel** and an **Amount** with its currency, then click **Run simulation**. The result
gives the provider tried first, the order of the next ones, the connections set aside under **Left
out** with their reason, and the **Decision log**. Nothing is charged.
[The simulator](https://docs.wajub.com/orchestration/routing-rules#the-simulator-on-the-routing-rules-page) says what it
cannot reproduce.
---
# Create a payment link
URL: https://docs.wajub.com/dashboard/payment-links/create
> Create a payment page with its own address from the dashboard, choose its type, describe it and publish it to share by WhatsApp, SMS or QR code.
A payment link is a payment page with its own address: you share it by WhatsApp, by SMS or with a
QR code, and anyone who has the link can pay.
The owner and the Administrator, Developer and Finance [roles](https://docs.wajub.com/dashboard#roles) create links, as
does a custom role with **Manage payment links**; an Analyst, a Viewer or a role with only **View
payment links** sees them without changing them. The **Pay as you go** plan allows 25 links,
archived ones included; **Growth** and the plans above have no limit. Links only exist in
[Live](https://docs.wajub.com/dashboard#sandbox-and-live). Creating a link does not ask for a
[security code](https://docs.wajub.com/dashboard#the-security-code).
## The four link types
- [Sell something](https://docs.wajub.com/dashboard/payment-links/sell-something): an item, digital content or a service, at a fixed price.
- [Sell tickets](https://docs.wajub.com/dashboard/payment-links/sell-tickets): seats for a concert, a training or a gala.
- [Raise funds](https://docs.wajub.com/dashboard/payment-links/raise-funds): contributions towards a goal to reach.
- [Receive donations](https://docs.wajub.com/dashboard/payment-links/donations): gifts of whatever amount each donor chooses.
## The steps
1. **Open the form**
In **Live**, open **Payment links**, then **Create link**. The **New payment link** page shows
the form and, on a large screen, a preview of the payment page as your customers will see it,
updated with each change. On a phone, the **Preview** button opens it.
2. **Choose the type**
Under **What do you want to collect money for?**, choose one of the four types. For **Sell
something**, also choose under **What kind?**: **Physical item**, **Digital content** or
**Service**.
*Once the link has been paid, its type can no longer change.*
3. **Start from a template if needed**
Under **Start from:**, a template fills in a few settings of the chosen type, never the title or
the price. The templates disappear as soon as the title is filled in; each type's page says
what its templates prepare.
4. **Describe the offer**
In **The offer**, the **Title** is required, 3 to 120 characters. Add a **Photo** and a
**Description** if needed. The section's other fields depend on the type.
5. **Fill in the type's sections**
The price, the amounts or the tickets, then delivery or access, change with the type: follow
the steps on its page, [Sell something](https://docs.wajub.com/dashboard/payment-links/sell-something#the-steps),
[Sell tickets](https://docs.wajub.com/dashboard/payment-links/sell-tickets#the-steps),
[Raise funds](https://docs.wajub.com/dashboard/payment-links/raise-funds#the-steps) or
[Receive donations](https://docs.wajub.com/dashboard/payment-links/donations#the-steps). Questions for the customer,
promo codes and payment methods apply to all four: see
[Set what the customer fills in](https://docs.wajub.com/dashboard/payment-links/payer-fields).
6. **Choose the link address**
In **Address and access**, **Link address** sets the end of the address, for example
wajub.link/adaora-bag; leave it empty for a short address generated automatically. The form
tells you at once whether it is free. The password, the closing date, **Close after the first payment** and
the other access settings are described in [Share a link](https://docs.wajub.com/dashboard/payment-links/share#address-and-access).
7. **Publish the link**
**Publish the link** creates the link and puts it online; the button becomes **Create the link
offline** when **Page online** is off. If fields still need fixing, the form lists them, and
clicking one takes you to it. Once the plan's limit is reached, publishing is blocked and the
draft stays saved.
## The other sections
The folded sections sum up their settings; open them as needed. **Button and thank-you** changes
the **Button text**, which the page completes with the amount, and shows a **Thank-you message**
on the confirmation. **After the payment, send the customer to** sends the customer to a page of
your site a few seconds after the payment, with the payment reference in the address.
**Your organisation** files the link with a **Category**, **Tags** to filter the list and an
**External reference**, your own identifier. Nothing in this section is shown to customers.
## What the customer sees
The customer opens the page at the link's address, fills in what the link asks for, pays with one
of your payment methods and receives their receipt by email.
## After publishing
The **Your link is online** window opens so you can share it: see
[Share a link](https://docs.wajub.com/dashboard/payment-links/share). To change the link, put it offline or delete it,
see [Edit or remove a link](https://docs.wajub.com/dashboard/payment-links/edit-offline-delete).
> [!NOTE]
> **A link you started stays as a draft**
>
> Until the link is published, the form saves itself and the header shows **Draft saved**. The
> next time you choose **Create link**, the form offers **Resume** or **Start over**. The draft
> follows your account, not the device, and you only have one at a time.
---
# Receive donations
URL: https://docs.wajub.com/dashboard/payment-links/donations
> Create a donation link with suggested amounts, tiers that say what a gift makes possible, a donor wall and anonymous gifts.
The **Receive donations** type accepts gifts of whatever amount each donor chooses, with no goal to
reach: a church offering, support for an association. To aim for an amount, create a link to
[raise funds](https://docs.wajub.com/dashboard/payment-links/raise-funds) instead. It needs the same rights as a
[payment link](https://docs.wajub.com/dashboard/payment-links/create): **Manage payment links**,
[Live](https://docs.wajub.com/dashboard#sandbox-and-live), and room within the plan's link limit. No
[security code](https://docs.wajub.com/dashboard#the-security-code) is asked for.
## The steps
1. **Choose Receive donations**
In **New payment link**, choose **Receive donations**. Under **Start from:**, **Church offering
or tithe** and **Association or NGO** allow anonymous gifts and offer four everyday amounts,
FCFA 1,000, 2,500, 5,000 and 10,000; only the second shows the recent donors.
2. **Present the cause**
Fill in **The offer** and **Organized by** as for a
[fundraiser](https://docs.wajub.com/dashboard/payment-links/raise-funds#the-steps).
3. **Offer amounts**
In **Amounts**, choose the **Currency**, then up to 6 **Suggested amounts**; the donor can
always give another amount. **Minimum gift** and **Maximum gift** are optional and also bound
the suggested amounts.
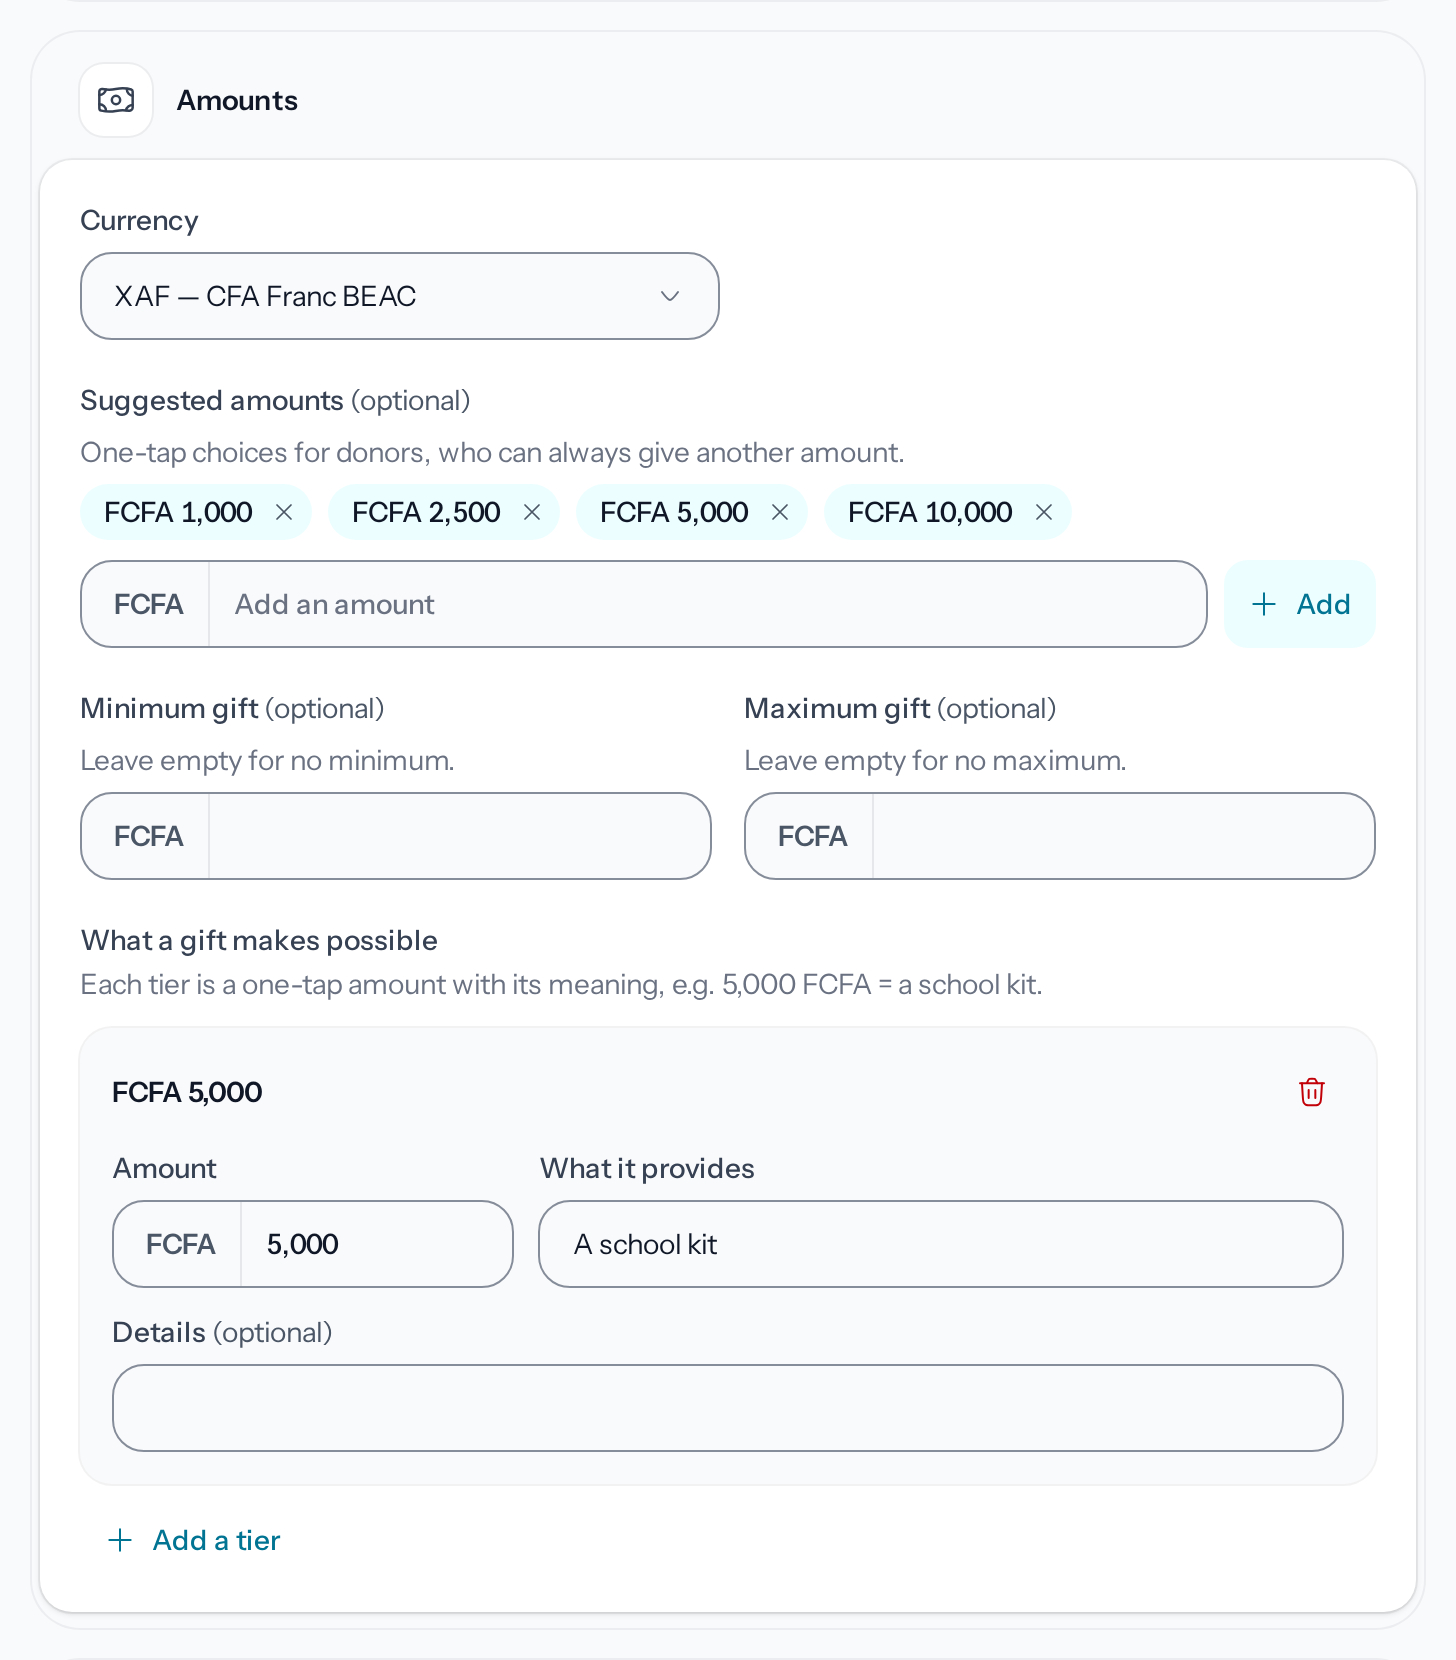
*Each tier is a one-tap amount, with what it pays for.*
4. **Say what a gift makes possible**
Under **What a gift makes possible**, **Add a tier** pairs an **Amount** with **What it
provides**, for example FCFA 5,000 for a school kit, with optional **Details**. Up to 6 tiers.
5. **Choose what the page shows**
In **What the page shows**, **Show recent donors and the total given** shows the latest gifts;
turned off, the page shows neither amount nor donor. **Let donors give anonymously** lets the
donor hide their name.
6. **Publish the link**
Choose the address in **Address and access**, as for a
[payment link](https://docs.wajub.com/dashboard/payment-links/create#the-steps), then **Publish the link**.
## Anonymous gifts
An anonymous gift hides the donor's name on the page only. In the link's **Donors** tab, the row
keeps their name with the **Anonymous on the page** badge, and so does the export: see
[Track a link](https://docs.wajub.com/dashboard/payment-links/track#people-and-export).
## What the donor sees
The donor chooses a tier or a suggested amount, or enters their own, then pays.
## After publishing
**News** is posted as for a
[fundraiser](https://docs.wajub.com/dashboard/payment-links/raise-funds#after-publishing). The total given and the
gifts are tracked on the link's page: see
[Track a link](https://docs.wajub.com/dashboard/payment-links/track#what-the-link-gathered). A donation link stays open
until you put it offline, unless you have set **Close the page on** or **Maximum number of
payments** in [Address and access](https://docs.wajub.com/dashboard/payment-links/share#address-and-access).
---
# Edit or remove a link
URL: https://docs.wajub.com/dashboard/payment-links/edit-offline-delete
> Edit a published payment link, put it offline, archive, duplicate or delete it, and reopen an expired link.
These actions need **Manage payment links**, as for
[creating a link](https://docs.wajub.com/dashboard/payment-links/create), and take place in
[Live](https://docs.wajub.com/dashboard#sandbox-and-live). Only deleting asks for the
[security code](https://docs.wajub.com/dashboard#the-security-code).
## Edit a link
1. **Open the link's form**
On the link's page, choose **Edit**, or in the **Payment links** list, the same choice in the
row's menu.
2. **Change what you need**
The form is the creation form, without the templates. The header shows **Unsaved changes**
until you have saved.
3. **Save**
**Save changes**, or Ctrl+S (Cmd+S on a Mac). The published page changes at once.
Once the link has been paid, its type can no longer change. For an event, the ticket types are
fixed at the first sale: see [Sell tickets](https://docs.wajub.com/dashboard/payment-links/sell-tickets#after-the-first-sale).
## Put offline or archive
The menu at the top of the link's page, like the menu of each row in the list, offers two ways to
close the page:
- **Put offline**: the address answers "page not found" until you choose **Put online** in the menu, or **Put it online** in the **This page is offline** banner. Nothing is deleted.
- **Archive**: the page tells customers that the link is no longer available, its payments stay, and the list hides it except with the **Archived links** filter. **Unarchive** gives it back its previous state.
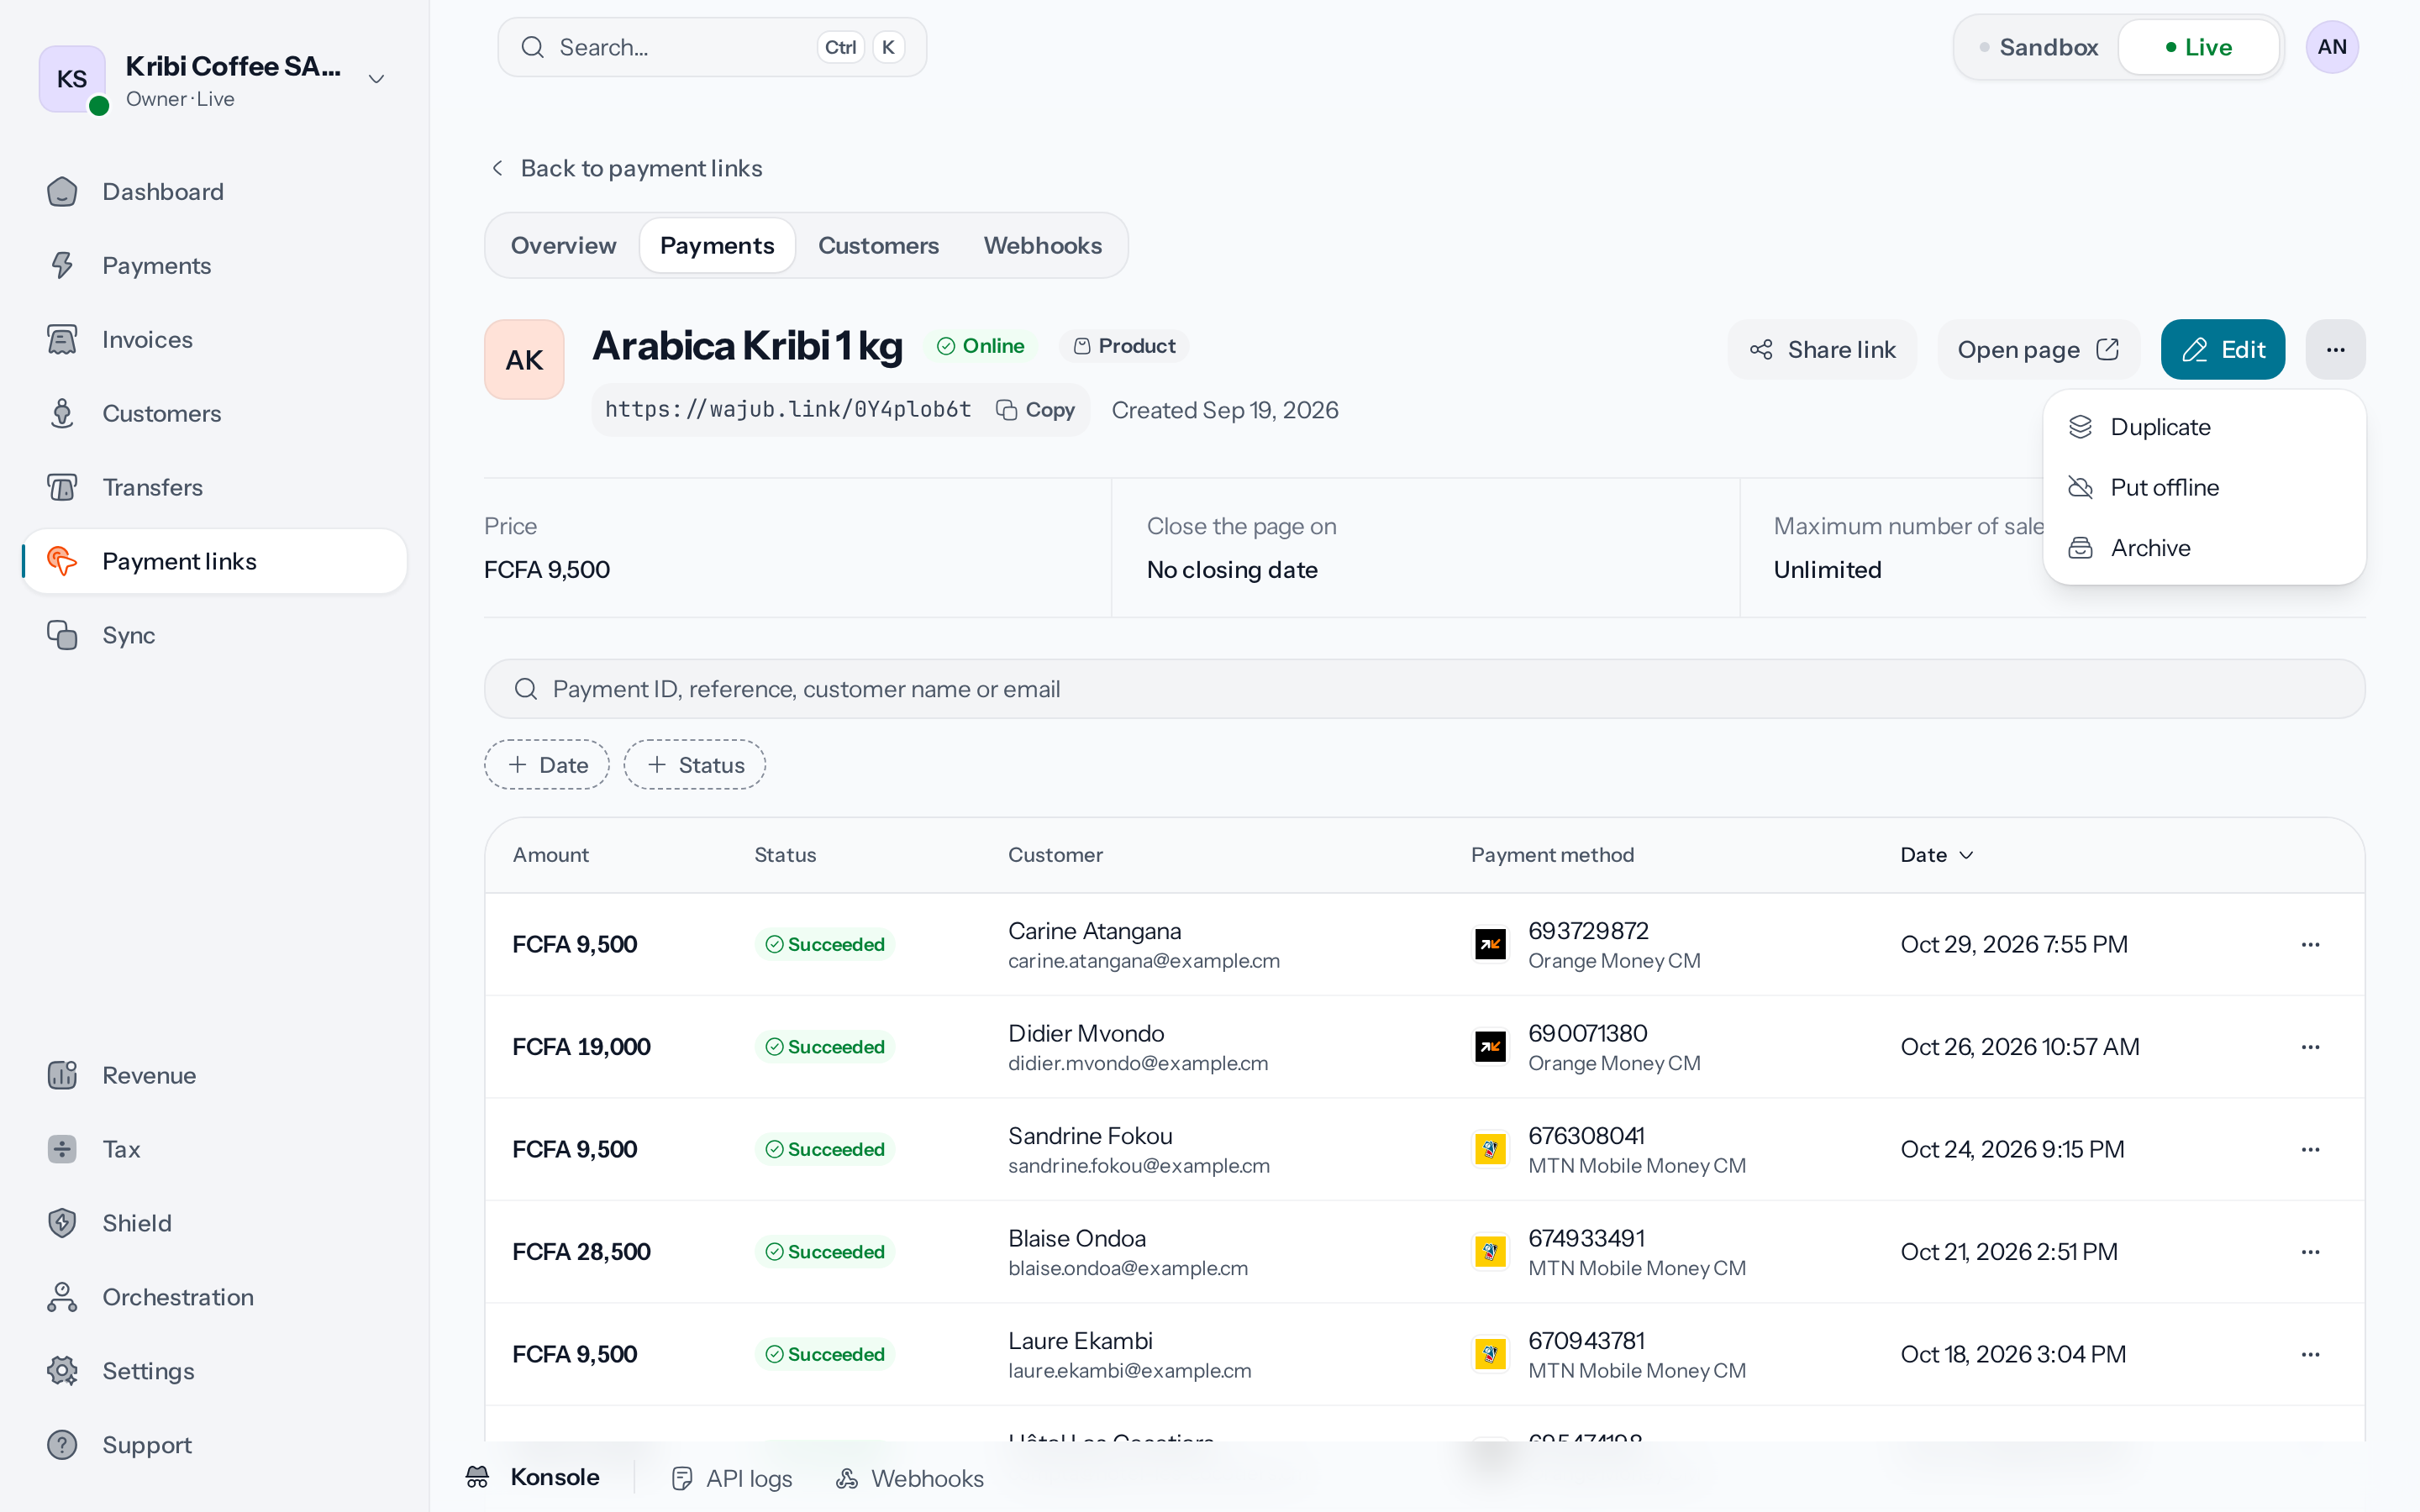
*Delete only appears for a link that has not received any payment yet.*
## Several links at once
In the list, tick up to 100 links: the bar that appears puts them online or offline, archives or
unarchives them together.
## Duplicate a link
**Duplicate**, in the menu, opens the form filled in with the link's settings and the title "Copy
of" followed by its own. The address, the dates, the password, the hosted file, the promo codes,
the news and the external reference are not copied. The copy is online by default and counts as a
new link within the plan's limit.
## Delete a link
Only a link that has received no payment can be deleted: **Delete**, at the bottom of the link
page's menu, then **Delete link** and the security code. The link, its page and its settings are
gone for good, and its address answers "page not found". A link already paid is archived instead,
to keep its payments.
## An expired link
Past its closing date, the link's page shows **This link has expired**. **Change the closing date**
opens the form to choose a new one or remove it. An expired or archived link cannot be put back
online as it is: change its date first, or unarchive it.
---
# Notify your server
URL: https://docs.wajub.com/dashboard/payment-links/notify-server
> Add a webhook endpoint to a payment link that notifies your server of each payment, ticket, donation or refund, and manage its signing secret.
A link's **Webhooks** tab sends its events to an address on your server, signed with a secret of
each endpoint's own. Anyone who sees payment links sees the tab; adding, editing or deleting an
endpoint needs **Manage payment links**. These actions, like revealing or rolling an endpoint's
secret, ask for the [security code](https://docs.wajub.com/dashboard#the-security-code). Links only exist in
[Live](https://docs.wajub.com/dashboard#sandbox-and-live). The content of the events and how to verify the signature are
described in the developer documentation:
[Webhooks of one link](https://docs.wajub.com/payments/link/tracking#webhooks-of-one-link).
## The steps
1. **Open the Webhooks tab**
On the link's page, open the **Webhooks** tab, then **Add endpoint**.
2. **Give your server's address**
In **Endpoint URL**, enter a public HTTPS address on your server.
3. **Choose the events**
Under **Events**, tick the ones the endpoint should receive: **Payment completed
successfully**, **Event ticket purchased**, **Donation received**, **Order placed**, **Payment
refunded, or lost in a dispute** and **Link expired**. It only receives those.
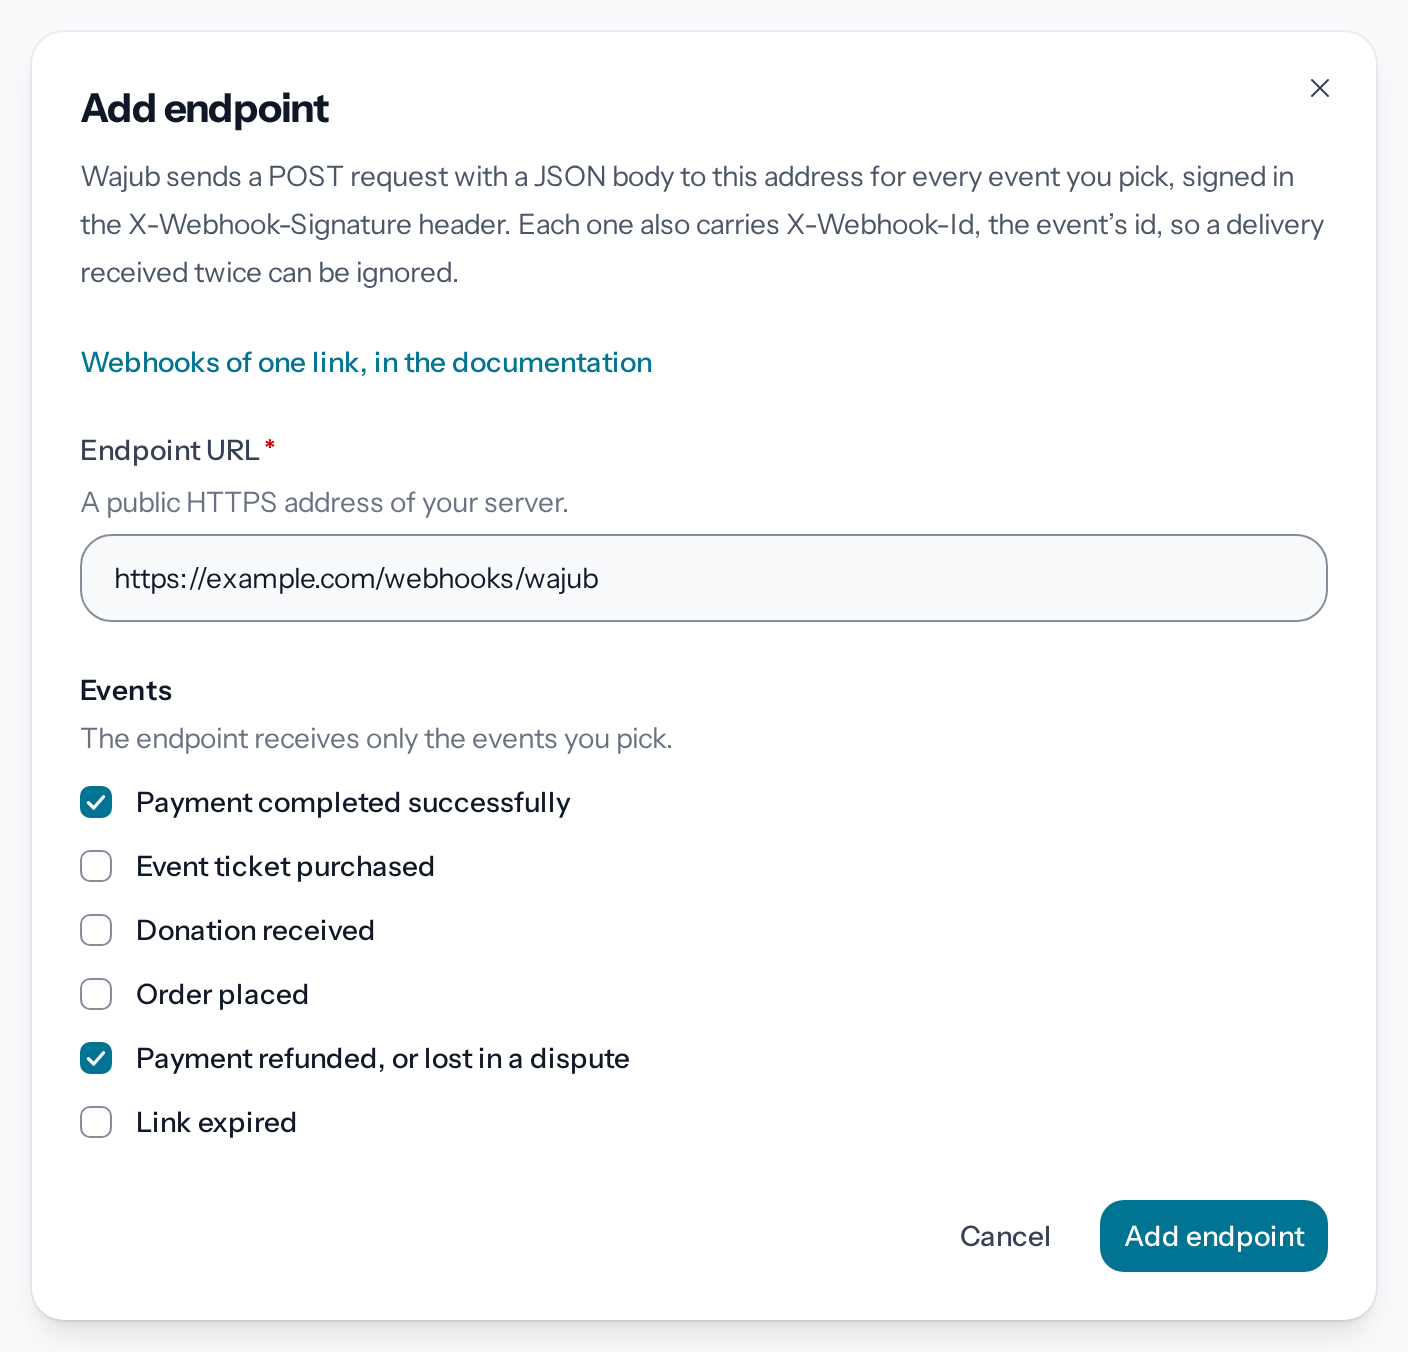
*The endpoint only receives the ticked events.*
4. **Save the endpoint**
**Add endpoint**, at the bottom of the window, saves it after the security code. When your
organisation already has as many endpoints as allowed, the window says so under **Endpoint
URL**: delete one you no longer use to add another.
5. **Copy the signing secret**
In the endpoint's menu, **Reveal signing secret** gives, after the security code, the
**Signing secret** your server uses to verify each delivery.
6. **Send a test**
**Send test**, in the endpoint's menu, sends a test event and says whether your server accepted
it. After too many tests, the message says when you can try again. The **Last delivery**, on
the endpoint's row, only counts real events, with the HTTP status received.
## Manage an endpoint
Each endpoint's menu also offers **Copy URL** and **Edit endpoint**, where turning off **Active**
keeps its settings without sending it anything. **Roll signing secret** opens **Roll signing
secret?**, which says when the old secret stops working. **Roll secret**, after the security code,
signs deliveries with a new secret and shows it under **Signing secret**: put it on your server so
that it keeps accepting deliveries. **Delete endpoint** asks **Delete this endpoint?**: the
endpoint stops receiving the link's events and its secret is lost, with no way back.
To receive the events of all your links at once, use the
[developer console webhooks](https://docs.wajub.com/developer-tools/webhooks) instead; their list of events is under
[Payment links](https://docs.wajub.com/developer-tools/webhooks/events#payment-links).
---
# Set what the customer fills in
URL: https://docs.wajub.com/dashboard/payment-links/payer-fields
> Add questions for the customer and promo codes, limit the payment methods and offer the page in several languages and currencies, for every link type.
These settings apply to all four link types and sit in the link's form, both when you create it and
with **Edit**. They need the same rights as a [payment link](https://docs.wajub.com/dashboard/payment-links/create):
**Manage payment links** and [Live](https://docs.wajub.com/dashboard#sandbox-and-live). No
[security code](https://docs.wajub.com/dashboard#the-security-code) is asked for.
Each customer gives their email for the receipt and can add their name and phone number. Only add
what you really need.
## Questions for the customer
In **What the customer fills in**, **Add a question** asks up to 10 questions. Each one has a
label, **Question**, and an **Answer** type: **Short text**, **Long text**, **Email**, **Phone**,
**Drop-down list** with up to 20 **Choices**, or **Checkbox to tick**. **Answer required** stops
the customer from paying without answering; for a checkbox, the switch becomes **Must be ticked to
pay**, useful for terms to accept. The answers reach
[the customer export](https://docs.wajub.com/dashboard/payment-links/track#people-and-export).
For an event, the details asked for each ticket are set separately: see
[Sell tickets](https://docs.wajub.com/dashboard/payment-links/sell-tickets).
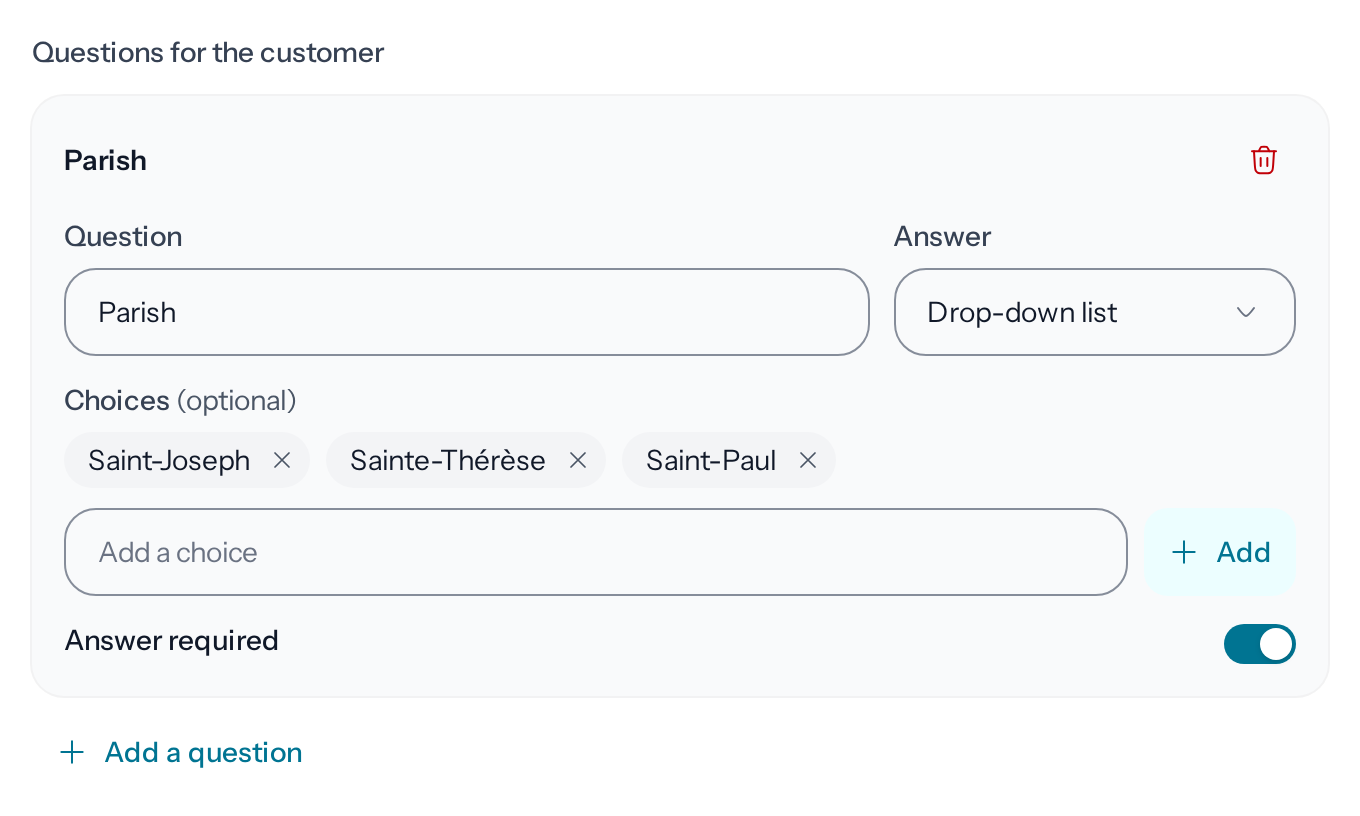
*The answers reach the link's customer export.*
## Promo codes
Under **Promo codes**, **Add a code** creates up to 20 codes. The **Code** fits in 32 characters:
capital letters, digits, hyphens and underscores. Choose the **Discount**, as a **Percentage** or a
**Fixed amount**, then its **Value**. **Number of uses** and **Valid until** are optional;
**Active** suspends a code without deleting it. The code field only appears on the page while at
least one code is active.
## Payment methods
By default, the customer is offered every method you collect payments on. Under **Payment
methods**, narrow the choice with **Only these countries**, **Only these payment methods** or
**Only these kinds of method** (**Mobile Money**, **Cards**, **Bank**, **Crypto**), alone or
together. Cards and crypto do not depend on any country. Under **Currency**, **Every method**
converts the amount when the currencies differ; **Same currency only** keeps the methods that
collect in the payment's currency.
## Languages and currencies
In **Languages and currencies**, the **Main language** is the one you write the page in, French or
English. Under **Languages offered to visitors**, tick the languages the visitor can see the page
in: each one opens a block to translate the title, the description, the button text and the
thank-you message; an empty field falls back to the main language's text.
**Other currencies visitors can pay in** lets visitors pay in another currency, at the day's rate.
Only the currencies accepted by one of your payment methods are offered.
---
# Raise funds
URL: https://docs.wajub.com/dashboard/payment-links/raise-funds
> Create a fundraising link with a goal, suggested amounts, a progress bar, milestones and an end date, then post news.
The **Raise funds** type gathers contributions towards a goal: a community project, medical
expenses, a membership fee. Each contributor chooses their amount. It needs the same rights as a
[payment link](https://docs.wajub.com/dashboard/payment-links/create): **Manage payment links**,
[Live](https://docs.wajub.com/dashboard#sandbox-and-live), and room within the plan's link limit. No
[security code](https://docs.wajub.com/dashboard#the-security-code) is asked for.
## The steps
1. **Choose Raise funds**
In **New payment link**, choose **Raise funds**. Under **Start from:**, **Community project**
shows the progress and the contributors; **Medical expenses** shows the progress and hides the
contributors.
2. **Present the fundraiser**
Fill in **The offer** as for any [payment link](https://docs.wajub.com/dashboard/payment-links/create#the-steps).
**Organized by** names the person or organisation behind the fundraiser; the page shows it as
verified when your Wajub account is.
3. **Set the goal**
In **Goal and amounts**, enter the **Goal** and choose its currency in the same field.
**Suggested amounts** offers up to 6 one-tap amounts; the contributor can always enter another
one. **Minimum contribution** is optional and stays below the goal.
*The contributor can always enter an amount other than the suggested ones.*
4. **Choose what the page shows**
In **What the page shows**, **Show the amount raised and the progress bar** shows how far the
fundraiser has got; turned off, the page only shows the goal. **Show contributors** shows how
many there are and the name of the last eight, never their contact details; their amounts
only appear while **Show the amount raised and the progress bar** is on.
5. **Choose what happens at the goal**
With **Keep collecting once the goal is reached** off, the page takes no more contributions
once the goal is reached and says so; a refund that brings the total back below the goal opens
it again. Turned on, the fundraiser goes on past its goal.
6. **Set the end of the campaign**
**End of the campaign** is optional: on that date, the page closes by itself, and it shows a
countdown during the last 30 days. It replaces the closing date of the other types.
7. **Add milestones**
**Add a milestone** marks a stage towards the goal, up to 10, with its **Amount**, an optional
**Title** and **What it achieves**. While the amount raised is shown, the page ticks off each
milestone reached.
8. **Publish the link**
Choose the address in **Address and access**, as for a
[payment link](https://docs.wajub.com/dashboard/payment-links/create#the-steps), then **Publish the link**.
## What the contributor sees
The contributor sees the goal and the progress if you show it, chooses or enters an amount and
pays.
## After publishing
To tell people what the money is for, open **Edit**, then **Post news** in **News**, with a
**Title**, a **Date** and the **News text**; the page shows the last four, out of 20 at most. The
amount raised and the contributions are tracked on the link's page: see
[Track a link](https://docs.wajub.com/dashboard/payment-links/track#what-the-link-gathered).
The fundraiser stops at the **End of the campaign**, when the goal is reached unless **Keep
collecting once the goal is reached** is on, at the **Maximum number of payments** if you set one
in **Address and access**, or when you put the link offline or archive it: see
[Edit or remove a link](https://docs.wajub.com/dashboard/payment-links/edit-offline-delete#offline-or-archive).
---
# Sell something
URL: https://docs.wajub.com/dashboard/payment-links/sell-something
> Sell a physical item, digital content or a service at a fixed price with a payment link, with its options, its stock, its delivery or its access.
The **Sell something** type sells, at a fixed price, an item delivered or collected in person, a
file or a link to download, or an appointment. It needs the same rights as a
[payment link](https://docs.wajub.com/dashboard/payment-links/create): **Manage payment links**,
[Live](https://docs.wajub.com/dashboard#sandbox-and-live), and room within the plan's link limit. No
[security code](https://docs.wajub.com/dashboard#the-security-code) is asked for.
## The steps
1. **Choose the product type**
In **New payment link**, choose **Sell something**, then under **What kind?**: **Physical
item**, **Digital content** or **Service**. Under **Start from:**, **Clothing or accessory**
asks for a delivery address and adds the **Size** option from S to XL; **Online course or
e-book** prepares a download link; **Consultation** prepares a 60-minute online service.
2. **Describe the product**
Fill in **The offer** as for any [payment link](https://docs.wajub.com/dashboard/payment-links/create#the-steps).
**More photos** adds up to 10 images, in the order they appear on the page. An MP4 or WebM
**Video** replaces the photo at the top of the page.
3. **Set the price**
In **Price and options**, enter the **Price** and choose its currency in the same field. The
price is required and the customer cannot change it. To let each person choose their amount,
create a link to [raise funds](https://docs.wajub.com/dashboard/payment-links/raise-funds) or
[receive donations](https://docs.wajub.com/dashboard/payment-links/donations) instead.
4. **Add options**
**Add an option** creates a size, a colour or a format, up to 5 options of 20 choices each.
**Shown as** displays them as **Buttons with text** or **Color swatches**, and a choice can
cost more than the base price. The customer picks one choice from each option before paying.
*A choice can cost more than the base price.*
5. **Set delivery or access**
The next section depends on the product type: [a physical item](#a-physical-item),
[digital content](#digital-content) or [a service](#a-service).
6. **Publish the link**
Choose the address in **Address and access**, as for a
[payment link](https://docs.wajub.com/dashboard/payment-links/create#the-steps), then **Publish the link**.
## A physical item
The **Stock**, under the price, is not shown on the page, but the customer cannot order more than
what is left: once it runs out, the page takes no more orders, unless **Keep selling when out of
stock** is on, to deliver later. Leave it empty if you do not track stock.
In **Delivery and returns**, turn off **Ask for a delivery address** for an item collected in
person. The **Delivery fee** is added once per order; empty or 0, delivery is free. The **Return
policy** appears on the page. Each buyer's chosen option and address reach
[the customer export](https://docs.wajub.com/dashboard/payment-links/track#people-and-export).
## Digital content
In **Access to the content**, **How the customer gets it** offers two choices:
- **A download link**: the https address of your file, on Drive, Dropbox or your site.
- **A file hosted by Wajub**: up to 500 MB, from the **Growth** plan up.
After the payment, the customer receives by email an access link specific to their payment, with
your **Access instructions**, which also appear on the page. The file's address never appears on
the page. **Access lasts** sets, in days from the payment, how long this link works, up to 365:
30 days on a new link, no limit if the field is empty. With **Single-use access**, the access link
stops working after the first download: each buyer downloads once, and the payment link stays
open to the next buyers. A customer refunded in full loses access.
With **A download link**, the customer lands on your own address and keeps it: protecting it is up
to you.
## A service
In **How the service works**, **Where it takes place** offers **Online**, **In person** or
**Both**. Online or for both, the **Meeting link** is required: it goes out by email after the
payment, with **What the customer should prepare**, which also appears on the page, as do the
**Duration** (from 5 minutes to 24 hours) and the **Cancellation policy**. No time slot is booked:
agree on the time with the customer.
## What the customer sees
The customer chooses their options and quantity, up to 100, gives their email, and their address if
the item is delivered, then pays the price shown.
---
# Sell tickets
URL: https://docs.wajub.com/dashboard/payment-links/sell-tickets
> Sell seats for a concert, a training or a gala with a payment link, ticket types, a ticket with a QR code and the attendee list.
A ticketing link is a payment link of the **Sell tickets** type: the buyer chooses a ticket type and
the number of seats, pays, and receives a ticket with a QR code by email.
It needs the same rights as a [payment link](https://docs.wajub.com/dashboard/payment-links/create): **Manage payment
links**, [Live](https://docs.wajub.com/dashboard#sandbox-and-live), and room within the plan's link limit. No
[security code](https://docs.wajub.com/dashboard#the-security-code) is asked for.
## The steps
1. **Choose Sell tickets**
In **Live**, open **Payment links**, then **Create link**, and choose **Sell tickets** under
**What do you want to collect money for?**. Under **Start from:**, **Concert or show** creates
two tickets, Standard and VIP, and **Training or conference** a Participant ticket that asks
for each attendee's name and company.
2. **Describe the event**
In **The offer**, give a **Title**, a **Poster or photo** and a **Description**: the programme,
the artists or speakers, what the ticket includes. Set when it begins in **Starts**, and if
needed when it finishes in **Ends**, then the **Time zone of the event**: attendees see the
times in this time zone.
The **Venue** is required, a hall or "Online"; **Address**, **City** and **Country** are
optional.
3. **Create the ticket types**
In **Tickets**, choose the **Currency**, then give each ticket a **Name**, a **Price** and a
**Quantity**. A price of 0 makes the ticket free, and an empty quantity leaves it unlimited.
**Add a ticket type** adds another one, up to 20, and **Venue capacity** caps the total across
all ticket types.
*From the first ticket sold, the ticket types no longer change.*
4. **Set the ticket that is sent**
In **Tickets and refunds**, **Send a ticket with a QR code** is on by default. Add your
**Refund policy**: it appears in the ticket email.
*One email goes to the buyer, with one QR code for the whole purchase.*
The email goes to the buyer's address, not to each attendee: it holds one QR code that covers
the whole purchase, with the number of tickets.
5. **Ask for attendee details**
In **What the customer fills in**, **Details asked for each attendee** adds up to 10 fields
filled in once per ticket, such as **Full name** or **T-shirt size**. The answers reach the
link's **Attendees** tab and its export, not the ticket.
6. **Publish the link**
Choose the address in **Address and access**, as for a
[payment link](https://docs.wajub.com/dashboard/payment-links/create#the-steps), then **Publish the link**. There is
no closing date to set: sales stop by themselves at **Ends**, or when the event starts if
**Ends** is empty.
## What the buyer does
The buyer chooses a ticket type and up to 100 seats, fills in each attendee's details and pays; the
page flags a sold-out ticket and closes sales once the event is over, or once it has started when
it has no end.
## On the day
Wajub does not scan tickets or record entries. To check people in, use the **Attendees** tab: one
row per purchase, with the buyer, the ticket type and number of tickets, the attendees and the
amount. **Search attendees** finds a name, an email, a phone number or an attendee, and **Export**
downloads the list as CSV. Since one QR code covers a whole purchase, check in the list how many
tickets it stands for.
The link's page tracks the **Tickets sold**, the **Buyers** and the **Tickets left**.
## After the first sale
From the first ticket sold, the ticket types no longer change: name, price, quantity and order are
fixed. The **Venue capacity** and the rest of the link stay editable. A ticket type whose sales
were all refunded can be renamed, not removed.
After the event, the payment page closes sales, but the link stays **Online** in the dashboard:
**Archive**, in the link page's menu, puts it away.
---
# Choose the link domain
URL: https://docs.wajub.com/dashboard/payment-links/settings
> Serve your payment links on your own domain rather than on wajub.link, from the payment link settings.
By default, a link's address starts with wajub.link. With a verified domain of your own, your links
can open on your own address; custom domains come with the **Scale** and **Enterprise** plans. The
owner, an Administrator, a Developer or a Viewer opens this
setting, as does a custom role with **View settings**; only the owner, an Administrator or a role
with **Manage settings** saves it (see the [roles](https://docs.wajub.com/dashboard#roles)). It only exists in
[Live](https://docs.wajub.com/dashboard#sandbox-and-live), and no [security code](https://docs.wajub.com/dashboard#the-security-code) is asked
for.
## The steps
1. **Verify your domain**
The domain must first be connected and verified: see
[Connect your domain](https://docs.wajub.com/dashboard/settings/custom-domains).
2. **Open the link settings**
In **Settings**, under **Products**, open **Payment links**. The page is called **Links**.
3. **Choose the domain**
In **Payment link domain**, choose your domain under **Domain**, or **Default (wajub.link)** to
go back to the Wajub address. Without a verified domain, the page says so and offers **Add a
domain**.
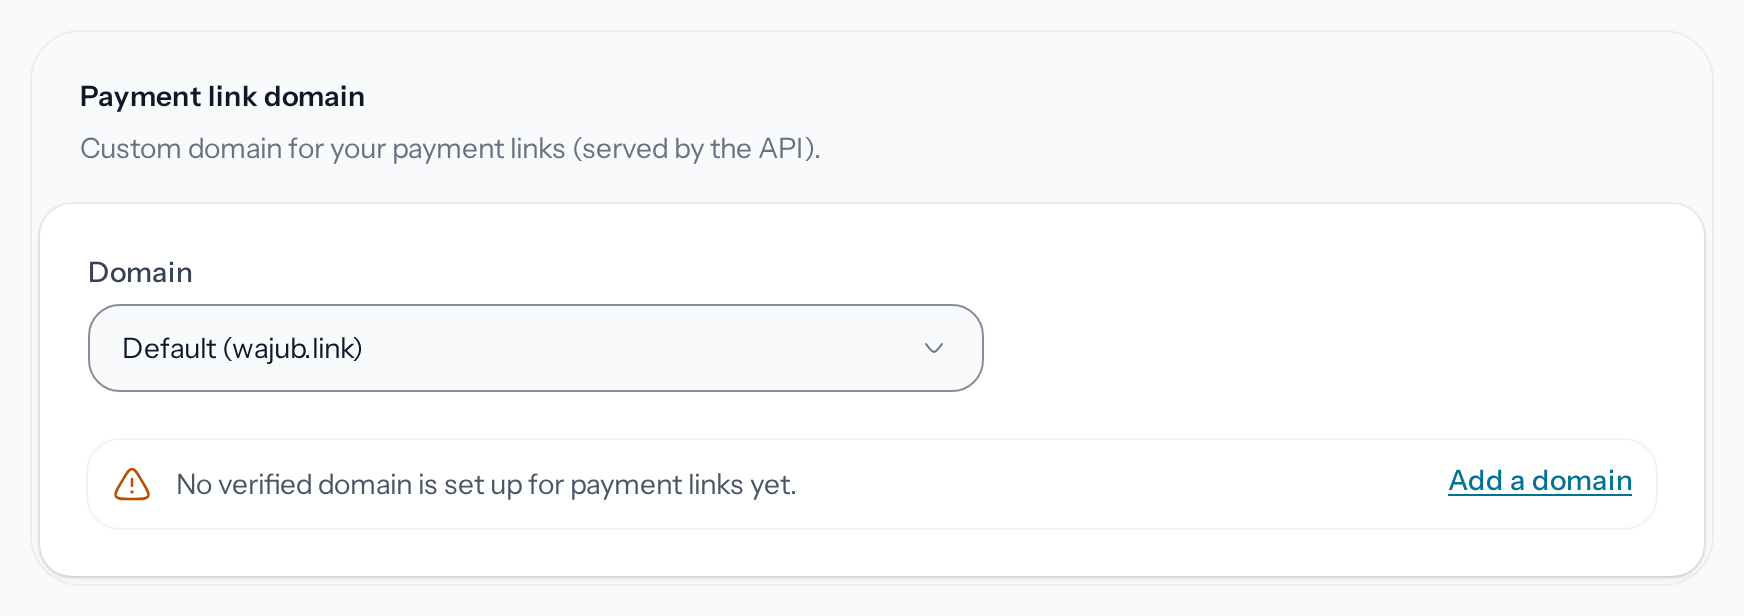
*Only verified domains are offered.*
4. **Save**
The bottom bar offers **Save changes**, or **Discard** to go back to the previous setting.
## What changes
The chosen domain serves every link that does not have its own domain, including those already
published, and it is preselected for each new link. To keep another address for a link, choose its
**Domain** in the link's form: see
[Share a link](https://docs.wajub.com/dashboard/payment-links/share#address-and-access).
---
# Share a link
URL: https://docs.wajub.com/dashboard/payment-links/share
> Send a payment link's address by WhatsApp or SMS, print its QR code, put a payment button on your site and set the page's address and access.
Anyone who sees payment links can open the share window. Changing a link's address or access needs
**Manage payment links**, as for [creating a link](https://docs.wajub.com/dashboard/payment-links/create). Links only
exist in [Live](https://docs.wajub.com/dashboard#sandbox-and-live). No [security code](https://docs.wajub.com/dashboard#the-security-code) is
asked for.
## The steps
1. **Open the share window**
It opens by itself after publishing, titled **Your link is online**, or **Your link is created,
offline for now** if the page is not online yet. Later, **Share link** at the top of the link's
page reopens it.
2. **Send the address**
Copy the **Link address**, or choose under **Share with**: WhatsApp, SMS, Telegram, X, Facebook
or email, which prepare a message with the link. On a phone, a button also opens the device's
share sheet.
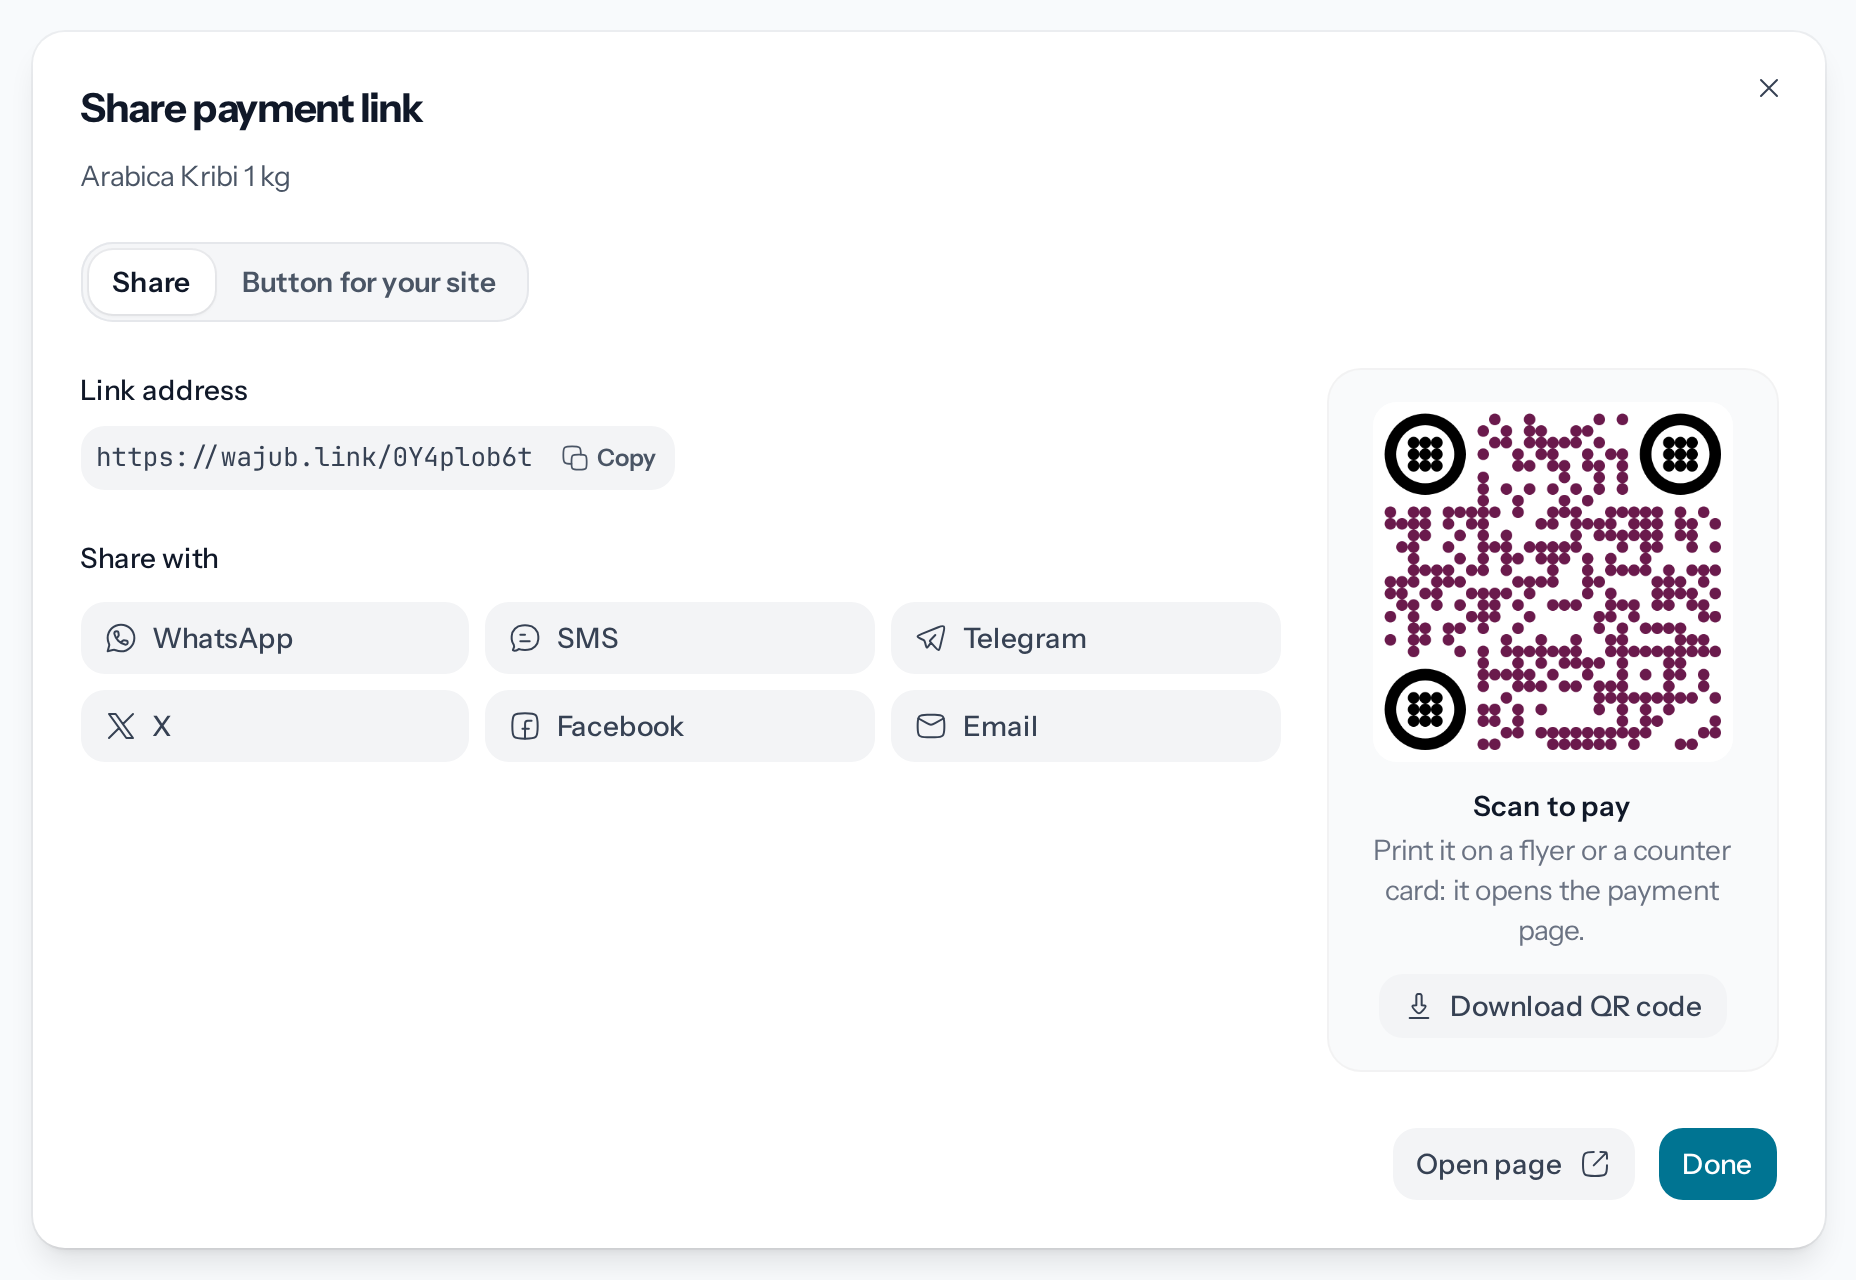
*The QR code opens the link's payment page.*
3. **Print the QR code**
**Download QR code** saves the image to print on a flyer or a counter card: once scanned, it
opens the payment page.
## The button for your site
The **Button for your site** tab prepares a button to paste into your site. **Over your site** lets
the customer pay without leaving your page; **On the payment page** is a plain link that works
everywhere, even where scripts are not allowed. Set the **Button text**, the **Color**, the
**Shape** (**Square**, **Rounded** or **Pill**) and the **Size**; for a plain link, **Open the
page in** chooses **New tab** or **Same tab**. The **Preview** shows the button, then **Copy**
copies the **Code to paste** into the "Code", "HTML" or "Embed" block of Systeme.io, WordPress,
Wix, Webflow or Shopify.
If you have listed sites in
[Sites that show the page](https://docs.wajub.com/dashboard/settings/checkout-page#embedding), the window over your site
only opens on them; elsewhere, the button offers the page in a new tab. While the list is
empty, it opens on any site.
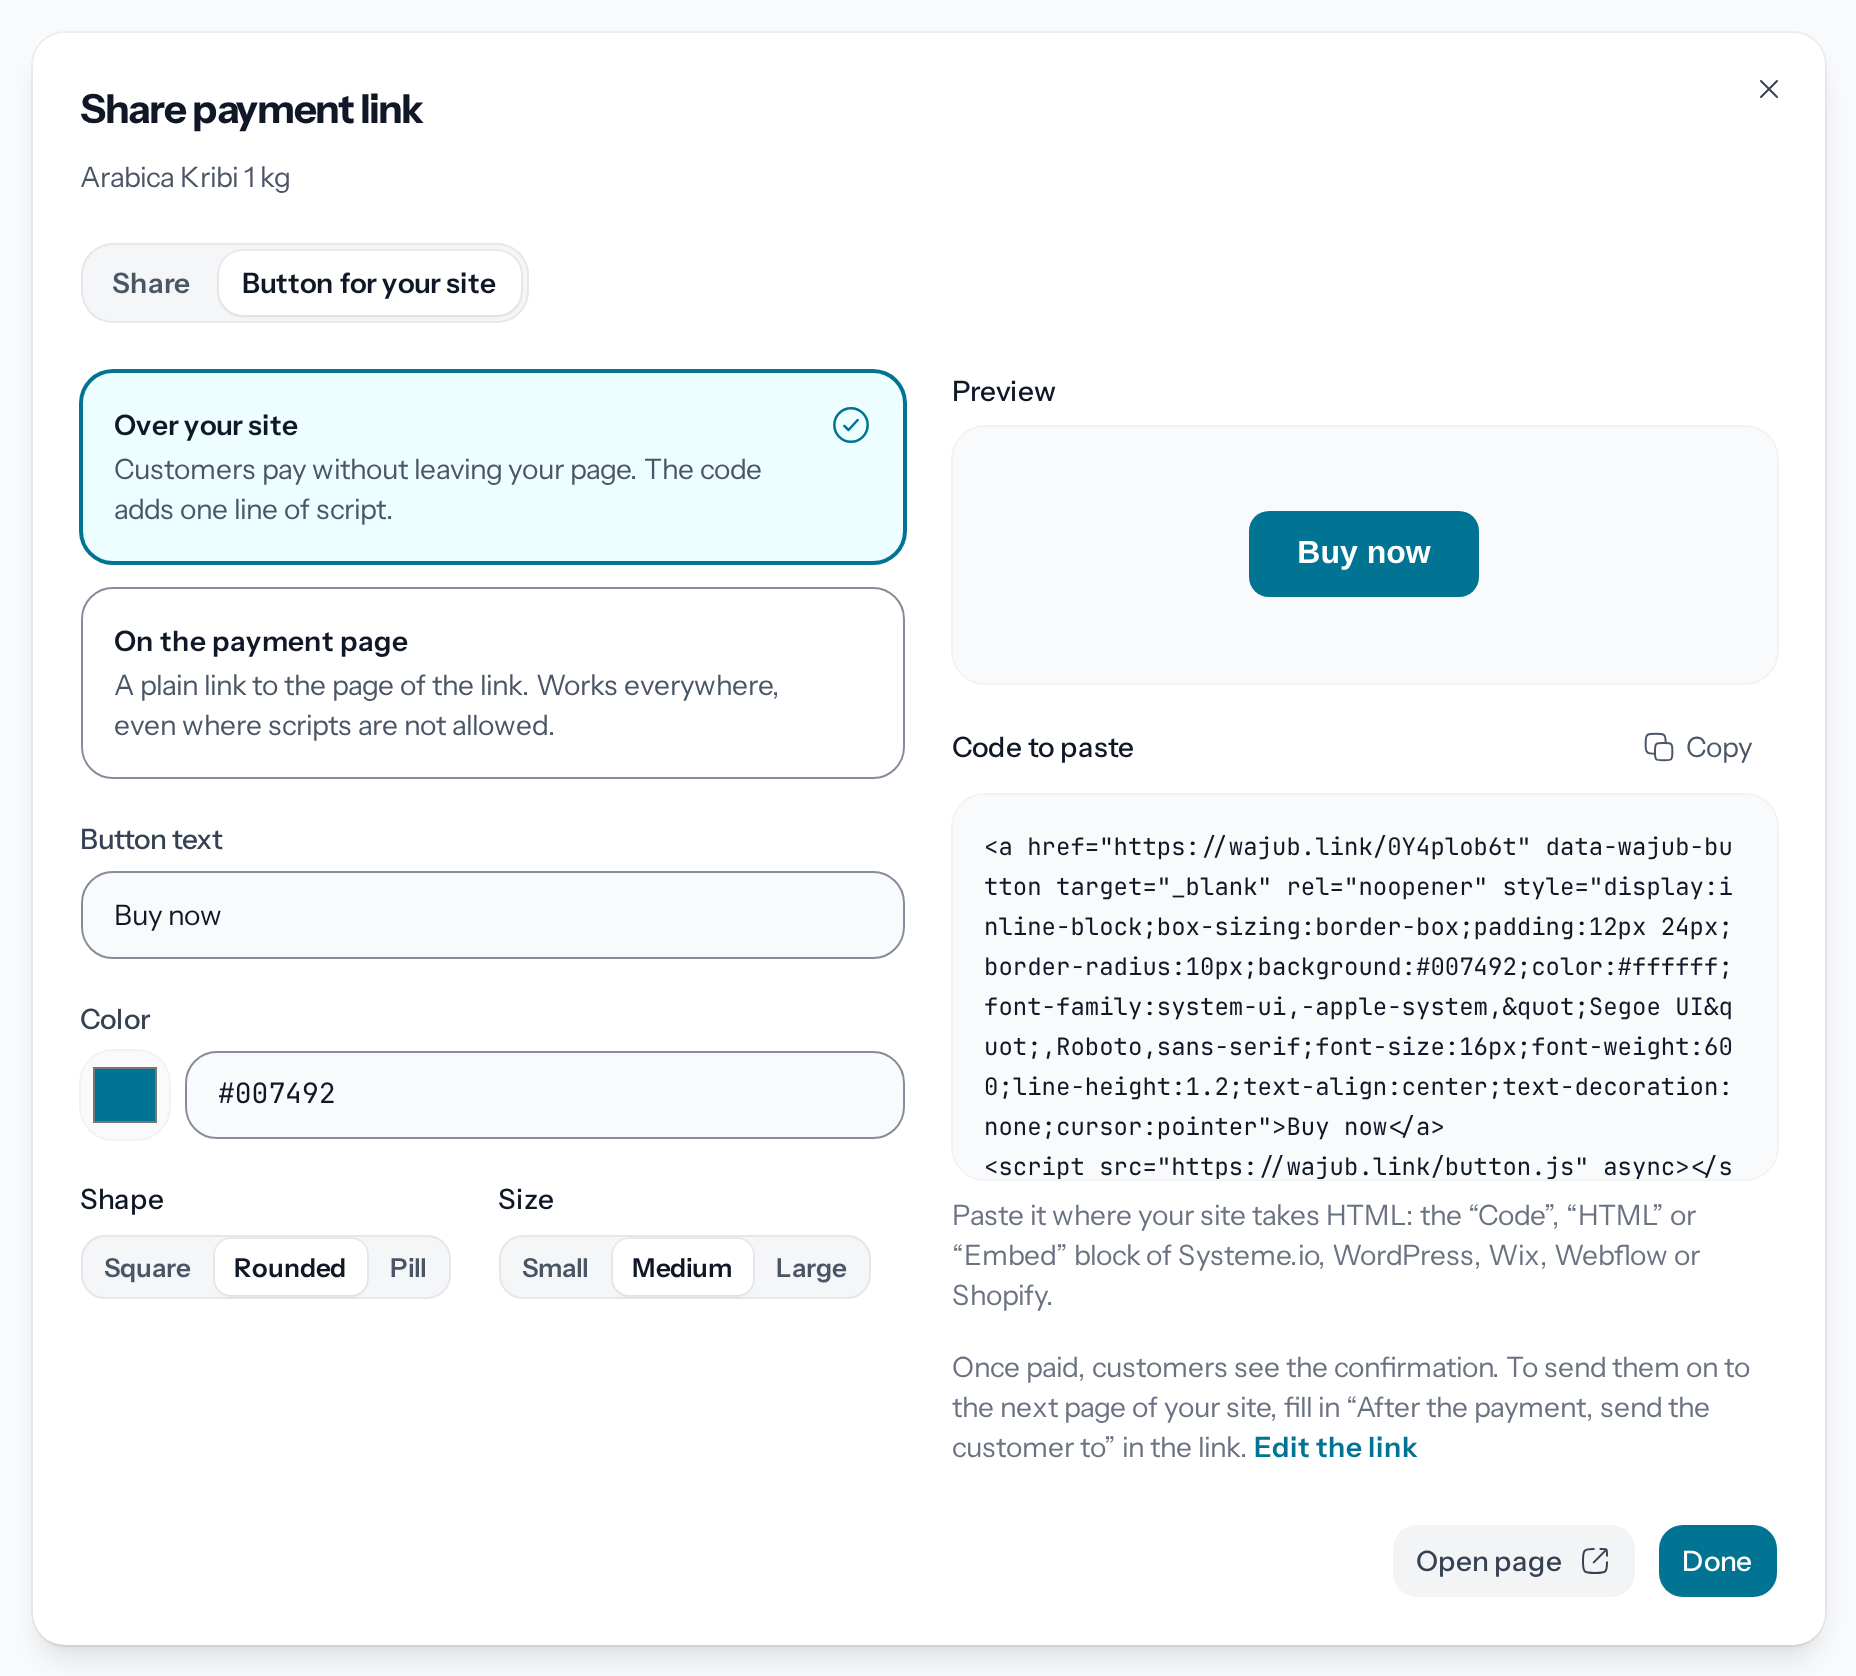
*The code is pasted into your site's HTML block.*
## Address and access
These settings sit in **Address and access**, when you create the link or with **Edit**:
- **Link address**: the end of the address, 3 to 100 letters, digits, hyphens or underscores, free across all of Wajub.
- **Domain**: only appears with a verified domain; see [Choose the link domain](https://docs.wajub.com/dashboard/payment-links/settings).
- **Page online**: turned off, the page answers "page not found" until it is put online.
- **Close the page on**: a closing date, except for an event or a fundraiser, which stop by themselves.
- **Maximum number of sales**, or **Maximum number of payments** for a donation or a fundraiser: the page closes once the number is reached.
- **Close after the first payment**: for a single payer. Once the payment succeeds, the page tells visitors the link has already been used, and while a payment is in progress, other visitors are told so. The link opens again if that payment does not go through; a refund does not reopen it. If a second payment still succeeds, the owner, Administrators and Finance members receive an email naming the payment to refund.
- **Password to open the page**: 4 to 100 characters, to give with the link; afterwards, **Change the password** or **Remove the password**.
- **Close after this many visits**: the page closes beyond this number of visits.
Empty fields set no limit.
---
# Track a link
URL: https://docs.wajub.com/dashboard/payment-links/track
> Read a payment link's visits, sales and conversion rate, its fundraising or tickets, its payments and its customers, and export its customers as CSV.
Anyone who sees payment links reads these figures; exporting needs **Manage payment links**. Links
only exist in [Live](https://docs.wajub.com/dashboard#sandbox-and-live). Open **Payment links**, then the link: its page
reads by tabs, **Overview**, **Payments**, the tab for its customers and **Webhooks**.
## Performance
Under **Performance**, the **Period** is the last 30 days by default. Four figures sum it up:
**Visits**, **Sales**, **Revenue** and **Conversion rate**, with the total since the link was
created under the first three, and under the rate, as soon as there is a sale, the average sale for
the period. **Visits and sales** plots them day by day, and **Show as a table** shows the same
figures as a table. **Top countries** says where the visits come from, **Devices** what the page
was opened on.
## What the link gathered
Further down, a block depends on the type, since the start:
- Fundraiser: **Fundraising progress**, the amount raised against the goal, the **Goal progress** and the number of **Donors**.
- Donations: **Donations**, with the number of **Donors** and the **Total given**.
- Event: **Tickets**, with the **Tickets sold**, the **Buyers** and the tickets left.
Amounts received in a currency other than the link's are shown separately, under the total.
**Link details** then repeats its settings: currency, stock, delivery, duration or venue, end of the
campaign, password, category and tags.
## Payments
The **Payments** tab lists the link's payments with their amount, their status, the customer, the
payment method, the payment ID and the date.
## Customers and export
The next tab is called **Customers**, **Donors** for a donation or a fundraiser, or **Attendees**
for an event. It shows one row per purchase or gift, with the **Anonymous on the page** or
**Dispute lost** badges. The search finds a name, an email or a phone number, and each row's menu
leads to **Open payment** or **View customer**.
**Export** downloads a CSV of 50,000 rows at most, with the tab's search and dates. It adds the
answers to the link's questions and columns that depend on the type: quantity, chosen option and
delivery address for a product; ticket type and attendees for an event; anonymous gift or not for
a donation or a fundraiser. Each export counts towards your [plan](https://docs.wajub.com/dashboard/subscription/plans)'s
monthly export limit.
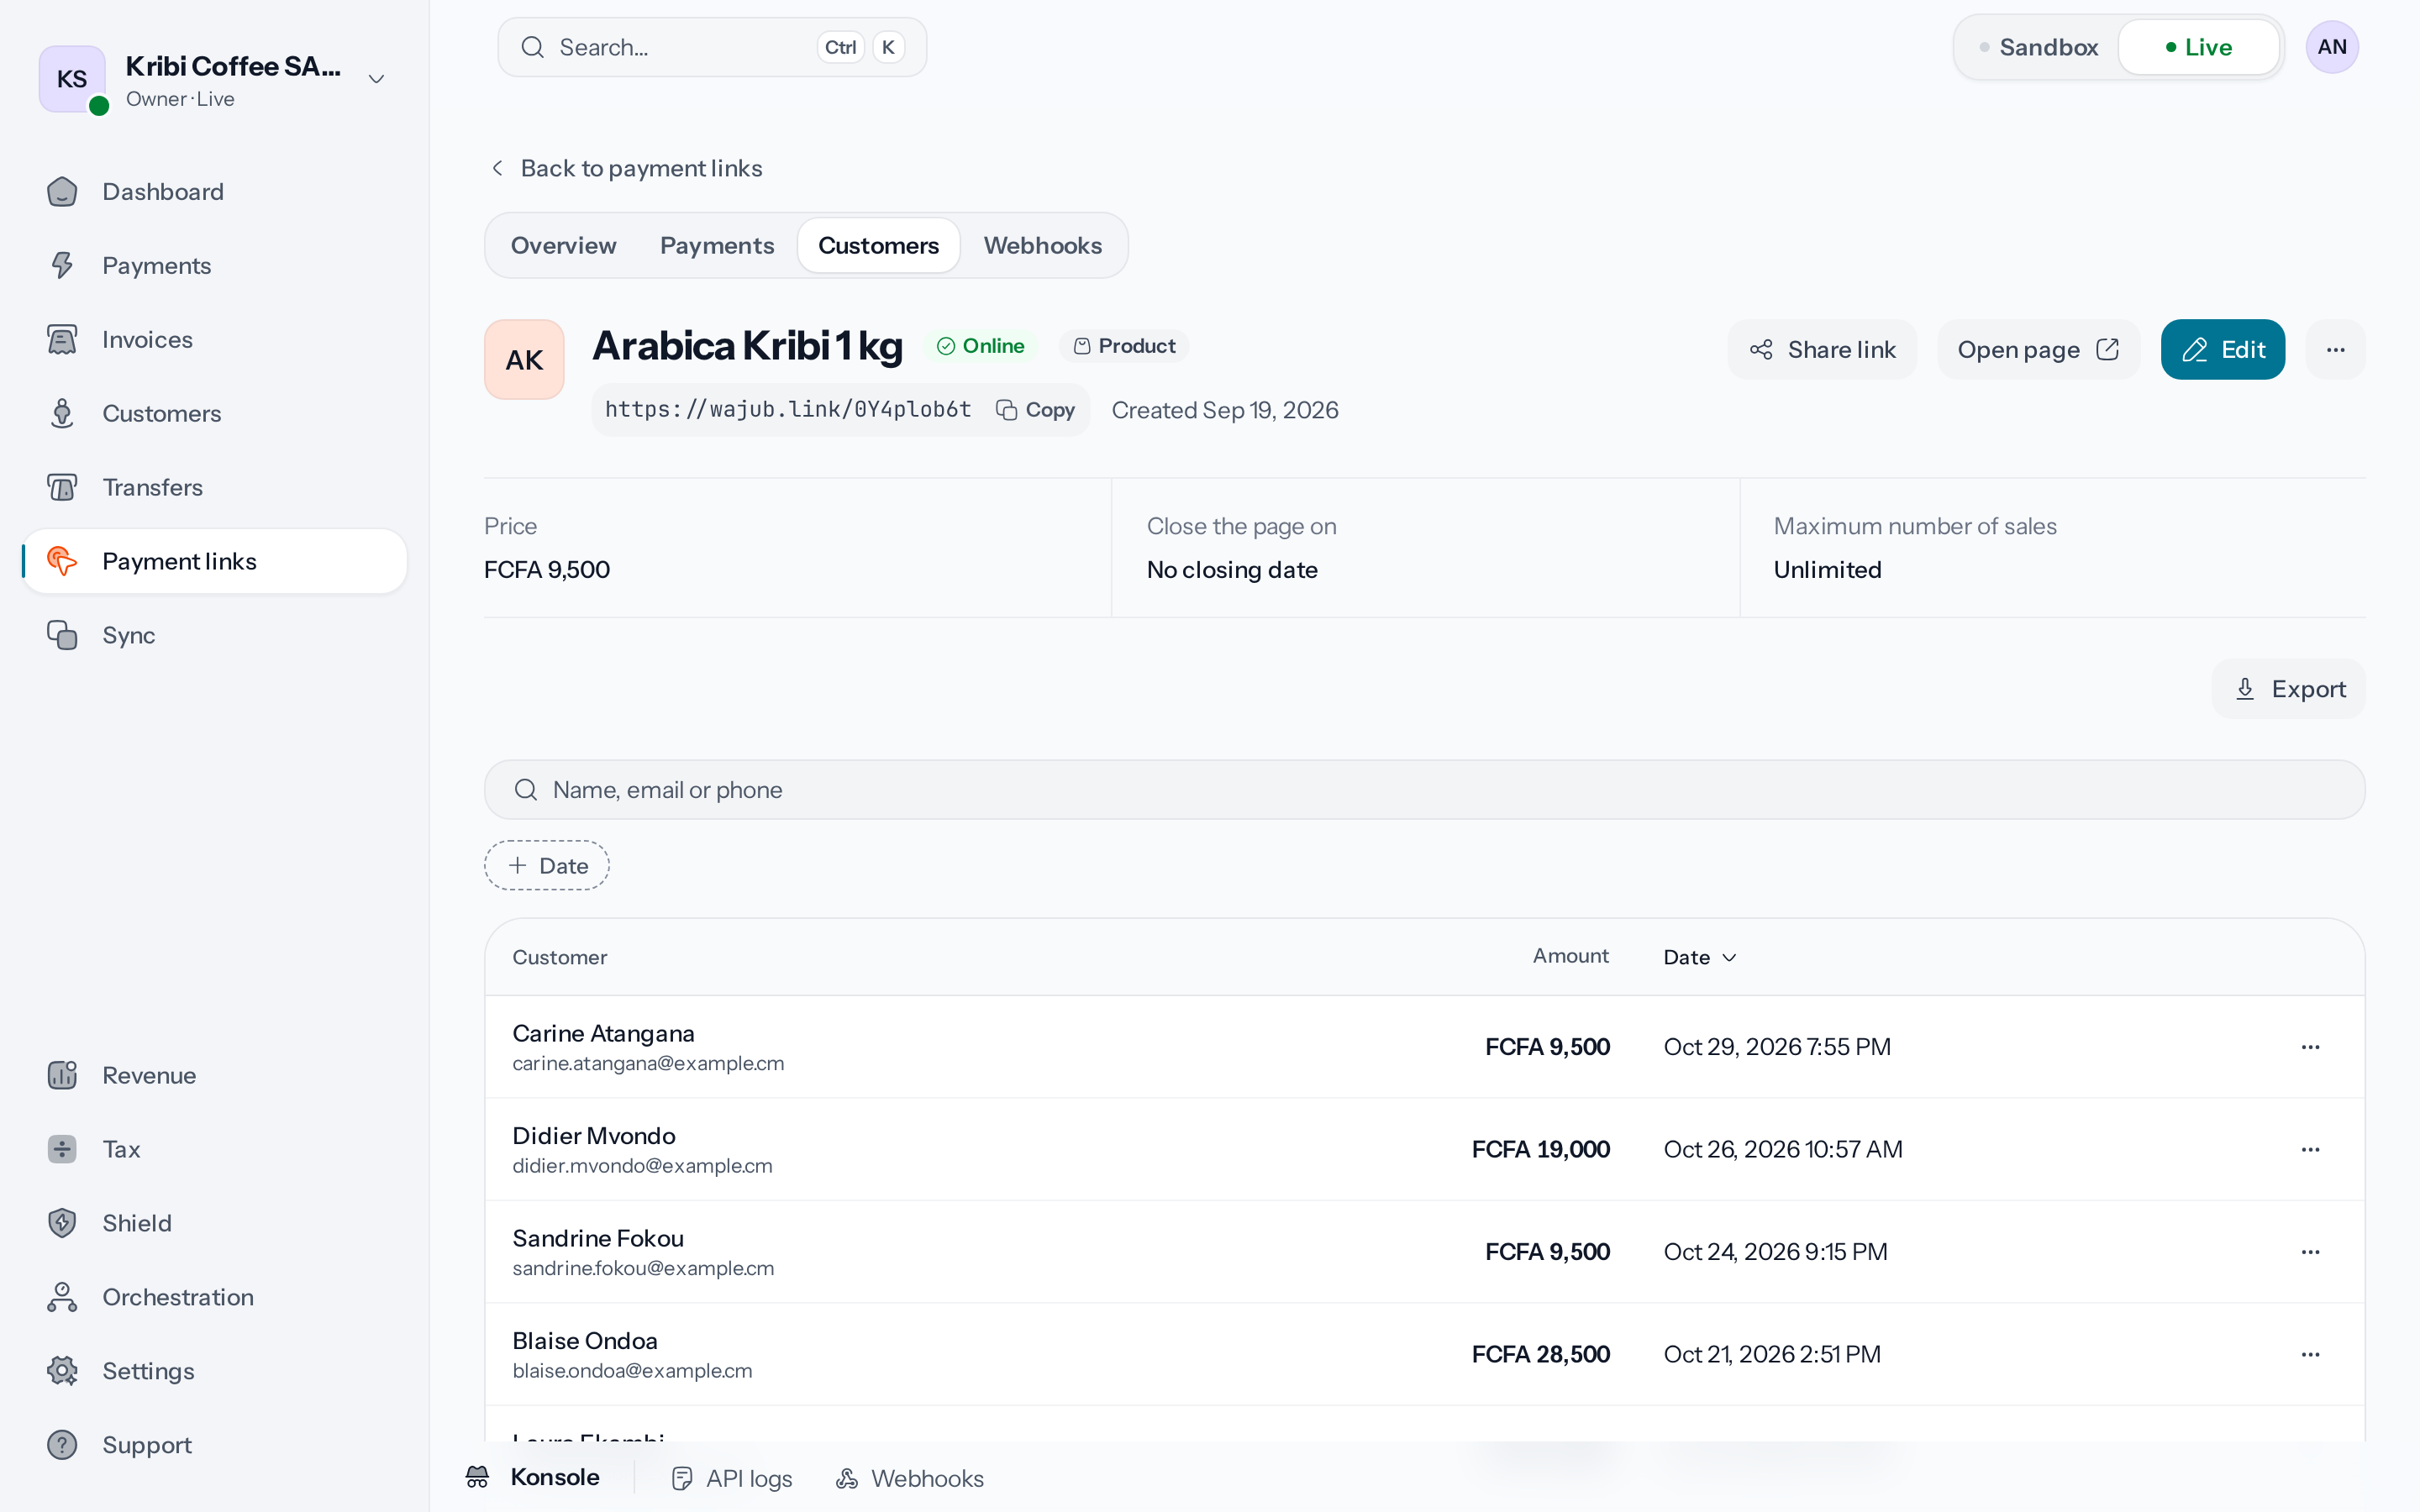
*The answers to the link's questions only appear in the export.*
---
# Respond to a dispute
URL: https://docs.wajub.com/dashboard/payments/disputes
> Read a dispute, send your evidence and write to the customer before the deadline, then accept the dispute or mark it as won.
A dispute challenges a payment: for a payment collected by Wajub, the disputed amount is held on
your balance until the dispute ends, and you have until a deadline to respond. It comes from a
customer who disputes from their Pocket portal, after a refund request, or from the customer's
bank, through the provider that processed the payment: it is then a chargeback.
Every [role](https://docs.wajub.com/dashboard#roles) can see disputes, on every plan. Sending evidence, writing to the
customer, writing a note, accepting a dispute or marking it as won is open to the owner,
Administrators, Support specialist members and custom roles that have **Manage disputes**.
Accepting and marking as won ask for the [security code](https://docs.wajub.com/dashboard#the-security-code). Disputes
in [Sandbox](https://docs.wajub.com/dashboard#sandbox-and-live) stay separate from those in Live and send no email.
## The disputes list
When a dispute opens in Live, the owner, Administrators and Support specialist members receive an
email with a link to the dispute.
In the dashboard, open **Payments**, then the **Disputes** tab. The list brings together disputes
and refund requests; choose **Stage** › **Dispute** to keep only the disputes. Requests have their
own page: [Respond to a refund request](https://docs.wajub.com/dashboard/payments/refund-requests).
Each row gives the **Amount**, the **Stage**, the **Status**, the **Respond by** date with the
time left, the **Reason**, the **Customer** and the **Opened** date. A dispute that came from a
request shows **From a refund request**. Choose the **Respond by** header to see the nearest
deadlines first.
A dispute is **Open** until your first evidence, then **Under review**. It ends **Won**, **Lost**
or **Resolved**.
The search bar finds a dispute by its ID, its payment's ID or its reason. **Date**, **Stage**,
**Status** and **Amount** filter the list. The menu at the end of a row offers **Open dispute**,
**Copy dispute ID**, **View payment** and, when the dispute has a customer, **View customer**.
## Read a dispute
Choose the dispute's row, or **Respond to the dispute** on the payment's page. The header gives
the disputed amount, the status, the **Dispute ID** and the date it was opened. Below, a box
recalls the deadline and the time left; it turns red with less than three days to go, then
announces that the deadline has passed.
*The deadline right under the disputed amount.*
The facts under the header give the **Respond by** date, the dispute's **Reason**, and the
disputed **Payment** with the customer's name. **Dispute details** gives the means to reach the
customer, then their own words: the **Customer's explanation** for a dispute opened from Pocket,
or the **Details from the provider** for a chargeback.
For a dispute that came from a request, the **Refund request** section repeats the date of the
request, the **Amount requested**, then your answer if you had rejected it, or **Not answered in
time**, and the date the customer turned it into a dispute.
**Evidence** lists what you have sent, **Conversation** your exchanges with the customer, and the
history lays out the dispute since it opened. On the right, **Disputed payment** gives the date of
the payment and its **Payment ID**. The header menu offers **View payment** and **View customer**.
A dispute opened from Pocket gives you seven days to respond. After that, it stays open until you
or the Wajub team settle it.
## Submit evidence
1. **Choose Submit evidence**
At the top of the dispute's page, choose **Submit evidence**. The window of the same name
opens.
*One evidence type, a description and a file.*
2. **Choose the evidence type**
Under **Evidence type**, choose what the evidence shows, for example **Proof of delivery**,
**Customer communication** or **Receipt**.
3. **Describe the evidence**
Under **Description**, say what the evidence establishes, in 2,000 characters at most.
4. **Attach the document**
Under **File (optional)**, add a PDF, a JPG or PNG image, a Word document or a text
file, of 10 MB at most.
5. **Send the evidence**
Choose **Submit evidence**. The message "Evidence submitted successfully." appears, the
evidence shows up under **Evidence** and the dispute moves to **Under review**.
The dispute keeps one piece of evidence per type: new evidence of the same type replaces the
previous one.
## Reply to the customer
1. **Start from a template if needed**
Under **Response templates**, choose a template, for example **Product delivered**, **Service
rendered** or **Customer authorized payment**. Its text fills in **Reply to the customer**.
2. **Write the message**
Under **Reply to the customer**, write or adapt the message, in 5,000 characters at most.
3. **Attach files if needed**
Choose **Attach a file** to add a PDF, a JPG or PNG image, a Word document or a text file, of
10 MB at most each.
4. **Send**
Choose **Send**. The message "Message sent successfully." appears and your message joins
**Conversation**.
The customer follows the dispute's status and the conversation in their Pocket portal, where they
can reply to you; they see neither your evidence nor your notes.
## Accept the dispute
Accepting a dispute admits that the customer is right: you lose the dispute, with no way back.
1. **Choose Accept dispute**
At the top of the dispute's page, choose **Accept dispute**. **Accept dispute?** recalls that
the customer will be refunded and that you will lose the dispute.
2. **Confirm with the security code**
Choose **Accept dispute**, then enter the security code. The message "Dispute has been
accepted." appears and the dispute moves to **Lost**.
For a dispute opened from Pocket on a payment that succeeded, the customer is refunded the
disputed amount, up to what is left to refund on the payment. The fee on this refund is yours to
bear, whatever your [default choice](https://docs.wajub.com/dashboard/payments/refund#the-default-fee-choice), and the
refund appears in [Track refunds](https://docs.wajub.com/dashboard/payments/track-refunds).
An accepted chargeback is not refunded: the customer's bank has already given them the money
back, and the disputed amount is taken from your balance. While a chargeback is open on a
payment, a dispute opened from Pocket on that same payment cannot be accepted; the window gives
the reason.
## Mark the dispute as won
**Mark as won** records that a dispute opened from Pocket ended in your favour.
1. **Choose Mark as won**
In the header menu, choose **Mark as won**. **Mark dispute as won?** opens.
2. **Confirm with the security code**
Choose **Mark as won**, then enter the security code. The message "Dispute has been marked as
won." appears and the dispute moves to **Won**.
The held amount goes back to your available balance. The menu does not offer **Mark as won** for
a chargeback: only the customer's bank decides it.
## Notes
A dispute's notes are written at the bottom of the history, under "What should your members know
about this dispute?", and are pinned or deleted like a payment's notes:
[Notes](https://docs.wajub.com/dashboard/payments/read#notes). They also exist in Sandbox.
---
# Find a payment
URL: https://docs.wajub.com/dashboard/payments/find
> Search for a payment by reference or customer, filter the list by status, amount, provider or metadata, and export it as CSV, Excel, PDF or JSON.
**Payments** lists your customers' payments, with their amount, their status and the customer who
paid. Search and filters find one specific payment; the export takes the list away in a file.
Every [role](https://docs.wajub.com/dashboard#roles) can open **Payments**, on every plan. Exporting is open to the
owner, Administrators, Finance and Support specialist members, and custom roles that have
**Manage payments**, in [Live](https://docs.wajub.com/dashboard#sandbox-and-live) only. Nothing on this page asks for
the [security code](https://docs.wajub.com/dashboard#the-security-code).
## The list
Open **Payments** in the menu. The tabs at the top also lead to **Refunds** and **Disputes**; the
number shown on **Disputes** counts the refund requests waiting for your answer.
Each row gives the **Amount**, the **Status**, the **Description** with the payment ID, the
**Customer**, the **Payment method** and the **Date**. The description only appears on a wide
screen, and the payment method is hidden on a narrow screen. A payment made in instalments shows
how many instalments it has. **Customer deleted** replaces the name of a customer erased since,
**No customer** flags a payment without a customer. Choose the **Amount** or **Date** header to
sort the list.
*Search and filters above, one payment per row.*
The menu at the end of a row offers **Open payment**, **Copy payment ID** and, when the payment
has a customer, **View customer**. For a **Succeeded**, **Partially refunded** or **Refunded**
payment, it adds **Download receipt**. Tick rows, up to 100, to **Copy IDs** for all of them at
once or to export them.
## Search and filter
The search bar finds a payment by its reference, its description, or the customer's name, email
or phone number. **Date** limits the list to a ready-made period or to the days of your choice.
The other filters combine:
- **Status**: one or more statuses, for example **Succeeded**, **Pending** or **Failed**.
- **Amount**: a minimum, a maximum, or both.
- **Provider**: the provider that processed the payment. This filter only appears if your
organisation has connected a provider:
[Connect a provider](https://docs.wajub.com/dashboard/orchestration/connect-provider).
- **Channel**: the channel the customer paid through, or **Any channel**.
- **Failure reason**: in Live, why a payment failed, grouped under **On the provider's side**,
**On the customer's side** and **Other**, for example **Insufficient funds**.
- **Integration**: the SDK or page the payment was made from.
**Checkout (hosted page or Wajub.js)** gathers the checkouts that did not say which, and
**Unknown** the payments that show none.
- **Installments**: **With installments** or **Without installments**.
- **Metadata**: a **Key** sent by your integration, and its **Value (optional)**. Choose
**Apply**.
A figure on the home page opens this list with two more filters: **Period**, the exact period the
figure counted, and **Credited to balance**, or **Status** for a figure about failures. Choose
days in **Date** to replace the period. Each filter is removed with its cross.
## Export
Choose **Export** at the top of the page, or in the bar that appears when rows are ticked.
**Export payments** opens: the file covers the list with its filters, or only the ticked rows.
Each payment in the file gives its **Integration**.
1. **Choose the format**
Under **Format**, choose **CSV**, **Excel**, **PDF** or **JSON**.
2. **Choose the period**
With no rows ticked, under **Period**, choose a ready-made period, or set **From** and **To**
under **Custom period** and choose **Apply**. Without a period, every date is exported.
**Filters kept** recalls the search and the filters the file will apply.
3. **Export**
Choose **Export CSV**, **Export Excel**, **Export PDF** or **Export JSON**, depending on the
format. The file downloads, and "Your export is ready:" appears with its name.
In Sandbox, the window explains that exports only hold live data and does not offer to export.
Each export counts towards your plan's monthly limit:
[Change your plan](https://docs.wajub.com/dashboard/subscription/plans). Once the limit is reached, the window says so
and no longer exports. The owner, Administrators and custom roles with **Manage account** see
**Upgrade plan**; other members are asked to turn to the owner.
---
# Read a payment
URL: https://docs.wajub.com/dashboard/payments/read
> A payment's status, history and breakdown, its receipt, the team's notes and sending the payment link to the customer again.
A payment's page brings together what happened to it: its status, each attempt, what it brings
you once the fees are taken off, and the disputes opened on it.
Every [role](https://docs.wajub.com/dashboard#roles) can open a payment, on every plan. Writing a note and sending the
payment link again need **Manage payments**, which the owner, Administrators, Finance and Support
specialist members have, and the Sandbox user in Sandbox. The **Installments** tab only exists
from the **Growth** plan up, and notes only in [Live](https://docs.wajub.com/dashboard#sandbox-and-live). Apart from
refunds, nothing on this page asks for the [security code](https://docs.wajub.com/dashboard#the-security-code).
## The header
Open a payment from **Payments**: [Find a payment](https://docs.wajub.com/dashboard/payments/find). The header gives
the amount, the status, the **Payment ID** and its date. **Risk hold** flags a payment credited to
your balance whose money is held for a while before it can be transferred.
Below, **Customer** leads to the customer's profile, **Payment method** names the method and the
provider, and **Created from** says where the payment comes from, for example a payment link, an
invoice, the API or the dashboard. **Back to payments** returns to the list.
The header buttons depend on the status. **Receipt** appears for a succeeded, refunded or
partially refunded payment; **Refund** is described in
[Refund a payment](https://docs.wajub.com/dashboard/payments/refund). The menu next to them offers, depending on the
payment, **View customer**, **Download receipt (PDF)** and **Send payment link**.
*The payment on the left, what it brings you on the right.*
When a customer disputes the payment, the **This payment is disputed** box gives the disputed
amount, the reason and the deadline for your answer. **Respond to the dispute** opens the dispute:
[Respond to a dispute](https://docs.wajub.com/dashboard/payments/disputes). Once the dispute is over, the box becomes
**Dispute won** or **Dispute closed**, with **View dispute**.
## The tabs
**Overview** opens first. **Refunds** appears when the payment has any, with the amount, the
reason and the status of each one: [Track refunds](https://docs.wajub.com/dashboard/payments/track-refunds).
**Installments** appears for a payment made in instalments, with the details of each instalment.
## The overview
A payment that did not go through starts with a box. **Payment failed** gives the **Error code**
and a **Suggested action** to pass on to the customer. **Payment expired** and **Payment
cancelled** say that the payment stopped before it was completed.
**Payment details** gives the **Credited on** date. During a hold, **Funds available on** says
when it lifts; once it has lifted, **Funds became available on** says since when you can transfer
the money. Then come the **Exchange rate** and **Paid in** when the customer paid in another
currency, the **Integration**, the SDK or page the payment was made from, the **Description**,
and the **Statement descriptor** the customer sees on their statement.
The following sections only appear if the payment has them: **Order items**, for information,
**Tax**, **References** with **Your reference**, **Processing reference** and **Provider
reference**, **Addresses**, then **Related payments**.
**History** lays out the payment's stages and each of its attempts, with the provider that
processed it; **Expand all** opens them all. For a payment that has not succeeded, **Review
routing** leads to the provider choice Wajub made. **Webhooks** lists the events sent to your
server for this payment, with the response received and the retries. **Metadata** shows the data
added by your integration.
## The revenue breakdown
On the right, **Revenue breakdown** starts from the **Gross amount**, takes off each fee with its
rate, then what was **Refunded** and what was **Lost in a dispute**. The **Net amount** is what
you keep; "Will be paid out on" gives the date it is paid out, when that date is known. As long as
the payment has not succeeded, the fees are **Charged on success** and the net amount **Not
settled**.
Below, **Payment method** details the method used, and **Risk and security** gives the risk score
and what the check found.
## Notes
Notes are written at the bottom of **History**, for the members of your team; the customer never
sees them. Type the text under "What should your members know about this payment?", then choose
**Add note**. A note's menu offers **Pin note**, which files it under **Pinned notes** at the top
of the history, and **Delete note**.
## The receipt
**Receipt** opens the receipt as the customer sees it: the amount paid, the date, the payment
method and your organisation's details. **Download PDF** saves it, **Print receipt** prints it.
**Download receipt (PDF)**, in the menu, saves it without opening it.
## Resend the payment link
A customer who did not finish their payment can pick it up again from a link sent by email. The
payment must be **Pending** or **Processing**, not yet expired, and linked to a customer.
1. **Choose Send payment link**
In the header menu, choose **Send payment link**. If the customer has an email address, a
window shows it and asks for confirmation.
2. **Enter the address if needed**
If the customer has no email address, type it in **Customer's email**. It is only saved on their profile
if your role can manage customers.
3. **Send the link**
Choose **Send link**. The customer receives an email with the link to finish their payment.
---
# Respond to a refund request
URL: https://docs.wajub.com/dashboard/payments/refund-requests
> Approve or reject the refund request a customer made from their Pocket portal, before they can turn it into a dispute.
A customer who wants their money back starts with a refund request, from their Pocket portal.
This is the amicable stage, before any dispute: your answer decides whether they get their money
back or whether they can dispute the payment.
Every [role](https://docs.wajub.com/dashboard#roles) can see requests. Approving is open to the owner, Administrators,
Support specialist members and custom roles that have **Refund payments**, and asks for the
[security code](https://docs.wajub.com/dashboard#the-security-code). Rejecting is open to the owner, Administrators,
Finance and Support specialist members and custom roles that have **Manage payments**, with no
security code. Requests only exist in
[Live](https://docs.wajub.com/dashboard#sandbox-and-live), on every plan.
## Open a request
When a request arrives, the owner and the members who can approve or reject it receive an email,
then, if it is still waiting, a reminder two days before the customer can open a dispute. These
emails follow each person's **Disputes** preference:
[Preferences](https://docs.wajub.com/dashboard/account/preferences). The link in the email opens the request directly.
In the dashboard, open **Payments**, then the **Disputes** tab: the number shown on the tab counts
the requests waiting for your answer. Choose **Stage** › **Request** to keep only those, then
choose the row. **Review the refund request** opens.
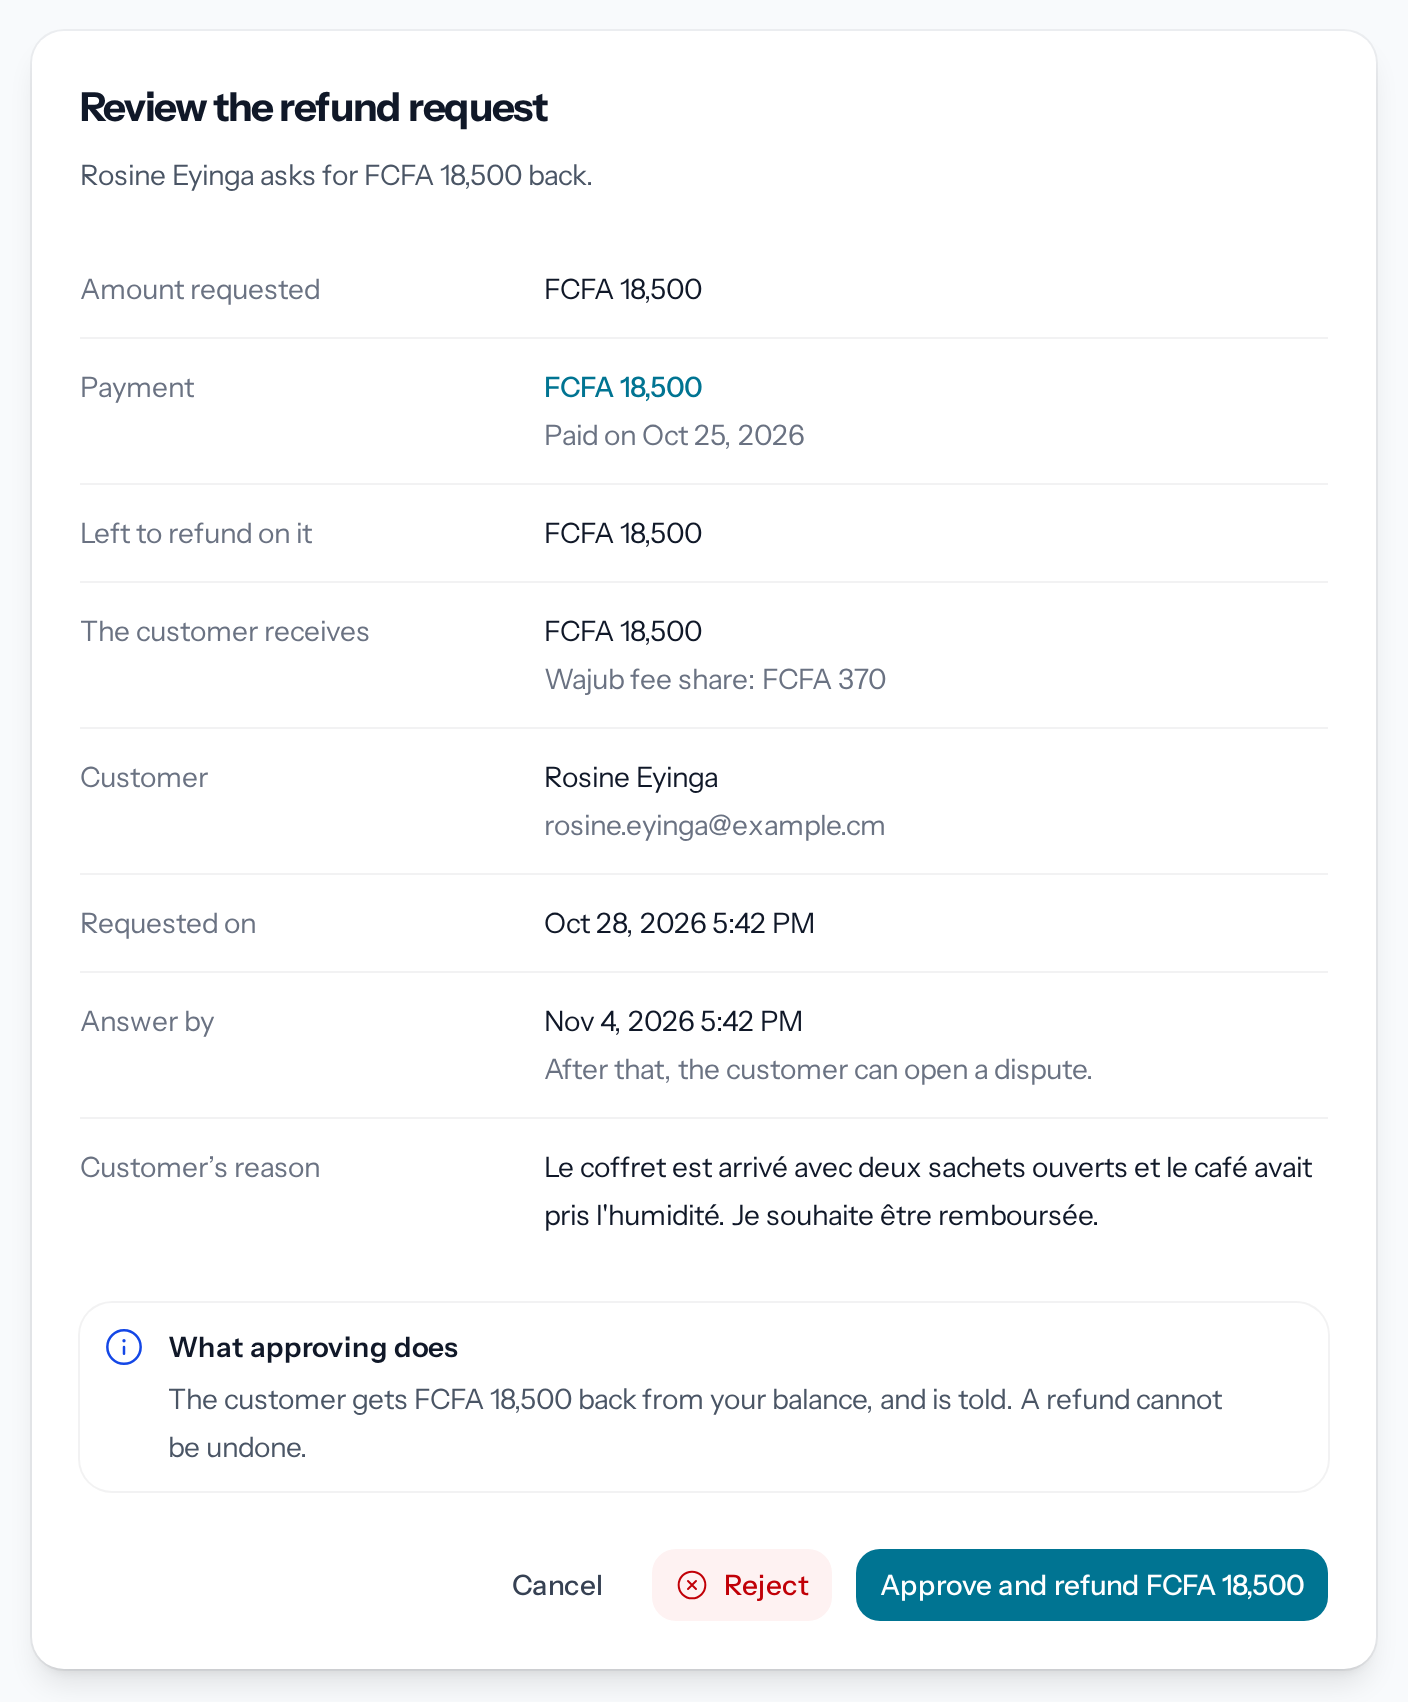
*The amount requested, the customer's reason and the deadline for your answer.*
The window gives the **Amount requested**, the **Payment** and what is left to refund on it
(**Left to refund on it**), what **The customer receives** once the Wajub fee share is settled,
and the **Customer's reason**. **Answer by** is the date after which the customer can open a
dispute if you have not answered.
## Approve
1. **Check what approving does**
The **What approving does** box says how much the customer gets back, from your balance. The
fee share follows your default choice:
[The default fee choice](https://docs.wajub.com/dashboard/payments/refund#the-default-fee-choice).
2. **Approve**
Choose the "Approve and refund" button, followed by the amount requested, then enter the
security code. The message "Refund request approved. The refund has been created." appears.
The refund goes out like any other refund: [Track refunds](https://docs.wajub.com/dashboard/payments/track-refunds). In
the list of disputes, the request's menu then offers **View refund**.
## Reject
1. **Choose Reject**
In the request window, choose **Reject**. **Reject the refund request** appears: no money
moves.
2. **Write your answer**
Under **Your answer to the customer**, say why you are rejecting it and what the customer can
do instead, in 1,000 characters at most. The answer is required.
3. **Reject the request**
Choose **Reject request**. The message "Refund request rejected." appears.
The customer reads your answer in their Pocket portal.
## When approving is blocked
A box replaces **What approving does** when the request cannot be refunded as it stands:
| Box | What to do |
| ---------------------------------------- | -------------------------------------------------------------------------------------------------------------------------------- |
| **This payment cannot be refunded** | Only a payment that succeeded and was credited to your balance can be refunded. Reject it and explain why. |
| **A dispute is open on this payment** | Respond to the dispute rather than to the request, so you do not pay the customer twice. **Open the dispute** leads there. |
| **A chargeback is open on this payment** | The customer's bank decides; the payment cannot be refunded before its decision. |
| **Nothing is left to refund** | The payment has already been given back in full. Reject it and tell the customer. |
| **More than is left to refund** | The customer is asking for more than what is left. If you reject it, they can open a dispute for what is left. |
| **Already approved** | The request was approved and the refund made, but the answer got lost. **Finish the approval** closes it, with no second refund. |
## When the customer opens a dispute
The customer can turn their request into a dispute from Pocket seven days after making it if you
have not answered, or within 30 days of your rejection. The request then moves to **Escalated**,
and the dispute appears in the same list, marked **From a refund request**:
[Respond to a dispute](https://docs.wajub.com/dashboard/payments/disputes).
---
# Refund a payment
URL: https://docs.wajub.com/dashboard/payments/refund
> Give all or part of a payment back to your customer, choose who bears the Wajub fee, and set this choice by default in Settings › Refunds.
A refund sends the customer all or part of what they paid. It cannot be cancelled.
Refunding is open to the owner, Administrators, Support specialist members and custom
[roles](https://docs.wajub.com/dashboard#roles) that have **Refund payments**, on every plan: a Finance member cannot
refund. Refunding asks for the [security code](https://docs.wajub.com/dashboard#the-security-code). In
[Sandbox](https://docs.wajub.com/dashboard#sandbox-and-live), it happens at once, with no real money.
## The steps
1. **Open the payment**
Open the payment from **Payments**: [Find a payment](https://docs.wajub.com/dashboard/payments/find). **Refund**
appears at the top of the page for a **Succeeded** or **Partially refunded** payment that
still has an amount to give back.
2. **Choose Refund**
Choose **Refund**. **Refund this payment** opens on the **Payment amount**, what is **Already
refunded**, what was **Lost in a dispute** if anything was, and the amount **Available for
refund**.
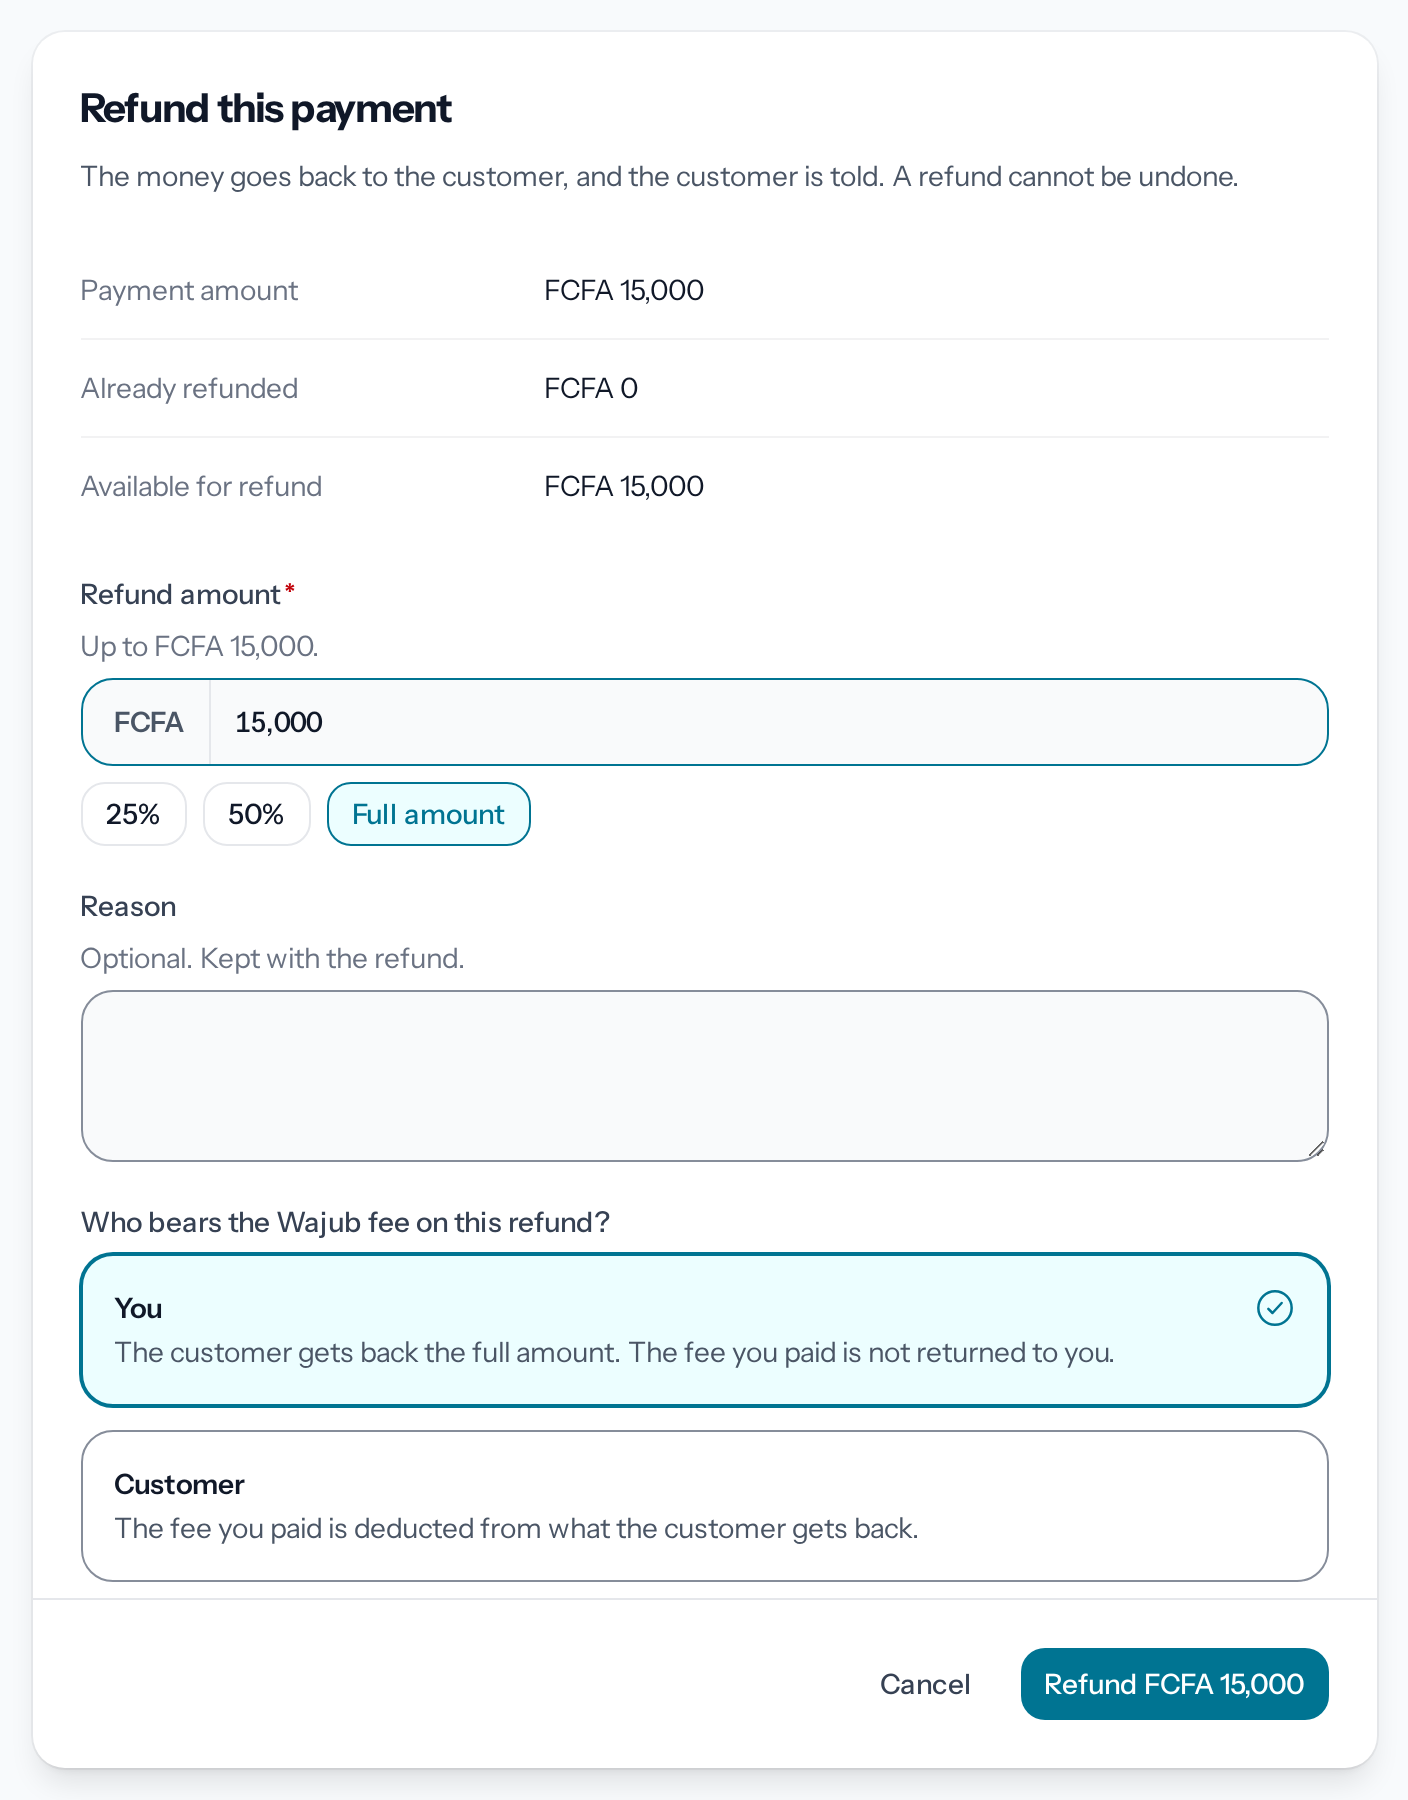
*The amount is filled in in advance with everything left to refund.*
3. **Enter the amount**
**Refund amount** is filled in in advance with everything left to refund. For a partial
refund, enter a smaller amount, or choose 25% or 50% of the amount left; **Full amount** goes
back to everything that is left.
4. **Add a reason**
The optional **Reason**, of 500 characters at most, stays attached to the refund.
5. **Choose who bears the fee**
If the payment cost a Wajub fee, **Who bears the Wajub fee on this refund?** offers two cards.
**You** gives the customer back everything they paid, including a fee they may have paid on
top, taken from your balance. **Customer** leaves the fee share to the customer: it is
deducted from what they get back. The card chosen in advance follows the default setting,
described further down.
6. **Check what the refund does**
Once the amount is valid, **What this refund does** shows the **Refund amount**, what **The
customer receives**, the **Wajub fee share** if there is one, what **Comes off your balance**
and what is **Left to refund after**. For a payment collected on your own account at a
provider, **Comes off your balance** reads **Nothing** and says to refund it from there. The
refund button waits until these figures show; if they cannot be shown, choose **Try again**.
7. **Confirm with the security code**
Choose the "Refund" button, followed by the amount, then enter the security code. The
confirmation message says what happens next, depending on the case described below.
## After the refund
For a payment collected by Wajub, Wajub sends the refund to the customer. For a payment collected on your own
account at a provider, the refund is recorded, but it is up to you to make it from that provider;
it updates in Wajub once the provider confirms it. In both cases, the payment's **Refunds** tab
tracks it: [Track refunds](https://docs.wajub.com/dashboard/payments/track-refunds).
When the refund is refused, the reason shows under **Refund amount**; any other problem shows
under **The refund was not made**. During a chargeback, the
customer's bank decides alone and the payment cannot be refunded: **Refund** disappears until its
decision. An account whose refunds are restricted must first
[contact support](https://docs.wajub.com/dashboard/help/support).
## The default fee choice
**Settings › Refunds** sets who bears the fee when you refund, for the share of the fee that
matches the amount given back. Wajub keeps its fee in every case. The dashboard fills in this
choice in advance in each refund, and the API applies it when a refund does not specify anything.
Under **Who bears the fee on a refund**, choose:
- **Whoever paid it at payment time**: you keep bearing the fee you had paid, and a customer who
had paid it on top does not get it back. This is the starting choice.
- **You**: the customer gets back everything they paid, fee included, taken from your balance.
- **The customer**: the fee share stays with the customer, deducted from what they get back when
you were the one who had paid it.
Choose **Save changes**. Changing this setting is open to the owner, Administrators and custom
roles that have **Manage settings**; a Developer or a Viewer can read it without being able to
change it.
---
# Track refunds
URL: https://docs.wajub.com/dashboard/payments/track-refunds
> Find a refund, see where it stands and what the customer received, and export the list of refunds.
**Refunds** lists the money given back to your customers, whether the refund comes from the
dashboard, the API or an approved refund request, and says where each one stands.
Every [role](https://docs.wajub.com/dashboard#roles) can open **Refunds**, on every plan. Exporting is open to the
owner, Administrators, Finance and Support specialist members, and custom roles that have
**Manage payments**, in [Live](https://docs.wajub.com/dashboard#sandbox-and-live) only. Nothing on this page asks for
the [security code](https://docs.wajub.com/dashboard#the-security-code).
## The list
Open **Payments**, then the **Refunds** tab. Each row gives the **Amount**, the **Status**, the
**Customer** and the refunded **Payment**, with the **Date**. A refund goes through **Pending**
and **Processing** before it is **Succeeded**; it can also end up **Failed** or **Cancelled**.
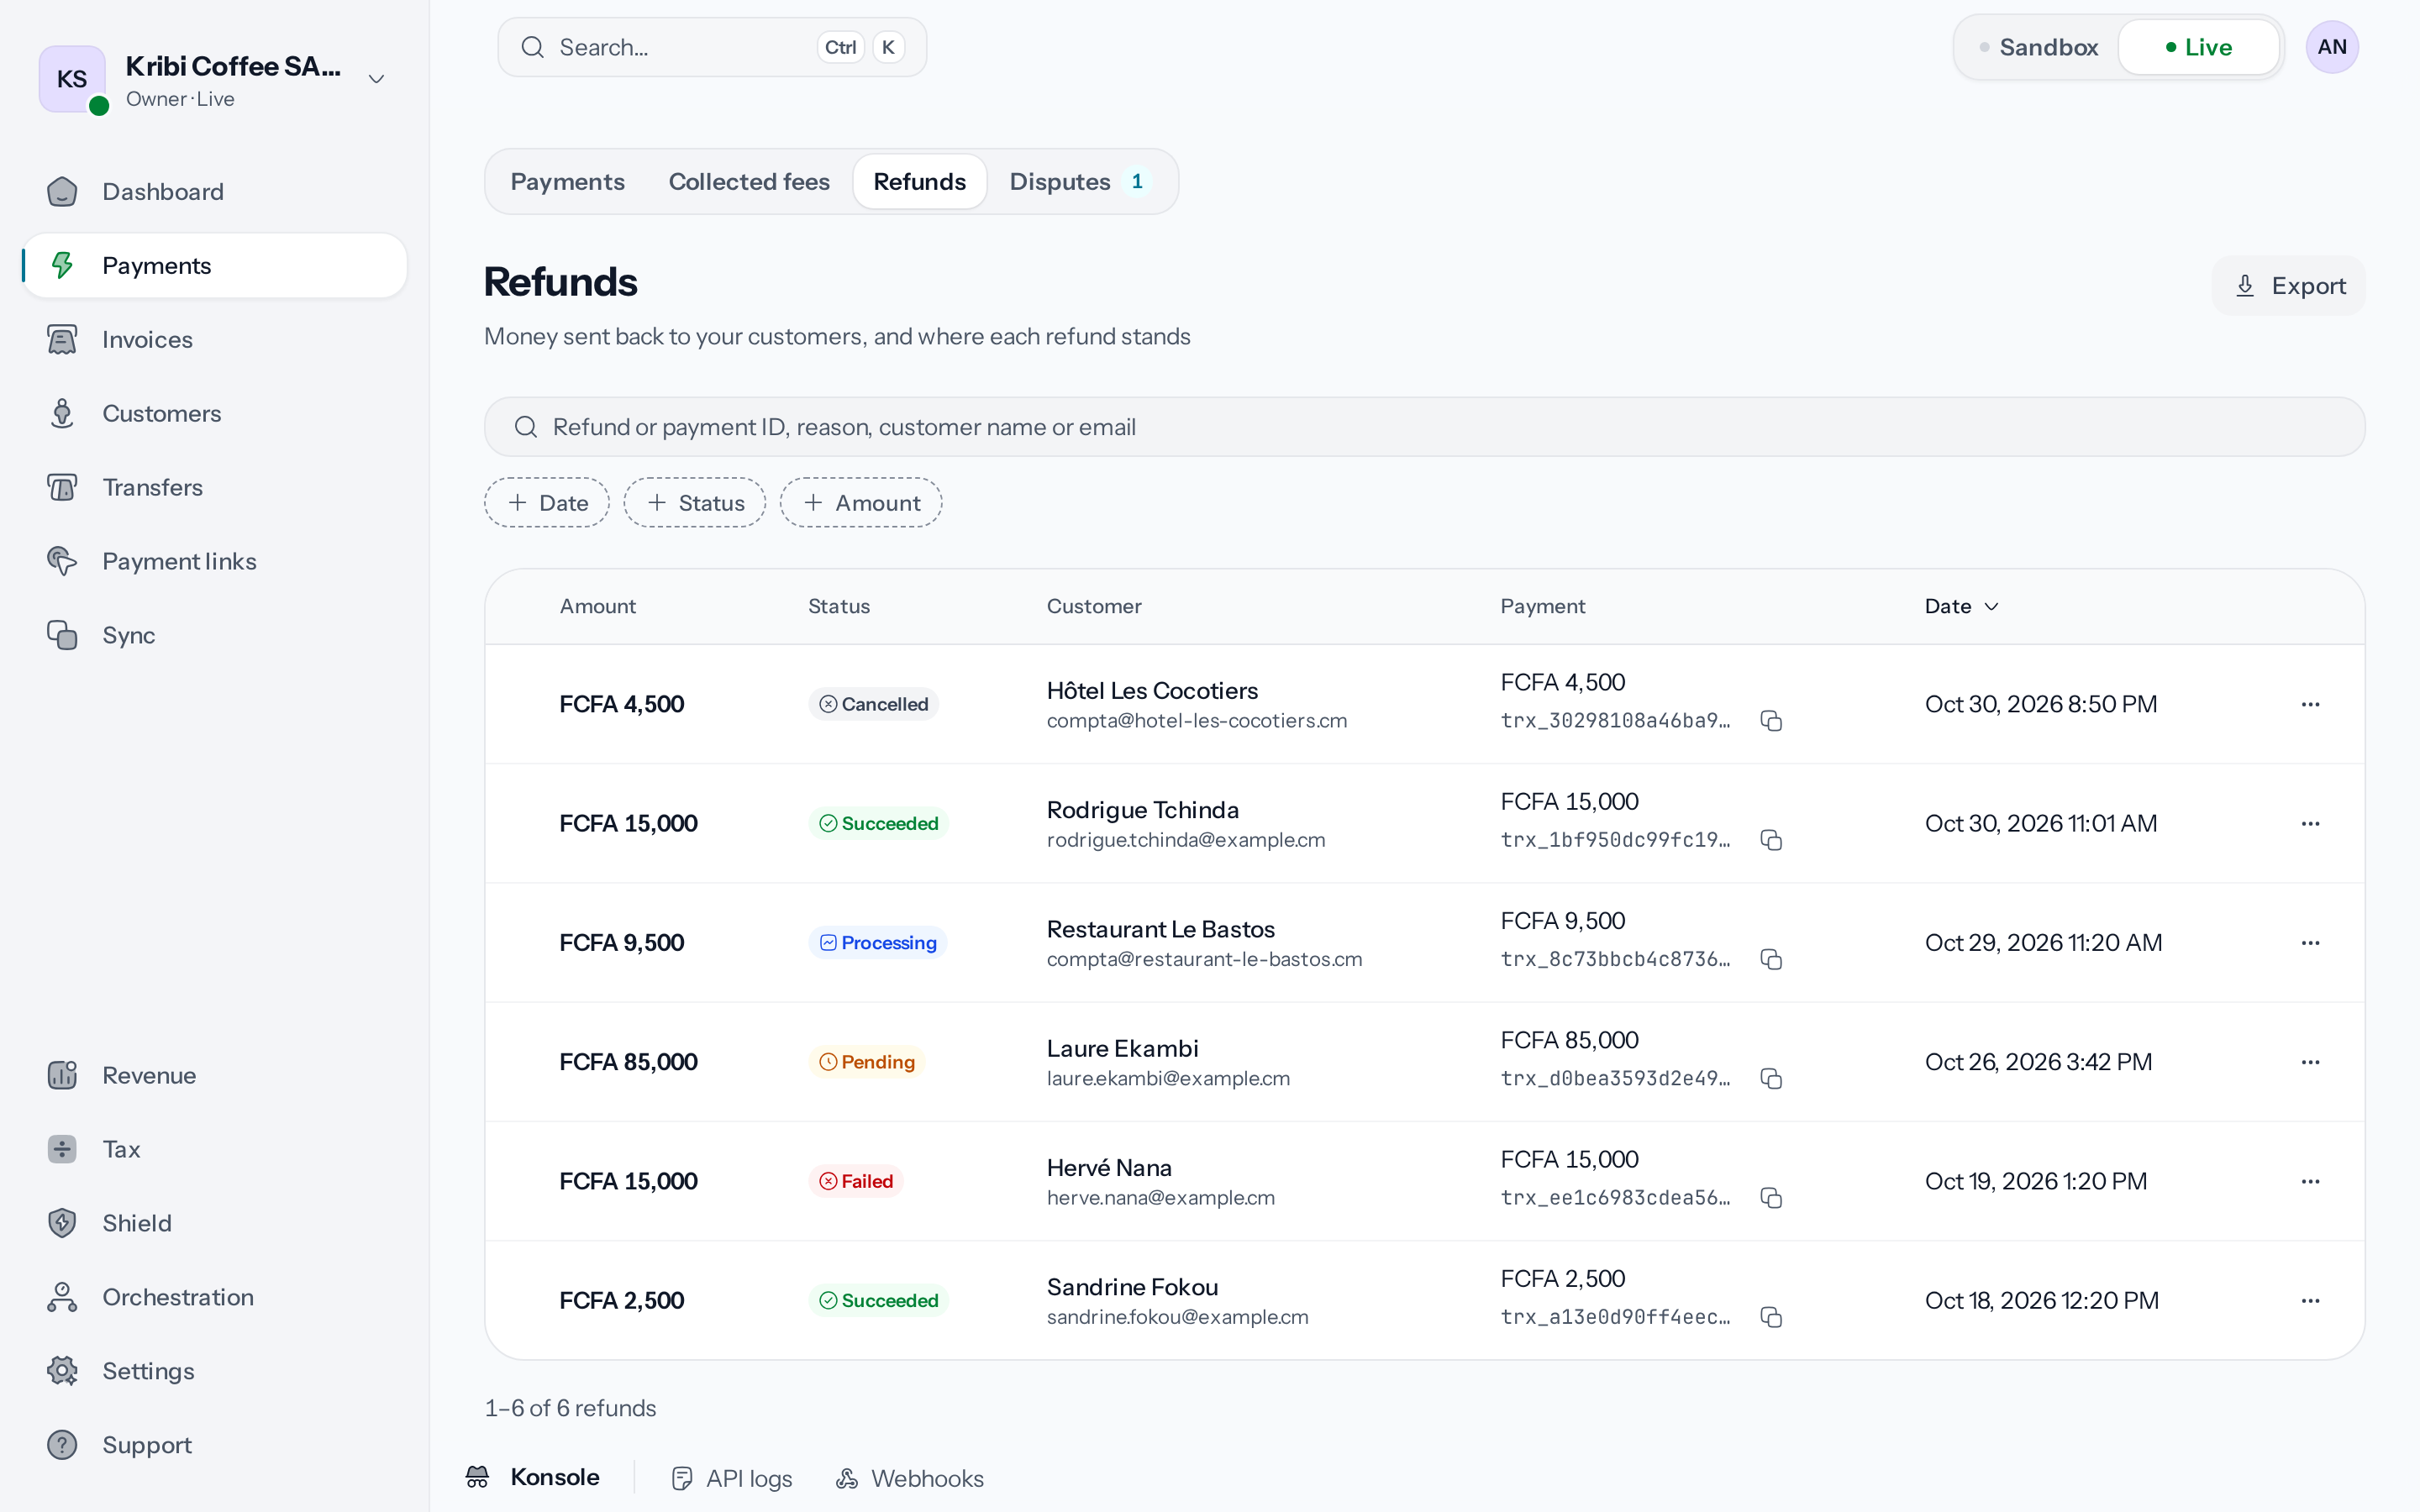
*One refund per row, with the payment it refunds.*
The search bar finds a refund by its ID, its payment's ID, its reason, or the customer's name or
email. **Date**, **Status** and **Amount** filter the list.
The menu at the end of a row offers **Open refund**, **Copy refund ID**, **View payment** and,
when the refund has a customer, **View customer**. Tick rows to **Copy IDs** for all of them at
once or to export them.
## Refund details
A refund's page gives its amount, its status and its **Refund ID**. Below, **Payment** leads to
the refunded payment, **Customer** to the customer's profile, and **The customer receives** gives
what they get back, with who bore the fee.
**Refund details** repeats the **Reason**, the **Description**, the **Completed on** date and,
when the payment carried any, the **Tax** cancelled in proportion to the refund. The history
follows the refund from **Refund requested** to **Refund completed**, or to **Refund failed** or
**Refund cancelled**; in between, **Waiting for the provider** shows that it is under way. On the
right, **Source payment** sums up the payment.
On the payment's page, the **Refunds** tab also lists its refunds. For a refund under way, it
says whether the Wajub team is handling it, whether it is on its way to the customer, or whether
you still have to make it from your account at the provider.
## Export
Choose **Export** at the top of the tab, or in the bar that appears when rows are ticked.
**Export refunds** works like the payments export, with the same formats and the same monthly
limit: [Export payments](https://docs.wajub.com/dashboard/payments/find#export).
---
# Review the audit log
URL: https://docs.wajub.com/dashboard/settings/audit-log
> Find who changed what in the organisation, when and from which IP address, and check that the log has not been tampered with.
The **Audit log** keeps the changes made to the organisation, each with the member who made it,
their IP address, their device and the time:
- the organisation's name, members, invitations, roles and custom roles;
- API keys and webhook signing secrets;
- the sites allowed to embed the payment page, transfer security and custom domains;
- business verification, billing and the subscription;
- refunds, disputes, payment links sent and credit notes;
- customers;
- transfers, recurring transfers and beneficiaries;
- payment providers and routing rules;
- Sync connections and connected apps;
- what Wajub support does in the organisation.
Settings such as branding, the payment page's fields, its language and its currencies are not
recorded. Your own sign-ins, password, two-factor method and passkeys are in [Your
activity](https://docs.wajub.com/dashboard/account/activity-and-data).
The owner, an Administrator, a Developer, a Viewer or a custom role with **View settings** opens
the log. No one can edit it, and it has no export. The same log shows in Sandbox and in Live.
## Open the log
Open **Settings**, then **Audit log** in the **Organization** group. Each row gives the **Action**,
the **Member** who made it, the **IP address and device** and the **Date**. An action made by Wajub
itself shows **System** instead of the member. Entries run from the most recent to the oldest, 50
per page.
What Wajub support does shows **Wajub support** instead of the member, for example **Wajub support
opened the organization**, **Wajub support session ended** or **Organization details updated by
Wajub support**. Each time support opens the organisation, the owner also receives an email.
*Each row says who did what, from where and when.*
Most of the owner's changes also add an **Owner used full access** row. To follow only one kind of
change, filter by **Action**.
## Find an action
The search covers the member's email, the IP address or the action. The **Date** filter, up to 365
days back, and the **Action** and **Member** filters can be combined. **Member** still offers a
member who has left the organisation, and offers **Wajub support** once support has acted in it.
## Check integrity
Each entry is linked to the one before it, which makes any entry that was changed, deleted or moved
visible. **Check integrity** checks the whole log and shows **The audit log is intact**, with the
number of entries checked, or **The audit log has been altered**, with the first entry that does
not match. If so, contact [support](https://docs.wajub.com/dashboard/help/support).
---
# Customise your brand
URL: https://docs.wajub.com/dashboard/settings/branding
> Put your logo, colours and font on the payment page, invoices, receipts and the emails sent to your customers, with a live preview.
**Settings › Branding** gives what your customers see your logo, your colours and your font: the
payment page, invoices, receipts and emails.
The owner, an Administrator, a Developer, a Viewer or a custom role with **View settings** opens
the page. Only the owner, an Administrator or a custom role with **Manage settings** saves a brand.
It needs the **Growth** plan or above; otherwise, see [Modules outside your
plan](https://docs.wajub.com/dashboard#modules-outside-your-plan). The brand applies in Sandbox as in Live, and no
security code is asked for.
## The steps
1. **Open the brand studio**
Open **Settings**, then **Branding** in the **Products** group. The **Brand studio** shows the
settings on the left and the preview on the right.
*The other settings are in the Colors, Typography and Advanced tabs.*
2. **Upload your logos**
In the **Identity** tab, upload a square **Icon** of 512 × 512 px and a wide **Logo**, as PNG
or JPG, up to 2 MB each.
3. **Choose your colours**
In the **Colors** tab, start from one of the **Presets**, then adjust the **Color tokens** one
by one if needed, by typing a code such as #007492.
4. **Set the presentation**
In the **Typography** tab, choose the **Appearance** (**Follow device**, **Light** or
**Dark**), the **Density**, the **Media treatment**, the **Font family** and the **Corner
radius**.
5. **Check the preview**
Above the preview, switch between the payment page, the invoice, the receipt and the email, on
**Mobile**, **Tablet** or **Desktop**.
6. **Save the brand**
**Save changes**, in the bar at the bottom of the screen, applies every setting at once;
**Discard** cancels them.
## Advanced settings
The **Advanced** tab sets the payment page's **Checkout domain**: **Default (pay.wajub.com)** or
one of your [custom domains](https://docs.wajub.com/dashboard/settings/custom-domains). A custom domain that serves the
payment page is picked here on its own once it is verified. Payment links and invoices choose
theirs in **Settings › Payment links** and **Settings › Invoices**. **Theme backup** exports
your settings with **Export JSON** and brings them back with **Import JSON**, for example in another
organisation. **Reset all** puts the colours, the font, the corners and the presentation back to
their defaults; nothing changes until you save.
A removed logo disappears from the payment page, invoices and emails at the next save. The page
also warns you when no site is declared to show your payment page: see [Set up the payment
page](https://docs.wajub.com/dashboard/settings/checkout-page#embedding).
---
# Set up the payment page
URL: https://docs.wajub.com/dashboard/settings/checkout-page
> Add fields to fill in before paying, choose the payment page's language and currencies, and declare the sites that can show it in a frame.
**Settings › Checkout** sets what the Wajub payment page asks the customer, in which language and
with which currencies it appears, and on which sites it can show up.
The owner, an Administrator, a Developer, a Viewer or a custom role with **View settings** opens
these settings. Only the owner, an Administrator or a custom role with **Manage settings** changes
them; a Developer or a role with **Manage developer settings** can also change the list of sites.
Every plan has these settings, which apply in Sandbox as in Live. Only saving the list of sites asks
for the security code.
## Add a field
1. **Open the fields**
Open **Settings › Checkout**. The **Fields** tab lists your **Custom fields**, next to a
preview of the payment page on **Mobile**, **Tablet** or **Desktop**.
*Each field shows its type and its placeholder.*
2. **Open the field form**
**Add custom field** opens the window of the same name.
3. **Choose the field type**
Under **Field type**, choose **Short text**, **Long text**, **Number** for a numeric value,
**Email**, **Phone**, **Dropdown** or **Checkbox**. For a dropdown, add its choices under
**Options** with **Add option**.
4. **Write the question**
Type the **Label (question)**, and if needed a **Placeholder (optional)** that shows in the
empty field. **Required field** makes the customer fill it in to pay.
5. **Add the field**
**Add custom field** saves the field: the payment page asks for it straight away.
The menu at the end of a field edits it, hides it from checkout without deleting it, or deletes it
for good; the arrows on its left change its place in the list. The customer fills in these fields
on the payment page, before paying.
## Choose the language
In the **Language** tab, the **Default language** is **Auto-detect**, **English** or **French**.
**Save changes** applies the choice.
## Currencies
In the **Currencies** tab, the **Base currency** is the one in which the dashboard presents your
figures and bills by default, the same for every member. It does not change the settlement
currency, the one your payouts are made in, shown in **Settings › General**.
**Enable auto-conversion** shows prices in the customer's currency, among the **Display
currencies** you choose; the customer always pays in the payment's currency. **Enable manual
split payments** lets your integration split a payment into two, three or four instalments,
according to the **Allowed split counts** and above the **Minimum amount for manual split**. **Save changes** applies these settings.
## Sites that show the page
If your site shows the payment page in a frame, declare it in the **Embedding** tab, under
**Allowed sites**, one per line: https\:// followed by the domain, with no path, up to 20 sites.
Only these sites can then show it, in Sandbox as in Live. While the list is empty, any site can,
and the page warns you about it. **Save changes** asks for the security code.
*An empty list lets any site show your payment page.*
---
# Connect your domain
URL: https://docs.wajub.com/dashboard/settings/custom-domains
> Serve the payment page, payment links and invoices on a subdomain of your own, such as pay.example.com, by publishing two DNS records.
A custom domain replaces the default Wajub address with a subdomain you own, such as
pay.example.com, for the payment page, payment links and invoices.
The owner, an Administrator, a Developer or a custom role with **Manage settings** or **Manage
developer settings** connects and manages domains; a Viewer or a role with only **View settings**
sees them. It needs the **Scale** or **Enterprise** plan; otherwise, see [Modules outside your
plan](https://docs.wajub.com/dashboard#modules-outside-your-plan). Only deleting a domain asks for the security code.
## The steps
1. **Open custom domains**
Open **Settings**, then **Custom domains** in the **Products** group.
2. **Add the subdomain**
Under **Add custom domain**, type the subdomain, for example pay.example.com, without https\://
or a path, then click **Add custom domain**. It appears under **Connected domains**, marked
**Pending verification**, with the two DNS records to publish.
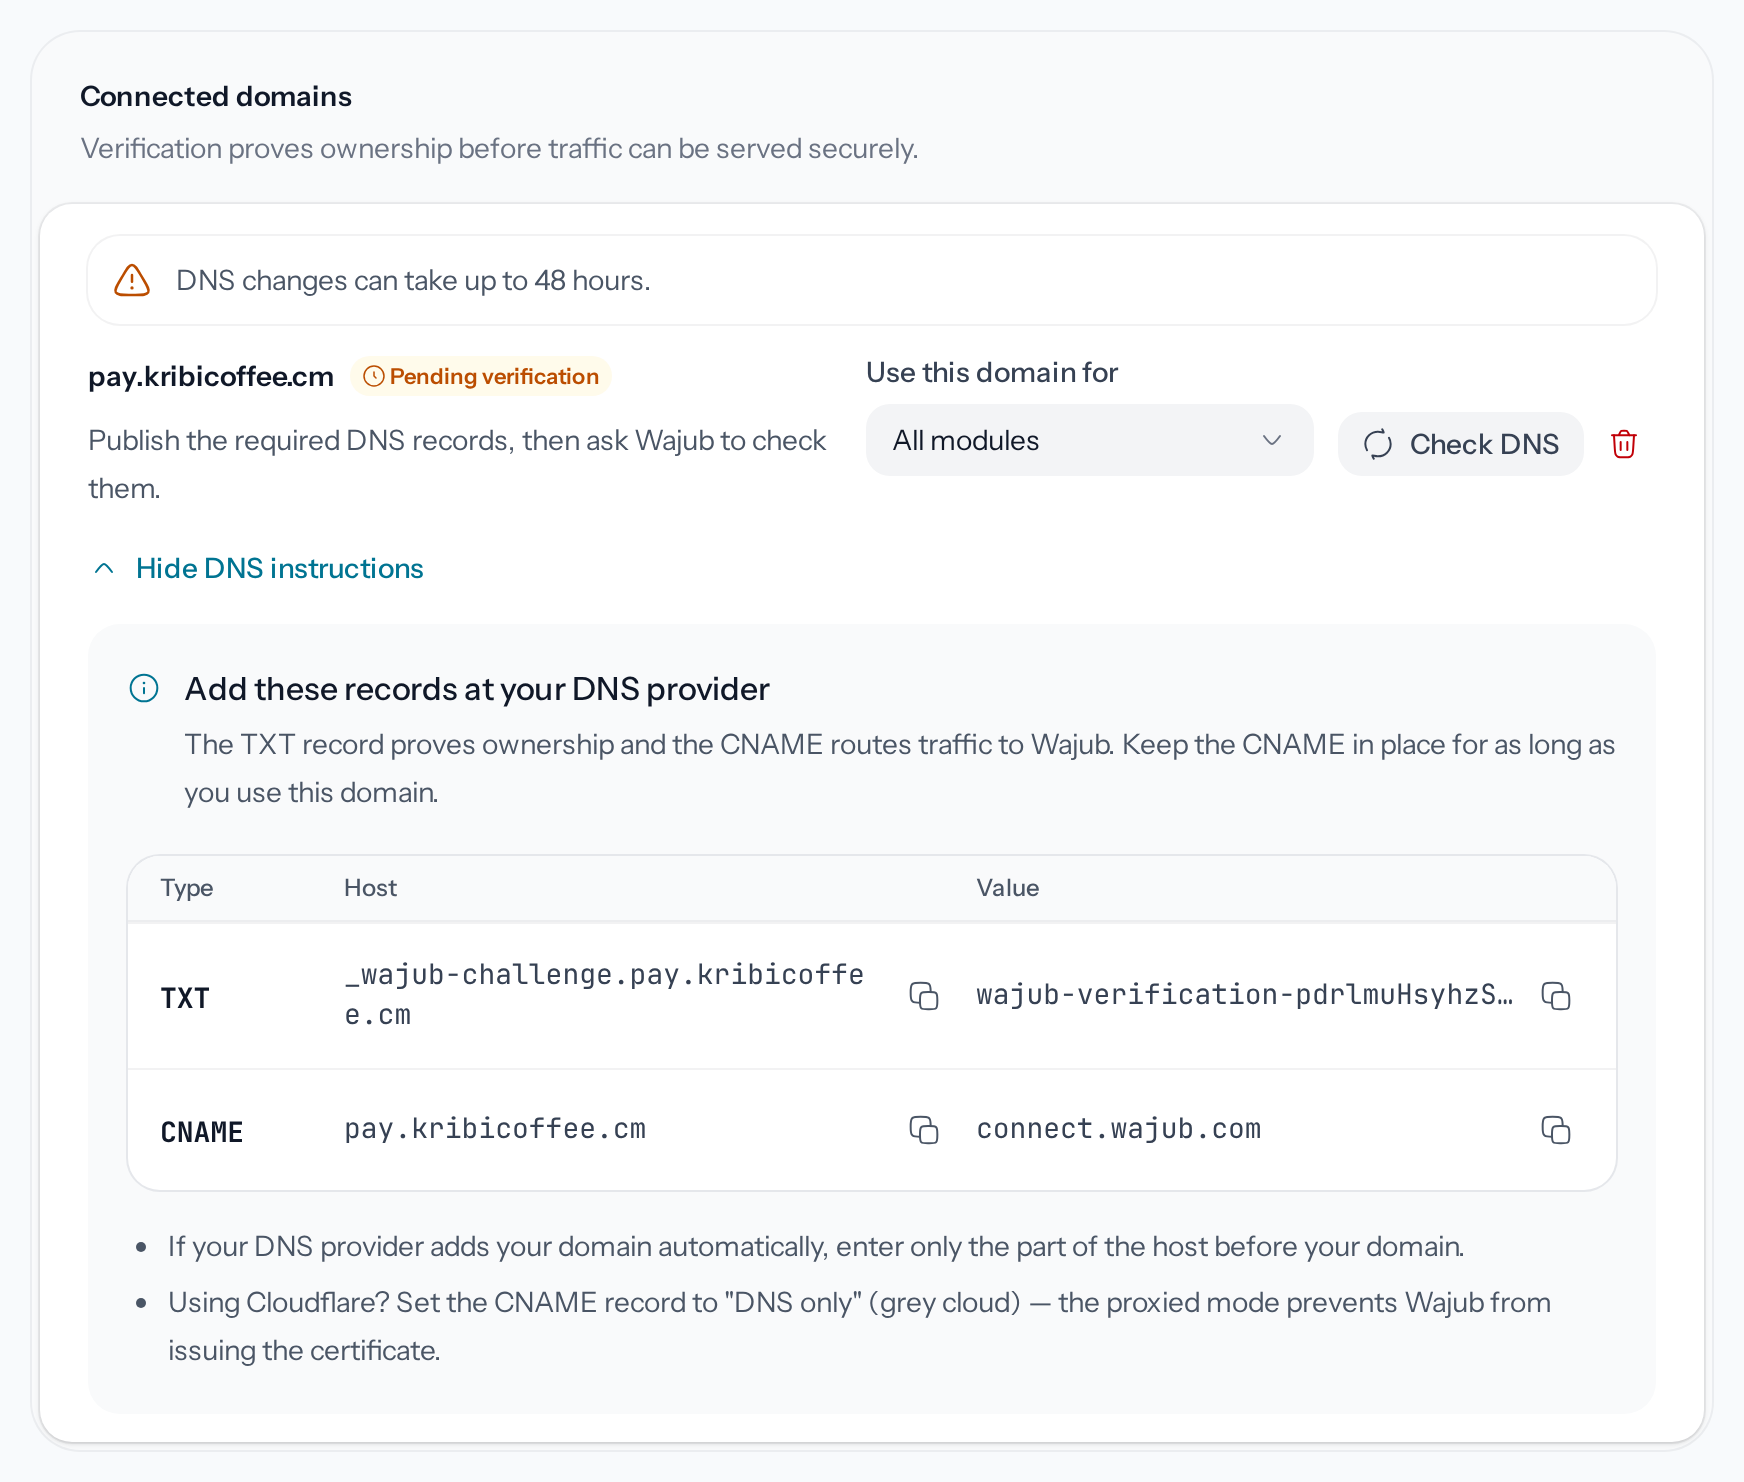
*Each host and each value has its own button to copy it.*
3. **Publish the DNS records**
At your DNS provider, add the TXT record, which proves the domain is yours, and the CNAME, which
sends visitors to Wajub. Keep the CNAME for as long as you use the domain. With Cloudflare, set
the CNAME to "DNS only", the grey cloud.
4. **Check the DNS**
**Check DNS** checks both records. A DNS change can take up to 48 hours: if the check fails,
**What we see in your DNS** shows what Wajub found, and **Check DNS** runs the check again. Once
the DNS is confirmed, the domain stays in **Securing connection** while Wajub prepares its
certificate, then moves to **Verified** and serves your pages, after a few minutes.
5. **Choose what it serves**
Under **Use this domain for**, keep **All modules**, or limit it to the payment page, payment
links or invoices. A domain that serves the payment page is used there as soon as it is
verified; [Branding](https://docs.wajub.com/dashboard/settings/branding#advanced-settings) can change it.
6. **Choose it for links and invoices**
Payment links and invoices keep the Wajub address until you choose the domain under **Domain**,
in **Settings › Payment links** for links and **Settings › Invoices** for invoices. Both pages
only open in Live.
## If the domain stops pointing to Wajub
If the CNAME disappears or changes, the owner, the Administrators and the Developers receive an
email, and the domain shows **This domain no longer points to Wajub**, with the time left before
it is disconnected. Fix the record before then. Otherwise the domain is disconnected, a second
email says so, and the payment page, payment links and invoices go back to the default Wajub
address. Once the record is fixed, **Retry** on the domain connects it again.
## Delete a domain
**Delete domain** asks for the security code, then removes the domain for good: the pages that used
it switch straight away to the default Wajub address. A domain already connected to another Wajub
organisation cannot be added.
> [!NOTE]
> **A subdomain rather than the root domain**
>
> Most DNS providers refuse a CNAME on the domain itself, such as example.com. Connect a subdomain,
> or use an ALIAS or ANAME record if your provider offers one.
---
# Rename the organisation
URL: https://docs.wajub.com/dashboard/settings/general
> Change the organisation's name, and find in Settings › General its business details, its account number, its support ID and its settlement currency.
**Settings › General** holds the organisation's name, its business details and the numbers to
give to support or to another Wajub organisation.
The owner, an Administrator, a Developer, a Viewer or a custom role with **View settings** opens
the page. Only the owner, an Administrator or a custom role with **Manage settings** can rename the
organisation. The name is the same in Sandbox and in Live, and no security code is asked for.
## The steps
1. **Open the General page**
Open **Settings**, then **General** in the **Organization** group.
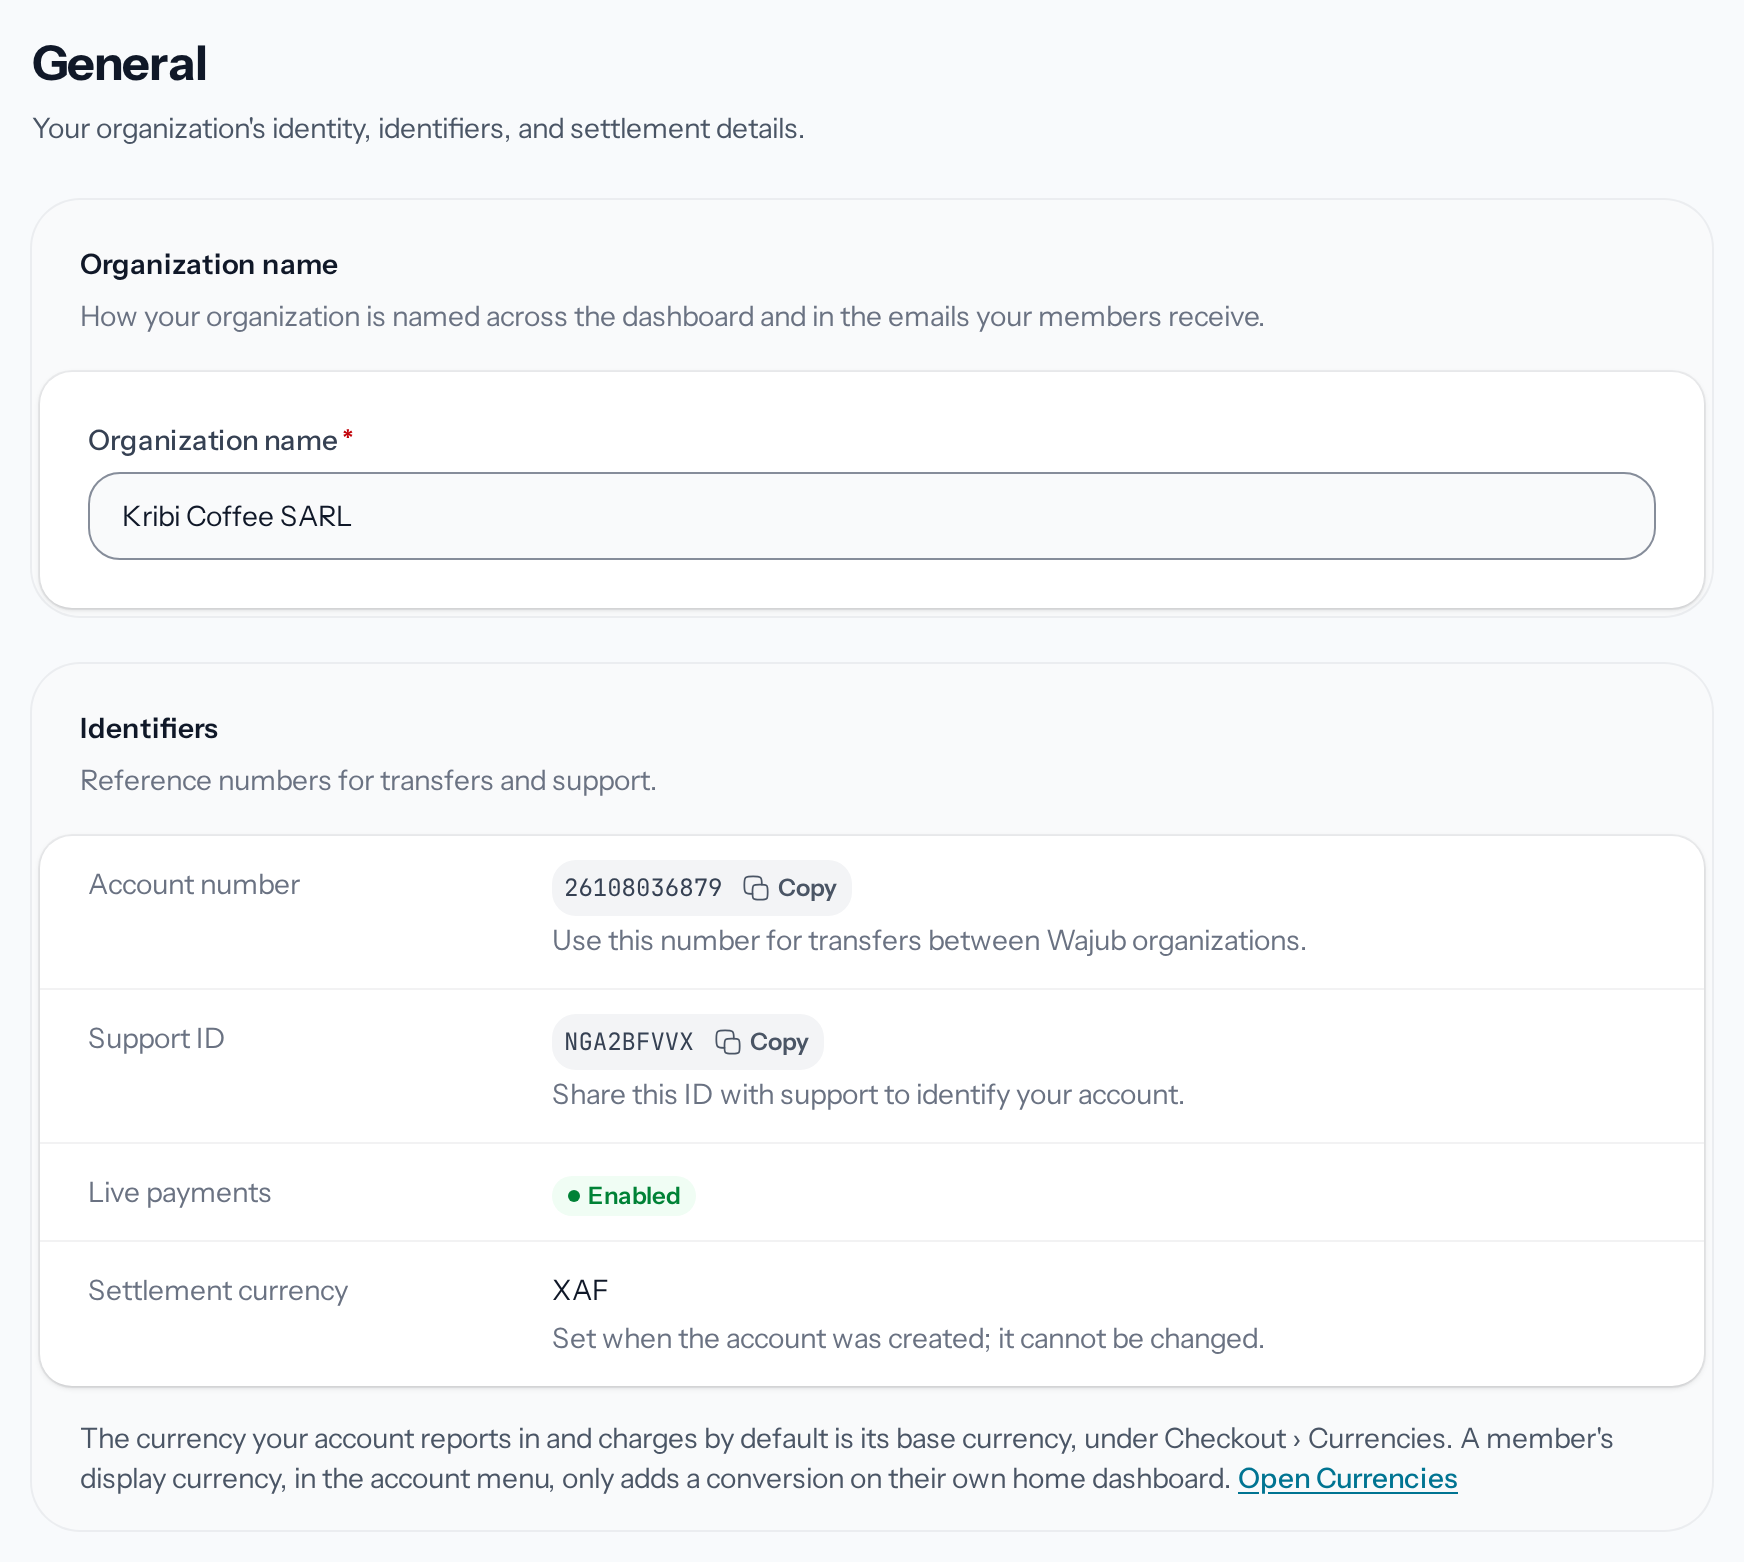
*The account number and the support ID each have a Copy button.*
2. **Type the new name**
In **Organization name**, replace the current name: it is required, up to 255 characters. A
bar appears at the bottom of the screen as soon as you make the first change.
3. **Save the name**
**Save changes** applies the new name; **Discard** puts the old one back. The new name shows up
straight away in the dashboard and in your members' emails.
## What the page shows
**Business details** repeats your verification file, submitted from **Compliance**: legal name,
account type, website, business email, phone, country and owner. See
[Verify your business](https://docs.wajub.com/dashboard/activation/verify-business).
**Identifiers** gives the **Account number**, which another Wajub organisation uses to send you a
transfer, and the **Support ID**, to give to [support](https://docs.wajub.com/dashboard/help/support) so that it can find
your account. **Live payments** shows whether the organisation can already accept payments in Live.
The **Settlement currency**, the one in which Wajub pays out your balance, is set when the account
is created and never changes. The base currency is set separately: see
[Set up the payment page](https://docs.wajub.com/dashboard/settings/checkout-page#currencies).
At the bottom of the page, the owner sees a **Danger zone**, to hand over or close the
organisation: see [Manage your organisations](https://docs.wajub.com/dashboard/settings/organizations).
---
# Invite and manage members
URL: https://docs.wajub.com/dashboard/settings/members
> Invite someone into the organisation with a role, follow pending invitations, change a member's role, remove them or leave the organisation.
Everyone who works in your organisation joins it through an invitation, with a
[role](https://docs.wajub.com/dashboard#roles) that sets what they see and what they can do.
The owner, an Administrator or a custom role with **Manage members** and **View settings** manages
members. The plan limits how many there can be, not counting the owner: 3 with **Pay as you go**, 5
with **Growth**, no limit with **Scale** and **Enterprise**. Inviting, changing a role, removing a
member and leaving the organisation ask for the security code; resending or cancelling an
invitation does not.
## The steps
1. **Open the member list**
Open **Settings › Members**. Each member is listed with their email and role; the owner is
marked **Owner**, and your own row **You**.

*The menu at the end of each row changes the member's role or removes them.*
2. **Open the invitation**
**Invite member** opens the window of the same name.
3. **Type the email address**
In **Email address**, type the address of the person you are inviting. A disposable address
is refused: **Disposable e-mail addresses cannot be used on Wajub. Use a permanent address.**
4. **Choose their role**
Under **Role**, choose one of the seven roles or a [custom
role](https://docs.wajub.com/dashboard/settings/roles). A role that includes permissions you do not hold is greyed
out: only someone who holds them can give it.
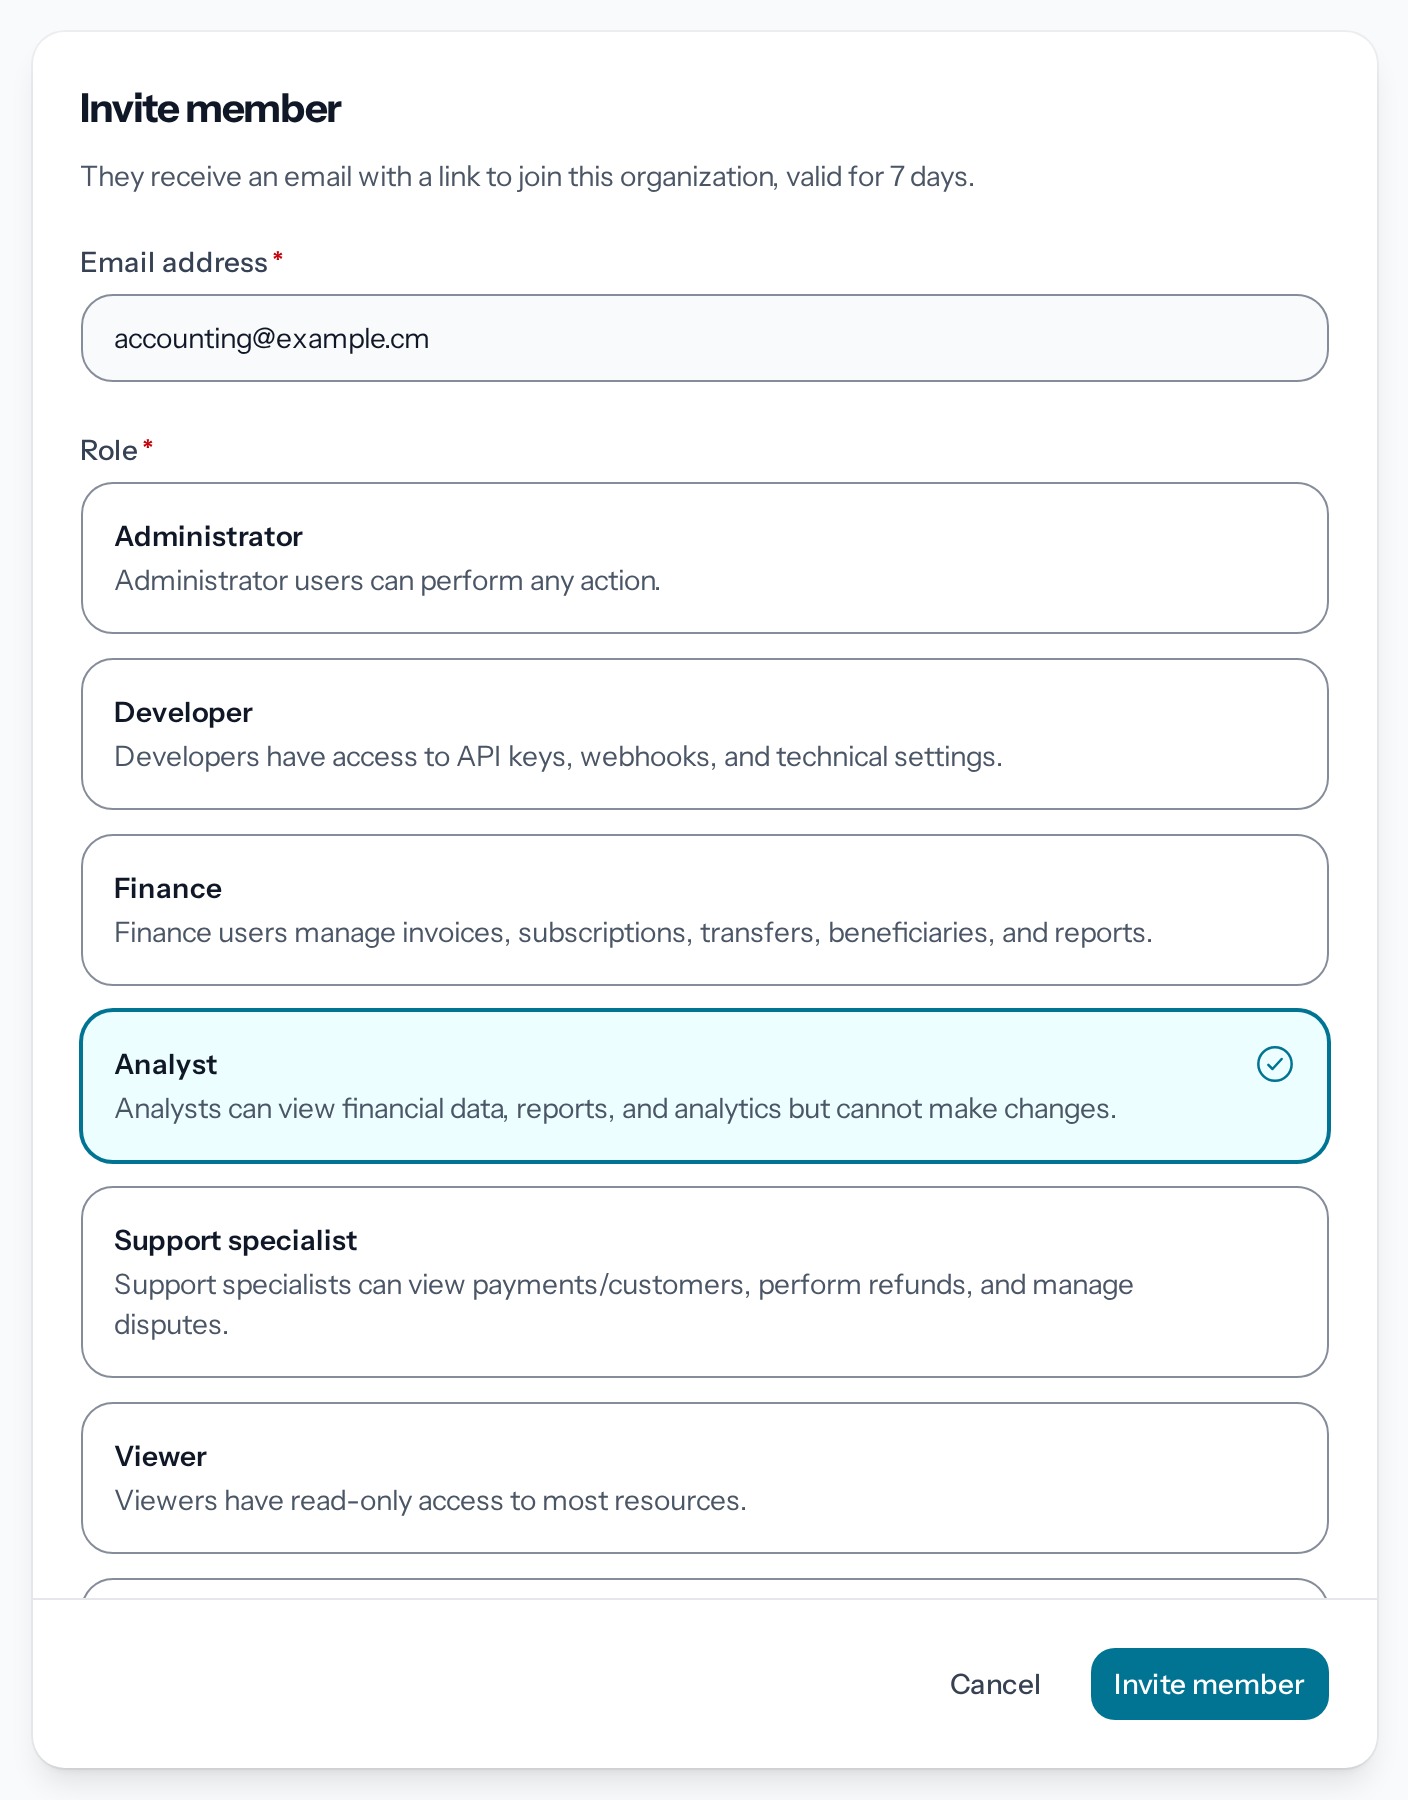
*Each role in the list says what it allows.*
5. **Send the invitation**
**Invite member** asks for the security code, then sends the email. The invitation appears in
the list of pending invitations.
## What the invitee receives
The person receives an email with a link to join the organisation, valid for 7 days. To accept,
they sign in to Wajub with the invited address, or create their account with that address if they
do not have one. If the organisation has reached its plan's limit in the meantime, the acceptance
is refused: pending invitations do not count towards the limit until they are accepted.
## Pending invitations
**Resend invitation** sends a new email and starts the 7 days again. **Cancel invitation** turns off
the link in the email and lets the person know; **Keep invitation** closes the window without
changing anything.
## Change a role or remove a member
The menu at the end of a member's row offers **Change role**, which takes effect straight away,
and **Remove member**: the person loses access at once, and you can invite them again later. A
member who holds permissions you do not have can only be changed or removed by someone who holds
them. The owner cannot remove themselves: they [hand over the
organisation](https://docs.wajub.com/dashboard/settings/organizations#transfer-ownership) first.
On your own row, **Leave organization** removes you from it at once; only a member who manages
members can invite you back.
> [!NOTE]
> **A member without 'Manage members' cannot leave on their own**
>
> **Leave organization** is on this page, which only members who manage members can open. A
> Developer, a Finance member, an Analyst, a Support specialist, a Viewer or a Sandbox user asks
> the owner or an Administrator to remove them.
## Emails each role receives
Wajub sends the emails on each topic to the roles below. The owner receives what an Administrator
receives.
| Topic | Roles |
| ---------------------------------------------------------------------------------------------------- | ----------------------------------------- |
| Payments, invoices, transfers, balance adjustments, business verification | **Administrator**, **Finance** |
| Disputes | **Administrator**, **Support specialist** |
| Sync, technical alerts such as a failing webhook endpoint or a domain that no longer points to Wajub | **Administrator**, **Developer** |
| Security, Wajub Rail | **Administrator** |
---
# Manage your organisations
URL: https://docs.wajub.com/dashboard/settings/organizations
> Create another organisation, switch from one to another, hand an organisation over to another member or close it.
An organisation has its own payments, members and settings. A single Wajub account can create
several, for example one per business, and be a member of organisations created by others.
Anyone can create an organisation and becomes its owner. Handing over or closing an organisation is
reserved for its owner, and asks for the security code.
## Create an organisation
1. **Open the organisation switcher**
Click the organisation's name at the top of the menu, then **Create organization**.
2. **Name the organisation**
Type the **Organization name**: your customers see it on receipts and payment pages, and you
can change it later.
3. **Create it**
**Create organization** creates it and switches you to it. It starts in Sandbox: to accept
payments in Live, [verify its
business](https://docs.wajub.com/dashboard/activation/verify-business).
The new organisation takes the country you signed up with, which sets its settlement currency.
## Switch organisations
The switcher at the top of the menu lists **Your organizations**; clicking one switches you to it,
and from nine onwards, **Search organizations** filters them. **Manage organizations** opens
**Settings › Organizations**, which lists every organisation you are a member of, with **Current**
on the one you are in, **Owner** on yours, and a **Switch** button on the others.
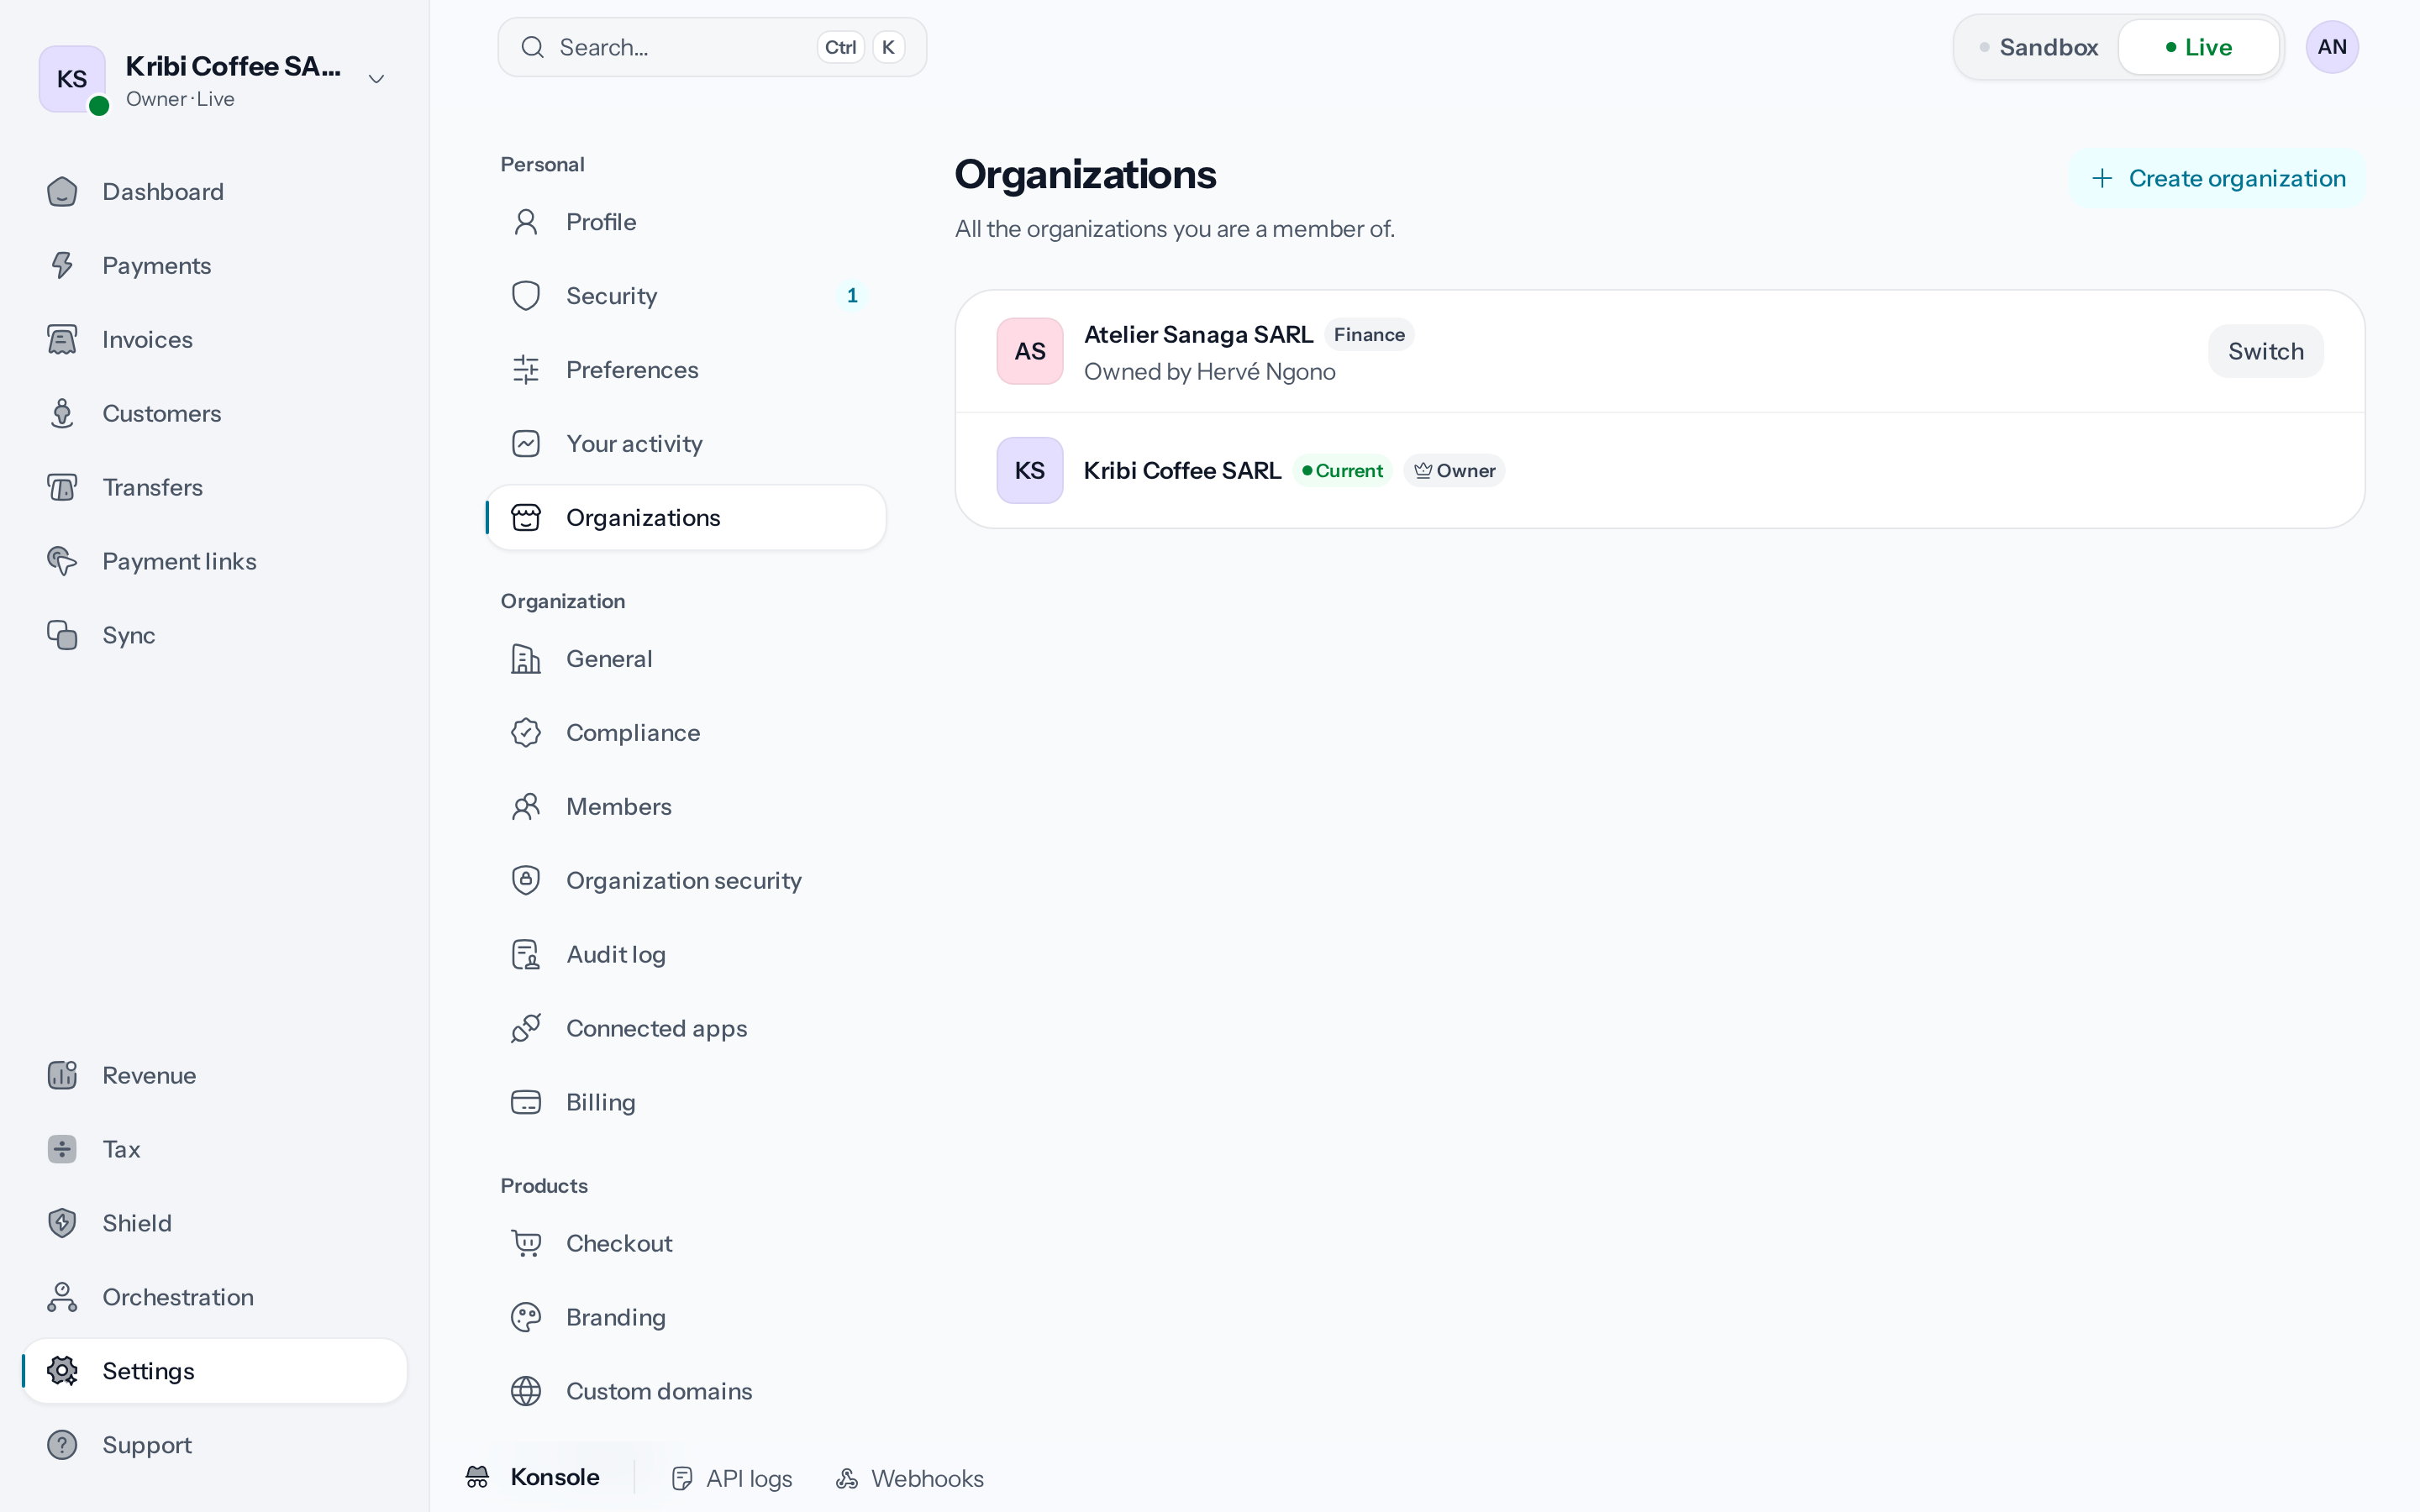
*An organisation that is not yours shows your role and its owner.*
To leave an organisation you are a member of, see [Invite and manage
members](https://docs.wajub.com/dashboard/settings/members#change-a-role-or-remove-a-member).
## Transfer ownership
1. **Open the danger zone**
Open **Settings › General** and scroll down to the **Danger zone**.
*Only the owner sees the Danger zone.*
2. **Choose the new owner**
**Transfer ownership** opens a window: choose the member in **New owner**. Only a member of the
organisation can become its owner; if there is no other member, [invite
them](https://docs.wajub.com/dashboard/settings/members) first.
3. **Send the invitation**
**Send transfer invitation** asks for the security code, then sends the invitation by email. It
is valid for 7 days; a new invitation replaces the previous one.
The invited member opens **Organization ownership transfer** and chooses **Accept transfer** or
**Decline**. Until then, you remain the owner. If they accept, they become the owner, with control
over the settings and billing, and you become an Administrator.
## Close the organisation
In the **Danger zone**, **Close organization** opens a window. While the organisation has a
balance, even a pending or reserved one, an open dispute, or a refund or transfer in progress, the
window lists them under **Settle these first, then close the organization** and cannot close it.
Otherwise, type the organisation's name in **Type the organization's name to confirm**, then
**Close organization** asks for the security code. Its API keys stop working at once, every member
loses access and no more payments can be taken. The data is kept, but only
[support](https://docs.wajub.com/dashboard/help/support) can reopen it.
---
# Create a custom role
URL: https://docs.wajub.com/dashboard/settings/roles
> Prepare a role with the permissions you choose when none of the seven roles fits, give it to a member, then edit or delete it.
When none of the [seven roles](https://docs.wajub.com/dashboard#roles) fits, a custom role brings together exactly the
permissions you choose, for example for an accountant who reads payments, transfers and reports
without changing anything.
The owner, an Administrator or a custom role with **Manage members** creates custom roles, and can
only put into them permissions they hold themselves. Creating or deleting a role does not ask for
a security code; editing one does, because the change applies at once to the members who hold it.
## The steps
1. **Open custom roles**
Open **Settings › Members › Custom roles**. From the member list, **Manage custom roles** leads
there too.
2. **Open the form**
**Create custom role** opens the form on the page.
3. **Name the role**
The **Role name** is required, up to 50 characters, and must be unique in the organisation. The
**Description** is optional, up to 255 characters, and shows next to the role.
4. **Tick its permissions**
Under **Permissions**, tick at least one. They are grouped by module, each with **Select all**;
a greyed-out box is a permission you do not hold.
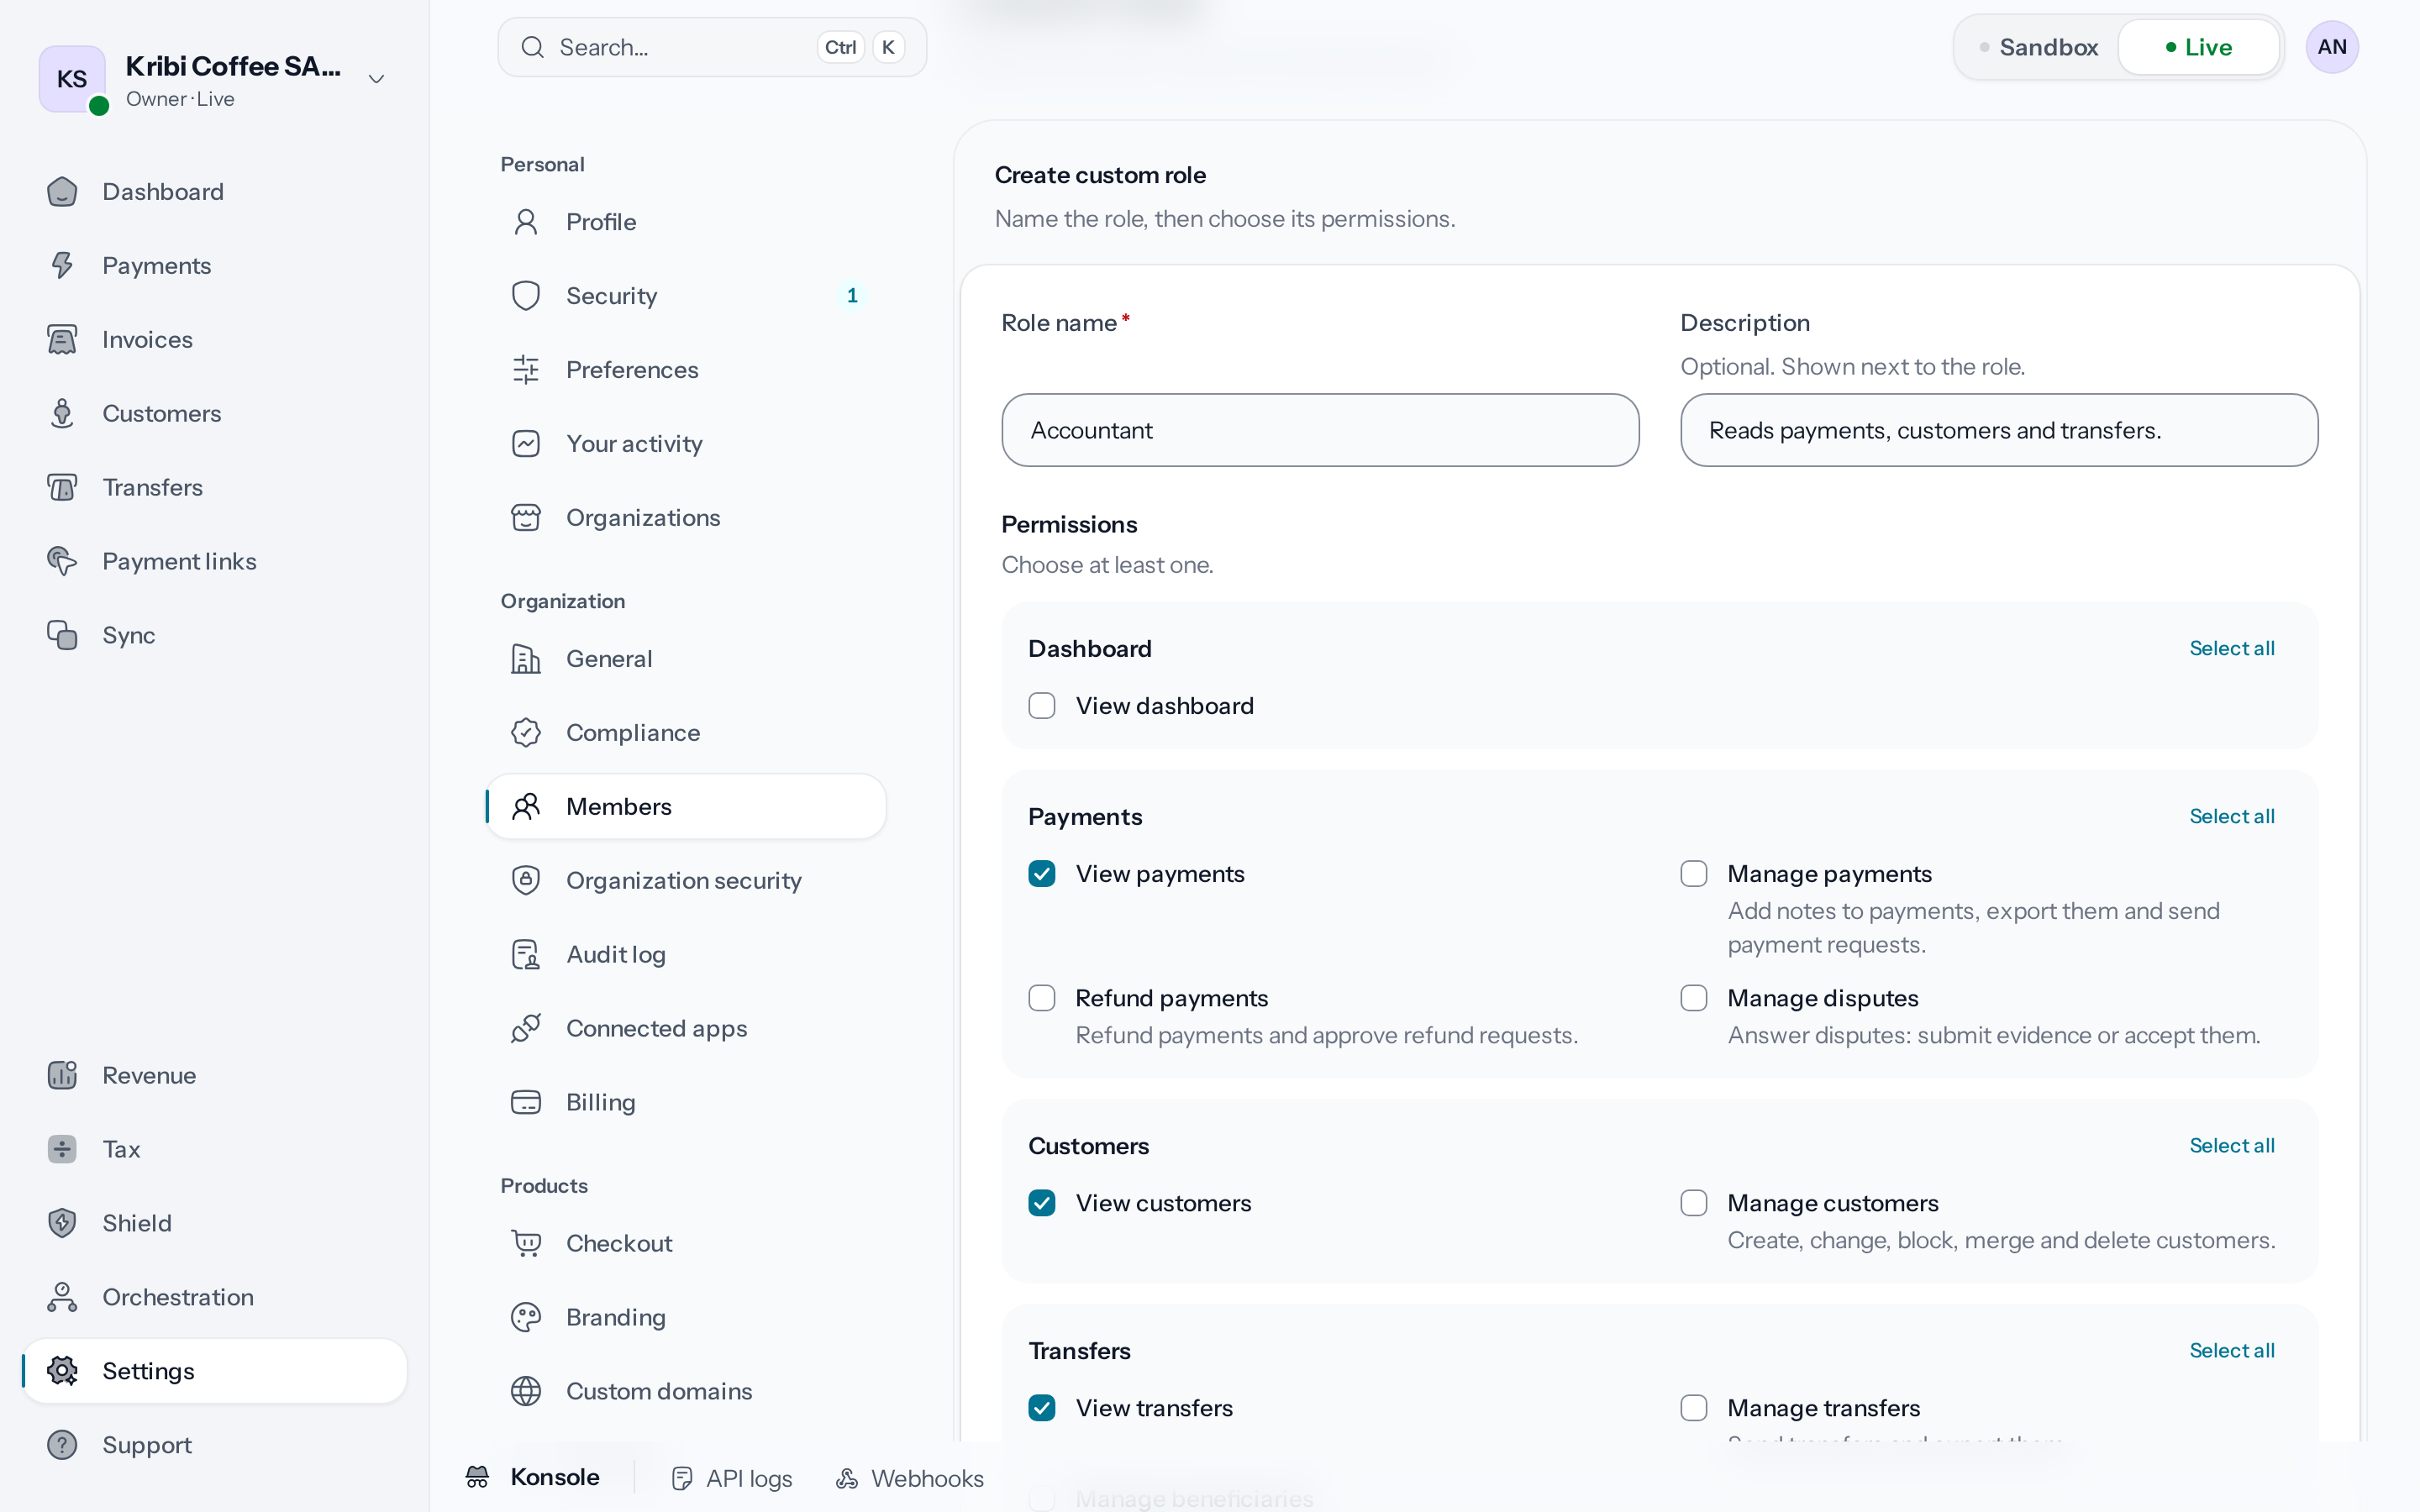
*The permissions are grouped by module.*
5. **Create the role**
**Create custom role** saves the role. It appears in the list, marked **Held by no member**.
6. **Give the role to a member**
In **Settings › Members**, choose it when you invite someone, or with **Change role** on a
member's row: see [Invite and manage
members](https://docs.wajub.com/dashboard/settings/members).
## Settings permissions
Five permissions open the organisation's settings. **View settings** opens them without changing
anything. **Manage settings** changes security, the payment page, branding, domains, refunds,
payment links and invoices, the transfer settings (payout accounts, recurring transfers and
transfer security), and switches between Sandbox and Live. **Manage developer settings** only
changes the technical settings: custom domains, the sites that embed the payment page and payment
routing; it also switches between Sandbox and Live. **Manage members** invites and removes members,
changes their role and creates custom roles. **Manage account** takes care of business
verification and subscription billing.
## Edit or delete a role
The menu at the end of a role offers **Edit role**, which reopens the form: **Save role** asks for
the security code, and a new name follows the role to its members and to pending invitations.
**Delete role** erases it for good, but only if no member holds it and no pending invitation gives
it: change their role or cancel the invitation first.
A role that grants permissions you do not hold can only be edited or deleted by someone who holds
them.
---
# Secure the organisation
URL: https://docs.wajub.com/dashboard/settings/security
> Require two-factor authentication from every member and limit dashboard access to certain IP addresses, in Settings › Organization security.
Two rules protect the whole organisation: every member confirms their sign-ins with a second step,
and the dashboard only opens from the IP addresses you allow. Two-factor authentication on your
own account is set separately, in [Secure your
sign-in](https://docs.wajub.com/dashboard/account/security).
The owner, an Administrator, a Developer, a Viewer or a custom role with **View settings** reads
these rules. Only the owner, an Administrator or a custom role with **Manage settings** changes
them, and saving asks for the security code. The rules apply in Sandbox as in Live.
## Require two-factor authentication
1. **Open organisation security**
Open **Settings**, then **Organization security** in the **Organization** group.
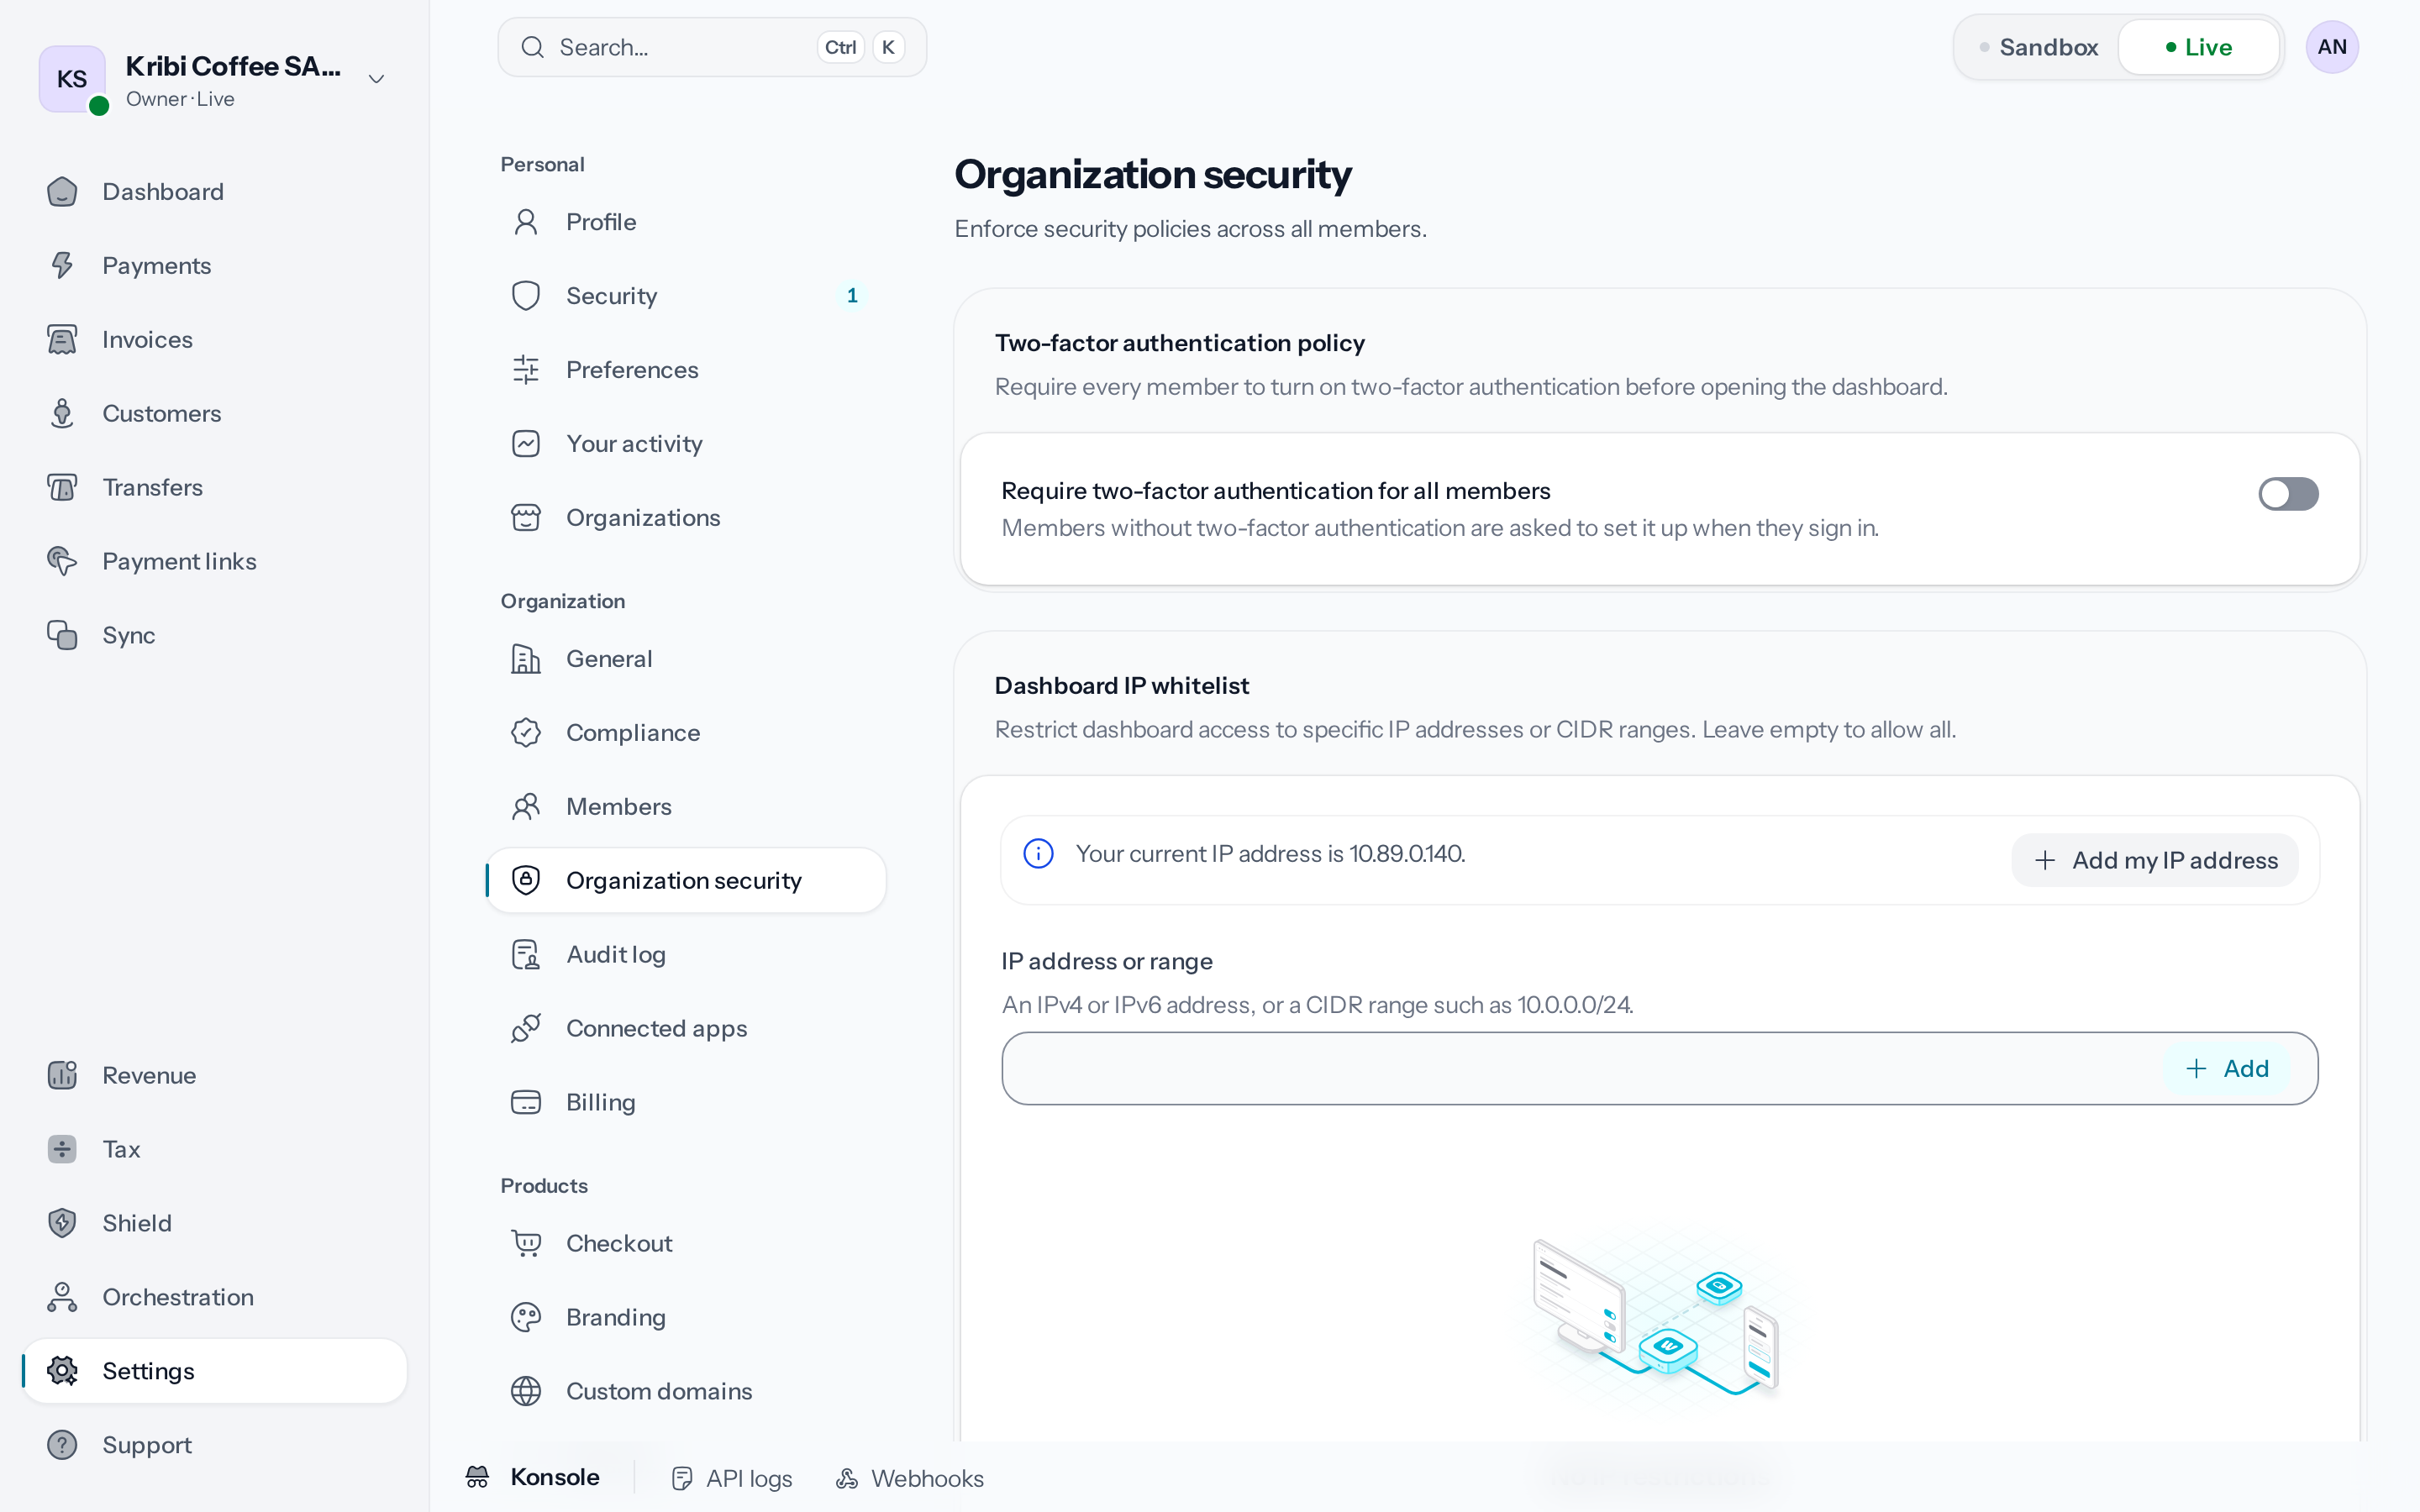
*Both rules are saved together, with the security code.*
2. **Turn the rule on**
Under **Two-factor authentication policy**, turn on **Require two-factor authentication for all
members**.
3. **Save**
**Save changes**, in the bar at the bottom of the screen, asks for the security code and then
applies the rule.
The rule applies as soon as it is saved. A member who does not have two-factor authentication yet
lands, at their next action, on **Set up two-factor authentication**, and cannot open anything in
the organisation until they choose a method: **Authenticator app**, **Code by email**, **Passkey**
or, if they have a verified phone number, **Code by text message**. A member already signed in
without having passed their second step is signed out and signs back in with it.
**Trust this device for 30 days**, which a member can tick when entering their code at sign-in,
lets that browser skip the second step for 30 days. An organisation that requires two-factor
authentication does not accept it: its members go through the second step at every sign-in.
## Restrict IP addresses
1. **Add your own address**
Under **Dashboard IP whitelist**, the page shows your current IP address. **Add my IP address**
puts it in the list. Until it is there, the page warns you that you would lose access and
refuses to save.
2. **Add the other addresses**
In **IP address or range**, type an IPv4 or IPv6 address, or a range such as 10.0.0.0/24, then
click **Add**. Repeat for each office or network.
3. **Save the list**
**Save changes** asks for the security code and then applies the list.
An empty list, marked **No IP restrictions**, lets the dashboard open from anywhere. A member who
signs in from another address lands on **Access denied**: they can **Switch to another
organization**, open their **Personal settings** or **Sign out**, and ask an Administrator to add
their address. The list only covers the dashboard: it does not limit calls made with your API keys.
An API key has its own list of allowed addresses, see [Environments & API
keys](https://docs.wajub.com/getting-started/environments#narrowing-what-a-key-can-do).
---
# Activate Shield
URL: https://docs.wajub.com/dashboard/shield/enable
> Activate Shield to see its decisions on your payments, set how strict it is and handle the payments it flags.
Shield assesses the fraud risk of every payment in Live. Wajub's default protection already
applies to your payments: activating Shield shows you its decisions and lets you adjust them.
The owner, an Administrator or a custom role with **Manage Shield** can activate Shield; with
**View Shield** alone, a custom role reads its screens without changing anything. The other
[roles](https://docs.wajub.com/dashboard#roles) do not see Shield. Shield is part of every plan, and only exists in
[Live](https://docs.wajub.com/dashboard#sandbox-and-live). No security code is asked for.
## The steps
1. **Open Shield**
In **Live**, open **Shield** in the menu. Until Shield is activated, the page presents **Fraud
protection** under the title **Stop fraud before it costs you.**, with no tabs.
*Without the Manage Shield permission, a message replaces the button.*
2. **Activate Shield**
Click **Activate Shield**. Without the permission, the page shows **Ask an administrator of
your organization to activate Shield.** instead.
The message **Shield is now active.** appears, and the page becomes the overview, with the
**Overview**, **Reviews**, **Rules**, **Lists** and **Risk controls** tabs.
## What activating changes
Your own settings apply in place of Wajub's: your thresholds, stricter than Wajub's, never more
lenient, and with **Shield Advanced** your rules, your blocklist and automatic 3D Secure.
[Adjust risk controls](https://docs.wajub.com/dashboard/shield/settings) describes them.
A payment Shield flags is collected like the others, then joins the **Reviews**, where you decide
what to do about the customer: [Review a flagged payment](https://docs.wajub.com/dashboard/shield/reviews). A blocked
attempt is listed there too, with nothing collected.
## The overview
At the top, **Screened this month**, **Flagged** and **Waiting for review** count the current
month, compared with the previous month, and **Open disputes** the disputes in progress. **Risk
distribution this month** shows the share of flagged payments sent to review and the share of
blocked payments. **Waiting for your review** lists the latest flagged payments, and **Review
all** opens the reviews. **Rule performance** ranks your custom rules by how often they fired,
with **Manage rules**. Disputes are handled from the payments:
[Handle a dispute](https://docs.wajub.com/dashboard/payments/disputes).
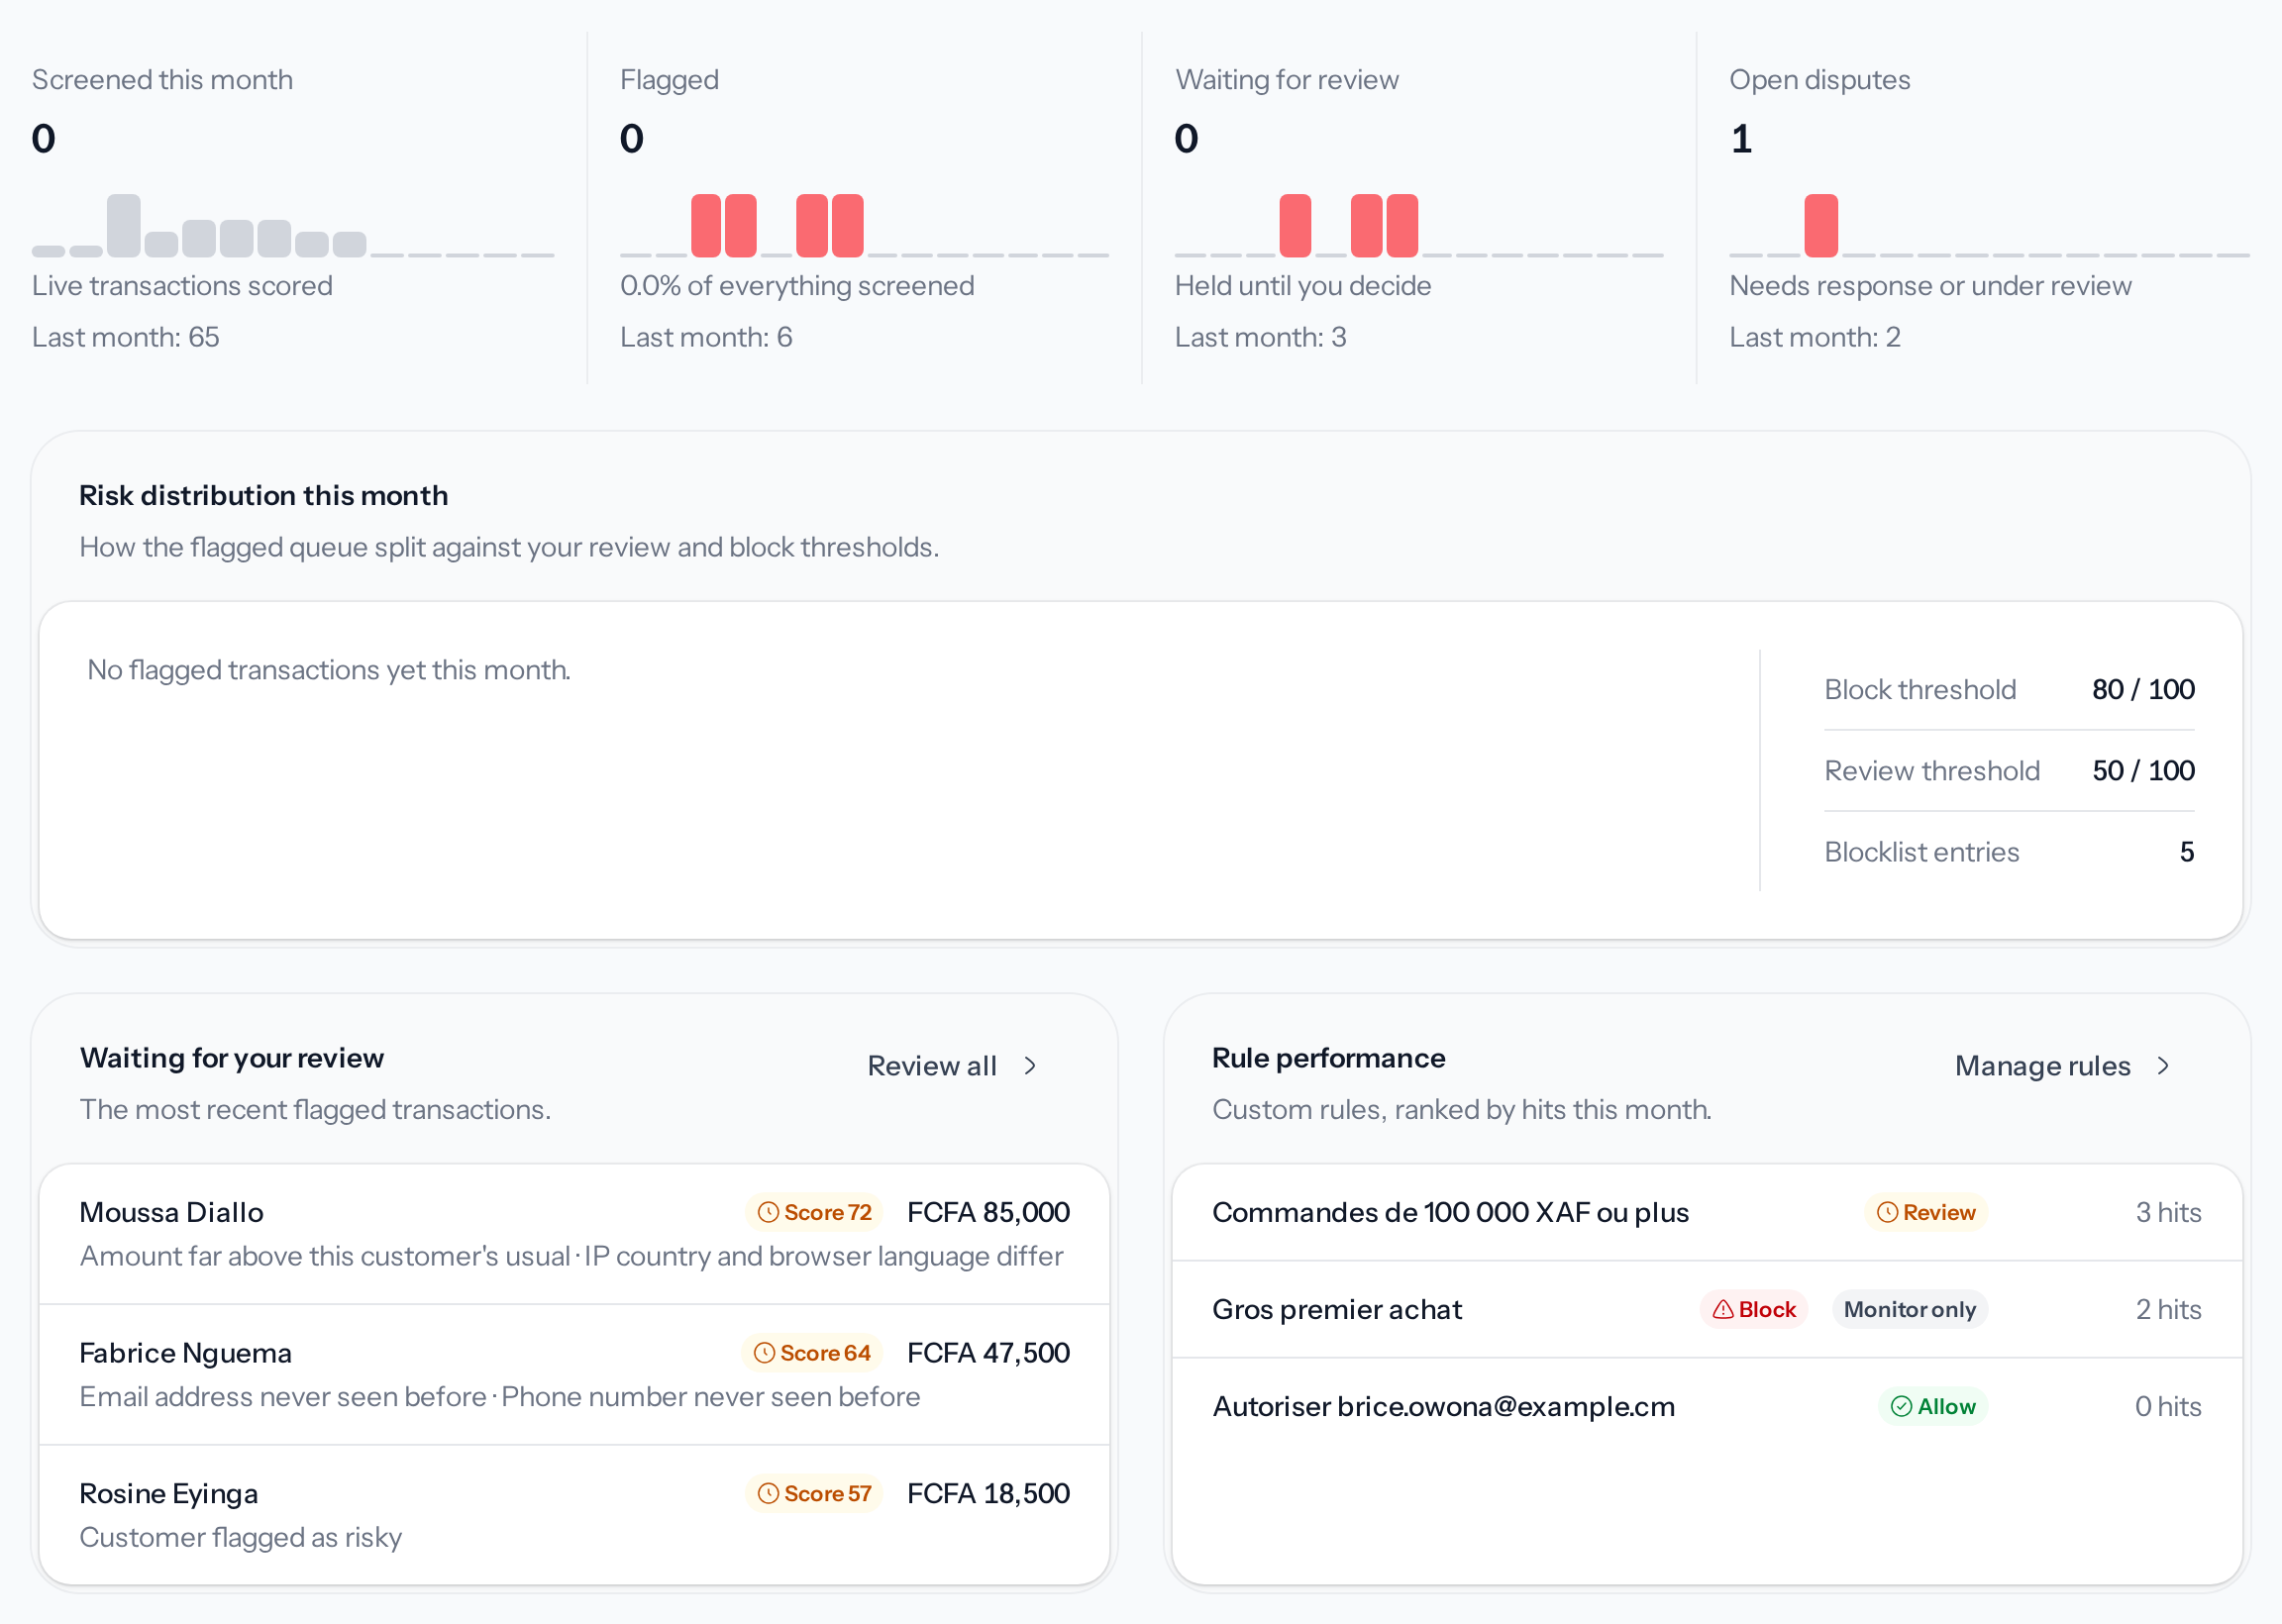
*The first three figures count the current month.*
## Turning Shield off
In **Risk controls**, turn off **Use my Shield settings**, then click **Save changes**. Wajub's
default protection keeps applying, and Shield goes back to its activation page. Your thresholds are
kept for the next activation.
## What the customer sees
An allowed or flagged payment goes through normally for the customer, sometimes with a 3D Secure
confirmation from their bank; a blocked payment is declined, with a reference to give to support.
---
# Manage Shield lists
URL: https://docs.wajub.com/dashboard/shield/lists
> Add an email address, a phone number, an IP address, a country or a card BIN to Shield's blocklist, and remove an allowed customer.
The **Lists** tab brings together the customers you always let through and the values Shield
refuses outright. Both apply straight away to the next payments.
The owner, an Administrator or a custom role with **Manage Shield** edits the lists; **View
Shield** is enough to read them. **Allowed customers** exist on every plan. The **Blocklist** is
part of **Shield Advanced**, included in the **Scale** and **Enterprise** plans and offered as an
[add-on](https://docs.wajub.com/dashboard/subscription/add-ons) on the others; without it, the tab shows **Lists are
part of Shield Advanced**. Shield must be [activated](https://docs.wajub.com/dashboard/shield/enable). No security code
is asked for.
## The steps
1. **Open the lists**
In **Shield**, open the **Lists** tab. The **Add to the blocklist** form sits below the
**Allowed customers**.
2. **Choose the type**
Under **Type**, choose **Email address**, **Phone number**, **IP address**, **Country** or
**Card BIN**. The next field says what it expects: the whole address, the number with its
country code, a single IP address, a country whose IP addresses are refused, or the first 6 to
8 digits of a card.
3. **Enter the value**
Fill in the field named after the chosen type, **Email address** for example, then if needed
**Reason (optional)**, which only your members see.
4. **Add the entry**
Click **Add to the blocklist**. The message **Entry added to blocklist.** appears, and the
entry shows at the top of the **Blocklist**. Each addition also turns on **Enforce the
blocklist** in the [risk controls](https://docs.wajub.com/dashboard/shield/settings).
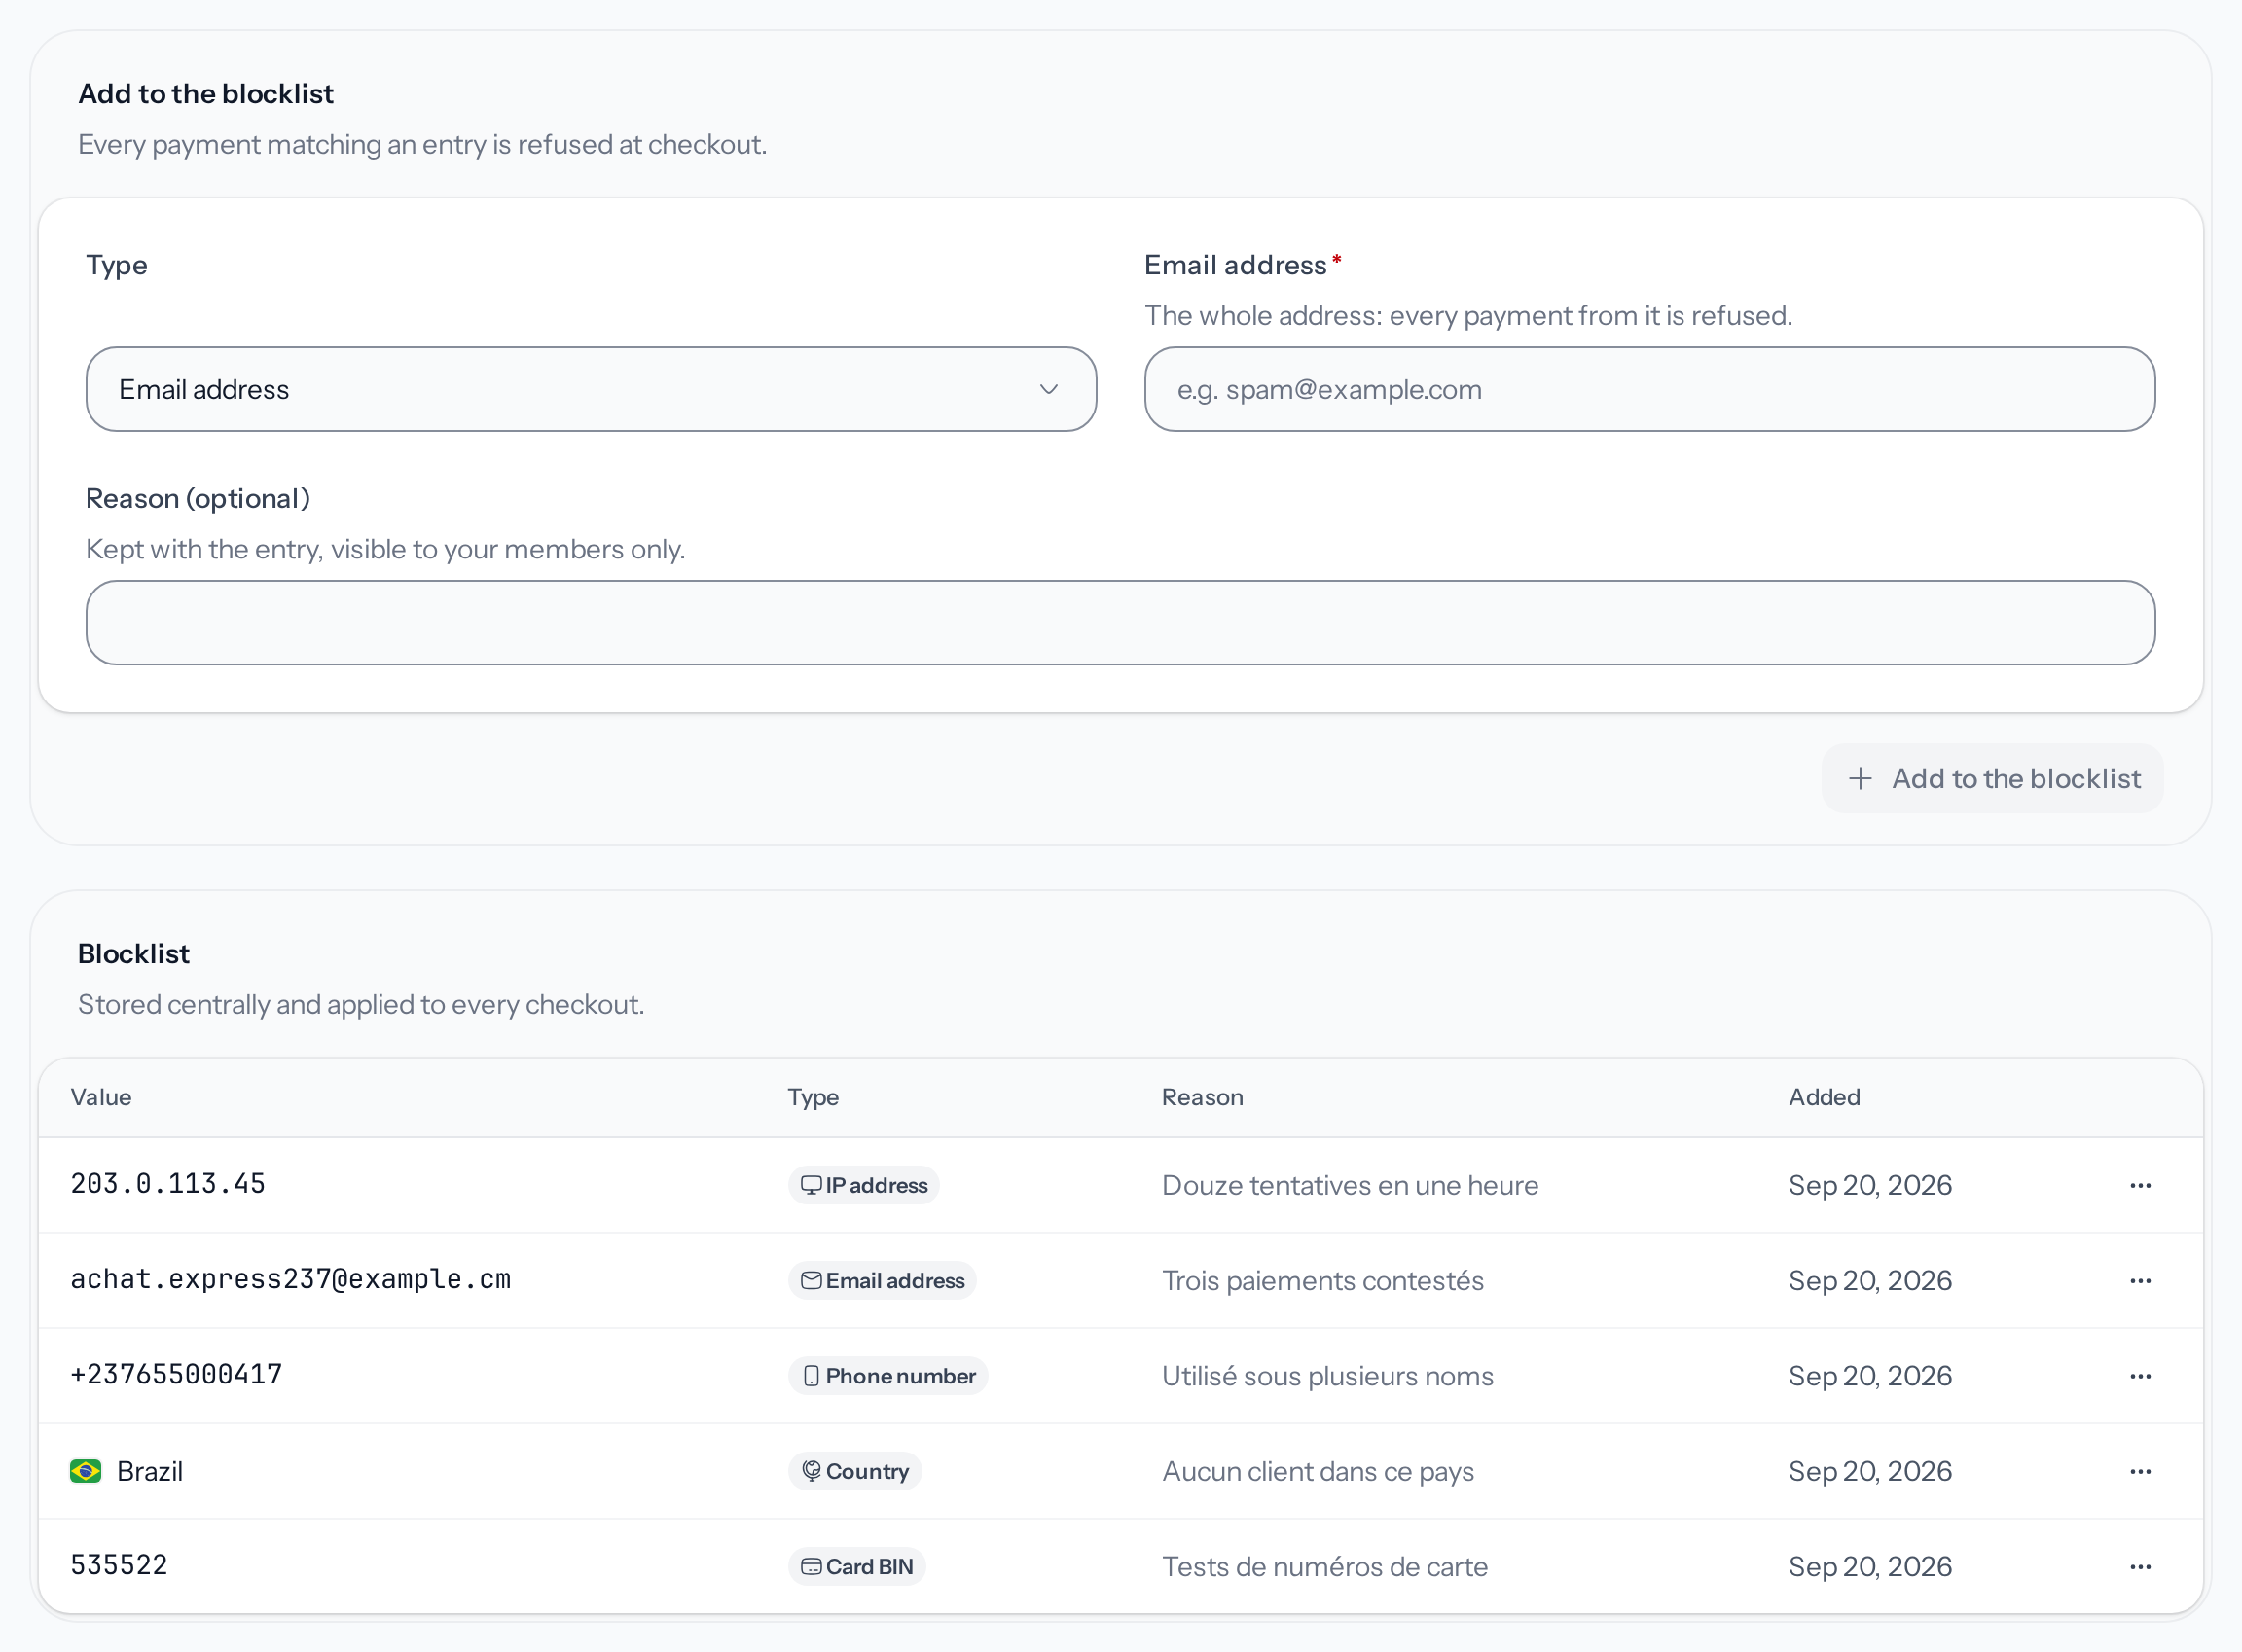
*Every payment that matches an entry is refused.*
## The blocklist
Beyond 10 entries, a search above the list filters them by value, type or reason, and the button
below the list loads the next ones, 50 at a time. An entry's menu offers **Copy value** and
**Remove entry**: after confirmation, it no longer blocks anything. A rule can also rely on the
list with the **Matches an entry in the blocklist** condition:
[Create a Shield rule](https://docs.wajub.com/dashboard/shield/rules).
## Allowed customers
A customer joins **Allowed customers** when you choose **Always allow customer** on one of their
payments, in the [reviews](https://docs.wajub.com/dashboard/shield/reviews). Their payments go through whatever their
score, unless they are on your blocklist or on a sanctions list. The table shows the
**Customer**, **Identified by** (their email or phone) and **Allowed since**.
Their row's menu offers **Stop allowing**. After confirmation, Shield assesses their next payments
like everyone else's, and the message **This customer is no longer always allowed.** appears.
---
# Review a flagged payment
URL: https://docs.wajub.com/dashboard/shield/reviews
> Check a payment Shield finds suspicious or an attempt it blocked, then approve it, allow the customer for good, or block them and refund.
A payment Shield finds suspicious is collected like the others, then joins the **Reviews**; an
attempt Shield blocked is listed there too, with nothing collected. Shield never holds the money:
if it is fraud, check before you deliver, then block the customer and refund them.
The owner, an Administrator or a custom role with **Manage Shield** decides; **View Shield** is
enough to read the list. Approving and allowing a customer work on every plan. Blocking the
customer takes **Shield Advanced**, included in the **Scale** and **Enterprise** plans and offered
as an [add-on](https://docs.wajub.com/dashboard/subscription/add-ons) on the others. Refunding at the same time also
takes **Refund payments** and the [security code](https://docs.wajub.com/dashboard#the-security-code).
## The steps
1. **Open the reviews**
In **Shield**, open the **Reviews** tab. The table covers the last 90 days, with the
**Amount**, the **Score**, the **Customer**, the **Reasons** for the flag, the **Payment
method** and the date under **Flagged**. The **Decision** filter keeps the flagged payments
(**Review**) or the blocked attempts (**Block**).
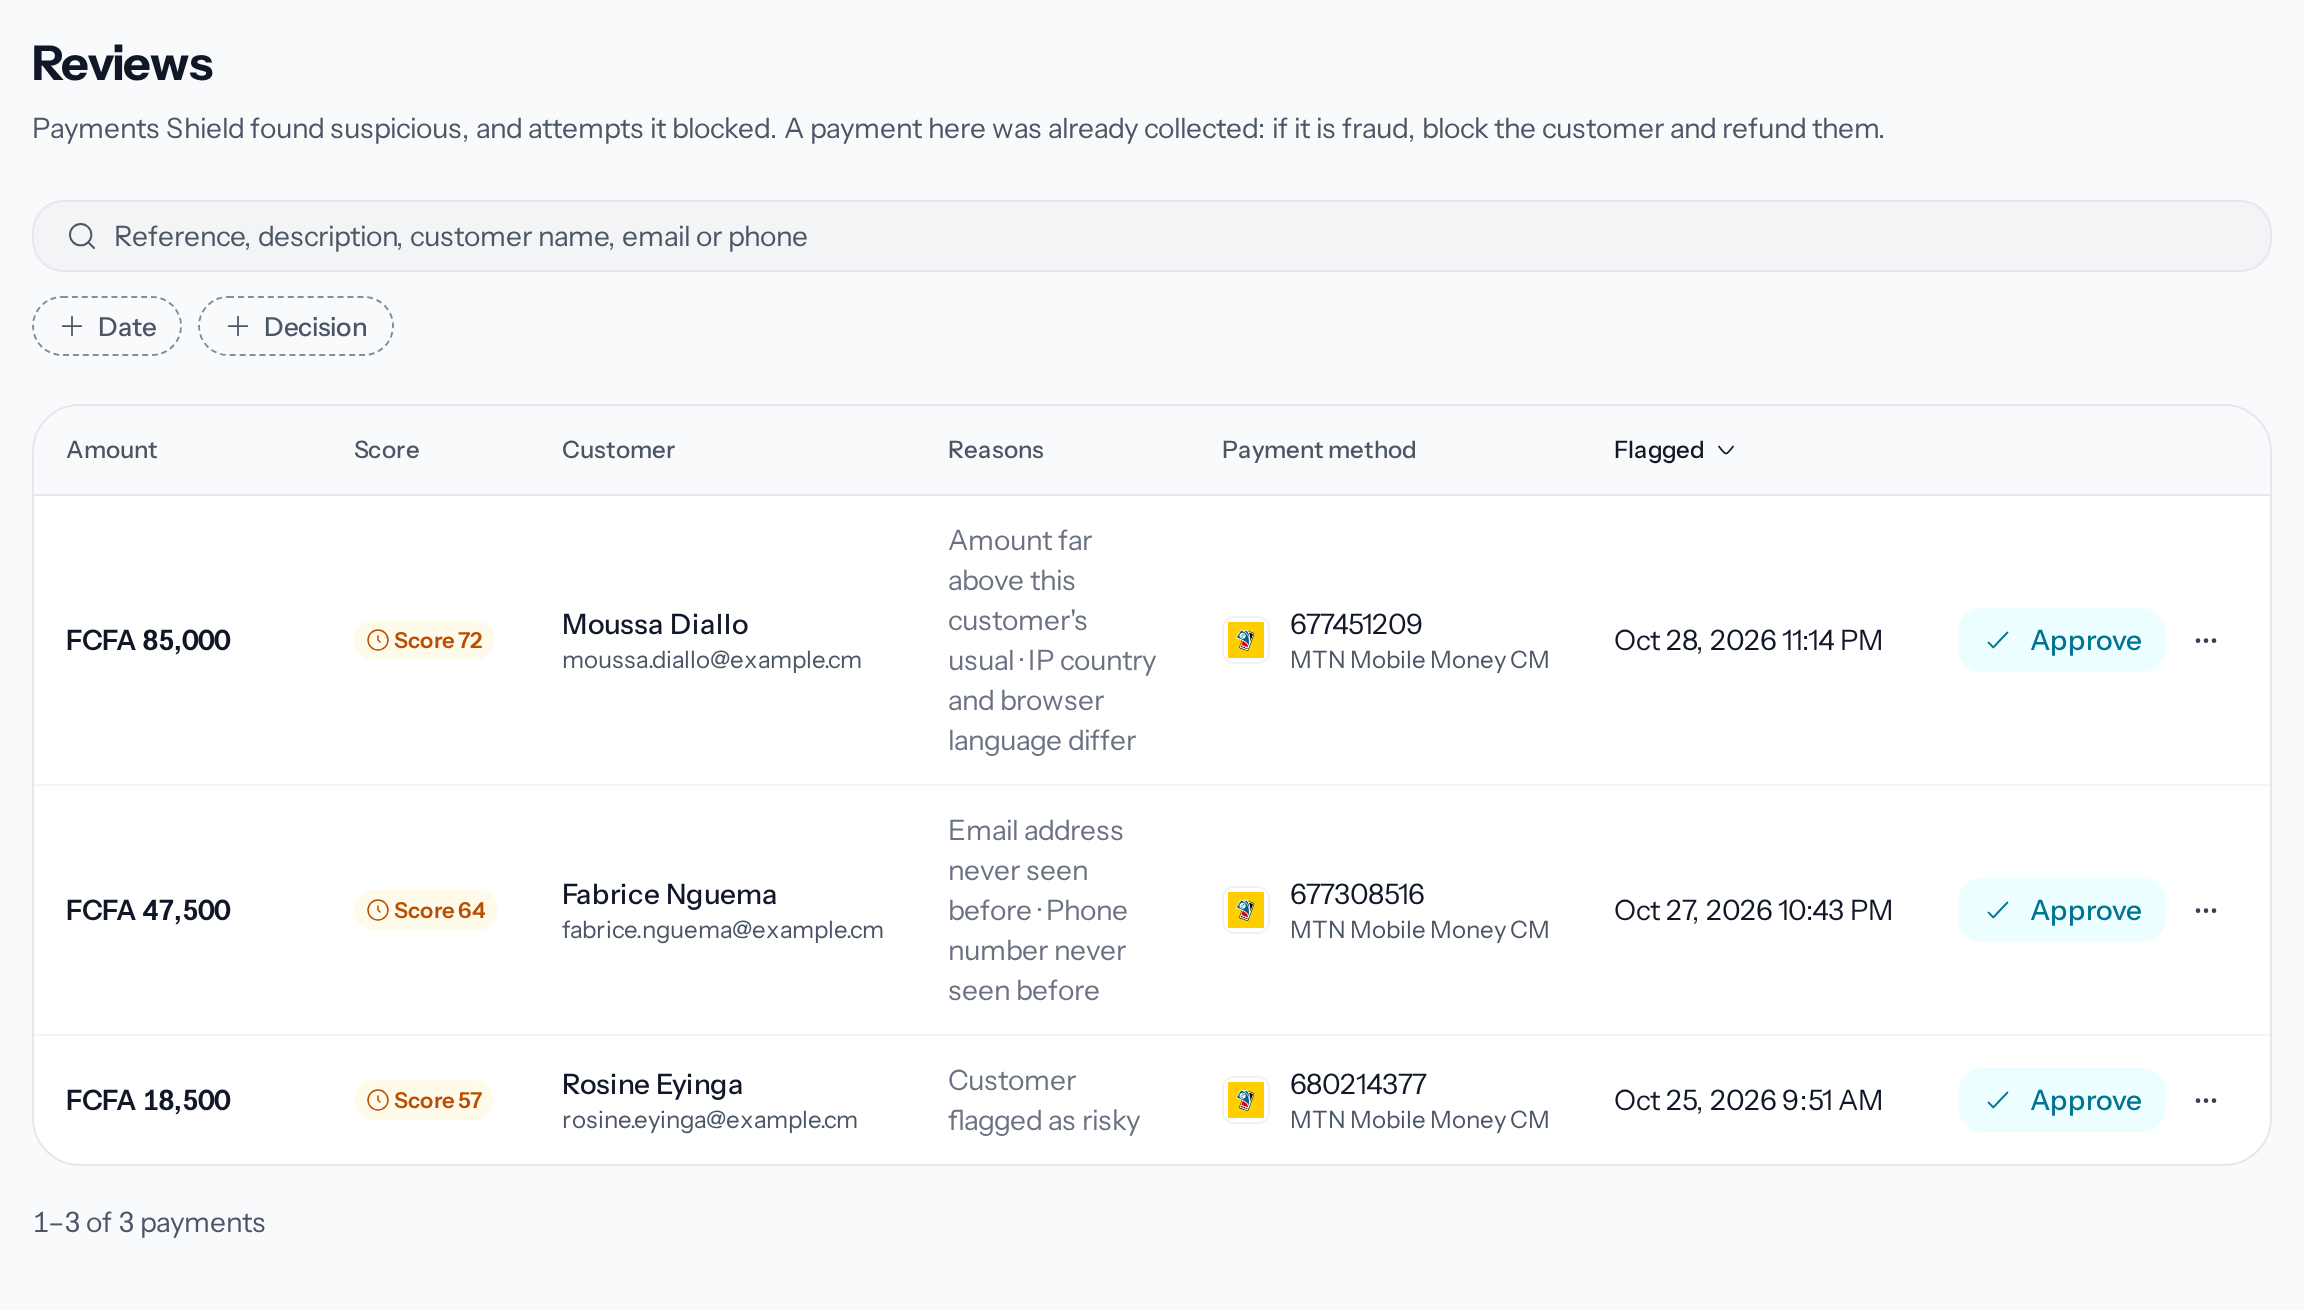
*Every payment in the list has already been collected, apart from blocked attempts.*
2. **Check the payment**
Click the row to open the payment's page:
[Read a payment](https://docs.wajub.com/dashboard/payments/read). The menu at the end of the row also offers **Copy
payment ID** and **View customer**.
3. **Approve a legitimate payment**
Click **Approve**. The payment leaves the list with nothing else changed, and the message
**Review closed.** appears.
For a trusted customer, choose **Always allow customer** in the row's menu instead: their next
payments will go through, and they join the
[allowed customers](https://docs.wajub.com/dashboard/shield/lists#allowed-customers). The menu only offers it when
the customer has an email or a phone number.
## Blocking the customer
If it is fraud, choose **Block customer** in the row's menu. A window opens in the customer's
name, for example "Block Moussa Diallo?". For a collected payment, **Block without refunding**
blocks the customer and leaves the money, and **Block and refund** gives the full amount back to
the customer after the security code. For a blocked attempt, nothing was collected: the button is
**Block customer**.
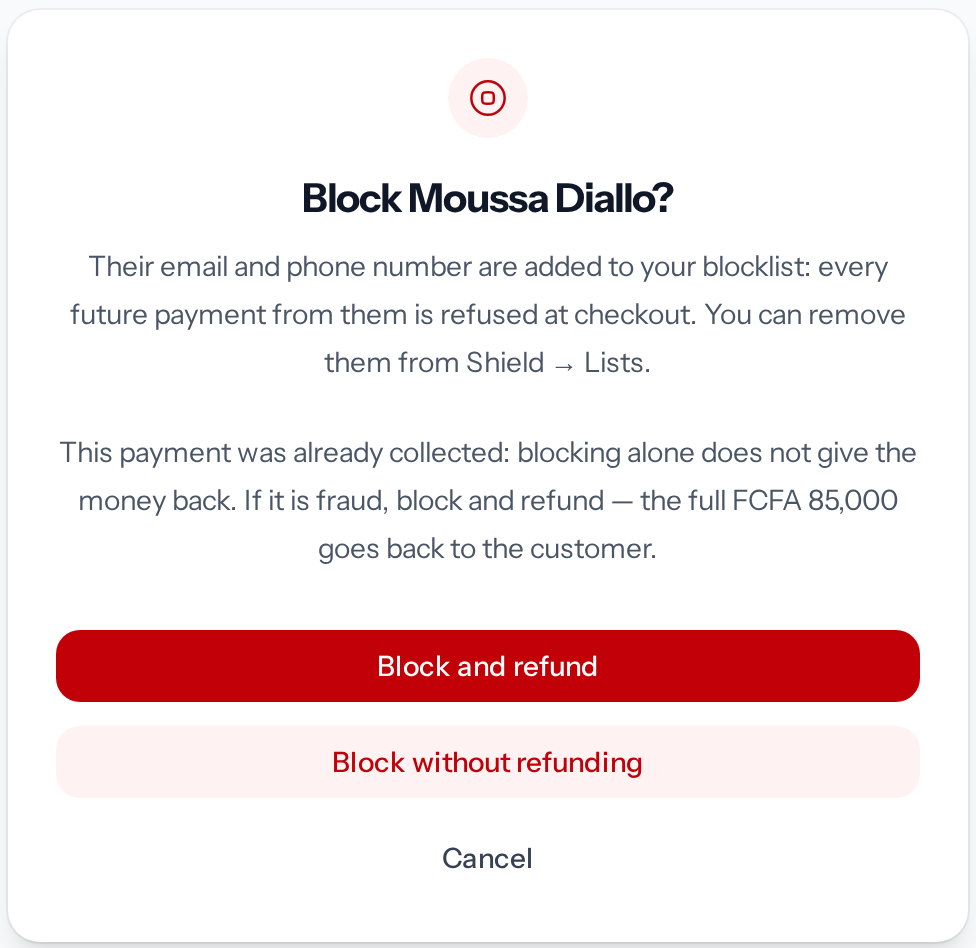
*Blocking alone does not give the money back to the customer.*
The customer's email and phone join the [blocklist](https://docs.wajub.com/dashboard/shield/lists), which applies from
then on: their next payments are declined. Follow the refund on the payment's page:
[Refund a payment](https://docs.wajub.com/dashboard/payments/refund).
> [!NOTE]
> **Before Shield is activated**
>
> Until Shield is activated, the **Reviews** only list the payments whose payer has a name close to
> a sanctioned person, and the **Shield** page flags them with **Review them**. These payments were
> collected: check them before you deliver, then click **Mark reviewed**.
---
# Create a Shield rule
URL: https://docs.wajub.com/dashboard/shield/rules
> Create a Shield rule that blocks a payment, sends it to review, requires 3D Secure or allows it based on your conditions, then reorder, turn off or delete it.
A custom rule decides on a payment based on your own conditions: its amount, its currency, its
payment method, the customer's email or phone, the country of their IP address.
The owner, an Administrator or a custom role with **Manage Shield** creates and edits rules;
**View Shield** is enough to read them. Custom rules are part of **Shield Advanced**, included in
the **Scale** and **Enterprise** plans and offered as an [add-on](https://docs.wajub.com/dashboard/subscription/add-ons)
on the others. Without it, the tab shows **Custom rules are part of Shield Advanced**. Shield must
be [activated](https://docs.wajub.com/dashboard/shield/enable). No security code is asked for.
## The steps
1. **Open the dialog**
In **Shield**, open the **Rules** tab, then click **Create rule**. The **Create rule** dialog
opens.
2. **Name the rule**
The **Name** is required, 120 characters at most. The **Description (optional)** tells your
members what the rule is for.
3. **Choose the action**
Under **Action**, **Block** declines the payment. **Send to review** lets it through and adds
it to the **Reviews**, unless Shield already blocks it. **Challenge with 3DS** has a card
payment confirmed with the customer's bank, where the card's processor offers it. **Allow (bypass other rules)** lets the payment through, unless it matches
your blocklist or exactly matches a sanctioned name.
4. **Choose the mode**
Under **Mode**, **Enforced** acts on payments. **Monitor only** counts the matching payments
without deciding anything: the rule carries the **Monitor only** badge, and its firings show
like the others, so you can judge it before enforcing it.
5. **Add the conditions**
Under **When all of these are true**, choose a **Field**, an **Operator** and a **Value**.
**Add condition** adds another one, up to 10: the rule only applies when all of them are true.
The fields are **Transaction amount**, **Currency**, **Payment method**, **Customer email**,
**Customer phone**, **IP country**, **First transaction from this customer** and **Matches an
entry in the blocklist**.
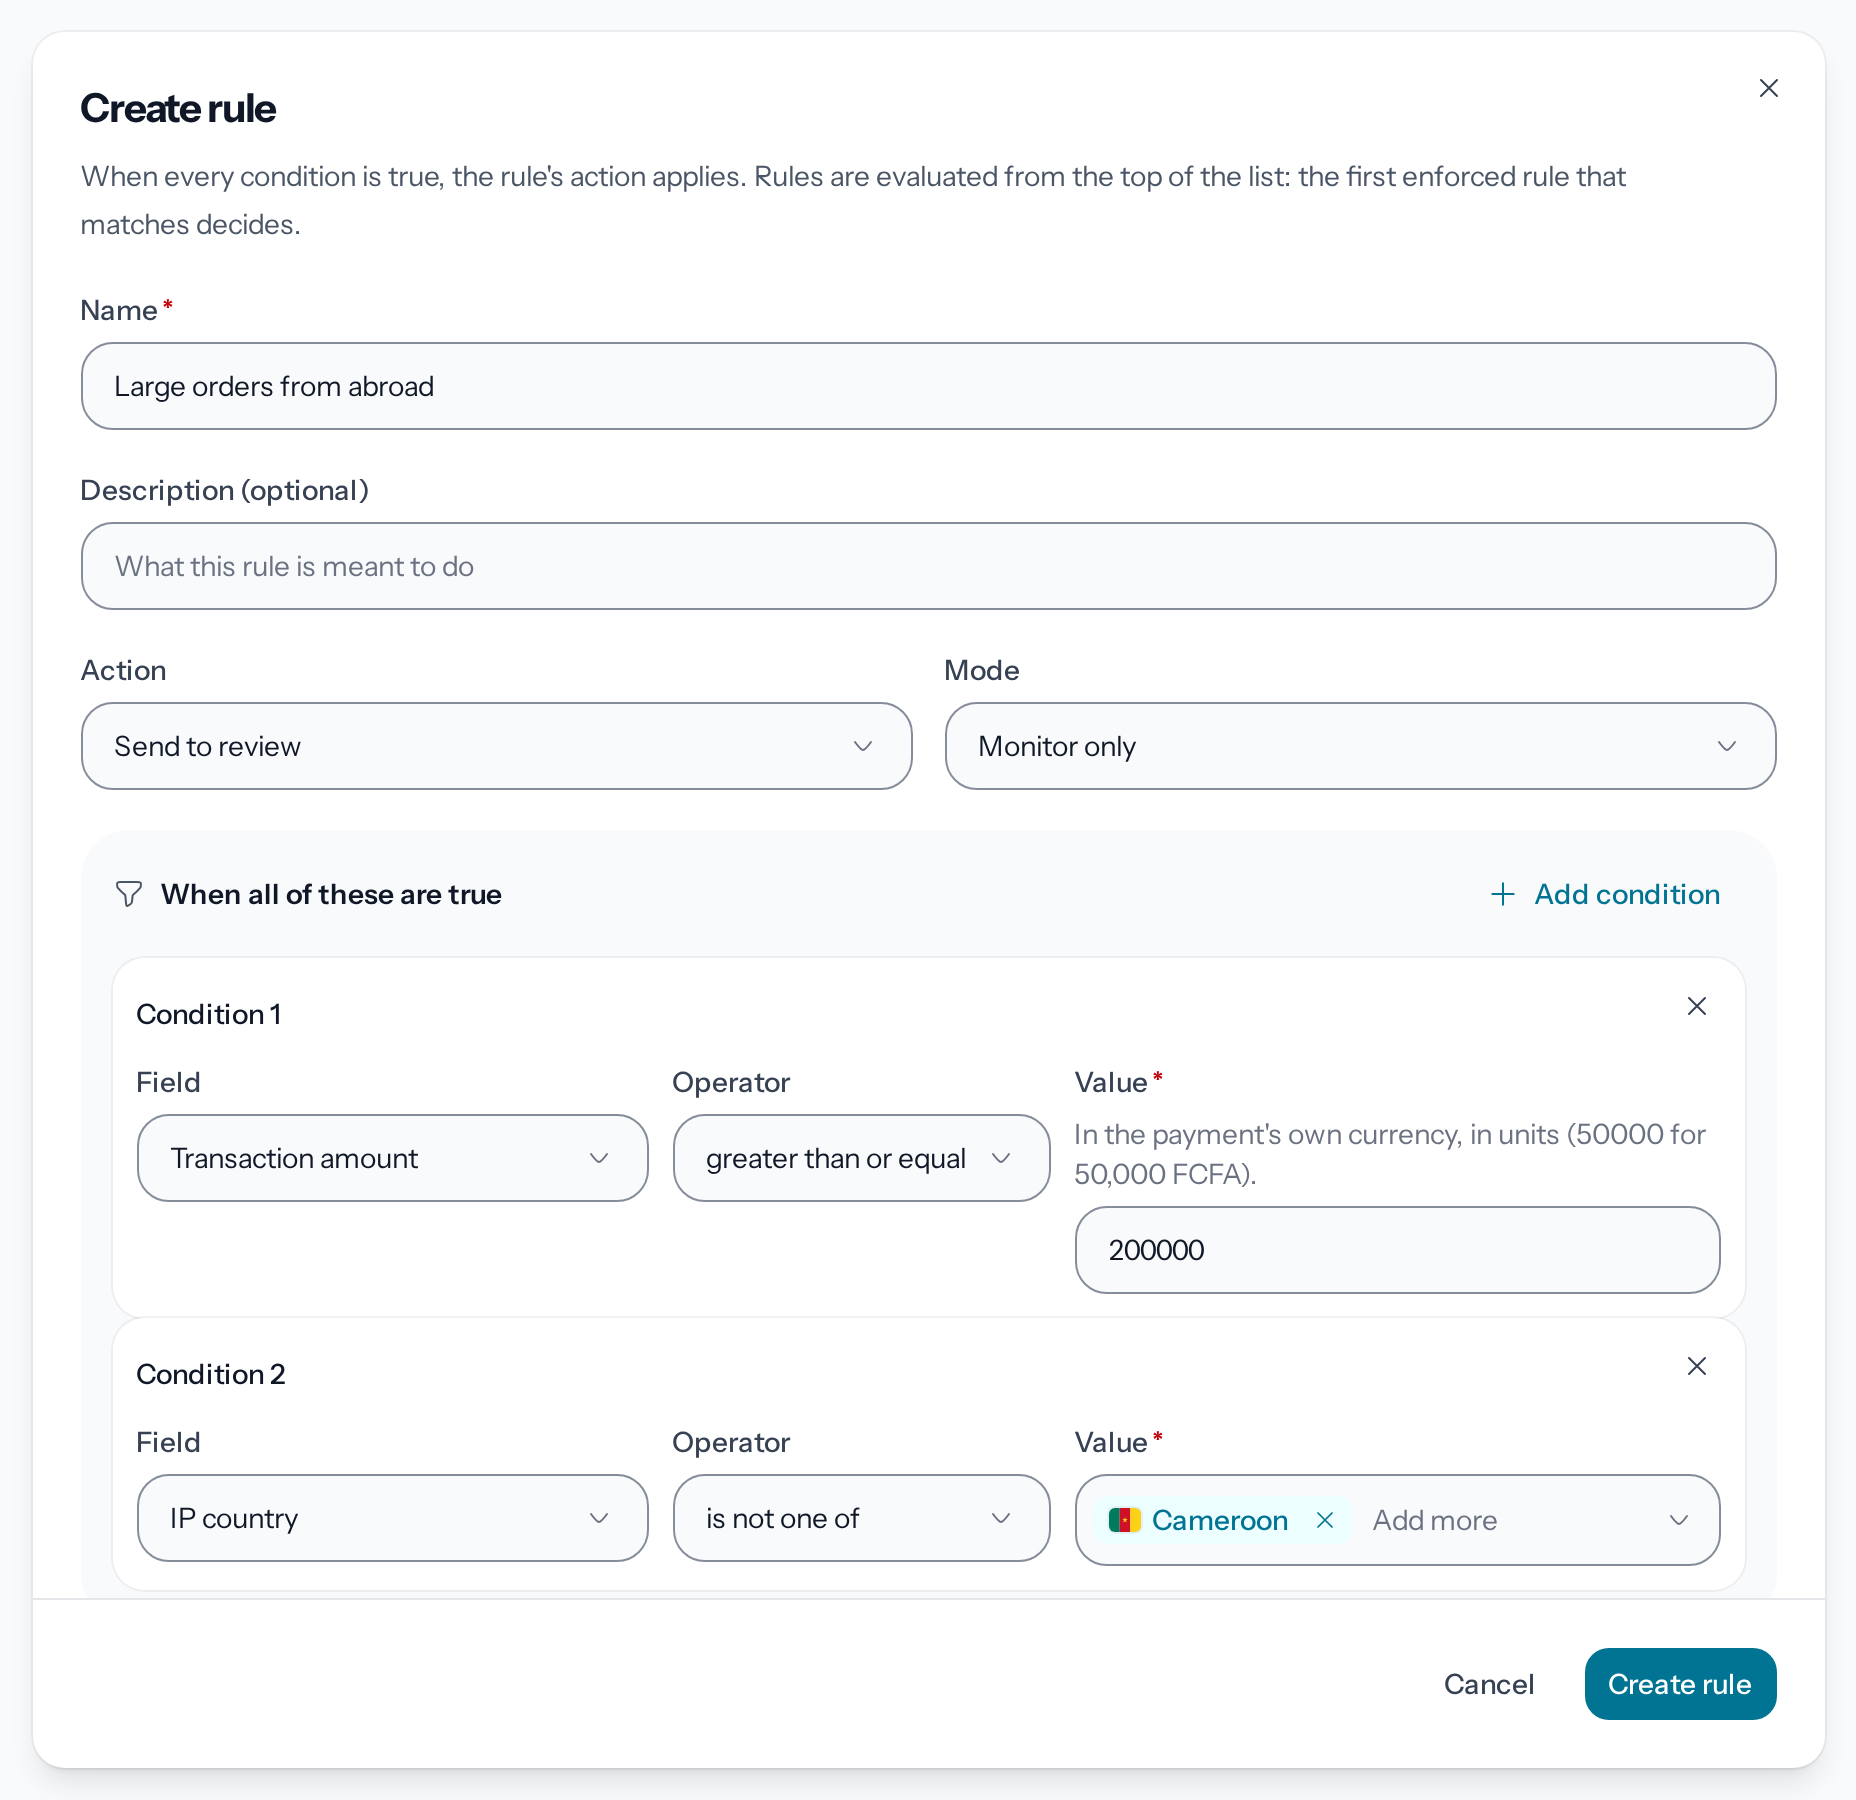
*The rule only applies when all its conditions are true.*
6. **Create the rule**
Leave **Active** on so that it applies straight away, then click **Create rule**. The message
**Rule created.** appears, and the rule is added at the bottom of **Your custom rules**.
## Rule order
Shield reads your rules from top to bottom, and the first enforced rule that matches the payment
decides; a rule in **Monitor only** never decides. The arrows on each row move it up or down one
place. A customer allowed from the reviews becomes an **Allow** rule placed at the top of the
list. [Rules](https://docs.wajub.com/risk/shield/rules#which-one-wins), in the developer docs, explains what wins.
## Edit, turn off or delete a rule
The switch on each row turns the rule off or back on: an inactive rule is kept, and never
evaluated. The row's menu offers **Edit rule**, which opens the dialog again, and **Delete rule**,
which asks for confirmation: the payments it would have targeted then go through unchanged.
If your plan loses **Shield Advanced**, your rules are kept but no longer apply; they resume if
you get the add-on back. Customers allowed from the reviews stay allowed on every plan.
## Built-in protections
Below your rules, **Built-in protections** sums up the checks Shield applies to every payment,
with no setup. **Shield Advanced** adds more.
---
# Adjust risk controls
URL: https://docs.wajub.com/dashboard/shield/settings
> Set Shield's review and block thresholds, automatic 3D Secure, the blocklist and what happens to a payer close to a sanctioned name.
**Risk controls** sets how strict Shield is: from which score a payment is sent to review or
declined, and what else Shield does.
The owner, an Administrator or a custom role with **Manage Shield** sees this tab; **View Shield**
is not enough. The thresholds and sanctions screening work on every plan. Automatic 3D Secure and
the blocklist are part of **Shield Advanced**, included in the **Scale** and **Enterprise** plans
and offered as an [add-on](https://docs.wajub.com/dashboard/subscription/add-ons) on the others. No security code is
asked for.
## The steps
1. **Open the risk controls**
In **Shield**, open the **Risk controls** tab. The page brings together the **Scoring** and
**Sanctions screening** sections, and with **Shield Advanced** the **3D Secure** and
**Blocklist** sections.
2. **Apply your settings**
Under **Scoring**, turn on **Use my Shield settings**: your thresholds, and with **Shield
Advanced** your blocklist and your rules, apply to every payment in Live. When it is off,
Wajub's default protection applies alone, and Shield goes back to its activation page.
3. **Set the thresholds**
A payment whose score reaches the **Review threshold** goes through, then appears in your
[reviews](https://docs.wajub.com/dashboard/shield/reviews). From the **Block threshold**, it is declined. A lower
threshold is stricter, and you can be stricter than Wajub, never more lenient: the page shows
the allowed limits.
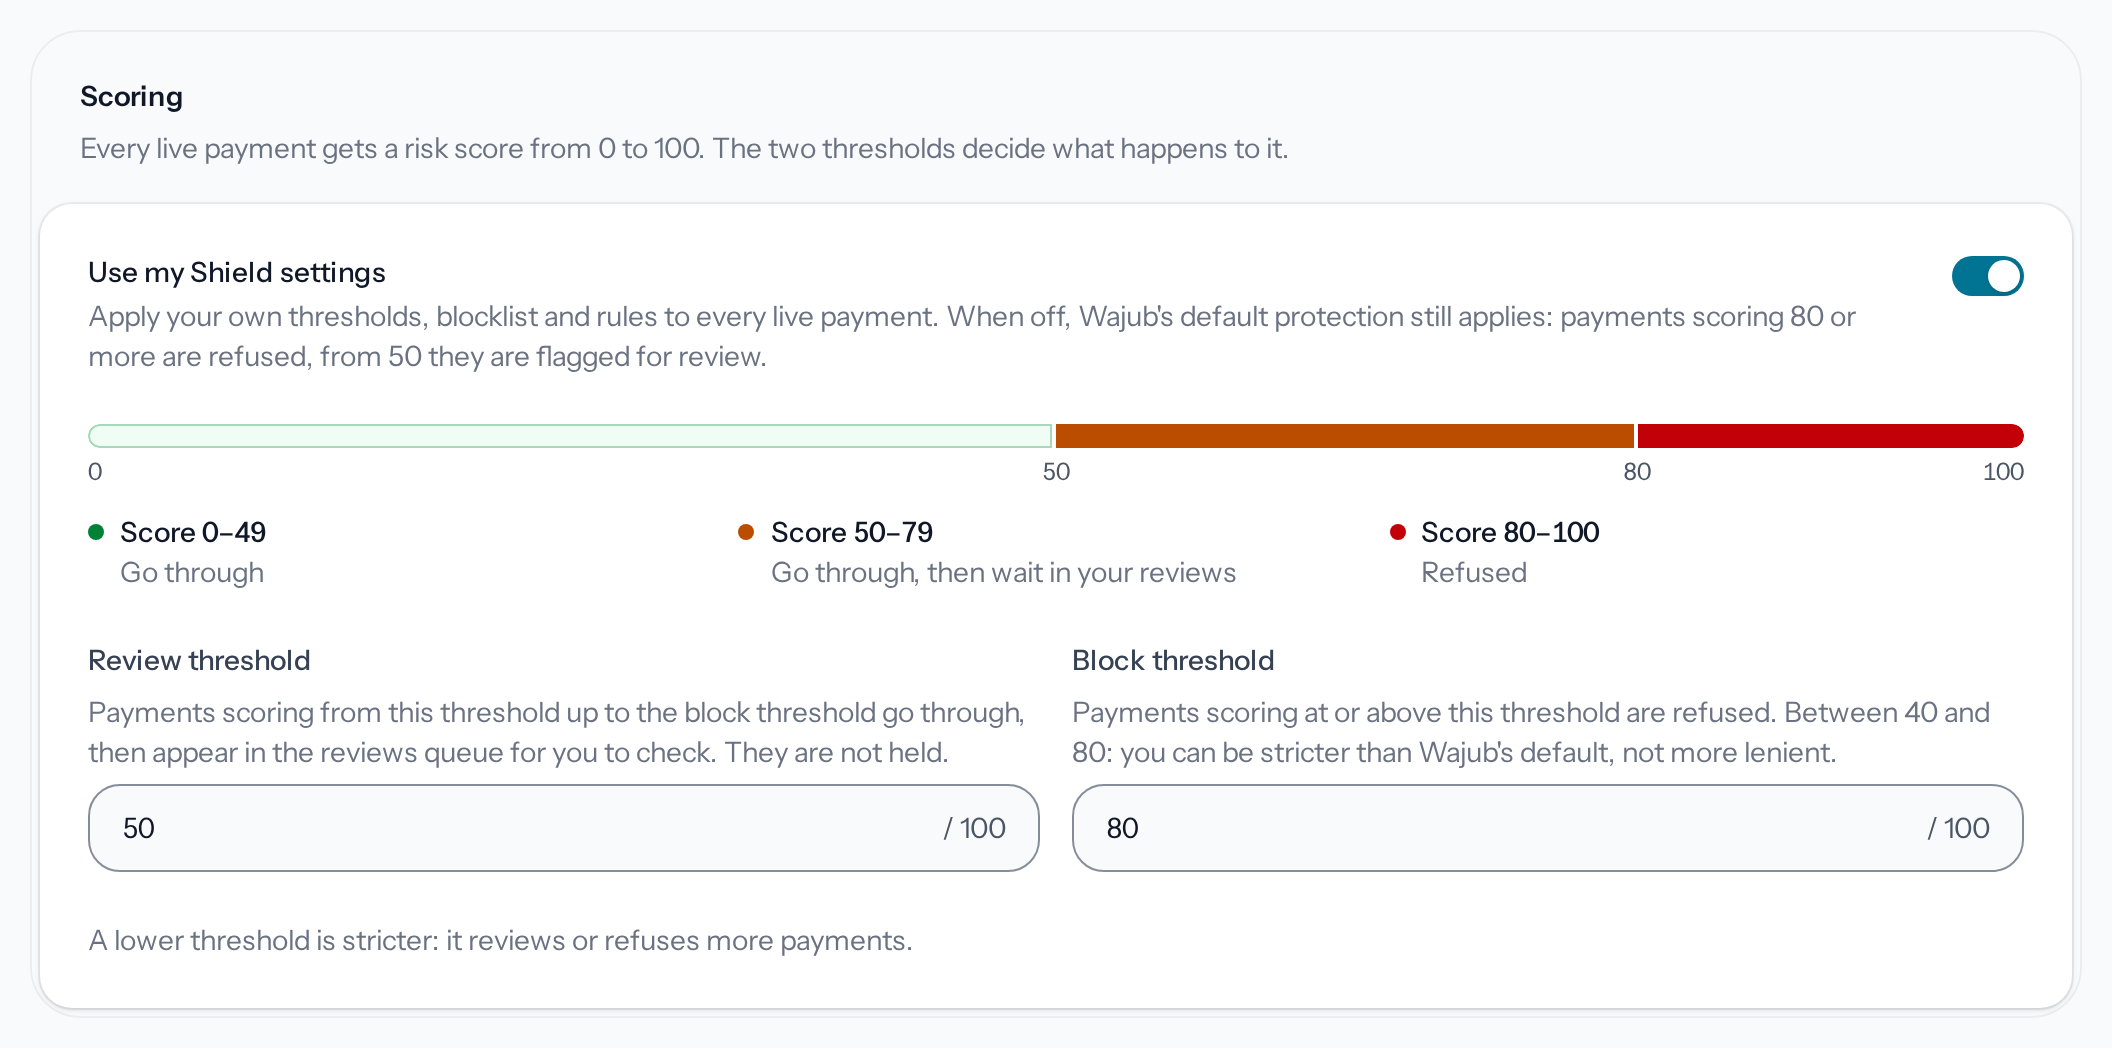
*The score band shows what applies right now.*
4. **Choose automatic 3D Secure**
With **Shield Advanced**, **Auto 3D Secure** asks for 3D Secure on card payments whose score
reaches your review threshold, where the card's processor offers it. Without **Shield Advanced**, an **Auto 3D Secure** card offers **Upgrade to enable**
instead.
5. **Enforce the blocklist**
With **Shield Advanced**, **Enforce the blocklist** declines the payments that match one of
your entries. It turns on by itself as soon as an entry is added, and **Manage the blocklist**
opens the **Lists** tab: [Manage Shield lists](https://docs.wajub.com/dashboard/shield/lists).
6. **Choose the response to sanctions**
Wajub checks every payer against sanctions lists, on every plan, and always declines an exact
match. Under **A payer close to a sanctions listing**, **Flag for review** lets the payment
through and adds it to your reviews, and **Refuse the payment** declines it like an exact
match.
7. **Save**
From the first change, the bar at the bottom offers **Save changes** and **Discard**. The
message **Shield settings updated.** confirms the save.
---
# Activate an add-on
URL: https://docs.wajub.com/dashboard/subscription/add-ons
> Add a module your plan does not include, such as Sync or Shield Advanced, without changing plan, then renew or cancel it.
An add-on adds a module your plan does not include, such as Sync or Shield Advanced, without
changing plan. Its price is monthly, and it renews on the same date as the plan.
The owner, an Administrator or a custom [role](https://docs.wajub.com/dashboard#roles) with **Manage account** activates
add-ons. An activated add-on applies to the whole organisation, [in Sandbox and in
Live](https://docs.wajub.com/dashboard#sandbox-and-live), and no [security code](https://docs.wajub.com/dashboard#the-security-code) is asked
for.
## The steps
1. **Open billing**
Open **Settings**, then **Billing** in the **Organization** group. On the **Subscription**
tab, the **Add-ons** card lists each add-on with its price per month; it does not appear when
your plan includes them all.
2. **Choose the add-on**
**Activate**, on the add-on's row, opens the activation dialog. It shows the amount **Charged
today**, worked out pro rata until your plan renews, then the **Monthly price**. A free add-on
is activated straight away, without a dialog.
*The first payment only covers the days left until the plan renews.*
3. **Choose the payment method**
Choose **Card**, **Mobile Money**, **Crypto** or **Bank transfer**. If your subscription
already has a payment method, the dialog offers that one; **Pay with a different method** shows
the others.
4. **Pay for the add-on**
The **Pay** button, followed by the amount, opens a secure payment page for a card, Mobile
Money or Crypto; the add-on is activated as soon as the payment is confirmed. For a bank
transfer, the instructions arrive by email, and the add-on is activated when Wajub confirms the
transfer.
When you open a module your plan does not include, its page also offers **Activate add-on**,
beside the plans that include it: see
[Modules outside your plan](https://docs.wajub.com/dashboard#modules-outside-your-plan).
## Renewal
Each add-on renews on your plan's date, and its row says how. Either it is billed with the plan,
or it is paid separately before that date, from the **Invoices** tab with **Pay now**: see
[Pay a Wajub invoice](https://docs.wajub.com/dashboard/subscription/wajub-invoices). Without payment, it stops on that
day, and **Activate** turns it back on.
## Cancel an add-on
**Cancel add-on**, on its row, opens a confirmation that gives its end date. The same button
confirms; **Keep add-on** closes it without changing anything. The add-on stays active until that
date, then deactivates. Until then, **Resume** keeps it.
---
# Request the Enterprise plan
URL: https://docs.wajub.com/dashboard/subscription/enterprise
> Ask Wajub's sales team for the Enterprise plan from billing, follow the request, then pay the proforma by bank transfer.
The **Enterprise** plan has negotiated rates, unlimited everything, dedicated support and an SLA.
You ask Wajub's sales team for it from billing, and you pay for it by bank transfer.
The owner, an Administrator or a custom [role](https://docs.wajub.com/dashboard#roles) with **Manage account** sends the
request, [in Sandbox and in Live](https://docs.wajub.com/dashboard#sandbox-and-live), without a
[security code](https://docs.wajub.com/dashboard#the-security-code). The organisation has only one request in progress
at a time: a new one is only possible after a refusal.
## The steps
1. **Open the request**
Open **Settings**, then **Billing** in the **Organization** group. On the **Subscription**
tab, **Contact sales**, in the **Enterprise** box, opens the dialog of the same name. The same
button is in the **Change plan** dialog.
2. **Describe what you need**
The **Company name** is required. The **Monthly transaction volume**, the **Contact phone**
and the **Requirements** help the team prepare its quote.
*Only the company name is required.*
3. **Send the request**
**Send inquiry** sends it to the sales team. The **Enterprise** box then shows its status and
**View request**.
## Track the request
**View request** opens **Enterprise inquiry**: the **Inquiry status**, your requirements and the
**Notes from our team**. The sales team replies within 1 to 2 business days, with a quote or with
questions. A refused request shows **Inquiry declined**.
## Pay the proforma
When the team sends its quote, the page shows the **Proforma reference**, the **Amount due** and
the **Payment instructions**.
1. **Download the proforma**
**Download proforma** saves the proforma invoice, with the bank account to pay into.
2. **Make the transfer**
Transfer the **Amount due** to that account, with the **Proforma reference** in the transfer
description.
3. **Upload the proof**
Choose your proof under **Upload proof of payment**, then **Upload**. The team reviews it.
**Payment confirmed** appears when the team has received the transfer: activation usually takes
less than one business day. The page then shows **Enterprise plan active**. Renewals are also paid
by bank transfer, from billing: see [Pay by bank transfer](https://docs.wajub.com/dashboard/subscription/manage#bank-transfer).
---
# Manage your subscription
URL: https://docs.wajub.com/dashboard/subscription/manage
> Cancel or resume the organisation's Wajub subscription, understand how it renews and pay for a plan settled by bank transfer.
The **Subscription** tab in billing shows your plan and its period. There you cancel the
subscription, resume it before it ends, and pay for a plan settled by bank transfer.
The owner, an Administrator or a custom [role](https://docs.wajub.com/dashboard#roles) with **Manage account** manages
the subscription, [in Sandbox and in Live](https://docs.wajub.com/dashboard#sandbox-and-live), without a
[security code](https://docs.wajub.com/dashboard#the-security-code).
## Cancel the subscription
1. **Open billing**
Open **Settings**, then **Billing** in the **Organization** group. On the **Subscription**
tab, **Cancel subscription** is in the **Current plan** card, for a paid plan.
2. **Start the cancellation**
**Cancel subscription** opens **Cancel your subscription?**, with the date until which your
plan stays active.
*Nothing changes before the end date.*
3. **Confirm the cancellation**
**Cancel subscription** confirms; **Keep subscription** closes the dialog without changing
anything. The **Current plan** card then shows the end date.
Your plan and its modules stay active until that date, then the organisation moves to the **Pay
as you go** plan.
## Resume the subscription
Until the end date, **Resume subscription**, in **Current plan**, undoes the cancellation: the
plan carries on as before.
## Renewal
Paid by card, the plan renews by itself at the end of each period. Paid by Mobile Money or Crypto,
it does not renew by itself: a reminder with a payment link arrives by email before the end date.
On the end date, if the renewal has not been paid, the plan's modules stop and the organisation
moves to the **Pay as you go** plan. For a few more days, for a plan paid by Mobile Money or
Crypto, **Pay now**, in the **Invoices** tab, settles the renewal and turns the modules back on:
see [Pay a Wajub invoice](https://docs.wajub.com/dashboard/subscription/wajub-invoices). After that, you have to choose
a plan again.
## Pay by bank transfer
A plan settled by bank transfer, such as the [Enterprise](https://docs.wajub.com/dashboard/subscription/enterprise)
plan, shows the **Bank transfer** card when a payment is due. It gives the **Amount due** and the
**Reference** to put on your transfer.
Once you have made the transfer, choose your proof under **Upload proof of payment** (PDF, PNG or
JPG, 5 MB at most), add **Your bank's transfer reference** if you wish, then **Upload**. **Proof
received** then appears: the Wajub team checks it within 1 business day, and your plan starts or
renews as soon as the transfer is confirmed. **Send another proof** adds another one.
---
# Change your plan
URL: https://docs.wajub.com/dashboard/subscription/plans
> Move to another Wajub plan from Settings › Billing, choose the billing period and the payment method, then pay.
Your plan sets the modules and the limits of your organisation, such as the number of members or
payment links. You change it from billing, and the new plan applies to the whole organisation.
The owner, an Administrator or a custom [role](https://docs.wajub.com/dashboard#roles) with **Manage account** manages
the subscription; other roles cannot open **Billing**. The plan is the same [in Sandbox and in
Live](https://docs.wajub.com/dashboard#sandbox-and-live), and no [security code](https://docs.wajub.com/dashboard#the-security-code) is asked
for.
## The steps
1. **Open billing**
Open **Settings**, then **Billing** in the **Organization** group. The **Subscription** tab
shows your **Current plan**, the **Compare plans** table, the period's **Usage** and the
**Subscription history**. Your organization's menu, at the top of the sidebar, leads there
too: its last line names your plan.
**Compare plans** puts the plans side by side: the fee per payment on the Wajub rail, the
limits (payment links, invoices, exports, members, providers) and the modules included. Under
a plan, **Choose** opens the dialog on that plan.
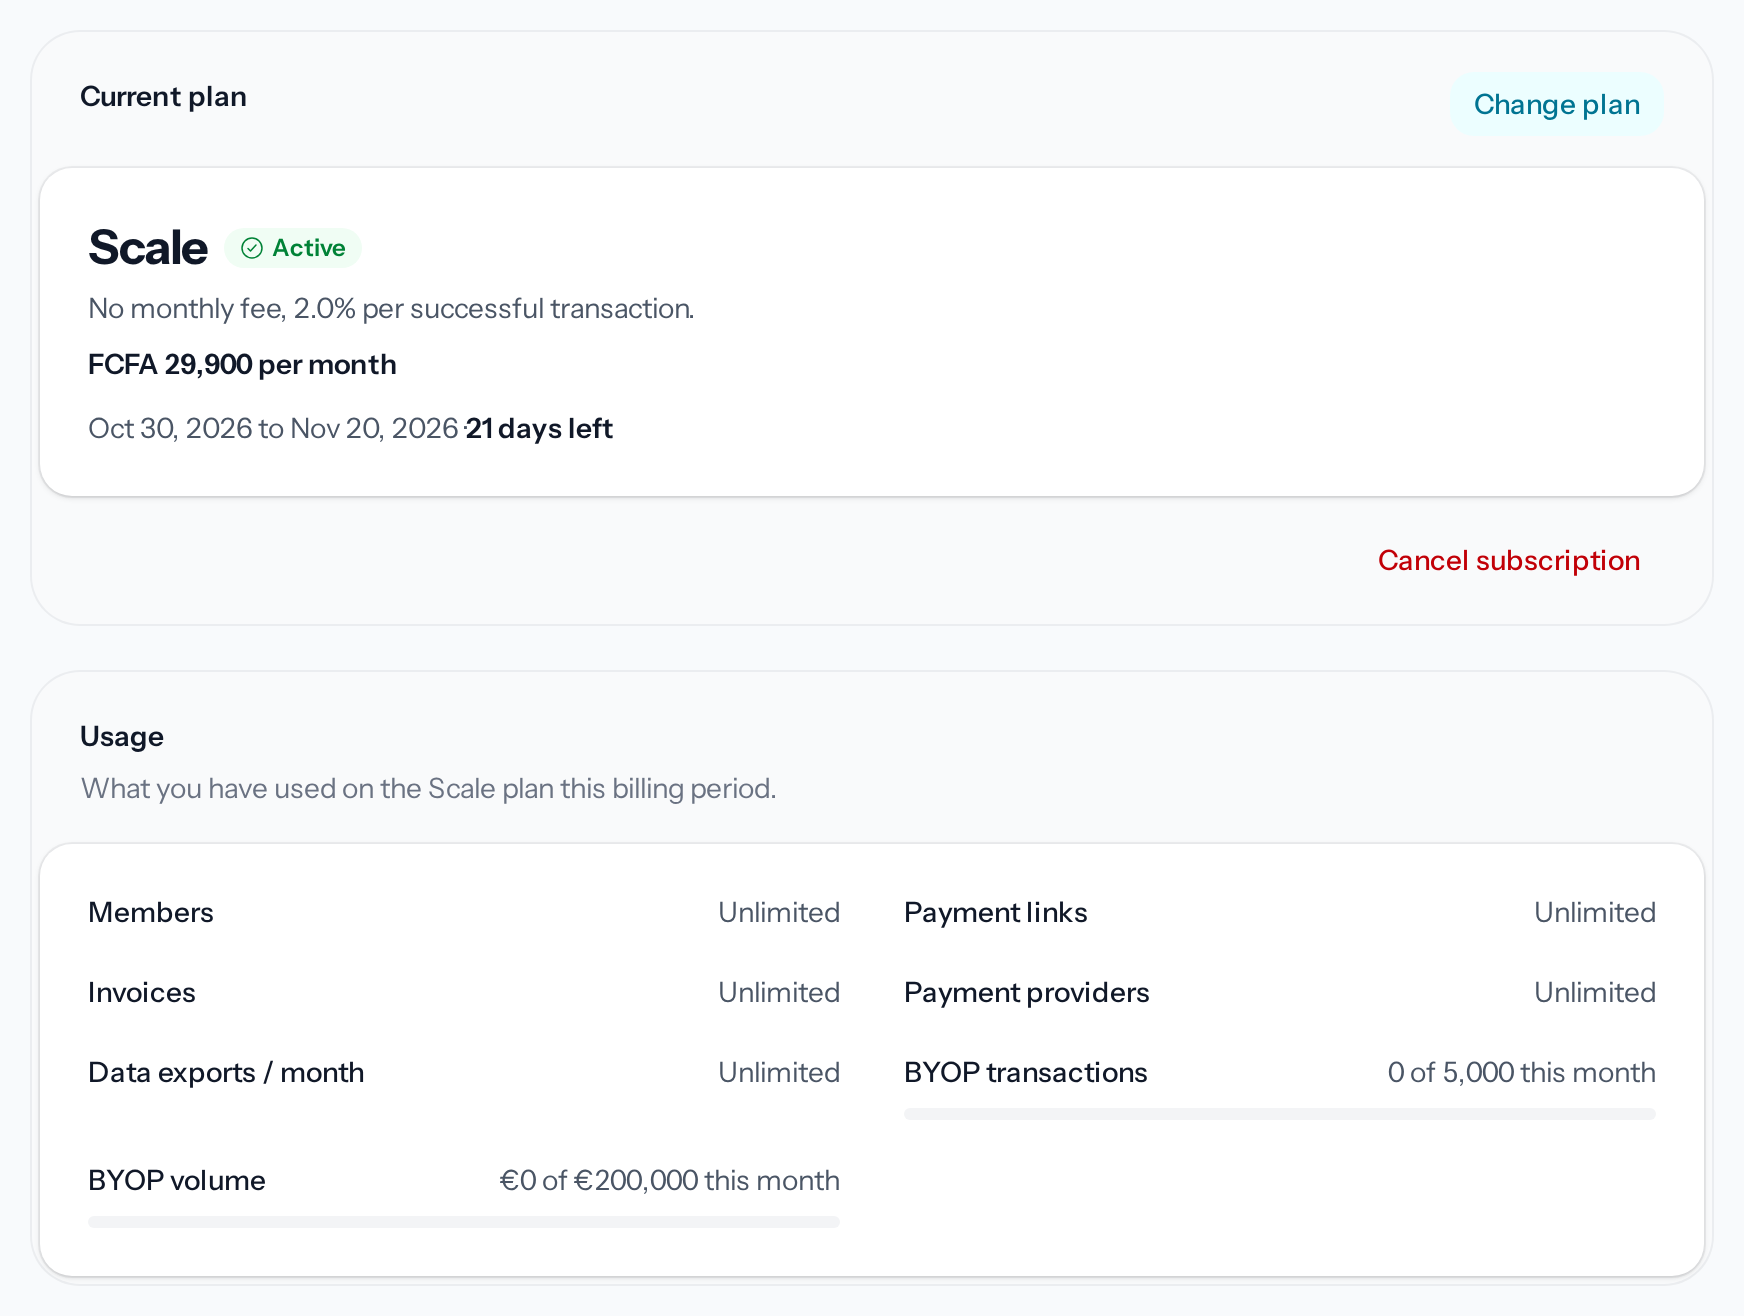
*Change plan is in the Current plan card.*
2. **Choose the plan**
**Change plan** opens the dialog of the same name. Under **Choose your plan**, each plan gives
its price, its fee per payment, its limits and what it adds to yours. Select the plan you
want: yours is marked **Current** and cannot be chosen. Then **Choose billing period**.
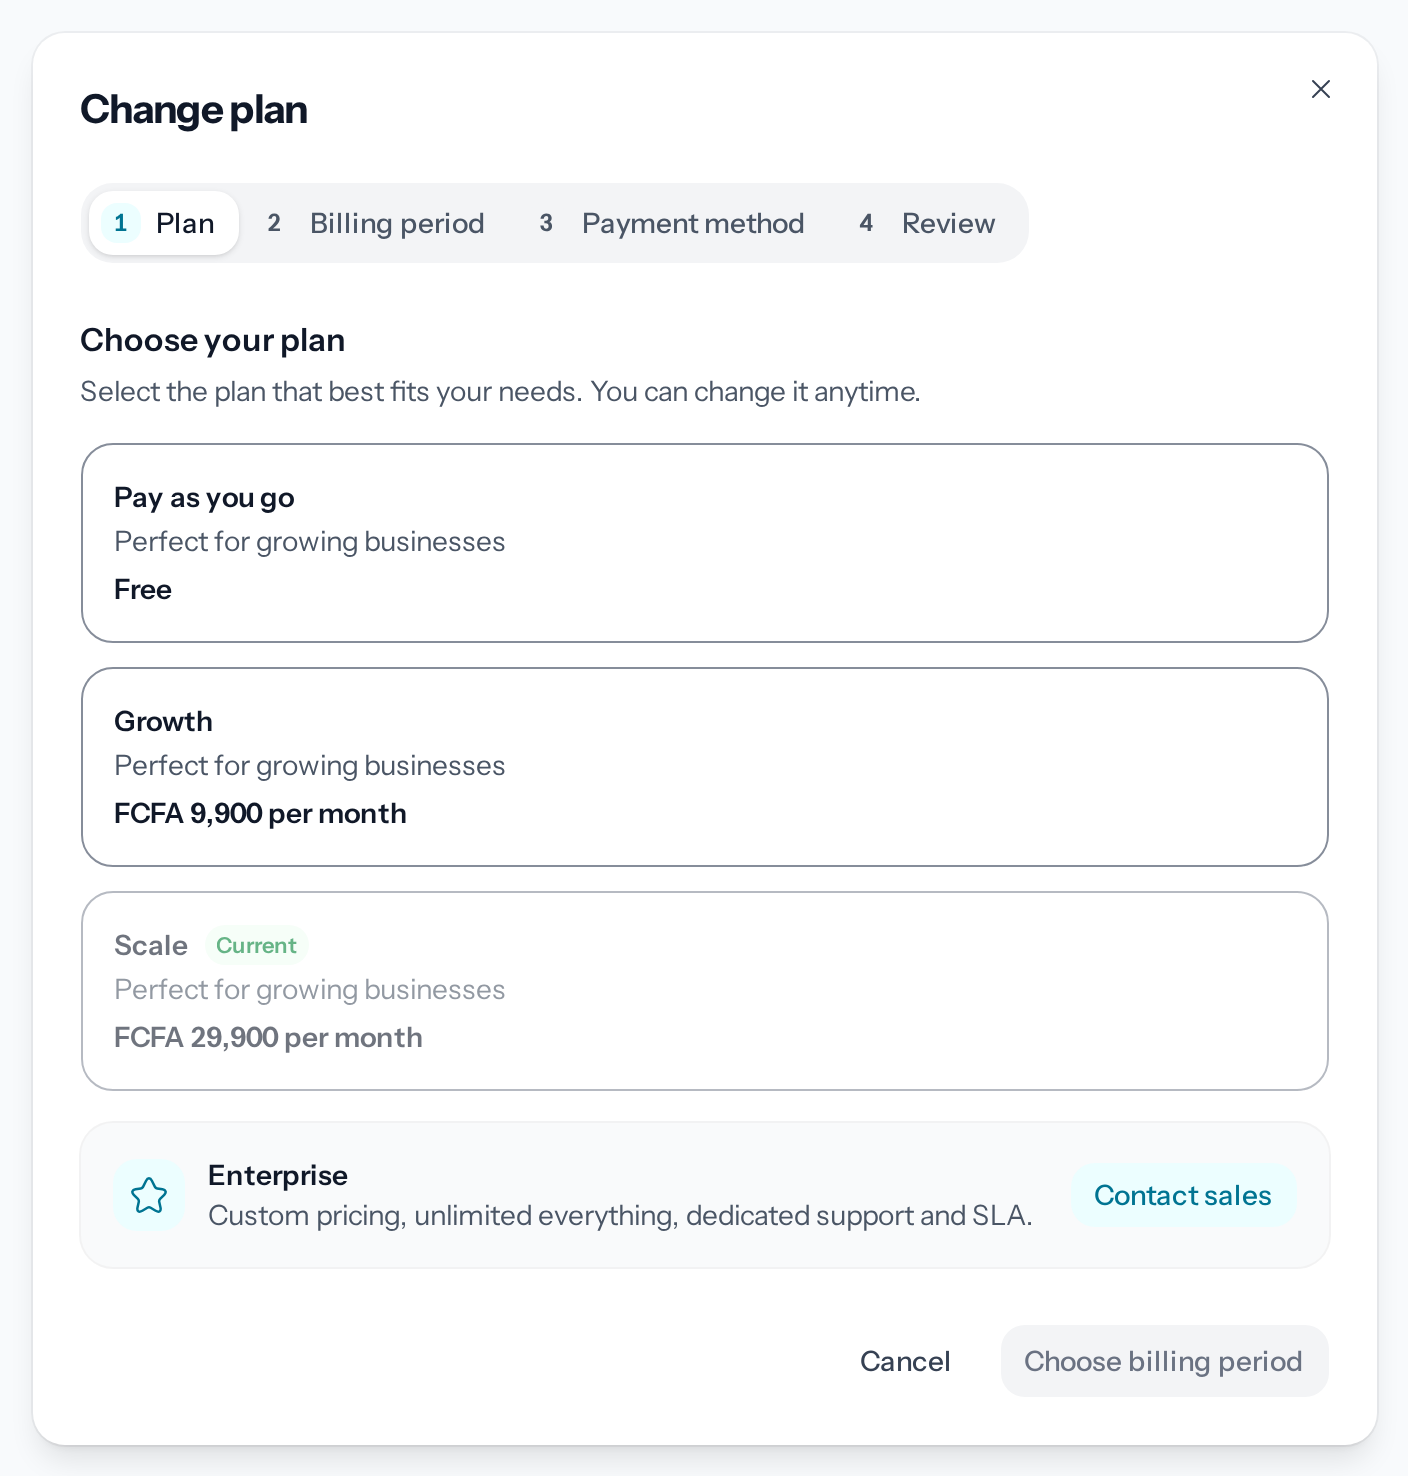
*The dialog's four steps are at the top: Plan, Billing period, Payment method, Review.*
For the **Enterprise** plan, **Contact sales** opens a request: see
[Request the Enterprise plan](https://docs.wajub.com/dashboard/subscription/enterprise).
3. **Choose the period**
Under **Billing period**, choose **Monthly**, **3 months**, **6 months** or **Yearly**. A
longer period shows what you save and the price without the discount. Then **Choose payment
method**.
4. **Choose the payment method**
With a **Card**, the plan renews by itself at the end of each period. With **Mobile Money** or
**Crypto**, you receive a reminder with a payment link before the period ends. Bank transfer is
kept for the Enterprise plan. Then **Review the change**.
5. **Check and pay**
**Review** sums up the plan, the period, the **Discount**, the payment method and the
**Renewal**. Below, the **Plan price**, the discount and, if your current paid plan is still
running, the **Unused days of your current plan** give the amount **Due today**. If the chosen
payment method cannot take those days off, a warning says so.
**Pay**, followed by the amount, opens a secure payment page. When nothing is due, the button
reads **Change plan** and the plan changes right away.
## Try a plan
An organization that never paid for a plan can try one. In **Compare plans**, **Try 7 days for
1,000 FCFA** opens a dialog that says everything before the payment:
- you pay 1,000 FCFA on the Wajub payment page, and the plan opens for 7 days as soon as the
payment is confirmed;
- to keep it after that, you pay its price per month; a reminder with a payment link reaches you
before the trial ends;
- without a payment, your organization goes back to the free plan, and nothing else is charged.
There is one trial per organization. During the trial, **Current plan** is marked **Trial** with
its end date. If you change plan during the trial, the days left of it come off the new plan's
price for what they cost you, not for the plan's price.
## The assistant on each plan
Every plan includes the AI assistant; what changes is the number of questions your organization
may ask in a month:
| Plan | Questions a month |
| ------------- | ----------------- |
| Pay as you go | 30 |
| Growth | 300 |
| Scale | 2,000 |
On the free plan, the assistant opens once your organization is in production. Before that, the
**Assistant** button of the top bar and the buttons that ask it about a record (**Analyze
payment**, **Summarize this period**…) are shown with a small lock: clicking one says the
assistant opens with production, and names the plan that includes it from today. The free
plan's assistant answers in its panel; its e-mails (the alerts and the Monday summary) come with
a paid plan.
The panel shows the questions left this month. Once they are used up, it says so and names the
plan that includes more; the count starts again on the 1st. A member who cannot change the plan
is told to ask the owner.
## When a plan pays for itself
The Wajub rail's fees fall with the plan. When the fees a plan would have saved you over the last
30 days exceed its price, **Billing** and **Revenue** show **The … plan would pay for itself**,
with the fees you paid, the estimated saving and the plan's price. It is an estimate made on what
you collected through the Wajub rail: it moves with your volume. Nothing shows while no plan would
earn you money.
## Before a limit is reached
From 80% of a limit of your plan, the page concerned says so: **Payment links**, **Invoices**,
**Members**, **Providers** and the export dialog show, for instance, "21 of 25 payment links
used", with **See plans**.
## After paying
The new plan replaces the old one as soon as the payment is confirmed, and **Current plan** shows
it. If you leave the payment page without paying, the **Subscription** tab shows **Payment
pending** with the plan you asked for, and **Complete payment** reopens the payment page.
> [!NOTE]
> **Going back to the free plan**
>
> Choosing **Pay as you go** in this dialog changes the plan straight away, with **Change plan** as
> the last button, and the days already paid for on your current plan are lost. To keep it until
> its end date, [cancel the subscription](https://docs.wajub.com/dashboard/subscription/manage#cancel) instead.
---
# Pay a Wajub invoice
URL: https://docs.wajub.com/dashboard/subscription/wajub-invoices
> Pay what the organisation owes Wajub for its plan, its add-ons and its usage, download the invoices and set the details they show.
The **Invoices** tab in billing gathers what your organisation owes Wajub: plan, add-ons and usage
overages. There you pay the amount due and download your invoices.
The owner, an Administrator or a custom [role](https://docs.wajub.com/dashboard#roles) with **Manage account** pays the
invoices, [in Sandbox and in Live](https://docs.wajub.com/dashboard#sandbox-and-live), without a
[security code](https://docs.wajub.com/dashboard#the-security-code).
## The steps
1. **Open the invoices**
Open **Settings**, then **Billing** in the **Organization** group, and the **Invoices** tab.
The **Amount due** card gives the total, its breakdown and its due date: **Overdue**, a due
date within 7 days, the renewal date or **Upcoming**.
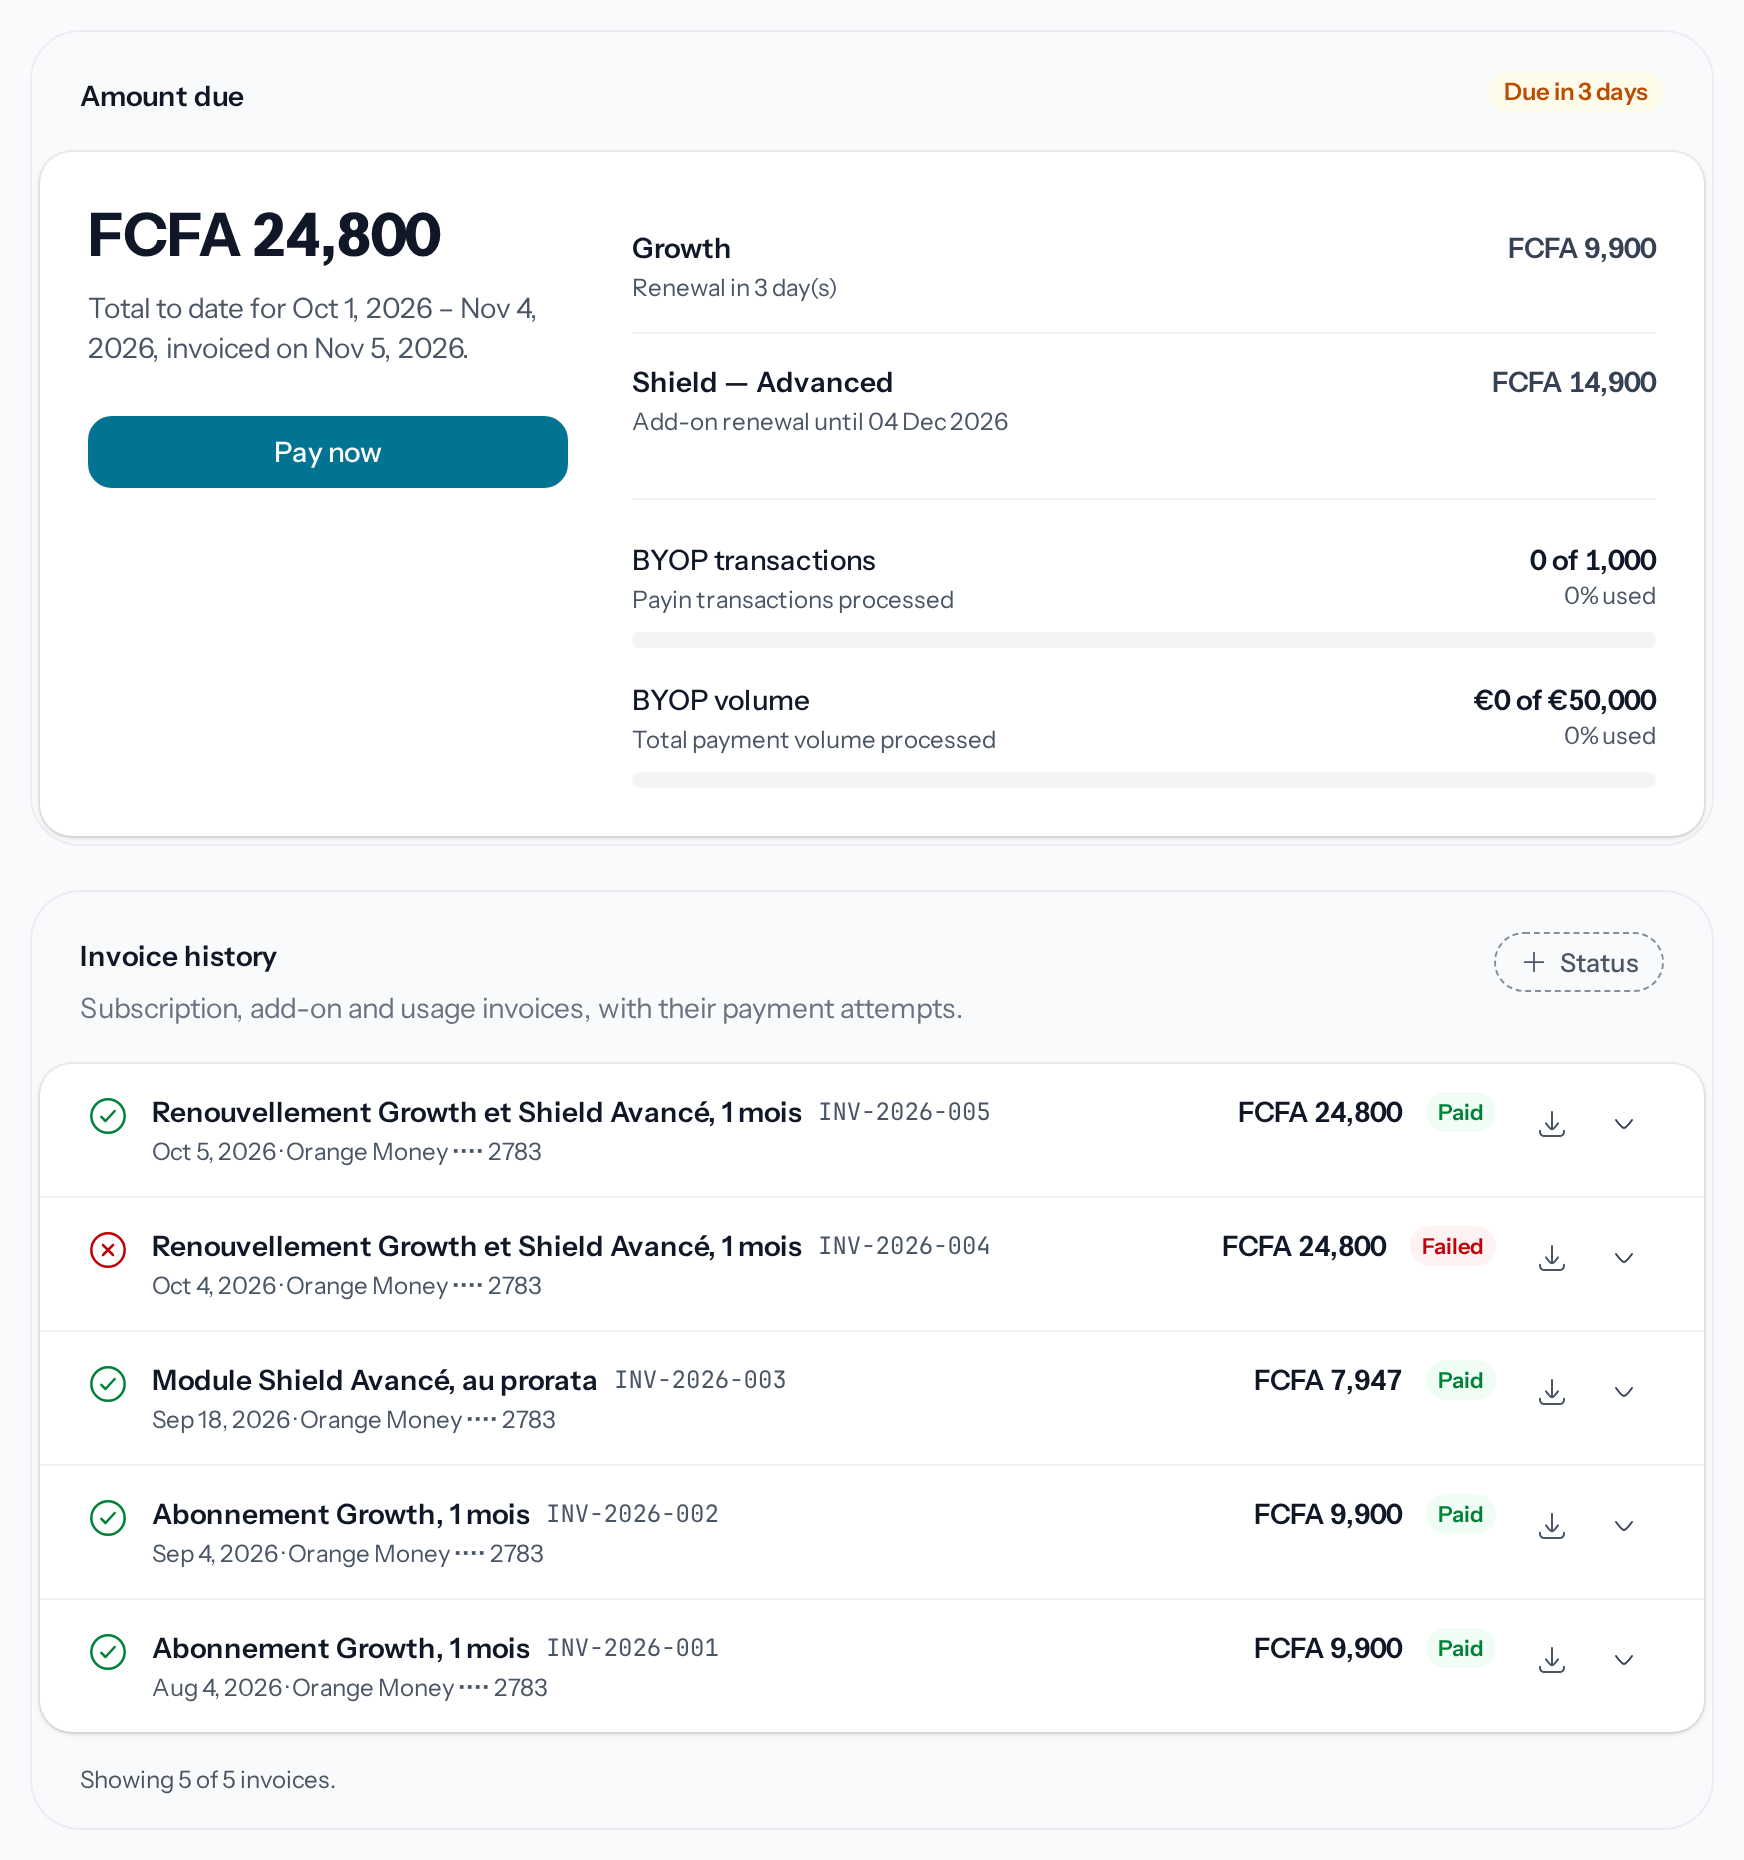
*Pay now only appears when an amount is due.*
2. **Start the payment**
**Pay now** opens **Pay invoice**, with the amount to pay.
3. **Choose the payment method**
Your subscription's payment method is already selected; you can pick another one.
4. **Pay the invoice**
By card, Mobile Money or Crypto, the **Pay** button, followed by the amount, opens a secure
payment page. If the amount due has changed in the meantime, nothing is charged: the dialog
shows the new amount, which you then pay in turn. If the invoice has been paid or replaced in
the meantime, the dialog reads **Nothing is due any more** and nothing is charged.
## Download an invoice
**Invoice history** lists each invoice with its date and its **Status**, and the **Status** filter
keeps only some of them. The download button, on the row, downloads the invoice. An expanded row
shows its **Payment attempts**. Further down, **Failed payment attempts** lists the payments that
did not go through, with their reason.
## Billing details
The **Billing settings** tab sets what appears on your invoices: the **Billing email**, which
receives invoices and billing notices, the **Tax ID / VAT number** and the **PO / reference
number**. **Save changes** applies them.
**Auto-debit usage overages** charges your card each month for BYOP usage overages, without
waiting for you to pay them. It can only be turned on for a subscription paid by card.
---
# Track Sync activity
URL: https://docs.wajub.com/dashboard/sync/activity
> Read the volume, payments and commissions of your connected merchants, all together or account by account.
The tabs of **Sync** follow what your connected merchants collect through your platform and what
you earn from it.
The owner, an Administrator, a Finance member, an Analyst, a Viewer, or a custom role with **View
transfers** or **Manage transfers**, sees this activity. The plan is the one for
[Connect a merchant](https://docs.wajub.com/dashboard/sync/connect-merchant): **Scale**, **Enterprise** or the **Sync**
add-on. Each environment shows its own connections and its own payments:
[Sandbox and Live](https://docs.wajub.com/dashboard#sandbox-and-live).
## Overview
Sync opens on **Overview**. **Connected accounts** counts all your connections, including your
active merchants and your pending invitations. For the chosen **Period**, **Volume**,
**Payments** and **Commissions** are compared with the previous period, and the **Volume and
commissions** chart follows them by day or by month.
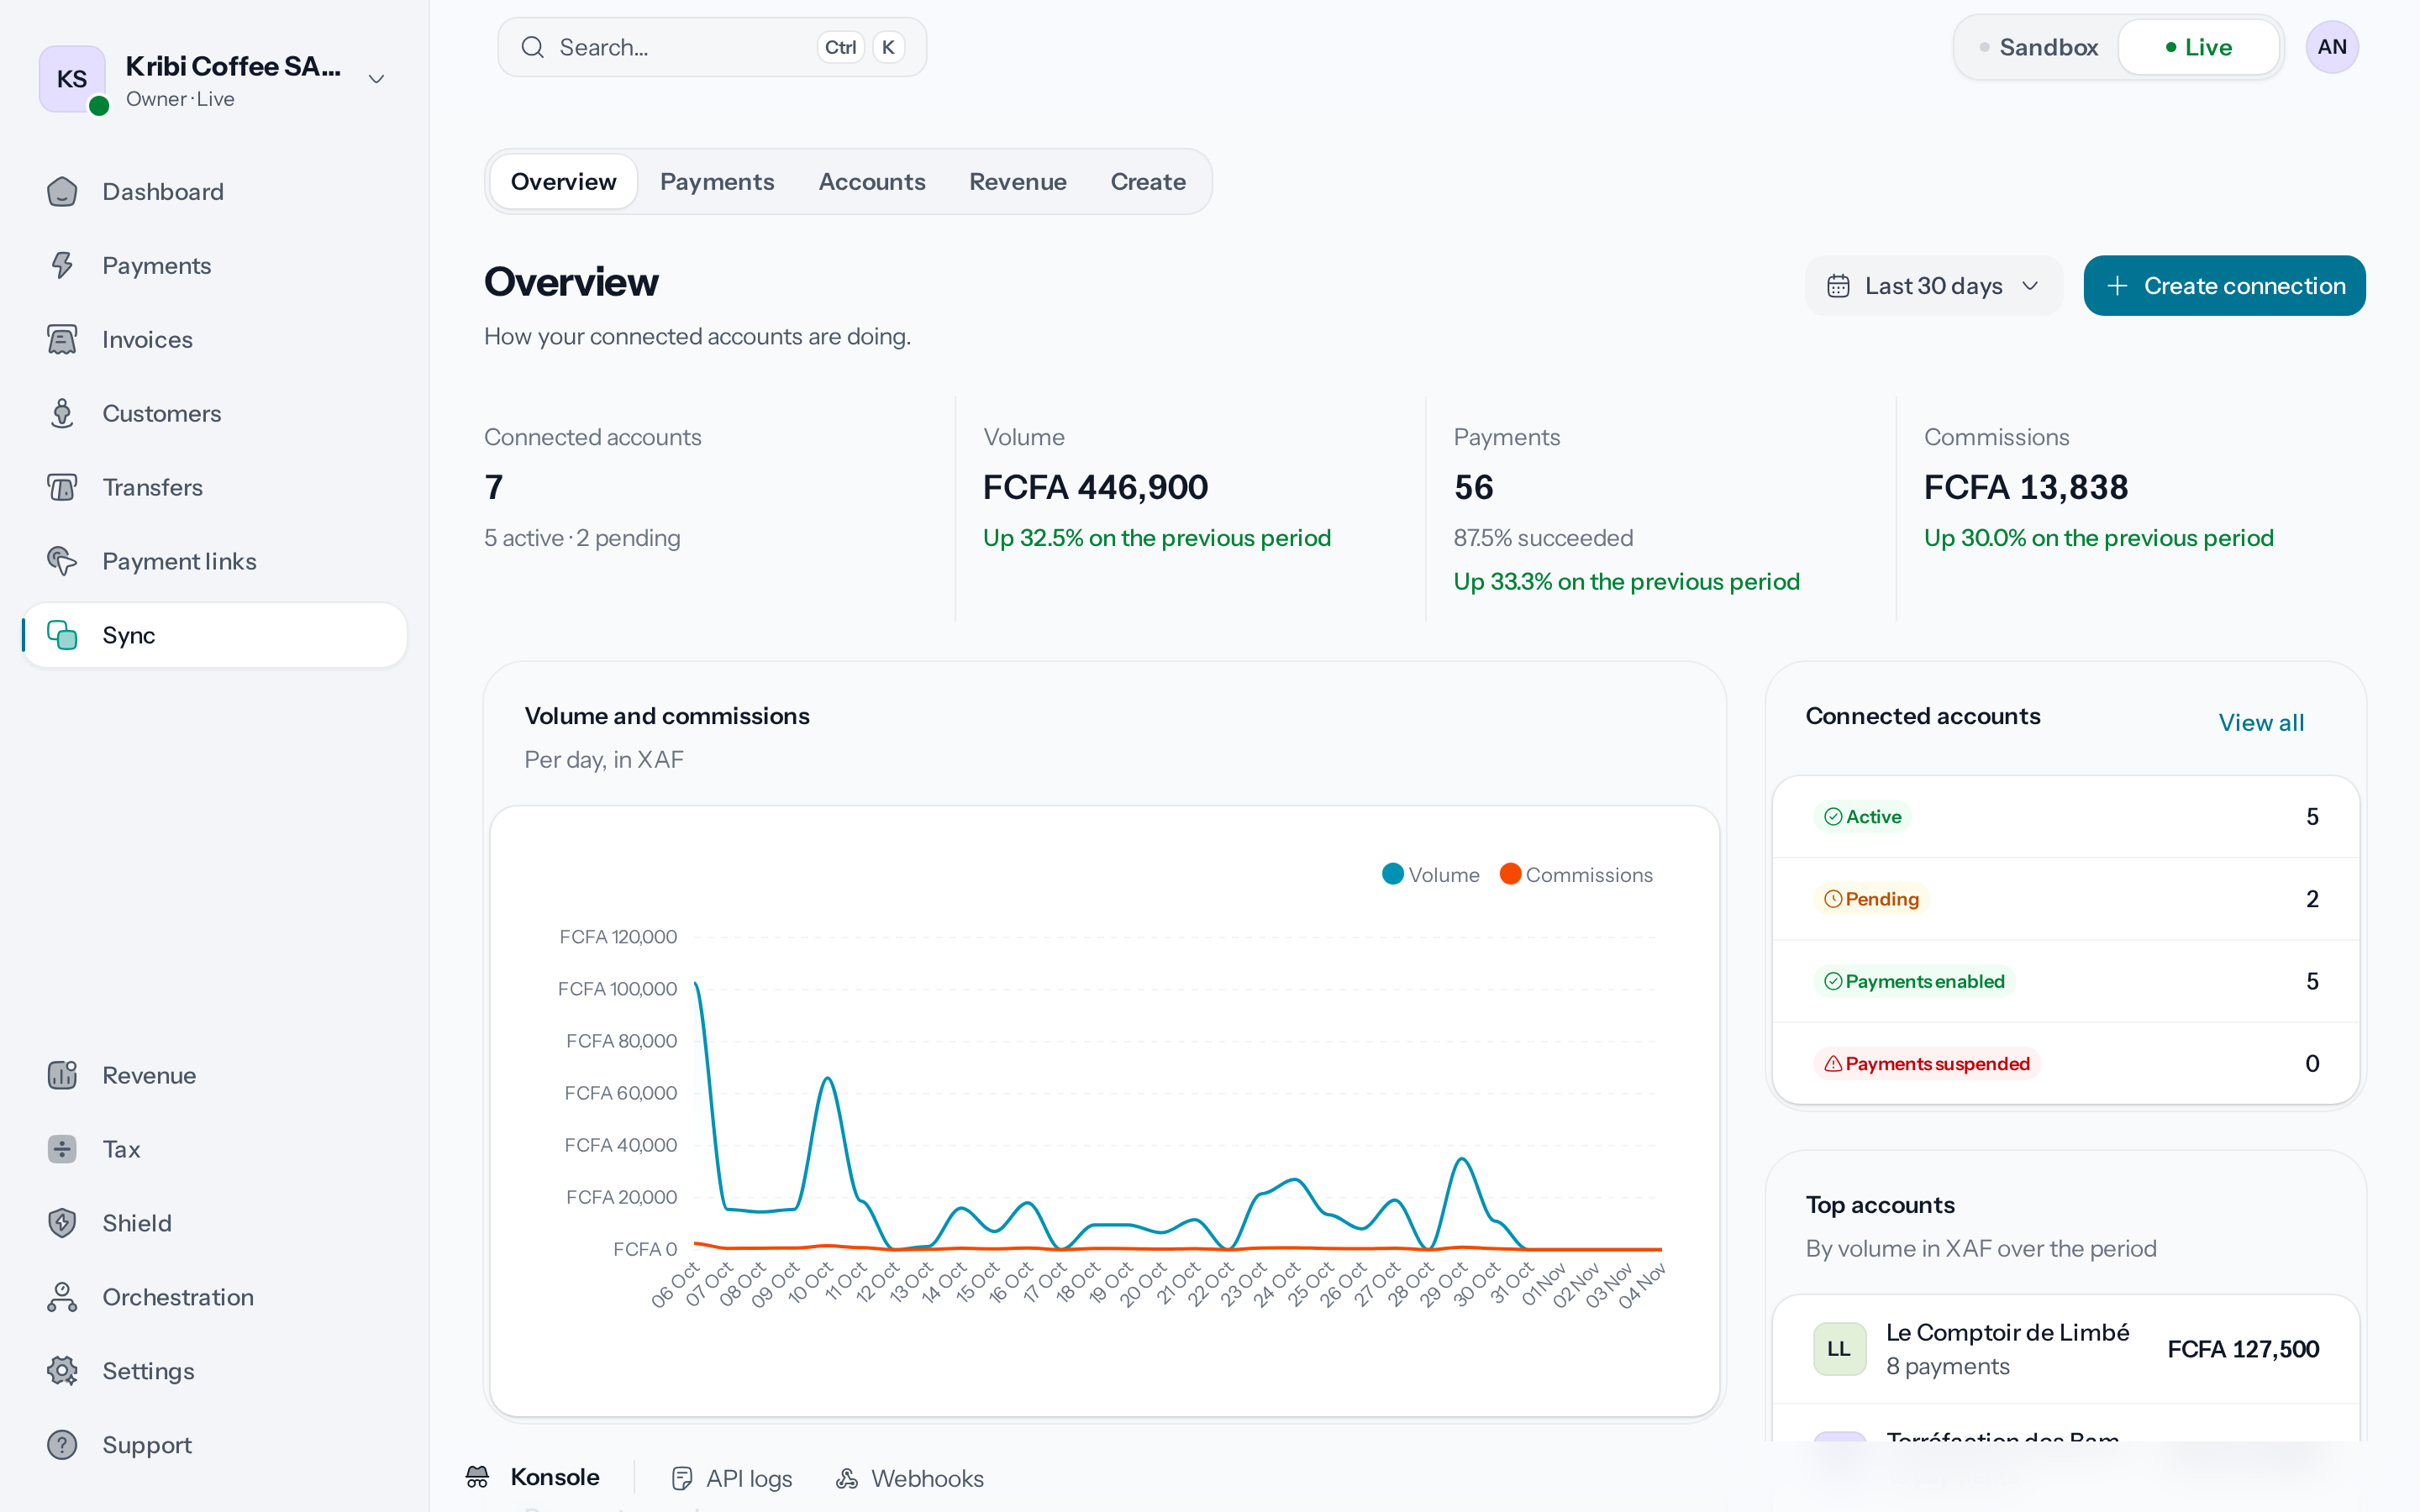
*The volume, payments and commissions are compared with the previous period.*
Below, **Latest payments** lists the recent payments, **Top accounts** ranks your merchants by
volume, **Payment channels** breaks the payments down by payment method, and **Since the start**
gives the cumulative volume, payments and commissions.
## Payments
The **Payments** tab lists the payments collected by all your connected accounts. The search takes
the payment ID, its reference, its description, or the customer's name or email; **Account**
narrows the list to one merchant, and **Payment date** to a period. An opened payment shows **Your
commission** on that payment.
## Revenue
The **Revenue** tab shows **Commission revenue** for the chosen **Period**: **Commissions in the
period**, compared with the previous period, **Commissions since the start** and **Connected
merchants**, then a chart of the commissions over time.
**Revenue by merchant** ranks your merchants from the largest amount to the smallest, with one row
per currency when a merchant is paid in several currencies. If you earn in several currencies,
**Commissions by currency** shows them side by side, never adding them up.
## Collected fees
In the **Payments** menu, the **Collected fees** tab lists your commission on each payment
collected for a connected merchant, with the **Total collected** at the top. The search takes the
payment's ID, reference or description, and the filters take the date and the amount of the fee;
each fee leads to the payment it comes from.
The tab also needs the **Growth** plan or a plan above it: with the **Sync** add-on on **Pay as
you go**, it does not appear. A custom role also needs **View payments**.
## An account in detail
A merchant's page, opened from **Sync › Accounts**, has its own tabs.
[Manage a connected account](https://docs.wajub.com/dashboard/sync/connected-account#open-an-account) describes its
overview. The other tabs follow the permissions the merchant granted:
| Tab | Appears with the permission |
| ----------------------------- | ------------------------------- |
| **Payments** and **Disputes** | **Payments** or **Read access** |
| **Transfers** | **Transfers** |
| **Refunds** | **Refunds** |
| **Customers** | **Customers** |
These tabs only appear once the merchant is connected. **Timeline**, always there, shows the
**History**: what happened on the connection, newest first.
---
# Connect a merchant
URL: https://docs.wajub.com/dashboard/sync/connect-merchant
> Invite a merchant to connect their Wajub account to your platform, with your commission and the permissions you ask for, then share the invitation link with them.
Sync is for platforms that collect payments for the merchants who sell on them: you take a
commission on each of their payments. You prepare a connection with your terms, and the merchant
accepts it from an invitation link.
The owner, an Administrator, a Finance member or a custom role with **Manage transfers** can
connect a merchant; an Analyst, a Viewer or a custom role with **View transfers** follows the
connected accounts without being able to create one. Sync needs the **Scale** or **Enterprise**
plan, or the **Sync** add-on, which can be added to any plan:
[Add an add-on](https://docs.wajub.com/dashboard/subscription/add-ons). Sync works in Sandbox and in Live, with separate
connections in each environment. No security code is asked for to create a connection.
## The steps
1. **Open the form**
Open **Sync**, then the **Create** tab. The **Connect a merchant** page goes through three
steps: **Account**, **Terms** and **Review**.
2. **Choose the account type**
Under **Account type**, **Direct** suits a merchant who has a full Wajub account and runs it
themselves. **Lite** gives them a simplified space, and they always collect through Wajub. This
choice cannot be changed afterwards: it is part of what the merchant accepts.
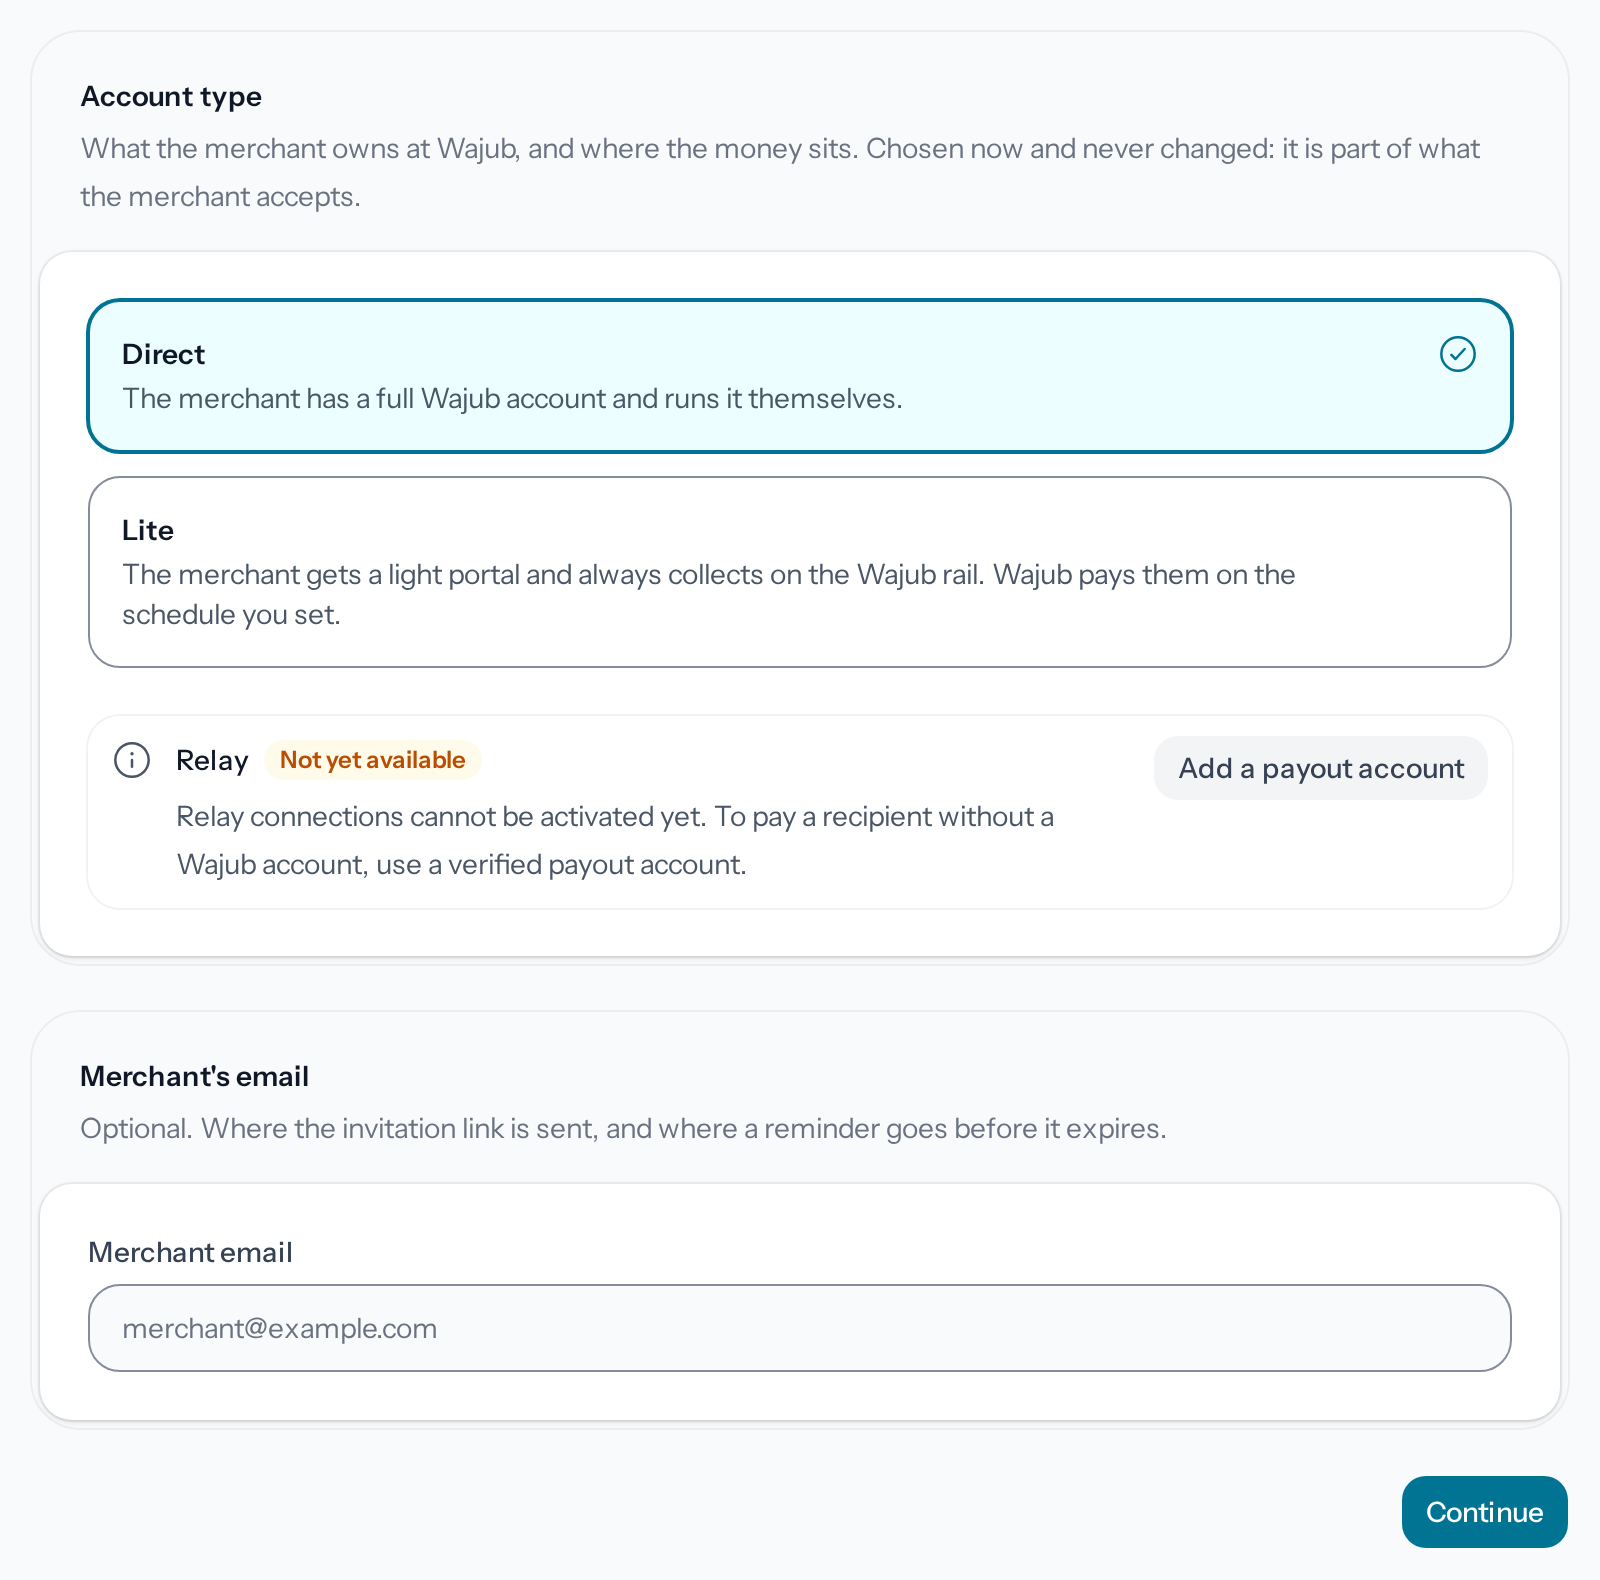
*Relay is not yet available: to pay someone without a Wajub account, use a payout account.*
**Relay** is marked **Not yet available**. To pay a recipient who has no Wajub account,
[add a payout account](https://docs.wajub.com/dashboard/transfers/payout-accounts).
3. **Give the merchant's email**
**Merchant email** is optional: it is the address you can send the invitation to, and where
reminders go before it expires. Without an address, you share the link yourself. **Continue**
moves on to the terms.
4. **Set your commission**
In **Pricing**, the commission starts from your defaults, which you change here for this
merchant: a **Percentage** of each payment, from 0 to 100, and a **Fixed fee** added to the
percentage, in the **Currency of the amounts**. **Minimum fee** and **Maximum fee** are
optional. With neither a percentage nor a fixed fee, the form warns you that you will take
nothing on this merchant's payments.
5. **Choose the permissions**
**Permissions** sets what your platform may do on the merchant's account: **Read access**,
**Payments**, always asked for, **Transfers**, **Refunds**, **Disputes**, **Customers** and
**Invoices**. The merchant sees this list before accepting and can revoke your access at any
time. **Continue** opens the review.
6. **Create the connection**
**Review** sums up the account and the terms; **Edit** takes you back to a section's step.
**Create connection** creates the connection and opens its page on **Waiting for the merchant
to connect**, with the invitation link.
## Share the invitation link
The **Invitation link** section gives the link to copy, the **Share on WhatsApp** button and a QR
code, which the merchant can scan with their phone, to download with **Download PNG** or
**Download SVG**. The link works only once, and anyone who opens it can connect an account to your
platform: send it to the merchant only.
*The link only appears once, right after creation.*
The link expires after 30 days, on the date shown under the QR code, and reminders go to the
merchant's address during its last 3 days. It is only shown at creation: later, **Regenerate
link** gives a new one, and the old one stops working. With an email address, **Resend
invitation** sends the merchant a new link, and the one you had shared stops working too. Either
way, the new link has 30 days again.
## What the merchant sees
The merchant opens the link, signs in to Wajub or creates their account, chooses the business to
connect, completes their verification if it is missing, then reads your terms and accepts them.
## After the merchant accepts
The connection moves to the **Active** status in **Sync › Accounts**. Until then, you can still
change the pricing and the permissions on its page; after that, the merchant must accept any
change. [Manage a connected account](https://docs.wajub.com/dashboard/sync/connected-account) describes this page, and
[Set up Sync](https://docs.wajub.com/dashboard/sync/settings) the defaults of a new invitation.
---
# Manage a connected account
URL: https://docs.wajub.com/dashboard/sync/connected-account
> Read a connected merchant's page, change their commission or permissions, suspend their payments, cancel an invitation or disconnect the merchant.
Each invited merchant has their own page in Sync: their activity, the terms of the connection and
the actions to change it or end it.
The owner, an Administrator, a Finance member or a custom role with **Manage transfers** manages a
connected account; an Analyst, a Viewer or a custom role with **View transfers** views it. The plan
is the one for [Connect a merchant](https://docs.wajub.com/dashboard/sync/connect-merchant): **Scale**, **Enterprise** or
the **Sync** add-on.
Suspending or resuming payments and disconnecting a merchant ask for the
[security code](https://docs.wajub.com/dashboard#the-security-code); changing the terms, regenerating the link or
cancelling an invitation do not.
## Open an account
Open **Sync**, then the **Accounts** tab. **Sync accounts** lists the connected merchants and the
pending invitations, with their **Status**, the amount **Collected**, their **Payments** and the
creation date. Click an account to open its page.
The header gives the merchant's name, the **Connection ID** and the status of the connection:
**Pending**, **Active**, **Expired** or **Cancelled**. Once the merchant is connected, a second
badge says whether they can collect through your platform: **Payments enabled**, **Payments
suspended** or **Payments inactive**. In Live, a new connection stays **Payments inactive** until
Wajub accepts the merchant's verification, and for a Lite account their Wajub Rail contract, then
moves to **Payments enabled** by itself; in Sandbox, it collects straight away.
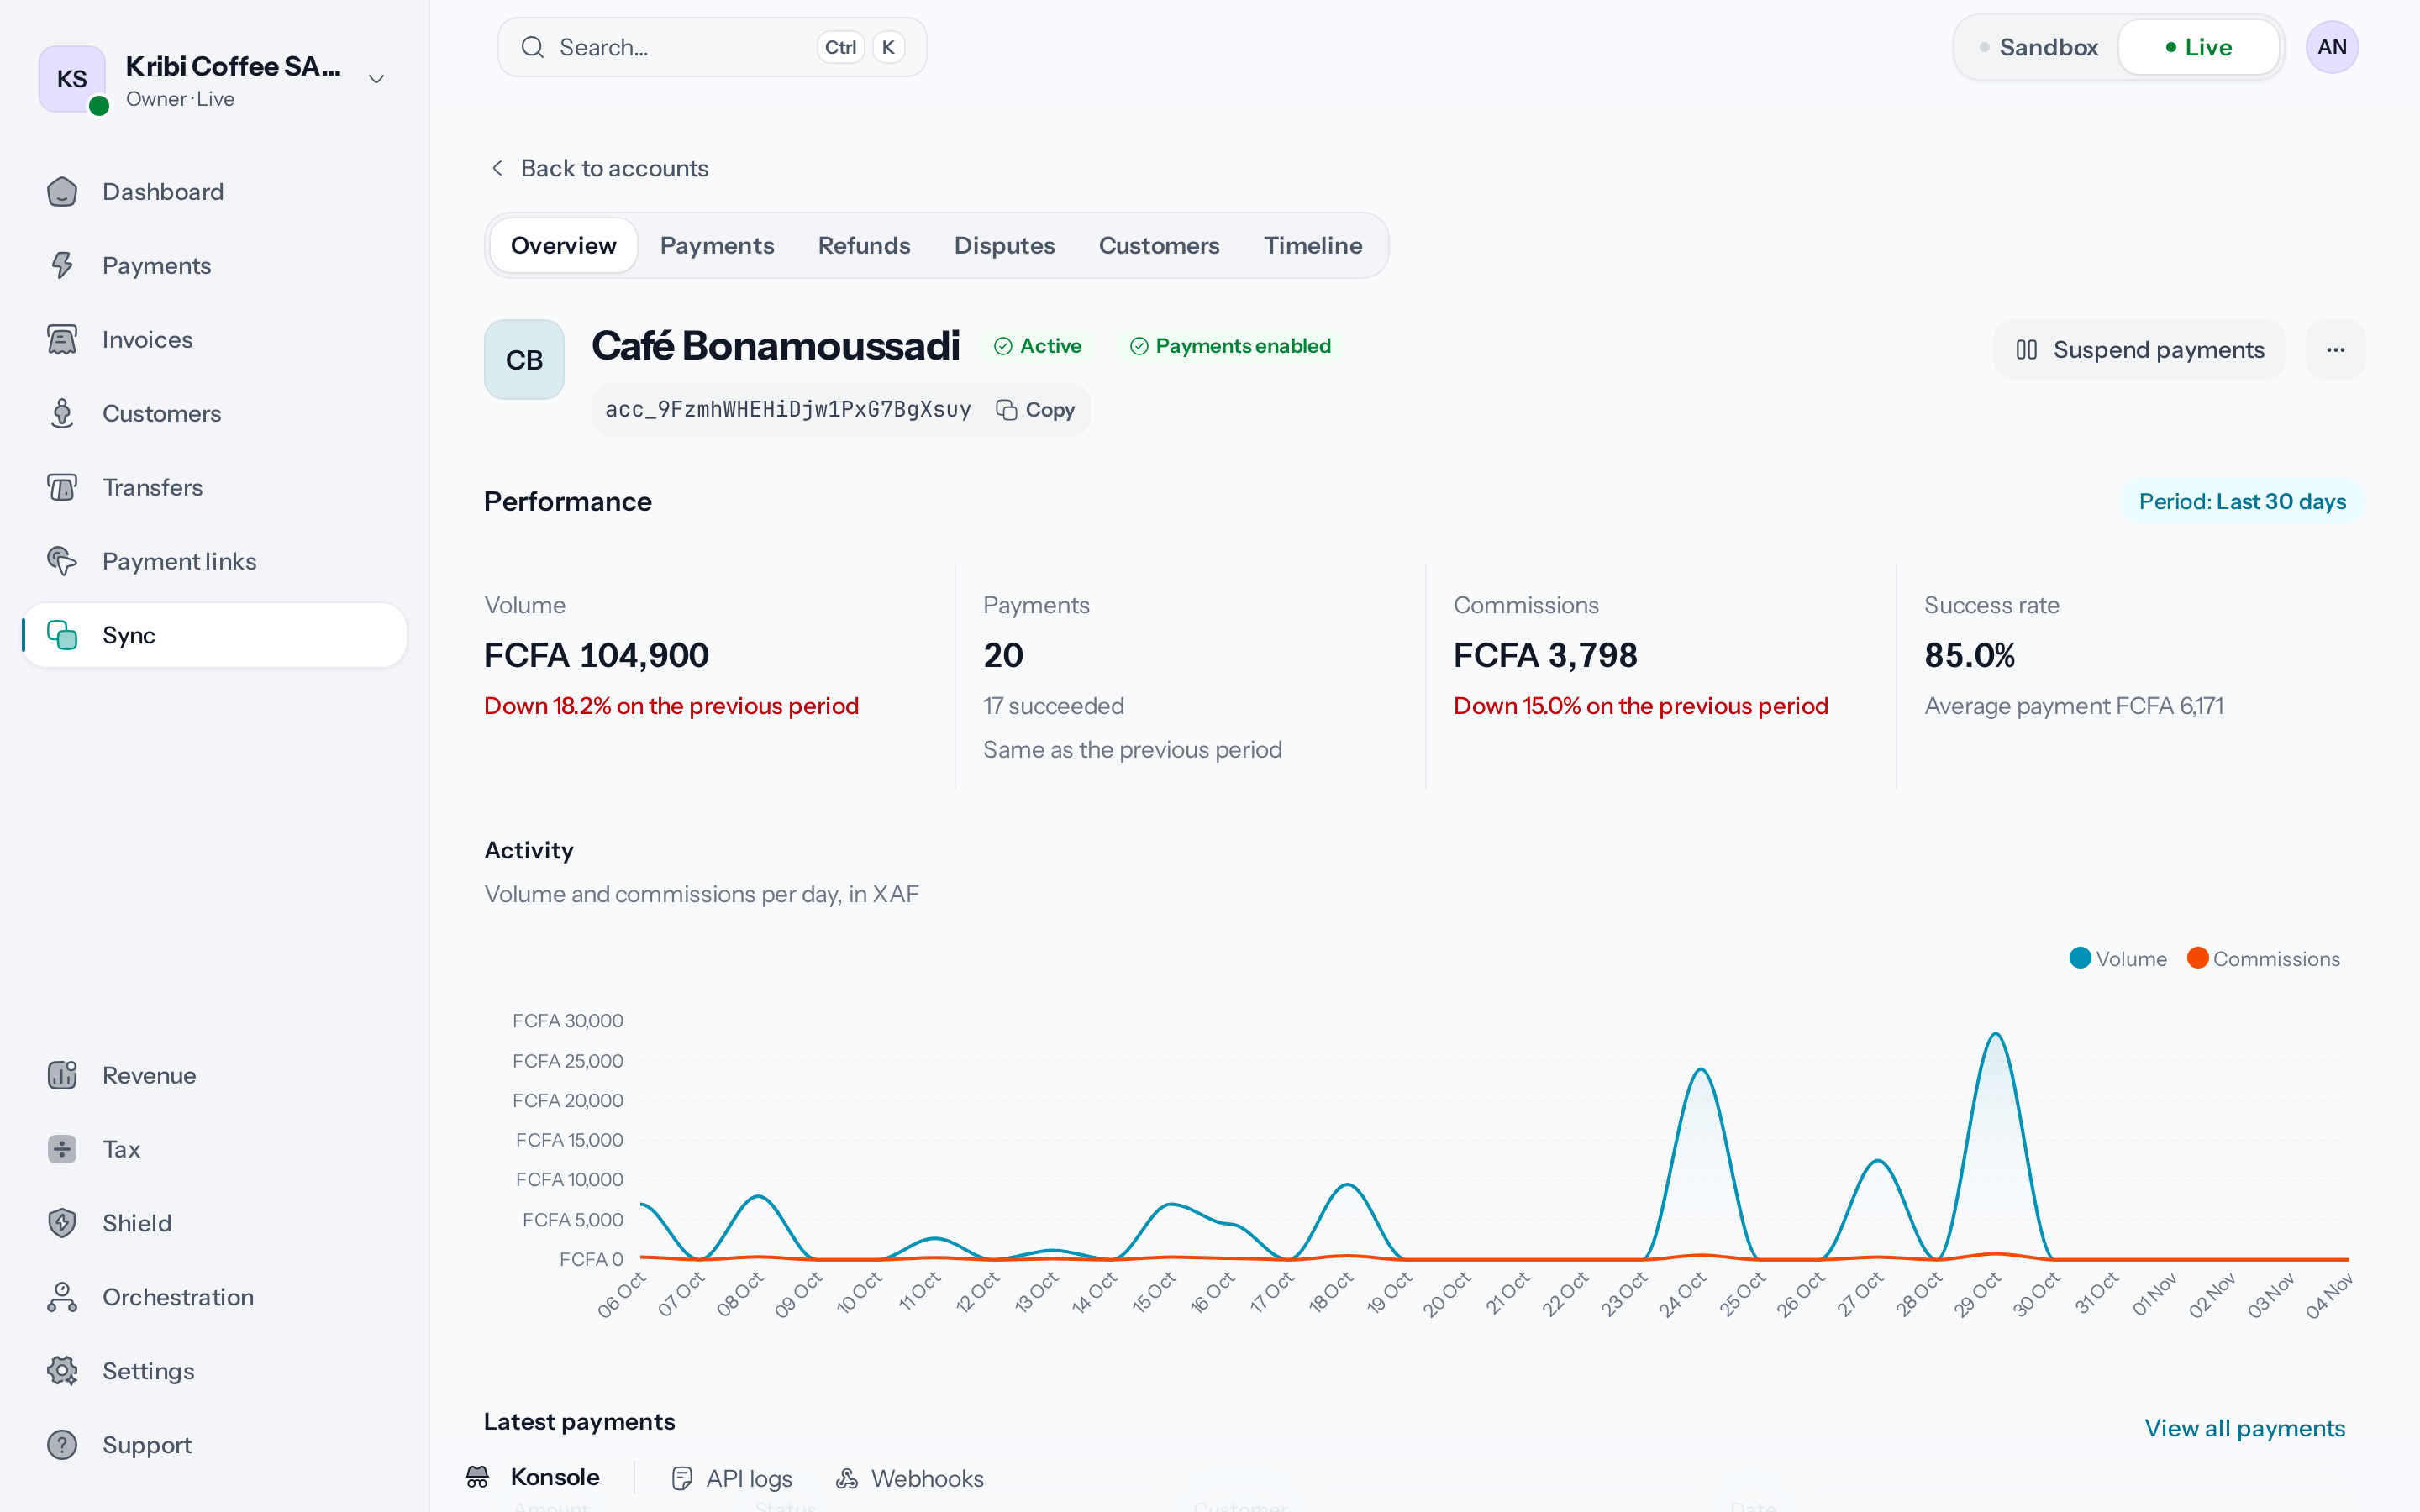
*The second badge says whether the merchant can collect through your platform.*
**Performance** shows the **Volume**, the **Commissions**, the **Payments** and the **Success
rate** over the chosen period, with the **Latest payments** below. **Connection details** repeats
the account type, the merchant's email and the dates. The account's other tabs are described in
[Track Sync activity](https://docs.wajub.com/dashboard/sync/activity#one-account).
## Change the terms
1. **Edit the pricing or the permissions**
On the account page, change the **Percentage**, the **Fixed fee**, the **Minimum fee** or the
**Maximum fee** in **Pricing**, or tick other boxes in **Permissions**. The pricing shows the
commission taken on a sample payment.
2. **Add a message**
When the merchant is already connected, **Message to the merchant**, optional, goes with your
proposal. While the invitation is pending, there is no message: the merchant will discover the
terms when they open the link.
3. **Save or propose**
For a pending invitation, **Save pricing** or **Save permissions** applies the change straight
away. For a connected merchant, the button becomes **Propose new pricing** or **Propose new
permissions**: the merchant receives the proposal by email and accepts or declines it.
While you wait for their answer, a box at the top of the page recalls the proposal and its
date, and the connection keeps its current terms.
## Suspend or resume payments
**Suspend payments**, at the top of the page, stops the merchant from collecting through your
platform; payments already made do not change. After the confirmation and the security code, the
badge changes to **Payments suspended** and the merchant is told by email, unless they have turned
that email off. **Resume payments** does the opposite.
## Regenerate or cancel an invitation
As long as the merchant has not connected, the **Connection actions** menu, to the right of the
header, offers **Regenerate link** and **Cancel connection**.
[Share the invitation link](https://docs.wajub.com/dashboard/sync/connect-merchant#share-the-invitation) says what a new
link changes. Cancelling the connection makes the link unusable, and cannot be undone; **Keep it**
closes the window without changing anything.
An expired or cancelled invitation shows **This invitation has expired** or **This connection has
ended**: **Create connection** prepares a new one.
## Disconnect a merchant
In the **Connection actions** menu, **Disconnect** followed by the merchant's name cuts your
platform's access to their account at once: their API access is revoked and they can no longer
collect through you. Payments already made stay in both accounts. After the confirmation and the
security code, the page shows **This connection has ended** and keeps the history.
This is final: to reconnect this merchant, create a new connection and send them the new
invitation. The merchant can also disconnect from their side:
[Respond to a platform](https://docs.wajub.com/dashboard/sync/connected-to-a-platform#disconnect-from-a-platform).
---
# Respond to a platform
URL: https://docs.wajub.com/dashboard/sync/connected-to-a-platform
> When your organisation is connected to a platform through Sync, see what it can do on your account, accept or decline its new terms, and disconnect from it.
A platform that collects for you through Sync sends you an invitation link. Once connected, it
takes a commission on your payments and acts on your account according to the permissions you
granted it. **Settings › Connected apps**, in the **Organization** group, lists these platforms.
The owner, an Administrator, a Developer, a Viewer or a custom role with **View settings** sees
this page; only the owner, an Administrator or a custom role with **Manage settings** accepts a
connection, answers new terms or disconnects a platform. The page is open to every plan. It shows
the connections of the current [environment](https://docs.wajub.com/dashboard#sandbox-and-live): a connection made in
Sandbox does not appear in Live. Disconnecting asks for the
[security code](https://docs.wajub.com/dashboard#the-security-code).
## Accept a connection
The invitation link opens outside the dashboard: you sign in to Wajub, choose the organisation to
connect, then read the platform's terms and accept them. Only a member who can manage this
organisation's settings can accept it. The platform then appears in **Connected apps**, with the
connection date and the **Permissions granted**.
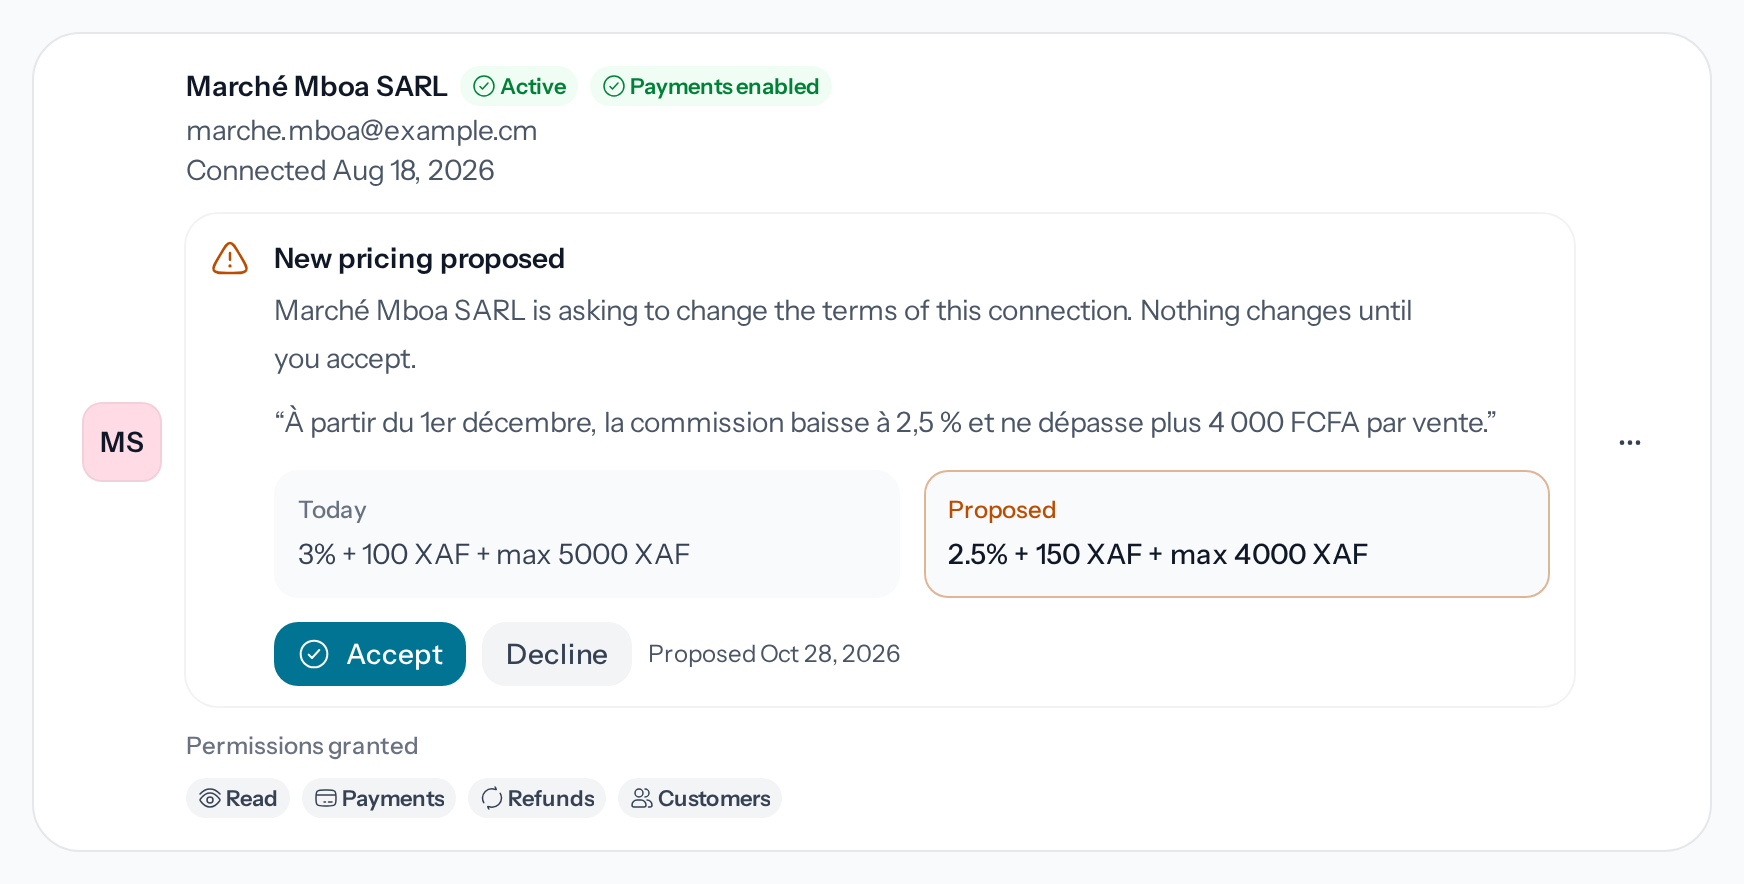
*A proposal from the platform changes nothing until you accept it.*
## Answer new terms
A connected platform can propose another commission or other permissions. You receive the
proposal by email, and nothing changes until you accept it.
1. **Open the proposal**
Open **Settings › Connected apps**. Under the platform's name, the **New pricing proposed** or
**New permissions proposed** box puts the **Today** column and the **Proposed** column side by
side, with the platform's message if it wrote one.
2. **Accept or decline**
**Accept** opens **Accept the new terms?**: after **Accept new terms**, they apply to
everything that happens from then on, and sales already made keep the old ones. **Decline**
opens **Decline the new terms?**: after **Decline new terms**, the connection keeps its current
terms, and the platform can propose others later.
## Disconnect from a platform
Open the platform's menu, to the right of its row, then **Disconnect**. After the confirmation and
the security code, the platform loses all its access to your account at once and the row
disappears. Payments already processed stay in your history. To reconnect, you need a new
invitation from the platform.
The platform can also disconnect you or suspend your payments; the emails that warn you are set in
[Connected account emails](https://docs.wajub.com/dashboard/sync/settings#connected-account-emails), with the **Scale**
or **Enterprise** plan, or the **Sync** add-on.
---
# Set up Sync
URL: https://docs.wajub.com/dashboard/sync/settings
> Choose the default permissions and commission of a new Sync invitation, and the emails you receive when a platform acts on your account.
**Settings › Sync** has two tabs: **Platform**, the default terms of your new invitations, and
**Connected account**, the emails you receive when a platform you are connected to acts on your
account.
The owner, an Administrator, a Developer, a Viewer or a custom role with **View settings** opens
these settings; only the owner, an Administrator or a custom role with **Manage settings** changes
them. Both tabs need the **Scale** or **Enterprise** plan, or the **Sync** add-on: without them,
the entry stays visible but [locked](https://docs.wajub.com/dashboard#modules-outside-your-plan). The settings apply to
Sandbox and Live alike, and no security code is asked for.
## The default terms
1. **Open the Sync settings**
Open **Settings › Sync**. The page opens on the **Platform** tab.
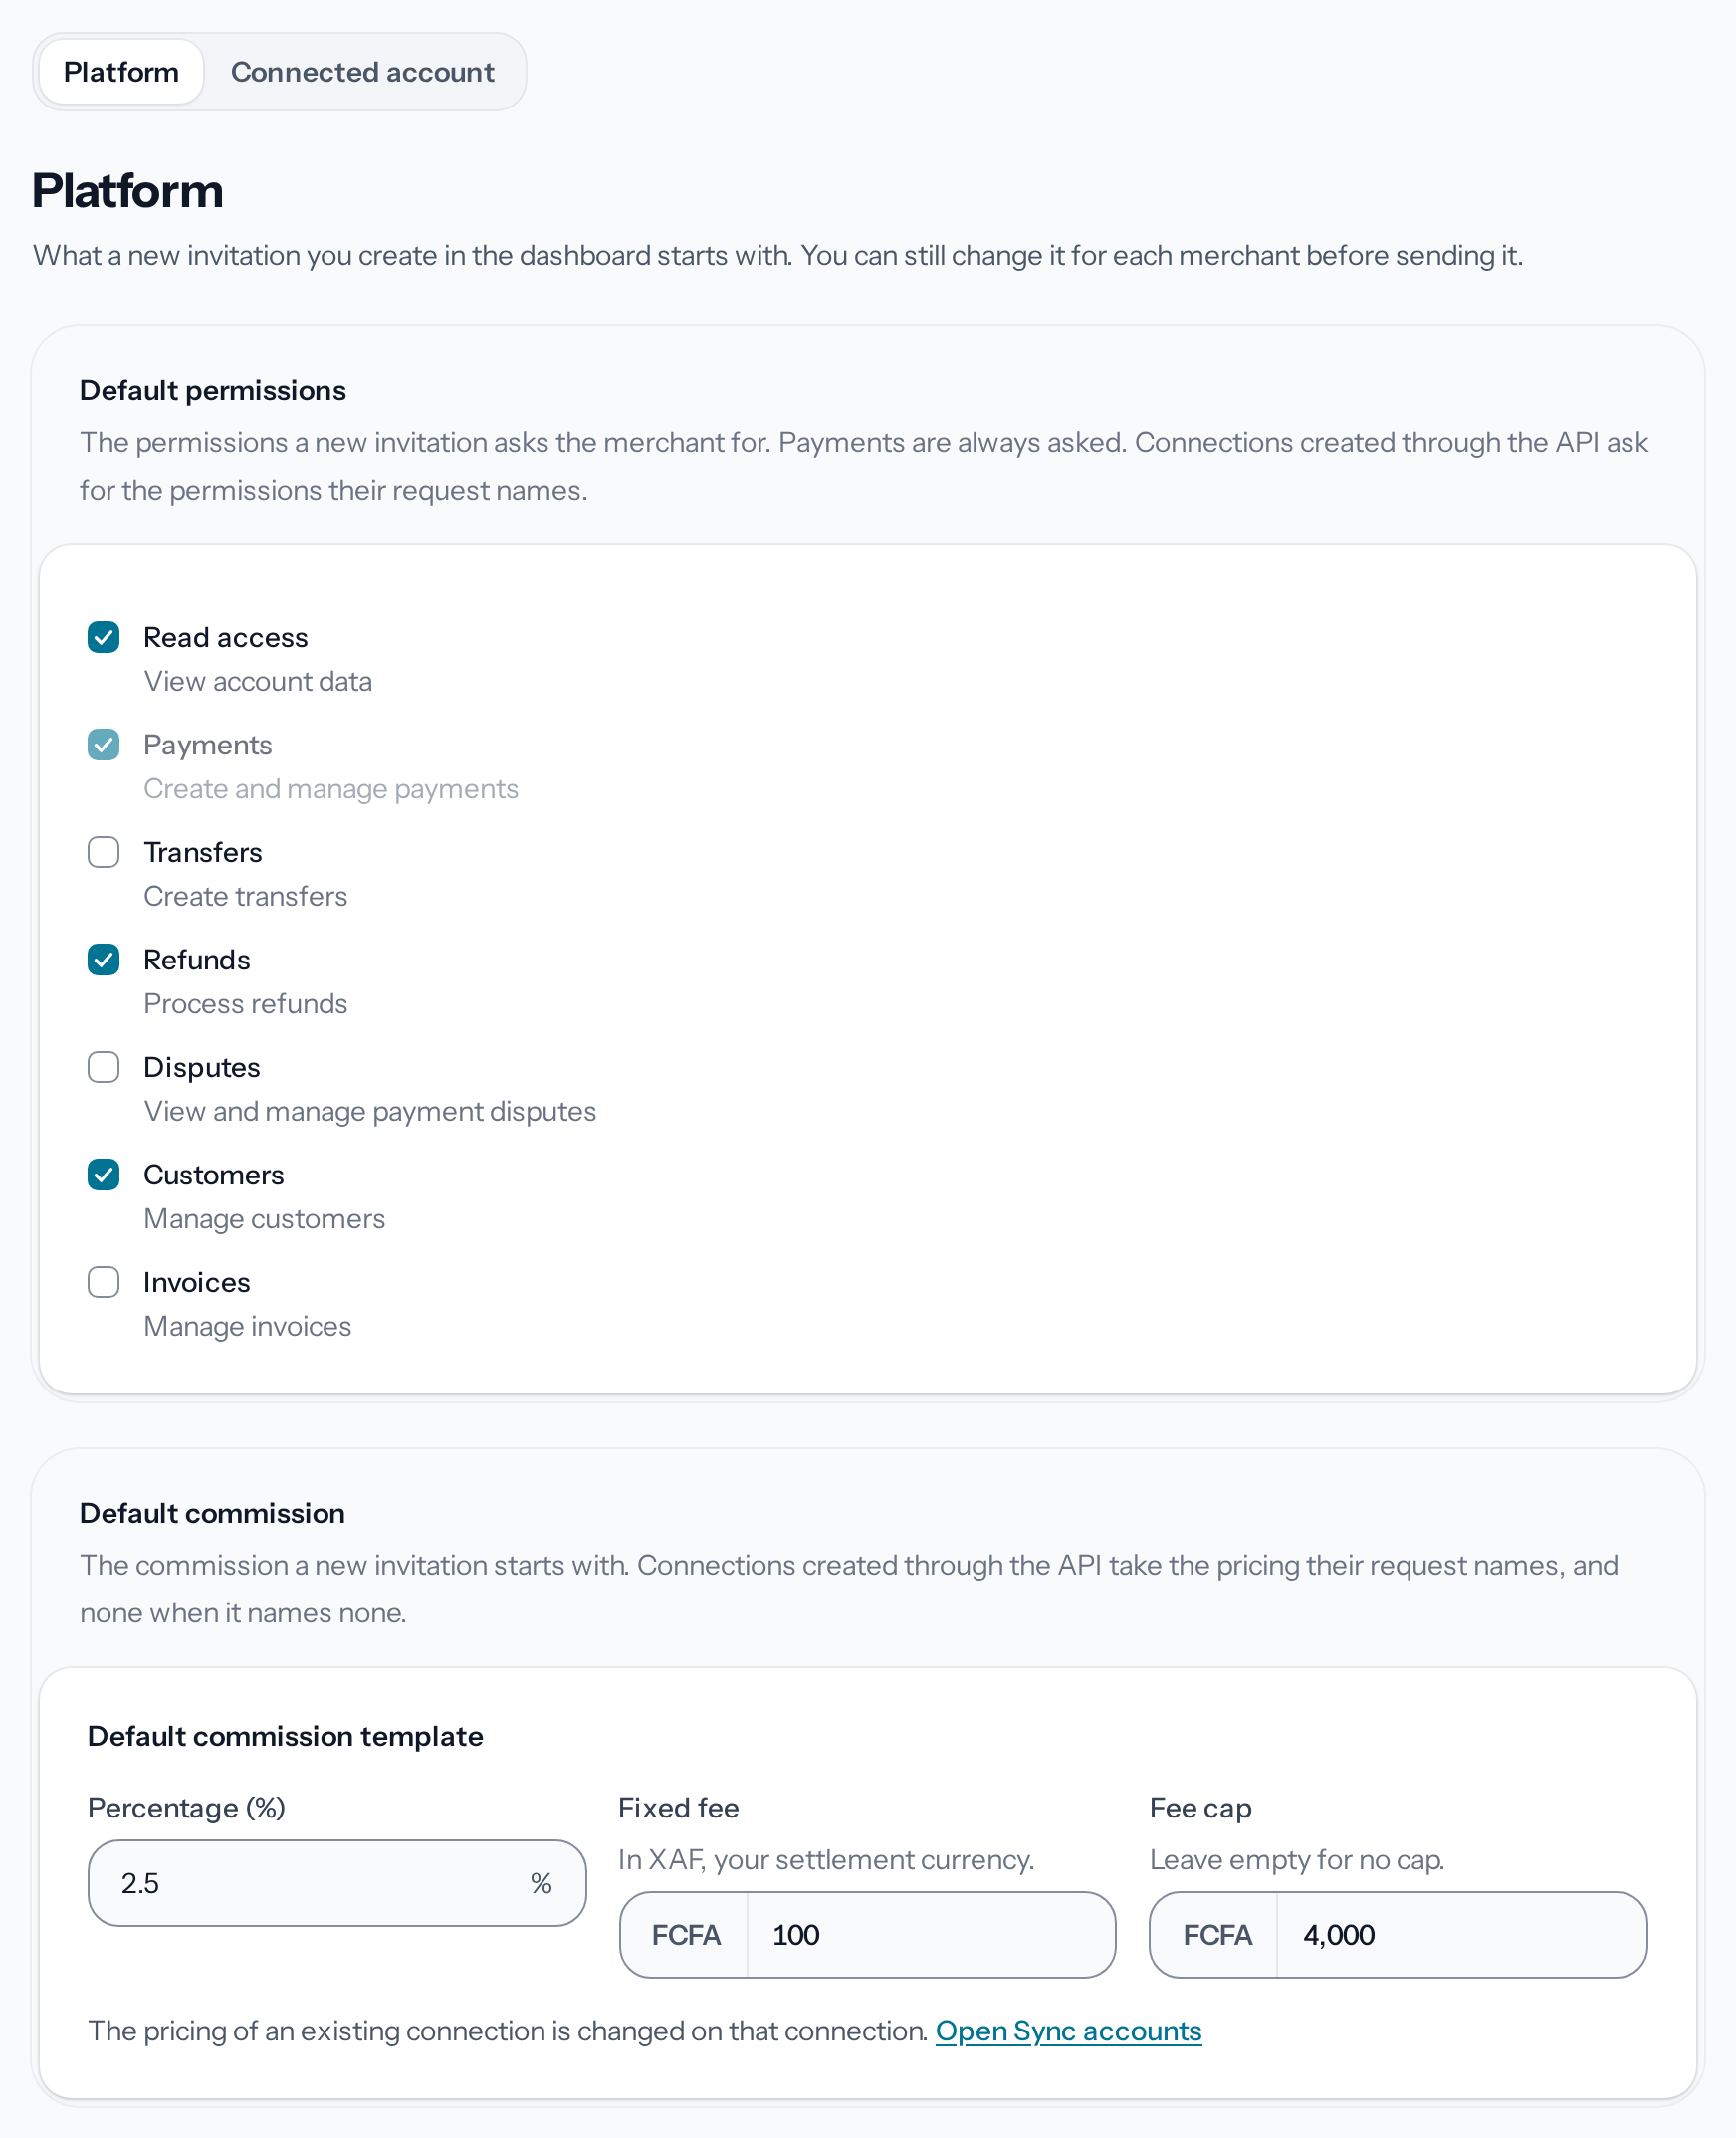
*These terms fill in each new invitation, and you can still change them there.*
2. **Tick the default permissions**
Under **Default permissions**, tick what a new invitation asks the merchant for. **Payments** is
always asked for. From the first change, the **You have unsaved changes** bar appears at the
bottom of the page.
3. **Set the default commission**
Under **Default commission**, enter the **Percentage (%)** and the **Fixed fee**, in your
settlement currency. Leave **Fee cap** empty to leave the commission uncapped.
4. **Save**
**Save changes** applies the new values; **Discard** goes back to the previous ones.
These values only apply to invitations created afterwards in the dashboard, and you can still
change them for each merchant in the form. An existing connection keeps its terms: they are
changed on its page, see [Change the terms](https://docs.wajub.com/dashboard/sync/connected-account#change-the-terms). A
connection created through the API takes the permissions and the commission its request names,
and no commission when it names none: [Account capabilities](https://docs.wajub.com/sync/account-types#pricing).
## Connected account emails
The **Connected account** tab concerns your organisation when it is itself connected to a
platform. Under **Email notifications**, three switches:
| Switch | The email goes out when |
| -------------------------- | -------------------------------------------------------- |
| **Capabilities changed** | the platform turns permissions on or off on your account |
| **Payment status changed** | the platform suspends or resumes your payments |
| **Connection terminated** | the platform disconnects you |
A switch turned off stops that email. New terms a platform proposes always arrive by email, since
they wait for your answer:
[Respond to a platform](https://docs.wajub.com/dashboard/sync/connected-to-a-platform#answer-new-terms).
Save with **Save changes**.
---
# Set up tax
URL: https://docs.wajub.com/dashboard/tax/settings
> Turn on the VAT or GST calculation on your payments, say whether your prices include it, choose the default country and record your tax registration.
Once collection is turned on, Wajub works out the tax in each credited payment, from the payer's
country, and files it in [your report](https://docs.wajub.com/dashboard/tax/track). Your customers still pay the price
you set.
The owner, an Administrator, a Finance member or a custom role with **Manage tax** sets up tax,
from the **Growth** plan up. As [Sandbox and Live](https://docs.wajub.com/dashboard#sandbox-and-live) points out, the
module only exists in Live. No security code is asked for.
## The steps
1. **Open the tax settings**
In **Tax**, click **Configure tax**, or the **Settings** tab if collection is already turned
on. The **Tax settings** page opens.
2. **Turn on collection**
Turn on **Enable tax collection**. **Tax-inclusive pricing**, **Default country** and **Tax
registration** appear. The **Tax rates by country** box reminds you that each country's
standard rate is already set up.
3. **Say whether your prices include tax**
When on, **Tax-inclusive pricing** counts the tax inside each price. When off, the report counts
the rate on top of each price. Payments and links always charge the price you set; only invoices
can add the tax on top.
4. **Choose the default country**
The **Default country** is used when the payer's country is unknown.
5. **Enter your tax registration**
Choose the **Tax ID type**, then enter the **Tax registration number**: both are required to
turn collection on, and the number must follow its type's format. It is kept with your
settings, and is not printed on invoices or receipts for now.
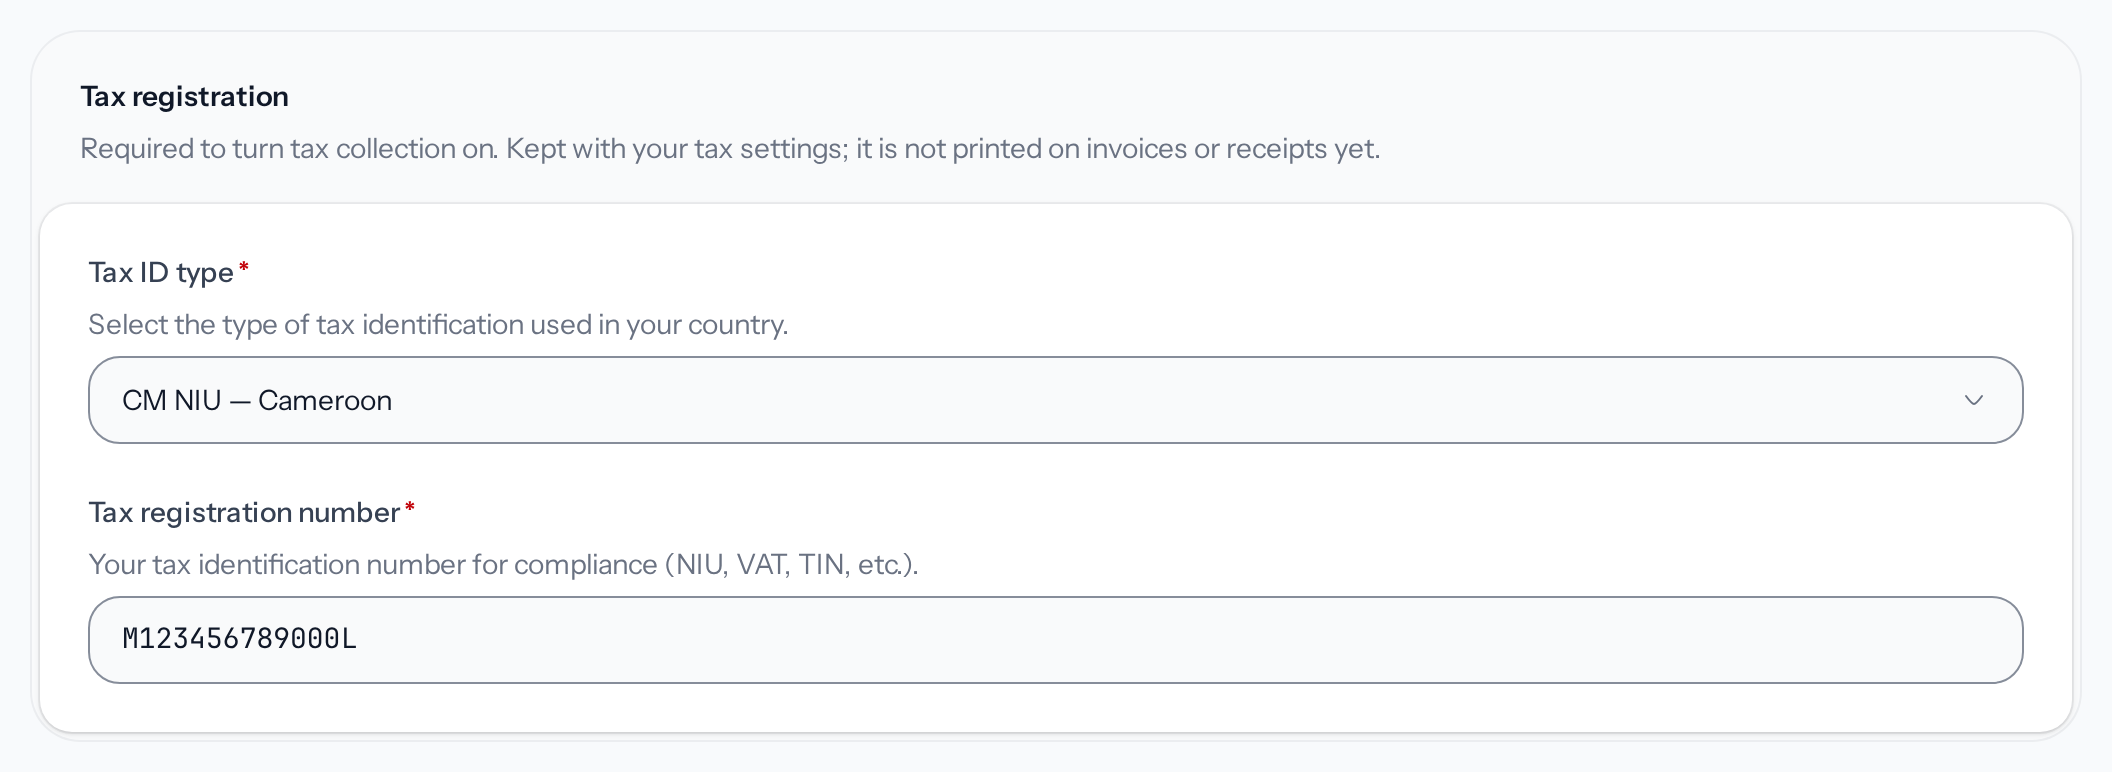
*The registration number is required to turn collection on.*
6. **Save**
Click **Save changes** in the bottom bar: **Tax settings updated.** appears. **Tax** now shows
the report, with the **Overview** and **Settings** tabs.
## In your invoices
While collection is turned on, the invoice form offers **Collect tax automatically** at the lines
step: it applies your tax settings and the customer's country. Turn it off to set each line's tax
yourself, as for [any invoice](https://docs.wajub.com/dashboard/invoices/create#the-steps).
## Turn it off
Turn off **Enable tax collection**, then save. New payments are no longer taxed, and **Tax** shows
[its introduction](https://docs.wajub.com/dashboard/tax/track#before-turning-it-on) again in place of the report. To turn
it back on, go through **Configure tax** again.
---
# Track the tax collected
URL: https://docs.wajub.com/dashboard/tax/track
> Read the tax worked out on your payments for a period, by country and by currency, and export it as CSV for your accountant.
**Tax** shows the VAT or GST that Wajub worked out on credited payments, online and on POS
terminals, for the period chosen. The calculation does not change what your customers pay.
The module is included from the **Growth** plan up
([Modules outside your plan](https://docs.wajub.com/dashboard#modules-outside-your-plan)) and only exists in
[Live](https://docs.wajub.com/dashboard#sandbox-and-live). Every role that reads tax sees
the report ([Roles](https://docs.wajub.com/dashboard#roles)). The export needs **Manage tax**: the owner, an
Administrator, a Finance member or a custom role that has it. No security code is asked for.
## Before turning it on
As long as collection is not turned on, **Tax** introduces the module with the **Tax collection**
badge. Those with **Manage tax** find **Configure tax** there, which opens
[the tax settings](https://docs.wajub.com/dashboard/tax/settings). Everyone else reads "Ask an administrator of your
organization to configure tax collection.". If collection is turned off later, this introduction
comes back in place of the report.
## Read the report
Choose the **Period** at the top right: **Last 30 days** by default, another ready-made period, or
the first and the last day in the calendar, then **Apply**. Three figures sum up the period: **Tax
collected** and **Taxable amount** (excluding tax), both converted into your account's currency,
then **Countries**, the number of countries where payments were taxed.
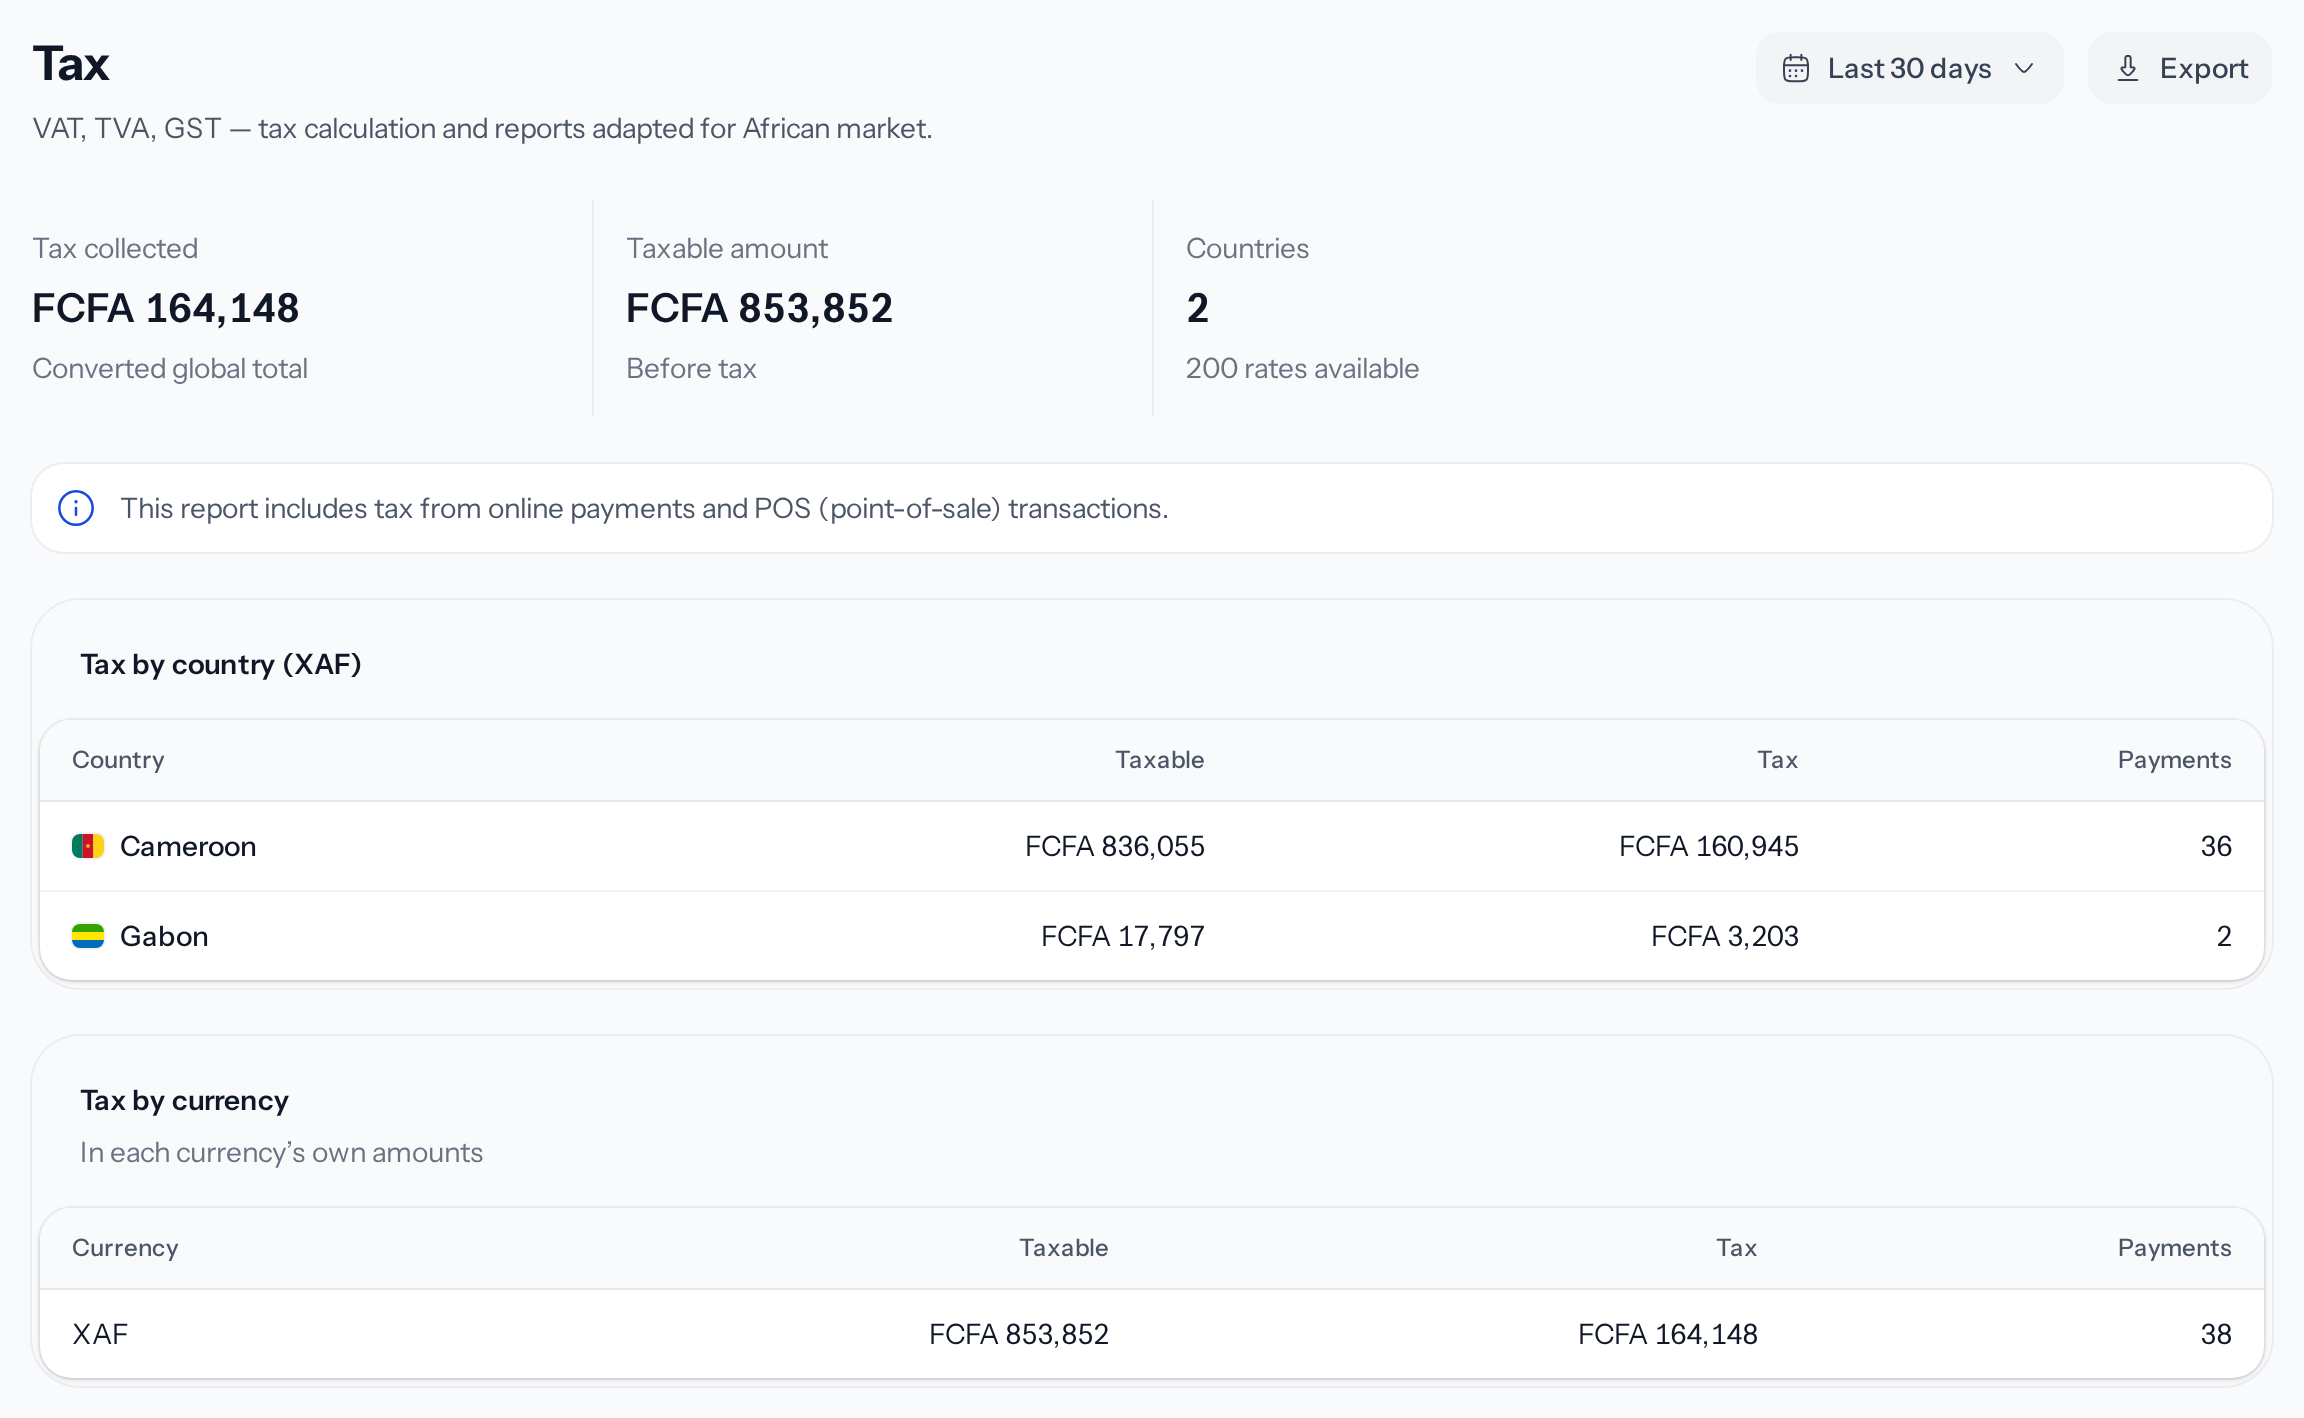
*The totals and the tax by country are converted into the account's currency.*
**Tax by country** breaks down, for each payer's country, the taxable amount, the tax and the
number of **Payments**. **Tax by currency** gives the same figures in each currency's own amount. A
currency with no exchange rate is left out of the totals and of the tax by country: the **Some
currencies are left out of the totals** box says so.
A successful refund takes its share of tax out of the report. With no taxed payment in the period,
the table shows **No tax collected for this period**.
## Export the report
**Export**, next to the period, then **CSV** under **Download as**: the file holds the totals, the
tax by country and the tax by currency for the period shown, and "Your export is ready" gives its
name.
---
# Manage beneficiaries
URL: https://docs.wajub.com/dashboard/transfers/beneficiaries
> Find the beneficiaries your integration pays through the API, read their page, edit, archive or delete them, and export them.
The **Beneficiaries** tab of **Transfers** lists the recipients your integration creates and pays
through the API, as [Create a beneficiary](https://docs.wajub.com/payouts/beneficiaries/create) explains. The dashboard
does not create any: to withdraw your balance to one of your own accounts,
[link a payout account](https://docs.wajub.com/dashboard/transfers/payout-accounts). Until your integration has created
a beneficiary, an overview page replaces the list.
Everyone with **View transfers** opens the list and the beneficiaries, in Sandbox as in Live: each
environment has its own beneficiaries. The owner, an Administrator, a Finance member or a custom
role with **Manage beneficiaries** edits, archives, restores, deletes and exports, in Live. All of
these actions except exporting ask for the security code.
## The list
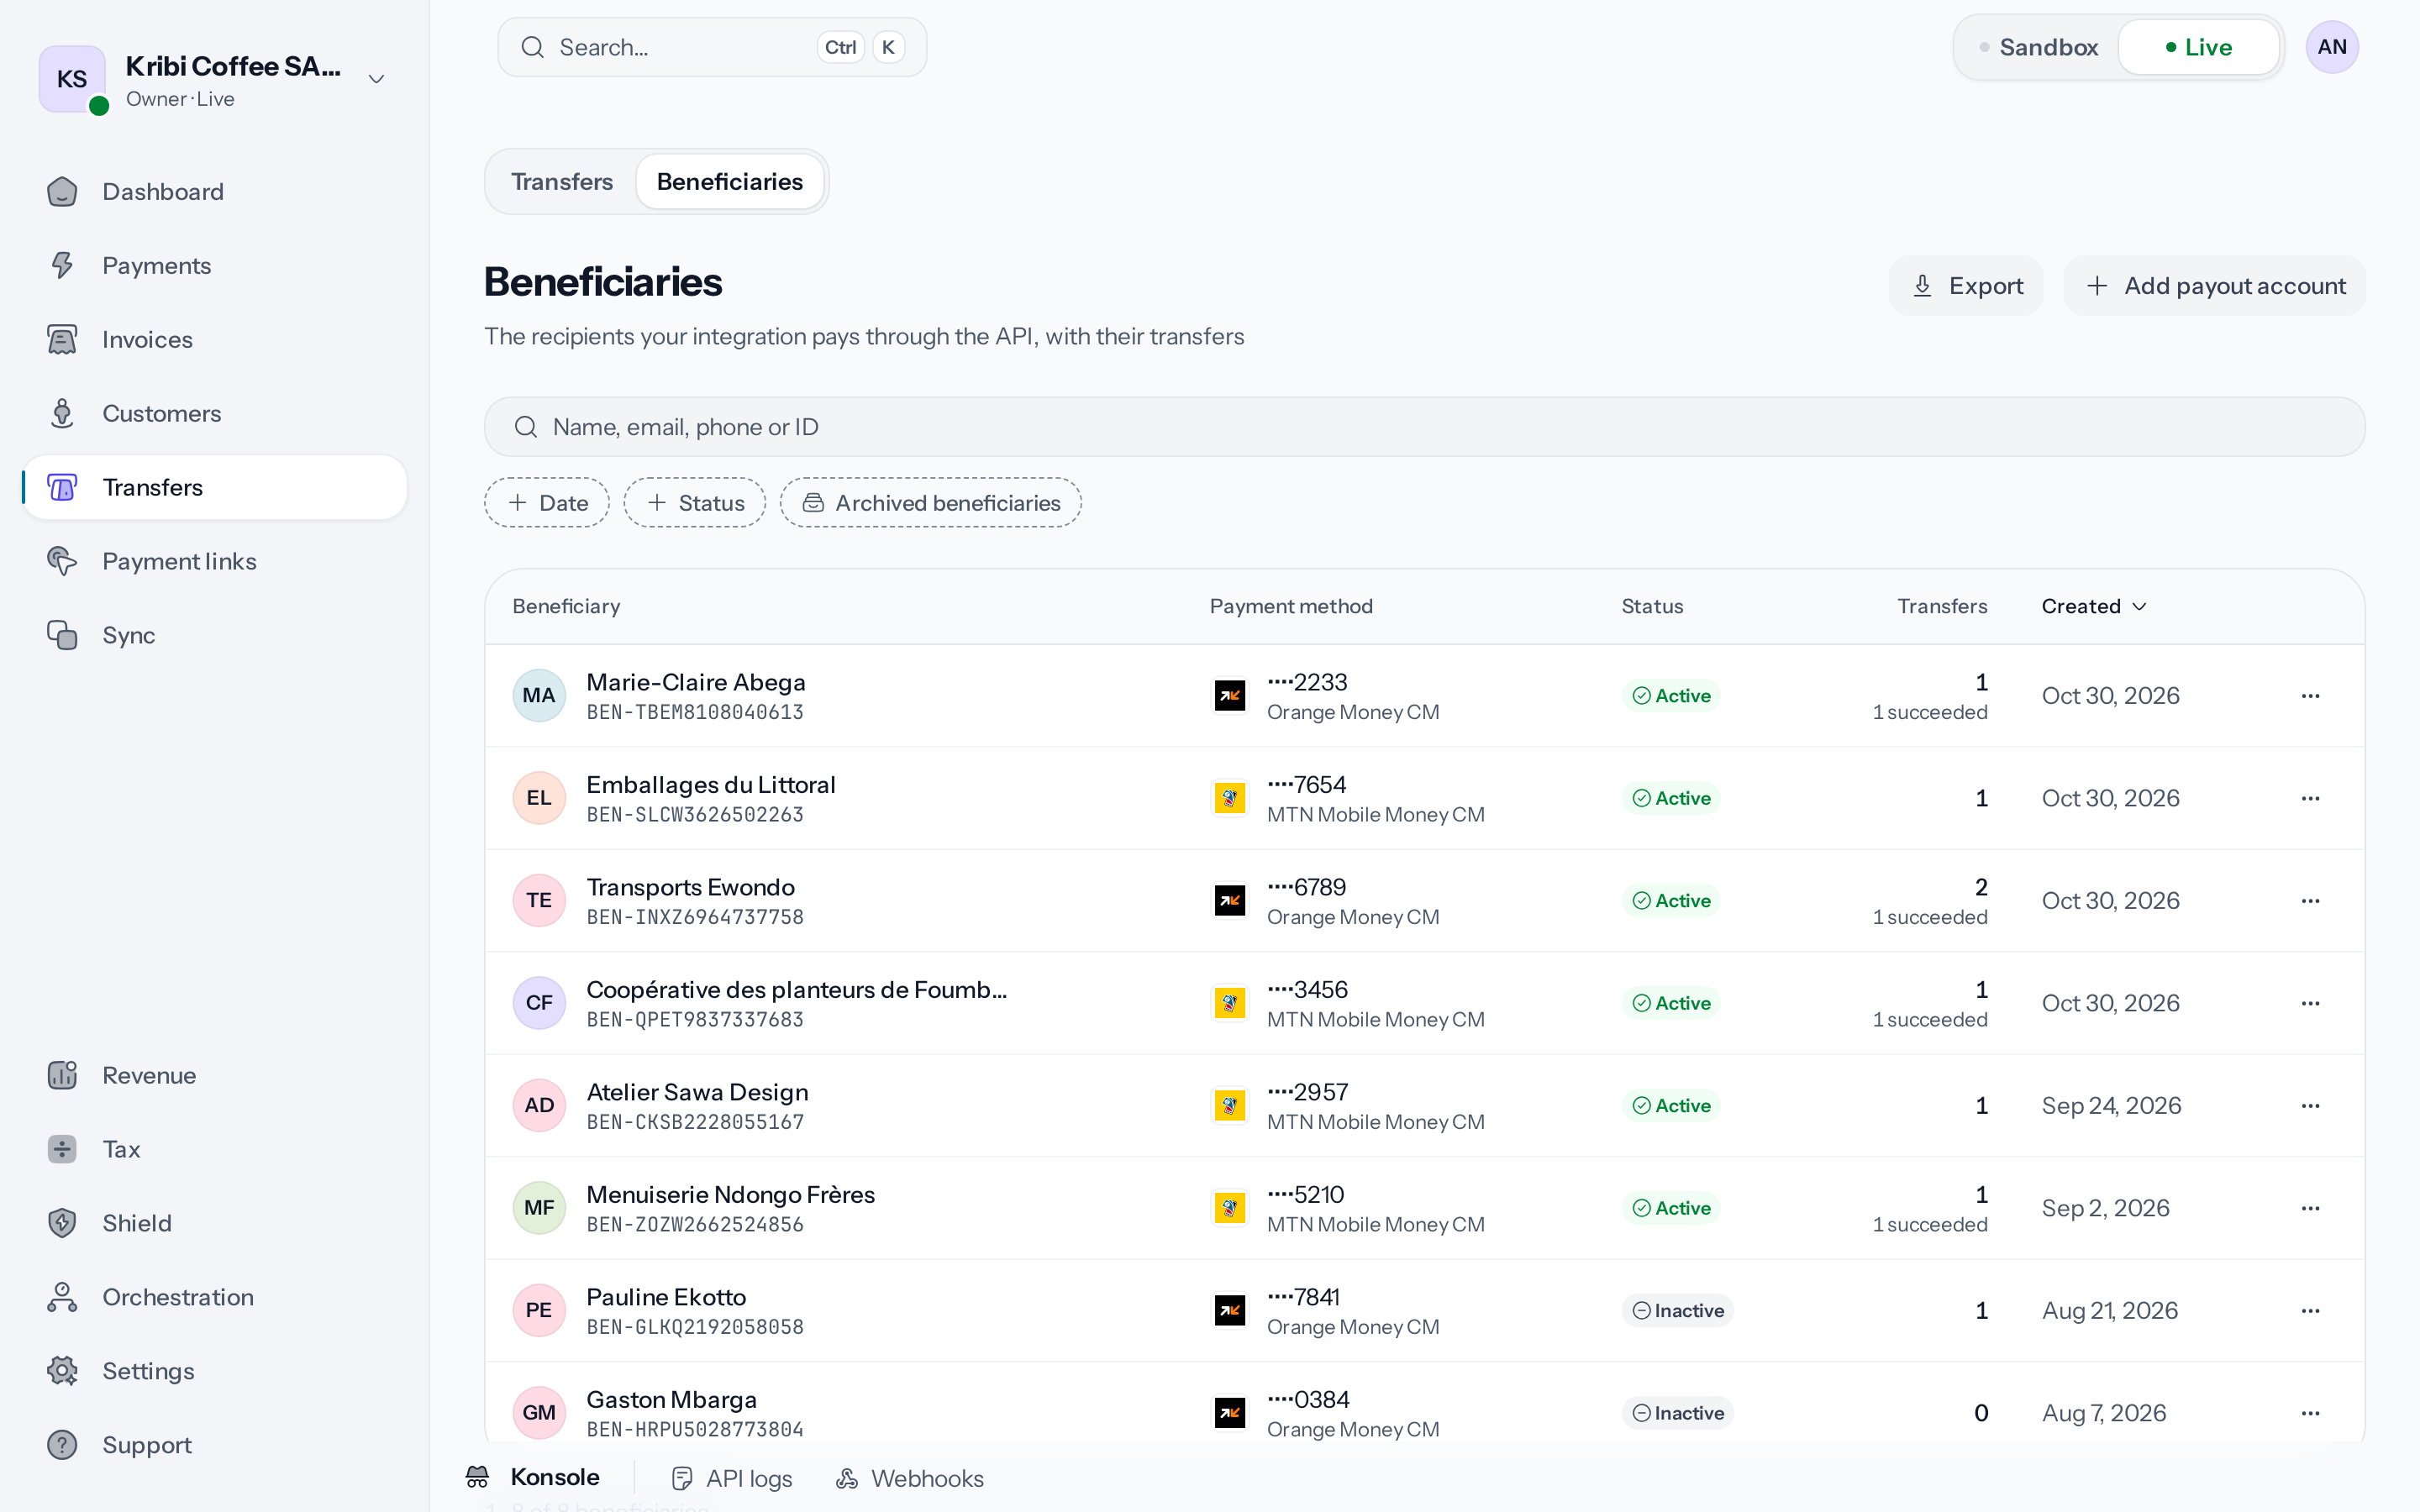
*The list only shows the beneficiaries created through the API.*
Each row gives the **Beneficiary**, their **Payment method**, their **Status**, their
**Transfers** with the number that succeeded, and the **Created** date. The filters cover the
**Creation date**, the **Status**, **Active** or **Inactive**, and **Archived beneficiaries**,
which shows only archived beneficiaries. The search finds a beneficiary by name, email, phone or
ID. The menu at the end of a row offers **Open beneficiary**, **Copy beneficiary ID** and, in Live,
**Edit**.
## The beneficiary page
The header gives the name, the status, the **API beneficiary** type and the **Beneficiary ID** to
copy. Three figures follow: the number of **Transfers**, the **Received** amount, currency by
currency, and the **Success rate**. Then come the **Beneficiary details**, the **Transfer
activity** of the last 30 days and the **Recent transfers**: **View all transfers** opens the
transfers list filtered on this beneficiary. On the side, **Payment method** and **By status** sum
up where they are paid and how their transfers ended.
The same page opens for a payout account, for example from **View beneficiary** on a transfer. It
then carries the **Payout account** type and, in Live, for whoever can send a transfer, the **Send
transfer** button when the account is active and not archived: it opens the transfer form on that
account.
## Edit a beneficiary
1. **Open the form**
On the beneficiary's page, or in the menu of their row, choose **Edit**.
2. **Correct the contact**
Under **Contact**, correct the **Name**, which is required, the **Email**, the **Phone** or the
**Country**.
3. **Change the payment method**
Under **Payouts**, the **Type** stays the one chosen at creation. **Payment method** offers the
methods already saved for your beneficiaries.
4. **Turn the beneficiary on or off**
Turned off, **Active** gets every transfer to this beneficiary refused, through the API as from
the dashboard.
5. **Save the changes**
Choose **Save changes**, then enter the security code. The beneficiary's page opens on
"Beneficiary updated successfully.".
The **Note**, at the bottom of the form, keeps information only your members see.
## Archive, restore or delete
The beneficiary page's menu offers **Archive beneficiary**: they leave the list and can no longer
be paid, and their transfers stay. The **Archived beneficiaries** filter finds them; their page
shows **This beneficiary is archived** and its menu offers **Restore beneficiary**.
**Delete permanently** erases the beneficiary and their statistics, with no way back. A
beneficiary with a transfer still in progress cannot be deleted: archive them instead. Each of
these three actions asks for the security code.
## Export beneficiaries
In Live, **Export**, at the top of the list, opens **Export beneficiaries**: the file, in CSV,
Excel, PDF or JSON, holds the beneficiaries the list shows with its filters and their order. Each
export counts towards the monthly limit of the **Pay as you go** plan.
---
# Link a payout account
URL: https://docs.wajub.com/dashboard/transfers/payout-accounts
> Add the Mobile Money number or the bank account that receives your transfers, get it verified, turn on automatic payouts to it, then edit or archive it.
A transfer goes from your balance to a payout account: a Mobile Money number, a bank account or a
Wajub account, your own or that of someone you pay. You add it once, then choose it at each
[transfer](https://docs.wajub.com/dashboard/transfers/send).
The owner, an Administrator or a custom role with **Manage settings** adds, edits and gets payout
accounts verified, on every plan. A Finance member sends transfers but does not open this page. It
only exists in Live, and adding, editing or getting an account verified asks for the security code.
## The steps
1. **Open the form**
Open **Settings › Transfers**, **Payout accounts** tab, then **Add payout account**. The form
goes through four steps, **Country**, **Method**, **Details** and **Review**, and **Continue**
moves from one to the next.
2. **Choose the country**
Under **Country of the account**, choose the country where the number or the bank account is
registered.
3. **Choose the payout method**
**Payout method** offers the methods open in that country: Mobile Money, bank, bank transfer or
Wajub account depending on the country. A card cannot receive a transfer. If no method is open
for your organisation yet, the form says so and offers, depending on the case, **Request
access**, **Sign the contract** or **View application**.
4. **Enter the number or the account**
For Mobile Money, enter the **Mobile number**. For MTN, Orange Money and Express Union in
Cameroon, the dashboard queries the operator and shows "Registered name:" followed by the
holder's name, with **Use this name**. For a bank account, enter the **Account number**; for a
bank transfer, the **Bank name**, the **Account currency**, the IBAN or account number, the
SWIFT/BIC or local bank code, and the **Bank account attestation** when it is asked for. For a
Wajub account, the **Wajub account number**.
5. **Give the account holder**
**Account holder name** is the name the account is registered under, as the bank knows it for a
bank transfer. **Notification email**, optional, receives the payout confirmations.
6. **Add the account**
The **Review** step shows **Where the money goes** and **Account holder** again: the money goes
to this account exactly as entered. Choose **Add payout account**, then enter the security
code. If you came from the transfer form, you go back to it with this account already chosen.
## Get the account verified
A transfer only goes to a **Verified** account. When it is added, a Mobile Money account is
verified when the name registered with the operator matches the holder entered, the legal name in
your activation file or one of the people it declares. A Wajub account is verified when its holder
matches. Otherwise, the list shows it as **Not verified**.
For a Mobile Money account that is **Not verified**, **Verify with the operator** runs the
comparison again and asks for the security code. If the names match, the account becomes
**Verified**. Otherwise, the organisation's owner receives a six-digit code by email, valid for 15
minutes: enter it in the field that appears on the account's row, then **Verify**. The dashboard
cannot get a bank account verified.
## Automatic payouts
Above the list, **Automatic payouts** pays your sales out to one of your payout accounts every
night, without a transfer from you. It is off until you turn it on: your money otherwise stays on
your balance until you send a [transfer](https://docs.wajub.com/dashboard/transfers/send).
1. **Turn it on**
Turn on **Pay my balance out automatically**.
2. **Choose the account**
Under **Paid to**, choose the payout account that receives the money. With only one account,
it is already chosen. With none, add one first: the section says so.
3. **Save**
Choose **Save**, then enter the security code.
Each night, Wajub pays the sales not paid out yet, less their refunds, fees and lost disputes, and
never more than what is available on your balance with the payout's fee on top: what you already
sent yourself is not sent again, and funds you added to your balance stay on it. The first payout
after you turn it on includes the sales already on your balance, up to what is available. Nothing
is sent below 1 000. [Balance and settlements](https://docs.wajub.com/payouts/balance#settlement-to-your-payout-account)
gives the details.
If the chosen account is archived or deactivated, nothing is paid out and the section asks you to
choose another one. Turn the switch off and save to stop automatic payouts at any time.
## Edit or archive an account
The menu at the end of a row offers **Edit**: **Edit payout account** changes the contact, the
**Payment method**, the **Active** box and a **Note** only your members see. **Save changes** asks
for the security code. Changing the payment method sets the account back to **Not verified** and
emails a security alert to the owner.
**Archive**, in the same menu, removes the account from the list: no transfer can be sent to it
any more, and its transfers stay. Archiving asks for the security code and the **Manage
beneficiaries** permission. To find it again later, open one of its transfers, then **View
beneficiary**: its page offers **Restore beneficiary**.
> [!NOTE]
> **Your integration's beneficiaries**
>
> The recipients your integration pays through the API are beneficiaries too, but not payout
> accounts: they are in [Manage beneficiaries](https://docs.wajub.com/dashboard/transfers/beneficiaries).
---
# Schedule transfers
URL: https://docs.wajub.com/dashboard/transfers/recurring
> Create a schedule that sends the same amount to a payout account every hour, day, week or month, then pause, edit or delete it.
A recurring transfer pays the same payout account on a schedule: a supplier every month, your own
account every week. Each run is a real transfer, with the same limits, the same checks and the same
[review](https://docs.wajub.com/dashboard/transfers/under-review) as a transfer sent by hand.
The owner, an Administrator or a custom role with **Manage settings** creates and manages
schedules, in Live. Creating, editing or resuming a schedule requires the **Growth** plan or a plan
above. Creating, editing and deleting ask for the security code; pausing and resuming do not.
## The steps
1. **Open the form**
Open **Settings › Transfers**, **Recurring transfers** tab, then **Create recurring transfer**.
If your plan does not include them, the page shows **Not included in your plan** and the button
leads to the plans.
2. **Choose the account and the amount**
Under **Recipient and amount**, choose the **Payout account**, then the **Amount of each run**,
within the limits shown above the field. The **Name**, optional, helps find the schedule in the
list; the **Description**, optional, shows on each transfer.
3. **Set the schedule**
Under **Schedule**, choose the **Frequency**: **Every hour**, **Daily**, **Weekly** with the
**Day of the week**, or **Monthly** with the **Day of the month**, from 1 to 31. A shorter month
uses its last day. Except for hourly sends, set the **Time of day (UTC)**, 09:00 by default: the
schedule runs in UTC, and 09:00 UTC is 10:00 in Cameroon.
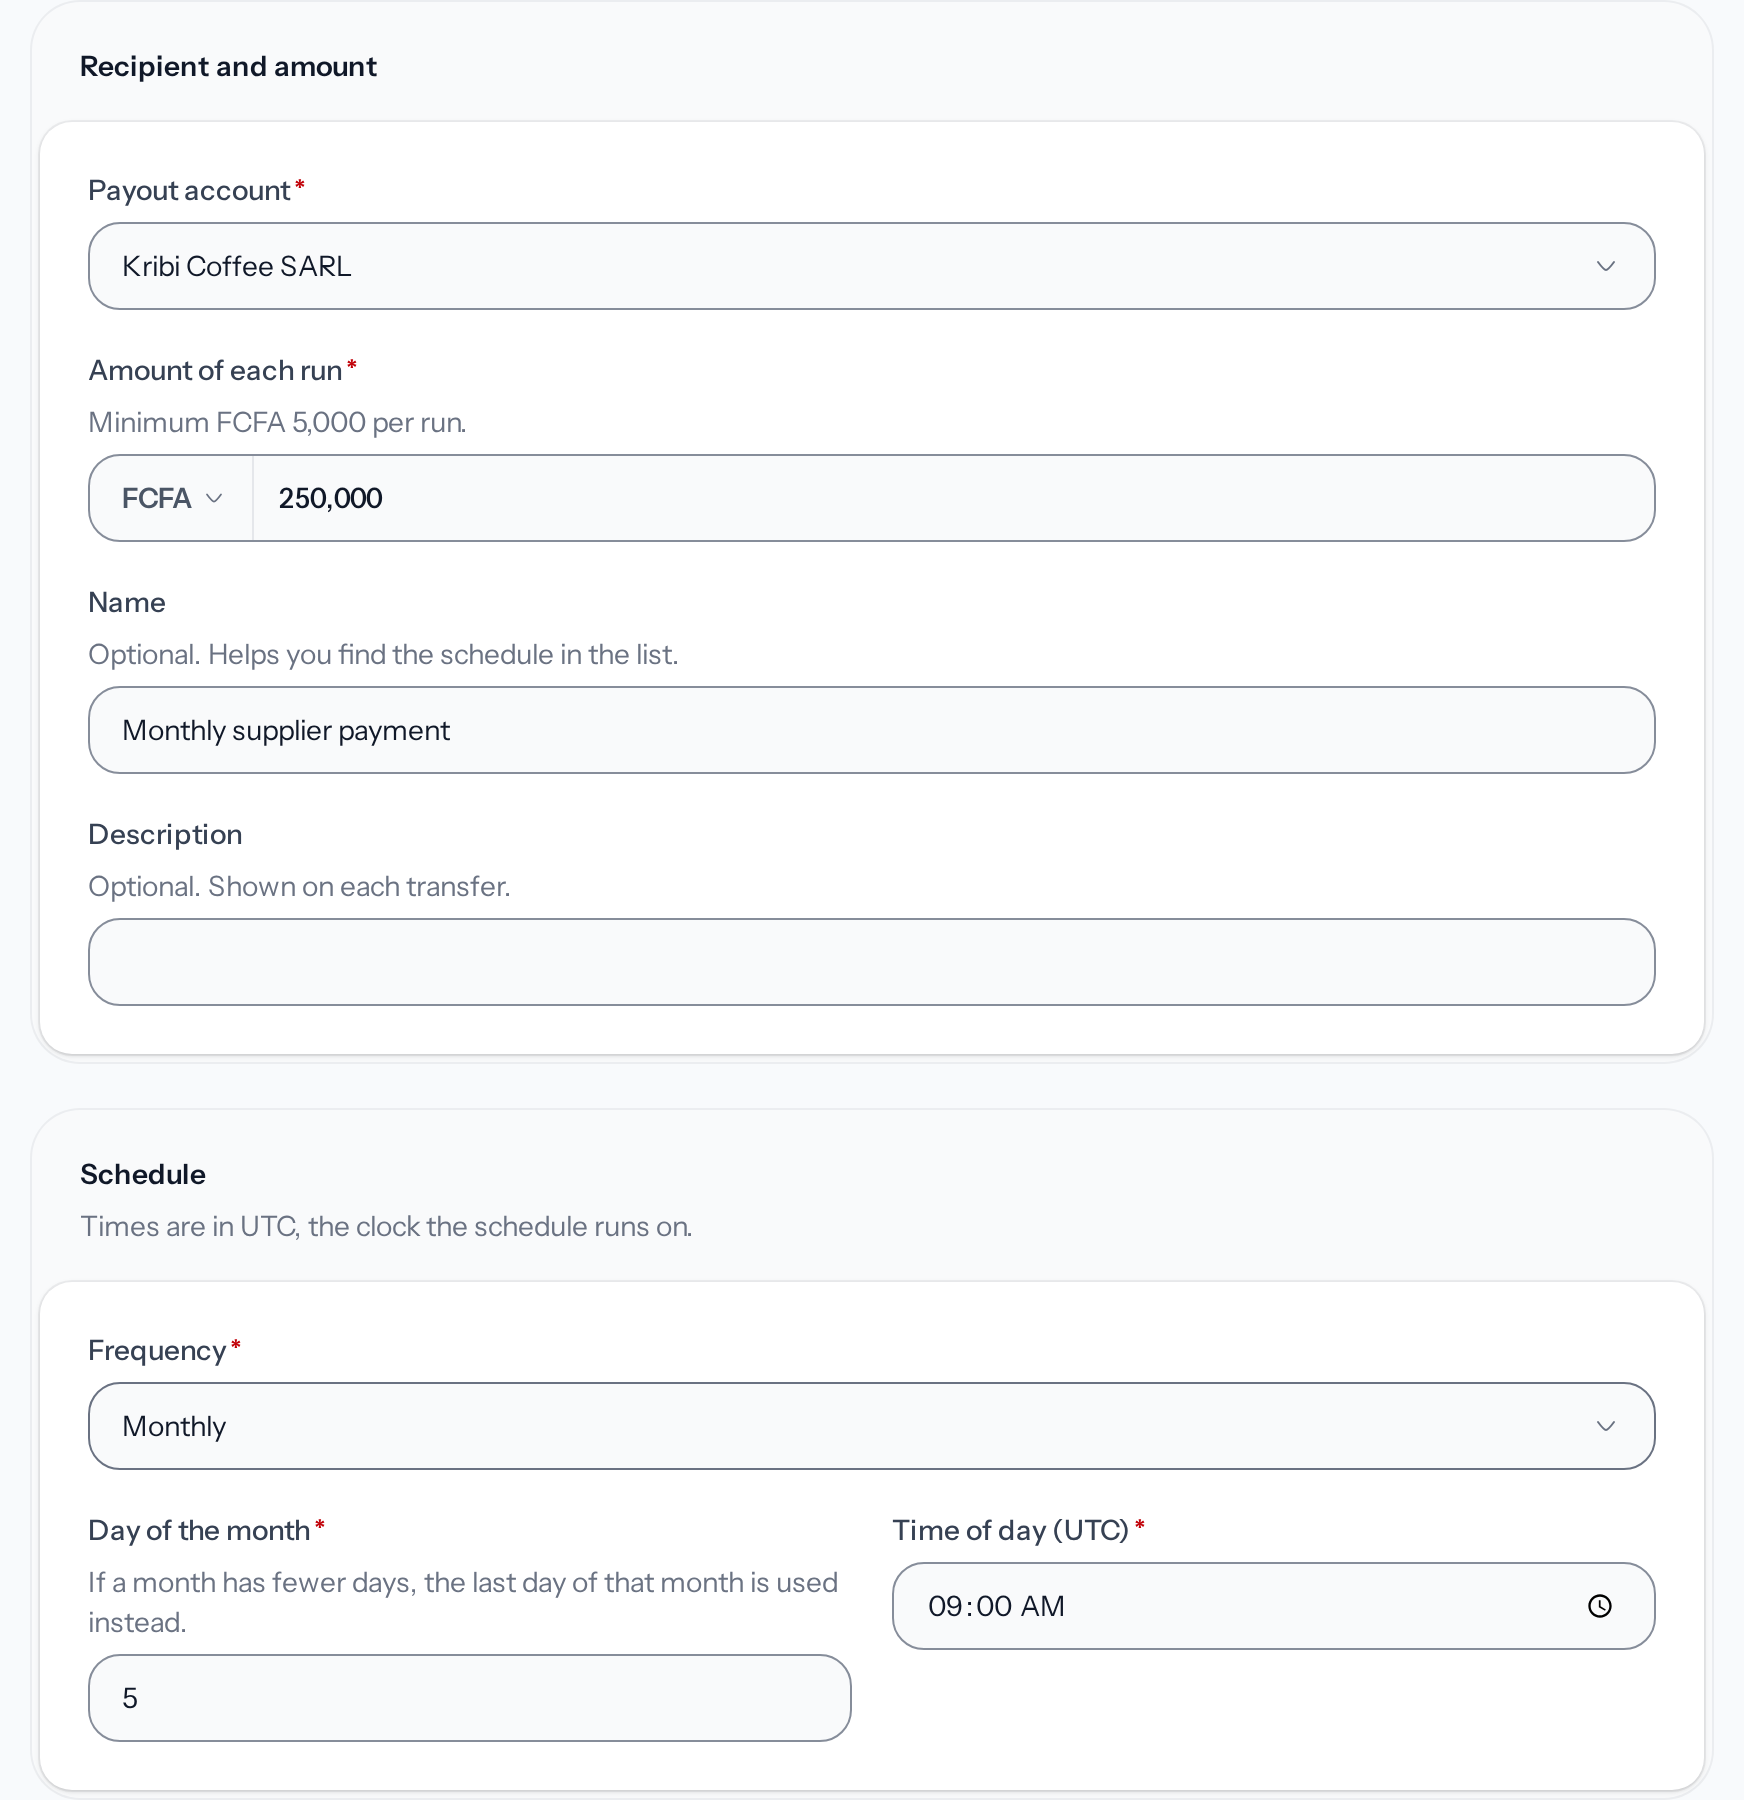
*The schedule's times are in UTC.*
4. **Check the schedule**
Choose **Review**. The step shows the recipient, the amount of each run and the rhythm again,
for example "On day 5 of every month at 09:00 UTC". **Edit details** goes back to the form.
5. **Create the schedule**
Choose **Create recurring transfer**, then enter the security code. The confirmation message
gives the date of the first send, and the schedule joins the list, **Active**.
## Track and edit a schedule
Each row of **Recurring transfers** gives the account, the amount, the rhythm, the next run and the
last one with its status. The transfers it sends carry the source **Recurring** in
[the transfers list](https://docs.wajub.com/dashboard/transfers/track#the-list).
The menu at the end of a row offers **Edit**: **Save changes** then works out the next run again
from now. **Pause schedule** stops the sends. **Resume schedule** restarts it at its next date,
without catching up on missed sends, and sets its failure count back to zero; without the plan,
the menu shows **Upgrade to resume**. **Delete schedule** stops the sends for good, and the
transfers already sent stay.
## When a run fails
A run fails when Wajub refuses the transfer, for example for lack of balance, or when **Transfers
allowed from** is set to **API only**, **Stop all transfers** is on or the amount falls outside the
limits of the [general settings](https://docs.wajub.com/dashboard/transfers/settings#general-settings). The row then
shows the number of consecutive failures and the last error, and the schedule moves on to its next
date. After three failures in a row, it becomes **Paused** and the owner receives an email. Resume
it once the cause is fixed.
If your plan no longer includes recurring transfers, your active schedules pause within a few
minutes and the owner is told. You can still see and delete them. They start again by themselves
when your plan includes them again, at their next date.
> [!NOTE]
> **Temporarily unavailable**
>
> When Wajub suspends recurring transfers, the page says so with this box: no send goes out, your
> schedules stay as they are, and each transfer that fell due in the meantime goes once when the
> service is back.
---
# Send a transfer
URL: https://docs.wajub.com/dashboard/transfers/send
> Send money from your balance to one of your payout accounts, check the fees before sending, and what gets a transfer refused.
A transfer sends money from your balance to one of your
[payout accounts](https://docs.wajub.com/dashboard/transfers/payout-accounts). To pay the same account on a fixed date,
[schedule transfers](https://docs.wajub.com/dashboard/transfers/recurring).
The owner, an Administrator, a Finance member or a custom role with **Manage transfers** can send a
transfer, on every plan. The form only exists in Live, and sending asks for the security code.
## The steps
1. **Open the form**
Open **Transfers**, then **Create transfer**. At the top, the form gives the **Available
balance**, what you can send, and the **Pending** amount, not yet available to send.
[Balance and settlements](https://docs.wajub.com/payouts/balance) explains this delay.
2. **Choose the account**
Under **Payout account**, choose the account that receives the money. Each one carries its
status, **Verified** or **Not verified**: an account that is not verified shows **This account
is not verified yet** and cannot receive the transfer. The list holds your 100 most recent
accounts.
3. **Enter the amount**
Enter the **Amount** and, if needed, change the currency. Above the field, the form shows the
minimum and the fees, which are added on top of the amount: the account receives the whole
amount entered, and your balance pays the amount plus the fees. **Description**, optional,
shows on the transfer.
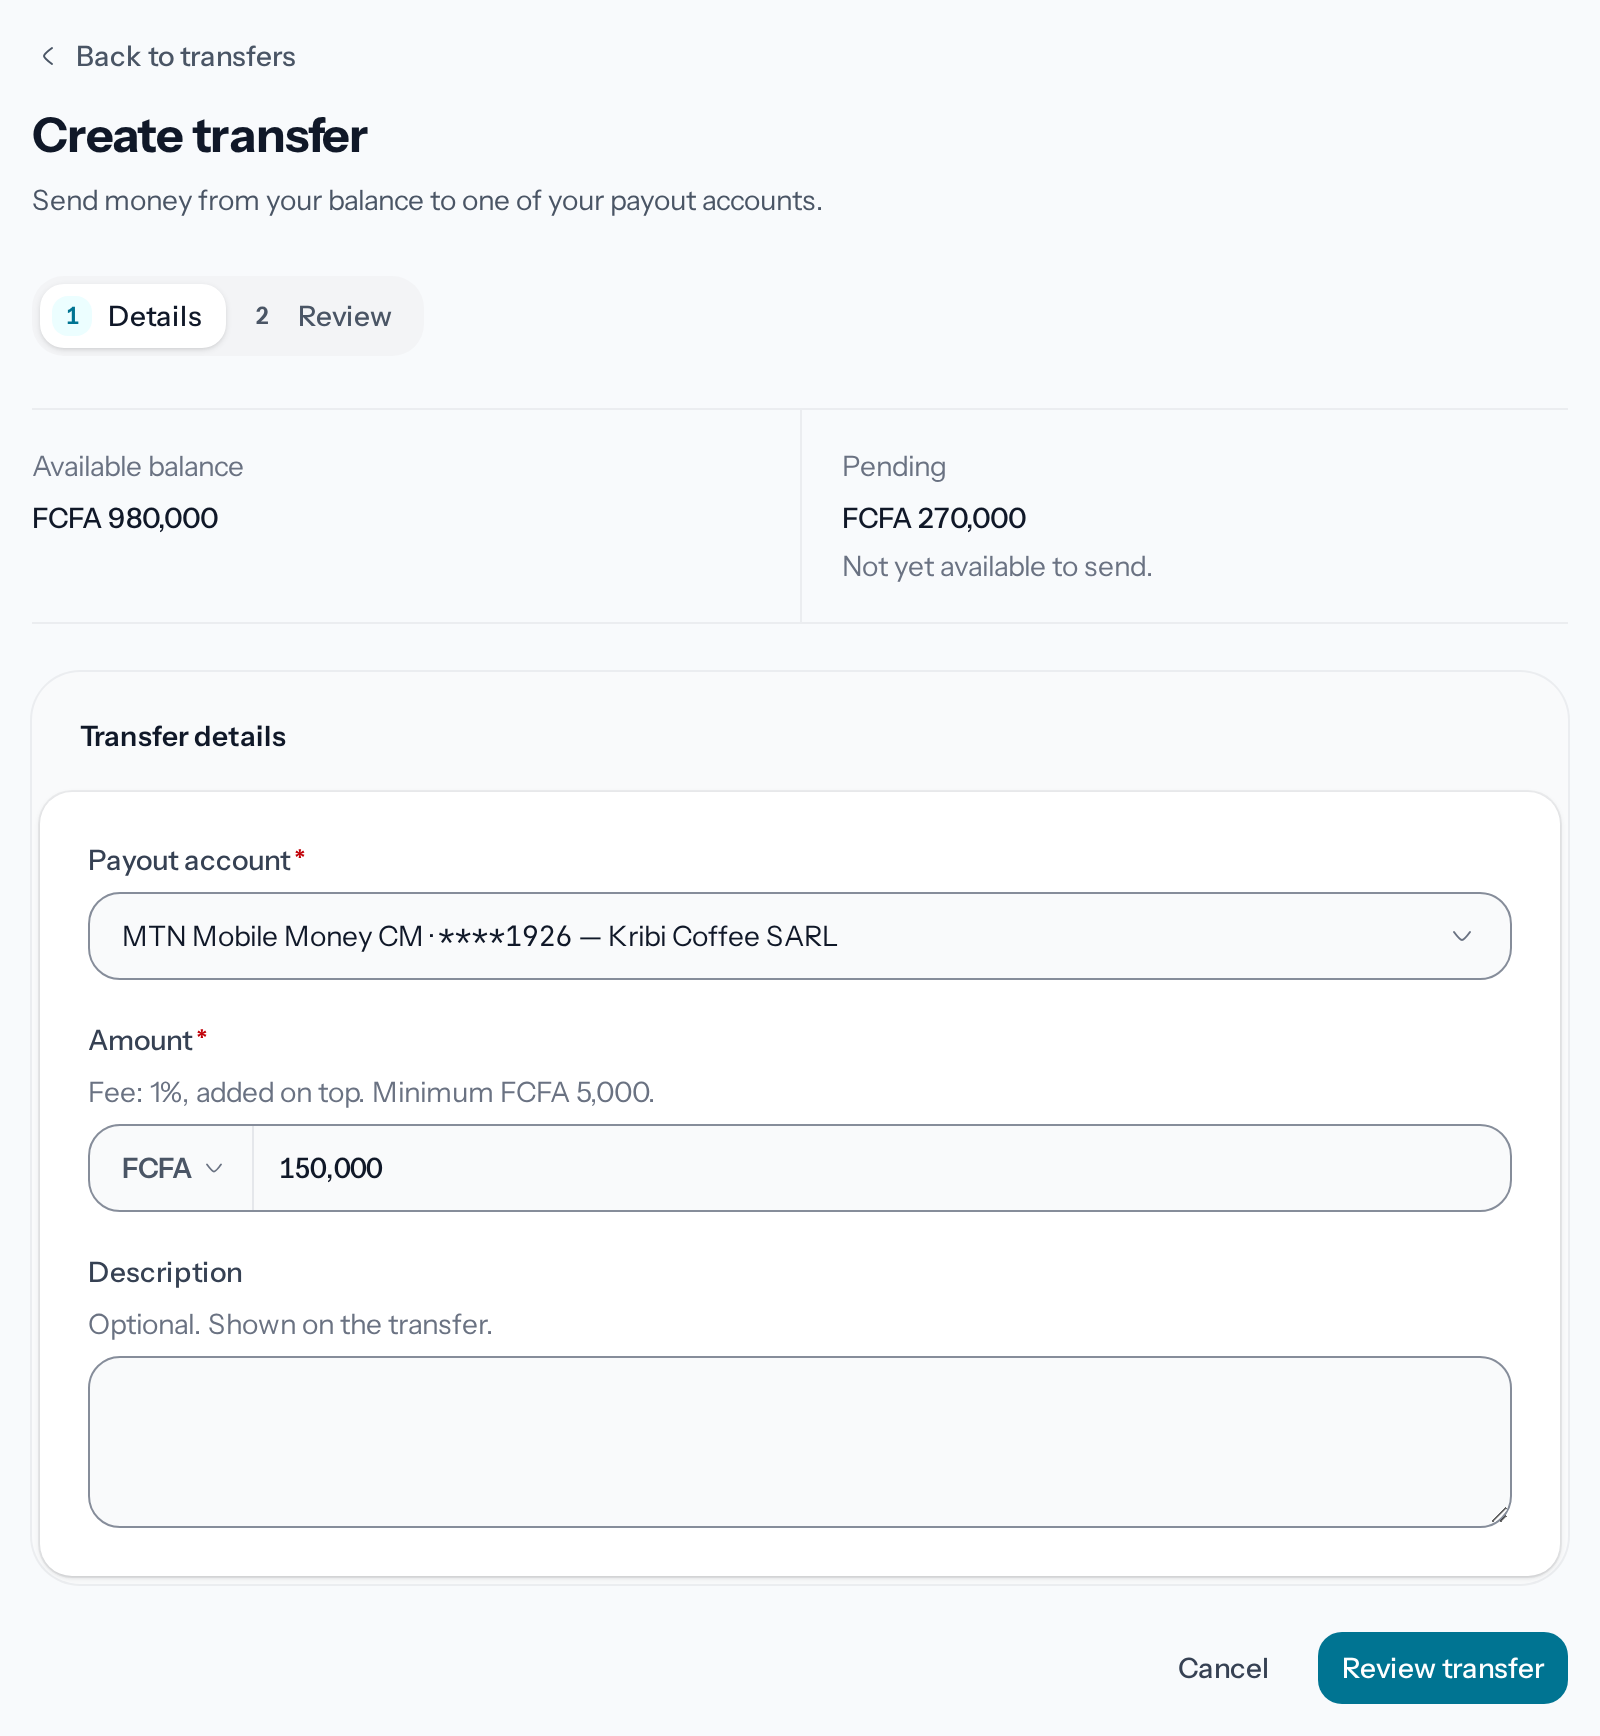
*The fees are added on top of the amount the account receives.*
4. **Review the transfer**
Choose **Review transfer**: the dashboard works out the fees and moves to the **Review** step.
**Recipient** shows the **Account holder**, the account and its **Verification** again;
**Amount** gives the amount, the fees and the total. **Edit details** goes back to the form.
5. **Send the transfer**
The button repeats the sum, for example "Send FCFA 150,000". Choose it, then enter the security
code. **Transfers** opens on "Transfer initiated.". If the transfer is held for review, its page
opens instead: [Track a held transfer](https://docs.wajub.com/dashboard/transfers/under-review) explains what
happens next.
## When sending is refused
The form shows the reason under the amount and nothing goes. The
[transfer security](https://docs.wajub.com/dashboard/transfers/settings#security-settings) settings refuse the send
when **Transfers allowed from** is set to **API only** or **Stop all transfers** is on, when
two-factor authentication is required and has not been confirmed recently, when transfers are
limited to the IP addresses on the list while the list is empty, or when the day's maximum number
or amount is reached. The amount must also stay within the limits of the
[general settings](https://docs.wajub.com/dashboard/transfers/settings#general-settings).
Wajub also refuses a transfer to an account that is not verified, and any transfer while your
balance is negative or a restriction blocks your organisation's transfers.
> [!NOTE]
> **A transfer cannot be cancelled**
>
> Once sent, it goes as it is. The one exception is a transfer whose page shows **Waiting for the
> payment method**: you can [cancel it while it waits](https://docs.wajub.com/dashboard/transfers/track#cancel-a-waiting-transfer).
> If the page seems not to respond, do not open another one: sent again from the same form, the
> transfer is not paid twice, and the form shows **A transfer was already sent from this form**.
---
# Configure transfers
URL: https://docs.wajub.com/dashboard/transfers/settings
> The general transfer settings, from the currency to the limits and the emails, and the security settings that decide where a transfer can come from.
**Settings › Transfers** brings together, in the **General** and **Security** tabs, the rules all
your transfers follow. The other two tabs have their own page:
[Payout accounts](https://docs.wajub.com/dashboard/transfers/payout-accounts) and
[Recurring transfers](https://docs.wajub.com/dashboard/transfers/recurring).
The owner, an Administrator or a custom role with **Manage settings** changes these settings, on
every plan. A Finance member does not open this page. It only exists in Live. Saving the
**Security** tab asks for the security code; the **General** tab does not.
## General settings
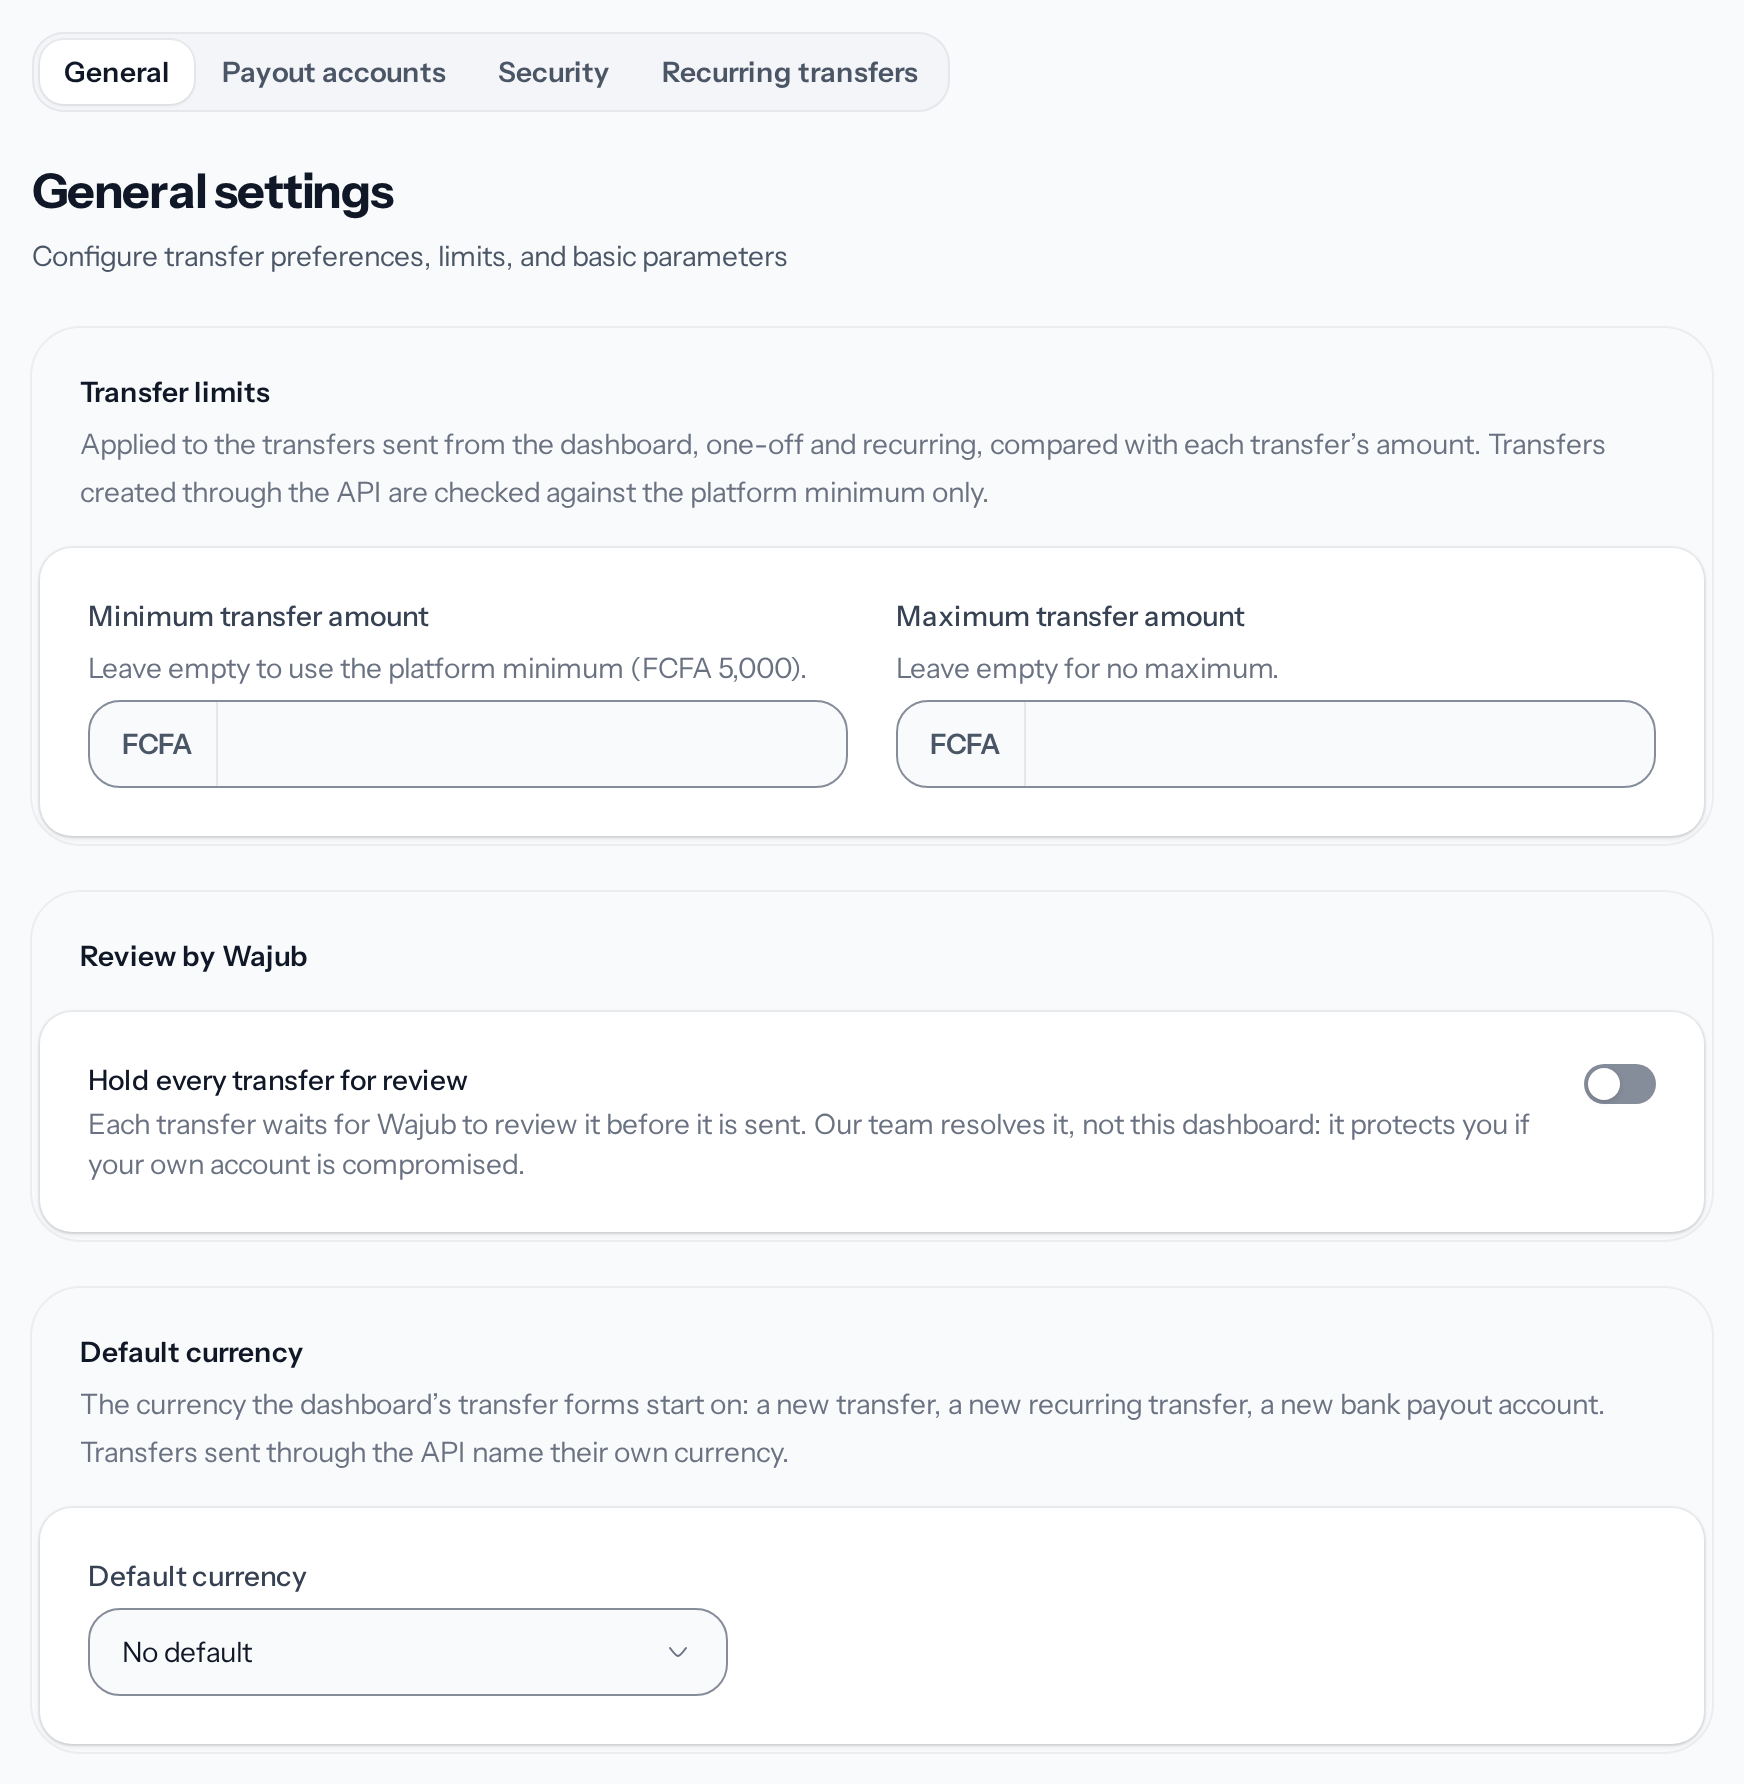
*The General tab saves without a security code.*
Under **Transfer limits**, **Minimum transfer amount**, left empty, uses Wajub's minimum; **Maximum
transfer amount**, left empty, sets no ceiling. These limits apply to dashboard transfers, one-off
and recurring. API transfers are only compared with Wajub's minimum.
Under **Review by Wajub**, **Hold every transfer for review** makes each transfer wait for the
Wajub team's decision before it is sent. **No review under this amount**, optional, exempts small
amounts, which can still be held for another reason:
[Track a held transfer](https://docs.wajub.com/dashboard/transfers/under-review).
**Default currency** is the currency the transfer, recurring transfer and bank payout account forms
open on. Transfers sent through the API name their own currency.
**Transfers that cannot go out** applies to every Live transfer, from the dashboard or the API,
except [automatic payouts](https://docs.wajub.com/dashboard/transfers/payout-accounts#automatic-payouts) to your own
account:
- **Cancel unsent transfers after (hours)**, from 1 to 168, 24 by default: a transfer no operator
has received after that time, because it is still waiting for your confirmation or for its place
in the queue, is cancelled and its amount returns to the balance.
- **Retry once a transfer refused for a temporary reason**, off by default: when every operator
refuses a transfer for a passing reason on their side, such as being unavailable or out of funds,
it goes again once, 10 minutes later. An invalid account, a limit or your balance are never
retried.
Under **Emails**, **Send transfer emails**, on by default, notifies you when a dashboard transfer
goes out, and when a Live transfer fails or is cancelled after the delay above. The email goes to
the owner, Administrators and Finance members, except those who turned these emails off in their
preferences. Security emails are always sent.
**Save changes** applies the tab.
## Security settings
Under **Who can send transfers**, **Transfers allowed from** offers three choices:
| Choice | Effect |
| --------------------- | ------------------------------------------------------------------------------------------------------ |
| **API and dashboard** | Your integration and the dashboard send transfers. |
| **API only** | The dashboard refuses any send, one-off or recurring. |
| **Dashboard only** | Wajub refuses Live transfers created through the API, with the error transfers\_disabled\_for\_source. |
**Stop all transfers** refuses every Live transfer, from the dashboard as from the API, one-off or
recurring, until you turn it off. [Automatic payouts](https://docs.wajub.com/dashboard/transfers/payout-accounts#automatic-payouts) to your own account, if you
turned them on, continue. The dashboard asks for
confirmation before saving.
The other settings add checks:
- **Require two-factor authentication for transfers**: a dashboard transfer needs a recent
two-factor authentication.
- **Review transfers from this amount**: from this amount, the transfer waits for Wajub's review.
- **Maximum transfers per day** and **Maximum amount per day**: beyond them, Wajub refuses the
transfer, whether it comes from the dashboard, a schedule or the API. The amount is entered in
XAF, and other currencies are converted at the current rate.
- **Allow transfers from listed IP addresses only**: a dashboard transfer must come from an address
on the organisation's list, and it is refused while the list is empty. **Edit the IP allowlist**
opens [Restrict IP addresses](https://docs.wajub.com/dashboard/settings/security#restrict-ip-addresses).
Under **Threat detection**, **Anomaly detection is always on** recalls that Wajub holds a first
transfer, or an amount far above the usual, on every account.
> [!NOTE]
> **A setting with no effect**
>
> **Require beneficiary verification** changes nothing: Wajub already refuses any transfer to an
> account that is not verified, whether the box is ticked or not.
---
# Track your transfers
URL: https://docs.wajub.com/dashboard/transfers/track
> Read the transfers list, its figures and its filters, what a transfer's page shows, leave notes on it, cancel a waiting transfer and export transfers.
**Transfers** lists every transfer that left your balance: from the dashboard, through a recurring
transfer schedule or through your integration.
The owner, an Administrator, a Finance member, an Analyst, a Viewer or a custom role with **View
transfers** opens the list and the transfers, in Sandbox as in Live. Exporting, writing a note and
cancelling a waiting transfer require **Manage transfers** and Live. Cancelling does not ask for
the security code.
## The list
At the top, four figures: the **Available balance**, the transfers **In progress**, with the number
held for review when there are some, the **Completed** amount and the number of **Failed**
transfers, failed or cancelled. The last three compare the last 15 days with the 15 before, and
clicking one of them filters the list.
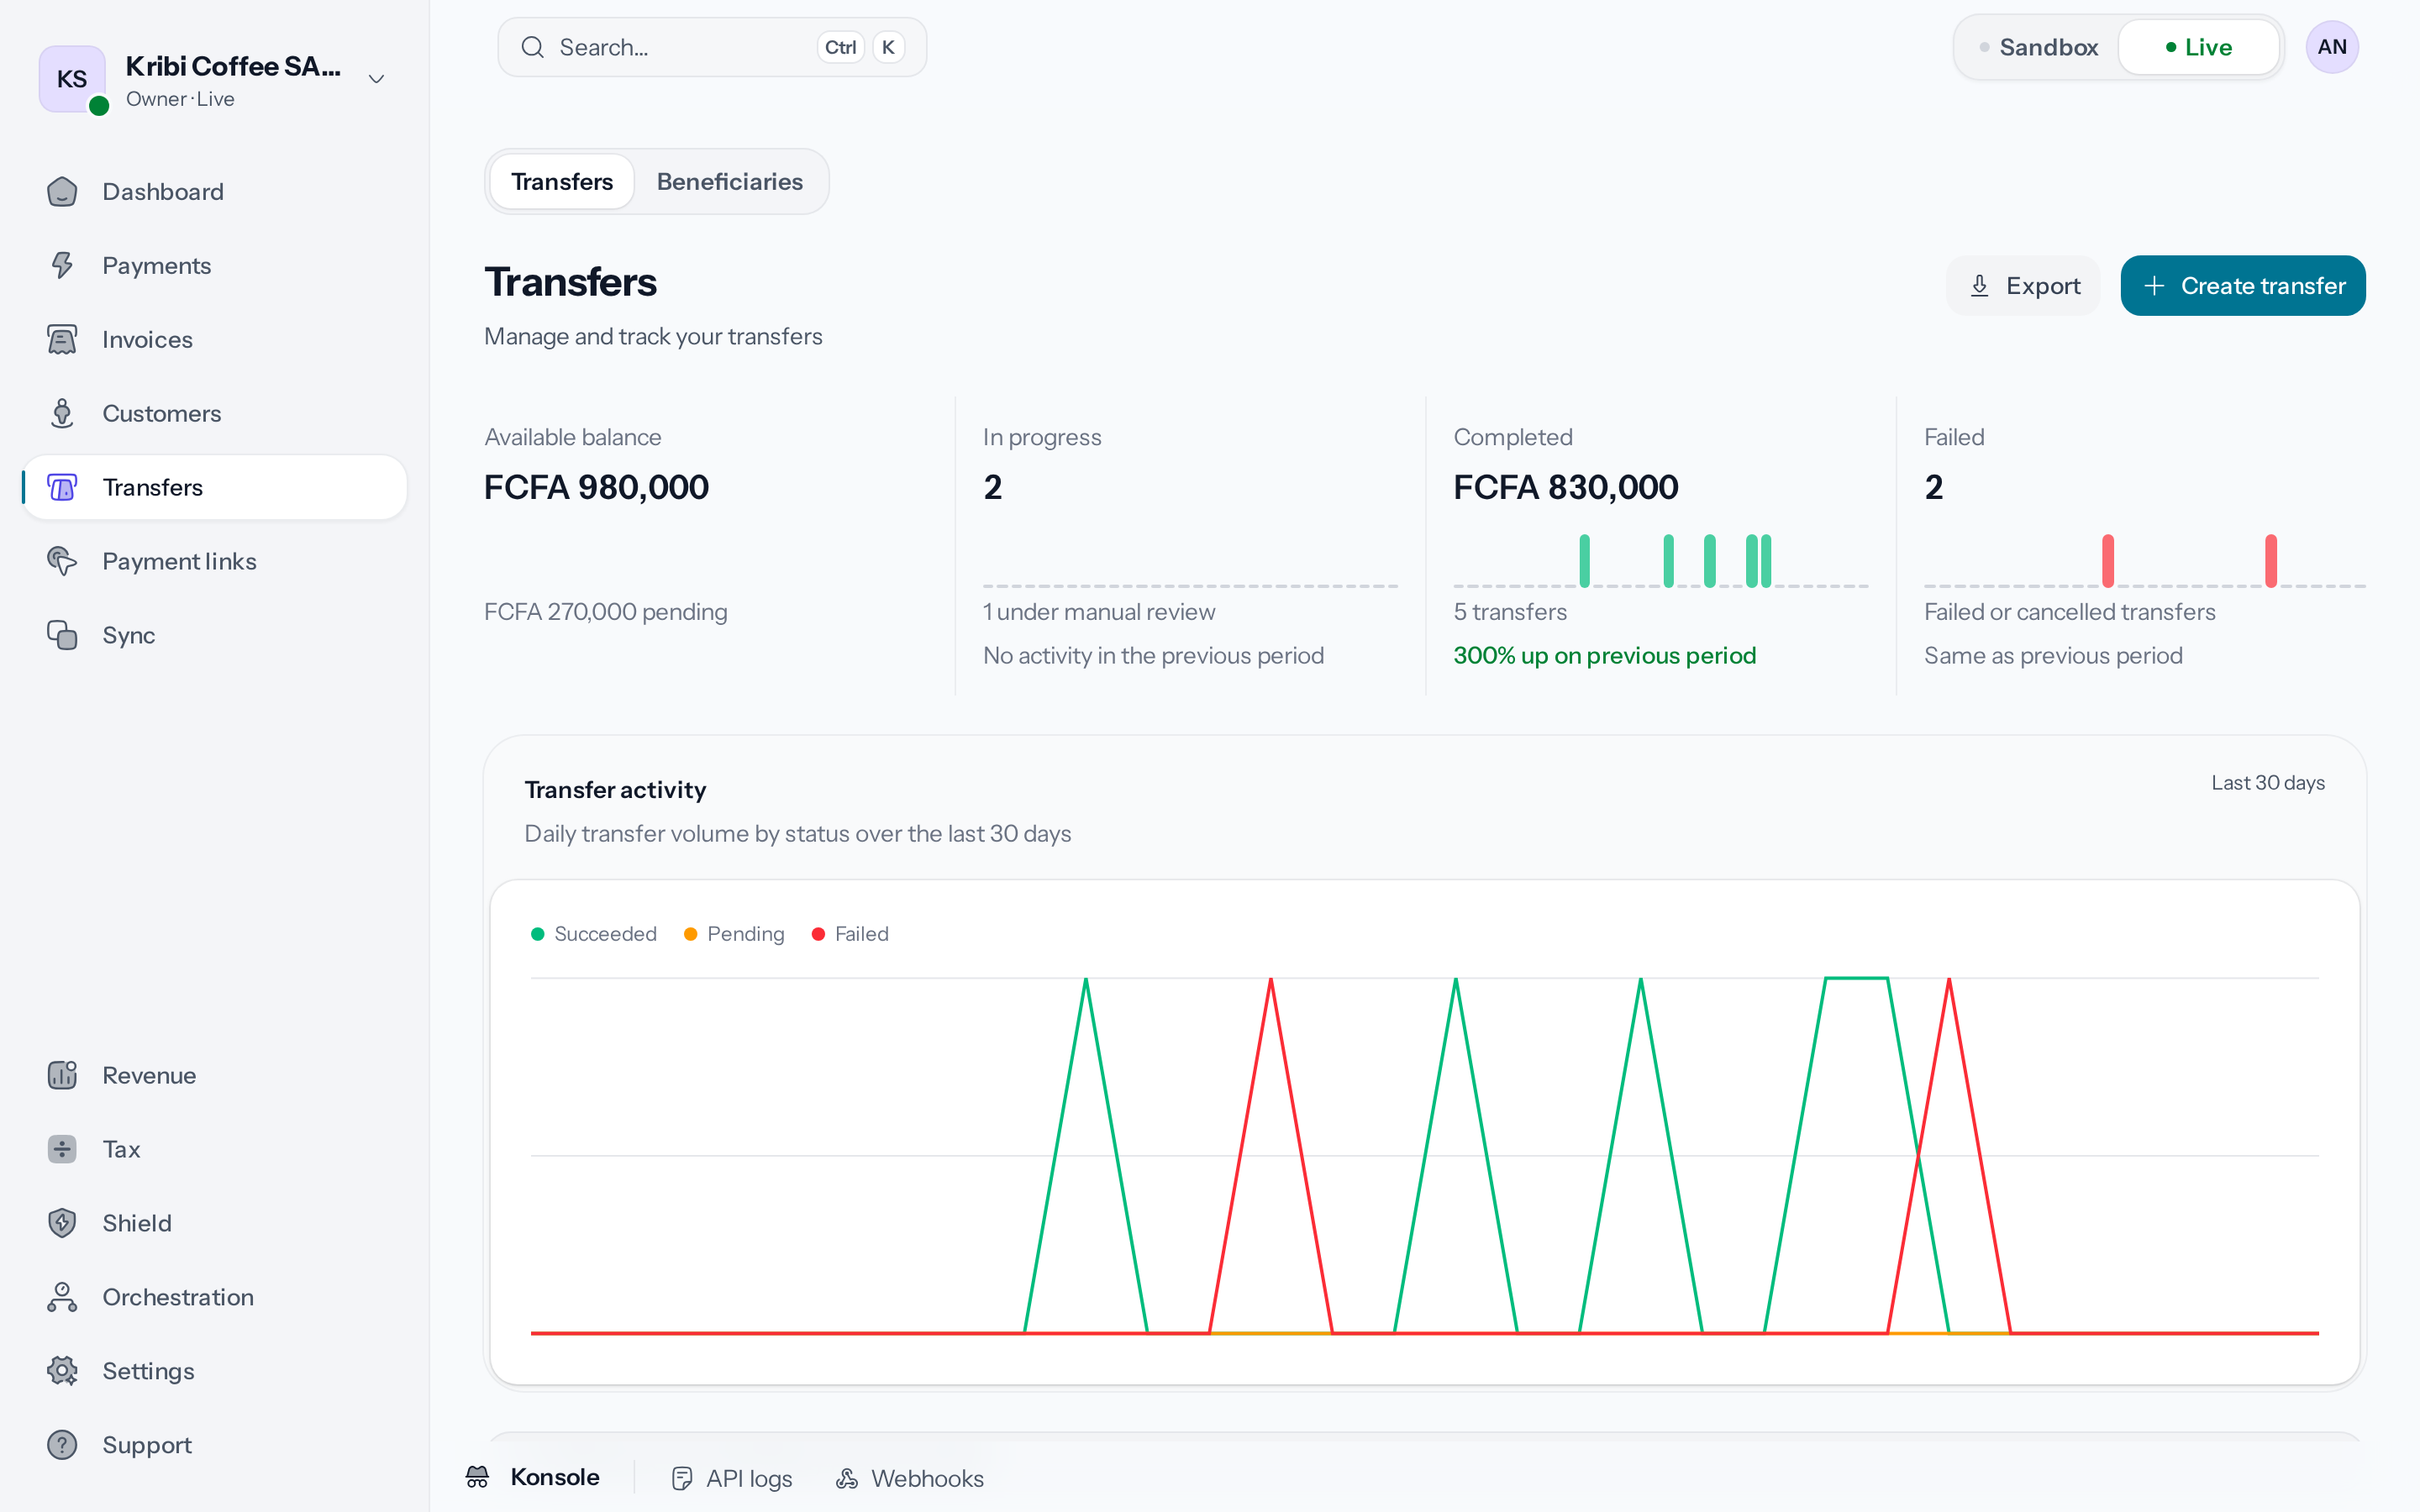
*Clicking In progress, Completed or Failed filters the list.*
The filters cover the **Transfer date**, the **Status**, the **Amount**, the **Currency**, the
**Provider** and the **Source**: API, **Dashboard**, **Recurring**, Webhook or **Third party**.
The menu at the end of a row offers **Open transfer**, **Copy transfer ID** and **View
beneficiary**.
| Status | What it means |
| ------------------------- | ------------------------------------------------------------------------------------------------------------------------------------ |
| **Pending** | Created, not yet handed to the operator or the bank. |
| **Under review** | Held for review by Wajub: [Track a held transfer](https://docs.wajub.com/dashboard/transfers/under-review). |
| **Processing** | Handed to the operator or the bank, which has not confirmed it yet, or [waiting for its payment method](#cancel-a-waiting-transfer). |
| **Succeeded** | The operator or the bank confirmed the send. |
| **Failed**, **Cancelled** | Nothing went, and the amount returns to the available balance. |
## The transfer page
The header gives the amount, the status, the **Transfer ID** to copy for support, then the
beneficiary, their **Payment method** and the source, under **Sent from**. A failed transfer shows
**Transfer failed** with its reason. For a bank transfer, the **Bank transfer** box gives the date
by which Wajub sends it, then, once the transfer has gone, its date and the bank reference.
Then come the **Transfer details**, the **Amount breakdown**, where the fees are added on top of
the amount received, and the **History**, which follows each step and each attempt with an
operator. In Live, the history's **Internal note** field leaves an instruction for the team, with
**Add note**: only your members see notes. A note's menu offers **Pin note**, which keeps it under
**Pinned notes**, and **Delete note**.
## Cancel a waiting transfer
When its payment method is temporarily unavailable, a transfer stays **Processing** and its page
shows **Waiting for the payment method**, as does its **History**. It leaves on its own as soon as
the method is back, and its amount stays reserved until then.
In Live, to stop it meanwhile, click **Cancel transfer** in that box. **Cancel this transfer?**
asks you to confirm: **Cancel transfer** cancels it, **Keep waiting** leaves it as it is. The
transfer becomes **Cancelled**, the beneficiary receives nothing, and its amount is available in
your balance again. If it left in the meantime, the cancellation is refused and the transfer goes
on.
## Export transfers
In Live, **Export**, at the top of the list, opens **Export transfers**: the file holds the
transfers the list shows with its filters. To export only some, tick them, up to 100, then
**Export** in the bottom bar, which opens **Export the selected transfers**. The same bar offers
**Copy IDs**. Each export counts towards the monthly limit of the **Pay as you go** plan.
---
# Track a held transfer
URL: https://docs.wajub.com/dashboard/transfers/under-review
> Why Wajub holds a transfer for review, what you see in the meantime, what happens when it is accepted or rejected, and how to confirm an older pending transfer.
Before it goes, a transfer can be held for review by the Wajub team. It then stays **Under review**
until the decision, which the dashboard cannot take: that is what protects you if your own account
is compromised.
Everyone who sees transfers can follow a held transfer. Confirming or rejecting an older transfer
**Awaiting confirmation** requires **Manage transfers** and Live, and only confirming asks for the
security code.
## Why a transfer is held
Wajub holds a transfer in Live, whether it comes from the dashboard, a schedule or your
integration. A first transfer, or one far above your usual amounts, is held for Wajub review, on
every account. A transfer is also held in these cases:
- a restriction placed by Wajub on your organisation, which subjects its transfers to review;
- **Hold every transfer for review** turned on in your
[general settings](https://docs.wajub.com/dashboard/transfers/settings#general-settings), except under the amount
chosen in **No review under this amount**;
- an amount equal to or above **Review transfers from this amount**, in your
[security settings](https://docs.wajub.com/dashboard/transfers/settings#security-settings).
## While it is under review
Right after sending, the transfer's page opens on "This transfer was flagged and is awaiting review
before it can proceed.". In **Transfers**, the **In progress** figure says how many transfers are
held, for example "2 under manual review", and the **Status** filter finds them. Its amount stays
reserved on your balance. A transfer under review is never cancelled by the delay in
[Transfers that cannot go out](https://docs.wajub.com/dashboard/transfers/settings#general-settings): that delay only
counts from its approval.
## Wajub's decision
Accepted, the transfer goes to the operator or the bank and becomes **Processing**, then
**Succeeded**. Rejected, it becomes **Failed**, and its amount returns to the available balance.
## Confirm an older transfer
When a transfer's page shows the **Awaiting confirmation** box, the transfer stays **Pending**
until you confirm or reject it.
**Confirm transfer** opens a window titled with the amount and the beneficiary, for example "Send
FCFA 150,000 to Kribi Coffee SARL?", then asks for the security code. The transfer
then goes through the same checks as a new one: it goes, it is held for review in turn, or it is
refused and keeps waiting. **Reject transfer** asks for a **Rejection reason**, with no code: the
transfer becomes **Cancelled** and its amount returns to the available balance. Without an answer,
it is cancelled at the end of the **Transfers that cannot go out** delay.
---
# Automate your transfers
URL: https://docs.wajub.com/dashboard/use-cases/automatic-payouts
> Receive your money without thinking about it, by linking your payout account and then scheduling a transfer of the same amount every day, every week or every month.
A recurring transfer sends the same amount from your balance to your account on fixed dates: you no
longer have to think about paying yourself. Each step links to the page that covers it in detail.
The owner, an Administrator or a custom [role](https://docs.wajub.com/dashboard#roles) with **View settings** and **Manage
settings** can follow the whole path; a Finance member sends transfers by hand, but creates neither
payout accounts nor schedules. Recurring transfers need the **Growth** plan or a plan above it.
Everything happens in [Live](https://docs.wajub.com/dashboard#sandbox-and-live), and adding the account, having it
verified and creating the schedule ask for the [security code](https://docs.wajub.com/dashboard#the-security-code).
## The steps
1. **Add your payout account**
Link the Mobile Money number or the bank account that will receive the money:
[Link a payout account](https://docs.wajub.com/dashboard/transfers/payout-accounts#the-steps).
2. **Get the account verified**
A transfer, recurring or not, only goes to a **Verified** account:
[Get the account verified](https://docs.wajub.com/dashboard/transfers/payout-accounts#verify-the-account).
3. **Choose an amount your balance covers**
Each transfer sends the same amount, whatever your sales: choose it so that your available
balance covers it on every date, otherwise the transfer fails. See
[When a run fails](https://docs.wajub.com/dashboard/transfers/recurring#when-a-run-fails).
4. **Schedule the transfer**
Create the schedule with this account, this amount and the frequency you want:
[Schedule transfers](https://docs.wajub.com/dashboard/transfers/recurring#the-steps).
5. **Keep an eye on the transfers**
The list of schedules shows the next run and the status of the last one; a schedule that fails
several times in a row pauses itself:
[Track and edit a schedule](https://docs.wajub.com/dashboard/transfers/recurring#manage-a-schedule).
---
# Bill a customer
URL: https://docs.wajub.com/dashboard/use-cases/bill-a-customer
> Bill a customer in one go, in several instalments or every month, let the email reminders go out and record a payment received in cash or by bank transfer.
An invoice is for one specific customer, who receives it by email with a link to pay it online.
Each step links to the page that covers it in detail.
The owner, an Administrator, a Finance member or a custom [role](https://docs.wajub.com/dashboard#roles) with **Manage
invoices** can follow the whole path, in [Live](https://docs.wajub.com/dashboard#sandbox-and-live). A Finance member can
open **Customers** but enters the customer on the invoice: adding one there needs **Manage
customers**. Only the owner and Administrators can make an invoice recurring, from the **Growth**
plan up; the **Pay as you go** plan allows 10 invoices in all. No
[security code](https://docs.wajub.com/dashboard#the-security-code) is asked for.
## The steps
1. **Add the customer**
Add them in **Customers**: [Add a customer](https://docs.wajub.com/dashboard/customers/add). You can also enter them
directly on the invoice.
2. **Create the invoice**
Open **Invoices › Create invoice**, then choose the customer and add the lines:
[Create and send an invoice](https://docs.wajub.com/dashboard/invoices/create#the-steps).
3. **Choose the payment schedule**
Under **How the customer pays**, keep **In one payment**, or choose **In installments** to
[split the total](https://docs.wajub.com/dashboard/invoices/installments). To bill every month, make the invoice
[recurring](https://docs.wajub.com/dashboard/invoices/recurring): each copy waits as a draft until you send it.
4. **Send the invoice**
Create and send the invoice: the customer receives the PDF and a button to pay.
[What the customer receives](https://docs.wajub.com/dashboard/invoices/create#what-the-customer-receives).
5. **Track the invoice**
The invoice page shows what is paid and what is still due. With a due date, the customer gets
email reminders without you having to do anything:
[Track and chase an invoice](https://docs.wajub.com/dashboard/invoices/track-and-remind).
6. **Record a payment made outside Wajub**
If the customer pays in cash or by bank transfer, record it on the invoice:
[Record a payment received](https://docs.wajub.com/dashboard/invoices/record-payment).
---
# Sell a digital product
URL: https://docs.wajub.com/dashboard/use-cases/digital-products
> Sell a course, an e-book or a file with a payment link, and let Wajub send the customer their access after each payment.
A **Sell something** link of the **Digital content** kind takes the payment, then sends the
customer access to your course, your e-book or your file by itself. Each step links to the page
that covers it in detail.
Like any payment link, it needs **Manage payment links** ([roles](https://docs.wajub.com/dashboard#roles)) and
[Live](https://docs.wajub.com/dashboard#sandbox-and-live), with no
[security code](https://docs.wajub.com/dashboard#the-security-code). A download link to your own address works with
every plan; a file hosted by Wajub needs the **Growth** plan or a plan above it.
## The steps
1. **Choose Digital content**
Create a **Sell something** link of the **Digital content** kind, or start from the **Online
course or e-book** template: [Sell something](https://docs.wajub.com/dashboard/payment-links/sell-something#the-steps).
2. **Choose how the customer gets the content**
Under **How the customer gets it**, choose **A download link** or **A file hosted by Wajub**,
and set how long access lasts:
[Digital content](https://docs.wajub.com/dashboard/payment-links/sell-something#digital-content).
3. **Share the link**
Send the address to your followers or put a button on your site:
[Share a link](https://docs.wajub.com/dashboard/payment-links/share).
4. **Track the sales**
The link's **Payments** tab lists each sale, and its **Customers** tab each buyer:
[Track a link](https://docs.wajub.com/dashboard/payment-links/track#payments).
---
# Raise money for a cause
URL: https://docs.wajub.com/dashboard/use-cases/fundraising
> Receive donations or fund a project for an association, a church or a cause with a payment link, show the donors and tell people what the money is for.
A donation or fundraising link lets everyone give the amount they choose, and its page can show who
has already given. Each step links to the page that covers it in detail.
Creating the link, posting news and exporting the donors need **Manage payment links**; anyone
who can see payment links can follow the fundraising ([roles](https://docs.wajub.com/dashboard#roles)). The **Pay as you
go** plan allows 25 links. Everything happens in [Live](https://docs.wajub.com/dashboard#sandbox-and-live), with no
[security code](https://docs.wajub.com/dashboard#the-security-code).
## The steps
1. **Choose the type of link**
**Receive donations** accepts gifts with no target, such as an offering or support for an
association; **Raise funds** aims for an amount, with a progress bar and an end date if you
want one. See [The four link types](https://docs.wajub.com/dashboard/payment-links/create#the-four-types).
2. **Create the link**
Follow [Receive donations](https://docs.wajub.com/dashboard/payment-links/donations#the-steps) or
[Raise funds](https://docs.wajub.com/dashboard/payment-links/raise-funds#the-steps).
3. **Show the donors**
When you create the link, choose under **What the page shows** whether the latest donors and
the total appear. On a donation link, anyone can also give without showing their name:
[Anonymous gifts](https://docs.wajub.com/dashboard/payment-links/donations#anonymous-gifts).
4. **Share the link**
Send the address to your groups or print the QR code for the place of worship or the event:
[Share a link](https://docs.wajub.com/dashboard/payment-links/share#the-steps).
5. **Post news**
Tell people on the page what the money received is used for:
[After publishing](https://docs.wajub.com/dashboard/payment-links/raise-funds#after-publishing).
6. **Follow the fundraising**
The link's page shows the amount raised and the number of donors:
[Track a link](https://docs.wajub.com/dashboard/payment-links/track#what-the-link-gathered).
7. **Thank the donors**
Export the **Donors** tab to get each donor's name and email, even those who gave
anonymously: [Customers and export](https://docs.wajub.com/dashboard/payment-links/track#people-and-export).
---
# Prepare your accounting
URL: https://docs.wajub.com/dashboard/use-cases/monthly-accounting
> Export the payments, refunds, transfers and invoices each month, along with the revenue report and the Wajub invoices, to hand to your accountant.
Once a month, gather in a few files what your accountant asks for: what you collected, refunded,
transferred and invoiced, and what Wajub invoiced you. Each step links to the page that covers it
in detail.
Exports only exist in [Live](https://docs.wajub.com/dashboard#sandbox-and-live). The owner, an Administrator or a
Finance member can make every export on this page; an Analyst can only make the revenue one
([roles](https://docs.wajub.com/dashboard#roles)). Wajub invoices need **Manage
account**: the owner, an Administrator or a custom role that has it. On the **Pay as you go**
plan, each export counts towards the limit of 10 a month, across every export in the dashboard,
and this path uses up to five of them. No
[security code](https://docs.wajub.com/dashboard#the-security-code) is asked for.
## The steps
1. **Export the month's payments**
Export the **Payments** list with the first and the last day of the month as the period:
[Export payments](https://docs.wajub.com/dashboard/payments/find#export).
2. **Export the refunds**
Do the same in the **Refunds** tab:
[Export refunds](https://docs.wajub.com/dashboard/payments/track-refunds#export).
3. **Export the transfers**
Filter **Transfers** on the month's **Transfer date**, then export:
[Export transfers](https://docs.wajub.com/dashboard/transfers/track#export-transfers).
4. **Export your invoices**
If you invoice your customers, export the month's invoices:
[Export invoices](https://docs.wajub.com/dashboard/invoices/export-and-bulk#export-invoices).
5. **Export the revenue report**
In **Revenue**, set the **Period** to the month, then export **Overview** as Excel or PDF:
[Track your revenue](https://docs.wajub.com/dashboard/home/revenue#export-a-report).
6. **Download your Wajub invoices**
Get the invoices for your plan and your usage:
[Download an invoice](https://docs.wajub.com/dashboard/subscription/wajub-invoices#download-an-invoice).
---
# Organise an event
URL: https://docs.wajub.com/dashboard/use-cases/paid-event
> Sell seats for a concert, a training or a gala with a payment link, follow the sales and check people in with the attendee list.
A **Sell tickets** link sells your seats online and keeps the attendee list for the day of the
event. Each step links to the page that covers it in detail.
Creating, exporting and archiving the link need **Manage payment links**; anyone who can see
payment links can follow the sales ([roles](https://docs.wajub.com/dashboard#roles)). The **Pay as you go** plan allows
25 links. Everything happens in [Live](https://docs.wajub.com/dashboard#sandbox-and-live), with no
[security code](https://docs.wajub.com/dashboard#the-security-code).
## The steps
1. **Create the ticketing link**
Create a **Sell tickets** link with your ticket types:
[Sell tickets](https://docs.wajub.com/dashboard/payment-links/sell-tickets#the-steps).
2. **Ask for the attendees' names**
To check people in by name, ask at least for each attendee's name when you create the link,
at the "Ask for attendee details" step of
[Sell tickets](https://docs.wajub.com/dashboard/payment-links/sell-tickets#the-steps).
3. **Share the link**
Send the address by WhatsApp or SMS, or print the link's QR code on your posters:
[Share a link](https://docs.wajub.com/dashboard/payment-links/share#the-steps).
4. **Follow the sales**
The link's page counts the tickets sold and the tickets left:
[Track a link](https://docs.wajub.com/dashboard/payment-links/track#what-the-link-gathered).
5. **Export the attendee list**
The day before, export the **Attendees** tab to have the list at the entrance:
[On the day](https://docs.wajub.com/dashboard/payment-links/sell-tickets#on-the-day). Wajub does not send group
messages to buyers; to write to them, use the emails in this export.
6. **Check people in with the list**
Wajub does not scan tickets: at the entrance, find each buyer in the list. A purchase of
several seats gets a single QR code, so check in the list how many seats it covers. See
[On the day](https://docs.wajub.com/dashboard/payment-links/sell-tickets#on-the-day).
7. **Archive the link**
After the event, [archive the link](https://docs.wajub.com/dashboard/payment-links/edit-offline-delete#offline-or-archive)
to remove it from the list of links.
---
# Sell on social media
URL: https://docs.wajub.com/dashboard/use-cases/social-selling
> Sell an item, a file or a service in a WhatsApp chat or a Facebook or Instagram post with a payment link, then deliver and get the money.
A payment link gives what you sell a page where people pay: you paste its address into a chat, a
post or your bio, and the customer pays from their phone. Each step links to the page that covers
it in detail.
Creating the link and exporting its customers need **Manage payment links**, and the **Pay as you
go** plan allows 25 links. To get the money, a Finance member can send the transfer, but only the
owner, an Administrator or a custom [role](https://docs.wajub.com/dashboard#roles) with **View settings** and **Manage
settings** can add the payout account. Everything happens in [Live](https://docs.wajub.com/dashboard#sandbox-and-live),
and both the account and the transfer ask for the [security code](https://docs.wajub.com/dashboard#the-security-code).
## The steps
1. **Create the link**
Create a **Sell something** link, as a **Physical item**, **Digital content** or **Service**
depending on what you sell: [Sell something](https://docs.wajub.com/dashboard/payment-links/sell-something).
2. **Share the address**
Send the address into the chat or the post from the share window:
[Share a link](https://docs.wajub.com/dashboard/payment-links/share#the-steps). Instagram is not in it: copy the
address and paste it into your bio, a story or a message.
3. **Check the payment before you deliver**
Deliver once the payment shows as **Succeeded** in the link's **Payments** tab, never on the
strength of a screenshot sent by the customer: [Track a link](https://docs.wajub.com/dashboard/payment-links/track#payments).
4. **Export the orders**
For an item you deliver, export the link's **Customers** tab: the file gives each buyer's
delivery address. See [Customers and export](https://docs.wajub.com/dashboard/payment-links/track#people-and-export).
5. **Add a payout account**
Link the Mobile Money number or the bank account that will receive the money:
[Link a payout account](https://docs.wajub.com/dashboard/transfers/payout-accounts).
6. **Send yourself the money**
Transfer your balance to this account: [Send a transfer](https://docs.wajub.com/dashboard/transfers/send). To stop
doing it by hand, [automate your transfers](https://docs.wajub.com/dashboard/use-cases/automatic-payouts).
---
# Work with your team
URL: https://docs.wajub.com/dashboard/use-cases/team-and-accountant
> Invite your colleagues and your accountant with the role that matches their work, and know what each of them can see and export.
Each person who works with you joins the organisation through an invitation, with a role that sets
what they see and what they can do. Each step links to the page that covers it in detail.
The owner, an Administrator or a custom [role](https://docs.wajub.com/dashboard#roles) with **Manage members** and
**View settings** can invite and manage members, in
[both Sandbox and Live](https://docs.wajub.com/dashboard#sandbox-and-live). The plan limits the number of members: see
[Invite and manage members](https://docs.wajub.com/dashboard/settings/members). Inviting, changing a role and removing a
member ask for the [security code](https://docs.wajub.com/dashboard#the-security-code).
## The steps
1. **Choose each person's role**
**Finance** suits someone who collects payments, invoices and sends transfers, **Support
specialist** someone who answers customers and gives refunds, **Analyst** someone who reads the
figures without changing anything: [Roles](https://docs.wajub.com/dashboard#roles).
2. **Create a tailored role if needed**
If none of the seven roles fits, bring the permissions you want together in a custom role:
[Create a custom role](https://docs.wajub.com/dashboard/settings/roles).
3. **Invite the person**
Send the invitation with the role you chose:
[Invite and manage members](https://docs.wajub.com/dashboard/settings/members#the-steps).
4. **Follow the invitation**
Until the person accepts, the invitation stays pending:
[Pending invitations](https://docs.wajub.com/dashboard/settings/members#pending-invitations).
5. **Change a role when the job changes**
Change a member's role or remove them from the organisation:
[Change a role or remove a member](https://docs.wajub.com/dashboard/settings/members#change-a-role-or-remove-a-member).
## Your accountant's role
An **Analyst** reads payments, transfers, invoices and revenue, and exports the
[Revenue](https://docs.wajub.com/dashboard/home/revenue#export-a-report) report. They do not export payments, refunds,
transfers or invoices: those exports need **Manage payments**, **Manage transfers**
and **Manage invoices**. A **Finance** member has all three, but **Manage transfers** also lets
them send money. For an accountant who must not send anything, make the exports yourself:
[Prepare your accounting](https://docs.wajub.com/dashboard/use-cases/monthly-accounting).
Wajub invoices, the ones for your plan, can only be downloaded with **Manage account**, which also
lets you [change your plan](https://docs.wajub.com/dashboard/subscription/plans): neither Finance nor Analyst has it, so
download them yourself.
---
# Take payments on your site
URL: https://docs.wajub.com/dashboard/use-cases/website-button
> Put a payment button on your site without a developer, by copying its code from a payment link, then give it your brand and your domain.
A payment link provides the code for a button to paste into your site, on Systeme.io, WordPress,
Wix, Webflow or Shopify: the customer pays without anyone writing code. Each step links to the
page that covers it in detail.
Creating the link needs **Manage payment links**, but anyone who can see payment links can copy the
button code, in [Live](https://docs.wajub.com/dashboard#sandbox-and-live). Adding your site, setting up the branding,
connecting the domain and choosing it for your links (in Live) need **Manage settings**, which the
owner and Administrators have; a Developer can also add the site and connect the domain
([roles](https://docs.wajub.com/dashboard#roles)). Branding needs the **Growth** plan or a plan above it, the domain
**Scale** or **Enterprise**. Only saving the list of sites asks for the
[security code](https://docs.wajub.com/dashboard#the-security-code).
## The steps
1. **Create the link**
Create the link for what you sell: [Create a payment link](https://docs.wajub.com/dashboard/payment-links/create).
2. **Prepare the button**
On the link's page, open **Share link**, then the **Button for your site** tab, and choose
**Over your site** or **On the payment page**:
[The button for your site](https://docs.wajub.com/dashboard/payment-links/share#button-for-your-site).
3. **Paste the code into your site**
Choose **Copy**, then paste the code into an HTML block on your site and publish the page.
See [The button for your site](https://docs.wajub.com/dashboard/payment-links/share#button-for-your-site).
4. **Add your site**
Add your site's address in
[Sites that show the page](https://docs.wajub.com/dashboard/settings/checkout-page#embedding): the **Over your
site** window then opens on your sites, and on no others.
5. **Apply your brand**
Give the payment page your logo and your colours:
[Customise your brand](https://docs.wajub.com/dashboard/settings/branding).
6. **Connect your domain**
Serve the payment page on an address of your own, such as pay.example.com:
[Connect your domain](https://docs.wajub.com/dashboard/settings/custom-domains).
7. **Choose this domain for your links**
Once the domain is verified, choose it for your payment links:
[Choose the link domain](https://docs.wajub.com/dashboard/payment-links/settings).
---
# Direct API
URL: https://docs.wajub.com/payments/direct-api
> Charge a payment from your server, on a channel you chose, with no Wajub page.
With the Direct API you render every screen: your server charges the payment on the channel you
picked, and Wajub tells you the outcome. It takes two calls, `POST /payments` to record the payment
and `POST /payments/{id}` to charge it.
> [!CAUTION]
> **This call belongs on your server**
>
> Send it with your secret key, from your backend. Never use an `sk.…` key from a browser: Wajub
> rejects it with a `403`. If your payment screen lives in a browser, use
> [Embedded Components](https://docs.wajub.com/libraries/components) instead.
## 1. Create the payment
Create the payment as the [Payments Quickstart](https://docs.wajub.com/payments/quickstart#1-create-the-payment) shows.
Keep `transaction.id` from the answer. You will not use `authorization_url`, which is for the hosted
page. Keep `authorization_token` as well if you charge a channel whose provider asks the payer for a
code: it is the credential that [confirms that step](#a-code-or-another-detail), and it is returned
at creation only.
The payment is `pending`, and nobody has been charged yet.
## 2. Charge it
`POST /payments/{id}`
- `channel` (string, required): Where to charge: a channel slug from `GET /channels`, such as `cm.mtn` or `cm.orange`. Send `mobile`, or `cm.mobile` for Cameroon, to let Wajub find the operator from the phone number. These two are the only aggregates.
- `data.phone` (string): The Mobile Money number to charge. International format is safest; a local number is read in the country of the channel.
- `data.operator` (string): With `cm.mobile` only: the operator the payer picked, such as `orange`. Used when the number alone does not tell Wajub which operator it belongs to, a ported number for instance.
- `data.otp` (string): The code the payer generated in their operator's menu, for a channel that answered `payer_otp`: digits only. See [A code the payer generates](#a-code-the-payer-generates).
- `data.iban` (string): For a bank channel. `data.account_number` is accepted instead.
- `data.wallet_address` (string): For a crypto channel.
- `data.save_payment_method` (boolean): Save this payment method on the customer, to offer it again next time. Only with the payer's consent. Defaults to `false`.
Every field under `data` is also accepted at the root of the body. Send an `Idempotency-Key` header
unique to this charge, so that a retry after a timeout never charges twice.
**Charge a payment on MTN Mobile Money**
```bash
curl https://api.wajub.com/payments/trx_test_CSUGajfv9xh0XQ5wu2lx \
-H "Authorization: sk_test.xxxxxxxxxxxxxxxx…" \
-H "Content-Type: application/json" \
-H "Idempotency-Key: charge-order-4172-1" \
-d '{
"channel": "cm.mtn",
"data": { "phone": "+237670000000" }
}'
```
```javascript
const payment = await wajub.payments.process(
'trx_test_CSUGajfv9xh0XQ5wu2lx',
{
channel: 'cm.mtn',
data: { phone: '+237670000000' },
},
{ idempotencyKey: 'charge-order-4172-1' },
);
console.log(payment.status);
```
```python
from wajub import RequestOptions
payment = wajub.payments.process(
"trx_test_CSUGajfv9xh0XQ5wu2lx",
{
"channel": "cm.mtn",
"data": {"phone": "+237670000000"},
},
RequestOptions(idempotency_key="charge-order-4172-1"),
)
print(payment.status)
```
```php
use Wajub\RequestOptions;
$payment = $wajub->payments->process('trx_test_CSUGajfv9xh0XQ5wu2lx', [
'channel' => 'cm.mtn',
'data' => [
'phone' => '+237670000000',
],
], new RequestOptions(idempotencyKey: 'charge-order-4172-1'));
echo $payment->status;
```
```go
payment, err := client.Payments.Process(context.Background(), "trx_test_CSUGajfv9xh0XQ5wu2lx", map[string]any{
"channel": "cm.mtn",
"data": map[string]any{"phone": "+237670000000"},
}, &wajub.RequestOptions{IdempotencyKey: "charge-order-4172-1"})
if err != nil {
log.Fatal(err)
}
log.Println(payment.Status)
```
## The answer
For Mobile Money the answer is almost always `202 Accepted`. The prompt is on the payer's handset,
the payment has moved to `processing`, and `message` is the line to show while you wait:
```json title="Response · 202 Accepted"
{
"code": 202,
"status": "Accepted",
"message": "Confirm the transaction on your phone.",
"transaction": {
"id": "trx_test_CSUGajfv9xh0XQ5wu2lx",
"reference": "order-4172",
"amount": 5000,
"currency": "XAF",
"status": "processing",
"channel": "cm.mtn",
"sandbox": true
}
}
```
The outcome arrives later, as a `payment.succeeded` or `payment.failed` webhook. Before you fulfil
the order, [retrieve the payment](https://docs.wajub.com/payments/quickstart#3-verify-before-you-fulfil) and read its
`status`, as in every other mode.
| Code | What it means | What to do |
| ----- | ------------------------------------------------------------------------------------------------------------------------------------------------------------------------------------------------------------------------------------------------------------------ | ---------------------------------------------------------------------------------------------------------------------------------------------------------------------------------- |
| `200` | The channel confirmed at once. The payment is `succeeded` | Verify, then fulfil |
| `202` | Waiting for the payer, or for a next step named in `action` | Show `message`, complete the step in `action` if there is one, wait for the webhook |
| `400` | The payment can no longer be charged: it already succeeded, expired or was cancelled, or, in live, its `expires_at` has passed | Create a new payment if needed |
| `402` | The operator or the card issuer declined. The payment is back to `pending`. Also `error_code: merchant_not_verified` while your account's verification is pending, and `otp_attempts_exceeded` once the operator refused three of the payer's codes on the channel | Let the payer try again, see below. For `merchant_not_verified`, finish your verification |
| `403` | Refused by a restriction on your account, or by [Shield](https://docs.wajub.com/risk/shield). A Shield block carries `error_code: shield_blocked` and its `BLK-…` reference in `block_reference` | Do not retry the same attempt |
| `404` | No payment with this id, in this environment | Check the id and the key |
| `409` | A charge is already in progress on this payment (`error_code: payment_in_progress`), a call with the same `Idempotency-Key` is still running, or the payment was prepared and its order not validated yet | Wait for the outcome of the attempt in progress, by webhook or by retrieving the payment. Charge again once it is back to `pending`, or `processing` with no charge left under way |
| `422` | The channel is not accepted, the number does not match the operator, the amount is above the channel's ceiling, or the `Idempotency-Key` was already used for a different request | Fix the request. A reused key needs a new key for a new charge |
A `402` carries `error_code`, a stable reason such as `insufficient_funds` that you can translate for
the payer, and `limit_exceeded` when the payment would go past one of your account's limits.
## When `action` is set
Most Mobile Money charges need nothing more from you: `action` is absent and you wait for the
webhook. When the provider behind the channel wants the payer to do something first, the answer is
still a `202`, `action` names that step, and the answer carries what the step needs.
| `action` | What the payer does | What the answer carries |
| --------------------------------------------------------------------- | --------------------------------------------------------------- | ----------------------------------------------------------------------------------------------------------------------- |
| `redirect` | Approves the payment on the provider's page or in its app | `action_url`, where to send the payer |
| `confirm_otp` | Types the code the provider sent them | `otp_id`, and `otp_masked_contact`, where the code went, masked, or empty when the provider does not say |
| `payer_otp` | Generates a code in their operator's menu, then gives it to you | `payer_otp`, how to get the code. Charge again with it in `data.otp` |
| `confirm_pin`, `confirm_phone`, `confirm_birthday`, `confirm_address` | Gives the provider one more detail | `pin_id` and `pin_instruction`, or the same pair named after `phone`, `birthday` or `address` |
| `client_session` | Pays in a window the provider runs itself | `client_session`, with its `id` and, when the provider has a page of its own, `hosted_url` |
| `confirm` | Follows the instruction in `message` | Nothing more in live. In sandbox, a crypto channel adds `crypto.deposit` |
| `confirm_3ds` | Authenticates with the card issuer | Nothing for you to handle: that step happens in the payment page or the components, one more reason to take cards there |
The step can differ from one payment to the next on the same channel, so read `action` on every
`202` instead of assuming one per channel.
### A redirect
Wave works this way: the payer approves in the Wave app, not on a prompt. So do the crypto channels
in live, where the provider's page shows the address and the amount to send.
```json title="Response · 202 Accepted, with a redirect"
{
"code": 202,
"status": "Accepted",
"message": "Open Wave to confirm your payment.",
"action": "redirect",
"transaction": {
"id": "trx_CSUGajfv9xh0XQ5wu2lx",
"amount": 5000,
"currency": "XOF",
"status": "processing",
"channel": "ci.wave"
},
"action_url": "https://pay.wave.com/c/cos-0example00"
}
```
Send the payer to `action_url`: a redirect in a browser, a link or a button in an app. When they are
done, the provider brings them back to the `callback` of the payment, if you set one. The outcome
still arrives by webhook, and you still verify the payment before you fulfil.
### A code, or another detail
With `confirm_otp` the provider has sent the payer a code. Collect it on your own screen, then send
it from your server to [`POST /payments/{id}/confirm`](https://docs.wajub.com/api/payments/confirm), with your secret key,
the `otp_id` of the answer and the code.
```bash title="Confirm the code the payer received"
curl https://api.wajub.com/payments/trx_CSUGajfv9xh0XQ5wu2lx/confirm \
-H "Authorization: sk.xxxxxxxxxxxxxxxx…" \
-H "Idempotency-Key: confirm-order-1042" \
-H "Content-Type: application/json" \
-d '{
"otp_id": "prc_2b4l4EObTOnOa501JXNi",
"code": "482913"
}'
```
The answer is the charge's. `200` when the payment is paid. `202` when the provider asks for one more
step: `action` names it, with what it needs, as on the charge. `402` when the provider refused what
was sent: `error_code` says why (`invalid_otp`, or `max_attempts_exceeded` once the three tries of
the step are used up) and `attempts_remaining` counts the tries left. With none left, charge the
payment again. Send an `Idempotency-Key`: a retried call then answers what the first one did,
without sending the code to the provider twice.
The four other steps take the same call, with their own fields. Each `…_instruction` field of the
charge's answer is the provider's own wording of what it asks for.
| `action` | Body of `POST /payments/{id}/confirm` |
| ------------------ | ---------------------------------------------------- |
| `confirm_otp` | `otp_id`, `code` |
| `confirm_pin` | `pin_id`, `pin` |
| `confirm_phone` | `phone_id`, `phone` |
| `confirm_birthday` | `birthday_id`, `birthday` as `YYYY-MM-DD` |
| `confirm_address` | `address_id`, `address`, `city`, `state`, `zip_code` |
Each step allows three tries, whether it is confirmed from your integration or from the payment
page.
### A code the payer generates
A few operators, such as Orange Money in Burkina Faso, take a payment only with a code the payer
generates in their operator's menu first. Without it, or with a code the operator refuses, nothing
is charged: the answer is a `202` with `action: payer_otp`, the payment stays `pending`, and
`payer_otp` says how to get the code: `ussd_code` to dial, `amount` and `currency`, the exact amount
to type, `otp_length`, the steps in `steps.fr` and `steps.en`, `reason` (`required`, `invalid` or
`refused`) and `attempts_remaining`. `ussd_code` and `otp_length` may be `null`, and each step is an
object whose `text` is what to show. With `invalid` or `refused`, the answer also carries
`error_code: invalid_otp`. Show the steps and `payer_message`, collect the
code, then charge the payment again on the same channel with the code in `data.otp` and a new
`Idempotency-Key`. Once the operator has refused three codes on that channel, the charge answers
`402` with `error_code: otp_attempts_exceeded`: the payer pays with another channel.
### The provider's own window
With `client_session` the provider collects the payment itself. When `client_session.hosted_url` is
present, send the payer to it as you would for a redirect. Once they are back, call
`POST /payments/{id}/confirm` with `client_session_id` set to `client_session.id`. It answers as the
charge does, `202` while the outcome is not final yet. A provider that only offers a widget inside the
page, with no `hosted_url`, is meant for [Embedded Components](https://docs.wajub.com/libraries/components), which open it
for you.
## Letting Wajub find the operator
With `channel` set to `mobile`, or to `cm.mobile` for Cameroon, Wajub reads the operator from the
number and charges on it: `+23767…` goes to `cm.mtn`. These two are the only aggregates: another
country is charged on its operator's own channel, such as `ci.orange`. When the number cannot be
attributed, a ported one for instance, Wajub uses `data.operator` if you sent it with `cm.mobile`,
and answers `422` otherwise.
With a precise channel such as `cm.mtn`, the number has to belong to that operator. An Orange number
sent on `cm.mtn` is refused with a `422` that names the right channel, instead of being charged on
the wrong network.
Some channels are named after a wallet, not after an operator. Wave (`ci.wave`, `sn.wave`), Express
Union (`cm.eu`), Djamo (`ci.djamo`, `sn.djamo`), Capitec Pay (`za.capitec`), OPay (`ng.opay`) and
PalmPay (`ng.palmpay`) are held whatever the payer's operator, so any number is accepted on them. The other wallets belong to one operator, and
take a number of that operator: `ke.mpesa` a Safaricom number, `tz.mpesa` and `mz.mpesa` a Vodacom
one, `tg.tmoney` a Togocel one, `gh.vodafone` a Telecel one. An aggregate sends such a number to the
wallet. [Phone numbers](https://docs.wajub.com/payments/payment-methods/phone-numbers#how-the-operator-is-identified) lists every wallet
and the operator behind it.
On a payment created with [`accept`](https://docs.wajub.com/payments/payment-methods#choosing-what-a-payment-accepts),
an aggregate is judged by the operator the number resolves to: `cm.mobile` with an MTN number is
accepted wherever `cm.mtn` is.
## Retrying after a decline
A `402` leaves the payment `pending`, so the same payment can be charged again: with another number,
another operator, or the same one once the payer has topped up. Use a **new** `Idempotency-Key` for
that new attempt. Sending the first key again returns the first answer, the `402`, without trying
again.
The same key is still the right one after a timeout or a network error, when you do not know whether
the first call went through.
## Cards
Live refuses raw card data: a card number or a security code in the body is answered with a `422`
and `error_code: raw_card_data_not_accepted`, before anything is charged. Cards are collected by
[Hosted Checkout](https://docs.wajub.com/payments/hosted-checkout), [Embedded Components](https://docs.wajub.com/libraries/components) or a
mobile SDK, which collect them securely.
Sandbox accepts `channel: card` with the published test cards only, so you can exercise the whole
flow. Any other card number is refused there too. A sandbox card charge takes four fields in
`data`, each answered with a `422` on its name when it is missing or malformed:
| Field | What it holds |
| ------------- | -------------------------------------------------------------------------------------------- |
| `card.number` | A [test card](https://docs.wajub.com/developer-tools/testing/test-scenarios#cards). The number decides the outcome |
| `card.holder` | The name on the card. `card_holder` is accepted too |
| `exp` | The expiry as `MM/YY` or `MM/YYYY`, a year from this one to thirty years ahead |
| `cvc` | Three or four digits |
The two `card.` keys are names with a dot in them, not a nested object: `"data": {"card.number":
"4242424242424242", "card.holder": "Amina Diallo", "exp": "12/30", "cvc": "123"}`.
## In sandbox
The last six digits of the phone number decide the outcome, as on the hosted page. `…000000`
succeeds; `…000001` is declined at once as live declines: a `402` with `error_code:
insufficient_funds`, and the payment stays `pending`.
The full table is in [Test scenarios](https://docs.wajub.com/developer-tools/testing/test-scenarios).
Sandbox never answers `redirect`, `confirm_otp` or `client_session`: those steps only happen in
live. It answers Mobile Money and bank channels with no `action`, a 3-D Secure test card with
`confirm_3ds`, and a crypto channel with `confirm` and `crypto.deposit`, the address and the amount
to send. Orange Money in Burkina Faso (`bf.orange`) asks for the payer's code with `payer_otp`, as
in live, and accepts `123456`.
The Direct API is available on every plan, in sandbox and in live. Splitting a payment into
instalments, with [`POST /payments/{id}/splits`](https://docs.wajub.com/api/payments/splits), works in both, on Mobile
Money channels in live: [Split payments](https://docs.wajub.com/sync/split-payments) describes it.
- [Choose your integration](https://docs.wajub.com/payments/integration-paths): The four modes compared, and when the Direct API is the right one.
- [Phone numbers](https://docs.wajub.com/payments/payment-methods/phone-numbers): The formats a number can take, and how the operator is found.
- [Payment lifecycle](https://docs.wajub.com/payments/lifecycle): Every status a payment goes through, and the webhook for each.
- [API reference](https://docs.wajub.com/api/payments/process): Every field of POST /payments/{id}.
---
# Hosted Checkout
URL: https://docs.wajub.com/payments/hosted-checkout
> The page Wajub renders for your customer, what it handles, and what you control.
Hosted Checkout is the shortest path to a working payment. You create the payment, send the customer
to the page Wajub renders, and verify the outcome when they come back.
> [!TIP]
> **The integration code**
>
> The code for a redirect, an inline frame or an overlay is in [Wajub Components → Hosted
> checkout](https://docs.wajub.com/libraries/components/hosted-checkout).
## Create the payment
Everything the page needs comes from the create call. Send it from your server with the secret key:
the public key also creates payments, but it exists for the case where the call is made in a
browser.
`POST /payments`
- `amount` (number, required): Amount in the major unit of the currency. Decimals are accepted, so `10.50` is ten dollars fifty. In XAF and XOF the payment must fall between 25 and 2 000 000.
- `currency` (string, required): ISO 4217 code: XAF, XOF, NGN, GHS, KES and the rest of the supported list.
- `customer` (object): Payer identity: `email`, `phone`, `name`, plus `address` and `metadata`. At least one of `customer`, `email`, `phone` or `customer_id` is required, and the object is the form that grows with you.
- `description` (string): A single label shown to the customer on the page. Defaults to "Payment".
- `items` (array): Line items displayed on the page, each with a `name`, a `description` and a `quantity`. They are shown, never summed: `amount` remains what you charge.
- `callback` (string (url)): Where the customer is sent afterwards, whatever the outcome: success, failure, cancellation or expiry, told apart by `status` in the query string. Must be HTTPS, and `http://localhost` or `http://127.0.0.1` are accepted in sandbox; any other address answers `422`. Omit it and they stay on a Wajub confirmation page, in which case the webhook is your only signal.
- `reference` (string): Your own order number. It comes back on every read and in the return URL. It carries no uniqueness constraint, so it is not what prevents a double charge.
- `expires.in` (integer): How long the page stays usable, in minutes, from 5 to 43 200. Defaults to 1 440, which is 24 hours.
- `bearer` (string): Who pays the Wajub fee: `merchant` by default, or `customer`, which adds the fee on top and shows the breakdown on the page.
- `accept` (object): Narrows the payment methods offered, by `countries`, `channels`, `types` and `currencies`. Omit it and every method you can collect on is shown. See [Choosing what a payment accepts](https://docs.wajub.com/payments/payment-methods#choosing-what-a-payment-accepts).
- `metadata` (object): Free key-value pairs, returned on reads and in webhooks.
A create call that uses the hosted page's own fields looks like this:
**Create a payment for the hosted page**
```bash
curl https://api.wajub.com/payments \
-H "Authorization: sk_test.xxxxxxxxxxxxxxxx…" \
-H "Content-Type: application/json" \
-d '{
"amount": 25000,
"currency": "XAF",
"customer": { "email": "amina@example.com", "name": "Amina N." },
"description": "Order #4172",
"reference": "order-4172",
"items": [
{ "name": "Wireless earbuds", "quantity": 1 },
{ "name": "Delivery", "quantity": 1 }
],
"expires": { "in": 60 },
"callback": "https://shop.example.com/order/complete"
}'
```
```javascript
const payment = await wajub.payments.create({
amount: 25000,
currency: 'XAF',
customer: { email: 'amina@example.com', name: 'Amina N.' },
description: 'Order #4172',
reference: 'order-4172',
expires: { in: 60 },
callback: 'https://shop.example.com/order/complete',
});
res.redirect(payment.authorization_url);
```
```python
payment = wajub.payments.create({
"amount": 25000,
"currency": "XAF",
"customer": {"email": "amina@example.com", "name": "Amina N."},
"description": "Order #4172",
"reference": "order-4172",
"expires": {"in": 60},
"callback": "https://shop.example.com/order/complete",
})
return redirect(payment.authorization_url)
```
```php
$payment = $wajub->payments->create([
'amount' => 25000,
'currency' => 'XAF',
'customer' => [
'email' => 'amina@example.com',
'name' => 'Amina N.',
],
'description' => 'Order #4172',
'reference' => 'order-4172',
'expires' => ['in' => 60],
'callback' => 'https://shop.example.com/order/complete',
]);
return redirect($payment->authorization_url);
```
```go
payment, err := client.Payments.Create(context.Background(), map[string]any{
"amount": 25000,
"currency": "XAF",
"customer": map[string]any{"email": "amina@example.com", "name": "Amina N."},
"description": "Order #4172",
"reference": "order-4172",
"expires": map[string]any{"in": 60},
"callback": "https://shop.example.com/order/complete",
}, nil)
if err != nil {
log.Fatal(err)
}
http.Redirect(w, r, payment.AuthorizationURL, http.StatusSeeOther)
```
The response carries the payment and the page to send the customer to. Store `transaction.id`
against your order before you redirect:
```json title="Response · 201 Created"
{
"code": 201,
"status": "Created",
"message": "Payment initiated",
"authorization_url": "https://pay.wajub.com/xxxxxxxxxxxxxxxxxxxxxxxxxxxxxxxx",
"authorization_token": "xxxxxxxxxxxxxxxxxxxxxxxxxxxxxxxx",
"transaction": {
"id": "trx_test_CSUGajfv9xh0XQ5wu2lx",
"reference": "order-4172",
"amount": 25000,
"currency": "XAF",
"status": "pending",
"sandbox": true,
"created_at": "2026-09-11T10:24:00+00:00"
}
}
```
`authorization_url` carries an opaque session token, not the transaction id. Redirect to it exactly
as returned: never parse it, and never build one yourself. The host is not always `pay.wajub.com`
either, since an account on the Scale plan can serve its checkout from its own verified domain.
## What the page decides on its own
The customer sees only the methods that can take this payment, not a fixed list.
Mobile Money caps a single debit at **500 000 XAF**, and the same in XOF. A payment above that is
refused, and the page asks the payer for a smaller amount or another method.
If you set `bearer` to `customer`, the page shows the fee on top of your amount and the total
actually being debited.
The language is English or French. It follows the [**Checkout — Language**](https://dashboard.wajub.com/settings/regional/language) setting, which
accepts `auto`, `en` or `fr`. On `auto`, the page uses the customer's own `preferred_language`, and
opens in French when the customer has none.
## Handle the return
Once the attempt is over, the customer comes back to your `callback` with the payment identified in
the query string:
```bash title="Return redirect"
https://shop.example.com/order/complete?reference=trx_test_CSUGajfv9xh0XQ5wu2lx&status=succeeded&trxref=order-4172
```
`reference` is the Wajub payment id and `trxref` is the `reference` you sent, present only when you
set one. Both come back whatever the outcome. `status` is `succeeded`, `failed`, `cancelled` or
`expired`. After a success the page sends the customer on by itself; after a failure or an expiry,
when they choose to come back. A customer who closes the page without finishing never comes back at
all.
> [!CAUTION]
> **The return proves nothing**
>
> Anyone can open that URL by hand and change `status`. A customer who closes the tab never opens it
> at all. Confirm with `GET /payments/{id}` from your server, or act on the `payment.succeeded`
> webhook, before you ship anything.
The verification call takes the id you stored before redirecting:
**Verify before fulfilling**
```bash
curl https://api.wajub.com/payments/trx_test_CSUGajfv9xh0XQ5wu2lx \
-H "Authorization: sk_test.xxxxxxxxxxxxxxxx…"
```
```javascript
const payment = await wajub.payments.retrieve(req.query.reference);
if (payment.status === 'succeeded' && payment.amount === order.total) {
await fulfill(order);
}
```
```python
payment = wajub.payments.retrieve(request.args["reference"])
if payment.status == "succeeded" and payment.amount == order.total:
fulfill(order)
```
```php
$payment = $wajub->payments->retrieve($request->query('reference'));
// Compare whole minor units. Use 1000 instead of 100 for a three-decimal currency.
$paid = (int) round((float) $payment->amount * 100);
$due = (int) round((float) $order->total * 100);
if ($payment->status === 'succeeded' && $paid === $due) {
$order->fulfill();
}
```
```go
payment, err := client.Payments.Retrieve(context.Background(), r.URL.Query().Get("reference"))
if err != nil {
log.Fatal(err)
}
if payment.Status == "succeeded" && payment.Amount == order.Total {
fulfill(order)
}
```
Check the amount and the currency as well as the status, and let the webhook close the orders whose
customer never came back.
## Make the page yours
The look of the page is set once for the whole account, in **Settings → Branding**, and applies to
every payment page you ever create, in sandbox as in production.
| What you set | Where it shows |
| ----------------------------------------- | ----------------------------------------------------- |
| Rectangular logo, square logo, favicon | The header of the page and the browser tab |
| Primary, secondary and background colours | Buttons, links and the page surface |
| Text and button text colours | Contrast against your own palette |
| Success and error colours | The confirmation and the failure states |
| Font and border radius | The whole page |
| Appearance mode | `system`, `light` or `dark` |
| Density and cover style | How tight the layout is, and how the header is framed |
> [!NOTE]
> **Branding needs a paid plan**
>
> **Settings → Branding** needs the Design Customization feature, which starts at **Growth**. On Pay as you go
> the payment page keeps the default appearance. Serving the checkout from your own domain is a
> separate feature, Custom domain, that starts at **Scale**.
You can also collect information the payment itself does not carry, a delivery note or a table
number, by adding fields in **Settings → Collect**. Each field has a type among `text`,
`textarea`, `select`, `checkbox`, `number`, `email` and `tel`, a label, an optional placeholder, and
a required flag. They appear on the hosted page in the order you arrange them.
- [Payments Quickstart](https://docs.wajub.com/payments/quickstart): The same flow end to end, from create to verified webhook.
- [Display the checkout](https://docs.wajub.com/libraries/components/hosted-checkout): Redirect, inline frame or overlay, with the code for each.
- [Branding](https://docs.wajub.com/libraries/components/branding): Every appearance setting and how it reaches the page.
- [Payment methods & channels](https://docs.wajub.com/payments/payment-methods): Which operators are offered, country by country.
- [Payment lifecycle](https://docs.wajub.com/payments/lifecycle): Every state the payment holds while the customer is on the page.
- [Test the payment page](https://docs.wajub.com/developer-tools/testing/test-scenarios): Sandbox numbers that drive each outcome on demand.
---
# Collect payments
URL: https://docs.wajub.com/payments
> The four ways to take a payment, what each costs you in code, and what follows.
Four ways to take a payment, which differ only in who renders the screen where the customer
confirms. The operators you reach, the webhooks you receive and the refunds you can issue are the
same in all four.
## Four ways in
Undecided? [Choose your integration](https://docs.wajub.com/payments/integration-paths) compares the four on code,
customisation and use case. If you would rather see one work before choosing, the
[Quickstart](https://docs.wajub.com/payments/quickstart) takes a sandbox payment from nothing to a verified webhook.
## Payment methods
Mobile Money is the backbone: MTN, Orange, Wave, Airtel, Moov and M-Pesa, across a dozen countries.
Cards and domestic bank transfers are available where the operator supports them. Channels are
named `country.operator`, so `cm.mtn` is MTN Mobile Money in Cameroon and `sn.wave` is Wave in
Senegal.
The full country and operator matrix is in [Payment methods &
channels](https://docs.wajub.com/payments/payment-methods), and the number formats each operator accepts are in [Phone
number formats](https://docs.wajub.com/payments/payment-methods/phone-numbers). Get the number format wrong and the payment fails before
the customer ever sees a prompt, so that second page is worth reading once.
## The two calls
Creating a payment never charges anyone. `POST /payments` records the intent, holds it `pending`,
and hands you back a hosted page URL and a browser-safe session token. Nothing has reached an
operator yet.
What charges is the second call. Hosted Checkout, Components and Payment Links make it for you. Only
[Direct API](https://docs.wajub.com/payments/direct-api) leaves it to you: you collect the phone number yourself, then send
`POST /payments/{id}` with a `channel` and the payment details.
> [!CAUTION]
> **A private key in a browser is refused**
>
> Never use `sk.…` from a browser. When Wajub detects it, the request is rejected with a `403` and
> the key's owner is emailed. Direct API therefore belongs on your server. Front-end code uses the
> public key, or the session token the create response returns.
## API resources
Payments share one API with every other product. These are the resources this one calls; the full
parameters and responses are in the [API reference](https://docs.wajub.com/api).
| Endpoint | Methods | Used for |
| --------------------------------------------------- | --------------------------- | -------------------------------------------------------------------------------------------------------------------------------------------------------------------------------------------------------------------------------------------------------------------------- |
| [`/payments`](https://docs.wajub.com/api/payments) | `GET` `POST` `DELETE` | Create, list, retrieve and cancel a payment |
| [`/payments/{id}`](https://docs.wajub.com/api/payments/process) | `POST` | Charge it on a channel, and its `/splits` for instalments, on Mobile Money in live |
| [`/payments/{id}/activate`](https://docs.wajub.com/api/payments/activate) | `POST` | Create a payment prepared with `deferred: true` once the order is placed, for [payment fields shown before the order exists](https://docs.wajub.com/libraries/components/payment-fields#before-the-order-exists). Before that, [`PATCH /payments/{id}`](https://docs.wajub.com/api/payments/update) changes its amount |
| [`/refunds`](https://docs.wajub.com/api/refunds) | `GET` `POST` | Issue a refund and follow it |
| [`/customers`](https://docs.wajub.com/api/customers) | `GET` `POST` `PUT` `DELETE` | Returning customers, plus block and deactivate |
| [`/disputes`](https://docs.wajub.com/api/disputes) | `GET` `POST` | Evidence, acceptance, closure and messages |
| [`/links`](https://docs.wajub.com/api/payment-links) | `GET` `POST` `PUT` `DELETE` | Payment links. Production only |
Standard payment calls need no product-specific header. A marketplace attributing the payment to
one of its subaccounts adds `X-Sync: acc_…` to the same call, as described in [Sync → API
resources](https://docs.wajub.com/sync#the-resources).
## After the payment
| Need | Where |
| ----------------------------------------- | -------------------------------------------------------- |
| Know the outcome as it happens | [Webhooks](https://docs.wajub.com/developer-tools/webhooks) |
| Understand each state and its transitions | [Payment lifecycle](https://docs.wajub.com/payments/lifecycle) |
| Refund a payment | [Refunds](https://docs.wajub.com/payments/refunds) |
| Handle a dispute or a chargeback | [Disputes](https://docs.wajub.com/payments/disputes) |
| Recognise a returning customer | [Customers](https://docs.wajub.com/payments/customers) |
| Decide between webhooks and polling | [Webhooks vs polling](https://docs.wajub.com/developer-tools/webhooks/polling) |
- [Payments Quickstart](https://docs.wajub.com/payments/quickstart): A sandbox payment from nothing to a verified webhook.
- [Choose your integration](https://docs.wajub.com/payments/integration-paths): The four modes compared on code, control and use case.
- [Payment methods & channels](https://docs.wajub.com/payments/payment-methods): Country and operator coverage, channel by channel.
- [Accept a payment](https://docs.wajub.com/guides/accept-a-payment): The end-to-end walkthrough: create, redirect, verify, fulfil.
---
# Choose your integration
URL: https://docs.wajub.com/payments/integration-paths
> The four ways to take a payment, compared on control, code and constraints.
The four integration modes compared: who renders the screen where the customer confirms, and what
you write. The operators, webhooks and refunds are the same in all four.
## The decision in one table
| Mode | Who renders the payment screen | What you write | Best for |
| ----------------------- | ------------------------------ | ----------------------------------- | ------------------------------------------ |
| **Hosted Checkout** | Wajub, on its own page | A redirect and a return handler | Shipping quickly, on any stack |
| **Embedded Components** | Wajub, inside your page | A server route plus the browser SDK | Staying on your domain, with your branding |
| **Payment Links** | Wajub, on its own page | Nothing | Selling without a site or a server |
| **Direct API** | You | The entire payment interface | Native apps and custom flows |
## What the create response hands you
Creating a payment charges nobody. It records the intent, holds it `pending` and answers with two
fields. Which one you use is what your integration mode decides.
- `authorization_url` (string): **Hosted Checkout.** The full URL of the Wajub-hosted payment page. Redirect your customer there. An opaque session URL: never parse it or build one yourself.
- `authorization_token` (string): **Embedded Components.** A browser-safe session token scoped to this payment. Pass it as `sessionId` to `wajub.mount()`. It is returned on creation only, never on a later retrieval.
In code, the whole difference between the two modes is one line:
```js title="Which field each mode uses"
// Hosted Checkout: send the customer to the page Wajub renders.
res.redirect(payment.authorization_url);
// Embedded Components: hand the token to the browser and mount in place.
wajub.mount('#checkout', { sessionId: payment.authorization_token });
```
Direct API uses neither to take the payment. It makes a second call instead, covered further down,
and needs the token only when a provider asks the payer for a code.
## Hosted Checkout
Your server creates the payment and redirects to `authorization_url`. The customer picks an
operator, enters their number and confirms on their handset, then lands back on your `callback`.
Wajub sends the webhook in parallel, so the outcome reaches you even if the customer closes the tab
on the way back.
You write two things: the route that creates the payment, and the handler that verifies it before
fulfilling the order.
The page carries your logo and your colours, set once in the Dashboard under Settings › Branding,
from the Growth plan. It is the mode we recommend, and the one the [Payments Quickstart](https://docs.wajub.com/payments/quickstart) walks through.
## Embedded Components
The same checkout, mounted inside your own layout. Your server creates the payment and passes
`authorization_token` to the browser, which calls `wajub.mount()` with it as `sessionId`. The
customer never leaves your domain.
You write a server route and a few lines of front-end code. What you do not write is the payment
interface itself: Mobile Money, cards, OTP and 3DS all come from the mounted component, and you
supply the wrapper around it.
When the components show on your checkout before the order exists, while the cart can still change,
create the payment with `deferred: true`. It is only prepared: it stays out of your payments and
sends no `payment.*` webhook. Your server changes its amount with `PATCH /payments/{id}` when the
total moves, then activates it with `POST /payments/{id}/activate` once the order is placed, from
the component's `onBeforeSubmit`.
[Before the order exists](https://docs.wajub.com/libraries/components/payment-fields#before-the-order-exists) walks
through it.
There is a vanilla JavaScript package and React, Vue, Svelte and Angular wrappers. The
[Components overview](https://docs.wajub.com/libraries/components#four-ways-to-take-a-payment) compares its four modes;
start with the [Components quickstart](https://docs.wajub.com/libraries/components/quickstart), then the framework page
that matches your stack.
## Payment Links
A shareable URL, or the QR code generated from it. You create it from the Dashboard or with one API
call, send it by WhatsApp, SMS or email, and the customer pays on a Wajub page. There is no server
code at any point.
Two limits are worth knowing before you plan around it. Payment Links are **production only**, the
sandbox has no equivalent, and the Pay as you go plan allows **25 links**. See [Payment
Links](https://docs.wajub.com/payments/link) for what a link can carry and how to track what it collects.
## Direct API
You collect the phone number yourself, then charge with a second call, `POST /payments/{id}`,
passing a `channel` such as `cm.mtn` and the payment details. The operator prompt goes out to the
customer's handset and you render every screen around it, including the waiting state and the
result. [Direct API](https://docs.wajub.com/payments/direct-api) walks through the call and every answer it can get.
Cards are the exception. Live refuses raw card data on this call, so a card is collected by Hosted
Checkout, the components or a mobile SDK, which collect it securely.
This is the only mode where the payment interface is entirely yours, which is why it exists for
native mobile apps and for flows no hosted page can express. It is also the only mode where a
mistake is yours to catch.
> [!CAUTION]
> **Direct API belongs on your server, never in a browser**
>
> Never use an `sk.…` key from a browser. When Wajub detects one, the request is rejected with a
> `403` and the key's owner is emailed. Front-end code uses the public key or the session token from the
> create response. If your payment interface lives in a browser, you want Embedded Components, not
> this.
## Still unsure
Start with Hosted Checkout. It is the shortest path to a payment that works, and moving to Embedded
Components later changes only your front end: the create call, the webhook handling and the
verification stay exactly as they are.
Go to Payment Links instead if you have no site to integrate into, and to Direct API only when you
have looked at Embedded Components and found something it genuinely cannot render.
- [Payments Quickstart](https://docs.wajub.com/payments/quickstart): A sandbox payment from create to verified webhook.
- [Hosted Checkout](https://docs.wajub.com/payments/hosted-checkout): The redirect flow in full, including theming and return handling.
- [Wajub Components](https://docs.wajub.com/libraries/components): Mounting the checkout in your own page, framework by framework.
- [Payment Links](https://docs.wajub.com/payments/link): Creating, sharing and tracking a link.
- [Payments API reference](https://docs.wajub.com/api/payments): Every parameter of the create and charge calls.
- [Accept a payment, full guide](https://docs.wajub.com/guides/accept-a-payment): The end-to-end walkthrough with the fulfilment logic around it.
---
# Payment lifecycle
URL: https://docs.wajub.com/payments/lifecycle
> Every state a payment holds, which webhook announces it, and what to do in each.
Every state a payment can hold, the webhook that announces it, and what your integration does in
each. Two of them mean "wait": `pending`, before any operator is contacted, and `processing`, while
the customer is being prompted, where a retry creates a second charge.
## The states
> [!NOTE]
> **Branch on `status`, never on the message**
>
> The `message` field is written for humans and can change without notice. The `status` value is
> part of the API contract and is what your code should switch on. Branch on it rather than on which
> event arrived, because more than one event can announce the same state.
| `status` | What it means | Webhook | What to do |
| ------------ | ------------------------------------------------------------------------------------------------------------------------------------------------------------ | -------------------- | ------------------------------------------------------------------ |
| `pending` | The payment exists. No operator has been contacted yet. | `payment.created` | Redirect the customer, or make the charge call. Nothing to fulfil. |
| `processing` | Sent to the operator. The customer is being prompted on their phone. | `payment.processing` | **Wait.** Do not retry and do not create a second payment. |
| `partial` | Some instalments of a split payment are settled, others are not. | `payment.split.*` | Wait. `amount_paid` on the payment says what has settled so far. |
| `succeeded` | Funds captured. | `payment.succeeded` | Fulfil the order. |
| `failed` | The attempt did not go through. | `payment.failed` | Read `failure_reason`, then decide whether a retry makes sense. |
| `cancelled` | Cancelled by you with `DELETE /payments/{id}`, or by the customer with the Cancel button of the hosted page. A decline on the handset is not a cancellation. | `payment.cancelled` | Offer to start a new payment. |
| `expired` | The payment window elapsed before the customer acted. | `payment.expired` | Create a new payment. The old one can never complete. |
**Payment**
`pending` (no operator contacted yet) → [`payment.processing`] `processing` (prompt sent to the handset) → [`payment.succeeded`] `succeeded` (funds captured, safe to fulfil)
Early exits, from pending or processing:
- `failed` (read failure_reason)
- `cancelled` (DELETE, or Cancel on the hosted page)
- `expired` (window closed)
Four of those end the attempt: `succeeded`, `failed`, `cancelled` and `expired`. `succeeded` never
moves again, except through refunds: a refunded payment reads `refunded` or `partially_refunded`.
## A prepared payment, before activation
A payment created with `deferred: true`, for
[payment fields shown before your order exists](https://docs.wajub.com/libraries/components/payment-fields#before-the-order-exists),
is only prepared until your server activates it with `POST /payments/{id}/activate`. Until then it
sends no `payment.*` webhook and stays out of `GET /payments` and the Dashboard. Read by its `id`,
it is `pending`, then `expired` or `cancelled`, and it cannot be charged. Activation sends
`payment.created`, and the payment then follows the states above, with the same `id` and expiry.
[Prepared payments](https://docs.wajub.com/api/payments#prepared-payments) sums up the differences.
## Which transitions are possible
Wajub only moves a payment along the paths below.
| From | Can become |
| ---------------------------------- | --------------------------------------------------------------------------- |
| `pending` | `processing` · `partial` · `succeeded` · `failed` · `cancelled` · `expired` |
| `processing` | `pending` · `partial` · `succeeded` · `failed` · `cancelled` · `expired` |
| `partial` | `processing` · `succeeded` · `failed` |
| `failed` · `cancelled` · `expired` | `succeeded` only |
Two of those paths surprise people. `processing` goes back to `pending` when the operator declines a
charge at once, with a `402`, so that the same payment can be charged again; `payment.attempt_failed`
tells your server. And a `failed`,
`cancelled` or `expired` payment can still become `succeeded` when the operator confirms the money
late: fulfil on `payment.succeeded` whenever it arrives. When a late confirmation cannot be
credited, for instance because another attempt had already collected the payment, the payer is
refunded and the payment stays as it was. Nothing else leaves those three states, so another attempt
after them means a new payment.
## Three things that surprise people
### `processing` means the customer's phone is ringing
This is the state your integration will spend the most time in, and the one most likely to be
mishandled. On mobile money, `processing` means the operator has pushed a prompt to the customer's
handset and is waiting for them to enter their PIN. That can take seconds, or the length of time it
takes someone to find their phone.
> [!WARNING]
> **Never retry a processing payment**
>
> Creating a second payment because the first one is "taking too long" is the most common way to
> charge a customer twice. A payment in `processing` is still live. Wait for `payment.succeeded`,
> `payment.failed`, or `payment.expired`.
### A refund changes the payment's `status` only through its refunds
A payment reads `partially_refunded` once refunds that succeeded cover part of it, and `refunded`
once they cover all of it. It is a reading of the refunds: the payment itself does not change, and
there is no `payment.refunded` event. [What the payment's status says](https://docs.wajub.com/payments/refunds#the-payments-status-never-changes)
Refunds have their own event family instead: `refund.created`, `refund.processing` (live only),
`refund.succeeded` and `refund.failed`, which also arrives, with `cancelled_by_wajub`, for a refund
Wajub stopped before sending it. To know how much of a payment came back, list its refunds with
[`GET /payments/{id}/refunds`](https://docs.wajub.com/api/payments/refunds) and sum the ones that succeeded.
### `partial` belongs to split payments only
A payment can be settled in two to four instalments, in sandbox and, on Mobile Money, in live
([Split payments](https://docs.wajub.com/sync/split-payments)). While some are paid and others are not, its status is
`partial`, `processing` while an instalment waits for the payer, and each instalment reports on its
own through `payment.split.processing`, `payment.split.succeeded` and `payment.split.failed`.
There is no `payment.partial` event, and a subscription matches exact names only: `payment.*` matches
nothing. List the three `payment.split` events by name, or subscribe to `*`. The payment carries no
list of its instalments: `amount_paid` is the authoritative record of what has settled, and each
`payment.split.*` event tells you which instalment moved.
A `partial` payment stays open until its last instalment is paid: nothing expires or cancels it. To
stop before, close it with [`POST /payments/{id}/close`](https://docs.wajub.com/api/payments/close): it becomes
`succeeded` for what was collected, which you keep or refund (`outcome`). `DELETE /payments/{id}`
refuses a payment with instalments already paid.
## Expiry
Every payment carries a deadline, set with `expires.in` at creation, in **minutes**, and read back in
its `expires_at`:
| | |
| ------- | ------------------------ |
| Minimum | 5 minutes |
| Default | 1 440 minutes (24 hours) |
| Maximum | 43 200 minutes (30 days) |
The floor is five minutes because a mobile money prompt needs time to reach the handset and be
confirmed. Shorter windows expire before the customer can pay.
`payment.expired` can arrive a little after `expires_at`, and the payment can still read `pending`
in between. Do not compute expiry yourself to decide an order is dead: an operator can still confirm
a payment in the final seconds of its window. A payment whose charge is still under way when
`expires_at` passes, the payer approving it on their phone for instance, does not expire then: it
waits for that charge. Paid, it is `succeeded`; refused at once, it is back to `pending` and can
expire; refused later, it is `failed`, except a payer's own code the operator refuses later, which
puts it back to `pending`, where it can expire too. A payment with an instalment already paid never
expires: it stays open until it is settled or [closed](https://docs.wajub.com/api/payments/close).
## What you receive when a payment fails
A failed payment carries a `failure_reason`, and `failure_message` says it in one sentence. See
[Failure Reasons](https://docs.wajub.com/api/failure-reasons#failed-payments).
Branch on `status` for control flow. Use `failure_reason` to explain to a human what happened, and to
decide manually whether a class of failure is worth retrying.
## Cancelling a payment
A payment nobody is paying can be cancelled from your server, when the customer abandons the order
on your side.
`DELETE /payments/{id}`
The payment moves to `cancelled`, `payment.cancelled` is sent, and its page stops accepting
payment. A payment that cannot be cancelled now answers `409`, with its reason in `error_code`:
| `error_code` | When | What to do |
| --------------------- | ------------------------------------------------------------------------------------------------- | ----------------------------------------------------------------------------------------------------------------- |
| `payment_in_progress` | A charge is under way: the payer is approving it on their phone, or paying on the provider's page | Wait for its outcome, by webhook or `GET /payments/{id}`. A payment that comes back to `pending` can be cancelled |
| `payment_partly_paid` | Instalments of it were paid | Close it with [`POST /payments/{id}/close`](https://docs.wajub.com/api/payments/close), keeping or refunding what was collected |
Any other payment, already paid, failed, cancelled or expired, answers `400 This payment cannot be
cancelled (already completed or expired).` A confirmation the operator sends after the cancel
still moves the payment to `succeeded`, as described above.
## Listing payments by state
`GET /payments`
| Query parameter | Accepts |
| -------------------------- | ----------------------------------------------------------------------------------------------------------- |
| `status` | `pending`, `processing`, `partial`, `succeeded`, `failed`, `cancelled`, `expired` |
| `reference` | Exactly the `reference` you sent at creation. It is not unique, so every payment that carries it comes back |
| `search` | Free text over the payment id, your `reference` and the description |
| `date_from`, `date_to` | Dates, compared with the creation date |
| `amount_min`, `amount_max` | Amounts in the major unit of the currency |
| `per_page` | 1 to 100, defaults to 25 |
| `cursor` | Switches to cursor pagination |
`status` also accepts `refunded` and `partially_refunded`: they list the payments refunded in full or
in part, which `succeeded` then leaves out. [What the payment's status says](https://docs.wajub.com/payments/refunds#the-payments-status-never-changes)
To see the payments still waiting on a customer, filter on `pending`:
**List pending payments**
```bash
curl -G https://api.wajub.com/payments \
-H "Authorization: $WAJUB_API_KEY" \
-d status=pending \
-d per_page=50
```
```javascript
const page = await wajub.payments.list({ status: 'pending', per_page: 50 });
for (const payment of page.data) {
console.log(payment.id, payment.created_at);
}
```
```python
page = wajub.payments.list({"status": "pending", "per_page": 50})
for payment in page.data:
print(payment["id"], payment["created_at"])
```
```php
$page = $wajub->payments->list([
'status' => 'pending',
'per_page' => 50,
]);
foreach ($page->data as $payment) {
echo $payment['id'], PHP_EOL;
}
```
```go
page, err := client.Payments.List(context.Background(), map[string]any{
"status": "pending",
"per_page": 50,
})
if err != nil {
log.Fatal(err)
}
for _, payment := range page.Data {
log.Println(payment["id"], payment["created_at"])
}
```
## The receipt of a succeeded payment
Once a payment has succeeded, it carries `receipt_url`: the payer's receipt, a page hosted on your
invoice domain, in the payer's language. The link is signed: pass the URL on as it is.
The same document comes in two other forms. Add `/pdf` to the path for a PDF, or `/data` for the
receipt as JSON, and keep the query string.
- [Webhooks](https://docs.wajub.com/developer-tools/webhooks): Receive these events reliably: signatures, retries, duplicates.
- [Test mode](https://docs.wajub.com/developer-tools/testing/sandbox-mode): Drive a payment into each state on demand with test numbers.
- [Refunds](https://docs.wajub.com/payments/refunds): The refund lifecycle and the events it emits.
- [Retrieve a payment](https://docs.wajub.com/api/payments/retrieve): Reconcile server-side when you need certainty.
---
# Quickstart
URL: https://docs.wajub.com/payments/quickstart
> A sandbox payment from create to verified webhook, for an account that already has keys.
A sandbox payment in four steps: create it, send the customer to a page, verify the outcome from your
server, and let webhooks tell you what happens after the customer is gone.
> [!NOTE]
> **This page starts after setup**
>
> It assumes an account, sandbox keys and an installed SDK. If you have none of that yet, the
> [platform quickstart](https://docs.wajub.com/getting-started/quickstart) covers account creation, keys and install, then
> walks the same four steps from zero.
## 1. Create the payment
One request carries the whole intent: how much, in which currency, who is paying, and where that
person comes back. Wajub records it, keeps it `pending`, and answers with a page to send the
customer to. Nothing has reached an operator yet, and nobody has been charged.
Send it from your server with the secret key. The public key creates payments too, but it exists for
the one case where the call happens inside a browser.
Describe the payer in the `customer` object. A top-level `email` also works and lands on the same
customer record, but the object is what grows with you: it carries `name`, `phone`, `address` and
`metadata` as well.
`POST /payments`
**Create a payment**
```bash
curl https://api.wajub.com/payments \
-H "Authorization: sk_test.xxxxxxxxxxxxxxxx…" \
-H "Content-Type: application/json" \
-d '{
"amount": 5000,
"currency": "XAF",
"customer": { "email": "amina@example.com" },
"reference": "order-4172",
"callback": "https://shop.example.com/order/complete"
}'
```
```javascript
import { Wajub } from '@wajub/node';
const wajub = new Wajub({ apiKey: process.env.WAJUB_API_KEY });
const payment = await wajub.payments.create({
amount: 5000,
currency: 'XAF',
customer: { email: 'amina@example.com' },
reference: 'order-4172',
callback: 'https://shop.example.com/order/complete',
});
console.log(payment.id, payment.authorization_url);
```
```python
import os
from wajub import Wajub
wajub = Wajub(api_key=os.environ["WAJUB_API_KEY"])
payment = wajub.payments.create({
"amount": 5000,
"currency": "XAF",
"customer": {"email": "amina@example.com"},
"reference": "order-4172",
"callback": "https://shop.example.com/order/complete",
})
print(payment.id, payment.authorization_url)
```
```php
getenv('WAJUB_API_KEY')]);
$payment = $wajub->payments->create([
'amount' => 5000,
'currency' => 'XAF',
'customer' => [
'email' => 'amina@example.com',
],
'reference' => 'order-4172',
'callback' => 'https://shop.example.com/order/complete',
]);
echo $payment->authorization_url;
```
```go
client, err := wajub.New(wajub.Config{APIKey: os.Getenv("WAJUB_API_KEY")})
if err != nil {
log.Fatal(err)
}
payment, err := client.Payments.Create(context.Background(), map[string]any{
"amount": 5000,
"currency": "XAF",
"customer": map[string]any{"email": "amina@example.com"},
"reference": "order-4172",
"callback": "https://shop.example.com/order/complete",
}, nil)
if err != nil {
log.Fatal(err)
}
log.Println(payment.ID, payment.AuthorizationURL)
```
Wajub answers `201 Created`. Two fields matter here: `transaction.id`, which you store against your
order, and `authorization_url`, which is where the customer goes next.
```json title="Response · 201 Created"
{
"code": 201,
"status": "Created",
"message": "Payment initiated",
"authorization_url": "https://pay.wajub.com/xxxxxxxxxxxxxxxxxxxxxxxxxxxxxxxx",
"authorization_token": "xxxxxxxxxxxxxxxxxxxxxxxxxxxxxxxx",
"transaction": {
"id": "trx_test_CSUGajfv9xh0XQ5wu2lx",
"reference": "order-4172",
"amount": 5000,
"amount_paid": 0,
"currency": "XAF",
"status": "pending",
"customer": {
"id": "cus_test_sAaim5apjocIgtlhzJY3wQ8s",
"email": "amina@example.com"
},
"callback": "https://shop.example.com/order/complete",
"sandbox": true,
"created_at": "2026-09-11T10:24:00+00:00"
}
}
```
> [!NOTE]
> **Amounts are in the major unit, never in centimes**
>
> `"amount": 5000` is 5 000 XAF, not 50. Wajub has no subunits. A payment in XAF or XOF must fall
> between 25 and 2 000 000; outside that range the API answers `422` with the bound in
> `errors.amount`.
`reference` is yours: your order number, returned on every read and searchable in the Dashboard. It
carries no uniqueness constraint, so sending it twice creates two payments, and
`GET /payments?reference=order-4172` lists every payment that carries it. A payment is read by its
`id`.
What does protect you from a double charge is the `Idempotency-Key` header. Generate it yourself,
store it next to the order, and resend the same value on every retry: the API then returns the
original payment instead of opening a second one. Pass this key yourself on every call.
[Idempotency](https://docs.wajub.com/best-practices/idempotency) covers the strategies that work.
## 2. Send the customer to the page
Redirect to `authorization_url`. The customer picks an operator, types their number, confirms on
their handset and lands back on your `callback`.
That is Hosted Checkout, and it is the mode we recommend: Wajub renders the screen, so there is no
payment interface for you to maintain.
The session stays valid for 24 hours. Pass `expires.in` in minutes, anywhere from 5 to 43 200, to
close the window sooner.
In sandbox, the last six digits of the number decide the outcome, and `…000000` succeeds. The full
suffix table and a number per operator are in the [platform
quickstart](https://docs.wajub.com/getting-started/quickstart#4-pay-it-with-a-sandbox-number). Sandbox never asks for a
PIN.
## 3. Verify before you fulfil
The customer landing back on your `callback` proves nothing. Anyone can open that URL by hand, and a
customer who closes the tab never opens it at all. Ask the API what happened, from your server, with
the id you stored in step 1.
`GET /payments/{id}`
**Retrieve a payment**
```bash
curl https://api.wajub.com/payments/trx_test_CSUGajfv9xh0XQ5wu2lx \
-H "Authorization: sk_test.xxxxxxxxxxxxxxxx…"
```
```javascript
const payment = await wajub.payments.retrieve('trx_test_CSUGajfv9xh0XQ5wu2lx');
console.log(payment.status, payment.amount, payment.currency);
```
```python
payment = wajub.payments.retrieve("trx_test_CSUGajfv9xh0XQ5wu2lx")
print(payment.status, payment.amount, payment.currency)
```
```php
$payment = $wajub->payments->retrieve('trx_test_CSUGajfv9xh0XQ5wu2lx');
echo $payment->status;
```
```go
payment, err := client.Payments.Retrieve(context.Background(), "trx_test_CSUGajfv9xh0XQ5wu2lx")
if err != nil {
log.Fatal(err)
}
log.Println(payment.Status, payment.Amount, payment.Currency)
```
The answer is the payment as Wajub knows it, whatever the browser was told. `channel` names the
operator that was actually used, and `amount_paid` is what was really collected:
```json title="Response · 200 OK"
{
"code": 200,
"status": "OK",
"message": "Payment retrieved",
"transaction": {
"id": "trx_test_CSUGajfv9xh0XQ5wu2lx",
"reference": "order-4172",
"amount": 5000,
"amount_paid": 5000,
"currency": "XAF",
"status": "succeeded",
"channel": "cm.mtn",
"customer": {
"id": "cus_test_sAaim5apjocIgtlhzJY3wQ8s",
"email": "amina@example.com"
},
"sandbox": true,
"created_at": "2026-09-11T10:24:00+00:00"
}
}
```
Ship the order only when `status` is `succeeded`, and only once `amount` and `currency` match what
you charged for. A payment still `pending` is not a failure, it is a customer who has not finished
yet: leave the order open and let the next step close it.
## 4. Let the webhook close the loop
Verifying on return covers the customers who come back. Webhooks cover everyone else, and every
event that has no browser behind it at all: a confirmation the operator sends ten minutes late, a
refund issued from the Dashboard, a session that expires untouched.
Subscribe to the seven events a payment can produce, by name. A subscription matches exact names
only, so `payment.*` would receive nothing.
| Event | Fires when |
| ------------------------ | ------------------------------------------------------------------------------------- |
| `payment.created` | The payment was recorded and is `pending` |
| `payment.processing` | The request reached the operator, the customer is being prompted |
| `payment.succeeded` | Funds captured. This is the one to fulfil on |
| `payment.failed` | The operator reported the attempt as failed after the prompt went out |
| `payment.attempt_failed` | A decline answered at once: the payment is `pending` again and the customer can retry |
| `payment.expired` | The session ran out before the customer confirmed |
| `payment.cancelled` | Cancelled with `DELETE /payments/{id}`, or with the Cancel button of the hosted page |
> [!NOTE]
> **Webhooks are documented once, not here**
>
> Endpoint registration, signature verification, retries and the full catalog live in
> [Webhooks](https://docs.wajub.com/developer-tools/webhooks). One rule belongs here though: deduplicate on the event
> `id`. A failed delivery is [retried](https://docs.wajub.com/developer-tools/webhooks/retries), and every attempt carries
> that same `id`, which is what keeps a retry from shipping the order twice.
## Then pick the mode you ship
What you just built is Hosted Checkout. The other three modes change exactly one thing, who renders
the screen in step 2. Creating, verifying and handling webhooks stay word for word what they are
above.
**Integration modes**
- [Hosted Checkout](https://docs.wajub.com/payments/hosted-checkout): What you just built. Wajub renders operator choice, prompt and result.
- [Embedded Components](https://docs.wajub.com/libraries/components): The same screen, mounted in your page with the session token.
- [Payment Links](https://docs.wajub.com/payments/link/quickstart): No integration at all. Production only, 25 links on the free plan.
- [Direct API](https://docs.wajub.com/payments/direct-api): You collect the number and charge it yourself with a second call.
## What's next?
- [Payment lifecycle](https://docs.wajub.com/payments/lifecycle): Every status a payment can hold, and the moves between them.
- [Payment methods & channels](https://docs.wajub.com/payments/payment-methods): Country and operator coverage, channel by channel.
- [Phone number formats](https://docs.wajub.com/payments/payment-methods/phone-numbers): What each operator accepts, before a payment can even start.
- [Refunds](https://docs.wajub.com/payments/refunds): Full or partial refunds on a succeeded payment.
- [Accept a payment, full guide](https://docs.wajub.com/guides/accept-a-payment): The same flow end to end, with the fulfilment logic around it.
- [Go Live](https://docs.wajub.com/getting-started/going-live): The checklist before you switch to production keys.
---
# Deletion and erasure
URL: https://docs.wajub.com/payments/customers/delete
> Deleting a customer erases their personal data at once. What it removes, what it keeps, and what cannot be undone.
Deletion is not the reversible archive it is on most resources.
`DELETE /customers/{id}`
The record is removed from your lists and its personal data is anonymised immediately, in the same
request, to satisfy a right-to-erasure demand without a second step. The anonymised record stays in
the Dashboard's deleted customers until someone on your team deletes it for good. Past payments survive, since they are
financial records: their customer details are pseudonymised, and they keep the wallet or account
number they were paid with. The `customer.deleted` event carries the anonymised record, and the
customer's details are removed from the events and webhook deliveries already recorded. A repeated
call answers the same `200`. With `X-Sync`
the call answers `403`: a platform does not erase a merchant's customers. [Deleting a
payer](https://docs.wajub.com/resources/compliance#deleting-a-payer) lists everything it removes.
> [!CAUTION]
> **There is no undo through the API**
>
> The API has no restore endpoint. The Dashboard can restore the record, but the personal data does
> not come back with it: it was anonymised in the delete request. Deactivate rather than delete when
> you simply want a customer out of the way.
- [Deleting a payer](https://docs.wajub.com/resources/compliance#deleting-a-payer): Everything an erasure removes, across the platform.
- [Pocket](https://docs.wajub.com/payments/customers/pocket): Where a payer can delete their own data.
---
# Customers
URL: https://docs.wajub.com/payments/customers
> The payer record Wajub reuses across payments, and what it changes at checkout.
Every payment is attached to a customer, the payer record Wajub finds or creates for you and reuses
across your payments. Five pages go further:
- [Pay as a known customer](https://docs.wajub.com/payments/customers/known-customer), by its id, and what a known
customer changes on the checkout page.
- [Manage customers](https://docs.wajub.com/payments/customers/manage): create one up front, update, list, block, tax ids
and webhooks.
- [Deletion and erasure](https://docs.wajub.com/payments/customers/delete), what deleting a customer removes and what it
keeps.
- [Pocket](https://docs.wajub.com/payments/customers/pocket), where your payers find their payments, across merchants.
- In the dashboard guide, [the customer profile](https://docs.wajub.com/dashboard/customers/profile),
[merging two customers](https://docs.wajub.com/dashboard/customers/merge) and [the export](https://docs.wajub.com/dashboard/customers/bulk-actions#export-customers).
## Every payment creates or finds one
A payment must carry at least one of `email`, `phone` or `customer_id`. With none of the three the
API answers `422` and nothing is recorded.
Given one, Wajub looks for a matching customer on your account, in the environment you are calling.
If it finds one, the payment is attached to it. If it does not, it creates the customer and
attaches the payment to that. Either way you get a `customer` object back on the payment, carrying
the `id` you can reuse from then on.
Sandbox and live are separate populations. A customer created by a sandbox payment is invisible to
a live one, and the ids differ: `cus_test_…` in sandbox, `cus_…` in production.
## How Wajub decides two payments are the same person
Matching runs in a fixed order, and stops at the first hit.
| Order | Field | How it is compared |
| ----- | ------------- | ------------------------------------------------------------------------------------------------------------------------------- |
| 1 | `customer_id` | Exact match on the customer `id` |
| 2 | `email` | Trimmed, lowercased, so `Amina@Example.com` matches `amina@example.com` |
| 3 | `phone` | Read in E.164 first, so `+237 6 70 00 00 00`, `237670000000` and, for an account in Cameroon, `670000000` match `+237670000000` |
An account holds one customer per email, whatever its case, and per phone once in E.164.
> [!NOTE]
> **Phones are stored in E.164**
>
> Every customer phone is stored in E.164, whoever writes it: the API, a payment, a payment link or
> invoice payer, the Dashboard. A number written with `+` (or `00`) is read in its own country; one
> written without it is read in `phone_country` when you send it, else your account's country. A
> value that does not read as a phone number is kept as sent, and only matches itself. The formats
> are in [Phone number formats](https://docs.wajub.com/payments/payment-methods/phone-numbers).
When a payment carries both an email and a phone, the email decides. The phone is only consulted if
no customer matched the email, which means an existing customer can be found by email and then
quietly gain a phone number they never had.
## A payment never overwrites a customer
When a payment matches an existing customer, the data you sent is merged in, but only into the gaps.
A field that already holds a value is left alone.
| Sent on the payment | Customer already has a value | Customer has none |
| ------------------------ | -------------------------------- | ----------------------------------------------------------------------------------- |
| `name`, `email`, `phone` | Ignored | Filled in, unless another customer of the account already holds that email or phone |
| `metadata` | Merged key by key, your keys win | Filled in |
| `address` | Ignored | Attached as the primary shipping address |
| `shipping` | Ignored | Attached as the primary **billing** address |
Send the delivery address as `customer.address`.
The practical consequence: you cannot correct a customer through a payment. Send a payment with
`"name": "Amina Diallo"` for a customer already named `Amina N.` and the old name survives. Use
[`PUT /customers/{id}`](https://docs.wajub.com/payments/customers/manage#update-a-customer) for corrections. A payment
sent with `X-Sync` never touches the merchant's `metadata`: its `metadata` goes to the platform's
own, described in [On behalf of a subaccount](https://docs.wajub.com/payments/customers/manage#on-behalf-of-a-subaccount).
> [!NOTE]
> **The first payment drops the address**
>
> Addresses are only attached when the customer already existed. A brand new customer created by a
> payment is stored with its email, name, phone and metadata alone, so an
> `address` sent on that first payment is not kept on the customer record. [Create the customer up
> front](https://docs.wajub.com/payments/customers/manage#create-a-customer-up-front) if the address matters to you.
- [Customers API reference](https://docs.wajub.com/api/customers): Every field on the resource, and its endpoints.
- [Phone number formats](https://docs.wajub.com/payments/payment-methods/phone-numbers): The international format every customer phone is stored in.
---
# Pay as a known customer
URL: https://docs.wajub.com/payments/customers/known-customer
> Charge a customer by its id, and what a known customer changes on the checkout page.
Once you hold an `id`, from the `customer` object of an earlier payment or from
[`POST /customers`](https://docs.wajub.com/payments/customers/manage#create-a-customer-up-front), pass it and skip the
contact fields entirely. The `customer` field accepts the id as a plain string, and `customer_id`
accepts the same value; they are two spellings of one thing.
**Charge an existing customer**
```bash
curl https://api.wajub.com/payments \
-H "Authorization: sk_test.xxxxxxxxxxxxxxxx…" \
-H "Content-Type: application/json" \
-d '{
"amount": 5000,
"currency": "XAF",
"customer": "cus_test_sAaim5apjocIgtlhzJY3wQ8s",
"reference": "order-4173"
}'
```
```javascript
const payment = await wajub.payments.create({
amount: 5000,
currency: 'XAF',
customer: 'cus_test_sAaim5apjocIgtlhzJY3wQ8s',
reference: 'order-4173',
});
```
```python
payment = wajub.payments.create({
"amount": 5000,
"currency": "XAF",
"customer": "cus_test_sAaim5apjocIgtlhzJY3wQ8s",
"reference": "order-4173",
})
```
```php
$payment = $wajub->payments->create([
'amount' => 5000,
'currency' => 'XAF',
'customer' => 'cus_test_sAaim5apjocIgtlhzJY3wQ8s',
'reference' => 'order-4173',
]);
```
```go
payment, err := client.Payments.Create(context.Background(), map[string]any{
"amount": 5000,
"currency": "XAF",
"customer": "cus_test_sAaim5apjocIgtlhzJY3wQ8s",
"reference": "order-4173",
}, nil)
```
The identifier does not have to be an id. If the value you pass matches no customer `id`, Wajub
tries it as a phone number, then as an email address. So `"customer": "amina@example.com"` and
`"customer": "+237670000000"` both resolve, which is convenient when your own database stores the
email and not the Wajub id.
> [!CAUTION]
> **An identifier that resolves to nothing is a 422, not a new customer**
>
> This is the one place where the API refuses to create. Pass `customer` or `customer_id` and Wajub
> will find that customer or fail the call with a `422` on the field you used, `Customer not found.`;
> it never falls back to creating one. A stale id, a customer deleted last week, or a live id sent to sandbox all kill the
> payment outright. Send `email` or `phone` instead when you are not certain the record exists.
## What a customer changes on the checkout page
This is the part that pays for the extra call. A payment attached to a known customer renders a
different page.
| What the customer carries | What the checkout does with it |
| ----------------------------------- | ---------------------------------------------------------------------- |
| Past cards and Mobile Money numbers | Offers them as one-tap saved methods, default first, ten at most |
| `preferred_language` | Sets the page locale, unless the team or branding setting overrides it |
| `currency` | Becomes the pre-selected currency when auto-convert is enabled |
Saved methods are the real win for returning payers: the number is already there, masked, and they
confirm on the handset without typing it again.
> [!NOTE]
> **Saving a method is the payer's decision**
>
> A card or Mobile Money number is only kept when the payer ticks the box on the checkout page. It
> is never inferred and never defaulted on, so a customer record with no saved methods is the
> normal state until someone opts in. Only cards and Mobile Money are reusable; wallets and bank
> transfers are not stored.
- [Manage customers](https://docs.wajub.com/payments/customers/manage): Create one up front, so the first payment already has an id to use.
- [Recurring invoices](https://docs.wajub.com/billing/invoice/recurring): Bill a known customer on a schedule.
---
# Manage customers
URL: https://docs.wajub.com/payments/customers/manage
> Create a customer up front, update, list and block one, keep its tax ids, and follow its webhooks.
## Create a customer up front
Creating explicitly is worth it when you know the payer before they pay: a signup, an imported
customer base, a B2B account with a tax id and a billing address.
`POST /customers`
At least one of `email` or `phone` is required. Everything else is optional, and the fields below
are the ones worth knowing; the full list is in the [API reference](https://docs.wajub.com/api/customers/create).
- `email` (string): Required unless `phone` is given. Stored as sent, and found whatever its case: a second `POST /customers` with `Amina@Example.com` returns the customer stored as `amina@example.com`.
- `phone` (string): Required unless `email` is given. Stored in E.164: a number without its international prefix is read in `phone_country`, else your account's country.
- `name` (string): Display name, the only name field you can set.
- `type` (enum, default `individual`): `individual` or `business`. Sending `business_name` alone infers `business`.
- `business_name` (string): Required when `type` is `business`. Becomes the customer `name`.
- `currency` (string): Preferred currency, used as the checkout default when auto-convert is on.
- `preferred_language` (string): Locale for the hosted checkout, below the team and branding settings.
- `address` (object): Shipping address: `country`, `city`, `state`, `postal_code`, `address_line1`, `address_line2`.
- `billing` (object): Billing address, same shape as `address`.
- `customer_group` (string): Free-form segment you can filter the list on.
- `tags` (array): Strings, up to 50 characters each.
- `metadata` (object): Free-form key-value data of your own.
Send it from your server with the secret key.
**Create a customer**
```bash
curl https://api.wajub.com/customers \
-H "Authorization: sk_test.xxxxxxxxxxxxxxxx…" \
-H "Content-Type: application/json" \
-H "Idempotency-Key: cus-signup-9182" \
-d '{
"email": "amina@example.com",
"phone": "+237670000000",
"name": "Amina Diallo",
"metadata": { "user_id": "u_9182" }
}'
```
```javascript
const customer = await wajub.customers.create({
email: 'amina@example.com',
phone: '+237670000000',
name: 'Amina Diallo',
metadata: { user_id: 'u_9182' },
});
console.log(customer.id);
```
```python
customer = wajub.customers.create({
"email": "amina@example.com",
"phone": "+237670000000",
"name": "Amina Diallo",
"metadata": {"user_id": "u_9182"},
})
print(customer.id)
```
```php
$customer = $wajub->customers->create([
'email' => 'amina@example.com',
'phone' => '+237670000000',
'name' => 'Amina Diallo',
'metadata' => [
'user_id' => 'u_9182',
],
]);
echo $customer->id;
```
```go
customer, err := client.Customers.Create(context.Background(), map[string]any{
"email": "amina@example.com",
"phone": "+237670000000",
"name": "Amina Diallo",
"metadata": map[string]any{"user_id": "u_9182"},
}, nil)
```
A new customer comes back as `201 Created`, with the `id` you will pass on payments from now on.
```json title="Response · 201 Created"
{
"code": 201,
"status": "Created",
"message": "Customer created",
"customer": {
"id": "cus_test_sAaim5apjocIgtlhzJY3wQ8s",
"type": "individual",
"name": "Amina Diallo",
"email": "amina@example.com",
"phone": "+237670000000",
"status": "active",
"blocked": false,
"tags": [],
"metadata": { "user_id": "u_9182" },
"sandbox": true,
"created_at": "2026-09-11T10:24:00+00:00"
}
}
```
> [!WARNING]
> **A duplicate answers 200, not 201**
>
> Create a customer whose email (whatever its case) or phone already exists and the API returns the
> existing record with `200 OK` and the message `Customer already exists for this merchant`. With a
> publishable key, that record holds only its `id` and the fields the request sent. Nothing is
> duplicated, and nothing is updated either. Branch on `code === 201` to tell a real
> creation from a match, and never treat the `200` as an error.
`Idempotency-Key` works here as it does on payments: the same key replays the original response for
24 hours instead of opening a second record. It is the safe way to retry a signup hook.
## Update a customer
A payment never corrects a customer, it only fills the fields still empty: see [A payment never
overwrites a customer](https://docs.wajub.com/payments/customers#a-payment-never-overwrites-a-customer). Corrections go
through `PUT /customers/{id}`.
`PUT /customers/{id}`
`PUT /customers/{id}` changes only the fields you send. The `name` changes only when you send it:
`first_name` and `last_name` are refused, and sending `business_name` on an individual leaves their
name alone (on a business, a new `business_name` becomes its name unless you send `name` too). An
`email` (whatever its case) or a `phone` already held by another customer of the account answers
`422` on that field, `A customer with this email already exists.` or
`A customer with this phone already exists.`
## Retrieve and list
Retrieving takes the customer `id` and returns the same object as the create call.
`GET /customers/{id}`
Listing returns your customers newest first, and accepts filters that map onto how you segment
them.
`GET /customers`
| Query parameter | Accepts |
| ---------------- | --------------------------------------------------------------------- |
| `per_page` | 1 to 100, defaults to 25 |
| `search` | Free text over name, email, phone and id |
| `status` | `active`, `inactive`, `blocked` |
| `type` | `individual`, `business` |
| `country` | Two-letter country code of the customer's shipping or billing address |
| `customer_group` | The group string you set on the customer |
| `cursor` | An opaque cursor from a previous response |
Pagination has two modes and the default is the page-number one. Send no `cursor` and `meta` holds
`current_page`, `last_page`, `per_page` and `total`, plus the `next_cursor` and `has_more` that let
you go on with a cursor. Send that `next_cursor` as `cursor` and the endpoint switches to cursor
mode, where `meta` holds `per_page`, `next_cursor`, `prev_cursor` and `has_more` instead.
Cursor mode is what you want for a full export, since it stays correct while new customers are
being created. [Pagination](https://docs.wajub.com/api/pagination) covers both.
## On behalf of a subaccount
A marketplace creating a customer on behalf of one of its subaccounts adds the `X-Sync` header to
`POST /customers`, and the duplicate rule above applies: when the merchant already has a customer
with this email or phone, that customer is returned with `200`, and nothing is duplicated. The
platform's call only fills the fields the merchant left empty; it never changes one they set. The
customer returned, found or created, is open to the connection from then on: the platform can read
and list them and use them on its payments and invoices. It manages a customer it created; on one
the merchant already had, its updates only fill the fields the merchant left empty, and it cannot
block them. A payment created with `X-Sync` and
the email or phone of an existing customer is attached to that customer the same way. When the
merchant blocked that customer, the payment is refused from version `2026-11-02`, as for any
[blocked customer](#status-and-blocking), even if the connection has no access to them.
With `X-Sync`, a customer never shows the merchant's `notes`, `block_reason` or `metadata`, and
`notes` sent with `X-Sync` is ignored. `metadata` is the platform's own: it reads and writes it as
on any customer, each connection has its own, and the merchant's stays theirs. On a customer the
merchant already had, `POST /customers` and payments add the keys the platform has not set yet,
and `PUT /customers/{id}` replaces the platform's metadata. [Account
types](https://docs.wajub.com/sync/account-types#customers-are-shared-with-the-merchant) has the details.
## Status and blocking
A customer is `active`, `inactive` or `blocked`, and four endpoints move them between those states.
| Call | Effect |
| --------------------------------- | ----------------------------------------------------------------- |
| `POST /customers/{id}/block` | Sets `blocked`, stores your `reason` and a `blocked_at` timestamp |
| `POST /customers/{id}/unblock` | Returns the customer to `active` |
| `POST /customers/{id}/deactivate` | Sets `inactive` |
| `POST /customers/{id}/activate` | Sets `active` |
Blocking an already blocked customer answers `400`, as does unblocking one who is not blocked.
`inactive` is a label on the customer record, on every API version. What `blocked` does depends on
the version:
- **From `2026-11-02`**, a blocked customer cannot pay, in sandbox and live. A new payment for them,
named by `customer_id` or found by their email or phone, answers `403` with
`error_code: customer_blocked`, and nothing is created. A payment created on that version can no
longer be charged or confirmed once its customer is blocked. Your payment links and invoices
create their payments on the version your account is pinned to.
[Blocked customers](https://docs.wajub.com/api/errors#blocked-customers)
- **Before `2026-11-02`**, `blocked` only marks the customer, for your team and your
[routing rules](https://docs.wajub.com/orchestration/routing-rules): they can still pay.
Unblocking lets them pay again. [Versioning](https://docs.wajub.com/api/versioning) says how your version is chosen.
> [!NOTE]
> **To refuse a payer whatever the version**
>
> Add their email or phone to the Shield [blocklist](https://docs.wajub.com/risk/shield/rules), which is checked on every
> live transaction and rejects it outright.
## Tax ids
A business customer's tax registration numbers are kept in their own list, one entry per number: a
Cameroonian NIU, a Senegalese NINEA, an EU VAT number. The list is available in live only.
`POST /customers/{id}/tax_ids`
- `type` (string, required): The kind of number: `cm.niu`, `sn.ninea`, `ci.ifu`, `ke.pin`, `ng.tin`, `gh.tin`, `gh.vat`, `eu.vat`, `gb.vat` or `us.ein`. Another type is accepted too, and only its length is checked.
- `value` (string, required): The number itself, with or without the spaces and dashes its format writes.
- `country_code` (string, required): ISO 3166-1 alpha-2, such as `CM`.
Add the number from your server, with a live secret key:
**Add a tax id**
```bash
curl https://api.wajub.com/customers/cus_sAaim5apjocIgtlhzJY3wQ8s/tax_ids \
-H "Authorization: $WAJUB_API_KEY" \
-H "Content-Type: application/json" \
-d '{
"type": "cm.niu",
"value": "M123456789000L",
"country_code": "CM"
}'
```
```javascript
const taxId = await wajub.customers.createTaxId('cus_sAaim5apjocIgtlhzJY3wQ8s', {
type: 'cm.niu',
value: 'M123456789000L',
country_code: 'CM',
});
console.log(taxId.verification_status);
```
```python
tax_id = wajub.customers.create_tax_id("cus_sAaim5apjocIgtlhzJY3wQ8s", {
"type": "cm.niu",
"value": "M123456789000L",
"country_code": "CM",
})
print(tax_id["verification_status"])
```
```php
$taxId = $wajub->customers->createTaxId('cus_sAaim5apjocIgtlhzJY3wQ8s', [
'type' => 'cm.niu',
'value' => 'M123456789000L',
'country_code' => 'CM',
]);
echo $taxId['verification_status'];
```
```go
taxID, err := client.Customers.CreateTaxID(context.Background(), "cus_sAaim5apjocIgtlhzJY3wQ8s", map[string]any{
"type": "cm.niu",
"value": "M123456789000L",
"country_code": "CM",
}, nil)
if err != nil {
log.Fatal(err)
}
log.Println(taxID["verification_status"])
```
The number comes back `pending` while Wajub checks it. `verification_status` then
becomes `verified` when the value matches the format of its type, `failed` when it does not, and
`unavailable` when the check could not run. The formats are the ones your own registration number is
checked against ([Tax configuration](https://docs.wajub.com/tax/configuration#customer-tax-ids) lists them): a Cameroonian
NIU is a letter, twelve digits and a letter. For an `eu.vat` number the check also confirms that
the number is registered.
Adding the same type and number again does not add a copy: the call answers `200` with the existing
entry, back to `pending` while it is checked again. That is how you retry an `unavailable` check.
`GET /customers/{id}/tax_ids` lists the numbers with their status, and
`DELETE /customers/{id}/tax_ids/{tax_id}` removes one.
## Webhooks
Three events follow a customer, and they carry the full customer object as their payload.
| Event | Fires when |
| ------------------ | ---------------------------------------------------------------------- |
| `customer.created` | A customer is created, including one created implicitly by a payment |
| `customer.updated` | Any field changes, including a status change or a merge from a payment |
| `customer.deleted` | The customer is deleted and anonymised |
`customer.created` is noisier than it looks: it fires for every new payer your checkout sees, not
only for the ones you create yourself. Registration, verification and retries are covered in
[Webhooks](https://docs.wajub.com/developer-tools/webhooks).
- [Customers API reference](https://docs.wajub.com/api/customers): Every field on the resource, and its endpoints.
- [Shield Rules](https://docs.wajub.com/risk/shield/rules): The blocklist that actually refuses a payer, by email, phone, IP or BIN.
- [Webhooks](https://docs.wajub.com/developer-tools/webhooks): Register an endpoint and verify the signature on customer events.
- [Pagination](https://docs.wajub.com/api/pagination): Page numbers for a screen, cursors for an export.
---
# Pocket
URL: https://docs.wajub.com/payments/customers/pocket
> The payer's side. Where your customers find their payments, ask for a refund, escalate it to a dispute or delete their data.
Your customers have their own space, Pocket, at `pocket.wajub.com`. A payer signs in with their email
or phone number and a one-time code, and finds every live payment made with that address or number,
across all the merchants on Wajub.
From there they can:
- ask you for a refund, with an amount and a reason. The request lands in your Dashboard's
**Disputes** list, where you approve or reject it;
- escalate that request to a [dispute](https://docs.wajub.com/payments/disputes) once you reject it, for 30 days after
your answer, or once it has waited 7 days without one;
- follow their disputes, the chargebacks their bank opened included, and write to you on them;
- remove a saved payment method, or choose their default one;
- read and download the invoices sent to them;
- delete their data.
While the payer's bank handles a chargeback on a payment, the payer can neither send a refund
request on it nor escalate one, and those delays wait: they resume where they stood once the bank
has decided. The details are in [Refund requests](https://docs.wajub.com/payments/refunds#refund-requests).
There is nothing to integrate: Pocket reads the same customers and payments your integration
creates, which is one more reason to send the payer's real email and phone.
- [Disputes](https://docs.wajub.com/payments/disputes): What happens once a payer escalates a request from Pocket.
- [Deletion and erasure](https://docs.wajub.com/payments/customers/delete): What deleting a customer removes, and what it keeps.
---
# Disputes
URL: https://docs.wajub.com/payments/disputes
> When a payer contests a payment, how you respond, and what a loss costs you.
A dispute is a payer, or their card network, contesting one of your payments: you answer it, and it
ends with you keeping the money or with your balance debited. You cannot create one through the API.
> [!CAUTION]
> **Dispute endpoints need the secret key**
>
> Every call in this section requires a secret key and answers `406 Not Acceptable` with
> `Private Key Required` to a public key. They belong on your server.
Two pages go further:
- [Respond to a dispute](https://docs.wajub.com/payments/disputes/respond), with evidence, by conceding, or by talking
to the payer.
- [Track disputes](https://docs.wajub.com/payments/disputes/track), reading them and the webhooks they send.
## Where a dispute comes from
A dispute reaches you from one of two places.
**The payer escalates a refund request from Pocket**, the Wajub wallet where they can see the
payments they have made. A problem starts there as a
[refund request](https://docs.wajub.com/payments/refunds#refund-requests) to you. The payer can turn it into a dispute
once you reject it, for 30 days after your answer, or once it has waited 7 days without one. They
pick a reason, and the words of their request become the first message on the dispute thread.
| Reason the payer picks | What they are claiming |
| -------------------------- | ------------------------------------------- |
| `product_not_received` | They paid and nothing arrived |
| `product_not_as_described` | What arrived was not what was sold |
| `duplicate_charge` | They were charged twice for one thing |
| `fraudulent` | They did not make this payment |
| `other` | Anything else, explained in the description |
A dispute from Pocket carries the amount the payer asked for, capped at what is left on the payment
once its refunds and the chargebacks you lost are taken off, and a `due_date` to answer by, seven
days after it opened.
**The provider reports a chargeback.** When a card network or a provider notifies a chargeback on
one of your payments, Wajub opens a dispute for it. It carries the provider's own
`provider_reference`, its reason code in `reason`, and the amount the provider disputes, which can
be less than the payment. It also carries a `due_date`: the provider's deadline when it sends one,
seven days after opening otherwise.
A later notice for the same chargeback, with the same `provider_reference`, updates its dispute
rather than opening a second one, even once it is decided. A chargeback that arrives while a payer's
dispute from Pocket runs on the payment opens its own dispute. A payer cannot escalate a request
while a chargeback runs on the payment, nor open a second dispute from Pocket on it.
> [!WARNING]
> **Disputes do not exist in sandbox**
>
> Disputes come from real payers and real providers, so a test payment never produces one. This
> flow cannot be rehearsed end to end before you go live. Build your handler against the payloads
> on this page, and check it against the first real dispute you receive.
> [!NOTE]
> **The amount is held while the dispute is open**
>
> A dispute opened from Pocket, on a payment Wajub collected for you, moves the
> disputed amount from your available balance to your disputed balance, as far as your available
> balance allows. Winning moves it back. Losing debits it, as described below.
## The states a dispute moves through
**Dispute**
`open` (waiting on your evidence) → `under_review` (evidence in, being judged) → [`dispute.won`] `won` (you keep the money)
The other outcome, from open or under_review:
- `lost` (amount debited from your balance)
A dispute lands `open`. Submitting evidence moves it to `under_review` on its own, you do not set
that yourself. From either of those two states it can end as `won` or `lost`. On a dispute from
Pocket both are final.
Wajub adjudicates a dispute from Pocket, and the payer's bank a chargeback. There is no endpoint
that lets you declare yourself the winner; what you can do is put the evidence in front of the
people who decide, or concede.
### How a chargeback is decided
The payer's bank decides a chargeback, through the provider, and the dispute follows the decision
the provider reports. A decision sets `status` and `resolved_at`, with `metadata.decided_by` set to
`provider` and `metadata.provider_stage` naming the provider's stage that decided it.
| What the provider reports | What happens to the dispute |
| -------------------------------------------------------------- | ---------------------------------------------------------------------------------------------------------------------------------------------------------- |
| A win | `open` or `under_review` becomes `won` |
| A loss | `open`, `under_review` or `won` becomes `lost`: a chargeback you won can still be lost at a later stage |
| A new chargeback stage that takes the funds again, after a win | `won` becomes `open` again: `resolved_at` is cleared, `due_date` is set again, the provider's or seven days later, and `metadata.reopened_at` records when |
`lost` is final: a win reported after a loss changes nothing. Each change sends `dispute.updated`,
with `dispute.won` for a win, or `dispute.lost` and `dispute.closed` for a loss. A reopened dispute
sends only `dispute.updated`, and its deadline reminder is sent again.
## What a loss costs
On a payment Wajub collected for you, a lost dispute takes the disputed amount off
your balance, capped at whatever has not already left through a refund on the same payment, so the
money cannot be taken twice. On a payment collected through your own provider account, Wajub holds
none of the money, and the provider settles the chargeback with you directly.
A **flat dispute fee** is charged on top, 15 000 XAF by default in the dispute's currency, when the
loss comes from the API, with `accept` or `close`, or from a provider chargeback. Accepting from
the Dashboard does not charge it. So losing a 25 000 XAF dispute through the API costs 40 000 XAF,
not 25 000. The debits happen on the status change itself, not on anything you call afterwards, and
only once per dispute: a chargeback lost after a win or a reopening is debited once.
A dispute does not change the original payment's status. When you accept, the refund Wajub
creates for the payer is an ordinary refund, with its own `refund.*` events, and shows on the
payment like any other refund. It does not take the disputed amount a second time. If the payer
paid Wajub's fee on top of the price (`bearer: customer`), that fee is debited from you as well,
since the payer gets back everything they paid. The money movement shows on your balance, which is where you reconcile
it.
## Refunds wait for a chargeback
While a chargeback is `open` or `under_review` on a payment, no refund of that payment is made: the
payer's bank may give the money back itself. `POST /refunds` answers `422` with this message:
`Transaction cannot be refunded while a chargeback is open: the payer's bank may return the funds itself. It can be refunded again once the dispute is decided.`
Accepting a payer's dispute on the same payment fails with that answer too, and the dispute stays as
it was, since accepting it refunds the payer. Closing a payment paid in instalments with
`outcome: refund` answers `409` with the code `chargeback_open`. A dispute from Pocket holds no
refund back. Details on [Refunds](https://docs.wajub.com/payments/refunds#what-can-be-refunded).
## In the Dashboard
**Disputes** lists them with their status and the payment behind each one. Opening a dispute gives
you the payer's description, the message thread, and the same three actions the API exposes plus
one it does not: you can mark a dispute from Pocket as won from here when Wajub has adjudicated in
your favour. A chargeback cannot be marked won: its provider decides it. The same list carries the
[refund requests](https://docs.wajub.com/payments/refunds#refund-requests) payers send from Pocket, as their own stage.
The section needs the `manage_disputes` permission, which is separate from `manage_payments`, so a
teammate can run orders without being able to concede a dispute on your behalf.
## Fewer disputes is cheaper than winning them
A dispute costs you time whatever the outcome, so the work that pays best happens before one
exists.
Refund willingly when a customer complains and you have no case: a
[refund](https://docs.wajub.com/payments/refunds) you choose costs you the amount, a dispute you lose costs the amount
plus the flat dispute fee. Keep proof of delivery where you can attach it in one click. And let
[Shield](https://docs.wajub.com/risk/shield) reject the payments most likely to come back at you, since a payment refused up
front cannot be disputed at all.
- [Shield, fraud detection](https://docs.wajub.com/risk/shield): Reject risky payments before they can be disputed.
- [Refunds](https://docs.wajub.com/payments/refunds): Give the money back on your terms instead of theirs.
- [Balance and settlements](https://docs.wajub.com/payouts/balance): Where the debit from a lost dispute lands.
- [Webhooks](https://docs.wajub.com/developer-tools/webhooks): Register an endpoint and verify the signature on dispute events.
- [Security best practices](https://docs.wajub.com/best-practices/security): Limit fraud on the integration side.
- [Disputes API reference](https://docs.wajub.com/api/disputes): Every field on the resource, and the six endpoints.
---
# Respond to a dispute
URL: https://docs.wajub.com/payments/disputes/respond
> Send evidence, concede, or talk to the payer.
## Respond with evidence
This is the part that decides the outcome, and it is worth being thorough. Each piece of evidence
is filed under a type, and you can post several calls to build up a case.
`POST /disputes/{id}/submit-evidence`
- `evidence_type` (enum, required): One of `customer_communication`, `proof_of_delivery`, `service_documentation`, `receipt`, `product_description`, `cancellation_policy`, `refund_policy`, `duplicate_charge_documentation`, `other`.
- `evidence_text` (string): Your written argument for this piece, up to 2 000 characters.
- `evidence_file` (file): One file: PDF, JPG, JPEG, PNG, DOC, DOCX or TXT, 10 MB at most. Send the call as `multipart/form-data`.
The type is a slot, not a label. Post twice with `proof_of_delivery` and the second call replaces
the first, it does not add to it. Use a different type for each distinct piece, and put everything
you want to say about one piece into that one call.
Send a text, a file, or both: a call with neither answers `422`, and the dispute stays where it
was. Without a file, the piece is stored as your text alone: `evidence.proof_of_delivery` is then a
string rather than an object. The name you gave a file comes back as `file_name`.
Files are private: no address opens one on its own. Every answer of the API that returns the
dispute gives each file, evidence and message attachments alike, a `url`, a signed link valid 30
minutes. Past that, read the dispute again for a fresh one. A webhook carries `file_path` and no
link.
Because a file is involved, this is a form upload rather than a JSON body.
**Submit proof of delivery**
```bash
curl https://api.wajub.com/disputes/dsp_hrgUOE225KMKULRQqYvlh/submit-evidence \
-H "Authorization: sk.xxxxxxxxxxxxxxxx…" \
-F "evidence_type=proof_of_delivery" \
-F "evidence_text=Delivered 12 Sept, signed for by the customer." \
-F "evidence_file=@/path/to/delivery-note.pdf"
```
```javascript
import { readFile } from 'node:fs/promises';
// Text alone goes through the SDK, as JSON.
const dispute = await wajub.disputes.submitEvidence('dsp_hrgUOE225KMKULRQqYvlh', {
evidence_type: 'proof_of_delivery',
evidence_text: 'Delivered 12 Sept, signed for by the customer.',
});
console.log(dispute.status);
// A file needs multipart/form-data, which the SDK does not send.
// Post the form yourself instead of the call above.
const form = new FormData();
form.set('evidence_type', 'proof_of_delivery');
form.set('evidence_text', 'Delivered 12 Sept, signed for by the customer.');
form.set(
'evidence_file',
new Blob([await readFile('./delivery-note.pdf')], { type: 'application/pdf' }),
'delivery-note.pdf',
);
const response = await fetch('https://api.wajub.com/disputes/dsp_hrgUOE225KMKULRQqYvlh/submit-evidence', {
method: 'POST',
headers: { Authorization: process.env.WAJUB_API_KEY, Accept: 'application/json' },
body: form,
});
if (!response.ok) {
throw new Error('Evidence refused: ' + response.status);
}
const body = await response.json();
console.log(body.dispute.status);
```
```python
import os
import httpx
# Text alone goes through the SDK, as JSON.
dispute = wajub.disputes.submit_evidence(
"dsp_hrgUOE225KMKULRQqYvlh",
{
"evidence_type": "proof_of_delivery",
"evidence_text": "Delivered 12 Sept, signed for by the customer.",
},
)
print(dispute["status"])
# A file needs multipart/form-data, which the SDK does not send.
# Post the form yourself instead of the call above.
with open("delivery-note.pdf", "rb") as f:
response = httpx.post(
"https://api.wajub.com/disputes/dsp_hrgUOE225KMKULRQqYvlh/submit-evidence",
headers={"Authorization": os.environ["WAJUB_API_KEY"], "Accept": "application/json"},
data={
"evidence_type": "proof_of_delivery",
"evidence_text": "Delivered 12 Sept, signed for by the customer.",
},
files={"evidence_file": ("delivery-note.pdf", f, "application/pdf")},
)
response.raise_for_status()
print(response.json()["dispute"]["status"])
```
```php
use GuzzleHttp\Client;
// Text alone goes through the SDK, as JSON.
$dispute = $wajub->disputes->submitEvidence('dsp_hrgUOE225KMKULRQqYvlh', [
'evidence_type' => 'proof_of_delivery',
'evidence_text' => 'Delivered 12 Sept, signed for by the customer.',
]);
echo $dispute['status'];
// A file needs multipart/form-data, which the SDK does not send.
// Post the form yourself instead of the call above, with the Guzzle
// client the SDK already installed.
$response = (new Client())->post(
'https://api.wajub.com/disputes/dsp_hrgUOE225KMKULRQqYvlh/submit-evidence',
[
'headers' => [
'Authorization' => getenv('WAJUB_API_KEY'),
'Accept' => 'application/json',
],
'multipart' => [
['name' => 'evidence_type', 'contents' => 'proof_of_delivery'],
['name' => 'evidence_text', 'contents' => 'Delivered 12 Sept, signed for by the customer.'],
[
'name' => 'evidence_file',
'contents' => fopen('delivery-note.pdf', 'r'),
'filename' => 'delivery-note.pdf',
],
],
],
);
$body = json_decode((string) $response->getBody(), true);
echo $body['dispute']['status'];
```
```go
// Text alone goes through the SDK, as JSON.
dispute, err := client.Disputes.SubmitEvidence(context.Background(), "dsp_hrgUOE225KMKULRQqYvlh", map[string]any{
"evidence_type": "proof_of_delivery",
"evidence_text": "Delivered 12 Sept, signed for by the customer.",
}, nil)
if err != nil {
log.Fatal(err)
}
log.Println(dispute["status"])
// A file needs multipart/form-data, which the SDK does not send.
// Post the form yourself instead of the call above.
file, err := os.Open("delivery-note.pdf")
if err != nil {
log.Fatal(err)
}
defer file.Close()
var form bytes.Buffer
writer := multipart.NewWriter(&form)
writer.WriteField("evidence_type", "proof_of_delivery")
writer.WriteField("evidence_text", "Delivered 12 Sept, signed for by the customer.")
part, err := writer.CreateFormFile("evidence_file", "delivery-note.pdf")
if err != nil {
log.Fatal(err)
}
if _, err := io.Copy(part, file); err != nil {
log.Fatal(err)
}
writer.Close()
req, err := http.NewRequest(
http.MethodPost,
"https://api.wajub.com/disputes/dsp_hrgUOE225KMKULRQqYvlh/submit-evidence",
&form,
)
if err != nil {
log.Fatal(err)
}
req.Header.Set("Authorization", os.Getenv("WAJUB_API_KEY"))
req.Header.Set("Accept", "application/json")
req.Header.Set("Content-Type", writer.FormDataContentType())
res, err := http.DefaultClient.Do(req)
if err != nil {
log.Fatal(err)
}
defer res.Body.Close()
log.Println(res.Status)
```
The call answers `200 OK` with the dispute as it now stands, already moved to `under_review`, and
your evidence collected under `evidence`.
```json title="Response · 200 OK"
{
"code": 200,
"status": "OK",
"message": "Evidence submitted successfully",
"dispute": {
"id": "dsp_hrgUOE225KMKULRQqYvlh",
"transaction": "trx_CSUGajfv9xh0XQ5wu2lx",
"customer": "cus_sAaim5apjocIgtlhzJY3wQ8s",
"amount": 25000,
"currency": "XAF",
"status": "under_review",
"reason": "product_not_received",
"evidence": {
"proof_of_delivery": {
"text": "Delivered 12 Sept, signed for by the customer.",
"file_path": "…",
"file_name": "delivery-note.pdf",
"uploaded_at": "2026-09-11T12:04:00+00:00",
"url": "https://…?signature=…"
}
},
"sandbox": false,
"created_at": "2026-09-11T12:00:00+00:00"
}
}
```
Evidence can only be filed while the dispute is `open` or `under_review`. Once it is `won` or
`lost`, the call answers `422` and the case is shut.
> [!WARNING]
> **Evidence stays with Wajub**
>
> When a dispute's `evidence_reaches_provider` is `false`, what you
> file is recorded at Wajub and read by the people who rule on a Pocket dispute. It is not forwarded
> to the provider or the card network, so on a chargeback your defence has to go to the provider
> through your own account with them.
## Conceding, and a call that does not do what its name suggests
If the payer is right, concede early rather than letting it run.
`POST /disputes/{id}/accept`
Accepting takes an optional `merchant_response`, up to 2 000 characters, which is recorded against
the dispute. It sets the dispute to `lost` immediately and there is no way back, and it sends the
money back to the payer: Wajub creates a refund of the disputed amount, capped to what is still
refundable on the payment.
That refund carries the reason `customer_complaint` and the dispute's own reason in
`metadata.dispute_reason`, and it gives the payer back everything they paid for that amount, a fee
they paid on top included. If the refund cannot be created, the call fails and the dispute stays as
it was.
Three cases create no refund, and the dispute still ends `lost`:
- **A chargeback.** The payer's bank has already returned the money, so a refund would pay the
payer twice.
- **Nothing left to refund.** Earlier refunds already returned the whole payment.
- **A dispute in another currency than its payment.** There is no amount to refund in the payment's
own currency.
> [!CAUTION]
> **close is accept under another name**
>
> `POST /disputes/{id}/close` is not a neutral way to tidy a dispute away. It has exactly the same
> effect as `accept`: the dispute becomes `lost`, the payer is refunded unless it is a chargeback,
> and the outcome is final. If you were looking for a call that dismisses a dispute in your favour,
> there isn't one. Submit evidence instead.
## Talk to the payer
A dispute carries a message thread, opened by the payer's own description. You can reply on it.
`POST /disputes/{id}/messages`
Messages take `content`, required and up to 5 000 characters, and an optional `attachments` array
of files under the same limits as evidence. Each attachment comes back with `file_name`,
`file_path` and the same 30-minute `url`. `POST /disputes/{id}/send-message` is an alias for the
same thing. Your messages are recorded with a `sender_type` of `merchant`, the payer's with
`customer`, and the whole thread comes back on a retrieve. The thread stays open after the outcome:
a message on a dispute already `won` or `lost` is accepted and recorded, but changes nothing about
the result.
- [Track disputes](https://docs.wajub.com/payments/disputes/track): Read them and their webhooks.
- [Disputes API reference](https://docs.wajub.com/api/disputes): Every dispute endpoint.
---
# Track disputes
URL: https://docs.wajub.com/payments/disputes/track
> Read your disputes and follow them through their webhooks.
## Reading disputes
Retrieving one returns it with its transaction, its customer and its full message thread.
`GET /disputes/{id}`
`GET /disputes`
| Query parameter | Accepts |
| ---------------------- | ----------------------------------------------------- |
| `per_page` | 1 to 100, defaults to 25 |
| `status` | `open`, `under_review`, `won`, `lost` |
| `search` | Free text over the dispute id, reason and description |
| `date_from`, `date_to` | Dates, `date_to` no earlier than `date_from` |
| `cursor` | Switches to cursor pagination |
Beyond the obvious fields, a dispute carries `description` from the payer, your
`merchant_response`, the `evidence` you filed, `resolved_at` once it is decided, and `metadata`.
On a chargeback, `metadata.source` is `provider_webhook`. Once the provider decides it,
`metadata.decided_by` is `provider` and `metadata.provider_stage` names the provider's stage that
decided it. A chargeback you won that the provider reopens goes back to `open`, with `resolved_at`
cleared and `metadata.reopened_at` set. The rules are on
[Disputes](https://docs.wajub.com/payments/disputes#how-a-chargeback-is-decided).
> [!NOTE]
> **How due_date is set**
>
> Every dispute carries `due_date`, the deadline to answer by. On a dispute opened from Pocket, it
> is seven days after the opening. On a provider chargeback, it is the provider's deadline when it
> sends one, seven days after the opening otherwise. Past its deadline, a Pocket dispute stays open
> until Wajub decides it.
## Webhooks
Seven events, and the ones worth acting on are the outcomes, plus the reminder.
| Event | Fires when |
| ------------------------------ | -------------------------------------------------------------------------------------------------------------------------------------------------------------------------------- |
| `dispute.created` | A dispute was opened, by a payer or from a chargeback. Read it and decide how to answer |
| `dispute.updated` | Any field changed, including every status change, and a won chargeback reopening (`status: open`) |
| `dispute.won` | Resolved in your favour, nothing leaves your balance. On a chargeback, the provider can still decide otherwise later |
| `dispute.lost` | Resolved against you, the amount is debited. On a chargeback, it can follow a `dispute.won` |
| `dispute.closed` | Sent together with `dispute.lost`. A won dispute does not send it |
| `dispute.deadline_approaching` | The deadline is two days away and the dispute is still `open` or `under_review`. Sent once, with `metadata.reminded_at` set, and again after a chargeback reopens; answer it now |
| `dispute.deleted` | The dispute record was removed |
`dispute.deadline_approaching` is sent for every dispute with a `due_date`: Pocket disputes and
chargebacks alike. Writing `metadata.reminded_at` on the
dispute also sends a `dispute.updated` beside it.
> [!WARNING]
> **A loss sends you three webhooks**
>
> Going to `lost` emits `dispute.updated`, `dispute.lost` and `dispute.closed`, in that order, for
> the same event. Pick one to act on, `dispute.lost`, and let the other two pass. Acting on
> `dispute.closed` as well will debit your own books twice.
> [!NOTE]
> **A won chargeback can come back**
>
> The payer's bank can rule against you at a later stage of a chargeback you won, or take the funds
> again: the dispute then goes to `lost`, or back to `open`, and sends its webhooks as any other
> change. Wajub debits a loss once per dispute, so keep acting on `dispute.lost` alone, even when a
> `dispute.won` came before it.
**`dispute.created`**: A payer has opened a dispute on one of your payments.
```json title="dispute.created"
{
"id": "evt_Qp7Tz3Wk5Yb1NdLm2Xc94Rf8",
"event": "dispute.created",
"created": "2026-09-11T12:00:00+00:00",
"livemode": true,
"data": {
"id": "dsp_hrgUOE225KMKULRQqYvlh",
"transaction": "trx_CSUGajfv9xh0XQ5wu2lx",
"customer": "cus_sAaim5apjocIgtlhzJY3wQ8s",
"amount": 25000,
"currency": "XAF",
"status": "open",
"reason": "product_not_received",
"description": "Ordered on 2 Sept, nothing delivered."
}
}
```
Deduplicate on the event `id`, as everywhere else. Registration and signature verification
are in [Webhooks](https://docs.wajub.com/developer-tools/webhooks).
- [Respond to a dispute](https://docs.wajub.com/payments/disputes/respond): Evidence, conceding, talking to the payer.
- [Webhooks](https://docs.wajub.com/developer-tools/webhooks): Receive and verify the events.
---
# Customization
URL: https://docs.wajub.com/payments/link/customization
> What every link inherits from your account, and what each one controls on its own.
Your **brand**, set once for the account, gives every link its logo, colours, font and radius. Each
**link** controls its own content: images, wording, button, questions, languages and who may open
it.
## What comes from the account, once
Logo, palette, font, corner radius and appearance mode live in **Settings → Branding**.
Change them there and every link updates at once, alongside your hosted checkout and your invoices.
The full table is on [Hosted Checkout](https://docs.wajub.com/payments/hosted-checkout#make-the-page-yours), since it is
the same setting serving all three.
> [!NOTE]
> **Branding needs a paid plan**
>
> **Settings → Branding** needs the Design Customization feature, which starts at **Growth**. On Pay as you go
> every link keeps the default appearance. Serving links from your own domain instead of
> `wajub.link` is a separate feature, Custom domain, starting at **Scale**.
## What belongs to the link
Everything below is per link, and two links in the same account can differ on every one of them.
### Images
A `poster` is the banner at the top of the page, and `gallery` holds up to ten more shown beneath
it. For a product this is the difference between a page that sells and a page that states a price.
The two routes differ in what they take. The Dashboard uploads files, JPEG, PNG, GIF or WebP up to
10 MB each, and hosts them for you. The API takes **URLs you already host**, up to 2 048 characters
each, and never uploads anything. Point them at images you serve yourself.
### The button, and what follows the payment
`cta_type` sets the button wording from `buy_now`, `pay`, `donate`, `register`, or `custom` paired
with your own `custom_cta_text` of up to 50 characters.
`thank_you_message` replaces the default confirmation once the payment succeeds. It is the last
thing the payer reads, so it is the right place for a delivery time or a next step.
### Questions for the payer
`extra_fields` adds inputs to the page: a table number, a size, a note for the kitchen.
A field has a `name`, lowercase letters, digits and underscores, a `label`, a `type` among
`text`, `email`, `tel`, `textarea`, `select` and `checkbox`, a `required` flag, an optional
`placeholder`, and for a `select` its `options`. A link takes up to ten fields. The page asks
for the payer's email on top of them, always: a payment on a link cannot be made without one.
```json title="Two questions on the page"
{
"extra_fields": [
{ "name": "size", "label": "Size", "type": "select", "required": true, "options": ["S", "M", "L"] },
{ "name": "note", "label": "Note to the seller", "type": "textarea", "required": false }
]
}
```
Give every field a `name` and a `type`. The answers travel with the payment, nested rather than
flattened: read `metadata.extra_fields.size` in your webhook handler, not `metadata.size`.
### Promo codes
A link carries up to twenty promo codes, set in the Dashboard. Each has a `code`, 3 to 32
uppercase letters, digits, dashes or underscores, unique across your links, a discount that is a
percentage or a fixed amount, and optionally a cap on redemptions and an expiry date. The payer
types the code on the page and sees the discount before paying.
### Digital products
A `digital` product is delivered by email once the payment succeeds, so the payer must give an
email address. In the Dashboard you either upload the file, from the Growth plan, or give an
`https` URL to it, on every plan; `file_url` on `POST /links` takes an address of yours, not a file
uploaded in the Dashboard.
The email's **Download now** button is a link bound to that payment, never the file's own address,
and the page shows the file only after payment. The download works for the access period you set in
the Dashboard, or for good without one, even once the link is closed or archived, and stops when the
payment is refunded in full or lost in a dispute. With `single_use_access: true` the buyer downloads the file once: the
download page asks them to keep it, and a later visit says the download was used. That is the
buyer's access, not the link's: the next buyer can still buy, unless the link is a [single-use
link](https://docs.wajub.com/payments/link/tracking#how-a-link-closes). When `file_url` is your own address, the buyer is
sent on to it, so protect it as you would any download.
### Languages
A link can be bilingual. `supported_locales` lists which of `fr` and `en` the page offers,
`default_locale` says which one opens first, and `translations` carries the other version keyed by
locale.
```json title="The same link, in two languages"
{
"default_locale": "fr",
"supported_locales": ["fr", "en"],
"translations": {
"en": {
"title": "Amina Coffee, 250 g",
"description": "Roasted in Douala, ground to order.",
"custom_cta_text": "Order now",
"thank_you_message": "Thank you, we ship within 48 hours."
}
}
}
```
Only four fields translate: `title`, `description`, `custom_cta_text` and `thank_you_message`. The
base fields on the link are what the default locale shows, so you only ever write the second
language into `translations`.
### Currencies
`supported_currencies` lets the payer switch currency on the page. The link's own `currency` is
always offered, and whatever you add joins it.
### Who is allowed in
Five independent gates, and the page closes when any one of them trips.
| Set | The page answers |
| ------------------------------------ | ----------------------------------------------- |
| `is_public` set to `false` | `404`, the link is unpublished |
| `access_password` | A password prompt before anything else is shown |
| `max_views` reached | `410`, the view limit is spent |
| `expiry_date` past, or `is_archived` | `410`, the link is over |
| `single_use_link`, once paid | That the link has already been used to pay |
A blocked attempt is not counted as a view, so the password gate does not eat into `max_views`.
### What each type adds
The type brings its own controls, and they only exist on that type.
| Type | What you can tune |
| ------------- | -------------------------------------------------------------------------------------------------------------------------------------- |
| `product` | `product_variants`, stock, shipping, weight, and for a service the duration, location and meeting URL |
| `event` | Ticket types with their own name, price and quantity, `event_capacity`, `generate_qr_tickets`, `attendee_info_fields`, `refund_policy` |
| `fundraising` | `show_progress`, `show_contributors`, `allow_overflow`, `impact_tiers`, `campaign_deadline`, `fundraising_milestones` |
| `donation` | `suggested_amounts`, `allow_custom_amount`, `min_amount`, `max_amount`, `allow_anonymous`, `show_donor_wall` |
A service's meeting URL is never on the page before payment: the payer gets it in the confirmation
email of their payment, with what to prepare, and the page offers to join it once they have paid.
## What the API can set, and what it cannot
This is the part worth knowing before you automate anything. The API and the Dashboard do not reach
the same fields, and `POST /links` reaches more than `PUT /links/{id}`.
| Field | Create via API | Update via API | Dashboard |
| -------------------------------------------------------- | -------------- | -------------- | ----------------- |
| `title`, `description`, `price` | Yes | Yes | Yes |
| `currency` | Yes | No | Yes |
| `target_amount`, `min_amount`, `max_amount` | Yes | Yes | Yes |
| `callback_url` | Yes | Yes | No |
| `cta_type`, `custom_cta_text` | Yes | Yes | Yes |
| `custom_url`, `tags` | Yes | Yes | Yes |
| `category_id` | No | No | Yes |
| `is_public`, `is_archived`, `expiry_date`, `sales_limit` | Yes | Yes | Yes |
| `accept` (payment methods offered) | Yes | Yes | Yes |
| `extra_fields`, `thank_you_message` | Yes | No | Yes |
| `poster`, `gallery` | Yes, as URLs | No | Yes, as uploads |
| `allow_overflow`, on a fundraiser | Yes | Yes | Yes |
| Other type-specific fields, event and fundraising | Yes | No | Yes |
| `supported_locales`, `default_locale`, `translations` | No | No | Yes |
| `supported_currencies` | No | No | Yes |
| `access_password`, `max_views` | No | No | Yes |
| `single_use_link`, `single_use_access` | Yes | No | Yes |
| `file_url`, a digital product's file at your own address | Yes | No | Yes, or an upload |
| Promo codes | No | No | Yes |
| Custom domain, ticket types | No | No | Yes |
> [!WARNING]
> **Updating through the API is narrower than creating**
>
> `PUT /links/{id}` ignores the fields marked No in the Update via API column, and still answers
> `200`. Edit those in the Dashboard.
## In the Dashboard
Languages, currencies, the access password, the view limit, a custom domain and event ticket types
are set only in the Dashboard, on the link's form. The dashboard guide shows [how to create a
link](https://docs.wajub.com/dashboard/payment-links/create) and [how to edit one](https://docs.wajub.com/dashboard/payment-links/edit-offline-delete#edit).
Each link also carries its own webhook endpoints, separate from your account-wide ones, with their
own secret, a test send and a retry. Use them when one campaign needs to notify a system the rest of
your account does not. A delivery counts only when the endpoint answers with a `2xx`: any other
answer, a redirect included, is logged as failed and retried, and a redirect is never followed. The
test send tells you only whether the endpoint accepted it. The dashboard guide shows [where to add
one](https://docs.wajub.com/dashboard/payment-links/notify-server).
- [Payment Links](https://docs.wajub.com/payments/link): What the product is, and when a link beats an integration.
- [Quickstart](https://docs.wajub.com/payments/link/quickstart): Create a link, publish it, share it.
- [Tracking and conversions](https://docs.wajub.com/payments/link/tracking): Views, conversion rate, and the life of a link.
- [Hosted Checkout branding](https://docs.wajub.com/payments/hosted-checkout): The account-wide settings every payment page inherits.
- [Payment Links API reference](https://docs.wajub.com/api/payment-links): Every field the API accepts, endpoint by endpoint.
---
# Payment Links
URL: https://docs.wajub.com/payments/link
> Collect money from a URL you share, with no integration and no page of your own.
A payment link is a URL that takes money: you describe what you are selling, Wajub hosts the page,
and you share the address wherever your customers are. No code and no server of yours.
## When a link beats an integration
Reach for a link when the thing you are selling does not justify a checkout, or when there is no
site to put a checkout on.
A shop that sells on WhatsApp and has no storefront. A one-off invoice to a single client. Tickets
for an event next month. A fundraising campaign that needs a progress bar and a donor wall. A
consultant taking a deposit before a booking.
Reach for [Hosted Checkout](https://docs.wajub.com/payments/hosted-checkout) instead as soon as the payment is the end of
a flow your software controls: a cart, an order, a subscription. A link knows nothing about your
order, and cannot be created at the moment a customer needs it unless you call the API.
## Four kinds of link
The type is not a label, it changes the page. Pick the one that matches what you are collecting.
| Type | The page renders | Reach for it when |
| ------------- | ------------------------------------------------- | ------------------------------------- |
| `product` | A fixed price and a buy button | You sell one thing at one price |
| `event` | A date, a venue, a ticket count | You sell entry to something happening |
| `fundraising` | A goal, its progress, optionally the contributors | You are collecting toward a total |
| `donation` | A free amount, within bounds you can set | The payer decides what to give |
A `product` link also carries a `product_type`, one of `physical`, `digital` or `service`, which is
what brings stock, shipping or booking fields onto the page.
## Two ways to make one
**The Dashboard** is the normal route. **Links → Create Link** walks the fields with a live preview,
generates the QR code, and publishes when you are ready. Nothing on this page requires a developer.
**The API** is for when links are produced by your own software: one per client, one per campaign,
one per order. Same object, same page.
`POST /links`
The full field list, the required ones per type, and the traps worth knowing are in the
[Quickstart](https://docs.wajub.com/payments/link/quickstart).
> [!CAUTION]
> **Two things that will catch you**
>
> Links are **production only**. There is no sandbox equivalent, so the first link you make takes
> real money: a test key gets `403` on every `/links` call, with
> `This feature is only available in live mode.` And a link **goes live the moment you create it**: `is_public` defaults to `true`,
> so the URL that comes back is open to payers straight away. Send `is_public: false` to stage a
> link and publish it when you are ready.
## What it costs you in plan
Payment links need the Payment Links feature. **Pay as you go** includes them, capped at 25 live
links; Growth and above lift the cap entirely. Creating past your cap answers `403` with an upgrade
message rather than failing silently. Archived links count toward the cap: delete a link, rather
than archive it, to free its place.
By default a link is served from `wajub.link`. On Scale, a verified custom domain serves it instead,
so the address the payer sees is yours.
## What you get back
A link produces ordinary payments, on the same channels as everything else: MTN, Orange, Wave,
Airtel, Moov, M-Pesa, and cards where the country supports them. The full matrix is in [Payment
methods](https://docs.wajub.com/payments/payment-methods).
So there is no separate reconciliation. The payment lands in your Payments list, fires
`payment.succeeded`, settles into your balance and can be refunded like any other. What the link
adds on top is the page, the sharing, and per-link analytics.
| Need | Where |
| ------------------------------------------ | --------------------------------------------- |
| Make your first link | [Quickstart](https://docs.wajub.com/payments/link/quickstart) |
| Change how the page looks | [Customization](https://docs.wajub.com/payments/link/customization) |
| See views, conversions and the link's life | [Tracking](https://docs.wajub.com/payments/link/tracking) |
| Every field on the resource | [API reference](https://docs.wajub.com/api/payment-links) |
- [Payment Links Quickstart](https://docs.wajub.com/payments/link/quickstart): Create a link, publish it, share it, get told when someone pays.
- [Customization](https://docs.wajub.com/payments/link/customization): Brand colours, logo, and the fields on the page.
- [Tracking and conversions](https://docs.wajub.com/payments/link/tracking): Views, conversion rate, and the life of a link.
- [Choose your integration](https://docs.wajub.com/payments/integration-paths): The four modes compared, and when a link is the wrong one.
- [Payment methods](https://docs.wajub.com/payments/payment-methods): Which operators your payers see, country by country.
- [Webhooks](https://docs.wajub.com/developer-tools/webhooks): Listen for payment.succeeded and fulfil automatically.
---
# Quickstart
URL: https://docs.wajub.com/payments/link/quickstart
> Create a payment link, share it, and get paid without writing an integration.
Create a link, share its address, and get told by webhook when someone pays, without writing an
integration.
> [!WARNING]
> **Production only, and plan-gated**
>
> Payment links do not exist in the sandbox. Every link is live and takes real money from the first
> share, so the thing you test with is a small real amount you refund afterwards. The feature also
> needs the Payment Links feature on your plan: **25 links on Pay as you go**, unlimited from Growth
> upward. Past the cap, creation answers `403` with an upgrade message. A test key (`sk_test.`) gets
> `403` on every `/links` call, with `This feature is only available in live mode.`
## 1. Pick what the link is for
The `type` decides the shape of the page and which fields become mandatory. Four exist, and the
choice is not cosmetic: a fundraising link renders a progress bar, an event link renders a date and
a venue.
| Type | What the payer sees | What it requires |
| ------------- | --------------------------------------- | ------------------------------------------------------ |
| `product` | A fixed price you set | `price` |
| `event` | A date, a venue, a ticket count | `event_start_date`, `event_location`, `event_timezone` |
| `fundraising` | A campaign with a goal and its progress | `target_amount` |
| `donation` | A free amount, or one you bound | Nothing beyond the basics |
Beyond the type, every link needs a `title` of at least three characters, a `currency`, and a
`cta_type` that sets the wording of the button: `buy_now`, `pay`, `donate`, `register`, or `custom`
with your own `custom_cta_text`.
A `product` link also requires a `product_type`, one of `physical`, `digital` or `service`, which
is what brings in stock, shipping or booking fields further down.
## 2. Create it
The Dashboard is the fastest route: **Links → Create Link** walks through the same fields with a
preview beside them. What follows is the API equivalent, for when links are generated by your own
software.
`POST /links`
- `type` (enum, required): `product`, `event`, `fundraising` or `donation`.
- `product_type` (enum): Required for a `product`: `physical`, `digital` or `service`.
- `title` (string, required): Shown as the heading on the page. Three characters minimum.
- `currency` (string, required): ISO 4217 code, the currency every payment on this link is collected in.
- `cta_type` (enum, required): Button wording: `buy_now`, `pay`, `donate`, `register` or `custom`.
- `price` (number): Required for a `product`. The fixed amount the payer is charged.
- `target_amount` (number): Required for `fundraising`. The goal the progress bar fills toward.
- `min_amount` (number): Floor for a free amount, on a `donation`.
- `max_amount` (number): Ceiling for a free amount, on a `donation`.
- `custom_url` (string): Your own slug in place of the generated one, letters, digits, dashes and underscores. Unique across Wajub, deleted links included: a slug another merchant, or a link you deleted, already holds answers `422` on `custom_url`.
- `external_reference` (string): Your own reference for the link, up to 255 characters. Returned as you sent it, never shown to payers.
- `description` (string): Body text on the page, up to 5 000 characters.
- `callback_url` (string (url)): Where the payer is sent once the payment ends: after a success, and also when they cancel on the page. Read `status` in the query string.
- `expiry_date` (string (date)): When the link stops accepting payments. Must be in the future.
- `sales_limit` (integer): How many units the link may sell. Each payment counts its quantity, and a payment still in progress holds its units until it succeeds or expires.
- `extra_fields` (array): Questions asked on the page. Covered in the next step.
- `is_public` (boolean, default `true`): Whether the page opens at its URL. Send `false` to create the link offline: it answers `404` to payers until you publish it.
Send it with the secret key. Links are live only, so the key is `sk.` and not `sk_test.`.
**Create a product link**
```bash
curl https://api.wajub.com/links \
-H "Authorization: sk.xxxxxxxxxxxxxxxx…" \
-H "Content-Type: application/json" \
-H "Idempotency-Key: link-cafe-amina" \
-d '{
"type": "product",
"product_type": "physical",
"title": "Café Amina, 250 g",
"currency": "XAF",
"price": 3500,
"cta_type": "buy_now",
"custom_url": "cafe-amina",
"is_public": true
}'
```
```javascript
const link = await wajub.links.create({
type: 'product',
product_type: 'physical',
title: 'Café Amina, 250 g',
currency: 'XAF',
price: 3500,
cta_type: 'buy_now',
custom_url: 'cafe-amina',
is_public: true,
});
console.log(link.url);
```
```python
link = wajub.links.create({
"type": "product",
"product_type": "physical",
"title": "Café Amina, 250 g",
"currency": "XAF",
"price": 3500,
"cta_type": "buy_now",
"custom_url": "cafe-amina",
"is_public": True,
})
print(link.url)
```
```php
$link = $wajub->links->create([
'type' => 'product',
'product_type' => 'physical',
'title' => 'Café Amina, 250 g',
'currency' => 'XAF',
'price' => 3500,
'cta_type' => 'buy_now',
'custom_url' => 'cafe-amina',
'is_public' => true,
]);
echo $link->url;
```
```go
link, err := client.Links.Create(context.Background(), map[string]any{
"type": "product",
"product_type": "physical",
"title": "Café Amina, 250 g",
"currency": "XAF",
"price": 3500,
"cta_type": "buy_now",
"custom_url": "cafe-amina",
"is_public": true,
}, nil)
```
The answer is `201 Created`, and `url` is what you came for: the address you share, built from your
`custom_url` when you set one and from the generated id otherwise.
```json title="Response · 201 Created"
{
"code": 201,
"status": "Created",
"message": "Payment link created",
"link": {
"id": "8kD2xQpLm",
"type": "product",
"product_type": "physical",
"title": "Café Amina, 250 g",
"currency": "XAF",
"price": 3500,
"cta_type": "buy_now",
"custom_url": "cafe-amina",
"url": "https://wajub.link/cafe-amina",
"qr_url": null,
"is_public": true,
"is_archived": false,
"tags": [],
"created_at": "2026-09-11T14:00:00+00:00"
}
}
```
> [!CAUTION]
> **A link goes live the moment you create it**
>
> `is_public` defaults to `true`, so the URL in the response takes real money as soon as you have
> it. Send `is_public: false` to create the link offline instead: it then answers `404 This payment
> link is not available` to everyone who opens it, until you publish it with `PUT /links/{id}` or
> from the link's page in the Dashboard. The Dashboard creates links online too, and shows the same
> flag as the link's Status.
> [!WARNING]
> **The QR code comes from the Dashboard**
>
> `qr_url` can be `null` on a link created through the API. Download the QR code from the link's
> page in the Dashboard, or render one yourself from `url`.
> [!NOTE]
> **A link id is not prefixed like the rest of the API**
>
> Payments are `trx_…`, customers are `cus_…`, but a link id is a bare nine-character string such as
> `8kD2xQpLm`, because it doubles as the URL slug. Set `custom_url` and it is your slug that lands
> in the address instead; the id stays what you pass to `GET /links/{id}`.
## 3. Ask the payer a question, if you need to
A table number, a T-shirt size, a delivery note: `extra_fields` adds inputs to the page and carries
the answers through to the payment.
```json title="Two questions on the page"
{
"extra_fields": [
{ "name": "table", "label": "Table number", "type": "text", "required": true },
{ "name": "note", "label": "Note to the kitchen", "type": "textarea", "required": false }
]
}
```
A field needs a `name` and a `type`: the `name` is the key its answer comes back under, and the
`type` is the input the page draws. [Customization](https://docs.wajub.com/payments/link/customization#questions-for-the-payer) lists the types and
the other options.
What the payer types comes back on the payment, nested under its metadata rather than spread across
it, so `metadata.extra_fields.table` is where the table number is. Read it there in your webhook
handler and you have the answer next to the money.
## 4. Share it
The `url` works anywhere a URL works: a WhatsApp message, a bio, an SMS, a printed poster. Nothing
needs to be embedded and there is no page of yours involved. For a poster, the Dashboard gives you
the QR code on the link's own page, ready to download.
By default a link lives on `wajub.link`. On the Scale plan, a verified custom domain serves it
instead, so the address the payer sees is yours.
On the page, the payer gets the operators available in their country, the same list the hosted
checkout offers: MTN, Orange, Wave, Airtel, Moov, M-Pesa and cards where the country supports them.
The full matrix is in [Payment methods](https://docs.wajub.com/payments/payment-methods).
## 5. Get told when someone pays
A link produces ordinary payments. There is no `link.paid` event: what you listen for is
`payment.succeeded`, exactly as with every other mode.
| Event | Fires when |
| ------------------- | ------------------------------------------------- |
| `payment.succeeded` | Someone paid through the link. Fulfil on this one |
| `link.created` | A link was created |
| `link.updated` | A link was edited, archived or unarchived |
| `link.deleted` | A link was deleted |
| `link.expired` | A link's `expiry_date` passed |
Setting a `callback_url` sends the payer to your page afterwards, but that is a courtesy for them,
not a signal for you. Treat the webhook as the source of truth, as always.
[Webhooks](https://docs.wajub.com/developer-tools/webhooks) covers registration and signature verification.
## Closing a link
Three different ways, depending on what you mean by closed.
| You want | Set |
| --------------------------------------------------- | ----------------------- |
| It to stop on a date | `expiry_date` |
| It to stop after N sales | `sales_limit` |
| It to stop after one sale, with one payer at a time | `single_use_link: true` |
A link can also be archived with `is_archived` through `PUT /links/{id}`, which takes it out of your
lists without destroying what it has already collected. `DELETE /links/{id}` removes it outright.
## In the Dashboard
**Links** is the whole product without the API, and it shows what the API does not: each link's
views and conversion, the payments it produced and the people who paid, exportable. The dashboard
guide covers it, from [creating a link](https://docs.wajub.com/dashboard/payment-links/create) to [tracking
one](https://docs.wajub.com/dashboard/payment-links/track).
The section needs the Payment Links feature on the plan and the `view_links` or `manage_links`
permission, and it is hidden entirely while you are in sandbox.
- [Payment Links overview](https://docs.wajub.com/payments/link): What the product is, and when a link beats an integration.
- [Customization](https://docs.wajub.com/payments/link/customization): Brand colours, logo, and the fields on the page.
- [Tracking and conversions](https://docs.wajub.com/payments/link/tracking): Views, conversion rate, and the life of a link.
- [Payment methods](https://docs.wajub.com/payments/payment-methods): Which operators your payers see, country by country.
- [Webhooks](https://docs.wajub.com/developer-tools/webhooks): Register an endpoint and verify the signature.
- [Payment Links API reference](https://docs.wajub.com/api/payment-links): Every field on the resource, and the five endpoints.
---
# Tracking and conversions
URL: https://docs.wajub.com/payments/link/tracking
> What a link actually measures, where those numbers live, and how it closes.
The API tells you whether a link is still open; only the Dashboard shows how it performs.
## The API has no counters
`GET /links/{id}` returns what the link *is*, never how it has *performed*: no views, conversions
or revenue.
`GET /links/{id}`
**Retrieve a link**
```bash
curl https://api.wajub.com/links/8kD2xQpLm \
-H "Authorization: sk.xxxxxxxxxxxxxxxx…"
```
```javascript
const link = await wajub.links.retrieve('8kD2xQpLm');
console.log(link.is_public, link.is_archived, link.expiry_date);
```
```python
link = wajub.links.retrieve("8kD2xQpLm")
print(link.is_public, link.is_archived, link.expiry_date)
```
```php
$link = $wajub->links->retrieve('8kD2xQpLm');
echo $link->url;
```
```go
link, err := client.Links.Retrieve(context.Background(), "8kD2xQpLm")
if err != nil {
log.Fatal(err)
}
log.Println(link["url"], link["is_public"])
```
The answer is the link's state, which is what you poll to know whether it is still collecting.
```json title="Response · 200 OK"
{
"code": 200,
"status": "OK",
"message": "Payment link retrieved",
"link": {
"id": "8kD2xQpLm",
"type": "product",
"title": "Café Amina, 250 g",
"url": "https://wajub.link/cafe-amina",
"currency": "XAF",
"price": 3500,
"is_public": true,
"is_archived": false,
"expiry_date": null,
"sales_limit": null,
"created_at": "2026-09-11T14:00:00+00:00"
}
}
```
Listing works the same way. It takes `per_page`, `search`, `archived` to see archived links instead
of live ones, `only_public`, `type` (`product`, `event`, `fundraising` or `donation`), and
`sort_by` (`created_at`, `updated_at`, `title` or `type`) with `sort_dir` (`desc` or `asc`). The
list follows the sort first, then the newest first among links that tie. For exports, a `cursor`
walks the list in its default order, newest first: with another sort the list is paged by number
and carries no cursor. A `type`, `sort_by` or `sort_dir` outside these values is a `422` on that
field, as a `per_page` out of range is.
`GET /links`
## What is actually measured
Every visit that gets past the access gates is counted, with where it came from (the HTTP
referrer), the visitor's country and their device type.
Unique visitors are counted **per day**, so the same person visiting on two days counts as two
unique visitors. Read the figure as "unique per day", not as people.
> [!NOTE]
> **A blocked visit is not a view**
>
> When a link is password-protected, an attempt that fails the password is not counted. Neither is a
> visit to a link that is unpublished, expired or past its view limit. The counter only moves for
> visits that actually reached the page, which is what makes `max_views` a usable limit.
## The numbers, and where to read them
**Links → a link → Overview** is the only place these surface. **Total Views**, **Total Sales** and
**Total Revenue** count the link's whole life, and **Conversion Rate** sets those sales against its
visitors. The period you pick, the last 7, 14, 30 or 90 days, changes only the charts: the bars
under each total and **Visits & Sales Trends**. The average transaction, views per transaction, top
countries and devices always cover the last 30 days.
> [!WARNING]
> **Conversion rate is per visitor, not per view**
>
> The figure is `transactions ÷ unique visitors`, not `transactions ÷ views`. A page someone opened
> four times before paying counts as one visitor and one conversion, so the rate reads higher than a
> per-view calculation would. Compare it against itself over time rather than against a number from
> another tool.
## Attributing a channel
There is no query parameter that tags a visit. A `?src=whatsapp` on the shared URL is carried
nowhere: it does not reach the payment, it is not stored on the view, and it will not appear in any
report.
What you have instead is two things that do work.
The **referrer** is captured automatically, so traffic that arrives with one, from a link in a post
or a page, already shows its origin in the analytics. Traffic from WhatsApp, SMS or a QR code
carries no referrer, which is most of the traffic in practice.
So for anything you genuinely need to attribute, **make one link per channel**. Same product, same
price, different `custom_url`: `wajub.link/cafe-whatsapp`, `wajub.link/cafe-instagram`. Each keeps
its own views, its own conversion rate and its own revenue, and the comparison is exact rather than
inferred.
A payment made on a link names it: its `link` field is the link's `id`, in the API and in the
`payment.*` webhooks, so your handler knows which link, and so which channel, the money came from.
`GET /payments` has no link filter: to list a link's payments, read **Links → a link →
Transactions** in the Dashboard, or keep the `link` of each payment as it arrives.
## How a link closes
Five settings end a link's life, and they do not close it in the same way.
| Set | Closes | The payer gets |
| ----------------------- | ---------------------------------------------- | -------------------------------------------------------------------------------------------------- |
| `expiry_date` | The page, at a moment you choose | `410`, before anything renders |
| `is_archived` | The page, now | `410`, before anything renders |
| `sales_limit` | The payment, not the page | `422` on paying, `This payment link has reached its sales limit.` |
| `single_use_link` | The page, after its first successful payment | A page saying the link has already been used to pay |
| `allow_overflow: false` | A fundraiser's gifts, once it reaches its goal | A page saying the fundraiser has reached its goal; `410` with `error_code: goal_reached` on paying |
The difference matters. An expired or archived link never opens: the payer sees a closed page and
that is the end of it. A link at its sales limit **still opens normally**, shows the product and the
button, and only refuses when they try to pay. If you are selling a fixed quantity, expect payers to
reach that message rather than a closed page.
A single-use link takes one payer at a time. While someone is paying through it, another payer is
told that a payment through the link is in progress, and that the link opens again if that payment
does not go through. Once a payment succeeds, the link stays closed, even if you refund it. No field
of the link says it is closed: `payment.succeeded`, whose `link` is the link's `id`, is your signal.
Should a second payment still succeed through it, such as an earlier attempt the operator confirms
late, your team's owner, administrators and finance members get an e-mail naming the payment to
refund: Wajub does not refund it on its own.
A fundraiser with `allow_overflow` off stops taking gifts once what it kept reaches `target_amount`.
The gift that crosses the goal goes through; the next checkout answers `410` with `error_code:
goal_reached`, and the page, which still opens, says the fundraiser has reached its goal. A refund
that brings the total back below the goal opens it again. With `allow_overflow` on, the fundraiser
goes on past its goal. `POST /links` creates a fundraiser with `allow_overflow` off unless you send
it, and `PUT /links/{id}` changes it.
`link.expired` is sent once, within a day after a link's `expiry_date` passes, unless the link is
archived by then, with the link in `data`. Archiving sends `link.updated`, and so does a sale or a
refund that changes a product's stock. Reaching the sales limit, closing a single-use link and reaching a
fundraiser's goal send no event of their own.
Archiving is the reversible one: set `is_archived` back to `false` through `PUT /links/{id}` and the
link collects again, keeping everything it already gathered. `expiry_date` is a condition rather
than a state, so moving it forward reopens a link that had closed on it.
Unpublishing with `is_public: false` also closes a link, but answers `404` rather than `410`, since
an unpublished link is meant to look like it never existed. The access gates are covered in
[Customization](https://docs.wajub.com/payments/link/customization#who-is-allowed-in).
## What a refund gives back
A link counts what it kept, not what it once collected. A refund that succeeds, or a dispute you
lose, gives back what the payment took:
- A ticket or unit whose whole price is refunded no longer counts against `event_capacity`,
`sales_limit` or its ticket type's quantity, and goes back into a physical product's stock. A
refund of part of a ticket's price keeps the ticket: three 3 000 XAF tickets refunded 3 000 XAF
leave two sold.
- On a fundraiser or a donation page, the total raised, the progress towards the goal and the
number of supporters drop by what was refunded. A gift refunded in full leaves the donor wall,
and a fundraiser closed at its goal opens again if the total falls back below it.
- A payment lost in a dispute counts for nothing, like a full refund. A dispute still open, or one
you won, changes nothing.
A refund that fails, or one still on its way, changes nothing either.
## Webhooks of one link
A link's **Webhooks** tab in the Dashboard sends that link's own events to an address of yours,
with a signing secret of its own. They come on top of your account's webhooks, which cover every
payment.
| Event | Sent when |
| ------------------- | ---------------------------------------------------------------------------------------- |
| `payment.success` | A payment through the link succeeded, whatever its type |
| `ticket_purchased` | Tickets were bought on an event link |
| `donation.received` | A gift was received on a donation or fundraising link |
| `order.placed` | An order was paid on a product link |
| `payment.refunded` | A refund of one of its payments succeeded, once per refund, or a dispute on one was lost |
| `link_expired` | The link's `expiry_date` passed |
A payment that fails sends nothing. Sandbox payments go only to a sandbox link's endpoints, with
`sandbox: true`. In sandbox, a refund made from the dashboard sends no
`payment.refunded`.
Every delivery is a `POST` with a JSON body, signed in `X-Webhook-Signature` and named in
`X-Webhook-Event`. Every event also carries an `id` in the body and the same value in
`X-Webhook-Id`:
| Header | What it is |
| --------------------- | ------------------------------------------------------------------- |
| `X-Webhook-Signature` | Hex HMAC-SHA256 of the raw body, with the endpoint's signing secret |
| `X-Webhook-Event` | The event, as in the body |
| `X-Webhook-Id` | The event's `id`, as in the body |
**Verify a link delivery**
```javascript
import crypto from 'node:crypto';
app.post('/webhooks/link', express.raw({ type: 'application/json' }), (req, res) => {
const expected = crypto.createHmac('sha256', process.env.LINK_WEBHOOK_SECRET).update(req.body).digest('hex');
const received = String(req.headers['x-webhook-signature'] ?? '');
if (received.length !== expected.length || !crypto.timingSafeEqual(Buffer.from(received), Buffer.from(expected))) {
return res.sendStatus(400);
}
const event = JSON.parse(req.body);
// Skip an event.id you have already handled, then fulfil.
res.sendStatus(200);
});
```
```php
$raw = file_get_contents('php://input');
$expected = hash_hmac('sha256', $raw, getenv('LINK_WEBHOOK_SECRET'));
if (! hash_equals($expected, $_SERVER['HTTP_X_WEBHOOK_SIGNATURE'] ?? '')) {
http_response_code(400);
exit;
}
$event = json_decode($raw, true);
// Skip an $event['id'] you have already handled, then fulfil.
```
Answer with a `2xx` once the event is stored. A delivery that fails is tried again, for up to 72
hours, so the same event can arrive more than once. An event keeps its `id` every time, so keep the
ones you have handled and skip them. A delivery sent again from the tab has the same body and the
same `X-Webhook-Id`.
`timestamp` is when the event happened, not when it was sent: a retry, or a delivery sent again from
the tab, keeps it.
Every payment event carries the link and the payment. The payer is named by `name` and `email`
only: a payload never holds their phone number or card. What was typed at checkout comes with every
run of seven digits or more masked, as `23••••89`, inside a sentence too; `answers` holds only the
link's own questions, each cut at 500 characters.
```json title="ticket_purchased"
{
"id": "lwe_5b3c2f1e-8d0a-5c4b-9e7f-2a1d6c0b9e84",
"event": "ticket_purchased",
"link_id": "9f3a1c52-6b1e-4f7d-a1c2-7e0d4b8f2a61",
"link_uid": "8kD2xQpLm",
"link": {
"id": "9f3a1c52-6b1e-4f7d-a1c2-7e0d4b8f2a61",
"uid": "8kD2xQpLm",
"title": "Afrobeats night",
"type": "event"
},
"sandbox": false,
"timestamp": "2026-10-23T18:04:11+00:00",
"payment": {
"id": "trx_CSUGajfv9xh0XQ5wu2lx",
"reference": "order-4172",
"amount": 10000,
"currency": "XAF",
"status": "succeeded",
"amount_refunded": 0,
"dispute_lost": false,
"quantity": 2,
"quantity_kept": 2,
"channel": "cm.mtn",
"customer": { "id": "cus_Qe7Tb2Wn5Lr9Xc4Mv8Hk1Zs3", "name": "Ada Obi", "email": "ada@example.com" },
"answers": { "company": "Acme" },
"paid_at": "2026-10-23T18:04:09+00:00",
"created_at": "2026-10-23T18:02:47+00:00"
},
"ticket": {
"ticket_type": { "id": "3e1b7a90-2c4d-4f6e-8a1b-5d9c0e2f7b13", "name": "VIP" },
"quantity": 2,
"attendees": [{ "Full name": "Ada Obi", "Phone": "23••••33" }, { "Full name": "Ben Eko" }],
"event_start_date": "2026-11-07T20:00:00+00:00"
}
}
```
`link_uid` is the link's `id` in the API, and `payment.id` the payment's. `quantity_kept` is what
the payment still holds once its refunds and disputes are counted, as above. Each event adds one
object next to `payment`:
| Event | Adds |
| ------------------- | ----------------------------------------------------------------------------------------------------------------------------------------------------------------------------------------------------------------------------------------------------------------------------- |
| `payment.success` | Nothing more |
| `ticket_purchased` | `ticket`: `ticket_type` (`id`, `name`), `quantity`, `attendees`, `event_start_date` |
| `donation.received` | `donation`: `amount`, `currency`, `anonymous`, `recurring_interval` |
| `order.placed` | `order`: `product_type`, `quantity`, `variant`, `shipping_address` with its `phone` masked |
| `payment.refunded` | `refund`: `id`, `amount`, `currency`, `reason`, `created_at`. `payment.status` is then `partially_refunded` or `refunded`. For a lost dispute, `dispute` in place of `refund`: `id`, `amount`, `currency`, `reason`, `status`, `created_at`, with `payment.dispute_lost` true |
`anonymous` means the donor asked to stay off the public donor wall: you still get their name. A
lost dispute sends `payment.refunded` once; when a refund then settles it, that refund sends its own,
with another `id`. `link_expired` carries `id`, `event`, `link_id`, `link_uid`, the link with its
`expiry_date`, and `timestamp`.
## Reconciling the money
A link's payments are ordinary payments. They arrive in your Payments list, fire
`payment.succeeded`, settle into your balance and refund like any other, so there is nothing
link-specific to reconcile.
What the webhook carries is whatever the payer typed into your `extra_fields`, nested under
`metadata.extra_fields`, and the `link` the payment came from.
- [Payment Links](https://docs.wajub.com/payments/link): What the product is, and when a link beats an integration.
- [Quickstart](https://docs.wajub.com/payments/link/quickstart): Create a link, publish it, share it.
- [Customization](https://docs.wajub.com/payments/link/customization): Images, languages, currencies, and who is allowed in.
- [Webhooks](https://docs.wajub.com/developer-tools/webhooks): Listen for payment.succeeded and fulfil automatically.
- [Payment Links API reference](https://docs.wajub.com/api/payment-links): Every field on the resource, and the five endpoints.
---
# Bank transfers
URL: https://docs.wajub.com/payments/payment-methods/bank-transfers
> Domestic transfers on the `bank` channel, settled on the bank's clock.
For large amounts, mostly business to business. The customer receives account details, and the
payment moves to `succeeded` once the funds land.
| Type | Channel | Countries |
| --- | --- | --- |
| Domestic transfer | `bank` | CM, CI, SN, NG, GH |
A transfer settles on the bank's clock, not on the customer's. Expect a delay between the moment
they confirm and the moment the webhook fires, and never hold an order open in the browser waiting
for it.
- [Payment lifecycle](https://docs.wajub.com/payments/lifecycle): What the payment goes through until the funds land.
- [Webhooks](https://docs.wajub.com/developer-tools/webhooks): Hear about the payment when the transfer settles.
---
# Bank cards
URL: https://docs.wajub.com/payments/payment-methods/cards
> Visa and Mastercard on the `card` channel, and when Wajub asks for 3-D Secure.
Visa and Mastercard, offered on the hosted page wherever the settlement currency allows it.
| Network | Detected as | Notes |
| --- | --- | --- |
| Visa | `visa` | 3-D Secure 2 when requested |
| Mastercard | `mastercard` | 3-D Secure 2 when requested |
The channel is `card`, for both networks: you never name the brand. American Express, Discover,
Diners, JCB and Maestro are accepted where your provider supports them.
Wajub asks for 3-D Secure when [Shield](https://docs.wajub.com/risk/shield) calls for it: Shield Advanced's Auto 3DS from your
review threshold, or a `challenge_3ds` rule. Otherwise the provider and the card issuer apply their
own policy.
- [Shield](https://docs.wajub.com/risk/shield): The rules that ask for 3-D Secure.
- [Hosted Checkout](https://docs.wajub.com/payments/hosted-checkout): The page where the payer enters the card.
---
# Payment methods & channels
URL: https://docs.wajub.com/payments/payment-methods
> Every method Wajub collects with, its channel identifier, and where it works.
Every payment method is named by a **channel**: a family on its own, `mobile`, `card`, `bank` or
`crypto`, or a precise operator in the `country.operator` form. The hosted page offers every channel
your account can collect on; narrow it per payment with
[`accept`](#choosing-what-a-payment-accepts), and name a channel only in a Direct API charge.
> [!NOTE]
> **How to read a channel**
>
> `cm.mtn` is MTN Mobile Money in Cameroon, `sn.wave` is Wave in Senegal. The prefix is the ISO
> 3166-1 alpha-2 country code and the suffix the operator. A bare family name such as `mobile` lets
> Wajub resolve the operator from the phone number instead.
Each family has its own page:
- [Mobile Money](https://docs.wajub.com/payments/payment-methods/mobile-money), the operators and their channels, and the
[phone number formats](https://docs.wajub.com/payments/payment-methods/phone-numbers) each one accepts.
- [Bank cards](https://docs.wajub.com/payments/payment-methods/cards), Visa and Mastercard on the `card` channel.
- [Bank transfers](https://docs.wajub.com/payments/payment-methods/bank-transfers), on the `bank` channel.
- [Wallets & crypto](https://docs.wajub.com/payments/payment-methods/wallets-and-crypto), Apple Pay, Google Pay and the
`crypto.{asset}` channels.
## Where each country stands
The currency decides which channels exist, and the account's providers decide which of them are
switched on.
| Country | Currency | Mobile Money | Cards |
| --- | --- | --- | --- |
| Cameroon | XAF | MTN, Orange, Express Union | Yes |
| Côte d'Ivoire | XOF | MTN, Orange, Wave, Moov | Yes |
| Senegal | XOF | Orange, Wave, Free | Yes |
| Benin | XOF | MTN, Moov | Yes |
| Burkina Faso | XOF | Orange, Moov | Yes |
| Togo | XOF | T-Money, Moov | Yes |
| Mali | XOF | Orange, Moov | Yes |
| Ghana | GHS | MTN, Vodafone, AirtelTigo | Yes |
| Nigeria | NGN | OPay, through a Flutterwave v4 connection. Bank transfer and USSD too; PalmPay coming soon | Yes |
| Kenya | KES | M-Pesa, Airtel | Yes |
| Uganda | UGX | MTN, Airtel | Yes |
| Rwanda | RWF | MTN, Airtel | Yes |
| Tanzania | TZS | M-Pesa, Airtel, Tigo, Halopesa | Yes |
| Gabon | XAF | Airtel, Moov | Yes |
| Congo | XAF | MTN, Airtel | Yes |
| DR Congo | CDF | Orange, Airtel, Vodacom, Africell | Yes |
| Guinea | GNF | MTN, Orange | Yes |
| Liberia | LRD | MTN | Yes |
| Sierra Leone | SLE | Orange | Yes |
| Zambia | ZMW | MTN, Airtel, Zamtel | Yes |
| Malawi | MWK | Airtel, TNM | Yes |
| Mozambique | MZN | M-Pesa | Yes |
## Choosing what a payment accepts
Nothing is hidden by default: the payer sees every method your account can collect on, and a payment
in a currency a wallet does not use is converted, as described in
[Limits](https://docs.wajub.com/resources/limits). To narrow it, send `accept` when you create the payment, the link or the
invoice. Every key is optional, and a key you leave out narrows nothing.
- `accept.countries` (string[]): Only channels of these countries, as ISO 3166-1 alpha-2 codes. Cards and crypto belong to no country, so this never removes them.
- `accept.channels` (string[]): Only these channels, such as `cm.mtn`. An aggregate like `cm.mobile` stands for every mobile operator of that country, and `mobile` for every mobile operator.
- `accept.types` (string[]): Only these kinds of channel, such as `mobile_money` or `card`.
- `accept.currencies` (string): `any` (the default) offers every channel, converting the amount when the currencies differ. `payment` keeps only the channels that settle in the currency of the payment, so a XAF payment no longer shows Kenyan mobile money.
```json title="A USD payment, Cameroonian mobile money only"
{
"amount": 99.5,
"currency": "USD",
"email": "buyer@example.com",
"accept": { "countries": ["CM"], "types": ["mobile_money"] }
}
```
The restriction is kept on the payment and applies twice: the page offers only what it allows, and a
charge that names another channel is refused with a `422` and the code `channel_not_accepted`. If
`accept` leaves nothing to pay with, the create call itself answers `422` on `accept`, rather than
producing a page with no method on it.
A charge sent on `mobile` or on `cm.mobile` is checked on the operator
the number resolves to, not on the aggregate. With the restriction above, `cm.mobile` and an MTN
Cameroon number is charged on `cm.mtn`, and an Ivorian number is refused. A payment restricted to
`"channels": ["mobile"]` takes any Mobile Money operator, whichever the number resolves to, and no
card, bank or crypto channel.
A link or an invoice carries its own `accept`, and every payment opened from it inherits it. On a
link or an invoice, `accept: {}` clears the restriction. In the Dashboard the same fields sit under
**Payment methods**, in the link composer and on the invoice form.
## Previewing the methods before you create a payment
`GET /payments/options` lists the channels a payer could use for a currency and an amount, before
any payment exists: the ones your account offers on the payment page, narrowed to the payer's
`country` and to each channel's minimum and maximum. It takes the same `accept` restriction as
`POST /payments`. Use it to draw your own method picker; the payment, once created, is what the
payer is actually offered.
```bash title="Methods for 25 000 XAF in Cameroon"
curl "https://api.wajub.com/payments/options?currency=XAF&amount=25000&country=CM&locale=fr" \
-H "Authorization: sk_test.xxxxxxxxxxxxxxxx…"
```
The answer carries `code`, `status`, `message` and `channels`: each with its `slug`, `name`,
`name.fr`, `type`, `logo` and `countries`, and `operators` for `cm.mobile`. `logo_png`, on a channel
and on each operator, is the same logo as a PNG, for an app that draws no SVG, or `null` when there
is none.
[List payment options](https://docs.wajub.com/api/payments/options)
## Amounts and caps
Two different limits apply to the same payment, and they are easy to confuse.
The first is the payment itself. In XAF and XOF it must fall between **25 and 2 000 000**; outside
that range the create call is refused with a `422` naming the bound in `errors.amount`.
The second is what a single Mobile Money debit can carry, capped at **500 000 XAF**, and the same in
XOF. A payment above that is refused with a `422` when you charge it.
> [!WARNING]
> **Your own ceiling is lower until you are verified**
>
> The figures above are the platform's. What your account can actually collect is set by your
> verification level, and an unverified account has a live ceiling of zero. Check it in **Settings →
> Compliance**, covered in [Account activation](https://docs.wajub.com/getting-started/account-activation).
- [Phone number formats](https://docs.wajub.com/payments/payment-methods/phone-numbers): What each operator accepts, before a payment can even start.
- [Payment lifecycle](https://docs.wajub.com/payments/lifecycle): Every state a payment holds, and the webhook for each.
- [Settlement currency & balance](https://docs.wajub.com/payouts/balance): Which currency you are paid in, and when.
- [Fees & pricing](https://docs.wajub.com/payouts/balance/fees): What each channel costs you.
- [Send to these channels](https://docs.wajub.com/payouts/transfers): Mobile Money payouts with Transfers.
---
# Mobile Money
URL: https://docs.wajub.com/payments/payment-methods/mobile-money
> The operators Wajub collects through, their channels, countries and currencies.
The backbone of collection across the continent. The customer approves on their own handset, from a
USSD prompt or the operator's app, and nothing is captured until they do.
| Operator | Channels | Countries | Currencies |
| --- | --- | --- | --- |
| MTN MoMo | `cm.mtn` `ci.mtn` `bj.mtn` `gh.mtn` `ug.mtn` `rw.mtn` `zm.mtn` `cg.mtn` `gn.mtn` `lr.mtn` | CM, CI, BJ, GH, UG, RW, ZM, CG, GN, LR | XAF, XOF, GHS, UGX, RWF, ZMW, GNF, LRD |
| Orange Money | `cm.orange` `ci.orange` `sn.orange` `bf.orange` `ml.orange` `gn.orange` `cd.orange` `sl.orange` | CM, CI, SN, BF, ML, GN, SL, CD | XAF, XOF, GNF, SLE, CDF |
| Wave | `ci.wave` `sn.wave` | CI, SN | XOF |
| Airtel Money | `ug.airtel` `rw.airtel` `tz.airtel` `ke.airtel` `zm.airtel` `mw.airtel` `cd.airtel` `cg.airtel` `ga.airtel` | UG, RW, TZ, KE, ZM, MW, CD, CG, GA | UGX, RWF, TZS, KES, ZMW, MWK, CDF, XAF |
| Moov Money | `ci.moov` `bj.moov` `bf.moov` `tg.moov` `ml.moov` `ga.moov` | CI, BJ, BF, TG, ML, GA | XOF, XAF |
| M-Pesa | `ke.mpesa` `tz.mpesa` `mz.mpesa` | KE, TZ, MZ | KES, TZS, MZN |
Other operators complete the catalogue: Express Union in Cameroon (`cm.eu`), Free in Senegal,
T-Money in Togo, Vodafone and AirtelTigo in Ghana, Tigo and Halopesa in Tanzania, Vodacom and
Africell in DR Congo, Zamtel in Zambia, TNM in Malawi, Vodafone Cash in Egypt, Capitec Pay in
South Africa and OPay in Nigeria (`ng.opay`), charged through a Flutterwave v4 connection.
`mobile` and `cm.mobile`, for Cameroon, are not channels of the catalogue. They are the two
shortcuts the [charge call](https://docs.wajub.com/payments/direct-api#letting-wajub-find-the-operator) accepts, to let
Wajub resolve the operator from the number rather than naming it up front. No other country has an
aggregate: charge its operator's own channel.
> [!NOTE]
> **`GET /providers` is the list for your account**
>
> Coverage moves. [`GET /channels`](https://docs.wajub.com/api/channels/list) is the global catalogue: every channel Wajub
> supports, the same answer for every key, filtered by `country` if you pass one. What your own
> account can take depends on the providers your team has active, and that is
> [`GET /providers`](https://docs.wajub.com/api/providers/list): each active connection with the channels it actually
> offers, the ones the hosted checkout shows. Treat the table above as the shape of the offer. A new
> channel is a backward-compatible change, so it never breaks an existing integration.
- [Phone number formats](https://docs.wajub.com/payments/payment-methods/phone-numbers): What each operator accepts, before a payment can even start.
- [Choosing what a payment accepts](https://docs.wajub.com/payments/payment-methods#choosing-what-a-payment-accepts): Narrow a payment to some operators or countries.
- [Direct API](https://docs.wajub.com/payments/direct-api): Charge an operator yourself, once you have the number.
---
# Phone number formats
URL: https://docs.wajub.com/payments/payment-methods/phone-numbers
> How Wajub reads a Mobile Money number, country by country, and what it rejects.
The number formats Wajub accepts for Mobile Money, in payments, payouts and marketplace
settlements. Get the format wrong and the payment fails before the customer ever sees a prompt.
## Send E.164
Wajub expects the international form: a `+`, the country dialling code, then the subscriber number.
No spaces, no dashes, no parentheses. Leave out the 0 a national format dials first, as in Kenya or
Ghana, but keep the one that is part of the number: in Côte d'Ivoire, Benin, Congo and Burkina Faso,
a number can start with 0 after its country code.
```bash title="The shape of an accepted number"
+[country code][subscriber number]
+237670000000 Cameroon, MTN
+221770000000 Senegal, Orange
+254700000000 Kenya, Safaricom
+2250700000000 Côte d'Ivoire, Orange
```
A number that arrives without its country code is not automatically refused. When the call carries
a country to anchor it on (a `channel` like `cm.mtn` is enough), a local number such as `670000000`
is read as `+237670000000`. Without that anchor there is nothing to guess from, and the number comes
back as a `422`.
On a charge, `00` in place of the `+` is read the same way: `00237670000000` is `+237670000000`. A
number that lost the 0 that is part of it, such as `+225707000000`, gets it back, and the numbers of
a renumbering are read in their new form: an eight-digit Benin number takes `01` in front, and an
old eight-digit Gabonese number its 2024 block, `07 28 01 50` being `+24177280150`.
> [!TIP]
> **Send E.164 anyway**
>
> Relying on the fallback means relying on your own `channel` being right. Normalise on your side,
> at the point where the customer types the number, and you remove a whole class of failure from
> every call that follows.
## Every country Wajub reaches
Twenty-four countries: each one where the catalogue announces a channel paid with a phone number,
with its dialling code and those channels.
| Country | Dialling code | Channels |
| --- | --- | --- |
| Benin | `+229` | MTN MoMo, Moov Money |
| Burkina Faso | `+226` | Orange Money, Moov Money |
| Cameroon | `+237` | MTN MoMo, Orange Money, Express Union |
| Congo | `+242` | MTN MoMo, Airtel Money |
| Côte d'Ivoire | `+225` | MTN MoMo, Orange Money, Moov Money, Wave, Djamo |
| DR Congo | `+243` | Airtel Money, Vodacom M-Pesa, Orange Money, Africell Money |
| Egypt | `+20` | Vodafone Cash |
| Gabon | `+241` | Airtel Money, Moov Money |
| Ghana | `+233` | MTN MoMo, Vodafone Cash, AirtelTigo Money |
| Guinea | `+224` | MTN MoMo, Orange Money |
| Kenya | `+254` | M-Pesa, Airtel Money |
| Liberia | `+231` | MTN MoMo |
| Malawi | `+265` | Airtel Money, TNM Mpamba |
| Mali | `+223` | Orange Money, Moov Money |
| Mozambique | `+258` | M-Pesa |
| Nigeria | `+234` | OPay |
| Rwanda | `+250` | MTN MoMo, Airtel Money |
| Senegal | `+221` | Orange Money, Free Money, Wave, Djamo |
| Sierra Leone | `+232` | Orange Money |
| South Africa | `+27` | Capitec Pay |
| Tanzania | `+255` | M-Pesa, Tigo Pesa, Airtel Money, HaloPesa |
| Togo | `+228` | T-Money, Moov Money |
| Uganda | `+256` | MTN MoMo, Airtel Money |
| Zambia | `+260` | MTN MoMo, Airtel Money, Zamtel Kwacha |
## How the operator is identified
This is where production and sandbox genuinely differ, and the difference matters.
**In production**, Wajub identifies the operator that owns the number. A number it cannot attribute
to a supported operator is treated as having none.
Some channels are named after a wallet instead of an operator, and the number is read accordingly.
Wave (`ci.wave`, `sn.wave`), Express Union (`cm.eu`), Djamo (`ci.djamo`, `sn.djamo`), Capitec Pay
(`za.capitec`), OPay (`ng.opay`) and PalmPay (`ng.palmpay`) are held whatever the payer's operator,
so a number is never refused on them because of the network it belongs to. The other wallets belong to one operator, and a number of that
operator pays on the wallet's channel: `ke.mpesa` takes Safaricom numbers, `tz.mpesa` and
`mz.mpesa` take Vodacom numbers, and `gh.vodafone` takes the numbers of Telecel, formerly Vodafone
Ghana.
Every other channel is named after its operator, such as `zm.zamtel`, `mw.tnm` or `cd.africell`. An
aggregate resolves the same way: a Telecel number sent on `mobile` is charged on `gh.vodafone`.
**In sandbox**, Wajub matches the test prefixes below instead. They only pick a sandbox outcome:
some follow a real numbering plan and others do not, so none tells you how real numbers are
allocated. A wallet held whatever the operator, such as Capitec Pay, takes a test number of any
operator, its own prefix (`+2761…`) or another's, but never a number that is no test number.
> [!WARNING]
> **Do not build a prefix table of your own**
>
> The prefixes below are the sandbox's. Copying them into your code means reimplementing operator
> detection with data that is wrong in production, and stale the day a range is reassigned. Send the
> number and let Wajub resolve it.
| Country and operator | Sandbox prefix | Channel |
| --- | --- | --- |
| Cameroon / MTN MoMo | `+23767…` | `cm.mtn` |
| Cameroon / Orange Money | `+23769…` | `cm.orange` |
| Cameroon / Express Union | `+23768…` | `cm.eu` |
| Côte d'Ivoire / MTN MoMo | `+22505…` | `ci.mtn` |
| Côte d'Ivoire / Orange Money | `+22507…` | `ci.orange` |
| Côte d'Ivoire / Moov Money | `+22501…` | `ci.moov` |
| Côte d'Ivoire / Wave | `+22503…` | `ci.wave` |
| Senegal / Orange Money | `+22177…` | `sn.orange` |
| Senegal / Free Money | `+22176…` | `sn.free` |
| Senegal / Wave | `+22178…` | `sn.wave` |
| Benin / MTN MoMo | `+22990…`, `+2290190…` | `bj.mtn` |
| Benin / Moov Money | `+22991…`, `+2290191…` | `bj.moov` |
| Burkina Faso / Orange Money | `+22670…` | `bf.orange` |
| Burkina Faso / Moov Money | `+22671…` | `bf.moov` |
| Ghana / MTN MoMo | `+23324…` | `gh.mtn` |
| Ghana / Vodafone Cash | `+23320…` | `gh.vodafone` |
| Ghana / AirtelTigo Money | `+23327…` | `gh.airteltigo` |
| Kenya / M-Pesa | `+25470…` | `ke.mpesa` |
| Kenya / Airtel Money | `+25478…` | `ke.airtel` |
| Uganda / MTN MoMo | `+25677…` | `ug.mtn` |
| Uganda / Airtel Money | `+25675…` | `ug.airtel` |
| Rwanda / MTN MoMo | `+25078…` | `rw.mtn` |
| Rwanda / Airtel Money | `+25073…` | `rw.airtel` |
| Tanzania / Airtel Money | `+25567…` | `tz.airtel` |
| Tanzania / Tigo Pesa | `+25565…` | `tz.tigo` |
| Tanzania / HaloPesa | `+25562…` | `tz.halopesa` |
| Tanzania / M-Pesa | `+25576…` | `tz.mpesa` |
| DR Congo / Airtel Money | `+24399…` | `cd.airtel` |
| DR Congo / Orange Money | `+24389…` | `cd.orange` |
| DR Congo / Vodacom M-Pesa | `+24381…` | `cd.vodacom` |
| DR Congo / Africell Money | `+24390…` | `cd.africell` |
| Gabon / Airtel Money | `+2410…`, `+24174…`, `+24177…` | `ga.airtel` |
| Gabon / Moov Money | `+2416…`, `+24162…`, `+24165…`, `+24166…` | `ga.moov` |
| Congo / MTN MoMo | `+24206…` | `cg.mtn` |
| Congo / Airtel Money | `+24204…` | `cg.airtel` |
| Zambia / MTN MoMo | `+26096…` | `zm.mtn` |
| Zambia / Airtel Money | `+26097…` | `zm.airtel` |
| Zambia / Zamtel Kwacha | `+26095…` | `zm.zamtel` |
| Malawi / Airtel Money | `+26599…` | `mw.airtel` |
| Malawi / TNM Mpamba | `+26588…` | `mw.tnm` |
| Mali / Orange Money | `+22370…` | `ml.orange` |
| Mali / Moov Money | `+22366…` | `ml.moov` |
| Togo / Moov Money | `+22899…` | `tg.moov` |
| Togo / T-Money | `+22890…` | `tg.tmoney` |
| Guinea / MTN MoMo | `+22466…` | `gn.mtn` |
| Guinea / Orange Money | `+22462…` | `gn.orange` |
| Liberia / MTN MoMo | `+23188…` | `lr.mtn` |
| Mozambique / M-Pesa | `+25884…` | `mz.mpesa` |
| Egypt / Vodafone Cash | `+2010…` | `eg.vodafone` |
| Sierra Leone / Orange Money | `+23276…` | `sl.orange` |
| South Africa / Capitec Pay | `+2761…` | `za.capitec` |
## Letting Wajub pick the channel
The hosted page and the components pick the operator with the customer, so this only concerns the
charge call of a [Direct API](https://docs.wajub.com/payments/direct-api) integration. There, `channel` is required. Send
`mobile`, or `cm.mobile` for Cameroon, and Wajub resolves the operator from the number. This is the
case to prefer. These are the only two
aggregates: in another country, name the operator's channel, such as `ci.orange`.
The body of the charge call then names the aggregate and the number:
```json title="Operator resolved from the number"
{
"channel": "cm.mobile",
"data": { "phone": "+237670000000" }
}
```
Name a precise channel such as `cm.mtn` only when you want to force one operator. If the number and
the channel disagree, the call is refused rather than silently rerouted.
An aggregate also works on a payment restricted with
[`accept`](https://docs.wajub.com/payments/payment-methods#choosing-what-a-payment-accepts). The restriction is checked on
the operator the number resolves to, so `cm.mobile` with an MTN number is accepted wherever `cm.mtn`
is, and refused where it is not.
## What comes back when it is wrong
| Response | Cause | Fix |
| ----------------------------------- | -------------------------------------------------------------- | --------------------------------------------------------------------------------------------- |
| `422` on `phone` | No `+`, no country code, and nothing to anchor the number on | Normalise to E.164 before you send |
| `422` on `channel` | The channel names an operator that does not serve that country | Check the country's operators above |
| `422`, number and channel disagree | The number belongs to another operator than the one you named | Send `cm.mobile` and let Wajub resolve it |
| `422` on `phone`, no operator found | No supported operator owns the number | Ask the customer to confirm their number, or send the operator they picked in `data.operator` |
All four are refused on the charge call, `POST /payments/{id}`, not when the payment is created. The
payment stays `pending` and nothing reaches an operator, so the same payment can be charged again
once the number is fixed. A number the operator refuses after the prompt went out is a different
case: the payment fails, and the reason is in the [failure reasons](https://docs.wajub.com/api/failure-reasons)
catalogue.
- [Payment methods & channels](https://docs.wajub.com/payments/payment-methods): Every operator, its channel, and where it works.
- [Sandbox test numbers](https://docs.wajub.com/getting-started/quickstart#4-pay-it-with-a-sandbox-number): The suffixes that drive each outcome in test mode.
- [Failure reasons](https://docs.wajub.com/api/failure-reasons): Why a payment that reached an operator came back failed.
- [Transfers](https://docs.wajub.com/payouts/transfers): The same format, used as a payout destination.
- [Sync](https://docs.wajub.com/sync): The same format, used to settle a marketplace seller.
---
# Wallets & crypto
URL: https://docs.wajub.com/payments/payment-methods/wallets-and-crypto
> Apple Pay and Google Pay, and the crypto assets a payment can settle in.
Two families that come with their own conditions: wallets work in live only, and no crypto
provider can be connected yet.
## Wallets
Apple Pay and Google Pay tokenise the card on the device, so Wajub never sees the raw card or the
device credentials.
| Wallet | `wallet_type` | Requires |
| --- | --- | --- |
| Apple Pay | `apple_pay` | Safari, iOS |
| Google Pay | `google_pay` | Chrome, Android |
> [!WARNING]
> **Wallets are live only**
>
> A wallet appears on the hosted page and in the embedded components when one of your providers
> offers it, in live. Sandbox hides every wallet, so you cannot test one there. See [Wajub Components
> → JS](https://docs.wajub.com/libraries/components/js) for the component side.
## Crypto
The payment settles once the transfer confirms on chain. Channels follow `crypto.{asset}`, and if
you supply no `wallet_address` the payer is shown a deposit address to send to.
Four assets are in the catalogue, the dollar stablecoins and the two largest chains:
| Asset | Channel |
| --- | --- |
| Bitcoin | `crypto.btc` |
| Ethereum | `crypto.eth` |
| Tether | `crypto.usdt` |
| USD Coin | `crypto.usdc` |
Which of the four your customers actually see depends on the crypto provider enabled on your
account, so read `GET /providers` before you build a selector.
> [!NOTE]
> **Crypto is coming soon**
>
> No provider that carries these four assets can be connected yet, so they cannot be charged in
> live yet. [Coverage](https://docs.wajub.com/resources/coverage) lists the other rails in the same position.
- [Wajub Components, JS](https://docs.wajub.com/libraries/components/js): The wallet buttons on your own page.
- [Coverage](https://docs.wajub.com/resources/coverage): The rails that cannot be connected yet.
---
# Create a refund
URL: https://docs.wajub.com/payments/refunds/create
> The call that returns funds on a succeeded payment, its parameters and its answer.
The payment is named by its Wajub `id`. Your own `reference` on the payment is not accepted here.
`POST /refunds`
- `payment` (string, required): The payment's `id`, such as `trx_test_CSUGajfv9xh0XQ5wu2lx`. Your merchant `reference` is not accepted.
- `reason` (enum, required): Why you are refunding. The accepted values are listed below.
- `amount` (number): Amount in the major unit, decimals allowed and rounded to two. Omit it for a full refund of whatever is left.
- `currency` (string): Must equal the payment's currency. Defaults to it.
- `fees_bearer` (enum): `merchant` or `customer`: who bears the payment's Wajub fee for the refunded share. Defaults to your refund settings, else to whoever paid the fee at payment time. See below.
- `reference` (string): Your own reference for this refund, up to 255 characters. Comes back on reads.
- `metadata` (object): Free-form key-value data, echoed back on the refund object. One key is reserved: `dispute_settlement` marks the refund Wajub creates when you accept a dispute, and is dropped if you send it.
`reason` is required and closed. Sending anything outside this list is a `422`, so pick the closest
match rather than inventing one.
| Reason | Use it when |
| ----------------------- | ----------------------------------------------------------------------- |
| `requested_by_customer` | The customer asked, and you agreed |
| `duplicate` | The same order was paid twice |
| `fraudulent` | You believe the payment was not made by the cardholder or account owner |
| `product_not_received` | Goods never arrived |
| `service_not_delivered` | A service was paid for and not rendered |
| `wrong_amount` | You charged more than you should have |
| `customer_complaint` | A complaint you settled without assigning fault |
| `merchant_error` | Your own mistake: wrong item, wrong price, wrong customer |
| `network_error` | The payment went through on your side but not on theirs |
| `transaction_error` | A technical failure in the payment itself |
| `reconciliation` | Cleaning up a discrepancy found while reconciling |
Send the call from your server, with an `Idempotency-Key` if the refund can be triggered by
anything that retries.
**Refund part of a payment**
```bash
curl https://api.wajub.com/refunds \
-H "Authorization: sk_test.xxxxxxxxxxxxxxxx…" \
-H "Content-Type: application/json" \
-H "Idempotency-Key: refund-order-4172" \
-d '{
"payment": "trx_test_CSUGajfv9xh0XQ5wu2lx",
"amount": 2000,
"reason": "product_not_received",
"reference": "rma-881"
}'
```
```javascript
const refund = await wajub.refunds.create({
payment: 'trx_test_CSUGajfv9xh0XQ5wu2lx',
amount: 2000,
reason: 'product_not_received',
reference: 'rma-881',
});
console.log(refund.id, refund.status);
```
```python
refund = wajub.refunds.create({
"payment": "trx_test_CSUGajfv9xh0XQ5wu2lx",
"amount": 2000,
"reason": "product_not_received",
"reference": "rma-881",
})
print(refund.id, refund.status)
```
```php
$refund = $wajub->refunds->create([
'payment' => 'trx_test_CSUGajfv9xh0XQ5wu2lx',
'amount' => 2000,
'reason' => 'product_not_received',
'reference' => 'rma-881',
]);
echo $refund->id;
```
```go
refund, err := client.Refunds.Create(context.Background(), map[string]any{
"payment": "trx_test_CSUGajfv9xh0XQ5wu2lx",
"amount": 2000,
"reason": "product_not_received",
"reference": "rma-881",
}, nil)
```
Wajub answers `201 Created`. Nothing has left your balance yet: the refund has been accepted, and
`status` tells you how far it has got.
```json title="Response · 201 Created"
{
"code": 201,
"status": "Created",
"message": "Refund created successfully",
"refund": {
"id": "rfd_test_9xh0XQ5wu2lxCSUGajfv",
"transaction": "trx_test_CSUGajfv9xh0XQ5wu2lx",
"reference": "rma-881",
"amount": 2000,
"currency": "XAF",
"status": "processing",
"reason": "product_not_received",
"metadata": {},
"sandbox": true,
"created_at": "2026-09-11T10:30:00+00:00"
}
}
```
The payment is carried in `transaction`, not `payment`. Reads also return a `tax` breakdown where
tax applies, a `timeline` of the status changes, and `failure_reason` with `failure_message` when
the refund failed. A refund that took money from your balance also returns
`ledger_balance_currency`, `ledger_balance_before` and `ledger_balance_after`: your balance just
before the refund and just after it, so the difference is what it took, the payment fee's share
included when it moved with the refund. In sandbox they are your sandbox balance's. The
`refund.succeeded` payload carries them too. A refund that took nothing, because a lost dispute already had, has none of the three.
> [!NOTE]
> **Idempotency-Key, and what it keys on**
>
> The key never expires: the same key always returns the same refund, never a second one, and
> reusing it for another payment or another `amount` answers `422`. A key is spent for good, so derive it from this one refund, an order and a refund number,
> not from the order alone: a second refund of the same amount would only hand you back the first.
- [Track a refund](https://docs.wajub.com/payments/refunds/track): Follow it to its own outcome.
- [Idempotency](https://docs.wajub.com/best-practices/idempotency): Retry the call without refunding twice.
---
# Refunds
URL: https://docs.wajub.com/payments/refunds
> Return funds on a succeeded payment, and follow the refund to its own outcome.
A refund returns all or part of a succeeded payment, and you can stack several partial refunds until
the original amount is exhausted. It is its own object, with its own id, status and webhooks.
> [!CAUTION]
> **Refunds require the secret key**
>
> `POST /refunds` requires a secret key. A call carrying a public key is refused with
> `406 Not Acceptable` and the message `Private Key Required`. This endpoint belongs on your
> server, never in a browser or a mobile app.
Two pages go further:
- [Create a refund](https://docs.wajub.com/payments/refunds/create), the call, its parameters and its answer.
- [Track a refund](https://docs.wajub.com/payments/refunds/track), its webhooks, why one fails, how to test a failure,
and the list of refunds.
## What can be refunded
Five conditions are checked before a refund is recorded, and each one fails with its own `422`.
| Condition | What you get back when it fails |
| ------------------------------------ | ---------------------------------------------------------------------------------------------------------------------------------------------------------------- |
| The payment is `succeeded` | `Transaction must be completed to be refunded. Current status: …` |
| No chargeback is open on the payment | `Transaction cannot be refunded while a chargeback is open: the payer's bank may return the funds itself. It can be refunded again once the dispute is decided.` |
| Something is still refundable | `Transaction has already been fully refunded.`, or `Transaction has already been fully refunded or charged back.` when a chargeback you lost took what was left |
| The amount fits what is left | `Refund amount exceeds refundable amount (…)` |
| The currency matches the payment | `Refunds must be in the transaction currency (XAF).` |
The refundable amount is the payment amount minus everything already refunded, counting refunds
that are `pending` or `processing` as well as those that succeeded, and minus the chargebacks you
lost on the payment: the payer's bank already gave that money back.
A chargeback is a dispute the payer opened with their bank, the disputes whose `metadata.source` is
`provider_webhook`. While one is `open` or `under_review`, the bank may give the money back itself,
so no refund of that payment is accepted until the dispute is decided. A dispute the payer opened
from Pocket holds no refund back.
> [!NOTE]
> **A refund cannot convert a currency**
>
> `currency` is accepted, but the only value it may hold is the payment's own currency. It exists
> so you can be explicit, not so you can refund a XAF payment in XOF. Omit it and Wajub uses the
> payment's currency anyway.
## The refund has its own lifecycle
Five states, three of them terminal. A refund never returns to an earlier one.
**Refund**
`pending` (accepted, not yet sent) → [`refund.processing`] `processing` (handed to the provider) → [`refund.succeeded`] `succeeded` (funds returned, balance debited)
Early exits, from pending or processing:
- `failed` (read failure_reason)
- `cancelled` (stopped by Wajub before it was sent, from pending)
How long that takes is not up to Wajub. On a card the issuer decides, and several days is normal.
On Mobile Money the credit usually lands in minutes, sometimes hours. Nothing about your
integration changes that, so tell the customer a range rather than a time.
> [!WARNING]
> **A refund starts in a different state depending on the environment**
>
> In production a refund is created `pending` and moves to `processing` when it is sent. In
> sandbox it is created `processing` directly and resolves within seconds. Write your handler against the terminal states and you will not notice
> the difference; branch on `pending` and your sandbox tests will never hit that branch.
## Who sends a live refund
In production, a refund is sent one of three ways. `execution_mode` on the refund says which, once
Wajub has planned it, and `manual_reason` says why when it is not sent automatically.
| `execution_mode` | Who sends it |
| ---------------- | ------------------------------------------------------------------------------------------------------ |
| `automatic` | Wajub. See the three ways below |
| `merchant` | You: the payment was collected on your own provider account, which can neither refund nor pay out here |
| `manual` | Wajub support |
An automatic refund goes back one of three ways, tried in this order:
1. **Your provider's own refund API**, when it has one Wajub drives: Stripe, Paystack, Flutterwave
and PayPal today. The money goes back the way it came, cards included.
2. **The Wajub rail**, for a payment collected on it: the amount is pushed back to the payer's
mobile money number.
3. **A payout to the payer's number, through the provider that collected the payment**, when that
provider has no refund API but can pay out on that channel: Fapshi, Campay, MeSomb, pawaPay and
the like. The payout leaves your own account at that provider. It needs that provider's payouts
to be approved on Wajub and the payer's number to be on record.
When none applies, the refund is yours to make (`merchant`): refund the customer from your provider,
then mark the refund as made on its page in the Dashboard, or cancel it there. It also becomes yours
when Wajub tried to send it from your own provider account and the provider refused it, or its
outcome could not be confirmed: Wajub cannot look into that account, so check it before you refund
again. Such a refund is `processing`, and cancelling it closes it as `failed`. It also updates on its
own when the provider notifies Wajub of the refund, which Stripe, Paystack, PayPal, Adyen and FedaPay
do.
`manual_reason` is an object with a stable `code` to branch on and a `message` you can show.
| `code` | What it means |
| ------------------------------- | ------------------------------------------------------------------------------------------------------------------------------------------------------------------------------------------------------------------------------------------------------------------------------------------------------------ |
| `refund_from_your_provider` | Collected on your own provider account, which can neither refund nor pay out here: refund it there, then mark it as made in the Dashboard. It also updates once the provider confirms |
| `card_or_bank_payment` | The rail that collected it refunds mobile money only. Wajub support sends this one |
| `insufficient_balance` | Your balance does not cover the refund yet. It is sent by itself as soon as the balance covers it, for 72 hours; past that, Wajub support handles it |
| `platform_balance_insufficient` | On a Sync `lite` connection: the seller's balance does not cover the refund yet, and the platform's balance does not hold the rest. It is sent by itself as soon as they do, for 72 hours; past that, Wajub support handles it. [When a merchant goes negative](https://docs.wajub.com/sync/payouts#when-a-merchant-goes-negative) |
| `payer_number_missing` | The payer's mobile money number is not on record |
| `requested_over_24h` | Requested more than a day ago: Wajub support sends it |
| `outcome_being_confirmed` | Sent, and the operator's answer is not final yet |
| `automatic_attempt_failed` | The operator refused it and no money left: Wajub support processes it |
| `wajub_review` | Wajub support handles it |
`execution_mode` and `manual_reason` can change without the status changing; each change sends
`refund.updated` with the refund as it now stands. Either way the refund ends `succeeded` or
`failed`. Sandbox refunds have neither field.
## What the payment's status says
A payment reads `partially_refunded` once refunds that **succeeded** cover part of its amount, and
`refunded` once they cover all of it. A refund that is `pending`, `processing` or `failed` changes
nothing.
The status is a reading and nothing else moves with it: no payment event is sent, and the payment
is otherwise untouched. To know what is still refundable, list the payment's refunds and add up the
ones that are `pending`, `processing` or `succeeded`.
`GET /payments/{id}/refunds`
Subtract that total, and the amount of the chargebacks you lost on the payment, from the payment
amount and you have what is still refundable, which is exactly the figure the API checks against
when you post the next refund. [Handle refunds](https://docs.wajub.com/guides/handle-refunds) does it in code.
> [!NOTE]
> **Filtering refunded payments**
>
> `GET /payments?status=refunded` and `?status=partially_refunded` list those payments, and
> `?status=succeeded` leaves them out.
## Who bears the fee
Wajub keeps the fee of a payment you refund. What you decide is who ends up bearing it, for the
share of the fee that matches the refunded amount: you, or the customer. That is `fees_bearer`.
| The fee was paid by | `fees_bearer: merchant` | `fees_bearer: customer` |
| ----------------------------------------- | ----------------------------------------------------------------------------- | ---------------------------------------------------------------------------------------------- |
| You (`bearer: merchant` on the payment) | The customer gets the amount back. The fee you paid is not returned to you | The fee share is deducted from what the customer gets back, and you are debited that much less |
| The customer, on top (`bearer: customer`) | The customer gets the amount and the fee share back, and you are debited both | The customer gets the amount back, not the fee |
Left out, the fee stays with whoever paid it, which is the first and the last cell of the table. To
change that for every refund, set it once in **Settings,
Refunds**; `fees_bearer` on one refund overrides it.
The refund tells you what was applied: `fee_amount` is the fee share, and `payer_amount` what the
customer receives. Your balance is debited `payer_amount`, never more and never less. A partial
refund takes the same proportion of the fee, and the refund that completes the payment takes what
is left of it, so the shares add up exactly. In a currency with no subunit, such as XAF, a share is
a whole number, so `payer_amount` is too.
A payment collected on your own provider account is different. Wajub holds none of its money, so
nothing is debited from your balance: the refund leaves your account at that provider, whether Wajub
sends it there for you or you send it yourself, and the amount is `payer_amount`. With `bearer: merchant` Wajub charged no fee on it, so
`fee_amount` is `0` and `payer_amount` equals `amount`. With `bearer: customer` the payer paid the
fee on top to your provider, and the table above applies to it.
## The money moves on success, not on creation
Creating a refund reserves the amount against what is refundable, but touches no balance. The debit
happens when the refund reaches `succeeded`, and only then, for `payer_amount`: the amount, give or
take the fee share.
Two consequences worth planning around. In sandbox, a refund that succeeds debits your sandbox
balance by the amount refunded, as a live one debits your balance. A refund that pays back a dispute
you accepted debits it even when it fails, since the dispute is lost either way. And a refund issued
on a payment you already lost to a dispute is capped at whatever principal has not already been
reversed, so the same money cannot leave twice through two different doors.
Where the balance goes afterwards, and how a negative one behaves, is covered in [Balance and
settlements](https://docs.wajub.com/payouts/balance).
## In the Dashboard
A refund can be issued without any code. Open a payment under **Payments**, use its refund action,
and the result is the same object the API creates. The form asks who bears the fee when the payment
carried one, and shows what the customer will receive. The action needs the `refund_payments`
permission, which is separate from `manage_payments`, so a teammate can manage orders without being
able to give money back.
**Refunds** lists them all with their status, and exports to CSV or Excel in production.
The refunds payers ask for from Pocket are in **Disputes**, as their own stage: see
[Refund requests](#refund-requests).
## Refund requests
A payer using [Pocket](https://docs.wajub.com/payments/customers/pocket) can ask you for a refund on a payment they made,
with an amount and a reason. The request appears in the Dashboard's **Disputes** list, as its own
stage, and waits for you to approve or reject it. Nothing is refunded until it is approved, and
approving creates the refund exactly as the API would. The members who handle payments are e-mailed
when a request arrives.
The request is the amicable stage. If it does not settle the problem, the payer can escalate it to
a [dispute](https://docs.wajub.com/payments/disputes):
| Your answer | When the payer can escalate |
| ----------- | ------------------------------------------------------------------------------------------------------ |
| None yet | From 7 days after the request. Two days before, the members who handle payments are reminded by e-mail |
| A rejection | For 30 days after your answer. Past that, the request is closed |
| An approval | Never, the money went back |
While a chargeback is `open` or `under_review` on the payment, the payer's bank decides. A request
can be neither approved nor escalated, and the payer cannot send a new one. Its deadlines stop
counting and no reminder is sent. Once the bank has decided, they resume where they stood: the day
the payer can escalate, and the end of the 30 days after a rejection, come later by the time the
chargeback ran.
- [Handling refunds](https://docs.wajub.com/guides/handle-refunds): The full journey, reconciliation included.
- [Disputes](https://docs.wajub.com/payments/disputes): When the money is taken back rather than given back.
- [Balance and settlements](https://docs.wajub.com/payouts/balance): Where a refund lands once it has succeeded.
- [Payment lifecycle](https://docs.wajub.com/payments/lifecycle): Why the payment stays succeeded through all of this.
- [Sandbox mode](https://docs.wajub.com/developer-tools/testing/sandbox-mode): Test numbers and cards, and what each one triggers.
- [Refunds API reference](https://docs.wajub.com/api/refunds): Every field on the resource, and the three endpoints.
---
# Track a refund
URL: https://docs.wajub.com/payments/refunds/track
> Its webhooks, why a refund fails, a failing refund in sandbox, and listing refunds.
## Webhooks
Six events follow a refund. Subscribe to each by name: a subscription matches exact names only, and
`refund.*` matches nothing.
| Event | Fires when |
| ------------------- | ---------------------------------------------------------------------------------------------------------------------------------------------------------- |
| `refund.created` | The refund was accepted and recorded |
| `refund.processing` | The refund was sent. Live only |
| `refund.succeeded` | Funds returned. This is the one to reconcile on |
| `refund.failed` | The provider refused or could not complete it, read `failure_reason` |
| `refund.cancelled` | Wajub stopped a live refund before sending it: nothing left your balance. It arrives as `refund.failed`, with `cancelled_by_wajub` as its `failure_reason` |
| `refund.updated` | A live refund changed lane: `execution_mode` or `manual_reason` changed. Live only |
> [!NOTE]
> **refund.processing never fires in sandbox**
>
> In live, a refund moves from `pending` to `processing` when it is sent, and `refund.processing` is
> sent. In sandbox a refund is created `processing` directly, so that event
> never comes. Use `refund.created` if you need a signal at the start in both environments.
**`refund.succeeded`**: A full or partial refund has completed on the payment.
```json title="refund.succeeded"
{
"id": "evt_Lm2Xc94Rf8Qp7Tz3Wk5Yb1Nd",
"event": "refund.succeeded",
"created": "2026-09-11T11:02:41+00:00",
"livemode": true,
"data": {
"id": "rfd_9xh0XQ5wu2lxCSUGajfv",
"transaction": "trx_CSUGajfv9xh0XQ5wu2lx",
"reference": "rma-881",
"amount": 2000,
"currency": "XAF",
"status": "succeeded",
"reason": "product_not_received"
}
}
```
Deduplicate on the event `id`, as you do everywhere else. Registration and signature
verification are in [Webhooks](https://docs.wajub.com/developer-tools/webhooks).
## Test a failing refund in sandbox
Sandbox outcomes are deterministic, and they are decided by the payment method of the **original
payment**, not by anything you send on the refund. Pay with the right number, then refund it, and
you get the outcome you wanted.
For a payment made with Mobile Money, the last six digits of the phone number decide.
| Suffix on the original payment | Refund outcome |
| -------------------------------------- | -------------------------------------------------------------------------------------- |
| `000000` | Succeeds |
| `000009` | Payment succeeds, refund always fails. The one to test against |
| `000001`, `000002`, `000003`, `000004` | Nothing to refund: the payment itself never succeeds, so the refund call answers `422` |
| Anything else | Succeeds |
For a card payment, `4000000000005423` charges normally and then fails every refund. Every other
test card refunds cleanly. Crypto and bank payments always refund successfully, since there is no
failure address to test with.
A failed sandbox refund carries a `failure_reason` drawn at random from `insufficient_funds`,
`refund_rejected_by_issuer`, `transaction_already_reversed`, `network_error`, `provider_error` and
`provider_declined`, with a readable `failure_message` beside it. These are codes a live refund uses
too, listed under [Why a refund failed](#why-a-refund-failed).
> [!NOTE]
> **The one case that is random**
>
> When the original payment has no payment method attached at all, the sandbox outcome is random.
> If your tests flake, that is why: pay with a test number so the outcome is chosen.
## Why a refund failed
A `failed` refund always carries a `failure_reason`, from this list in production as in sandbox,
and a `failure_message` beside it: the provider's own words when it sent some.
| `failure_reason` | What it means |
| ------------------------------ | --------------------------------------------------------------------------------------------------- |
| `insufficient_funds` | The provider could not fund the refund |
| `refund_rejected_by_issuer` | A card issuer refused it |
| `transaction_already_reversed` | The payment was already reversed or refunded at the provider |
| `invalid_number` | The payer's number or account cannot receive it, for instance closed or not a subscriber. Live only |
| `limit_exceeded` | A limit on the receiving account or at the provider was reached. Live only |
| `network_error` | The provider could not be reached in time |
| `provider_error` | The provider was down, or refused the call itself |
| `provider_declined` | The provider refused it without saying why |
| `ops_failed` | Wajub support could not complete it. `failure_message` says why. Live only |
A failed refund takes nothing from your balance, with one exception in sandbox: a refund paying
back a dispute you accepted, which stands for the dispute's loss (see
[The money moves on success](https://docs.wajub.com/payments/refunds#the-money-moves-on-success-not-on-creation)). A retry
is a new refund.
## List refunds
Refunds come back newest first, across all your payments.
`GET /refunds`
| Query parameter | Accepts |
| ---------------------- | ----------------------------------------------------------- |
| `per_page` | 1 to 100, defaults to 25 |
| `status` | `pending`, `processing`, `succeeded`, `failed`, `cancelled` |
| `search` | Free text over the refund reference and id |
| `date_from`, `date_to` | Dates, `date_to` no earlier than `date_from` |
| `cursor` | Switches to cursor pagination, for exports |
Retrieving a single refund takes its id.
`GET /refunds/{id}`
- [Create a refund](https://docs.wajub.com/payments/refunds/create): The call and its parameters.
- [Webhooks](https://docs.wajub.com/developer-tools/webhooks): Receive and verify the events.
---
# Billing & subscriptions
URL: https://docs.wajub.com/billing
> Invoices, how a customer pays one, and what recurring billing does today.
An invoice is a document you hand to a customer, who pays it on a page Wajub hosts whenever they
decide to. This section covers issuing, sending and tracking invoices.
## What the section contains
One product ships: **Invoice**. It produces the numbered document, hosts the page the customer pays
on, and tracks what has come in against it. Subscriptions, in the sense of a plan a customer signs
up to and a wallet charged every month without them acting, is not something you can call today.
| What you need | What to reach for |
| ----------------------------------------------- | ---------------------------------------------------------------------- |
| Bill a customer once and get paid online | [Invoice](https://docs.wajub.com/billing/invoice) |
| Bill the same customer at a fixed interval | A recurring invoice: a new draft each cycle, still to be sent and paid |
| Charge a saved wallet on a schedule, unattended | Nothing yet, see [Subscriptions](https://docs.wajub.com/billing/subscriptions) |
| Take a payment your own checkout starts | [Payments](https://docs.wajub.com/payments), not billing |
> [!WARNING]
> **Live only, and plan-gated**
>
> Every `/invoices` route is live only, so a sandbox key answers `403` with
> `This feature is only available in live mode.` on all of them, `GET` included. The feature itself
> is Invoicing: **10 invoices in total on Pay as you go**, not ten per month, and
> unlimited from Growth upward. Past the cap, creation answers `403` with an upgrade message.
## An invoice is a document, not a charge
Creating one moves no money and notifies nobody. It writes a numbered document with its line items,
its totals and a status, and stops there. Sending it, paying it and chasing it are three separate
things that happen afterwards.
`POST /invoices`
- `customer_name` (string, required): Who the invoice is addressed to. A name is enough, a customer record is not required.
- `items` (array, required): At least one line. Each takes `name`, `quantity` and `unit_price`.
- `invoice_date` (string (date), required): The date printed on the document. Required: there is no default.
- `currency` (string, required): ISO 4217 code of a currency Wajub supports; any other answers `422`. Every amount on the invoice is in it.
- `language` (enum): `fr` or `en`, the language of the e-mail and the PDF. Defaults to the linked customer's preferred language, else your account's language ([**Checkout — Language**](https://dashboard.wajub.com/settings/regional/language)), else `en`.
- `customer_id` (string): Links the invoice to one of your [customers](https://docs.wajub.com/payments/customers), by its `cus_` id. Their details are snapshotted onto the document at creation.
- `customer_email` (string): Where `/send` e-mails the invoice and its PDF, and the address its payment and receipt use. Optional: an invoice without one stays payable, and [its page asks the payer](#where-the-customer-pays) for an e-mail.
- `due_date` (string (date)): On or after `invoice_date`. The invoice turns `overdue` once this date has passed.
- `payment_terms_days` (integer): Sets `due_date` that many days from today, and only when `due_date` is absent.
- `items[].tax_rate` (number): Percentage on that line, 0 to 100. Applied per line, not per invoice.
- `items[].discount_type` (enum): `percentage` or `fixed`, paired with `items[].discount_value`.
- `items[].discount_value` (number): The percentage, or the amount taken off that line. A discount on the whole invoice is `global_discount_type` and `global_discount_value`: see [An invoice-wide discount](https://docs.wajub.com/billing/invoice#an-invoice-wide-discount).
- `document_type` (enum, default `invoice`): `invoice`, `quote` or `estimate`. A quote or an estimate is read and listed like an invoice, and stays a draft: see [Quotes and estimates](https://docs.wajub.com/billing/invoice#quotes-and-estimates).
- `is_recurring` (boolean): Flags the document as recurring. Read the section on recurring invoices before you rely on it.
- `notes` (string): Free text under the lines, up to 5 000 characters. `terms` and `footer` sit alongside it.
Totals are computed for you from the lines, so you never send `subtotal` or `total`. Send the
invoice with a live secret key.
**Create an invoice**
```bash
curl https://api.wajub.com/invoices \
-H "Authorization: sk.xxxxxxxxxxxxxxxx…" \
-H "Content-Type: application/json" \
-H "Idempotency-Key: invoice-amina-september" \
-d '{
"customer_name": "Amina Traoré",
"customer_email": "amina@example.com",
"invoice_date": "2026-09-11",
"due_date": "2026-09-25",
"currency": "XAF",
"items": [
{ "name": "Consulting, September", "quantity": 3, "unit_price": 150000 }
]
}'
```
```javascript
const invoice = await wajub.invoices.create({
customer_name: 'Amina Traoré',
customer_email: 'amina@example.com',
invoice_date: '2026-09-11',
due_date: '2026-09-25',
currency: 'XAF',
items: [
{ name: 'Consulting, September', quantity: 3, unit_price: 150000 },
],
});
console.log(invoice.invoice_number, invoice.total);
```
```python
invoice = wajub.invoices.create({
"customer_name": "Amina Traoré",
"customer_email": "amina@example.com",
"invoice_date": "2026-09-11",
"due_date": "2026-09-25",
"currency": "XAF",
"items": [
{ "name": "Consulting, September", "quantity": 3, "unit_price": 150000 },
],
})
print(invoice.invoice_number, invoice.total)
```
```php
$invoice = $wajub->invoices->create([
'customer_name' => 'Amina Traoré',
'customer_email' => 'amina@example.com',
'invoice_date' => '2026-09-11',
'due_date' => '2026-09-25',
'currency' => 'XAF',
'items' => [
['name' => 'Consulting, September', 'quantity' => 3, 'unit_price' => 150000],
],
]);
echo $invoice->invoice_number;
```
```go
invoice, err := client.Invoices.Create(context.Background(), map[string]any{
"customer_name": "Amina Traoré",
"customer_email": "amina@example.com",
"invoice_date": "2026-09-11",
"due_date": "2026-09-25",
"currency": "XAF",
"items": []map[string]any{
{"name": "Consulting, September", "quantity": 3, "unit_price": 150000},
},
}, nil)
```
The answer is `201 Created`. The `id` is what every other call takes. `invoice_number` is still
`null`: the human reference printed on the document is assigned when the invoice is sent, from your
account's numbering, the same sequence the Dashboard uses: `INV-` (or the prefix you set), the year,
then a counter that restarts at `0001` each year.
```json title="Response · 201 Created"
{
"code": 201,
"status": "Created",
"message": "Invoice created",
"invoice": {
"id": "inv_LRQqYvlhrgUOE225KMKU",
"invoice_number": null,
"document_type": "invoice",
"status": "draft",
"customer_name": "Amina Traoré",
"customer_email": "amina@example.com",
"invoice_date": "2026-09-11",
"due_date": "2026-09-25",
"currency": "XAF",
"subtotal": 450000,
"discount_amount": 0,
"tax_amount": 0,
"total": 450000,
"amount_paid": 0,
"amount_due": 450000,
"is_recurring": false,
"sent_at": null,
"paid_at": null,
"created_at": "2026-09-11T14:00:00+00:00"
}
}
```
## The life of an invoice
**Invoice**
`draft` (not payable yet) → [`invoice.updated`] `sent` (the page opens) → [`invoice.updated`] `viewed` (the customer opened it) → [`invoice.updated`] `paid` (amount_due reaches zero)
The other states an invoice reaches:
- `partial` (some of the total is in)
- `overdue` (past its due date)
- `cancelled` (closed, no longer payable)
- `refunded` (paid, then given back)
The repetition on those arrows is the point. Every transition the API makes arrives as
`invoice.updated`, and the `status` field on the payload is what tells you which one it was. Four
events say more: `invoice.sent` when the invoice is sent, `invoice.cancelled` when it is cancelled,
`invoice.paid` when it is settled in full, and `invoice.payment_succeeded` for each payment made on
its page, an instalment included. There is no `invoice.overdue`.
Two of those states move on their own. `viewed` is written the first time the customer opens the
payment page, and an invoice turns `overdue` overnight once its `due_date` has passed.
Neither is something you set.
## Sending an invoice
`POST /invoices/{id}/send`
On a draft, the call assigns the `invoice_number`, moves the invoice to `sent`, stamps `sent_at`,
and e-mails `customer_email` a link to the invoice with a PDF copy attached, in the invoice's
`language`. Calling it again on an invoice already sent e-mails it again and stamps `sent_at` anew,
without changing its status.
The call needs someone to send to: `customer_email`, or the e-mail of the customer `customer_id`
links. Without either it answers `422` on `customer_email` and changes nothing, a draft included. An
invoice already `paid`, `cancelled` or `refunded` answers `400`: there is nothing left to ask for. A
quote or an estimate answers `400 Only an invoice can be sent through the API.` A draft addressed to
a name only can be sent from the Dashboard, which numbers it and opens its page without e-mailing
anyone; share the link yourself, and the page asks the payer for an e-mail.
Sending is also what opens the payment page: a draft's page does not open, and only four statuses
are payable: `sent`, `viewed`, `overdue` and `partial`.
## Where the customer pays
The payment page lives on its own host, with the invoice id as the whole path.
```text title="The customer's URL"
https://invoice.wajub.com/inv_LRQqYvlhrgUOE225KMKU
```
That address is not in the API response. Build it from the `id` you got back, or copy it from the
Dashboard, which is also the only place it changes: a merchant serving invoices from a verified
custom domain gets that host instead of `invoice.wajub.com`.
The page opens in the invoice's `language`, the one its e-mail and PDF are written in. The payer can
show it in the other by adding `?locale=fr` or `?locale=en` to the address.
The page itself is an ordinary checkout. It shows your branding, the invoice's lines, and the
operators available for its currency, and a payment made there is an ordinary payment: it lands in
your Payments list, fires `payment.succeeded`, settles into your balance and refunds like any
other. On success the invoice moves to `paid`, or to `partial` when the invoice is split into
installments and only one has been settled. The payment names the invoice in its `invoice` field,
the invoice's `id`.
Refund that payment in full, or every payment made on the invoice, and the invoice moves to
`refunded`, with `refunded_at` stamped and `invoice.updated` sent. That holds for an invoice paid in
part too, `partial` or `overdue` with a part paid: once what came in online has all gone back, it is
`refunded`. A partial refund leaves the invoice as it was. An invoice that holds money recorded with
`mark-paid` keeps its status: that money never went through Wajub, so a Wajub refund cannot give it
back. Issue a credit note from the Dashboard for it.
An invoice does not need an e-mail to be paid. When it carries none, meaning no `customer_email` and
no `customer_id`, the page shows the payer an e-mail field above the pay button and opens the
payment only once it holds a valid address. That address receives the payment confirmation and its
receipt, and the payment is recorded against the [customer](https://docs.wajub.com/payments/customers) of yours that has
it, created with the invoice's name if you have none yet. The address is also written on the
invoice as its `customer_email`, and `invoice.updated` tells you so: the next installment does not
ask again, and `/send` and the reminders now have someone to write to. Only the first
address given is kept, and an e-mail you put on the invoice is never replaced.
The page asks for nothing when the invoice carries an e-mail, and the payer cannot substitute
another address. It asks for nothing either when the invoice is linked to a customer: that customer
is the one who pays, with or without an e-mail on their record.
The page also serves the invoice as a PDF, for the customer to keep, at
`https://api.wajub.com/i/{id}/pdf`, in the invoice's `language` unless `?locale=fr` or `?locale=en`
asks for the other. Anyone holding the `id` can open both, so share it the way you would share the
link itself.
## Recording money you took elsewhere
Plenty of invoices are paid in cash, or by a bank transfer that never touches Wajub. Marking one
paid records that against the document without inventing a payment.
`POST /invoices/{id}/mark-paid`
Pass no `amount` and the invoice is settled in full. Pass one, above zero, and it is added to
`amount_paid`, which moves the invoice to `partial` until the total is covered. The invoice has to
be open: a draft answers `400`, since it was never sent, and so does an invoice already `paid`,
which keeps its `paid_at`. A cancelled or refunded invoice refuses the call with `400` too, so a
document its own flow has closed cannot be resurrected. An `amount` of zero answers `422`.
## Recurring invoices, as they stand today
`is_recurring` and `recurring_interval` are accepted on creation, the interval being one of
`daily`, `weekly`, `monthly`, `quarterly` or `yearly`. When a cycle comes due, Wajub copies the
recurring invoice into a fresh document with new dates and the customer's current details. The first copy is due one interval after the
invoice's own date, and each cycle is generated once.
Two things shape what recurrence means here. Each generated invoice is created as a `draft`, so
the chain produces documents rather than charges, and each one still needs to be sent and paid.
And it needs the Recurring billing feature, which starts at **Growth**: without it no copy is
generated and the parent invoice is left intact, so renewals resume on their own if a downgraded
account upgrades again.
Creating a recurring invoice through the API succeeds on any plan; without the feature, it is the
generation that is skipped.
[Recurring invoices](https://docs.wajub.com/billing/invoice/recurring) covers the calendar, what a copy carries over, and
how a recurrence ends.
## What reaches your webhook
Five events, all of them carrying the invoice rather than the money.
| Event | Fires when |
| --------------------------- | ------------------------------------------------------------------------------------------------------------------------------------------------------------- |
| `invoice.created` | An invoice is created, in draft: once, with its lines and totals |
| `invoice.updated` | Any field or status changes through the API, plus `viewed` and a payment. One per `PUT`, with its lines and totals, and none for a `PUT` that changes nothing |
| `invoice.payment_succeeded` | A payment made on the invoice's page succeeds, each instalment included |
| `invoice.paid` | The invoice is settled in full, online or with `mark-paid` |
| `invoice.deleted` | A draft invoice is deleted |
The money arrives on a separate event. When a customer pays an invoice online you receive
`payment.succeeded` for the payment itself, then `invoice.updated` and `invoice.payment_succeeded`
for the document, and `invoice.paid` once it is settled. `payment.succeeded` is the one to fulfil
on, since it carries the amount, the channel and the provider reference, and its `invoice` field
names the invoice it paid.
> [!WARNING]
> **Only the API emits these**
>
> Changes made in the Dashboard send no webhook: sending an invoice, marking it paid or cancelling
> it from the interface is silent. Invoices turn `overdue` overnight, and that change sends no
> webhook either. Poll `GET /invoices` if you need to see those.
## In the Dashboard
**Invoices** is wider than the API: it tracks reminders, exports the list, and acts on several
invoices at once, duplicates one and issues credit notes. The dashboard guide covers each: [tracking
and reminders](https://docs.wajub.com/dashboard/invoices/track-and-remind), [corrections and credit
notes](https://docs.wajub.com/dashboard/invoices/correct-cancel-refund), and [bulk actions and the
export](https://docs.wajub.com/dashboard/invoices/export-and-bulk).
A credit note is a document: it moves no money. It lowers the invoice's `amount_paid` by its amount,
and a later payment on the invoice counts it: the invoice turns `paid` once what was paid, less its
credit notes, covers the total.
An unpaid invoice turns `overdue` overnight once its `due_date` has passed, and
[reminders](https://docs.wajub.com/billing/invoice/reminders) go out on their own, before and after the due date, to
customers whose invoice is still open.
- [Invoice reference](https://docs.wajub.com/billing/invoice): Every field, how the totals are computed, and the eight calls.
- [Invoice Quickstart](https://docs.wajub.com/billing/invoice/quickstart): Issue your first invoice and get it paid.
- [Subscriptions](https://docs.wajub.com/billing/subscriptions): What recurring billing needs, and why it is not a product yet.
- [Customers](https://docs.wajub.com/payments/customers): Attach an invoice to a customer record rather than a name.
- [Webhooks](https://docs.wajub.com/developer-tools/webhooks): Listen for payment.succeeded and reconcile the invoice.
- [Invoices API reference](https://docs.wajub.com/api/invoices): Every field and the eight endpoints.
---
# Invoice reference
URL: https://docs.wajub.com/billing/invoice
> The invoice object, the amounts it computes, and the eight calls that manage it.
An invoice is a document you issue and your customer pays on a page Wajub hosts. This page is the
reference for the invoice object and its calls; [Billing & subscriptions](https://docs.wajub.com/billing) walks through
the cycle.
Invoicing is a live-mode product gated on your plan. A sandbox key gets `403 This feature is only
available in live mode.`, a plan without the feature gets `403 Invoicing is not available on your
plan.`, and a plan with a lifetime cap gets `403 You have reached the maximum number of invoices for
your plan.` once you hit it. Only documents of type `invoice` count toward that cap.
## The eight calls
Everything the API does with invoices is here. `/send` is the call that e-mails an invoice, its PDF
is a public link ([below](#the-pdf)), and no endpoint charges a customer.
| Call | What it does |
| ------------------------------- | ----------------------------------------------------------- |
| `GET /invoices` | List, filter and sort your invoices |
| `POST /invoices` | Create one, always as `draft` |
| `GET /invoices/{id}` | Retrieve one |
| `PUT /invoices/{id}` | Replace one, only while it is a draft |
| `DELETE /invoices/{id}` | Delete one, only while it is a draft |
| `POST /invoices/{id}/send` | Number it, e-mail it with its PDF, and open its public page |
| `POST /invoices/{id}/mark-paid` | Record a payment you collected elsewhere |
| `POST /invoices/{id}/cancel` | Close it out |
`{id}` is the `id` the API returns, the `inv_` string.
## The invoice object
This is what every call returns. `items` is present whenever the invoice was loaded with its lines,
which is all eight of them.
```json title="Response · an invoice with one taxed line"
{
"id": "inv_LRQqYvlhrgUOE225KMKU",
"invoice_number": "INV-2026-0001",
"document_type": "invoice",
"status": "sent",
"customer": "cus_7Kq2mX9vL4tRb3nP8sZcWd1e",
"customer_name": "Amina Traoré",
"customer_email": "amina@example.com",
"customer_company_name": "Traoré & Fils",
"customer_phone": "+237670000000",
"customer_address": "BP 1204, Douala",
"invoice_date": "2026-09-12",
"due_date": "2026-10-12",
"currency": "XAF",
"language": "fr",
"subtotal": 300000,
"discount_amount": 0,
"has_global_discount": false,
"global_discount_type": null,
"global_discount_value": null,
"tax_amount": 57750,
"total": 357750,
"amount_paid": 0,
"amount_due": 357750,
"payment_type": "full",
"is_recurring": false,
"recurring_interval": null,
"next_invoice_date": null,
"recurring_parent": null,
"notes": null,
"terms": null,
"footer": null,
"accept": {},
"sent_at": "2026-09-12T09:14:02+00:00",
"paid_at": null,
"cancelled_at": null,
"items": [
{
"id": "00000000-0000-0000-0000-000000000001",
"name": "Consulting service",
"description": null,
"quantity": 2,
"unit": null,
"unit_price": 150000,
"tax_rate": 19.25,
"tax_amount": 57750,
"discount_type": null,
"discount_value": 0,
"discount_amount": 0,
"subtotal": 300000,
"total": 357750,
"sort_order": 0
}
],
"created_at": "2026-09-12T09:10:44+00:00",
"updated_at": "2026-09-12T09:14:02+00:00"
}
```
`invoice_number` is `null` on a draft and assigned the first time the invoice is sent. It comes from
your account's numbering, the same sequence the Dashboard draws from, whether you send the invoice
here or there: the prefix (`INV-` unless you changed it), the year, then a four-digit counter, as set
in the Dashboard's invoice settings. The counter restarts at `0001` each year unless you turned that
off, and a number is unique within your account. `status` is one of `draft`, `sent`, `viewed`, `partial`, `paid`, `overdue`,
`cancelled` or `refunded`; the transitions between them and the webhooks they emit are on
[Billing & subscriptions](https://docs.wajub.com/billing).
`customer` is the customer the invoice is addressed to, by the `cus_` id the
[Customers API](https://docs.wajub.com/payments/customers) returns, and `null` when you addressed it to a name and an
e-mail only. Match on `customer`.
`language` is the language of the invoice's e-mail and PDF, `fr` or `en`, recorded when the invoice
is created, here or in the Dashboard. `accept` is the
restriction on the methods the payer is offered on the invoice's page, `{}` when there is none.
Two fields are computed rather than stored. `amount_due` is always `total` minus `amount_paid`,
floored at zero, so it never goes negative on an overpayment. `amount_paid` only moves through
`mark-paid`, through a payment made on the hosted page, or through a credit note issued from the
Dashboard, which lowers it by its amount. A payment on the page counts all three: the invoice's
online payments, plus what `mark-paid` recorded, less its credit notes. An invoice with a 1 000
credit note turns `paid` only once 1 000 more than its total has come in.
## Creating one
`customer_name`, `items`, `invoice_date` and `currency` are the four required fields. Everything else
is optional, and the invoice is always created as `draft` whatever you send.
`POST /invoices`
- `customer_name` (string, required): Who the invoice is addressed to. Required even when you pass `customer_id`.
- `customer_id` (string): One of your customers, by its `cus_` id. Its name, email, company, phone and address are copied onto the invoice and override the `customer_*` fields you sent. A customer that is not yours answers `422`.
- `customer_email` (string): Where `/send` e-mails the invoice and its PDF, and where its [reminders](https://docs.wajub.com/billing/invoice/reminders) go.
- `customer_company_name` (string): Printed on the document alongside the name.
- `customer_phone` (string): Printed on the document.
- `customer_address` (string): Printed on the document.
- `items` (array, required): At least one line. See the line object below.
- `invoice_date` (date, required): The issue date printed on the document.
- `due_date` (date): When payment is expected. Must be on or after `invoice_date`.
- `payment_terms_days` (integer): Sets `due_date` to that many days from today, and only when `due_date` is absent. Counted from today, not from `invoice_date`.
- `currency` (string, required): A currency Wajub supports: `XAF`, `XOF`, `NGN` and the rest of the [supported list](https://docs.wajub.com/resources/coverage). Any other code answers `422`.
- `language` (enum): `fr` or `en`: the language of the e-mail `/send` sends, of the reminders and of the PDF. Defaults to the preferred language of the customer `customer_id` names, else your account's language ([**Checkout — Language**](https://dashboard.wajub.com/settings/regional/language)), else `en`. Any other value answers `422`.
- `accept` (object): Restricts the methods the payer is offered on the invoice's page, as on [`POST /payments`](https://docs.wajub.com/payments/payment-methods#choosing-what-a-payment-accepts).
- `is_recurring` (boolean, default `false`): Marks the invoice as a template. See [Recurring invoices](https://docs.wajub.com/billing/invoice/recurring).
- `recurring_interval` (enum): `daily`, `weekly`, `monthly`, `quarterly` or `yearly`.
- `payment_type` (enum, default `full`): `full`, `split` or `milestone`. Instalments are covered below.
- `payment_schedules` (array): The instalments, when `payment_type` is not `full`.
- `notes` (string): Free text printed on the document, 5000 characters.
- `terms` (string): Terms and conditions, 5000 characters.
- `footer` (string): Footer line, 500 characters.
- `template_id` (string (uuid)): An invoice template created in the Dashboard. It drives the printed layout only.
- `document_type` (enum, default `invoice`): `invoice`, `quote` or `estimate`. A quote and an estimate stay drafts: see [Quotes and estimates](#quotes-and-estimates).
- `global_discount_type` (enum): `percentage` or `fixed`: a discount on the whole invoice. With `has_global_discount: true` and no type, the discount is a `percentage`. See [An invoice-wide discount](#an-invoice-wide-discount).
- `global_discount_value` (number): The percentage, up to 100, or the amount when the type is `fixed`, in the major unit, with at most two decimals and no more than the currency has; an amount takes off at most the lines' amount. Required when `has_global_discount` is `true`. With `has_global_discount` left out, it goes with `global_discount_type`: one without the other answers `422`.
- `has_global_discount` (boolean): `true` applies the discount `global_discount_value` sets, a `percentage` unless `global_discount_type` says `fixed`. `false` removes the invoice-wide discount, whatever the other two say.
Each entry in `items` is its own object.
- `name` (string, required): The line label.
- `description` (string): A second line under the label.
- `quantity` (number, required): How many.
- `unit_price` (integer, required): Price for one, in whole units of the currency.
- `unit` (string): A label such as `hour` or `day`. Cosmetic.
- `tax_rate` (number): Percentage from 0 to 100, applied on top of the line.
- `discount_type` (enum): `percentage` or `fixed`.
- `discount_value` (number): The percentage, up to 100, or the amount when the type is `fixed`, up to the line's `quantity` × `unit_price`: a discount never takes a line below zero. Beyond, `422` on `items.N.discount_value`.
**An invoice with VAT and a line discount**
```bash
curl https://api.wajub.com/invoices \
-H "Authorization: sk.xxxxxxxxxxxxxxxx…" \
-H "Content-Type: application/json" \
-d '{
"customer_name": "Traoré & Fils",
"customer_email": "amina@example.com",
"invoice_date": "2026-09-12",
"payment_terms_days": 30,
"currency": "XAF",
"items": [
{ "name": "Consulting service", "quantity": 2, "unit_price": 150000, "tax_rate": 19.25 },
{ "name": "Onboarding", "quantity": 1, "unit_price": 100000, "discount_type": "percentage", "discount_value": 10 }
]
}'
```
```javascript
const invoice = await wajub.invoices.create({
customer_name: 'Traoré & Fils',
customer_email: 'amina@example.com',
invoice_date: '2026-09-12',
payment_terms_days: 30,
currency: 'XAF',
items: [
{ name: 'Consulting service', quantity: 2, unit_price: 150000, tax_rate: 19.25 },
{ name: 'Onboarding', quantity: 1, unit_price: 100000, discount_type: 'percentage', discount_value: 10 },
],
});
```
```python
invoice = wajub.invoices.create({
"customer_name": "Traoré & Fils",
"customer_email": "amina@example.com",
"invoice_date": "2026-09-12",
"payment_terms_days": 30,
"currency": "XAF",
"items": [
{"name": "Consulting service", "quantity": 2, "unit_price": 150000, "tax_rate": 19.25},
{"name": "Onboarding", "quantity": 1, "unit_price": 100000, "discount_type": "percentage", "discount_value": 10},
],
})
```
```php
$invoice = $wajub->invoices->create([
'customer_name' => 'Traoré & Fils',
'customer_email' => 'amina@example.com',
'invoice_date' => '2026-09-12',
'payment_terms_days' => 30,
'currency' => 'XAF',
'items' => [
['name' => 'Consulting service', 'quantity' => 2, 'unit_price' => 150000, 'tax_rate' => 19.25],
['name' => 'Onboarding', 'quantity' => 1, 'unit_price' => 100000, 'discount_type' => 'percentage', 'discount_value' => 10],
],
]);
```
```go
invoice, err := client.Invoices.Create(context.Background(), map[string]any{
"customer_name": "Traoré & Fils",
"customer_email": "amina@example.com",
"invoice_date": "2026-09-12",
"payment_terms_days": 30,
"currency": "XAF",
"items": []map[string]any{
{"name": "Consulting service", "quantity": 2, "unit_price": 150000, "tax_rate": 19.25},
{"name": "Onboarding", "quantity": 1, "unit_price": 100000, "discount_type": "percentage", "discount_value": 10},
},
}, nil)
```
Creation is the only invoice call that honours `Idempotency-Key`. Replaying a create with the same
key returns the first invoice instead of issuing a second one; replaying a `send` or a `mark-paid`
runs again.
## Amounts are in the major unit
`unit_price`, `subtotal`, `discount_amount`, `tax_amount`, `total` and `amount_paid` are all in the
major unit of the currency: 150000 means one hundred and fifty thousand francs, not fifteen hundred.
Each amount is rounded to the currency's minor unit as it is worked out, and the next one is built
from the rounded value: whole francs in XAF and XOF, so 19.25% of 1 000 is 193; two decimals in most
other currencies, three in KWD, BHD, JOD, OMR and TND. A line's amounts keep at most two decimals.
## How a line is computed
The line does its own arithmetic on every save, in this order. You send the first four values; the
other four are computed and returned.
```
subtotal = quantity × unit_price
discount_amount = discount_type = percentage → subtotal × discount_value / 100
discount_type = fixed → discount_value
otherwise → 0
taxable = subtotal − discount_amount
tax_amount = taxable × tax_rate / 100
total = taxable + tax_amount
```
Tax is exclusive: it is added on top of the line, never carved out of it. And it is computed after
the discount, so a 10% discount on a taxed line lowers the tax with it. On an invoice with an
[invoice-wide discount](#an-invoice-wide-discount), the line's tax is worked out on `taxable` less
the line's share of that discount; the share itself stays in the invoice's `discount_amount`, so
the line's `total` is still `taxable` plus that tax.
The invoice then sums the lines, each net of its discount.
```
subtotal = Σ (line subtotal − line discount_amount)
discount_amount = the invoice-wide discount, 0 without one
tax_amount = Σ line tax_amount
total = Σ line total − discount_amount
amount_due = max(0, total − amount_paid)
```
A line discount comes off the invoice's `subtotal`, `total` and `amount_due`, and its tax with it.
The invoice's `discount_amount` is the invoice-wide discount only: the lines' own are in
`items[].discount_amount`.
## An invoice-wide discount
`global_discount_type` and `global_discount_value` take a discount off the whole invoice, after the
line discounts. A percentage is reckoned on the `subtotal`, the lines after their own discounts and
before tax; a `fixed` amount is taken as it is, up to that `subtotal`. The discount is spread over
the lines in proportion to their amount, before tax: each line's tax is worked out on what is left
of it, so the discount lowers the tax too, and a 100% discount leaves none. `total` is the
`subtotal` less the discount, plus the tax and any shipping.
```text title="Two lines and 10% off the invoice"
2 × 50 000, 10% off the line, VAT 19.25% line net 90 000 share 9 000
1 × 20 000, 5 000 off the line line net 15 000 share 1 500
subtotal 105 000 (90 000 + 15 000)
discount_amount 10 500 (10% of 105 000, spread 9 000 + 1 500)
tax_amount 15 593 (19.25% of 81 000, the first line less its share)
total 110 093 (105 000 − 10 500 + 15 593)
```
The invoice returns the discount you set as `has_global_discount`, `global_discount_type` and
`global_discount_value`, and what it came to as `discount_amount`. The payment page charges the
discounted total, and the receipt and the payment confirmation list the discount after the lines.
## Quotes and estimates
Create a quote or an estimate with `document_type: quote` or `estimate`. It is read, corrected,
cancelled and deleted by its `id` like an invoice, and `GET /invoices?document_type=quote` lists
quotes. It stays a `draft`: it is not sent, numbered nor paid through the API, so
`POST /invoices/{id}/send` answers `400 Only an invoice can be sent through the API.` and
`mark-paid` answers `400 Only an invoice can be marked as paid.` A `document_type` is set at
creation and kept: `PUT` does not change it.
## Paying in instalments
Set `payment_type` to `split` or `milestone` and pass the schedule. The hosted page then charges one
entry at a time instead of the full balance.
- `amount` (number, required): What this instalment charges.
- `label` (string): Shown on the payment page. Defaults to `Installment 1` or `Milestone 1`.
- `due_date` (date): Shown on the payment page.
The customer opens the invoice and sees the first entry that is not yet paid, charged at its
`amount` capped by the remaining `amount_due`. When it settles, Wajub marks that entry paid, adds
the amount to `amount_paid`, and moves the invoice to `partial`. The next visit offers the next
entry. The invoice turns `paid` when `amount_paid` reaches the total, and once every entry is
settled with a balance still outstanding the page falls back to charging the remainder in one go.
> [!WARNING]
> **You can set a schedule but you cannot read it back**
>
> The invoice object returns `payment_type` and never `payment_schedules`. Which instalments exist,
> which are paid and which transaction settled each one are only visible in the Dashboard. Keep your
> own copy of the schedule you sent if you need to follow it from your side.
## Listing
`GET /invoices` returns your live invoices, newest first, twenty-five at a time.
`GET /invoices`
- `search` (string): Full-text over number, customer name and email.
- `status` (enum): One status, exactly as it appears on the object: `draft`, `sent`, `viewed`, `partial`, `paid`, `overdue`, `cancelled` or `refunded`.
- `customer_id` (string): One customer, by its `cus_` id.
- `date_from` (date): Lower bound on `invoice_date`.
- `date_to` (date): Upper bound on `invoice_date`, on or after `date_from`.
- `due_date_from` (date): Lower bound on `due_date`.
- `due_date_to` (date): Upper bound on `due_date`, on or after `due_date_from`.
- `amount_min` (number): Lower bound on `total`, in the major unit, as `total` reads: `10000` is ten thousand francs. Each invoice is compared in its own currency.
- `amount_max` (number): Upper bound on `total`, in the major unit.
- `payment_status` (enum): `unpaid`, `partially_paid` or `fully_paid`, read from `amount_paid` against `total`.
- `sort_by` (enum, default `created_at`): `invoice_date`, `due_date`, `total`, `amount_paid`, `status` or `created_at`. The list follows it first, then the newest first among invoices that tie.
- `sort_dir` (enum, default `desc`): `asc` or `desc`.
- `per_page` (integer, default `25`): Between 1 and 100.
- `document_type` (enum, default `invoice`): `invoice`, `quote` or `estimate`: one kind of document per list. Without it, the list holds invoices only.
A `status`, `payment_status`, `document_type`, `sort_by` or `sort_dir` outside these values is a
`422` on that field, as a `per_page` out of range is. So is a date bound that is not a date, or an
upper bound before its lower one.
**Everything overdue on one customer**
```bash
curl -G https://api.wajub.com/invoices \
-H "Authorization: sk.xxxxxxxxxxxxxxxx…" \
-d status=overdue \
-d customer_id=cus_7Kq2mX9vL4tRb3nP8sZcWd1e
```
```javascript
const { data, meta } = await wajub.invoices.list({
status: 'overdue',
customer_id: 'cus_7Kq2mX9vL4tRb3nP8sZcWd1e',
});
```
```python
page = wajub.invoices.list({
"status": "overdue",
"customer_id": "cus_7Kq2mX9vL4tRb3nP8sZcWd1e",
})
```
```php
$page = $wajub->invoices->list([
'status' => 'overdue',
'customer_id' => 'cus_7Kq2mX9vL4tRb3nP8sZcWd1e',
]);
```
```go
page, err := client.Invoices.List(context.Background(), map[string]any{
"status": "overdue",
"customer_id": "cus_7Kq2mX9vL4tRb3nP8sZcWd1e",
})
```
The list is cursor-paginated on the default sort. Ask for a custom `sort_by` or `sort_dir` and it
falls back to page numbers.
## Correcting an invoice
`PUT /invoices/{id}` replaces the document rather than patching it. `customer_name`, `items`,
`invoice_date` and `currency` are required on every call, so send the whole invoice back with your
change applied, not the change alone. The lines you send replace the previous ones outright: each
update replaces the lines and their ids, so every `items[].id` changes.
> [!CAUTION]
> **Only a draft can be edited**
>
> As soon as the invoice has left `draft`, and on a draft that has money recorded against it, `PUT`
> answers `400 This invoice cannot be edited (paid, cancelled, or has payments).` and `DELETE`
> answers `400 This invoice cannot be deleted.` A sent invoice is already frozen. Cancel it and
> issue a replacement.
`recurring_interval` can be changed on update; the `recurring_frequency` alias accepted at creation
is not, so use `recurring_interval` everywhere. The invoice-wide discount is kept unless you send
it: `has_global_discount: false` removes it. `language` is left as it is unless you send it, even
when `customer_id` changes. A `PUT` sends one `invoice.updated`, with the lines and totals it saved,
and none when it changes nothing. A deleted invoice is never returned to you again, and its invoice
number stays taken.
## Recording a payment you collected elsewhere
`mark-paid` is for money that arrived outside Wajub, in cash or by bank transfer. It moves the
balance; it does not create a transaction and it does not settle anything.
`POST /invoices/{id}/mark-paid`
- `amount` (number): What you received, above zero. Omit it and the full `total` is recorded.
- `payment_date` (date): The day the money came in. Becomes `paid_at` when this payment settles the invoice, a single payment of the whole amount included. Today when omitted.
- `transaction_id` (string): Your reference for the money received, such as a transfer number. Kept on the payment the invoice records, which the Dashboard shows in its history; the API does not return it.
- `payment_method` (string): Kept the same way, for your records.
- `notes` (string): Kept the same way, for your records.
An `amount` below the total adds to `amount_paid` and sets the status to `partial`. Call it again for
the next instalment: the amounts accumulate, and the invoice flips to `paid` with a `paid_at` the
moment they reach the total.
**Record a half payment received by bank transfer**
```bash
curl https://api.wajub.com/invoices/inv_LRQqYvlhrgUOE225KMKU/mark-paid \
-H "Authorization: sk.xxxxxxxxxxxxxxxx…" \
-H "Content-Type: application/json" \
-d '{ "amount": 178875, "payment_date": "2026-09-20" }'
```
```javascript
const invoice = await wajub.invoices.markPaid('inv_LRQqYvlhrgUOE225KMKU', {
amount: 178875,
payment_date: '2026-09-20',
});
```
```python
invoice = wajub.invoices.mark_paid("inv_LRQqYvlhrgUOE225KMKU", {
"amount": 178875,
"payment_date": "2026-09-20",
})
```
```php
$invoice = $wajub->invoices->markPaid('inv_LRQqYvlhrgUOE225KMKU', [
'amount' => 178875,
'payment_date' => '2026-09-20',
]);
```
```go
invoice, err := client.Invoices.MarkPaid(context.Background(), "inv_LRQqYvlhrgUOE225KMKU", map[string]any{
"amount": 178875,
"payment_date": "2026-09-20",
}, nil)
```
The invoice has to be open: sent, viewed, overdue or partly paid. A draft answers `400`, since it was
never sent nor numbered: send it first. An invoice already `paid` answers `400` too, and keeps its
`paid_at`; so do a cancelled and a refunded one, with `400 This invoice cannot be marked as paid`,
and a quote or an estimate, with `400 Only an invoice can be marked as paid.`
An `amount` of zero or less answers `422`.
## The PDF
Once sent, an invoice has a PDF anyone holding its `id` can download, without a key: the copy your
customer files. A draft answers `404`, as its page does.
```text title="The invoice as a PDF"
https://api.wajub.com/i/inv_LRQqYvlhrgUOE225KMKU/pdf
```
It is written in the invoice's `language`. Add `?locale=fr` or `?locale=en` to have it in the other
one. This is the link the invoice page offers, so share it the way you share the page.
## Cancelling
`POST /invoices/{id}/cancel` sets the status to `cancelled`, stamps `cancelled_at`, and closes the
public page. Anything already `paid`, `cancelled` or
`refunded` answers `400 This invoice cannot be cancelled`.
Editing and deleting are both closed on an invoice that has been partially paid. Cancelling closes it
without refunding what was collected. Refunding in full what was paid on it online, with
[refunds](https://docs.wajub.com/payments/refunds) on the underlying payments, turns it `refunded` instead, unless part of
it was recorded with `mark-paid`.
- [Quickstart](https://docs.wajub.com/billing/invoice/quickstart): Issue and track your first invoice end to end.
- [Recurring invoices](https://docs.wajub.com/billing/invoice/recurring): What the recurring flag configures, and what it does not.
- [Reminders & follow-up](https://docs.wajub.com/billing/invoice/reminders): When your customer is reminded of an unpaid invoice.
- [Billing & subscriptions](https://docs.wajub.com/billing): The statuses, the transitions and the webhooks.
---
# Quickstart
URL: https://docs.wajub.com/billing/invoice/quickstart
> Issue an invoice, open its payment page, and know when it has been paid.
Four steps take you from nothing to money in your balance: create the document, open its page, hand
the customer the URL, then listen for the payment. Nothing happens between those steps on its own.
> [!WARNING]
> **Live only, and your first invoice is real**
>
> Invoices do not exist in sandbox. Every `/invoices` route answers `403` with `This feature is only
> available in live mode.` to a `sk_test.` key, `GET` included, so there is nothing to try against
> first. Issue your first one to yourself for a small amount. The feature is Invoicing: **10
> invoices in total on Pay as you go**, unlimited from Growth upward.
## 1. Create the document
An invoice is created as a draft and stays there until you move it. Creating one writes a numbered
document and nothing else: no money moves, no mail goes out, and the customer learns nothing.
Four fields are required, and a customer record is not among them. An invoice is addressed to a
name, so you can bill someone who has never paid you before.
`POST /invoices`
- `customer_name` (string, required): Who the invoice is addressed to.
- `items` (array, required): At least one line, each with `name`, `quantity` and `unit_price`.
- `invoice_date` (string (date), required): The date printed on the document.
- `currency` (string, required): ISO 4217 code. Every amount on the invoice is in it.
- `customer_email` (string): Where `/send` e-mails the invoice and its PDF, and the address its payment and receipt use. Without it, `/send` answers `422` unless `customer_id` names a customer with an e-mail; an invoice sent from the Dashboard without one has its page ask the payer.
- `due_date` (string (date)): On or after `invoice_date`. What decides when the invoice turns overdue.
- `accept` (object): Narrows the payment methods the invoice page offers, by `countries`, `channels`, `types` and `currencies`. See [Choosing what a payment accepts](https://docs.wajub.com/payments/payment-methods#choosing-what-a-payment-accepts).
- `customer_id` (string): Attaches an existing [customer](https://docs.wajub.com/payments/customers), by its `cus_` id. Their details are copied onto the document at creation.
The full field list, taxes, discounts and the rest, is on [the Invoice
page](https://docs.wajub.com/billing/invoice). Send this one with a live secret key.
**Create an invoice**
```bash
curl https://api.wajub.com/invoices \
-H "Authorization: sk.xxxxxxxxxxxxxxxx…" \
-H "Content-Type: application/json" \
-H "Idempotency-Key: invoice-amina-september" \
-d '{
"customer_name": "Amina Traoré",
"customer_email": "amina@example.com",
"invoice_date": "2026-09-11",
"due_date": "2026-09-25",
"currency": "XAF",
"items": [
{ "name": "Consulting, September", "quantity": 3, "unit_price": 150000 }
]
}'
```
```javascript
const invoice = await wajub.invoices.create({
customer_name: 'Amina Traoré',
customer_email: 'amina@example.com',
invoice_date: '2026-09-11',
due_date: '2026-09-25',
currency: 'XAF',
items: [
{ name: 'Consulting, September', quantity: 3, unit_price: 150000 },
],
});
console.log(invoice.id, invoice.total);
```
```python
invoice = wajub.invoices.create({
"customer_name": "Amina Traoré",
"customer_email": "amina@example.com",
"invoice_date": "2026-09-11",
"due_date": "2026-09-25",
"currency": "XAF",
"items": [
{ "name": "Consulting, September", "quantity": 3, "unit_price": 150000 },
],
})
print(invoice.id, invoice.total)
```
```php
$invoice = $wajub->invoices->create([
'customer_name' => 'Amina Traoré',
'customer_email' => 'amina@example.com',
'invoice_date' => '2026-09-11',
'due_date' => '2026-09-25',
'currency' => 'XAF',
'items' => [
['name' => 'Consulting, September', 'quantity' => 3, 'unit_price' => 150000],
],
]);
echo $invoice->id;
```
```go
invoice, err := client.Invoices.Create(context.Background(), map[string]any{
"customer_name": "Amina Traoré",
"customer_email": "amina@example.com",
"invoice_date": "2026-09-11",
"due_date": "2026-09-25",
"currency": "XAF",
"items": []map[string]any{
{"name": "Consulting, September", "quantity": 3, "unit_price": 150000},
},
}, nil)
```
The answer is `201 Created`. Totals are computed from the lines, so `subtotal`, `total` and
`amount_due` come back filled even though you never sent them.
```json title="Response · 201 Created"
{
"code": 201,
"status": "Created",
"message": "Invoice created",
"invoice": {
"id": "inv_LRQqYvlhrgUOE225KMKU",
"invoice_number": null,
"status": "draft",
"customer_name": "Amina Traoré",
"invoice_date": "2026-09-11",
"due_date": "2026-09-25",
"currency": "XAF",
"subtotal": 450000,
"total": 450000,
"amount_paid": 0,
"amount_due": 450000,
"sent_at": null,
"paid_at": null
}
}
```
Keep the `id`: every call that follows takes it. `invoice_number` is still `null`. The human
reference printed on the document is assigned in the next step, from your account's numbering, the
same sequence the Dashboard uses: `INV-` (or the prefix you set), the year, then a counter that
restarts at `0001` each year.
## 2. Open its payment page
A draft invoice cannot be paid: its page does not open, and only four statuses are payable: `sent`,
`viewed`, `overdue` and `partial`.
One call moves it out of draft.
`POST /invoices/{id}/send`
**Open the invoice for payment**
```bash
curl -X POST https://api.wajub.com/invoices/inv_LRQqYvlhrgUOE225KMKU/send \
-H "Authorization: sk.xxxxxxxxxxxxxxxx…"
```
```javascript
const invoice = await wajub.invoices.send('inv_LRQqYvlhrgUOE225KMKU');
console.log(invoice.status);
```
```python
invoice = wajub.invoices.send("inv_LRQqYvlhrgUOE225KMKU")
print(invoice["status"])
```
```php
$invoice = $wajub->invoices->send('inv_LRQqYvlhrgUOE225KMKU');
echo $invoice['status'];
```
```go
invoice, err := client.Invoices.Send(context.Background(), "inv_LRQqYvlhrgUOE225KMKU", nil)
if err != nil {
log.Fatal(err)
}
log.Println(invoice["status"])
```
It answers `200` with `status: "sent"`, `sent_at` stamped and the `invoice_number` assigned. The
call also e-mails `customer_email` a link to the invoice, with a PDF copy attached. Calling it again
later e-mails the invoice again and stamps `sent_at` anew, without changing its status.
The call refuses to send to nobody. Without `customer_email`, and without a `customer_id` whose
customer has an e-mail, it answers `422` on `customer_email` and the invoice stays a draft. An
invoice already `paid`, `cancelled` or `refunded` answers `400`.
## 3. Hand over the URL
The e-mail is not always enough: WhatsApp or SMS may be how you actually reach that customer. The
address to share is the invoice id on its own host.
```text title="The customer's URL"
https://invoice.wajub.com/inv_LRQqYvlhrgUOE225KMKU
```
That URL is not in the API response, so build it from the `id` you kept. The host is the one thing
that varies: a merchant serving invoices from a verified custom domain gets that domain instead, and
the Dashboard shows the real address on the invoice.
What opens is an ordinary checkout carrying your branding, the invoice's lines and the operators
available for its currency. The first time the customer opens it, the invoice moves from `sent` to
`viewed` on its own.
If you left `customer_email` out, `/send` refuses the invoice: send it from the Dashboard instead,
which opens its page without e-mailing anyone. The page then shows the payer an e-mail field above
the pay button and opens the payment only once it is filled in. That address receives the payment
confirmation and its receipt, and it is written on the invoice as its `customer_email`
(`invoice.updated` is sent), so later installments and `/send` use it.
## 4. Know when it has been paid
A paid invoice produces two events, and they are not interchangeable.
`payment.succeeded` is the money. It carries the amount, the channel, the provider reference, and
it is the one to fulfil on, because it is the only one that proves funds moved.
`invoice.updated` is the document. It fires on every change the invoice goes through, and paid is
just one of them.
**`invoice.updated`**: Fires on any change to the invoice. Read `data.status` to know which one.
```json title="invoice.updated"
{
"id": "evt_aio5DpN577tNU2vOxdmuZGhT",
"event": "invoice.updated",
"livemode": true,
"created": "2026-09-11T15:42:10+00:00",
"api_version": "2026-10-11",
"pending_webhooks": 1,
"request": {
"id": null,
"idempotency_key": null
},
"data": {
"id": "inv_LRQqYvlhrgUOE225KMKU",
"invoice_number": "INV-2026-0001",
"status": "paid",
"currency": "XAF",
"total": 450000,
"amount_paid": 450000,
"amount_due": 0,
"paid_at": "2026-09-11T15:42:09+00:00"
}
}
```
Two more events follow the money on the document's side. `invoice.payment_succeeded` arrives for
each payment made on the invoice's page, an instalment included, and `invoice.paid` once the
invoice is settled in full. Both carry the invoice, as do `invoice.sent` when the invoice is sent
and `invoice.cancelled` when it is cancelled. There is no `invoice.overdue`: for that one, the
status on an `invoice.updated` payload is what tells you which transition you are looking at. And `payment.succeeded` names the invoice it paid in its `invoice`
field.
> [!NOTE]
> **Fulfil on the payment, reconcile on the invoice**
>
> Deliver what the customer bought when `payment.succeeded` arrives, and use `invoice.updated` to
> keep your own copy of the document in step. Doing it the other way round means acting on a status
> that a manual mark-paid can also produce.
## When the money came in elsewhere
Cash, a bank transfer, a payment that never touched Wajub: record it against the document rather
than leaving the invoice open.
`POST /invoices/{id}/mark-paid`
Send no `amount` and the invoice is settled in full. Send one, above zero, and it is added to
`amount_paid`, which leaves the invoice `partial` until the total is covered. A draft, an invoice
already paid, a cancelled one and a refunded one refuse the call with `400`; an `amount` of zero
answers `422`.
## The statuses, and who writes them
Only three of the eight are yours to set. The rest are written by the customer's own actions or by
Wajub overnight, which is worth knowing before you build a state machine of your own on top.
| Status | Meaning | Written by |
| ----------- | ----------------------------- | ----------------------------------------------------- |
| `draft` | Created, not payable | Creation |
| `sent` | Payable, waiting | Your `/send` call |
| `viewed` | The customer opened the page | The customer, on first open |
| `partial` | Some of the total is in | A payment, or your `/mark-paid` |
| `paid` | Settled in full | A payment, or your `/mark-paid` |
| `overdue` | Past `due_date`, still unpaid | Wajub, overnight once `due_date` has passed |
| `cancelled` | Closed, no longer payable | Your `/cancel` call |
| `refunded` | Paid, then given back | Refunds covering every payment that settled it online |
- [Invoice reference](https://docs.wajub.com/billing/invoice): Every field, how the totals are computed, and the eight calls.
- [Recurring invoices](https://docs.wajub.com/billing/invoice/recurring): What the recurring flag does today, and what it does not.
- [Reminders & follow-up](https://docs.wajub.com/billing/invoice/reminders): Chasing an invoice that has gone quiet.
- [Customers](https://docs.wajub.com/payments/customers): Bill a customer record rather than a name.
- [Invoices API reference](https://docs.wajub.com/api/invoices): Every field and the eight endpoints.
---
# Recurring invoices
URL: https://docs.wajub.com/billing/invoice/recurring
> What the recurring flag configures, what generates the next one, and what does not.
A recurring invoice is an ordinary invoice that Wajub copies into a new draft each cycle. Every copy
still has to be sent and paid by the customer: nothing is debited automatically.
## Marking an invoice recurring
There is no separate endpoint and no subscription resource. Two fields on the ordinary create call
are the whole surface.
`POST /invoices`
- `is_recurring` (boolean, default `false`): Marks this invoice as the one Wajub copies each cycle. The first copy is due one interval after `invoice_date`. Only an invoice can recur: on a quote or an estimate, `true` answers `422`.
- `recurring_interval` (enum): `daily`, `weekly`, `monthly`, `quarterly` or `yearly`. The gap between copies.
- `recurring_frequency` (enum): Accepted on creation as a second spelling of `recurring_interval`, same five values.
- `customer_id` (string): Not optional here. A recurring invoice without a customer record never generates anything.
Everything else on the invoice, the lines, the totals, the notes, behaves exactly as on a one-off.
**An invoice that repeats every month**
```bash
curl https://api.wajub.com/invoices \
-H "Authorization: sk.xxxxxxxxxxxxxxxx…" \
-H "Content-Type: application/json" \
-d '{
"customer_id": "cus_7Kq2mX9vL4tRb3nP8sZcWd1e",
"customer_name": "Amina Traoré",
"invoice_date": "2026-09-11",
"currency": "XAF",
"items": [
{ "name": "Retainer", "quantity": 1, "unit_price": 250000 }
],
"is_recurring": true,
"recurring_interval": "monthly"
}'
```
```javascript
const invoice = await wajub.invoices.create({
customer_id: 'cus_7Kq2mX9vL4tRb3nP8sZcWd1e',
customer_name: 'Amina Traoré',
invoice_date: '2026-09-11',
currency: 'XAF',
items: [{ name: 'Retainer', quantity: 1, unit_price: 250000 }],
is_recurring: true,
recurring_interval: 'monthly',
});
```
```python
invoice = wajub.invoices.create({
"customer_id": "cus_7Kq2mX9vL4tRb3nP8sZcWd1e",
"customer_name": "Amina Traoré",
"invoice_date": "2026-09-11",
"currency": "XAF",
"items": [{ "name": "Retainer", "quantity": 1, "unit_price": 250000 }],
"is_recurring": True,
"recurring_interval": "monthly",
})
```
```php
$invoice = $wajub->invoices->create([
'customer_id' => 'cus_7Kq2mX9vL4tRb3nP8sZcWd1e',
'customer_name' => 'Amina Traoré',
'invoice_date' => '2026-09-11',
'currency' => 'XAF',
'items' => [
['name' => 'Retainer', 'quantity' => 1, 'unit_price' => 250000],
],
'is_recurring' => true,
'recurring_interval' => 'monthly',
]);
```
```go
invoice, err := client.Invoices.Create(context.Background(), map[string]any{
"customer_id": "cus_7Kq2mX9vL4tRb3nP8sZcWd1e",
"customer_name": "Amina Traoré",
"invoice_date": "2026-09-11",
"currency": "XAF",
"items": []map[string]any{
{"name": "Retainer", "quantity": 1, "unit_price": 250000},
},
"is_recurring": true,
"recurring_interval": "monthly",
}, nil)
```
The response is the same `201 Created` as any other invoice, `status: "draft"` included, carrying
two recurring fields and no more.
```json title="Response · 201 Created, abridged"
{
"invoice": {
"id": "inv_LRQqYvlhrgUOE225KMKU",
"invoice_number": null,
"status": "draft",
"currency": "XAF",
"total": 250000,
"is_recurring": true,
"recurring_interval": "monthly"
}
}
```
> [!WARNING]
> **recurring_frequency is a spelling, not a multiplier**
>
> `recurring_frequency: "monthly"` means every month, not a number of months. Update does not accept
> it: send `recurring_interval` everywhere.
## What the API cannot set
The recurrence has more settings, and none of them is on the API. An end after N occurrences, or
an interval of every N months, cannot be set through the API.
| Setting | What it does | Where |
| ------------------------------- | ----------------------------------------------------------------------------------- | ------------------ |
| A start date | Puts the first copy on a date you choose, instead of one interval after the invoice | The Dashboard form |
| An end date | The last day a cycle is generated for | The Dashboard form |
| An end after a number of copies | Stop after this many copies | Not available |
| A multiple of the interval | Every two months, every three weeks | Not available |
An end date entered in the Dashboard is applied: the cycle that falls on it is the last one
generated, and the series then stops for good. A recurrence created through the API has no end rule
at all: it runs until you [stop it](#stopping-a-recurrence).
## What comes back, and what does not
Four recurring fields come back on the invoice object.
| Field | On a recurring invoice | On a generated copy |
| -------------------- | --------------------------------------------------------------------------------------------------- | ------------------------------------------------------- |
| `is_recurring` | `true` while the series runs, `false` once it is stopped | `false`: a copy generates nothing |
| `recurring_interval` | `daily`, `weekly`, `monthly`, `quarterly` or `yearly` | The template's, copied |
| `next_invoice_date` | The date of the next copy, `YYYY-MM-DD`. `null` once the series is stopped or the invoice cancelled | `null` |
| `recurring_parent` | `null` | The `id` of the recurring invoice it was generated from |
So a copy is the invoice whose `recurring_parent` is set. The end rule is not in the response, and
`GET /invoices` has no recurring filter, though the Dashboard list does.
## How a cycle runs
The first copy is due one interval after the invoice's `invoice_date`, never in the past: a
backdated invoice does not produce the cycles that went by before it was recurring. A cycle is never
generated twice, even for a series switched off and on again. A copy cannot be made recurring itself
(`422`), and a duplicate of a recurring invoice is a plain draft that recurs only if you set it to.
On each cycle's date, Wajub copies every recurring invoice that is not cancelled, unless its end
date has passed or your plan lacks the feature.
| The copy inherits | The copy has of its own |
| --------------------------------------------------- | ------------------------------------------------------------------------------------------ |
| The lines, with their quantities, prices and taxes | No `invoice_number` until it is sent, like any draft |
| The currency and the whole-invoice discount | `invoice_date`, set to the cycle that just came due |
| The notes, terms, footer and payment instructions | `due_date`, thirty days later |
| The template, the language and the display settings | The customer block, re-read from the customer record |
| The payment methods it accepts | `is_recurring: false`. A copy is an ordinary invoice and never generates copies of its own |
Each cycle produces exactly one copy. A monthly, quarterly or yearly series never skips a month: one
month after 31 January is 28 February, and the series goes on from the 28th. Cycle dates are in
UTC.
Two of those deserve a second look. The customer block is re-snapshotted from the live customer
each time, so an address or a company name corrected on the record flows into the next document and
leaves the earlier ones untouched. And `due_date` is always thirty days after the copy's date,
whatever terms the original carried.
> [!CAUTION]
> **A copy is a draft, not a charge**
>
> Each generated invoice lands as `draft`, with `amount_paid` back to zero. It is not opened for
> payment, not emailed, and not paid, and it stays a draft past its due date: only a sent invoice
> turns `overdue`. Somebody still has to call `/send` and deliver the URL every
> cycle, exactly as for a one-off. Recurrence saves you writing the document, nothing else.
> [!WARNING]
> **No customer record, no copy**
>
> An invoice without `customer_id` never generates. An invoice addressed to a `customer_name` alone,
> which is perfectly valid for a one-off, silently produces no copy. Pass `customer_id` when you set
> `is_recurring`.
## Stopping a recurrence
An end date, where the Dashboard set one, ends the series on its own. Otherwise you stop it, at any
point and whatever the invoice's status, paid included.
`POST /invoices/{id}/stop-recurring`
```bash title="End the series, keep the document"
curl -X POST https://api.wajub.com/invoices/inv_LRQqYvlhrgUOE225KMKU/stop-recurring \
-H "Authorization: sk.xxxxxxxxxxxxxxxx…"
```
The call takes no body. The invoice comes back with `is_recurring: false` and `next_invoice_date:
null`, nothing else about it changes, and `invoice.updated` is sent. No copy is generated after
this, and the copies already generated stay as they are: each one is an invoice of its own, to send,
cancel or delete like any other. Stopping a series already stopped answers `200` and changes
nothing. In the Dashboard the same action is **Stop recurring**, in the invoice's actions menu.
Call it on the recurring invoice, not on a copy. A copy has no series of its own, so the call
answers `400` on it, with the template's id in `recurring_parent`:
```json title="Response · 400 on a generated copy"
{
"code": 400,
"status": "Bad Request",
"message": "This invoice was generated by a recurring invoice. Stop the series on that one.",
"recurring_parent": "inv_LRQqYvlhrgUOE225KMKU"
}
```
Two other calls touch the series, and both are narrower. `PUT /invoices/{id}` with
`is_recurring: false` stops it too, but only while the invoice is a draft, since only a draft can
be edited. Cancelling the invoice stops generation as well, and clears
`next_invoice_date`, but cancelling is refused once it is paid.
## What it costs in plan
Recurrence needs the Recurring billing feature, which starts at **Growth**.
The Dashboard refuses to save a recurring invoice without it. Without the plan, generation is
skipped and the document is left untouched, so a downgraded account resumes on its own if it
upgrades again, with the cycles that came due in the meantime. `POST /invoices` does not check the
plan, so creating a recurring invoice through the API succeeds on any plan and simply never
generates.
- [Invoice](https://docs.wajub.com/billing/invoice): The document, its payment page, and the rest of the lifecycle.
- [Quickstart](https://docs.wajub.com/billing/invoice/quickstart): Issue an invoice and get it paid, start to finish.
- [Reminders & follow-up](https://docs.wajub.com/billing/invoice/reminders): Chasing a cycle that has gone unpaid.
- [Subscriptions](https://docs.wajub.com/billing/subscriptions): Why an unattended recurring charge is not a product yet.
- [Invoices API reference](https://docs.wajub.com/api/invoices): Every field and the nine endpoints.
---
# Reminders & follow-up
URL: https://docs.wajub.com/billing/invoice/reminders
> When Wajub reminds your customer of an unpaid invoice, and how to follow up from your own code.
Wajub reminds your customer of an unpaid invoice by e-mail, before and after its due date, whether
you sent the invoice through the API or from the Dashboard. Reminders are on unless you turn them
off.
## When reminders go out
Each reminder falls on a day counted from the invoice's `due_date`. Until you pick other days, a new
account's are:
| Reminder | Day |
| ----------------- | -------------- |
| A week before | `due_date` − 7 |
| Three days before | `due_date` − 3 |
| The day before | `due_date` − 1 |
| A day late | `due_date` + 1 |
| A week late | `due_date` + 7 |
**Settings → Invoice → Reminders** in the Dashboard shows the days your account uses, and picks
other days, 1, 3, 7 or 14 days before the due date, the due date itself, or 1, 3, 7 or 14 days
after, or turns reminders off. The choice holds for every invoice of the account: no invoice turns
them off on its own, through the API or elsewhere.
A reminder whose day falls on or before the day the invoice was sent is skipped, so an invoice sent
after its due date is reminded only on the days still ahead of it. A reminder never lands on a day
the customer was already reminded. When several reminders are due at once, only the latest goes,
and none goes out more than a week after its day.
## Who receives what
An invoice is reminded when it has a `due_date`, has been sent (`sent`, `viewed`, `partial` or
`overdue`) and still has something owed. The e-mail goes to the customer `customer_id` links, else
to `customer_email`; an invoice with neither is not reminded. Drafts, quotes and estimates never
are.
The reminder is written in the invoice's `language`, with the PDF attached. It gives the invoice
number, the amount still due and the due date, with a button to the invoice's page. A partly paid
invoice is reminded of what is left.
A reminder sends no webhook and changes nothing on the invoice.
## What stops the reminders
The invoice being paid, cancelled or refunded, or nothing being left to pay. A reminder that was
about to go out when the invoice was paid is not sent.
## Following up from your own code
To follow up over another channel, such as SMS or WhatsApp, or on a schedule of your own, you have
two signals to build on, and they behave differently.
The first is the list, filtered on what is outstanding.
**Everything still owed and past its date**
```bash
curl "https://api.wajub.com/invoices?status=overdue&payment_status=unpaid" \
-H "Authorization: sk.xxxxxxxxxxxxxxxx…"
```
```javascript
const { data } = await wajub.invoices.list({
status: 'overdue',
payment_status: 'unpaid',
});
for (const invoice of data) {
console.log(invoice.invoice_number, invoice.amount_due, invoice.customer_email);
}
```
```python
result = wajub.invoices.list({"status": "overdue", "payment_status": "unpaid"})
for invoice in result.data:
print(invoice["invoice_number"], invoice["amount_due"])
```
```php
$result = $wajub->invoices->list([
'status' => 'overdue',
'payment_status' => 'unpaid',
]);
foreach ($result->data as $invoice) {
echo $invoice['invoice_number'], ' ', $invoice['amount_due'], PHP_EOL;
}
```
```go
result, err := client.Invoices.List(context.Background(), map[string]any{
"status": "overdue",
"payment_status": "unpaid",
})
if err != nil {
log.Fatal(err)
}
for _, invoice := range result.Data {
log.Println(invoice["invoice_number"], invoice["amount_due"])
}
```
`payment_status` takes `unpaid`, `partially_paid` or `fully_paid`, and narrows on what has actually
been received rather than on the status label. `due_date_from` and `due_date_to` bracket the window
when you want this week's late invoices rather than all of them.
> [!NOTE]
> **The overdue label lags by up to a day**
>
> Nothing flips an invoice to `overdue` at midnight. It happens overnight once `due_date` has
> passed, so an invoice that fell due this morning still reads `sent` until tomorrow. If you need the distinction
> on the day, compare `due_date` against today yourself rather than filtering on the status.
The second signal is the webhook, with one gap worth planning around.
**`invoice.updated`**: Fires on changes made through the API, on the first view, and on a payment. Read `data.status`.
```json title="invoice.updated"
{
"id": "evt_aio5DpN577tNU2vOxdmuZGhT",
"event": "invoice.updated",
"livemode": true,
"created": "2026-09-25T09:12:44+00:00",
"api_version": "2026-10-11",
"pending_webhooks": 1,
"request": {
"id": null,
"idempotency_key": null
},
"data": {
"id": "inv_LRQqYvlhrgUOE225KMKU",
"invoice_number": "INV-2026-0001",
"status": "partial",
"currency": "XAF",
"total": 450000,
"amount_paid": 150000,
"amount_due": 300000,
"due_date": "2026-09-25"
}
}
```
The gap is `overdue` itself. Invoices turn `overdue` overnight, and that change sends no webhook.
Overdue is something you notice by asking, not something you are told.
So the pattern that works: hold your own list of open invoices, check it on your own schedule, and
send your own reminder over the channel that customer actually reads. The message needs the payment
URL, which you rebuild from the invoice id.
```text title="What to put in your reminder"
https://invoice.wajub.com/inv_LRQqYvlhrgUOE225KMKU
```
- [Invoice](https://docs.wajub.com/billing/invoice): The document, its payment page, and the full lifecycle.
- [Quickstart](https://docs.wajub.com/billing/invoice/quickstart): Issue an invoice and get it paid, start to finish.
- [Recurring invoices](https://docs.wajub.com/billing/invoice/recurring): What the recurring flag configures, and what it does not.
- [Webhooks](https://docs.wajub.com/developer-tools/webhooks): Where invoice.updated fits with payment.succeeded.
- [Invoices API reference](https://docs.wajub.com/api/invoices): Every filter on the list endpoint.
---
# Account capabilities
URL: https://docs.wajub.com/sync/account-types
> The seven capabilities, what each one reaches, and how your commission is computed.
## The three modes
`account_type` says what the merchant owns at Wajub and where the money sits. Capabilities,
commission and the consent to a change of terms work the same way in the three; what follows from
the mode is listed below the table. It is chosen when you create the connection and never changes
afterwards: switching mode changes what the merchant agreed to, so it is a new connection they
accept again.
| Mode | The merchant | The money | Use it for |
| ------------------ | ---------------------------------------- | ---------------------------------------------------------------- | ---------------------------------------- |
| `direct` (default) | A full Wajub account they run themselves | Wajub rail, or their own provider contracts | Merchants already set up |
| `lite` | A light hosted portal | Wajub rail, always | Small sellers, the common case |
| `relay` | No Wajub account: their verified wallet | Yours: you collect and Wajub pays each seller what they are owed | Marketplaces that are merchant of record |
What follows from the mode:
- a `lite` connection refuses to start a payment while the merchant is not on the Wajub rail
(`409`, `error_code: account_not_on_rail`), and refuses a card, which the rail does not collect yet (`422` with
`error_code: card_not_available`, [The card reserve](https://docs.wajub.com/sync/payouts#the-card-reserve));
- a `relay` connection has no onboarding: there is no merchant account to claim. It is created with
`POST /accounts` and the seller's wallet, has no authorization link (`authorization_url` is `null`,
`POST /accounts/{id}/token` answers `422`) and no invitation date, and turns `active` as soon as the
operator confirms the wallet's name. Sales land on your balance, and Wajub pays each seller what
they are owed. [Relay](https://docs.wajub.com/sync/relay)
> [!WARNING]
> **These are not Standard, Express or Custom tiers**
>
> The mode is not a level of service and does not gate features. Two connections in different modes
> can hold exactly the same capabilities and the same pricing.
## The seven capabilities
A connection is granted a subset of this list, and the list is closed. At least one is required at
creation, and an unknown value is refused with `422`.
| Capability | What it names |
| ------------- | ------------------------------------------------------------------------------------------------------------------------------------------------------------------------------------------------------------------------------------------------------------------------ |
| `read` | Reading the events of what the connection brought |
| `payments` | Initiating payments and payment links |
| `withdrawals` | Paying out, and the beneficiaries paid. Not on a `lite` connection: only Wajub pays a Lite seller, so it is refused with `400` `capability_not_allowed_for_mode`, and a payout or beneficiary write under `X-Sync` on a Lite connection answers `403` with the same code |
| `refunds` | Issuing refunds |
| `disputes` | Answering disputes |
| `customers` | Managing customers |
| `invoices` | Issuing invoices |
Any other capability answers `422` when you create or update a connection.
## Every resource states what it requires
Capabilities are a real boundary: each resource declares the capability it takes, and a request
carrying `X-Sync` without that capability is refused with `403`.
| The request touches | The capability checked |
| -------------------------------------------------------------------------------- | ---------------------------------------------------------------------------------- |
| `/payments`, `/links` | `payments` |
| `/invoices` | `invoices` |
| `/customers`, `/customers/{id}/tax_ids` | `customers` |
| `/refunds` | `refunds` |
| `GET /payments/{id}/refunds`, `POST /payments/{id}/close` with `outcome: refund` | `payments` and `refunds` |
| `/disputes` | `disputes` |
| `/transfers`, `/beneficiaries`, `/identity` | `withdrawals` |
| `/`, `/providers`, `/events` | `read` |
| `/channels`, `/countries`, `/currencies` | none: the catalogues answer the same to everyone |
| `/balance`, `/webhooks`, `/shield`, `/tax` | cannot be called with `X-Sync` at all: they belong to the merchant's whole account |
| `/accounts` | cannot be called with `X-Sync` at all: they are yours |
A resource that cannot be called with `X-Sync` answers `403` with `This endpoint cannot be called
on behalf of a Sync account`, whatever the connection holds.
## A capability covers what the connection brought
Capabilities say *what* a platform may touch; the connection says *whose*. With `X-Sync`, a platform
reaches what this connection brought and nothing else of the merchant's: not their direct sales,
not their own links, invoices or payees, and nothing another platform brought.
| Resource | What the platform reaches |
| --------------------------------------- | ---------------------------------------------------------------------------------------------------------------------------------------------------------------------------------------------- |
| `/payments`, `/refunds` | Only those carrying this connection |
| `/disputes` | Only disputes on this connection's payments |
| `/links`, `/invoices` | Only those created with this connection's `X-Sync` |
| `/beneficiaries` | Only those created with this connection's `X-Sync`, including a beneficiary given inline in a transfer |
| `/transfers` | Only payouts this connection initiated, and only to its own beneficiaries |
| `/customers`, `/customers/{id}/tax_ids` | Customers seen on this connection's payments, and those it created or named by email or phone, unless the merchant removed its access; without the merchant's notes, block reason and metadata |
| `/events` | Only events about the payments, refunds, transfers, disputes, links, invoices and beneficiaries above |
Anything outside that answers `404`, as if it did not exist. A beneficiary the merchant already pays
is no exception: creating one for the same account with `X-Sync` gives the connection its own, and
paying the merchant's answers `422`.
### Customers are shared with the merchant
A customer is the merchant's, not the connection's. The connection reaches a customer once they
have bought through it, or once the platform has created them or named them by email or phone.
That is first or create: `POST /customers` with the email or phone of one of the merchant's
customers (the email whatever its case, the phone however it is written) returns that customer
with `200` instead of a duplicate, and `POST /payments` attaches the payment to them. Either call
only fills the fields the merchant left empty, never one they set. From then on the platform can
read and list them and use them on its payments and invoices, and the merchant sees the result.
A customer the platform created is its own to manage: it can update and block them. On a customer
the merchant already had, an update only fills the fields the merchant left empty, and blocking,
unblocking, activating, deactivating them or deleting a tax id answers `403`. Several connections
can reach the same customer. The platform cannot delete a customer: `DELETE /customers/{id}` with
`X-Sync` answers `403`, because erasing a customer is the merchant's decision.
The platform sees a customer's identity, contact details and addresses, never the merchant's
`notes`, `block_reason` or `metadata`, and `notes` it sends is ignored. The `metadata` it reads
and writes is its own, kept apart for each connection: on a customer the merchant already had,
`POST /customers` and payments add the keys the platform has not set yet, and
`PUT /customers/{id}` replaces them. The merchant's `metadata` never changes through `X-Sync`.
The merchant sees on the customer's page in the Dashboard which platforms reach the customer, and
since when, and can remove a platform's access. The removal lasts until the merchant restores the
access: the platform no longer reaches the customer, not even on its own past payments, naming them
again by email or phone does not bring them back, and its new payments for that email or phone are
created without a customer. Its `metadata` on that customer is deleted. Erasing a customer removes
every platform's access.
A customer the connection has neither seen nor named stays out of reach: `/customers/{id}` answers
`404`, and their `cus_` id given as `customer_id` on a payment or an invoice answers `422`, as an
unknown one does. Changing a customer's email or phone to another customer's answers `422`, as it
does for the merchant.
### Links and invoices collect for the connection
A payment made on a link or an invoice the connection created carries the connection, like a
payment made with `POST /payments` and `X-Sync`: the commission applies and the platform sees it
on `/payments`. Once the connection may no longer collect (cancelled, its payments suspended, the
capability withdrawn, or Sync no longer on your plan), the link answers `404` to the payer and the
invoice cannot be paid. They collect again when the connection does.
### Events, and replaying them
`GET /events` with `X-Sync` lists the events recorded about what the connection brought.
`POST /events/{id}/resend` with `X-Sync` sends the event to **your** endpoints, never to the
merchant's, carrying `data.account`.
## Changing the terms of a live connection
Capabilities and pricing are what the merchant agreed to, so once a connection is active they are
proposed rather than changed. `PUT /accounts/{id}` answers `202 Accepted` and returns the proposal
in `pending_changes`; the connection keeps running on its current terms until the merchant accepts
or declines in their own dashboard.
| Then | What happens |
| --------------------- | ------------------------------------------------------------------------- |
| The merchant accepts | The new terms apply from that moment, and `account.change_accepted` fires |
| The merchant declines | Nothing changes, and `account.change_declined` fires |
| You propose again | The new proposal replaces the one still on the table |
Sales already made keep the terms they were made under: a pricing change never re-prices a
commission already charged. While the connection is still `pending`, nobody has agreed to anything
yet and `PUT` applies the change outright, answering `200`.
## Pricing
Pricing is what your platform retains on the connected account's activity. It is one rule attached
to the connection, created by `POST /accounts` from the `pricing` object and changed afterwards with
`PUT /accounts/{id}` or from the Dashboard.
- `percentage_fee` (number): Percentage of the payment amount, between 0 and 100, with up to four decimal places.
- `fixed_fee` (number): Flat amount added on top of the percentage, in major units of the rule currency.
- `min_fee` (number): Floor. A computed fee below it is raised to it.
- `max_fee` (number): Cap. A computed fee above it is lowered to it.
- `currency` (string): Three-letter code the fee figures are expressed in. Required as soon as you set fixed_fee, min_fee or max_fee.
The two kinds combine rather than compete: a rule with both a percentage and a fixed fee charges
the percentage of the amount plus the flat figure, then applies the floor and the cap in that
order.
## How a fee is computed
Reading this sequence once explains every figure you will see on a `fee.received`.
| Step | What happens |
| ---- | ------------------------------------------------------------------------------------------------ |
| 1 | The payment succeeds and carries a connection |
| 2 | The connection's pricing applies |
| 3 | The fee currency is the rule's `currency`, or the payment's when the rule has none |
| 4 | Percentage and fixed fee are summed, then clamped by `min_fee` and `max_fee` |
| 5 | A fee of zero is not charged |
| 6 | The fee is charged once for the payment |
| 7 | The amount leaves the merchant's balance and lands on yours, held under the sale's own retention |
One payment carries at most one commission. The commission moves in the currency the sale settled in, converted when the rule uses another
currency.
A commission is a share of a sale, so a sale that comes undone takes its share with it.
## When the sale is refunded
`commission_refund_policy`, set on the connection, decides what comes back.
| Policy | On a refund |
| ------------------- | -------------------------------------------------------------------- |
| `prorata` (default) | The commission is returned in proportion to the amount refunded |
| `full` | The whole commission is returned on the first refund, partial or not |
| `none` | Nothing is returned; the merchant carries the refund alone |
Set it with `POST /accounts`, and change it with `PUT /accounts/{id}` only while the connection is
still pending: it is a commercial term the merchant accepted. Nothing is ever given back twice, and
several refunds on one sale can never return more than was charged.
### When a dispute on the sale is lost
A lost dispute undoes the sale as a refund does, and the same policy applies to the disputed amount:
a chargeback the provider reports lost, a dispute your merchant accepts, or one closed past its
deadline. Your merchant accepting a dispute pays the buyer back with a refund; the dispute and that
refund return the commission once between them, whichever is recorded first. A dispute won returns
nothing, since the sale stands.
### In sandbox
A sandbox sale moves the commission between the two sandbox balances, and a sandbox refund gives it
back by the same policy, so you can check what your merchants will see.
The reserve, the cover after a refund and recovery run in sandbox too
([Trying it all in sandbox](https://docs.wajub.com/sync/payouts#trying-it-all-in-sandbox)); only the commissions a merchant
owes when they collect on their own contract are live only.
> [!NOTE]
> **The rule currency is the denomination, not a filter**
>
> `currency` says what the fee is expressed in, not which payments the rule applies to. Charging a
> flat 500 XAF on a payment made in NGN converts at the active rate, and converts a second time if
> your platform's own balance is in a third currency. The `metadata` on the fee records both rates.
## One rule, for every payment
A connection carries one pricing rule, and it applies to every payment made on the connection.
There is no way to charge a different commission on small baskets or to exempt a currency: no
endpoint and no Dashboard form sets conditions on a rule.
> [!WARNING]
> **Pricing needs consent on acceptance too**
>
> Like capabilities, pricing on a connected merchant is proposed rather than changed: `PUT` answers
> `202` and the merchant decides. Set the commission you mean before you send the authorisation
> link, and you never have to ask.
## What stays editable outright
Two fields survive acceptance without the merchant's say-so, and they are the only two.
| Field | Why it stays open |
| ---------------- | ---------------------------------------------------------------------------------------------------------------------------------------------------------------------------------------------------------------------------------------------------------------------------------------------------------------------------------------------------------------------- |
| `callback` | The page the merchant is sent back to once they have accepted, and the origin a `redirect_uri` on the authorisation link has to share. HTTPS only (`http://localhost` and `http://127.0.0.1` with a sandbox key), or `422`. No event is sent to it: a connection's events go to your [webhook endpoints](https://docs.wajub.com/developer-tools/webhooks/events#accounts-for-sync-platforms) |
| `payment_status` | `active` or `suspended`, your own switch on the connection's ability to charge. `active` answers `409` while the merchant's verification is pending or rejected |
Suspending a connection stops both inbound payments and outbound transfers on it, and fires
`account.payment_suspended`. It is the lever to reach for when you would otherwise want to revoke a
capability, and unlike a capability it is reversible.
- [Sync](https://docs.wajub.com/sync): What a connection is and where it stops.
- [Quickstart](https://docs.wajub.com/sync/quickstart): Create a connection and take your first payment on it.
- [Onboarding](https://docs.wajub.com/sync/onboarding): The lifecycle, the authorisation link, and the statuses.
- [Subaccounts API](https://docs.wajub.com/api/subaccounts): The endpoint specification.
---
# Analytics
URL: https://docs.wajub.com/sync/analytics
> Your sellers' volume, the commission you kept, what you stand to lose and what your sellers were paid, in the Dashboard and through the API.
How much did your sellers sell, how much did you keep, how much could come back to you, and how much
did Wajub pay them? **Sync, Analytics** in the Dashboard and `GET /sync/metrics` answer with the
same figures, for a period compared with the period of the same length just before.
## Where the figures come from
Nothing is estimated: each amount is a line Wajub wrote when the money moved.
| Figure | Counted from | Placed in the period by |
| ---------------------------------- | ----------------------------------------------------------------------------------------------------------------------- | ----------------------- |
| Volume, a seller's sale | A payment made with `X-Sync` on one of your accounts, `succeeded`, `refunded` or `partially_refunded`, its gross amount | When it was credited |
| Volume, a part of a shared payment | A part passed to its seller; a part still waiting does not count | When it was passed on |
| Commission taken | The commission of the sale, of the part, or the one a Relay seller's due recorded | When it was taken |
| Commission returned | Given back on a refund or a lost dispute | When it was given back |
| Forgone | What your policy asked to give back, less what your balance allowed | When it was given back |
| Net commission | Taken less returned | |
| Take rate | Net commission over the volume of the same currency, in percent | |
| Paid out | Wajub's payouts to your sellers that succeeded | Their value date |
- **Currencies are never added together.** Every figure is per currency. The headline figures are in
the currency with the most volume over the period (`currency`).
- A commission can be in another currency than its sale: it counts in its own currency, and the take
rate only compares amounts of the same currency.
- A refund of a Relay sale reduces the seller's due and comes out of your balance: no commission
"returned" line is written for it, so none is counted.
- **Active sellers** are the accounts with at least one sale or part in the period. The **dispute
rate** is the disputes opened in the period on your sellers' sales over the period's sales made
with `X-Sync`: a shared payment's disputes are yours.
## What you see
| Block | Says |
| ----------------- | ---------------------------------------------------------------------------------------------------------------------------------------------------------------------------------------------------------------------------------------------------------------------------------------------------------------------------------------------------------------------------------------------------------------------------------------------------- |
| Volume | By currency and by mode (`direct`, `lite`, `relay`), sales, average sale, the share that came through shared payments |
| Commission | Taken, returned, forgone, net, take rate, by mode |
| Exposure and risk | Your [payout cap](https://docs.wajub.com/sync/payouts#your-exposure-cap) used, your sellers' reserves (the Lite reserve, and the [card reserve](https://docs.wajub.com/sync/payouts#the-card-reserve) of your Lite and Relay sellers' card sales), the sales [held until delivery](https://docs.wajub.com/sync/holds) and those released on their own within 7 days, the refunds you covered and what came back, your sellers by [risk level](https://docs.wajub.com/sync/seller-risk) and frozen, the disputes running and the dispute rate |
| Payouts | Paid in the period, on their way, owed to your Relay sellers, on your Lite sellers' balances, and the sellers whose payouts are held, by reason |
| Sellers | The first ten by volume, by net commission, and the ten riskiest |
In the Dashboard, the period is 7, 30 or 90 days, 12 months, or days you pick, in your browser's
days; the chart shows the previous period dotted. Members who can see payouts open it. When the
figures cannot be read for a moment, the page says so, with **Retry**.
## Through the API
```bash title="The last 90 days"
curl "https://api.wajub.com/sync/metrics?period=90d" \
-H "Authorization: sk.xxxxxxxxxxxxxxxx…"
```
| Rule | |
| --------- | -------------------------------------------------------------------------------------------------------------------------------------------------------------------------------------------------------------------------------------------------------------------------------------------------------------------------------------------------------------------------------------- |
| Key | Your own, never with `X-Sync` (`403`). Sync on your plan, otherwise `403 feature_not_in_plan` |
| `period` | `7d`, `30d` (default), `90d` or `12m` (365 days, the chart by month). Another value: `422` |
| Days | UTC, today included |
| Sandbox | A test key reads the sandbox: `sandbox: true`, `risk.exposure` is empty, and your Lite sellers' sandbox balances are all `lite_available` (`lite_pending` is 0) |
| Freshness | What happened over the period (sales, commission, payouts made, disputes opened, covers) counts everything up to `as_of`, usually a minute or two before the call. What stands now (reserves, held sales, open disputes, payouts on their way, what your sellers are owed and hold, exposure) is read when the figures are worked out. Either way, the answer is kept for five minutes |
| Limit | 10 calls a minute per platform and environment, on top of your plan's limit: `429` past it |
```json title="Response · 200 OK, shortened"
{
"data": {
"period": { "start": "2026-10-22T00:00:00+00:00", "end": "2026-11-20T23:59:59+00:00", "previous_start": "2026-09-22T00:00:00+00:00", "days": 30 },
"sandbox": false,
"as_of": "2026-11-20T23:58:00+00:00",
"currency": "XAF",
"volume": {
"active_sellers": 4,
"previous_active_sellers": 1,
"currencies": [
{ "currency": "XAF", "amount": 49000, "previous_amount": 4000, "change_percent": 1125, "sales": 5, "average": 9800, "shared_amount": 6000, "shared_percent": 12.24 }
]
},
"commission": [
{ "currency": "XAF", "taken": 2450, "returned": 300, "forgone": 70, "net": 2150, "take_rate": 4.39 }
],
"risk": {
"reserve": [ { "currency": "XAF", "held": 4000, "next_release_at": "2026-11-30T10:00:00+00:00", "card": { "held": 1500, "sales": 3, "next_release_at": "2027-02-18T10:00:00+00:00" } } ],
"sellers": { "scored": 3, "elevated": 1, "high": 1, "frozen": 1, "high_not_frozen": 1 },
"disputes": { "open": 1, "opened": 1, "sales": 4, "rate": 25 }
},
"payouts": {
"currencies": [ { "currency": "XAF", "paid": 11000, "payouts": 2, "in_flight": 2000, "relay_payable": 7600, "lite_available": 12000 } ],
"held": [ { "reason": "frozen", "sellers": 1 } ]
},
"sellers": { "currency": "XAF", "by_volume": [], "by_commission": [], "by_risk": [] }
}
}
```
Amounts are in major units; percentages out of 100 with two decimals, `change_percent` with one. A
percentage is `null` when there is nothing to compare: a previous period at zero, no volume, no
sale. `payouts.held[].reason` is `frozen`, `new_seller`, `exposure_cap`, `approval_withdrawn`,
`insufficient_balance` or `identity_required`. In `sellers`, `connected: false` marks an account
disconnected or deleted since, and `risk_score` is `null` for a seller never scored. In
`risk.reserve`, `held` and `next_release_at` include the card reserve, and `card` gives it on its
own: what your sellers' card sales keep, how many sales, and its next release.
[The full response](https://docs.wajub.com/api/subaccounts/metrics)
### Call it in the background
Any period answers quickly, but call this route from a scheduled job of yours, every five minutes at
most, and keep the answer on your side: not at every page view.
| Answer | When | What to do |
| -------------------------------------------- | ------------------------------------------------------------------------------------------ | ---------------------------------------- |
| `429` with `error_code: metrics_busy` | Another call is working out the same figures, and they were not ready within a few seconds | Retry after `Retry-After` |
| `429` without `error_code` | More than 10 calls in a minute | Wait for the next minute |
| `503` with `error_code: metrics_unavailable` | The period's figures cannot be read for a moment | Retry after `Retry-After`, not in a loop |
| `503` with `error_code: metrics_timeout` | The figures could not be worked out in time | Retry later, or ask for a shorter period |
A `503` is never a partial answer: the figures you get are always complete up to `as_of`.
- [Reports and statements](https://docs.wajub.com/sync/reports): The same ledger, line by line, as CSV, Excel or PDF.
- [Seller risk](https://docs.wajub.com/sync/seller-risk): Score, new sellers' delay and freezing.
- [Read your platform's figures](https://docs.wajub.com/api/subaccounts/metrics): The endpoint specification.
---
# Disputes on your sellers' sales
URL: https://docs.wajub.com/sync/disputes
> Let a Lite seller answer a dispute on their own sale, with their proof of delivery, and complete their answer through the API.
A dispute on a sale made with `X-Sync` is a dispute on the seller's account. The seller is often the
one holding the proof: the delivery slip, the messages with the buyer. With Sync, a Lite seller can
answer from their portal or from the `disputes` [embedded component](https://docs.wajub.com/sync/embedded-components), and
you hear of it.
## Who answers
Each connection carries `dispute_handling`:
| Value | Who answers | Default |
| ---------- | ---------------------------------------------------------------------------------------------------------------------------------------------------------------- | ----------------------------------------------------------------------- |
| `both` | The seller sends their evidence; you hear of it and can complete it through the API. The seller can still change their answer until 24 hours before the deadline | `lite` |
| `seller` | The seller answers; their answer is **final** once sent | |
| `platform` | You alone, through the API. The seller sees the dispute, read only | `relay`, and its only value: a Relay seller has no space to answer from |
**You can always answer through the API with `X-Sync`**, whatever the value. A `direct` merchant
answers from their own Dashboard: the setting is refused for them. A [shared
payment](https://docs.wajub.com/sync/split-payments#one-payment-several-sellers) is yours: its disputes are too.
Set it with `POST /accounts`, or change it at once with `PUT /accounts/{id}`; an answer the seller
already sent stays in the dispute.
```bash title="The seller answers alone"
curl -X PUT https://api.wajub.com/accounts/acc_Gt6yU3nE8rM1kS5vX9bQ \
-H "Authorization: sk.xxxxxxxxxxxxxxxx…" \
-H "Content-Type: application/json" \
-d '{"dispute_handling":"seller"}'
```
| `error_code` | Status | When |
| -------------------------------- | ------ | --------------------------------------------------------------------------- |
| `dispute_handling_not_available` | `400` | `seller` or `both` on a `relay` account, or any value on a `direct` account |
| | `422` | An unknown value (`errors.dispute_handling`) |
## What the seller does
1. **They prepare a draft**
One piece per type of evidence: `proof_of_delivery`, `customer_communication`, `receipt`,
`product_description`, `refund_policy` or `other`. A text of 2 000 characters at most, a file, or
both. Nothing reaches the dispute until they send it.
2. **They attach files**
PDF, JPG or PNG only, 5 MB at most. The content is checked: a script dressed as a PDF or an
image is refused.
3. **They send it**
Each piece not sent yet joins the dispute, the dispute turns `under_review`, and you receive
`account.dispute_evidence_submitted`.
**24 hours before the deadline**, the seller can no longer write. What they saved without sending
is **sent for them**, and a `both` answer becomes final; if they wrote nothing, their answer
`lapsed`. A dispute without a deadline has no cut-off and no reminder: the seller can answer while it is open.
When a dispute ends while the seller's answer is still open, that answer reads `closed`. With
`platform`, the seller reads that "your platform answers this dispute".
You are not cut off at that point: the API stays open to you until the dispute is decided. Complete
the answer **before** the seller's cut-off all the same, so they see it whole.
The seller is told by e-mail, in [your brand](https://docs.wajub.com/sync/own-domain#e-mails-in-your-brand), when the
dispute opens, and 3 days before its deadline if they have sent nothing, when the connection lets
them answer. A dispute without a deadline gets the opening e-mail only.
## Completing their answer
Read the file with `GET /disputes/{id}` and `X-Sync`, then add to it with
`POST /disputes/{id}/submit-evidence`. A piece you send under a type the seller already sent
**replaces** theirs: one type, one piece. A seller sending again in `both` only rewrites the pieces
they changed, so what you sent under another type stays. You and the seller can send at the same
time: each piece is added by its type without erasing the other's. A piece sent once the dispute is
closed is refused with `422`.
Who sent each piece is in the dispute's `evidence_submitted_by`, by evidence type, a text-only piece
included:
| Value | Who |
| ---------- | ------------------------------------------------------------------ |
| `merchant` | The merchant, in the Dashboard or through the API without `X-Sync` |
| `platform` | You, through the API with `X-Sync` |
| `seller` | The Lite seller, from their space or the `disputes` component |
| `null` | A piece sent before Wajub kept who sent it |
```json title="Who sent what"
"evidence": {
"proof_of_delivery": { "file_name": "delivery-slip.pdf", "submitted_by": "seller", "url": "https://…" },
"customer_communication": "The buyer confirmed receipt by message on 18 November."
},
"evidence_submitted_by": {
"proof_of_delivery": "seller",
"customer_communication": "platform"
}
```
`evidence` itself does not change: a text-only piece is still returned as its text, so code that
reads a string keeps working, and a piece with a file is an object that also carries its own
`submitted_by`.
## The event
`account.dispute_evidence_submitted` reaches your platform, in the dispute's environment, each time
the seller's sending adds or changes a piece, and when the cut-off sends their draft for them. It is
a [Sync lifecycle delivery](https://docs.wajub.com/developer-tools/webhooks/events#sync-lifecycle-deliveries): list it by
name in your endpoint's events.
```json title="An account.dispute_evidence_submitted delivery"
{
"event": "account.dispute_evidence_submitted",
"account": "acc_Gt6yU3nE8rM1kS5vX9bQ",
"sandbox": false,
"timestamp": "2026-11-21T09:12:04+00:00",
"dispute": {
"id": "dsp_8Hq2Lw4Tz6Nc1Vb3Xk9R",
"payment": "trx_Lw2Ka8Qd1Fz6Tn4Bc7Xm",
"status": "under_review",
"reason": "product_not_received",
"amount": 20000,
"currency": "XAF",
"due_date": "2026-11-30T10:00:00+00:00"
},
"submitted_by": "seller",
"evidence_types": ["proof_of_delivery"],
"dispute_handling": "both",
"seller_may_change_until": "2026-11-29T10:00:00+00:00"
}
```
`submitted_by` is `seller`, or `auto` when the cut-off sent the draft. `seller_may_change_until` is
set in `both` while the answer is still open to the seller, `null` otherwise. The `dispute.*` copies
you already receive do not change.
## The `disputes` component
Turn it on with `components: { disputes: { enabled: true } }` on
`POST /accounts/{id}/embedded_sessions`, then `wajub.create('disputes').mount('#wajub-disputes')`.
`lite` accounts only: a `relay` account answers `component_not_available`. It has no feature to turn
on: it follows `dispute_handling`, a form for `seller` and `both`, read only for `platform`. It never
shows your own pieces nor a file's address.
## The money does not change
A lost dispute is debited as it always was ([Sync refunds](https://docs.wajub.com/sync/refunds#a-lost-dispute-is-always-debited)).
A dispute won on a sale [held until delivery](https://docs.wajub.com/sync/holds) gives the seller back what the dispute
held, and the sale stays held until you release it.
- [Disputes](https://docs.wajub.com/api/disputes): The dispute lifecycle and the evidence API.
- [Embedded components](https://docs.wajub.com/sync/embedded-components): The `disputes` component and the others.
- [Sync refunds](https://docs.wajub.com/sync/refunds): Who pays for a refund or a lost dispute.
---
# Embedded components
URL: https://docs.wajub.com/sync/embedded-components
> Show a seller their sales, payouts, balance, account, disputes and pending actions inside your own pages, in your colours.
Your sellers already sign in to your product. Embedded components put pieces of their Wajub space
there, inside your pages and in your colours: their sales, their payouts, their balance, the actions
waiting for them. They never leave your site, and you never rebuild screens Wajub already keeps
up to date.
## The components
| Component | Shows | `lite` | `relay` |
| --------------- | -------------------------------------------------------------------------------------------------------------------------------------- | ------ | ------------------------------ |
| `notifications` | The actions waiting for the seller: identity check, missing payout account, identity document asked for, payouts held back | Yes | Yes |
| `payments` | Their sales, page by page (amount, fee, your commission, refunded, net, status), and the detail of each sale with its refunds | Yes | No |
| `payouts` | The payouts Wajub sent them, what each one settles line by line, the next payout, what holds payouts back, and their yearly statements | Yes | Yes, the payouts of their dues |
| `balance` | Lite: available, pending, kept in reserve, held until delivery. Relay: what is owed and payable, what is still held | Yes | Yes |
| `account` | The identity check left to complete, their payout accounts (last 4 characters), and optionally changing them | Yes | No |
| `disputes` | The disputes on their sales, and their answer when you let them give it ([Disputes on your sellers' sales](https://docs.wajub.com/sync/disputes)) | Yes | No |
A `direct` merchant has their own Dashboard: an embedded session for one is refused with
`account_type_not_embeddable`. Everything works in sandbox, with a test key and a sandbox account.
The whole portal in an iframe ([`portal_sessions`](https://docs.wajub.com/sync/onboarding#the-portal-in-your-own-pages))
is still there. Components are the recommended way: you choose what to show, and where.
## How it fits together
1. **Declare the origins of your pages**
Under **Settings, Sync, Platform**, list up to 5 `https` origins your pages are served from. The
components are shown there and nowhere else.
2. **Your server asks for a session**
`POST /accounts/{id}/embedded_sessions` with your secret key, naming the components to turn on.
You get a `client_secret`, valid once for 5 minutes, and `loader_url`.
3. **Your page loads the script**
`WajubConnect.init({ fetchClientSecret })` calls your server when it needs a secret, exchanges it
for a session of 30 minutes, then mounts each component in its own frame.
4. **The session ends, a new one starts**
When the session runs out, the loader asks your `fetchClientSecret` for a new secret. If the
seller is gone from your platform in the meantime, the component sends `exit`.
## Create a session
```bash title="A session with four components"
curl https://api.wajub.com/accounts/acc_Gt6yU3nE8rM1kS5vX9bQ/embedded_sessions \
-H "Authorization: sk.xxxxxxxxxxxxxxxx…" \
-H "Content-Type: application/json" \
-d '{
"components": {
"notifications": { "enabled": true },
"payments": { "enabled": true },
"payouts": { "enabled": true },
"account": { "enabled": true, "features": { "edit_payout_account": true } }
}
}'
```
| Field | |
| ------------------------------------------------- | ----------------------------------------------------------------------------------------------------------------------------------------------------------------------------------------------------------------------------------------------------------------------------------------------------------- |
| `components` | Required. Keys among `notifications`, `payments`, `payouts`, `balance`, `account`, `disputes`; at least one with `enabled: true` |
| `components.*.enabled` | `false` by default |
| `components.account.features.edit_payout_account` | Let the seller change their payout account from the component. **Always** after a code sent to the owner of their space, good for that new account only, never on your word alone, and the new account waits out the usual cooling-off period ([Changing the payout account](#changing-the-payout-account)) |
| `components.payments.features.refund_management` | Reserved: `true` is refused with `feature_not_available` for now |
```json title="Response · 201 Created"
{
"code": 201,
"status": "Created",
"message": "Embedded session created",
"embedded_session": {
"id": "es_0193f3c2a1b47c9e8d2f5a6b7c8d9e0f",
"client_secret": "es_0193f3c2a1b47c9e8d2f5a6b7c8d9e0f_secret_…",
"expires_at": "2026-11-20T10:05:00+00:00",
"account_type": "lite",
"components": {
"notifications": { "enabled": true, "features": {} },
"payments": { "enabled": true, "features": { "refund_management": false } },
"payouts": { "enabled": true, "features": {} },
"balance": { "enabled": false, "features": {} },
"account": { "enabled": true, "features": { "edit_payout_account": true } },
"disputes": { "enabled": false, "features": {} }
},
"loader_url": "https://acme.wajub.app/embed/v1.js"
}
}
```
`components` always lists the six components, each with `enabled` and its features, whether you
turned it on or not.
The `client_secret` works **once**, before `expires_at`, and only from a page on one of your declared
origins. Wajub keeps only its hash. Hand it to the browser that asked for it and nothing else: never
log it, never put it in a URL.
`loader_url` is on your sellers' address: [your own domain](https://docs.wajub.com/sync/own-domain) when it is active,
`yourname.wajub.app` once Wajub validated the name, `lite.wajub.com` before that.
| `error_code` | Status | When |
| -------------------------------------- | ------ | -------------------------------------------------------- |
| `account_type_not_embeddable` | `400` | A `direct` account |
| `component_not_available` | `400` | `payments`, `account` or `disputes` on a `relay` account |
| `feature_not_available` | `400` | `payments.refund_management: true` |
| `unknown_component`, `unknown_feature` | `400` | A key Wajub does not know |
| `no_component_enabled` | `400` | Nothing turned on |
| `account_not_active` | `409` | The connection is not active yet |
| `frame_origins_missing` | `409` | You have not declared any origin |
An account of another platform, or of the other environment, answers `404`.
## A complete integration
Your server holds the secret key and knows which seller is signed in. It creates the session and
hands the browser the `client_secret` alone.
```js title="Server · Node.js (Express)"
import express from 'express';
const app = express();
app.post('/wajub/embedded-session', requireSellerLogin, async (req, res) => {
const accountId = req.user.wajubAccountId; // acc_…
const response = await fetch(`https://api.wajub.com/accounts/${accountId}/embedded_sessions`, {
method: 'POST',
headers: {
Authorization: process.env.WAJUB_SECRET_KEY,
'Content-Type': 'application/json',
},
body: JSON.stringify({
components: {
notifications: { enabled: true },
payments: { enabled: true },
payouts: { enabled: true },
balance: { enabled: true },
account: { enabled: true, features: { edit_payout_account: true } },
},
}),
});
const body = await response.json();
if (!response.ok) return res.status(502).json({ error: body.error_code });
res.json({ client_secret: body.embedded_session.client_secret });
});
```
```php title="Server · PHP (Laravel)"
$session = Http::withHeaders(['Authorization' => config('services.wajub.secret')])
->post("https://api.wajub.com/accounts/{$accountId}/embedded_sessions", [
'components' => [
'payments' => ['enabled' => true],
'payouts' => ['enabled' => true],
],
])
->throw()
->json('embedded_session');
return ['client_secret' => $session['client_secret']];
```
Your page loads the script from `loader_url` and mounts the components where you want them.
```html title="Browser"
```
Before you try it: declare `https://your-site.example` under **Settings, Sync, Platform**, and in
test use a test key and a sandbox account.
## The loader
`WajubConnect` is version `1`, and stays as it is: a later change ships under another address.
| Call | Does |
| -------------------------------------------------------------- | ----------------------------------------------------------------------------------------------------------------- |
| `WajubConnect.init({ fetchClientSecret, appearance, locale })` | Starts one session. Every component created from it shares that session |
| `wajub.create(name)` | A component: `notifications`, `payments`, `payouts`, `balance`, `account` or `disputes` |
| `component.mount(target)` | Draws it in a CSS selector or an element. It takes the container's full width, and its height follows its content |
| `component.unmount()` | Removes it |
| `component.on(event, handler)` | Listens to `ready`, `loaderror` or `exit`; returns the component, so calls chain |
| `wajub.destroy()` | Removes every frame and the listener |
`locale` is `en` or `fr`; without it, the browser's language, and French failing that.
`WajubConnect.version` is `'1'` and `WajubConnect.components` lists the names.
| Event | When |
| ----------- | ------------------------------------------------------------------------------------------------------------------------------------------------------------------------------------------------------------------------------------- |
| `ready` | The component is drawn: `{ component }` |
| `loaderror` | It could not load: `{ type, message }`, with `type` such as `frame_timeout` (nothing answered within 15 seconds: check your declared origins), `invalid_client_secret`, `origin_not_allowed`, `component_not_enabled` or `load_error` |
| `exit` | The session ended and cannot be renewed |
### Appearance
The appearance is checked by Wajub: there is no free CSS.
| Key | Values |
| ---------------------------------------------------- | -------------------------------------------------------------------------------------------------------------------------------------------------------------------------------------------------------------------------------- |
| `colors.primary`, `colors.background`, `colors.text` | `#rgb` or `#rrggbb` |
| `border_radius` | `0px`, `4px`, `8px`, `12px` or `9999px` |
| `font` | Instrument Sans, Inter, Roboto, Open Sans, Lato, Montserrat, Poppins, DM Sans, Plus Jakarta Sans, Raleway, Nunito, Work Sans, Manrope, Outfit, Space Grotesk, Public Sans, Figtree, Lexend, Sora, Source Sans 3 or IBM Plex Sans |
| `mode` | `light`, `dark` or `system` |
Any other value is ignored, named in a console warning, and replaced by your brand under
**Settings, Branding**. A colour that lacks contrast is adjusted to stay readable, as on the portal.
## Changing the payout account
With `edit_payout_account` on, the `account` component lets a Lite seller change where they are
paid. Neither your word nor your session is enough for it:
| Step | |
| --------------------------------------- | ----------------------------------------------------------------------------------------------------------------------------------------------------------------------------------------------------------------------------------------------------------------------------------------------------------------------------------------------------------------------------- |
| The seller enters the new account | The operator and the number, or the bank account, checked as in their portal before any code goes out |
| A code goes to the owner of their space | To the e-mail address that opens their space, never one you registered. The e-mail names the new account (the operator, the last 4 digits) and says never to give the code to anyone, not even your platform or someone who says they work for Wajub. It comes from Wajub, under your validated space name ("yourname via Wajub"), without your logo, colour or reply address |
| The code confirms those details only | Sent with other details, it is refused and spent: the seller asks for a new one. Asking for a code for other details cancels the previous one |
| The account changes | After the usual cooling-off period. The seller gets an e-mail from Wajub saying their payout account changed, whose link leads to their Wajub address, never to your domain |
On [your own domain](https://docs.wajub.com/sync/own-domain), nothing is confirmed inside the frame: you hold that domain's
certificate. The component shows the payout accounts read-only, and its **Change payout account**
button opens the seller's Wajub address, `https://yourname.wajub.app/payout-account` (the component's
`change_url`, `null` on a Wajub address), in a new tab. The seller signs in there with their own code
and changes the account on the spot.
The loader and the component handle these answers of the frame themselves:
| Answer | When |
| ----------------------------------- | -------------------------------------------------------------------------------------------------------------------- |
| `409` `change_on_wajub`, with `url` | A code asked for, or a change sent, on your own domain: the change is made at `url` |
| `429` `too_many_codes` | 3 codes an hour or 6 a day; or a code for other details is on its way and the delay between two codes has not passed |
| `429` `payout_account_locked` | 5 wrong codes within 24 hours: the change is locked for 24 hours |
## Ending a seller's sessions
`POST /accounts/{id}/embedded_sessions/revoke` ends at once every embedded session of the seller: the
client secrets not claimed yet stop working, and the sessions already open end. Their frames answer
`session_expired`, and the loader asks your `fetchClientSecret` for a new secret. Call it when a
seller leaves your platform, or when a client secret may have leaked; if the seller should see
nothing more, have your server refuse that next secret.
```bash title="Revoke a seller's sessions"
curl -X POST https://api.wajub.com/accounts/acc_Gt6yU3nE8rM1kS5vX9bQ/embedded_sessions/revoke -H "Authorization: sk.xxxxxxxxxxxxxxxx…"
```
```json title="Response · 200 OK"
{
"code": 200,
"status": "OK",
"message": "Embedded sessions revoked",
"revoked": 2
}
```
| Rule | |
| ----------- | --------------------------------------------------------------------------------------------------------------------- |
| `revoked` | How many sessions still alive were ended, secrets not claimed yet included; `0` when none was |
| Environment | The account's own: a test key revokes the test sessions |
| Key | Your secret key, without `X-Sync`. A restricted key is refused (`403`), as on `POST /accounts/{id}/embedded_sessions` |
| Refusals | `400` `account_type_not_embeddable` on a `direct` account; `404` for an account of another platform |
## What keeps it safe
| Rule | Why |
| --------------------------------------- | -------------------------------------------------------------------------------------------------------------------------------------------------------------------------------------------------------------------------------------------------------------------------------------------------------------------------------------------------------------------------------------------------------------------------------------------------------------------------------------------------------- |
| No third-party cookie | The session travels by `postMessage` to the frame's exact origin, then in an `Authorization` header. It works in browsers that block third-party cookies |
| The token is never in a URL | The frame's address carries only the session's public id, which says which origins may frame it |
| Messages are checked both ways | The frame only listens to its parent on a declared origin; the loader only to its own frames |
| Framed by your origins only | The frames send `frame-ancestors` with the origins you declared |
| `Origin` guards a browser, not a secret | The secret is claimed only from a page on a declared origin. A server that holds a client secret can send any `Origin`: keep the secret on your server until your page asks for it, and [revoke the seller's sessions](#revoking-sessions) if it may have leaked |
| Your secret key only | Creating and revoking sessions take your secret key: a restricted key is refused |
| Read only, except one feature | Only `edit_payout_account` writes, and only after a one-time code sent to the e-mail address of the owner of the seller's space, never one you registered, and good for the account it names only. The code works once, for 10 minutes. At most 3 codes an hour and 6 a day; 5 wrong codes within 24 hours lock the change for 24 hours. On your own domain the change is made on the seller's Wajub address. After any change, the seller gets an e-mail from Wajub saying their payout account changed |
| The session follows your settings | It ends at once (the loader asks your server for a new secret) when the origin that opened it is no longer declared, the seller's space is closed, or Sync is no longer on your plan. Origins and plan are read again at least every 60 seconds |
> [!NOTE]
> **Calling the frames yourself**
>
> The loader and its frames call a few routes on your sellers' address (`/embed/v1/sessions`,
> `/embed/v1/payments`…). They are not an API to call by hand, and they may change within version
> `1` as long as the loader does not.
- [Your own domain](https://docs.wajub.com/sync/own-domain): Serve the portal and the components on a domain of yours.
- [Disputes on your sellers' sales](https://docs.wajub.com/sync/disputes): Let sellers answer from the `disputes` component.
- [Create an embedded session](https://docs.wajub.com/api/subaccounts/create-embedded-session): The endpoint specification.
- [Revoke the sessions](https://docs.wajub.com/api/subaccounts/revoke-embedded-sessions): End every embedded session of a seller.
---
# Hold until delivery
URL: https://docs.wajub.com/sync/holds
> Keep a seller's money from a sale until the buyer has the goods, then release it, or let it release itself.
A marketplace of physical goods pays its seller once the buyer has the parcel. With Sync, you ask
for that when you create the payment: the seller's money from the sale **stays held until you
release it**, and is released on its own at the latest after a delay you chose. A payment link or an
invoice you create for the seller can carry the same hold, for every payment made through it.
| The seller's mode | While the sale is held |
| ----------------- | --------------------------------------------------------------------------------------------------------------------------------------------------------------------------------------------------------- |
| `lite` | The sale is credited to the seller's balance as any sale, your commission taken, but the held part is left out of every payout: automatic, `POST /accounts/{id}/payouts`, and the sandbox simulator alike |
| `relay` | The seller's due is recorded as usual, and stays unpaid |
| `direct` | Refused with `hold_not_available_for_direct`: a Direct merchant withdraws from their own balance, and Wajub does not pay them |
Once released, by you or by its deadline, the seller is paid the sale **on their next payout**.
## The longest hold, per connection
Each `lite` or `relay` connection carries `hold_max_days`: **30** (default), **60** or **90** days.
Set it with `POST /accounts` or `PUT /accounts/{id}`, at any time, as `payout_schedule`; a sale
already held keeps its own deadline. Sending it for a `direct` account answers `400`, and any other
value `422`.
The delay runs from the moment the **payment succeeds**, not from its creation.
## Hold a sale
Add `hold` to `POST /payments`. On a sale made with `X-Sync`:
```bash title="A sale held until you release it"
curl https://api.wajub.com/payments \
-H "Authorization: sk.xxxxxxxxxxxxxxxx…" \
-H "X-Sync: acc_Gt6yU3nE8rM1kS5vX9bQ" \
-H "Content-Type: application/json" \
-d '{
"amount": 20000,
"currency": "XAF",
"email": "buyer@example.com",
"hold": { "until": "released", "max_days": 30 }
}'
```
On a [shared payment](https://docs.wajub.com/sync/split-payments#one-payment-several-sellers), `hold` holds every part, and
`shares[].hold` holds one part only, or gives it its own `max_days`: it wins over the top-level
`hold`.
```bash title="Only the first part is held, for 60 days at most"
curl https://api.wajub.com/payments \
-H "Authorization: sk.xxxxxxxxxxxxxxxx…" \
-H "Content-Type: application/json" \
-d '{
"amount": 100000,
"currency": "XAF",
"email": "buyer@example.com",
"shares": [
{ "account": "acc_Gt6yU3nE8rM1kS5vX9bQ", "amount": 20000, "hold": { "until": "released", "max_days": 60 } },
{ "account": "acc_7Yh2MpL4tRb3nP8sZcXv", "amount": 10000 }
]
}'
```
| Field | |
| ----------------------------------------------- | -------------------------------------------------------- |
| `hold.until` | Required with `hold`. Only `released` |
| `hold.max_days` | 1 to the account's `hold_max_days`, which is the default |
| `shares[].hold.until`, `shares[].hold.max_days` | The same, for one part |
| `error_code` (`422`) | When |
| ------------------------------- | ----------------------------------------------------------------------------------- |
| `hold_not_available_for_direct` | `hold` on a `direct` account, by `X-Sync` or on a `direct` part of a shared payment |
| `hold_max_days_exceeded` | `max_days` above the account's `hold_max_days` |
| `hold_requires_sync` | `hold` on a payment that is neither made with `X-Sync` nor shared |
| `hold_with_deferred` | `hold` with `deferred: true` |
When the hold is refused, nothing is created: neither the payment nor its parts.
### A sale paid in instalments
`hold` works on a payment the buyer pays in [instalments](https://docs.wajub.com/sync/split-payments#installment-splitting).
While the hold is `pending`, **each instalment is held from the moment it is credited**: none of it
is paid out. At the last instalment the whole sale is held (`held`), as any sale, and its
`release_at` runs from then.
A payment whose instalments never all come keeps its hold `pending`, and what its instalments
credited stays out of payouts, until you close the payment (`POST /payments/{id}/close`: the sale is
then held) or release it (`POST /payments/{id}/release`).
## On a payment link or an invoice
A payment link or an invoice you create with `X-Sync` of a `lite` or `relay` account takes the same
`hold`. Every payment made through it is then held as if you had created it with `hold`: read in
`GET /payments/{id}`, released with `POST /payments/{id}/release`, or on its own at its deadline.
On an invoice, every payment counts, a part of the balance or an instalment, and a recurring
invoice passes the hold to each invoice it generates.
```bash title="Every payment of this link is held until you release it"
curl https://api.wajub.com/links \
-H "Authorization: sk.xxxxxxxxxxxxxxxx…" \
-H "X-Sync: acc_Gt6yU3nE8rM1kS5vX9bQ" \
-H "Content-Type: application/json" \
-d '{
"type": "product",
"title": "Handmade basket",
"amount": 20000,
"currency": "XAF",
"cta_type": "buy_now",
"price": 20000,
"product_type": "physical",
"hold": { "until": "released", "max_days": 30 }
}'
```
| Field | |
| --------------- | --------------------------------------------------------------------------------------------------------------------------------------------------------------------------------------------------------------- |
| `hold.until` | Required with `hold`. Only `released` |
| `hold.max_days` | 1 to the account's `hold_max_days`. Left out, each payment is held up to the account's `hold_max_days` when it is opened. If you lower `hold_max_days` later, a payment is never held longer than the new value |
The link or the invoice returns its `hold` (`until`, and `max_days`, `null` for the account's), or
`null` when its payments are not held. The refusals are those of `POST /payments`:
`hold_requires_sync` without `X-Sync`, `hold_not_available_for_direct` on a `direct` account and
`hold_max_days_exceeded`.
To change it, send `hold` to `PUT /links/{id}` or `PUT /invoices/{id}`, or `hold: null` to remove it;
left out, it stays as it is.
| Rule | |
| ------------------------ | ---------------------------------------------------------------------------------------------------------------------------------------------------------------------------------------------------------------------------------------------------------------------- |
| Only you change it | With `X-Sync` of the account the link or the invoice was created for; on a `relay` one, your own key works too. A Lite seller's own key gets `403` with `error_code: hold_set_by_platform`, to remove the hold as to shorten it, and can still change the other fields |
| Until its first payment | Once a payment is made or in progress through it, `409` with `error_code: hold_locked`: each payment keeps the hold it was opened with. A payment cancelled, expired or failed does not count |
| The same hold sent again | Never refused |
Nothing is held by default: only the payments you create with `hold`, and those made through a link
or an invoice you created with `X-Sync` and `hold`.
## What you read
A sale made with `X-Sync` carries `hold`, and each part of a shared payment `shares[].hold`, in
`GET /payments/{id}`, the creation's answer and the `payment.*` webhooks. A publishable key never
sees it.
```json title="The hold object"
{
"status": "held",
"max_days": 30,
"currency": "XAF",
"amount": 19000,
"held": 14250,
"given_back": 4750,
"held_at": "2026-11-20T09:12:04+00:00",
"release_at": "2026-12-20T09:12:04+00:00",
"released_at": null,
"release_reason": null
}
```
| Field | |
| ---------------- | ---------------------------------------------------------------------------------------------------------------------------------------------------------------------------------------------------------------------------------- |
| `status` | `pending` (the payment has not succeeded yet), `held`, `released`, or `refunded` and `disputed` when a refund or a lost dispute took all of it back while held |
| `amount` | What the sale left the seller, in the settlement currency: in `lite`, the sale less Wajub's fee and your commission; in `relay`, their due. In major units, with decimals for a currency that has them, as `held` and `given_back` |
| `held` | What is still held |
| `given_back` | What refunds and lost disputes took back |
| `release_at` | When it releases itself |
| `release_reason` | `platform` (you) or `auto` (the deadline) |
In `shares[].hold` and in the webhooks, `account` and `account_type` are added.
## Release it
Once the buyer has the goods, release the payment, with your own key and **without** `X-Sync`:
```bash title="Release a held payment"
curl -X POST https://api.wajub.com/payments/trx_Lw2Ka8Qd1Fz6Tn4Bc7Xm/release \
-H "Authorization: sk.xxxxxxxxxxxxxxxx…"
```
Without a body, every held part is released. To release some parts of a shared payment only, name
their accounts: `{"shares": [{"account": "acc_Gt6yU3nE8rM1kS5vX9bQ"}]}`. A part is released whole,
never an amount of it: `shares[].amount` is refused.
| Rule | |
| ------------------ | ------------------------------------------------------------------------------------------------------------------- |
| Idempotent | Releasing what is already released answers `200` with the holds as they are, and sends no second `payment.released` |
| Before success | A part still `pending` can be released: it will never be held |
| From the Dashboard | The payment's page has a **Release** button, for members who manage payouts |
| Answer | When |
| ------------------------------ | --------------------------------------------------------------------------------------------------- |
| `200` | The payment's `holds`, as the release left them |
| `404` | Not a payment of yours or of your accounts, or of the other environment |
| `409` `payment_not_held` | Nothing of this payment is or was held: never asked for, or all taken back by a refund or a dispute |
| `422` `release_share_not_held` | An account in `shares` has no held part in this payment |
| `403` | Called with `X-Sync` |
## When nobody releases it
A hold still `pending` on a sale already credited keeps that sale out of payouts too, until the hold
is in place, at the latest at the next hourly run. A sale collected on the Wajub rail whose credit
to the seller is late (a failed write, no exchange rate yet) keeps its hold `pending` until the
credit comes, in `lite` as in `relay`: it is never released for want of something to hold. Only a
sale collected outside Wajub's balance, on a merchant's own provider contract, is released at once:
Wajub pays the seller nothing for it. Every hour, Wajub releases the holds whose `release_at` has passed (`payment.released` with
`reason: auto`). Three days before, you receive `payment.hold_expiring`, once per hold.
## Refunds and disputes while held
A refund is taken from the held money: in `lite` it is on the seller's balance, in `relay` the due is
reduced. **You never cover the held part.** The hold shrinks by what was taken back:
| The sale | The hold goes down by |
| -------------------------- | --------------------------------------------------------------------- |
| Made with `X-Sync` | The refunded share of the sale, all refunds and lost disputes counted |
| A part of a shared payment | Exactly what the part took back from the seller |
The hold goes down once the refund's debit is recorded, in sandbox as in live; until then the money
stays out of payouts, so you never cover the held part even when the debit comes late. Refunded in full, the hold reads `refunded`, or `disputed` after a lost dispute, with `held: 0`.
Your commission follows its usual rule, taken at the sale and given back by
`commission_refund_policy`; Wajub's fees are not given back, so a hold can stay a little above what
is left of the sale until it is released.
For example, a Lite sale of 20 000 XAF with a 5% commission holds 19 000. A refund of 5 000 takes
4 750 from the seller (5 000 less the 250 of commission you give back): 14 250 stays held, and you
cover nothing.
A dispute **won** while the sale is held gives the seller back what the dispute held, and does not
release the sale: it stays held until you release it or its deadline comes.
A held sale is not part of your [exposure](https://docs.wajub.com/sync/payouts#your-exposure-cap): it becomes exposure when
it is paid out, after its release.
## Events
Sent to your platform, in the sale's environment, with `data` the payment's `id`, `object` and the
`holds` concerned.
| Event | When |
| ----------------------- | ------------------------------------------------------------------------------------------------ |
| `payment.held` | A payment you asked to hold has succeeded (a shared payment: once its parts reached the sellers) |
| `payment.released` | You released it, or its deadline did; `reason` is `platform` or `auto` |
| `payment.hold_expiring` | Three days before it releases itself. Once per hold |
They are listed in `GET /events`, and can be filtered with `X-Sync`.
## In sandbox
So you do not wait 30 days, `POST /accounts/{id}/simulate` with `{"action": "expire_holds"}` brings
the connection's held sales to their deadline now: they are released as by the hourly run, with
`payment.released` and `reason: auto`.
```json title="Response · 200 OK"
{
"code": 200,
"status": "OK",
"message": "Holds released",
"action": "expire_holds",
"account": "acc_test_Gt6yU3nE8rM1kS5vX9bQ",
"released": { "holds": 2, "payments": 2 }
}
```
## What the seller sees
In their portal and in the `payments`, `payouts` and `balance` components, a Lite seller reads an
amount "awaiting delivery", paid as soon as you confirm delivery and at the latest on the date shown,
and on each held sale whether it is still waiting or was released by you. Their next payout estimate
leaves held sales out.
- [Paying sellers](https://docs.wajub.com/sync/payouts): Payouts, the reserve and what holds a payout back.
- [One payment, several sellers](https://docs.wajub.com/sync/split-payments#one-payment-several-sellers): Shared payments, part by part.
- [Release a payment](https://docs.wajub.com/api/subaccounts/release-payment): The endpoint specification.
---
# Sync
URL: https://docs.wajub.com/sync
> Collect for your platform's merchants and sellers, charge your commission, and choose who holds the account, in one of three modes.
Sync lets a marketplace or a platform act on behalf of the merchants it works with: once a merchant
has connected, you call the ordinary API with one extra header and the request runs as if they had
sent it. **A connection is not an account you create in the merchant's place**: they are the one who
accepts it, after reading what you ask for.
## Choosing a mode
A connection's mode says what the seller owns at Wajub, where the money sits, and what your platform
carries when a sale is undone. It is chosen at creation, with `account_type`, and never changes
afterwards.
| Mode | The seller has | The money goes through | Who sends them their money | What you carry | For |
| ------------------ | ---------------------------------------- | ----------------------------------------------- | --------------------------------------------------------------------------------------------------------------- | ---------------------------------------------------------------------------------------------------------------------------------- | --------------------------------- |
| `direct` (default) | A full Wajub account, with its Dashboard | The Wajub rail, or their own provider contracts | Themselves: they withdraw | Nothing: they carry their own negative balance. If they collect on their own contracts, your commission becomes a debt owed to you | Merchants who are already set up |
| `lite` | A seller portal, in your colours | The Wajub rail, always | Wajub, on the schedule you set | What they can no longer refund once paid, after their reserve is used up. You can take it back out of their next payouts | Small sellers, the common case |
| `relay` | No account: their verified wallet | Your own balance | Wajub, from your balance, on the schedule you set: the sale less Wajub's fee, your commission and what they owe | Everything: refunds and disputes come out of your balance, and what an already-paid seller owes is taken from their next payout | *Merchant of record* marketplaces |
> [!NOTE]
> **Live Lite and Relay need Wajub's review**
>
> A live `lite` or `relay` connection opens once Wajub has reviewed your platform for that mode. Ask
> under **Settings, Sync, Platform**. Everything works in sandbox without it. [Relay](https://docs.wajub.com/sync/relay)
These are not tiers: two connections in different modes can carry the same capabilities and the same
commission. What changes is who holds the account, and therefore [who refunds](https://docs.wajub.com/sync/refunds) and
[who pays the seller](https://docs.wajub.com/sync/payouts).
## What you need before you start
| Requirement | Detail |
| ---------------------------------------- | --------------------------------------------------------------------------------------------------------------------------------------------------------------------------------------------------------------------------------------------------------------------------------------------------------------------------- |
| Plan | Scale or Enterprise, or the Sync add-on on a lower plan. Without it, the account routes and any call carrying `X-Sync` answer `403` with `error_code: feature_not_in_plan` |
| Approval, for `lite` and `relay` in live | Wajub reviews your platform before you open live `lite` or `relay` connections: ask under **Settings, Sync, Platform**. Until then a live `POST /accounts` for those modes answers `403` with `error_code: sync_mode_not_approved`. Sandbox and `direct` need nothing. [Your exposure cap](https://docs.wajub.com/sync/payouts#your-exposure-cap) |
| Key | Your platform's secret key. A public key on an account route answers `406 Private Key Required` |
| The merchant | In `direct`, an existing Wajub account or someone willing to open one. In `lite`, a seller who accepts your invitation and verifies their identity: they have no account to run |
## The four things Sync does
**It connects an account.** You create a connection, hand the merchant a link, and they accept it
online. A `direct` merchant does so with their own account; a `lite` seller has no Dashboard, and
then finds their sales and payouts in their portal.
**It lends you their identity.** With `X-Sync` on a request, the request acts as the connected
merchant. The payment, the customer, the refund all belong to them.
**It charges your commission.** Each connection carries a pricing rule. When a payment attributed to
that connection succeeds, the fee leaves the merchant's balance and lands on yours, held under the
same retention as the sale itself, and it is given back if that sale is refunded or a dispute on it
is lost, by the policy you set on the connection.
**It copies their events to you.** A payment, refund or transfer on a connected account, and a
dispute on one of its payments, fires the webhook to the merchant and a second copy to your
platform's endpoints.
## What it does not do
> [!NOTE]
> **One payment, several sellers**
>
> One payment carries one `X-Sync` header. To share one basket between several sellers, create the
> payment with your own key and list the parts in `shares`: the buyer pays once, and Wajub shares the
> money out. [One payment, several sellers](https://docs.wajub.com/sync/split-payments#one-payment-several-sellers)
Two more limits are worth knowing before you design around them. Who pays a merchant depends on the
connection's mode: Wajub pays a `lite` merchant, on a schedule or when you call
`POST /accounts/{id}/payouts`, and a `direct` merchant withdraws for themselves or through an
ordinary [transfer](https://docs.wajub.com/payouts/transfers) you send with the `X-Sync` header, drawn on their balance.
[Paying sellers](https://docs.wajub.com/sync/payouts) covers all three modes. And once the merchant connects,
capabilities and pricing can only be changed with their agreement, which the
[capabilities page](https://docs.wajub.com/sync/account-types) explains.
## The header, in one place
Every route in this section is the ordinary route. What changes is one header.
```bash title="A payment attributed to a connection"
curl https://api.wajub.com/payments \
-H "Authorization: sk.xxxxxxxxxxxxxxxx…" \
-H "X-Sync: acc_7Yh2MpL4tRb3nP8sZcXv" \
-H "Content-Type: application/json" \
-d '{
"amount": 50000,
"currency": "XAF",
"customer": { "email": "buyer@example.com" }
}'
```
The header carries the connection's `id`, the value that comes back as `account.id` when you create
one. It is not the merchant's account id and not one of your keys.
`X-Sync` is read on every authenticated route, not only on payments. Customers, refunds, invoices,
transfers and payment links all accept it, each subject to the capability it requires, and a
resource that requires none, `/accounts` itself included, refuses the header outright. The
[capabilities page](https://docs.wajub.com/sync/account-types) lists which resource takes which.
## The resources
| Method | Endpoint | For |
| -------------------- | -------------------------------------------------------------------------------------------- | -------------------------------------------------------------------------------------- |
| `POST` `GET` | [`/accounts`](https://docs.wajub.com/api/subaccounts) | Create, list and retrieve a connection |
| `PUT` `DELETE` | [`/accounts/{id}`](https://docs.wajub.com/api/subaccounts) | Update pricing and status, or disconnect |
| `POST` | [`/accounts/{id}/token`](https://docs.wajub.com/api/subaccounts) | Mint a fresh authorisation link |
| `POST` | [`/accounts/{id}/payouts`](https://docs.wajub.com/api/subaccounts/payouts) | Pay a `lite` merchant now |
| `GET` | [`/accounts/{id}/commission-receivables`](https://docs.wajub.com/api/subaccounts/commission-receivables) | The commissions a merchant still owes you |
| `POST` | [`/accounts/{id}/embedded_sessions`](https://docs.wajub.com/api/subaccounts/create-embedded-session) | Show a seller's space in your pages ([Embedded components](https://docs.wajub.com/sync/embedded-components)) |
| `POST` | [`/payments/{id}/release`](https://docs.wajub.com/api/subaccounts/release-payment) | Release a sale held until delivery ([Hold until delivery](https://docs.wajub.com/sync/holds)) |
| `POST` | [`/accounts/{id}/freeze`](https://docs.wajub.com/api/subaccounts/freeze), [`/unfreeze`](https://docs.wajub.com/api/subaccounts/unfreeze) | Stop or resume paying a seller ([Seller risk](https://docs.wajub.com/sync/seller-risk)) |
| `GET` | [`/sync/limits`](https://docs.wajub.com/api/subaccounts/limits) | Your payout cap and what is used of it |
| `GET` `PUT` `DELETE` | [`/sync/portal_domain`](https://docs.wajub.com/api/subaccounts/retrieve-portal-domain) | Your sellers' portal on your own domain ([Your own domain](https://docs.wajub.com/sync/own-domain)) |
| `GET` | [`/sync/metrics`](https://docs.wajub.com/api/subaccounts/metrics) | Your platform's figures ([Analytics](https://docs.wajub.com/sync/analytics)) |
| `POST` `GET` | [`/sync/reports`](https://docs.wajub.com/api/subaccounts/create-report) | Accounting exports and seller statements ([Reports](https://docs.wajub.com/sync/reports)) |
Everything else is the normal API, called with the header.
- [Quickstart](https://docs.wajub.com/sync/quickstart): Create a connection, get it authorised, and take a payment on it.
- [Account capabilities](https://docs.wajub.com/sync/account-types): The seven capabilities, what each one reaches, and how pricing is computed.
- [Onboarding](https://docs.wajub.com/sync/onboarding): The lifecycle of a connection, and what freezes once a merchant accepts.
- [Refunds](https://docs.wajub.com/sync/refunds): Who asks, who sends and who pays, by mode and by where the sale was collected.
- [Split payments](https://docs.wajub.com/sync/split-payments): The three things that share the word split: instalments, your commission, and one payment shared between sellers.
- [Embedded components](https://docs.wajub.com/sync/embedded-components): Your sellers' sales, payouts and balance inside your own pages.
- [Hold until delivery](https://docs.wajub.com/sync/holds): Pay the seller once the buyer has the goods.
- [Seller risk](https://docs.wajub.com/sync/seller-risk): A score per seller, a delay for new sellers, and freezing.
- [Subaccounts API](https://docs.wajub.com/api/subaccounts): The endpoint specification.
---
# Onboarding
URL: https://docs.wajub.com/sync/onboarding
> The lifecycle of a connection, and what freezes the moment a merchant accepts it.
A connection carries two statuses that move independently. `status` says whether the merchant has
accepted, `payment_status` says whether the connection may move money. A live connection can be
`active` and still refuse every payment, which is the single most common surprise in this section.
## The lifecycle
| `status` | What it means | How it got there |
| ----------- | --------------------------------------------- | ---------------------------------- |
| `pending` | Created, nobody has accepted | `POST /accounts` |
| `active` | A merchant signed in and authorised it | They opened the authorisation link |
| `cancelled` | Ended, by you | `DELETE /accounts/{id}` |
| `expired` | The invitation ran out before anyone accepted | Time |
There is no `restricted` and no intermediate state. A cancelled connection reads `cancelled`, one
with a merchant attached reads `active`, an invitation nobody accepted before its date reads
`expired`, and everything else reads `pending`.
`expires_at` is the invitation's date: it is cleared when a merchant accepts, and an accepted
connection never expires.
## The authorisation link
Creating a connection mints a single-use authorisation token and hands it back inside a URL.
```json title="What comes back on an unclaimed connection"
{
"id": "acc_7Yh2MpL4tRb3nP8sZcXv",
"reference": "shop-amina",
"status": "pending",
"payment_status": "inactive",
"authorization_url": "https://sync.wajub.com/oauth/v2/authorize?access_token=…"
}
```
The merchant opens it, signs in to their own Wajub account, sees the capabilities you asked for,
and accepts. Your platform never handles their credentials and never creates anything on their
side.
> [!WARNING]
> **The link is a credential**
>
> Anyone holding that URL can attach an account to your platform. Send it over a channel you
> control, and treat it like a secret. If it leaks, `POST /accounts/{id}/token` revokes every link
> already issued, a reminder's included, and mints a replacement, valid for 30 days again. The call
> is refused with `400` once a merchant has claimed the connection, whether it is still running or
> was disconnected, because that merchant stays attached to it and the new link could never be used.
> Reaching them again means a new connection they accept again.
An invitation does not stay open forever: it expires 30 days after its link was last minted, by
creating the connection, by `POST /accounts/{id}/token` or by **Resend invitation** in the
Dashboard, each of which restarts the 30 days. The last two revoke the links already sent.
Three days before that, a reminder goes to the merchant's address if you gave one, with `email` on
`POST /accounts` or `PUT /accounts/{id}`; it is kept in `profile.email`. The reminder carries a link
of its own, and the link you already sent keeps working. Once the invitation expires, every link
in the merchant's inbox stops working. A Relay connection has no invitation, no authorization link
(`authorization_url` is `null`) and never expires.
You can hold up to 50 open invitations per environment: connections created and not yet accepted,
cancelled or expired. Relay connections do not count, since no merchant ever accepts them. Past
the cap, `POST /accounts` answers `429` with `You have reached the maximum of 50 pending
invitations.` Cancel the invitations you no longer need, or let them expire.
You see `authorization_url` once, in the answer to the call that minted it: creating the subaccount,
or regenerating its token. Reading the subaccount afterwards never returns it, claimed or not. Keep
it when you receive it; if you lose it, mint a new one. Once the connection is claimed, `connected_merchant`
appears in the response, carrying the merchant's business name and email.
## What the link cannot do
A connection is claimed once, and the checks run at the moment of the claim, not when the merchant
opened the link:
- a connection you cancelled stays cancelled, and the link cannot revive it. `POST /accounts/{id}/token`
can: on a cancelled invitation nobody claimed, it mints a new link and puts the connection back to
`pending`, with 30 days again;
- a connection another merchant already claimed cannot be taken over;
- an expired invitation is refused;
- in live mode, the merchant cannot claim it before filing their KYC. Filing is enough to connect;
verification is what releases payments (below);
- the link can carry a `redirect_uri`, but only one sharing an origin with the `callback` registered
on the connection. Any other host is refused, and a connection with no callback accepts none.
A merchant who submits twice lands on their own finished connection, not on an error.
## Back on your page
Before you send the link, you can add `&state=…` (a value of yours, such as a random token tied to
the vendor's session) and `&redirect_uri=…` to it. Once the merchant has accepted, they are sent to
that `redirect_uri`, or to the connection's `callback` when the link carries none, with these query
parameters:
| Parameter | What it carries |
| --------- | -------------------------------------------------------------------------------------------------------------------------------------------------------- |
| `account` | The connection's `id` (`acc_…`), the one every call and every `account.*` event uses |
| `state` | The `state` you put on the authorisation link, returned as it was. Check it against the one you stored, to know the visit is the answer to your own link |
| `status` | `connected` |
```text title="The return, for a link opened with state=8f3a"
https://example.com/connected?account=acc_7Yh2MpL4tRb3nP8sZcXv&state=8f3a&status=connected
```
The `callback` must be an HTTPS address: `POST` and `PUT /accounts` answer `422` otherwise, except
`http://localhost` and `http://127.0.0.1` with a sandbox key.
The return is a convenience for the merchant's browser, not a proof: anyone can open that URL.
Confirm the connection with `GET /accounts/{account}` or wait for `account.connected` on your
webhook endpoint before you act on it.
## Then payments have to be switched on
Acceptance is not always permission to charge. `payment_status` is set the moment the merchant
accepts.
| The merchant accepts | `payment_status` |
| --------------------------------------------------- | --------------------------------------------------------------------------------- |
| In sandbox | `active` straight away |
| In live, with their verification already cleared | `active` straight away, provided a `lite` connection also has the Wajub rail open |
| In live, with their verification still under review | `inactive` |
An `inactive` connection turns `active` on its own when the merchant's verification clears, and, on
a `lite` connection, once the Wajub rail is granted to them. Wajub then sends
`account.payment_activated`.
| `payment_status` | Effect on requests carrying `X-Sync` |
| ---------------- | --------------------------------------------------- |
| `inactive` | Calls that move money refused with `403`; reads run |
| `active` | Everything the capabilities allow runs |
| `suspended` | Calls that move money refused with `403`; reads run |
What is refused while `payment_status` is not `active`: creating, activating, updating or charging a
payment, creating or changing a payment link, a refund, a transfer or a batch, adding, changing or
verifying a beneficiary or recording what a seller owes back, and accepting or closing a dispute.
What still works: every `GET`, so you can follow what the connection did while the merchant's
verification is under review, plus cancelling a payment, deleting a payment link or a beneficiary,
and the identity lookups (`/identity/resolve`, `/identity/validate`).
Suspension is yours to use afterwards. Setting `payment_status` to `suspended` stops inbound
payments and outbound transfers together, deliberately: a connection frozen for a failed compliance
recheck should not be able to drain its balance while it is unable to earn.
The switch only lifts a suspension you applied yourself. Setting `payment_status` back to `active`
answers `409` with `error_code: merchant_not_verified` while the merchant's verification is pending
or was rejected: those connections come back on their own once verification clears.
## A Lite seller's own portal
A `lite` seller has no merchant dashboard, which is the point of the mode. Accepting your invitation
opens a seller space dedicated to your platform, separate from any other Wajub account they already
have: a `lite` connection is never attached to an existing organization. Their onboarding ends on
the Wajub rail application rather than on a dashboard, and afterwards they use a portal of their
own, carrying your branding.
| They do | Where |
| ------------------------------ | ----------------------------------------------------------------------------------------- |
| Sign in | A one-time code sent to the shop's email address |
| See their sales and payouts | Only those carrying this connection: never their other business, never another platform's |
| Apply for the Wajub rail | Hosted, during onboarding; the connection cannot charge until it is approved |
| Declare where their money goes | The portal's payout account page |
> [!WARNING]
> **A new payout destination is held before it can be used**
>
> A destination the seller has just declared or changed cannot receive a payout during a
> cooling-off period; the portal tells the seller when payouts to it can start. A transfer to a
> held destination is refused until the period is over.
### The portal's address
Your sellers sign in at an address in your name, which you choose and Wajub validates.
| Address | When it is used |
| -------------------- | ------------------------------------------------------------------------------ |
| `yourname.wajub.app` | As soon as Wajub has validated the name you asked for |
| `lite.wajub.com` | Until a name is validated, and for a seller who only knows their email address |
You ask for the name in the dashboard, under **Settings, Sync, Platform**: 3 to 40 lowercase
letters, digits or single hyphens, with no hyphen at either end.
- **Wajub validates each name before its address answers.** A refused name comes back with the
reason, and you can ask for another.
- **Some names are reserved**: those that would pass for an address of Wajub, for a sign-in or
payment page, for an operator or for a bank.
- **Asking for another name takes the live address offline** until the new one is validated;
meanwhile your sellers sign in at `lite.wajub.com`.
On your address, the portal carries your logo and colours, and the line "Payments operated by Wajub"
stays in the footer. A seller on several platforms finds each of their spaces from `lite.wajub.com`;
a session only ever opens one platform at a time.
The portal can also answer on a domain of yours, such as `sellers.yourplatform.com`, with Wajub's
e-mails to your sellers in your brand: [Your own domain and brand](https://docs.wajub.com/sync/own-domain).
### The portal in your own pages
Show a Lite seller their space inside your product. `POST /accounts/{id}/portal_sessions` returns
`portal_session`: `{ url, expires_at }`, a single-use link, valid 5 minutes, that opens the seller's portal already
signed in on this connection only, for 30 minutes.
| Rule | Why |
| --------------------------- | ----------------------------------------------------------------------------------------------------------------------------------- |
| Single use, short-lived | The link is a key: open it right away, never store or share it |
| This connection only | The session cannot list or open the seller's other spaces |
| Read only | Changing where the seller's money goes needs the seller's own sign-in, with their email code |
| Framed only by your origins | Declare up to 5 `https` origins under **Settings, Sync, Platform**; the portal can be put in an iframe on them, and on nothing else |
The sign-in page itself is never framed: when the session ends, open a new link. The hosted
onboarding stays a redirect, never an iframe, for the identity check and the camera.
To show only some pieces of the space, their sales, their payouts, their balance, where you want
them in your pages and in your colours, use [embedded components](https://docs.wajub.com/sync/embedded-components)
instead: they are the recommended way.
## What the merchant has to agree to again
The moment a merchant accepts, two of the four editable fields stop being yours alone.
| Field | After acceptance |
| ---------------- | ----------------------------------------------------------------------- |
| `capabilities` | `202 Accepted`: proposed to the merchant, returned in `pending_changes` |
| `pricing` | `202 Accepted`: proposed to the merchant, returned in `pending_changes` |
| `callback` | Still editable outright |
| `payment_status` | Still editable outright, and only editable from here |
The asymmetry is deliberate. What the merchant agreed to on the authorisation screen cannot be
changed behind their back, so a wider connection or a higher commission is a proposal they accept
or decline in their own dashboard, and the connection keeps running on its current terms in the
meantime. Suspension stays yours, with no proposal needed.
On their side, the merchant finds every platform they are connected to under **Settings, Connected
apps**: the capabilities they granted, the commission they agreed to, whether payments are on, and
any proposal waiting for them. Accepting or declining a proposal there sends you
`account.change_accepted` or `account.change_declined`. The same page lets them disconnect from your
platform, which ends the connection exactly as your own `DELETE` would.
## Ending a connection
`DELETE /accounts/{id}` revokes the tokens, sets `status` to `cancelled`, and fires
`account.deauthorized`. If the merchant had accepted, `payment_status` drops to `inactive` at the
same time and the response reads `Account disconnected`; on an unclaimed invitation it reads
`Account cancelled`.
```bash title="Disconnect a merchant"
curl -X DELETE https://api.wajub.com/accounts/acc_7Yh2MpL4tRb3nP8sZcXv \
-H "Authorization: sk.xxxxxxxxxxxxxxxx…"
```
Disconnecting does not touch anything that already happened. The merchant keeps their account, their
payments and their balance, and the commissions you already earned stay earned. What stops is your
ability to act on their behalf.
## The events to listen for
A connection's life is told by the events below, on your platform's endpoints. Creating a
connection sends `account.created`, with the account but not its link: `authorization_url` is only in
the answer to `POST /accounts`. The [event catalogue](https://docs.wajub.com/developer-tools/webhooks/events#accounts-for-sync-platforms)
describes every one of them.
| Event | Sent when |
| ----------------------------------------- | ------------------------------------------------------------------------------------------------------------------------------------------------------------------------------------------------------------------------------------------------- |
| `account.created` | You create it with `POST /accounts` |
| `account.onboarding_started` | The merchant opens the authorisation link |
| `account.onboarding_email_verified` | They confirm their email address |
| `account.onboarding_account_selected` | They pick the Wajub account to connect |
| `account.onboarding_kyc_submitted` | They file their KYC during the onboarding |
| `account.onboarding_declined` | They decline the connection; the link keeps working, and `reason` holds their words when they gave one |
| `account.connected` | They accept the connection |
| `account.payment_activated` | It becomes able to charge |
| `account.payment_suspended` | It is suspended, by you or after a failed verification |
| `account.change_requested` | You propose new capabilities or pricing |
| `account.change_accepted` | The merchant accepts a proposal |
| `account.change_declined` | The merchant declines a proposal |
| `account.updated` | It changes: through `PUT /accounts/{id}` (not a proposal alone, not a call that changes nothing), when `POST /accounts/{id}/token` puts a cancelled invitation back to `pending`, or when Wajub sends a Lite merchant's payout (`last_payout_at`) |
| `account.commission_receivable_recorded` | A commission is owed on a sale collected outside Wajub |
| `account.commission_receivable_collected` | That commission is collected |
| `account.deauthorized` | It is disconnected or cancelled |
> [!WARNING]
> **Two formats, two signatures**
>
> The events that follow your own API calls (`POST /accounts`, `PUT` and `DELETE /accounts/{id}`,
> `POST /accounts/{id}/token`, Lite payouts, change requests, commission receivables) carry the
> usual envelope, `X-Wajub-Signature` and `X-Wajub-Timestamp`. The events of the merchant's own
> steps (`onboarding_*`, `connected`, `change_accepted`, `change_declined`, the activations that
> follow a verification, and a disconnection made in the Dashboard) carry an `X-Sync-Event` header
> and a flat body with `event`, `account` (the `acc_…` id), `sandbox`, `timestamp` and the event's
> own fields. They are signed the same way as the others, in `X-Sync-Signature-V1` and
> `X-Sync-Timestamp`, with your endpoint's signing secret: pass those two headers to the SDK
> `constructEvent`, which checks the signature and refuses a timestamp more than 300 seconds old.
> Then keep the `X-Idempotency-Key` of every delivery you processed and ignore one you have already
> seen. These events reach only an endpoint subscribed to their exact name, not one subscribed to
> `*`, and are not redelivered beyond about two minutes: if your endpoint was down, read the
> connection with `GET /accounts/{id}`.
On top of those, every payment, refund and transfer made on a connected account, and every dispute
on one of its payments, fires its normal webhook to the merchant **and** a copy to your platform.
You do not need to poll a connection to know what it is doing.
- [Sync](https://docs.wajub.com/sync): What a connection is and where it stops.
- [Quickstart](https://docs.wajub.com/sync/quickstart): Create a connection and take your first payment on it.
- [Account capabilities](https://docs.wajub.com/sync/account-types): The seven capabilities and how the commission is computed.
- [Webhook events](https://docs.wajub.com/developer-tools/webhooks/events): Every event Wajub sends, and how to verify a signature.
---
# Your own domain and brand
URL: https://docs.wajub.com/sync/own-domain
> Serve your sellers' portal on a domain of yours, and send them Wajub's e-mails in your brand.
Your sellers should see your platform, not ours. Their portal can answer on a domain of yours,
`sellers.yourplatform.com`, in place of `yourname.wajub.app`, and the e-mails Wajub sends them carry
your name, logo and colour.
## Your own domain
| Rule | |
| ----------------------------- | ------------------------------------------------------------------------------------------------------------------------------------------------------------------------------ |
| One domain per platform | A **subdomain** only, never a zone's root: a root cannot carry a `CNAME` |
| Test and live alike | The domain is not tied to an environment: it serves the portal in both. A test key reads it; declaring and removing it take a **live key** (`403 live_key_required` otherwise) |
| Everything follows it | Once it is active, the portal, the [embedded components](https://docs.wajub.com/sync/embedded-components) and every link Wajub sends your sellers use it |
| The old address keeps working | `yourname.wajub.app` still answers, so a link already sent still opens |
### Set it up
1. **Declare the domain**
Under **Settings, Sync, Platform**, in **Your own domain**, or with `PUT /sync/portal_domain`.
2. **Create two DNS records**
At your DNS provider, the two records the answer lists (below).
3. **Wait for the check**
Wajub checks them every 10 minutes for 72 hours; **Check now** in the Dashboard does it at once.
When both are right, Wajub routes the domain and gets its TLS certificate: the status turns
`active`.
```bash title="Declare the domain"
curl -X PUT https://api.wajub.com/sync/portal_domain \
-H "Authorization: sk.xxxxxxxxxxxxxxxx…" \
-H "Content-Type: application/json" \
-d '{"domain":"sellers.yourplatform.com"}'
```
| Type | Name | Value |
| ------- | ---------------------------------------- | ----------------------------------------- |
| `CNAME` | `sellers.yourplatform.com` | `portals.wajub.app` |
| `TXT` | `_wajub-verify.sellers.yourplatform.com` | The token in the answer, `wajub-portal-…` |
Keep both records for as long as you use the domain. Once it is active, Wajub checks them again **every day**: a single failure cuts nothing and shows a warning under **Settings, Sync, Platform**, and neither does a check whose DNS read gets no answer, unless it lasts: when Wajub's resolvers get no answer from your zone for **more than 72 hours in a row**, the domain is removed as after three failures. After **three failures in a row**, about 72 hours, the domain turns `failed`, the portal stops answering on it, every link goes back to `yourname.wajub.app`, and your organization's owner and admins get an e-mail. Fix the records, then declare the domain again: the token does not change.
Wajub never takes over a host already routed elsewhere on Wajub, a merchant's payment domain for instance: the check then stays `verifying` with `routing_failed`.
> [!WARNING]
> **Three traps**
>
> If your DNS sits behind a proxy (an orange cloud, for example), set the `CNAME` to **DNS only**: a
> proxied record hides the `CNAME` (`cname_missing`) and prevents the certificate. Some DNS panels
> add your domain to the name on their own: type `sellers` and `_wajub-verify.sellers` there. Quotes
> around the `TXT` value are fine.
### The statuses
| `status` | Means |
| ------------- | --------------------------------------------------------------------------------------------------------------------------------------------------------------------------------------------------------------------------------------------------------------------- |
| `pending_dns` | Declared; the records are not right yet. `last_error` says why |
| `verifying` | The records are right; Wajub routes the domain and gets its certificate, within minutes |
| `active` | Served. Every portal link uses it |
| `failed` | Not verified within 72 hours; or active, then failing three daily checks in a row, or with no answer from your zone for more than 72 hours in a row. Declare it again to start another 72 hours, **with the same token**: the `TXT` record you already set stays good |
| `removed` | Removed by you |
| `blocked` | Blocked by Wajub, which says why in `removal_reason`: a domain in use, removed, failed, or one never declared. No platform can declare it until Wajub lifts the block; it then reads `removed` |
| `last_error` | Means |
| -------------------- | --------------------------------------------------------------------------------------- |
| `cname_missing` | No `CNAME` on the domain, or a proxied one |
| `cname_wrong_target` | The `CNAME` points somewhere other than `portals.wajub.app` |
| `txt_missing` | No `TXT` record at `_wajub-verify.` |
| `txt_mismatch` | The `TXT` record does not carry the token |
| `dns_unavailable` | The DNS could not be read: nothing is concluded, Wajub tries again 10 minutes later |
| `routing_failed` | The records are right but the routing is not in place yet: tried again 10 minutes later |
| `expired` | The 72 hours passed with no other error known |
### Manage it
| Call | Does |
| ---------------------------- | -------------------------------------------------------------------------------------------------------------------------------------------------------------------------- |
| `GET /sync/portal_domain` | Your domain, being verified or active; after a removal or a failure, the last one declared; `null` if you never declared any |
| `PUT /sync/portal_domain` | Declares it: `201`. The same domain again changes nothing: `200`, same token. Another domain replaces one still being verified; an `active` one has to be removed first |
| `DELETE /sync/portal_domain` | Removes it: the portal stops answering on it at once and links go back to `yourname.wajub.app`. The routing is gone within 10 minutes; you can then delete the DNS records |
All three are called with your own key, never with `X-Sync`. `PUT` and `DELETE` take a live key.
Removing a domain and declaring it again never cuts the portal on the new declaration: the old
routing is taken down only when no declaration claims the host.
| `error_code` | Status | When |
| ------------------------- | ------ | ------------------------------------------------------------------- |
| `invalid_domain` | `422` | Not a host name: a path, a port, a wildcard, an IP address, a space |
| `apex_domain` | `422` | A zone's root, such as `yourplatform.com` or `shop.co.uk` |
| `reserved_domain` | `422` | A domain of Wajub's |
| `live_key_required` | `403` | `PUT` or `DELETE` with a test key |
| `domain_blocked` | `409` | Wajub blocked this domain |
| `domain_taken` | `409` | Declared by another platform, or a merchant's own payment domain |
| `portal_domain_active` | `409` | You already have an active domain: remove it first |
| `portal_domain_not_found` | `404` | `DELETE` with no domain declared |
## What your sellers see
Under **Settings, Sync, Platform**, **What your sellers see** sets your brand for them. Left empty,
each field falls back to **Settings, Branding**: your organization's name, primary colour and logo.
| Field | |
| -------------- | --------------------------------------------------------------------------------------------------------------------------------------------------------------------------------- |
| Display name | 60 characters at most |
| Support e-mail | Sellers' replies go there (`Reply-To`), once you confirm the address with the code Wajub sends to it (**Send a code**, then **Confirm**). Changing it asks for a new confirmation |
| Colour | `#rrggbb` |
| Logo | PNG, JPEG or WebP, 1 MB at most, 32 to 2 000 pixels a side. SVG is refused |
The portal, the embedded components, the e-mails below and your sellers' yearly statements use it. In e-mails, your display name and logo appear once Wajub has approved your platform for Lite or Relay; before that, your organization's name and no logo.
### Payout accounts on your domain
On your domain, your sellers see their payout account but change it on their Wajub address,
`yourname.wajub.app/payout-account`: you hold your domain's certificate, so Wajub never lets a change
of where the money goes be confirmed there. The portal's page shows the accounts read-only with a link
that opens that address in a new tab, and the [embedded `account` component](https://docs.wajub.com/sync/embedded-components#changing-the-payout-account)
does the same. There the seller signs in with their own code, sent to the owner of their space, and
stays on the Wajub address. The sign-in code's e-mail names the host it was asked for: the seller
enters the code only there.
### E-mails in your brand
These e-mails reach your Lite sellers, and your Relay sellers for their invitation, in your brand:
- the portal sign-in code;
- the invitation to a `lite` or `relay` connection (a `direct` invitation stays Wajub's: the merchant
opens a Wajub account);
- their identity check: action needed, deadline passed, check again, status changed;
- payments suspended or reactivated, and the end of the connection;
- a dispute opened on their sale, and its reminder ([Disputes on your sellers' sales](https://docs.wajub.com/sync/disputes)).
| Part | What it says |
| ------------------ | ----------------------------------------------------------------------------------------------------------------------------------------------------------------------------------------------------------------------------------- |
| Sender | "yourname via Wajub", `yourname` being the space name Wajub validated (`yourname.wajub.app`), never the free display name; "Wajub" alone until a name is validated. From Wajub's sending address: there is no custom sending domain |
| Reply-To | Your support e-mail, once confirmed |
| Header and buttons | Your logo, or your name; your colour, unless it is too light for white text |
| Footer | "You are receiving this email about your seller account on Your platform.", then "Payments processed by Wajub" and Wajub's privacy link |
| Links | On your active domain |
Two e-mails stay in Wajub's voice, whatever your brand: the code to change a payout account, which
names the new account (the operator, the last 4 digits), and the notice that the payout account
changed (last 4 digits, date, when payouts resume, what to do if it was not them). Their sender is
"yourname via Wajub", their header carries your validated space name only, with no logo, colour or
Reply-To of yours, and their link leads to the seller's Wajub address, never to your domain.
- [Onboarding](https://docs.wajub.com/sync/onboarding#a-lite-sellers-own-portal): The portal, its address, and the portal in your own pages.
- [Embedded components](https://docs.wajub.com/sync/embedded-components): Pieces of the seller space in your pages.
- [Declare your portal domain](https://docs.wajub.com/api/subaccounts/declare-portal-domain): The endpoint specification.
---
# Paying sellers
URL: https://docs.wajub.com/sync/payouts
> Automatic payouts and the reserve for Lite merchants, and paying many sellers at once for Relay.
How a seller gets their money depends on the connection's mode. A `direct` merchant runs their own
account and withdraws from it themselves; nothing on this page applies to them. A `lite` merchant
has no dashboard to withdraw from, so Wajub pays them. A `relay` marketplace collects everything, and
Wajub pays each seller what they are owed out of its balance.
## Lite: Wajub pays the merchant
A Lite merchant is paid on the cadence you set on the connection. Each payout is a **sweep**: what
is available on their balance, less the reserve, less room for the payout's own fee.
| `payout_schedule` | What happens |
| ------------------ | --------------------------------------------------------- |
| `manual` (default) | Nothing, until you ask with `POST /accounts/{id}/payouts` |
| `daily` | Paid once a day |
| `weekly` | Paid once a week |
| `monthly` | Paid once a month |
Scheduled payouts run every hour: a seller who is due is paid within the hour of the run, so do not
expect all your sellers to be paid at the same second.
Set it with `POST /accounts` or `PUT /accounts/{id}` at any time. Unlike capabilities and pricing it
changes outright: when a merchant gets their own money takes nothing from them. It exists on `lite`
and [`relay`](https://docs.wajub.com/sync/relay#payouts) accounts, the two Wajub pays: sending it for a `direct` account is
refused with `400`.
```bash title="Pay a Lite merchant now"
curl -X POST https://api.wajub.com/accounts/acc_7Yh2MpL4tRb3nP8sZcXv/payouts \
-H "Authorization: sk.xxxxxxxxxxxxxxxx…"
```
| You get | When |
| ---------------------------------------------------- | ---------------------------------------------------------------------------------------------------------------------------------------- |
| `200` and the `transfer` | The payout was sent |
| `200` with `transfer: null`, `netted` and `currency` | Relay only: what the seller owed absorbed the whole payout, so nothing was sent |
| `409 There is nothing to pay out yet.` | The sweep is below `payout_min_amount`, or below 1 000 in the merchant's currency when the connection has none |
| `409` with `error_code: payout_limited` | Your exposure cap holds the payout back: see [Your exposure cap](#your-exposure-cap) |
| `409` with `error_code: sync_mode_not_approved` | Wajub withdrew your approval for Lite: payouts wait on the merchant's balance |
| `409` with `error_code: account_frozen` | The seller is frozen ([Seller risk](https://docs.wajub.com/sync/seller-risk#freezing-a-seller)) |
| `409` with `error_code: new_seller_delay` | The seller is new and none of their sales is old enough yet ([New sellers are paid later](https://docs.wajub.com/sync/seller-risk#new-sellers-are-paid-later)) |
| `422` with a reason | The connection is not `lite`, is not active, has no merchant yet or no destination declared, or a payout limit is reached |
A connection is swept **at most once a day**, whoever asks. A second call the same day sends nothing
and returns that day's sweep, whatever its status: check `transfer.status`, it can be `failed`, and
the next sweep is the next day's. Only the sweeps count: a payout you sent yourself with `X-Sync`
is never returned here. The amount is never yours to choose: it is what the merchant can be paid.
> [!NOTE]
> **Why the payout is a little under the balance**
>
> The sweep leaves room for the payout's own fee. A merchant paid into another Wajub account pays no
> fee, and is swept in full. Only the balance in the merchant's own
> currency is swept; a balance they hold in another currency waits for them to withdraw it.
Every payout goes to the destination the merchant declared in their portal, and passes the same
checks as any other transfer, the cooling-off period on a destination that was just declared or
changed included.
### What keeps money back
| What | Where it shows |
| ---------------------------------------------------------------------- | -------------------------------------------------------------------------- |
| The [reserve](#the-reserve) | Kept on the balance until its window closes |
| The [card reserve](#the-card-reserve) | A card sale's slice, kept 120 days against chargebacks |
| A sale [held until delivery](https://docs.wajub.com/sync/holds) | Left out of every payout until you release it, or its deadline comes |
| The [new sellers' delay](https://docs.wajub.com/sync/seller-risk#new-sellers-are-paid-later) | Only sales older than the delay are paid; `payout_hold.reason: new_seller` |
| A [freeze](https://docs.wajub.com/sync/seller-risk#freezing-a-seller) | Nothing is paid; `payout_hold.reason: frozen` |
| [Your exposure cap](#your-exposure-cap) | The rest of the payout waits; `payout_hold.reason: exposure_cap` |
On each sale, these do not add up: the largest is kept. The card reserve stays once the others are
over, until its own date.
## The reserve
A Lite merchant is paid without asking, so money can leave while the buyer can still be refunded. The
reserve keeps a slice of every sale back until that window closes: **10% for 30 days** by default.
| Then | What happens to the reserve |
| ------------------------------------------- | -------------------------------------------------- |
| A payout runs | It sends everything except what is held |
| A sale is refunded, or a dispute on it lost | The refund or the loss eats into the reserve first |
| The window closes | That slice is released and joins the next payout |
The reserve is not a charge and not a separate balance. The money stays the merchant's; the reserve
only says how much of it may not leave yet. The rate and duration are set by Wajub for a connection,
not by the platform.
## The card reserve
A card payment can come back as a chargeback up to **120 days** after the sale, long after its
retention; a Mobile Money payment cannot. So every card sale of a `lite` or `relay` seller keeps a
**card reserve**: **10% for 120 days** by default, on top of the sale's retention. Wajub can set other
terms for your platform when it reviews it, one for your Lite sellers and one for your Relay sellers.
A sale keeps the terms it was made under.
| Mode | Where it is kept |
| ------- | --------------------------------------------------------------------------------------------------------------------------------------------------------------------------------------------------------------------------------------------------------------------------------------------------- |
| `lite` | On the seller's balance, with the [reserve](#the-reserve): the larger of the two, for the longer of the two durations. Like the reserve, it only says how much may not leave yet |
| `relay` | Out of the seller's due. The payout pays the due less its card reserve (a `reserve_held` line), and the money stays on your balance: a withdrawal of yours that would dip into it is refused with `reserve_held`. The first payout after its date pays it to the seller (`reserve_brought_forward`) |
| Then | What happens |
| ---------------------------------------------------------- | ------------------------------------------------------------------------------------------------------------------------------------------------------------------------------------------ |
| A refund or a lost chargeback on the sale | It takes the sale's own card reserve first. In `lite`, the seller's other reserves follow only for what their balance no longer covers, then you |
| Relay: the sale is refunded before its due is paid | The due and its card reserve go down in the same proportion |
| Relay: a card reserve due is below `payout_min_amount` | It waits for the minimum, and is paid even below it 30 days after its date |
| Relay: you end the connection with `DELETE /accounts/{id}` | Wajub no longer pays its dues. The card reserve stays held until its date, since a chargeback can still come; it then leaves your balance's floor, and you settle with the seller yourself |
| Its date comes | It is released and joins the next payout |
Wallets backed by a card, and the wallets a payer can claw a payment back through, count as cards: a
sale paid with them keeps the card reserve.
For example, a Relay card sale of 20 000 XAF, with 300 of Wajub fees and a 5% commission, leaves a due
of 18 700 and a card reserve of 1 870: the seller is paid 16 830, then 1 870 with the first payout
after 120 days. If the sale is lost to a chargeback in between, the reserve is taken, and the seller
owes 16 830 only.
> [!NOTE]
> **Cards are not collected on the Wajub rail yet**
>
> A `lite` account's payment, or a [shared payment](https://docs.wajub.com/sync/split-payments#one-payment-several-sellers),
> is collected on the Wajub rail alone, which does not take cards today. Charging one with a card, or
> a wallet counted as one, answers `422` with `error_code: card_not_available`, before anything is
> charged, in live and in sandbox, and the payment page does not offer them for it. Offer Mobile
> Money. The day the rail takes cards, the refusal goes and the card reserve applies.
## When a merchant goes negative
A refund or a lost dispute can land after a merchant has been paid, when the reserve is no longer
enough. **You cover the rest.** The shortfall moves from your balance to the merchant's, the same
moment the refund or the loss is processed, and is recorded against it, up to the amount it took.
| What happens | What follows |
| -------------------- | --------------------------------------------------------------------------------------------------------------------------------------------------------------------------------------------------------------------------------------------------------------------------------------------------------------------------- |
| A refund you ask for | It is sent when the merchant's balance, the commission you return and your available balance cover the amount. Otherwise nothing is sent: the refund carries `manual_reason.code: platform_balance_insufficient` and is sent by itself as soon as your balance covers it, for 72 hours. Past that, Wajub support handles it |
| A lost dispute | It is debited whatever happens, and you cover it even when your balance falls short: your balance then goes below zero, and your payouts are suspended until your collections make it up |
Wajub never advances a refund: it is sent only when the money is there.
**While your balance is below zero, Wajub pays your Lite sellers nothing**, in sandbox (on your sandbox
balance) as in live: their money waits on their balance, and you receive `account.payout_limited`
with `reason: insufficient_balance`, which their live `payout_hold.reason` reads too. Their payouts
resume once your balance is back above zero.
A chargeback lost beyond the [card reserve](#the-card-reserve), and the flat dispute fee when Wajub
charges one, fall to:
| Mode | The loss | The dispute fee |
| ---------------- | --------------------------------------------------------------------------------- | ------------------------------------------- |
| `lite` | You cover it, even without the money: your balance goes below zero | The seller; what they cannot pay, you cover |
| `relay` | Your balance; the seller's part becomes their debt, taken from their next payouts | You |
| `direct` | The merchant's debt, recovered from their next sales | The merchant |
| A shared payment | Your balance; each part gives back its share | You |
### Getting back what you covered
By default a cover is recorded and nothing is taken back from the merchant. With
`cover_recovery: payouts` on the connection, what you covered returns to your balance, out of their
next payouts:
| Rule | What happens |
| --------------------------- | ----------------------------------------------------------------------------------------------------------- |
| When | On each payout to the merchant, automatic or asked for with `POST /accounts/{id}/payouts`, before it leaves |
| How much | At most what was about to be paid: never the reserve, never below zero |
| In which order | The oldest cover first, until everything has come back |
| A payout too small to leave | What is owed is taken all the same |
It is a term of the connection, like `commission_refund_policy`: the merchant reads it before
accepting, and `PUT /accounts/{id}` only changes it while the connection is still `pending`. It only
exists on a `lite` account: sending it for a `direct` or `relay` account is refused with `400`.
> [!WARNING]
> **This is the other side of Lite**
>
> Lite lets you recruit merchants without asking them to run a Wajub account. The merchants are
> yours, and so is what they owe after a refund. A Direct merchant, running their own account, carries
> their own negative balance instead.
## Your exposure cap
Every Lite payout is money that has left Wajub while the sale can still come back as a refund or a
lost dispute, which you then cover. So Wajub bounds what it pays your sellers on your behalf.
| Term | What it is |
| ---------------- | ------------------------------------------------------------------------------------------------------------------------------------------------------------------------------------------------------------------- |
| Exposure | What Wajub paid your Lite sellers, and your Relay sellers out of your balance, over the last 90 days, per currency. A card sale counts for 120 days, for what it left the seller beyond the card reserve still kept |
| Exposure cap | The most that exposure may reach, set by Wajub when it reviews your platform |
| Platform reserve | 10% of your exposure by default: the floor your own available balance keeps |
Lite and Relay share one exposure, one cap and one reserve: those of your Lite review, or of your
Relay review if you have no Lite one. A sale [held until delivery](https://docs.wajub.com/sync/holds) is not exposure: it
becomes exposure once it is paid out.
**Above the cap, payouts slow down; they never stop dead and are never taken back.** A sweep pays
what is left under the cap and the rest waits on the seller's balance, where it stays refundable. It
leaves as soon as room comes back, as older payouts leave the 90-day window. When the cap first holds
a payout back, you receive `account.payout_limited`, and the account carries `payout_hold` until a
payout leaves in full again. The seller reads in their portal that part of their payout will follow.
**The reserve is a floor, not a deduction.** A withdrawal of yours that would take your available
balance below it is refused with `platform_reserve`. Covering a seller's refund is never refused for
it: the reserve exists for exactly that.
### Following it
`GET /sync/limits`, with your own key and without `X-Sync`, returns one line per currency:
```json title="Response · 200 OK"
{
"data": [
{ "mode": "lite", "currency": "XAF", "exposure": 4120000, "cap": 5000000, "reserve_percentage": 10, "used_percent": 82.4, "window_days": 90, "card_window_days": 120 }
]
}
```
| Field | |
| ------------------ | ------------------------------------------------------------------------------------------------------------------ |
| `mode` | The review whose terms apply: `lite`, `relay`, or `null` when your platform was never reviewed (the default terms) |
| `exposure`, `cap` | In major units |
| `used_percent` | Exposure over cap, two decimals; 100 when the cap is 0 and something was paid |
| `window_days` | The window the exposure is counted over |
| `card_window_days` | How long a card sale counts |
The lines are your settlement currency, the currencies your review sets a cap for, and those Wajub
paid your sellers in. A sandbox key gets an empty list: no cap applies in sandbox.
When the exposure of a currency passes **80%** of its cap you receive `platform.exposure_warning`,
and `platform.exposure_reached` at **100%**: once per crossing, re-armed when the exposure falls back
under 70%. A jump straight past 100% sends `platform.exposure_reached` alone. They are
[Sync lifecycle deliveries](https://docs.wajub.com/developer-tools/webhooks/events#sync-lifecycle-deliveries), live only,
checked every 15 minutes, and also reach your organization's owner and admins by e-mail. A sending
that fails is tried again a few minutes later, so the same alert can arrive twice: deduplicate on
`X-Idempotency-Key`.
```json title="A platform.exposure_warning delivery"
{
"event": "platform.exposure_warning",
"sandbox": false,
"timestamp": "2026-11-20T10:15:00+00:00",
"currency": "XAF",
"exposure": 4120000,
"cap": 5000000,
"used_percent": 82.4,
"reserve_percentage": 10,
"window_days": 90,
"mode": "lite"
}
```
Under **Settings, Sync, Platform**, **Payout limit** shows, per currency, the cap used, what was paid
to your sellers over the window, the room left and your reserve, and the connections whose payouts
are waiting, with the reason.
### Asking for a higher cap
From the same section, **Ask for a higher limit**: the cap you want per currency, the volume you
expect, your delivery times and your returns policy. One request at a time. Wajub grants it, in
full or in part, or refuses it with a reason you read there, and tells you by e-mail.
## What a payout settles
Every payout Wajub sends a seller, Lite or Relay, comes with the lines it settles, written once when
it leaves. They add up to the amount paid, to the unit.
| Call | Returns |
| ------------------------------------- | ------------------------------------------------------------------------------------------------------ |
| `GET /accounts/{id}/payouts` | The connection's payouts, newest first: `date_from`, `date_to`, `status` (comma-separated), `per_page` |
| `GET /accounts/{id}/payouts/{payout}` | One payout with its `lines` and `lines_total` |
| `GET /accounts/{id}/dues` | Relay only: the seller's dues, by `status` (`held`, `payable`, `paid`, `reversed`) |
| Line `type` | What it is |
| ---------------------------------------------------- | -------------------------------------------------------------------------------- |
| `sale`, `share` | A sale, or a part of a shared payment, with its gross, fee and your commission |
| `refund`, `dispute` | What a refund or a lost dispute took back |
| `cover`, `recovery` | What you covered for the seller, and what came back to you out of this payout |
| `debt` | Relay: what the seller owed, netted from this payout |
| `payout_fee` | The payout's own fee |
| `balance_brought_forward`, `reserve_brought_forward` | What the previous payout left on the balance; in Relay, a card reserve now due |
| `reserve_held`, `balance_carried_forward` | What this payout leaves; in Relay, the card reserve kept out of the dues it pays |
| `adjustment` | Any difference no other line explains: shown, never folded into another line |
The seller reads the same lines under each payout in their portal, and both of you can export them as
CSV from the Dashboard. Payouts sent before this report existed have no lines (`lines_total: null`).
To reconcile every payout of a month at once, ask for a `payout_reconciliation`
[report](https://docs.wajub.com/sync/reports).
## Trying it all in sandbox
Lite and Relay run in sandbox by the same rules as in live, on sandbox balances, with sandbox payouts
that never leave Wajub: the reserve, the cover after a refund, recovery, dues, debts and shared
payments included. Sandbox sweeps run on their schedule like live ones, and
`POST /accounts/{id}/payouts` works with a sandbox key.
So you do not wait days for retention, a sandbox connection can be moved forward:
| `POST /accounts/{id}/simulate` | What it does |
| --------------------------------- | ------------------------------------------------------------------------------------------------------------------------------------------ |
| `{"action": "release_retention"}` | Releases the reserve, held Relay dues and the retention of shared parts; the Relay card reserves become due, and the next payout pays them |
| `{"action": "run_payout"}` | Pays the seller now, even if they were already paid today |
| `{"action": "expire_holds"}` | Brings the sales [held until delivery](https://docs.wajub.com/sync/holds) to their deadline now: they are released, with `payment.released` and `reason: auto` |
A live key gets `400` with `error_code: sandbox_only`, before anything is read.
## When your commission cannot be taken at once
A `direct` merchant can collect on their own provider contracts. Those sales never touch a Wajub
balance, so there is nothing to take your commission out of when they happen. It is owed instead:
| Then | What happens |
| ----------------------------------------- | ------------------------------------------------------------------------------------------------------ |
| The sale happens | The commission is recorded as owed, and `account.commission_receivable_recorded` is sent |
| The sale is refunded | What is owed is reduced by the connection's `commission_refund_policy`, as a commission taken would be |
| The merchant's Wajub balance can cover it | It is collected in full, and `account.commission_receivable_collected` is sent |
Collection never pushes the merchant below zero: an unpaid commission waits for money to arrive.
`GET /accounts/{id}/commission-receivables` lists what a connection owes you and totals what is still
outstanding.
## Relay: paying many sellers at once
A Relay marketplace collects every payment. With a `relay` connection per seller, Wajub works out and
pays what each one is owed on its own: see [Relay](https://docs.wajub.com/sync/relay). You can also pay beneficiaries
yourself, from your balance, in a payout run of one call.
```bash title="A payout run"
curl -X POST https://api.wajub.com/transfers/batch \
-H "Authorization: sk.xxxxxxxxxxxxxxxx…" \
-H "Idempotency-Key: payout-run-2026-09-30" \
-H "Content-Type: application/json" \
-d '{
"transfers": [
{ "beneficiary": "ben_LRQqYvlhrgUOE225KMKU", "amount": 125000, "reference": "seller-42" },
{ "beneficiary": "ben_7Hn2Qw9Xk4Lp3Rv8Tb6MzD", "amount": 48000, "reference": "seller-43" }
]
}'
```
| Rule | Why |
| --------------------------------------- | --------------------------------------------------------------------- |
| Up to 500 lines per call | Beyond that, split the run |
| `Idempotency-Key` is required | Retrying a run after a timeout sends only the lines that did not land |
| Each `reference` is unique in the batch | Each line is deduplicated by its reference |
| Lines succeed or fail on their own | One seller without a verified destination does not stop the others |
The answer lists every line with `accepted` or `rejected` and the reason. Each transfer keeps your
`reference` and the run's `batch_reference`, which is what ties it back to your own records.
### Sellers are checked before their first payout
Wajub pays sellers you recruited, so on a Relay account each new beneficiary's wallet is matched
against the name its operator has on file before it can be paid. Declare the seller's full name exactly
as it appears on their wallet.
| `verification` on the beneficiary | What it means |
| --------------------------------- | ---------------------------------------------------------------------------- |
| `verified` | The names match; the seller can be paid |
| `name_mismatch` | The operator knows this wallet under another name; payouts to it are refused |
| `lookup_unavailable` | The operator could not be asked; try again later |
`verified` is `true` or `false` on every beneficiary you read. Retry a check with
`POST /beneficiaries/{id}/verify`, after the operator was down or once you have corrected the name.
Here the call is a gate, not a lookup: it answers `422` unless the result is `verified`, and it
never returns the name the operator holds.
A line in a batch that pays an unverified seller is rejected on its own, and the rest of the batch goes
through.
> [!NOTE]
> **Only on Relay accounts**
>
> An account that does not run Relay keeps creating beneficiaries that are payable at once, as it
> always has, and the same call only
> [informs it](https://docs.wajub.com/payouts/beneficiaries/create#checking-the-name-on-a-wallet). Contact Wajub if this check
> does not fit your marketplace.
### When a paid seller owes money back
A sale is refunded after you paid the seller for it. The refund comes out of your balance, and nobody
can pull money back out of a Mobile Money wallet, so the seller now owes it. Only you know which
seller the order belonged to, so you declare it:
```bash title="Declare what a seller owes"
curl -X POST https://api.wajub.com/beneficiaries/ben_LRQqYvlhrgUOE225KMKU/receivables \
-H "Authorization: sk.xxxxxxxxxxxxxxxx…" \
-H "Content-Type: application/json" \
-d '{ "amount": 12500, "reference": "order-9981-refund" }'
```
Declaring the same `reference` again returns the first debt. Wajub records it and sends
`beneficiary.receivable_recorded`. What happens next depends on your account:
| Netting | What happens |
| ------------- | --------------------------------------------------------------------------------------------------------------------------- |
| Off (default) | Nothing else. You recover it however you like, then mark it with `POST /beneficiaries/{id}/receivables/{receivable}/settle` |
| On | Your next payout run to that seller is reduced by what they owe, and `beneficiary.receivable_recovered` is sent |
With netting on, each batch line reports `recovered`. A line whose payout is smaller than the debt
sends nothing, answers `status: recovered`, and the rest stays owed. Recovering only happens in
`POST /transfers/batch`; a single `POST /transfers` always sends what you asked. Ask Wajub to turn
netting on for your account.
> [!NOTE]
> **A failed line owes the debt again**
>
> If a line's payout is refused, whatever it would have recovered goes back on the debt. Retrying the
> run never recovers twice.
### Statements
`GET /beneficiaries/{id}/statement?from=2026-09-01&to=2026-09-30` returns everything paid to one
seller over a period, up to a year. Totals are split into `paid`, `in_progress` and `failed`: a payout
that failed is on the statement, but never counted as paid.
> [!NOTE]
> **Payout velocity**
>
> Too many payouts, or too large an amount paid out, in a short time, and the next payout is refused
> with `422`. The ceilings are set per account, for a merchant paying suppliers rather than a
> marketplace paying two hundred sellers: write to support to have yours raised before your first
> run. [Limits](https://docs.wajub.com/resources/limits#payouts-have-their-own-brakes)
- [Account capabilities](https://docs.wajub.com/sync/account-types): The three modes, and what each one engages.
- [Onboarding](https://docs.wajub.com/sync/onboarding): How a Lite merchant declares where their money goes.
- [Transfers & Payouts](https://docs.wajub.com/payouts/transfers): A single payout, and the checks every payout passes.
---
# Quickstart
URL: https://docs.wajub.com/sync/quickstart
> Create a connection, get it authorised, and take your first payment on it.
Four steps, and the third one is not yours to do. A connection only becomes usable once the
merchant signs in and accepts it, so plan for a round trip through a human before your first
payment.
Everything here needs your platform's secret key and a Scale plan.
## 1. Create the connection
You declare what the connection may do and what you will retain on it. Capabilities are required
and cannot be empty, pricing is optional. `callback` is the page the merchant comes back to once
they have accepted, not a webhook URL: no event is ever sent there.
**Create a connection**
```bash
curl https://api.wajub.com/accounts \
-H "Authorization: sk.xxxxxxxxxxxxxxxx…" \
-H "Content-Type: application/json" \
-d '{
"reference": "shop-amina",
"capabilities": ["read", "payments", "refunds"],
"pricing": { "percentage_fee": 2.5, "currency": "XAF" },
"callback": "https://example.com/connected"
}'
```
```javascript
const account = await wajub.accounts.create({
reference: 'shop-amina',
capabilities: ['read', 'payments', 'refunds'],
pricing: { percentage_fee: 2.5, currency: 'XAF' },
callback: 'https://example.com/connected',
});
console.log(account.id, account.authorization_url);
```
```python
account = wajub.accounts.create({
"reference": "shop-amina",
"capabilities": ["read", "payments", "refunds"],
"pricing": { "percentage_fee": 2.5, "currency": "XAF" },
"callback": "https://example.com/connected",
})
print(account.id, account.authorization_url)
```
```php
$account = $wajub->accounts->create([
'reference' => 'shop-amina',
'capabilities' => ['read', 'payments', 'refunds'],
'pricing' => [
'percentage_fee' => 2.5,
'currency' => 'XAF',
],
'callback' => 'https://example.com/connected',
]);
echo $account->id;
```
```go
account, err := client.Accounts.Create(ctx, map[string]any{
"reference": "shop-amina",
"capabilities": []string{"read", "payments", "refunds"},
"pricing": map[string]any{
"percentage_fee": 2.5,
"currency": "XAF",
},
"callback": "https://example.com/connected",
}, nil)
```
The answer is `201 Created`. Two fields matter more than the rest.
```json title="Response · 201 Created"
{
"code": 201,
"status": "Created",
"message": "Account created",
"account": {
"id": "acc_7Yh2MpL4tRb3nP8sZcXv",
"reference": "shop-amina",
"sandbox": false,
"capabilities": ["read", "payments", "refunds"],
"status": "pending",
"payment_status": "inactive",
"authorization_url": "https://sync.wajub.com/oauth/v2/authorize?access_token=…",
"pricing": {
"percentage_fee": 2.5,
"fixed_fee": 0,
"max_fee": 0,
"currency": "XAF"
},
"created_at": "2026-09-13T10:24:11+00:00"
}
}
```
`id` is the value you will send as `X-Sync`. `authorization_url` is the link the merchant has to
open, and this response is the only place it appears. Send it or store it now, because reading the
subaccount later will not give it back. `POST /accounts/{id}/token` mints a replacement.
## 2. Send the merchant their link
Put `authorization_url` in front of the merchant however suits you: an email, a button in your own
onboarding, a QR code. They open it, sign in to their Wajub account, review the capabilities you
asked for, and accept.
> [!NOTE]
> **The merchant brings their own account**
>
> There is nothing to create on their side through your integration. If they do not have a Wajub
> account yet, the authorisation page walks them through opening one, and the connection completes
> afterwards.
Once they accept, `status` flips to `active` and `connected_merchant` carries their business name and email.
You find out either by polling the account or by receiving `account.connected` on one of your
platform's webhook endpoints. Register the endpoint in the Dashboard or with `POST /webhooks` and
list `account.connected` by name: a `*` subscription does not receive it.
[Sync lifecycle deliveries](https://docs.wajub.com/developer-tools/webhooks/events#sync-lifecycle-deliveries) describes
what arrives.
## 3. Wait for payments to be switched on
In sandbox, `payment_status` turns `active` the moment the merchant accepts, and you can charge
straight away. In live it depends on the merchant: already verified, the connection is `active` at
once; still under review, it stays `inactive` until their verification clears, and Wajub then sends
`account.payment_activated`. A `lite` connection also waits for the Wajub rail to be granted to the
merchant.
## 4. Take a payment on it
From here it is the ordinary payments API. One header decides who the payment belongs to.
**Charge on behalf of the connection**
```bash
curl https://api.wajub.com/payments \
-H "Authorization: sk.xxxxxxxxxxxxxxxx…" \
-H "X-Sync: acc_7Yh2MpL4tRb3nP8sZcXv" \
-H "Content-Type: application/json" \
-d '{
"amount": 50000,
"currency": "XAF",
"customer": { "email": "buyer@example.com" },
"callback": "https://example.com/return"
}'
```
```javascript
const payment = await wajub.payments.create({
amount: 50000,
currency: 'XAF',
customer: { email: 'buyer@example.com' },
callback: 'https://example.com/return',
}, { sync: 'acc_7Yh2MpL4tRb3nP8sZcXv' });
```
```python
from wajub import RequestOptions
payment = wajub.payments.create({
"amount": 50000,
"currency": "XAF",
"customer": { "email": "buyer@example.com" },
"callback": "https://example.com/return",
}, RequestOptions(sync="acc_7Yh2MpL4tRb3nP8sZcXv"))
```
```php
use Wajub\RequestOptions;
$payment = $wajub->payments->create([
'amount' => 50000,
'currency' => 'XAF',
'customer' => [
'email' => 'buyer@example.com',
],
'callback' => 'https://example.com/return',
], new RequestOptions(sync: 'acc_7Yh2MpL4tRb3nP8sZcXv'));
```
```go
payment, err := client.Payments.Create(ctx, map[string]any{
"amount": 50000,
"currency": "XAF",
"customer": map[string]any{"email": "buyer@example.com"},
"callback": "https://example.com/return",
}, &wajub.RequestOptions{Sync: "acc_7Yh2MpL4tRb3nP8sZcXv"})
```
The payment belongs to the merchant from this point on. It appears in their Dashboard, settles into
their balance, and their webhooks fire. Yours fire too, with a copy of the same event.
## What you get back when it succeeds
When the payment completes, Wajub applies the connection's pricing, computes your commission on
the payment amount, and credits it to your platform. You are told by webhook.
```json title="fee.received (abridged)"
{
"id": "evt_2Hq8Ln4Vx7Rb9Tk3Mz6Pd1Wc",
"event": "fee.received",
"data": {
"amount": 1250,
"currency": "XAF",
"percentage": 2.5,
"fixed_amount": null,
"account": {
"id": "acc_7Yh2MpL4tRb3nP8sZcXv",
"reference": "acc_7Yh2MpL4tRb3nP8sZcXv"
},
"created_at": "2026-09-29T10:30:00+00:00"
},
"livemode": true,
"created": "2026-09-29T10:30:00+00:00"
}
```
Reconcile commissions per connection, on `account.id`.
The merchant receives the mirror of it, `fee.charged`, on their own endpoints. Between the two, both
sides of the commission are auditable without either of you asking the other.
> [!WARNING]
> **Get the pricing right before step 2**
>
> Once the merchant accepts, pricing and capabilities are theirs to agree to: changing either
> answers `202` and waits for them to accept it in their own dashboard, while the connection keeps
> running on the agreed terms. Deciding your commission before you send the link saves everyone
> that round trip.
- [Sync](https://docs.wajub.com/sync): What a connection is and where it stops.
- [Account capabilities](https://docs.wajub.com/sync/account-types): The seven capabilities and how the commission is computed.
- [Onboarding](https://docs.wajub.com/sync/onboarding): The lifecycle, the authorisation link, and what freezes.
- [Split payments](https://docs.wajub.com/sync/split-payments): Why one payment cannot be shared between two merchants.
---
# Refunds
URL: https://docs.wajub.com/sync/refunds
> Who asks for a refund, who sends it and who pays for it, by the connection's mode and by where the sale was collected.
A refund on a sale a connection brought raises three separate questions: who asks for it, who sends
the money back to the payer, and out of which money. The connection's mode answers the first; where
the sale was collected answers the other two.
## Who does what
| Sale | Who asks | Who sends the money back | Out of which money | If the money is short |
| --------------------------------- | -------------------------------------------------- | ----------------------------- | ----------------------------- | ----------------------------------------------------------------------------------------------------------------------------------------------------------------------------------------------- |
| `direct`, on the Wajub rail | The merchant, or you with the `refunds` capability | Wajub | The merchant's Wajub balance | The refund waits; a lost dispute becomes their debt |
| `direct`, on their own contracts | The same | Their provider, or themselves | Their account at the provider | Between them and their provider |
| `lite` (always on the Wajub rail) | You, with the `refunds` capability | Wajub | The seller's Wajub balance | Their reserve, then your balance |
| `relay` | You, with `X-Sync` | Wajub, or your provider | Your balance | The refund waits; a lost dispute becomes your debt. On the seller's side, their due is reduced, or what they owe is taken from their next payout ([Relay](https://docs.wajub.com/sync/relay#when-a-sale-is-refunded)) |
You ask for a refund with `POST /refunds` and the `X-Sync` header, on a payment this connection
brought. A `lite` seller cannot ask for one: their portal only shows their sales and their payouts.
## On the Wajub rail: the money has to be there
Wajub sends the money back to the payer, then debits the merchant's balance once the refund is
confirmed. **Wajub never advances a refund**: it is only sent when the money that covers it is there.
| What counts | Why |
| --------------------------------- | ------------------------------------------------------------------------------------------------------------------------------------------------------------------------------------------------------- |
| The merchant's balance | It is where the refund comes out of |
| The commission you return | It comes back on their balance just ahead of the debit, by your `commission_refund_policy`, as far as you still hold it: a merchant who withdrew nothing can therefore always refund their sale in full |
| In `lite`, your available balance | You cover what the seller no longer holds, up to the refunded amount |
When that is not enough, nothing is sent. The refund stays `pending`, with `execution_mode: manual`
and a `manual_reason.code`:
| `code` | What is missing |
| ------------------------------- | ----------------------------------------- |
| `insufficient_balance` | The merchant's balance |
| `platform_balance_insufficient` | In `lite`, the seller's balance and yours |
It is **sent by itself** as soon as the money arrives, for 72 hours from the request, and
`refund.updated` tells you of each change. Past that, Wajub support handles it.
> [!NOTE]
> **A refund on its way holds its money**
>
> Between a refund being sent and its debit, its amount stays on the balance: a withdrawal that would
> touch it is refused with `refund_in_flight`, the automatic payout of a `lite` seller leaves it in
> place, and a second refund does not count on it. In `lite`, the share your balance was counted on
> for is held on it the same way: a withdrawal of yours, or another seller's refund, cannot spend it
> until the refund is debited.
## A lost dispute is always debited
A lost dispute asks nobody: it is debited whatever the balance holds. The shortfall is the merchant's
in `direct`, and yours in `lite` and `relay`. In `lite` you cover it even when your balance falls
short: it then goes below zero, and your payouts are suspended until your collections make it up.
[When a merchant goes negative](https://docs.wajub.com/sync/payouts#when-a-merchant-goes-negative)
A sale [held until delivery](https://docs.wajub.com/sync/holds) is still on the seller's side: a refund or a lost dispute
is taken from the held money, and you never cover that part. A Lite seller can answer a dispute on
their sale themselves: [Disputes on your sellers' sales](https://docs.wajub.com/sync/disputes).
## Off the Wajub rail
A sale a `direct` merchant collects on their own contracts never touched a Wajub balance: Wajub
advances nothing and debits nothing. `execution_mode` says who sends the refund, as for any merchant.
[Who sends a live refund](https://docs.wajub.com/payments/refunds#who-sends-a-live-refund)
## Your commission
`commission_refund_policy`, on the connection, says what you return: pro rata to the refunded amount
(the default), all of it on the first refund, or nothing. A commission that was still a debt owed to
you, because the sale was collected off the rail, is reduced the same way.
What comes back never takes your balance below zero. It is capped at what you hold at that moment,
in the balance the sale's money sits in, less what other refunds on their way hold there. What you
no longer hold is never returned and is not a debt: the seller bears the refund without that part.
The `sync_fee_reversal` fee shows what was actually returned and, when it was capped,
`metadata.capped: true` and `metadata.policy_amount`, what your policy would have returned.
[When the sale is refunded](https://docs.wajub.com/sync/account-types#when-the-sale-is-refunded)
## Getting back what you covered
In `lite`, `cover_recovery: payouts` takes what you covered back out of the seller's next payouts.
[Getting back what you covered](https://docs.wajub.com/sync/payouts#getting-back-what-you-covered)
- [Refunds](https://docs.wajub.com/payments/refunds): Create a refund, and follow it to its outcome.
- [Paying sellers](https://docs.wajub.com/sync/payouts): The reserve, the cover and what you get back.
- [Account capabilities](https://docs.wajub.com/sync/account-types): The three modes, the capabilities and the commission.
---
# Relay
URL: https://docs.wajub.com/sync/relay
> Collect for sellers who have no Wajub account, and let Wajub work out and pay what each one is owed.
In `relay`, you are the merchant of record. Your sellers have no Wajub account: each one is a
connection tied to their mobile money wallet. You collect every sale on your own balance, and Wajub
keeps, sale by sale, what each seller is owed, then pays them on the schedule you set.
> [!NOTE]
> **Open in live once Wajub has reviewed your platform**
>
> Every call on this page works with a sandbox key. In live, Relay is open to every platform Wajub
> has approved for it: ask for the review under **Settings, Sync, Platform**. Until it is approved, or
> if the approval is withdrawn, `POST /accounts` with `account_type: relay`, a call carrying `X-Sync`
> on a live Relay connection, and a Relay part of a shared payment answer `403` with
> `error_code: sync_mode_not_approved`.
## One connection per seller
Create the connection with the seller's wallet: either a beneficiary you already have, or the
details to create one, with the same fields as `POST /beneficiaries`.
```bash title="A Relay seller"
curl https://api.wajub.com/accounts \
-H "Authorization: sk.xxxxxxxxxxxxxxxx…" \
-H "Content-Type: application/json" \
-d '{
"account_type": "relay",
"capabilities": ["payments", "refunds"],
"pricing": { "percentage_fee": 10, "currency": "XAF" },
"payout_schedule": "weekly",
"beneficiary": "ben_LRQqYvlhrgUOE225KMKU"
}'
```
| The wallet | The connection |
| --------------------------------------------------- | ----------------------------------------------------------------------------------------------------------------------------------------------- |
| Its name is confirmed by the operator | `active`, with `payment_status: active`, straight away |
| Not checked yet, or the operator could not be asked | `pending`; `relay.pending_reason` says why. It turns `active` as soon as a check succeeds, with `POST /beneficiaries/{id}/verify` or on its own |
| Known to the operator under another name | `pending` with `wallet_name_mismatch`: correct the name, then check again |
There is no onboarding and no `authorization_url`. A wallet carries one Relay connection per
platform: a second answers `409` with `error_code: relay_wallet_taken`.
## What each seller is owed
Charge with `X-Sync` as for any connection. The payment is yours: it lands on your balance. For each
sale that succeeds, Wajub records the seller's due:
| | |
| ------------ | ------------------------------------------------------------------------------------------------------------------------------------------------------------------------------------------------------ |
| The due | What the sale credited you, less Wajub's fee, less your commission (the connection's `pricing`) |
| Held | Until the sale clears retention, like the money itself |
| Payable | After that, until a payout takes it |
| Card reserve | A card sale keeps 10% of its due for 120 days by default, on your balance, against chargebacks: paid to the seller by the first payout after that ([The card reserve](https://docs.wajub.com/sync/payouts#the-card-reserve)) |
A sale you collected on your own provider account never reached Wajub, so it creates no due.
## Payouts
`payout_schedule` (`manual`, `daily`, `weekly`, `monthly`) and `payout_min_amount` work as for
`lite`, and `POST /accounts/{id}/payouts` pays the seller now. Each payout sends the seller's payable
dues, oldest first and whole, **less what they owe** after a refund, from your balance to their wallet.
When what they owe absorbs the whole payout, nothing is sent: the call answers `200` with
`transfer: null` and the amount `netted`.
A Relay seller gets **one payout a day** at most. When two runs meet the same day (the schedule and
your `POST /accounts/{id}/payouts`, or a call you retried), the second answers with that day's payout
and sends nothing more; dues recorded in between leave with the next day's payout, on a payout of
their own. A due is only ever marked paid by the payout that carried it.
| What holds a payout back | `payout_hold.reason` |
| ----------------------------------------------------- | -------------------------------------------------------------------------- |
| Your balance does not hold the amount | `insufficient_balance`: nothing leaves, the next run tries again |
| Your exposure cap | `exposure_cap` ([Your exposure cap](https://docs.wajub.com/sync/payouts#your-exposure-cap)) |
| Wajub withdrew your approval | `approval_withdrawn` |
| The seller passed the name-only tier | `identity_required` (below) |
| The seller is new, and only their older dues are paid | `new_seller` ([Seller risk](https://docs.wajub.com/sync/seller-risk#new-sellers-are-paid-later)) |
| You, or Wajub, froze the seller | `frozen` ([Seller risk](https://docs.wajub.com/sync/seller-risk#freezing-a-seller)) |
A sale you [hold until delivery](https://docs.wajub.com/sync/holds) keeps its due unpaid until you release it, without a
`payout_hold`.
Each hold sends `account.payout_limited` once, except `identity_required`, which sends
`account.identity_required`. A payout goes through every check of an ordinary
transfer, your reserve and refunds on their way included.
## When a sale is refunded
The refund comes out of your balance, as for any payment of yours: it waits with
`insufficient_balance` if you do not hold it. On the seller's side:
| The due | What happens |
| ------------ | ----------------------------------------------------------------------------------------- |
| Not paid yet | It is reduced by the refunded share, and cancelled if nothing is left |
| Already paid | What the seller owes is recorded on their beneficiary, and taken out of their next payout |
A lost dispute works the same way. Each refund or dispute counts once, however often it is replayed.
## The seller's identity, past a tier
A seller is paid on their wallet's name alone until what Wajub paid that wallet over the last 12
months reaches a ceiling (500 000 XAF or XOF). Past it, the part of a payout above the ceiling waits
for an identity document: you receive `account.identity_required`, and send it with
`POST /accounts/{id}/identity`, as `multipart/form-data`.
| Field | |
| --------------------- | ------------------------------------------------------------------ |
| `full_name` | As the document prints it |
| `document_type` | `national_id`, `passport`, `driving_license` or `residence_permit` |
| `document_number` | Never stored in clear |
| `birth_date` | `YYYY-MM-DD` |
| `document_expires_at` | Optional; an expired document is refused |
| `document` | JPG, PNG or PDF, 10 MB at most |
Wajub reviews it, usually within a working day: `account.identity_verified`, and the held payouts
leave from the next run, or `account.identity_rejected` with the reason. In sandbox it is approved at
once. The ceiling may change: Wajub tells Relay platforms before it does.
- [Paying sellers](https://docs.wajub.com/sync/payouts): Lite payouts, the exposure cap, and payout runs.
- [Refunds](https://docs.wajub.com/sync/refunds): Who refunds what, mode by mode.
- [Beneficiaries](https://docs.wajub.com/payouts/beneficiaries): Wallets, and checking the name on one.
---
# Reports and statements
URL: https://docs.wajub.com/sync/reports
> Reconcile each payout to your sellers, declare your commission, and hand each seller a yearly statement in your brand.
Your accountant matches each payout to your sellers with your bank or operator statement, and
declares your commission. Ask Wajub for a **report**, under **Sync, Reports** or with
`POST /sync/reports`: it is built in the background, usually within a minute or two, then
- `report.ready` reaches your endpoints;
- the member who asked in the Dashboard gets an e-mail, with a link to the Dashboard, never to the
file;
- it is kept **30 days**, and downloaded through a link **signed for 15 minutes**.
## The five reports
| `type` | Formats | Contains |
| ----------------------- | ------------- | --------------------------------------------------------------------------------------------------------------------------------------------------------------------------------- |
| `payout_reconciliation` | `csv`, `xlsx` | Every element of every payout to every seller, one row each |
| `seller_summary` | `csv`, `xlsx` | Per seller and currency: sales, refunds, lost disputes, commission taken, returned and net, paid out; and, as it is built, what they are owed, what is withheld, their cover debt |
| `platform_commission` | `csv`, `xlsx` | Your commission per month, seller and currency: taken, returned, net |
| `relay_dues` | `csv`, `xlsx` | Your Relay sellers' dues: their state, and the payout that paid them |
| `seller_statement` | `pdf` | One Lite or Relay seller's statement for the period |
| Rule | |
| -------------- | -------------------------------------------------------------------------------------------------------------------------------------------------------------------------------- |
| Period | UTC days, from `period_start` at midnight to the end of `period_end`, **366 days at most** |
| Amounts | Major units with their currency, as exact decimals with the currency's decimals (`19000.00`, `-286.50`). A negative amount stays a number |
| Dates | ISO 8601 UTC with offset (`2026-11-06T07:00:00+00:00`); a day alone as `YYYY-MM-DD` |
| Stable columns | `format_version` (today `1`) is in the report **and in the file's name**: `payout_reconciliation_v1_2026-11-01_2026-11-30.csv`. A column never changes meaning within a version |
| Personal data | The seller's name only. No e-mail address, no phone number, no identity document |
| CSV | UTF-8 with BOM, comma, RFC 4180 quoting, column names on the first line. A text cell starting with `=`, `+`, `-` or `@` gets a leading apostrophe, so it never runs as a formula |
| XLSX | One sheet, "Report", bold frozen header; text as strings, never formulas; amounts and counts as numbers. Past 1 048 576 rows it fails with `too_many_rows`: ask for CSV |
| Test key | Built from test data (`rpt_test_…`), with `report.ready` in test |
| Waiting | 5 reports at most at a time, being built or queued. A report still `pending` can be cancelled under **Sync, Reports**: it turns `failed` with `cancelled` and frees its place |
## Ask for one
```bash title="November's payouts, as CSV"
curl https://api.wajub.com/sync/reports \
-H "Authorization: sk.xxxxxxxxxxxxxxxx…" \
-H "Content-Type: application/json" \
-d '{"type":"payout_reconciliation","format":"csv","period_start":"2026-11-01","period_end":"2026-11-30"}'
```
| Field | |
| ---------------------------- | --------------------------------------------------------------------------------------------------------------------------------------------------------- |
| `type` | Required: one of the five above |
| `period_start`, `period_end` | Required, `YYYY-MM-DD`, UTC; `period_end` on or after `period_start` |
| `format` | `csv` or `xlsx` for an export, required; `pdf` for a statement, the default |
| `account` | The seller's `acc_…`, required for `seller_statement`: a `lite` or `relay` account of yours, in the same environment |
| `locale` | The language of a `seller_statement`: `en`, the default, or `fr`. Exports are the same in both: their columns never change. Any other value answers `422` |
The answer is `202` with the `report`, `pending`. Called with your own key, never with `X-Sync`.
| `error_code` | Status | When |
| ------------------------- | ------ | -------------------------------------------------------------------------------- |
| `format_not_available` | `422` | `pdf` for an export, `csv` or `xlsx` for a statement, or no format for an export |
| `period_too_long` | `422` | More than 366 days |
| `account_required` | `422` | `seller_statement` without `account` |
| `statement_not_available` | `400` | A statement for a `direct` account: they have their own Wajub reports |
| `too_many_reports` | `429` | 5 reports already waiting |
| | `404` | `account` unknown, another platform's, or of the other environment |
## Download it
When `report.ready` arrives, `GET /sync/reports/{id}` returns the report with `url`, a link signed
for 15 minutes (`url_expires_at`). Call it again for a fresh one, and never store the link.
| `status` | |
| --------------------- | --------------------------------------------------------------------------------------------------------------------------------------------------------------------------------------------------------------------------- |
| `pending`, `building` | On its way. A year of a large platform can stay `building` a few minutes: you still get one file, and one `report.ready` |
| `ready` | `url`, `row_count` (exports, header not counted), `file_name`, `file_size` in bytes, `completed_at`, `expires_at` |
| `failed` | `failure_reason`: `too_many_rows` (an XLSX past Excel's last row, ask for CSV), `build_failed` (three attempts failed, ask again) or `cancelled` (cancelled in the Dashboard). A failed report no longer counts among the 5 |
| `expired` | The file was deleted after 30 days |
`report.ready` is sent once per report. It is a [Sync lifecycle delivery](https://docs.wajub.com/developer-tools/webhooks/events#sync-lifecycle-deliveries):
list it by name. Its body is `event`, `sandbox`, `timestamp` and the `report`, without a link. A
report that failed sends nothing: read it with `GET`.
## The columns of `payout_reconciliation`
One row per **element** of each payout Wajub made to your sellers. A payout is in the period by its
**value date**, or, not paid yet, by its creation. **The `amount` of a payout's rows add up to its
`payout_amount`, to the centime.** The payouts follow each other in that same order, by value date
(or creation), then payout by payout, and a payout's rows keep their order (`line`).
| Column | |
| -------------------------------------------------- | ---------------------------------------------------------------------------- |
| `payout_id`, `payout_status` | `po_…`; `pending`, `processing`, `succeeded`, `failed` or `cancelled` |
| `payout_created_at`, `payout_value_date` | Creation; value date, empty until it succeeded |
| `operator_reference` | The operator's reference, the one on your statement |
| `payout_amount`, `currency` | What the payout paid |
| `account`, `account_type`, `seller_name` | The seller |
| `line`, `element`, `amount` | The row's rank in the payout, what it is, and its signed share of the payout |
| `payment`, `refund`, `dispute` | The public ids concerned |
| `occurred_at` | When the element happened |
| `escrow_amount`, `hold_status`, `hold_released_at` | The [hold until delivery](https://docs.wajub.com/sync/holds) of the sale concerned |
| `element` | Sign | |
| ---------------------------------------------------- | ----- | -------------------------------------------------------------------------------------------------------------------------- |
| `sale`, `share` | + | A sale, or a part of a shared payment, gross |
| `wajub_fee` | − | Wajub's fee on it |
| `commission` | − | Your commission |
| `refund`, `dispute` | − | What a refund or a lost dispute took back |
| `commission_returned` | + | Your commission given back with it |
| `cover`, `recovery` | + / − | What you covered for the seller, and what you took back |
| `debt` | − | A Relay seller's debt, netted |
| `payout_fee` | − | The payout's own fee |
| `reserve_brought_forward`, `balance_brought_forward` | + | What the previous payout left |
| `reserve_held`, `balance_carried_forward` | − | What this payout leaves for later |
| `adjustment` | ± | A balance movement no other element explains |
| `rounding` | ± | A centime's difference between gross, fees, commission and what was paid |
| `escrow_released` | 0 | A held Lite sale released since the previous payout, paid through `balance_brought_forward`; `escrow_amount` says how much |
| `unreported` | + | A payout whose detail was never written: one row of its whole amount |
The other exports list their columns in the same way, in the file's header: `seller_summary`
(`balance_due`, `withheld` and `cover_debt` are as the report is built, `as_of`, and empty for a
`direct` seller; its last column, `card_reserve`, is what the seller's card sales keep against
chargebacks, included in `withheld`), `platform_commission` (one row per month, seller and currency) and `relay_dues`
(one due per row, `outstanding` as `GET /accounts/{id}/dues` reads it).
## Your sellers' statements
A `seller_statement` is a PDF for one Lite or Relay seller, **in your brand**: per currency, what was
collected for them, refunded, lost to disputes, kept as your commission and paid to them, then month
by month. It says it is a record for their accounts, not a tax return; Wajub's fees are in each
payout's detail. Through the API it is in English unless you ask for `locale: fr`; from the
Dashboard, in the language of the member who asks.
A dispute the merchant accepted is counted once, among the lost disputes, never also among the
refunds: in the statement, in `seller_summary` and in the seller's figures. Ordinary refunds stay
under refunds.
| Who | Where |
| ------------------------------------- | ----------------------------------------------------------------------------------------------------------------------------------------- |
| You | The seller's page in **Sync, Accounts**, one button per year since they connected; or `POST /sync/reports` with any period up to 366 days |
| A Lite seller | Their portal, under Payouts |
| A Lite or Relay seller, in your pages | The `payouts` [component](https://docs.wajub.com/sync/embedded-components) shows their statements by year |
- [Analytics](https://docs.wajub.com/sync/analytics): The same ledger, as figures over a period.
- [What a payout settles](https://docs.wajub.com/sync/payouts#what-a-payout-settles): The lines of each payout, in the API.
- [Ask for a report](https://docs.wajub.com/api/subaccounts/create-report): The endpoint specification.
---
# Seller risk
URL: https://docs.wajub.com/sync/seller-risk
> A risk score per seller, a payout delay for new sellers, and freezing a seller, before the money leaves.
In `lite` you cover what a seller can no longer refund; in `relay` you pay your sellers. A seller who
collects then disappears costs you. Three protections act **before the money leaves**, on `lite` and
`relay` accounts only:
| Protection | What it does |
| ------------------------------------------------- | ----------------------------------------------------------------------- |
| [Risk score](#the-risk-score) | 0 to 100 per seller, with readable reasons |
| [New sellers' delay](#new-sellers-are-paid-later) | A new seller is paid only their older sales. Live only |
| [Freeze](#freezing-a-seller) | A seller is no longer paid, by your decision, Wajub's, or automatically |
A `direct` merchant runs their own account: no score, no delay, no freeze, and their account has no
`risk`, `frozen` or `new_seller`.
## The risk score
Wajub scores each seller after every sale, refund and dispute of theirs, and every night. Each signal
adds points; the score is their sum, capped at 100.
| `code` | Signal |
| ------------------------ | ---------------------------------------------------------------------------------------------------------------------- |
| `refund_rate` | A high share of the seller's sales refunded |
| `dispute_rate` | Disputes opened on the seller's recent sales |
| `new_connection` | A recently connected seller |
| `identity_unverified` | Lite: the seller's verification is not complete. Relay: the wallet is not verified with its operator. Never in sandbox |
| `payout_account_changed` | The payout account changed recently (a first account is not a change) |
| `volume_spike` | Sales far above the seller's usual volume, or a seller selling again after a long idle spell |
| `self_sales` | Sales paid from the phone number the seller is paid out to |
| `shield_flags` | Recent sales that Shield found risky |
| `level` | Score |
| ---------- | ---------- |
| `normal` | Below 40 |
| `elevated` | 40 or more |
| `high` | 70 or more |
The sales counted are those made with `X-Sync` on the account, and the parts of shared payments it
received.
```json title="The account's risk"
"risk": {
"score": 80,
"level": "high",
"reasons": [
{ "code": "self_sales", "points": 30, "description": "3 sales over 90 days were paid from the phone number the seller is paid out to." },
{ "code": "payout_account_changed", "points": 20, "description": "The account the seller is paid on changed 0 day(s) ago." }
],
"updated_at": "2026-11-20T10:00:00+00:00"
}
```
`risk` is `null` until the seller is scored for the first time, after their first sale or the next
night. Reasons are sorted by points, highest first; `code` is stable, `description` is in English.
`GET /accounts?risk_level=high` lists your sellers at one level (`normal` includes a seller not
scored yet), and `frozen=true` or `false` (`1` or `0` too) only the frozen sellers, or those not
frozen.
| Event | When |
| ----------------------- | ----------------------------------------------------------------------------------------------------------------------------------------- |
| `account.risk_elevated` | The level goes from `normal` to `elevated` |
| `account.risk_high` | The level reaches `high`. `suggestion: "freeze"` when the freeze is only suggested; `frozen: true` when it froze the seller automatically |
Each is sent **once per crossing**: a seller who stays `high` sends nothing more, and a jump from
`normal` to `high` sends `account.risk_high` alone. It is sent again only after the score has fallen at least 10 points under the threshold (to 60 or
less for 70, to 30 or less for 40) and crossed it again. `data` carries
`account`, `risk`, `frozen` and `suggestion`.
## New sellers are paid later
A `lite` or `relay` seller is **new** while their connection is less than 14 days old, or while their
identity is not verified (Lite: their verification; Relay: their wallet with its operator). While
new, they are paid **only the sales older than their delay**: 7 days by default.
| Mode | What waits |
| ------- | ----------------------------------------------------------------------------------------------------------------- |
| `lite` | What recent sales left them stays on their balance, and leaves with the first payout where the sale is old enough |
| `relay` | Dues recorded less than the delay ago stay `payable` and unpaid |
The delay applies in live only. On each sale, what is kept back is the **largest** of the reserve,
the [hold until delivery](https://docs.wajub.com/sync/holds) and the delay, never their sum: a recent sale of 6 000 with a
reserve of 600 on it keeps 6 000 back, not 6 600.
| The sale | What the delay keeps back |
| ------------------------------------------------------ | -------------------------------------------------------------------------------------------------------------------------------------------------------------------------------------------- |
| Credited less than the delay ago | What it left the seller, less what refunds and lost disputes took back **once their debit is on the seller's balance**: a refund still `pending`, or sent and not debited yet, frees nothing |
| Paid in instalments | What the instalments credited left the seller, from the first one until the last, whatever their dates |
| Only partly available (instalments still in retention) | What of it is available: the rest waits in retention anyway |
| Setting | |
| ----------------------- | --------------------------------------------------------------------------------------------------------------------- |
| `new_seller_delay_days` | On `POST /accounts` and `PUT /accounts/{id}`: 0 to 30 days, `null` for the default (7). Refused on a `direct` account |
| Wajub's floor | Wajub can set a floor for your platform: the delay is never below it |
```json title="The account's new_seller"
"new_seller": {
"is_new": true,
"delay_days": 7,
"delay_days_setting": null,
"until": "2026-12-03T10:00:00+00:00"
}
```
`until` is when the seller stops being new by age alone; `null` when they wait for their
verification, or are not new. `delay_days_setting` is your choice for the connection.
When a payout paid only the older sales, or nothing, because of the delay, the account's
`payout_hold.reason` reads `new_seller` and you receive `account.payout_limited` with
`reason: new_seller`, once per episode. `POST /accounts/{id}/payouts` answers `409` with
`error_code: new_seller_delay` when no sale is old enough. The seller reads in their portal and
components that, as a new seller, each sale is paid once it is N days old.
## Freezing a seller
A frozen seller is **no longer paid**: no automatic payout, no `POST /accounts/{id}/payouts`, and in
`lite` no transfer out of their balance. Their money stays where it is, so their refunds and
disputes still find it.
They **keep collecting**, so your shop does not break and what they collect stays at Wajub, unless
you freeze them with `block_payments: true`: they then **collect through nothing**, with `403`
`account_frozen`.
| Refused with `block_payments` | |
| ---------------------------------------------- | ----------------------------------------------------------------------------------------------------------------------------------------------------------------------------------------------------------------------------------- |
| New sales | `POST /payments`, `POST /links`, `POST /invoices` and `POST /payments/{id}/activate` with `X-Sync`; a part of a shared payment |
| Sales prepared before the freeze | The charge of a payment made for them, or shared with them: `POST /payments/{id}`, `POST /payments/{id}/splits`, the payment page, in live and in sandbox |
| Payments already charged, waiting on the payer | Every step after the charge, however long before the freeze it started: a code, a PIN or a 3-D Secure code (`POST /payments/{id}/confirm`, the payment page), a code sent again. Nothing reaches the provider and no try is counted |
| Links and invoices issued before | No longer payable: the link's page answers "This payment link is not available.", the invoice "This invoice is not available for payment." |
The freeze is read at every charge and every step, with no delay, whether you set it through the API
or in the Dashboard. Refunds go on.
A payer who already paid in their provider's window is not refused when the payment is confirmed
with `client_session_id`. Such a payment, or one a provider completes all the same, is collected: it
stays on the seller's balance, or as their Relay due, and is not paid out while the freeze lasts.
On a [shared payment](https://docs.wajub.com/sync/split-payments#one-payment-several-sellers), a single seller frozen with
`block_payments` blocks the whole payment, the other sellers' parts included, even when it was
created before the freeze: a shared payment is one charge, never collected in part. To sell anyway,
create a new payment without that seller's part, or lift the block.
```bash title="Freeze a seller"
curl https://api.wajub.com/accounts/acc_Gt6yU3nE8rM1kS5vX9bQ/freeze \
-H "Authorization: sk.xxxxxxxxxxxxxxxx…" \
-H "Content-Type: application/json" \
-d '{"reason":"Orders never delivered","block_payments":false}'
```
| Call | Body |
| ------------------------------ | ----------------------------------------------------------------------------------------------------------------------------------- |
| `POST /accounts/{id}/freeze` | `reason` (required, 500 characters at most, kept in the history and shown in your Dashboard), `block_payments` (`false` by default) |
| `POST /accounts/{id}/unfreeze` | `reason` (optional). The seller is paid again from the next run |
Both answer `200` with the account. Freezing a seller you already froze the same way, or unfreezing
one that is not frozen, changes nothing.
```json title="The account's frozen"
"frozen": {
"since": "2026-11-20T10:00:00+00:00",
"by": "platform",
"reason": "Orders never delivered",
"block_payments": false
},
"auto_freeze": null
```
`by` is `platform`, `wajub` or `auto`. `payout_hold.reason` reads `frozen` from the moment of the
freeze, sandbox included.
> [!WARNING]
> **A freeze set by Wajub is Wajub's**
>
> When Wajub froze a seller, you can neither lift that freeze nor change it, not its
> `block_payments`, its reason or its `by`: `freeze` on that seller answers `409` with
> `error_code: frozen_by_wajub`, and so does `unfreeze` unless you had frozen them first (below). The
> automatic freeze leaves it alone too. Contact Wajub's support.
### When Wajub freezes a seller you froze
Your freeze is **kept under Wajub's**. The account's `frozen` shows Wajub's (`by: wajub`), and the
payments are blocked if either freeze blocks them.
| Then | What happens |
| ------------------------------ | ------------------------------------------------------------------------------------------------------------------------------------------------------------ |
| Wajub lifts its freeze | Yours comes back as it was: its reason, its `block_payments`, its date. The seller stays frozen |
| You lift yours with `unfreeze` | Only yours goes: `200` with `message: "Your freeze is lifted. Wajub's freeze stays in force."`, and `frozen.by` still reads `wajub`. The seller stays frozen |
Each lifting sends `account.unfrozen`, with the freeze that stays in `still_frozen`.
| `error_code` | Status | Where | When |
| ---------------------------- | ------ | ------------------------------------------------------------------------------------------------------------------------------------------------------------------------------------------------------- | ---------------------------------------------------------- |
| `account_type_not_freezable` | `400` | `freeze`, `unfreeze` | A `direct` account |
| `frozen_by_wajub` | `409` | `freeze`, `unfreeze` | Wajub froze this seller, and you had not frozen them first |
| `account_frozen` | `409` | `POST /accounts/{id}/payouts` | The seller is frozen |
| `account_frozen` | `422` | `POST /transfers` | A frozen Lite seller: no payout leaves their balance |
| `account_frozen` | `403` | `POST /payments`, `/links`, `/invoices`, `/payments/{id}/activate` with `X-Sync`; a part of `shares`; the charge of a payment made for them, and its confirmation steps (`POST /payments/{id}/confirm`) | A frozen seller whose payments are blocked |
### Freezing automatically
**Off by default**: a seller reaching `high` sends `account.risk_high` with `suggestion: "freeze"`
and a suggestion in your Dashboard, and stays paid. Turn it on for your platform under **Sync, Seller
risk**, or per connection with `auto_freeze` on `POST` and `PUT /accounts` (`true`, `false`, or
`null` to follow your platform). Turned on, reaching `high` freezes the seller at once (`by: auto`),
`account.risk_high` carries `frozen: true`, and `account.frozen` is sent.
| Event | When | `data` |
| ------------------ | ---------------------------------------- | --------------------------------------------------------------------------------------------------- |
| `account.frozen` | Frozen by you, by Wajub, or by the score | `account`, `by`, `reason`, `block_payments` (the block in force), `frozen_at`, `still_frozen: null` |
| `account.unfrozen` | A freeze lifted | `account`, `by`, `reason`, `block_payments: false`, `frozen_at: null`, `still_frozen` |
`by` is who acted, `reason` is always there (`null` without one). On `account.unfrozen`,
`still_frozen` is the freeze that stays when only one of two was lifted, `null` when the seller is no
longer frozen: read it before you treat the seller as unfrozen. The body is the same whether the
freeze was set through the API, in the Dashboard, by the score or by Wajub.
```json title="Wajub lifted its freeze: yours stays"
{
"account": "acc_Gt6yU3nE8rM1kS5vX9bQ",
"by": "wajub",
"reason": null,
"block_payments": false,
"frozen_at": null,
"still_frozen": {
"by": "platform",
"reason": "Orders never delivered",
"block_payments": true,
"since": "2026-11-18T10:00:00+00:00"
}
}
```
A freeze made through the API or by the score arrives in the usual envelope; one made in the
Dashboard, or by Wajub, arrives as a [Sync lifecycle delivery](https://docs.wajub.com/developer-tools/webhooks/events#sync-lifecycle-deliveries).
## In the Dashboard
**Sync, Seller risk** lists your active Lite and Relay sellers by score, with their first two
reasons and their state, and lets members who manage payouts freeze and unfreeze them. Each seller's
page shows their score, its reasons, their delay and automatic freeze setting, and the history of
their score and freezes. Your sellers read "payouts suspended by your platform" in their portal:
Wajub's name is not shown there.
- [Paying sellers](https://docs.wajub.com/sync/payouts): What holds a payout back, and why.
- [Freeze a seller](https://docs.wajub.com/api/subaccounts/freeze): The endpoint specification.
- [Analytics](https://docs.wajub.com/sync/analytics): Your sellers at risk, next to your volume and commission.
---
# Split payments
URL: https://docs.wajub.com/sync/split-payments
> Installment splitting, per-connection commission, and one payment shared between several sellers.
Three unrelated features hide behind the word split. This page says which is which.
| What you might mean | What it is called here | Where it lives |
| ------------------------------------------------- | ---------------------- | ---------------------------- |
| One payer pays in several instalments | Installment splitting | `POST /payments/{id}/splits` |
| Your platform keeps a cut of a merchant's payment | Per-connection pricing | The `X-Sync` header |
| One payment shared between several sellers | Shared payment | `shares` on `POST /payments` |
## Installment splitting
This has nothing to do with marketplaces. The same payer settles a single payment in two, three or
four tranches, charged in sequence.
`POST /payments/{id}/splits`
> [!WARNING]
> **Off by default, and Mobile Money only in live**
>
> Turn on **Manual Split Payments** in the [**Checkout — Currencies**](https://dashboard.wajub.com/settings/regional/currency) settings first, where you also choose
> the allowed counts and a minimum amount. In live, tranches are charged on Mobile Money channels
> only: card, bank and crypto answer `422`.
The call charges the payment like `POST /payments/{id}`, so it takes the same `channel` and `data`.
Pass `split_count` for equal tranches, or `split_amounts` for unequal ones. The two are
alternatives, and `split_amounts` must sum to what the payer pays: the payment's `amount`, or its
`amount_total` when the payer bears the fee.
```bash title="Three equal instalments"
curl https://api.wajub.com/payments/trx_CSUGajfv9xh0XQ5wu2lx/splits \
-H "Authorization: sk_test.xxxxxxxxxxxxxxxx…" \
-H "Content-Type: application/json" \
-d '{
"channel": "cm.mtn",
"data": { "phone": "+237670000000" },
"split_count": 3
}'
```
`split_count` accepts 2, 3 or 4 and nothing else. For uneven tranches, send the amounts yourself.
```bash title="Uneven instalments"
curl https://api.wajub.com/payments/trx_CSUGajfv9xh0XQ5wu2lx/splits \
-H "Authorization: sk_test.xxxxxxxxxxxxxxxx…" \
-H "Content-Type: application/json" \
-d '{
"channel": "cm.mtn",
"data": { "phone": "+237670000000" },
"split_amounts": [4000, 3000, 3000],
"split_currency": "XAF"
}'
```
Between two and four values, each at least 0.01 and in the currency's own precision: whole francs
in XAF and XOF. One payer, one payment, several charges.
### What each call does
The first call sets the plan and charges the first tranche. Each later call charges the next one:
send it with the same `channel` and `data`, and without `split_count` or `split_amounts`, or with
the same plan. A different plan is refused with a `422`. Once a payment has a plan, any charge of it,
`POST /payments/{id}` or the payment page, takes the next tranche, never the whole amount.
| The call | What you get back |
| ----------------------------------------------- | ------------------------------------------------------------------------------------------------- |
| Charges a tranche the operator confirms at once | `200`, the payment `partial`, or `succeeded` on the last tranche |
| Charges a tranche the payer has to approve | `202`, the payment `processing` until the payer answers |
| Arrives while a tranche is still with the payer | `202` naming that tranche. Nothing more is charged |
| Charges a tranche the operator declines | `402`, that tranche `failed`, the payment back to `partial`, or `pending` if nothing was paid yet |
Every answer carries the tranche in `transaction.split`: its `id`, `split_number`, `total_splits`,
`amount` and `status`. Equal tranches are whole units, and the last one takes what is left: 10 000
XAF in three is 3 333, 3 333 and 3 334.
A declined tranche is charged again by the next call. The tranches already paid stay paid:
`amount_collected` is what they add up to, and the payment never goes back to `pending` once
something was collected.
### When the money is yours
Each tranche is yours as it clears: it is credited to your balance at once, under the usual hold,
and pays its share of the Wajub fee then, in live as in sandbox. When the payer bears the fee, you
are credited your part of each tranche and the tranches add up to `amount`. The payment reaches
`succeeded` with its last tranche, and does not expire while it is `partial`. Each tranche sends
`payment.split.processing`, then `payment.split.succeeded` or `payment.split.failed`;
`payment.succeeded` comes once, with the last.
[The split events](https://docs.wajub.com/developer-tools/webhooks/events#payment-splits) describe the payload.
### When the payer stops paying
Nothing closes a `partial` payment on its own. You decide, with
[`POST /payments/{id}/close`](https://docs.wajub.com/api/payments/close) and an `outcome`:
| `outcome` | What happens |
| --------- | -------------------------------------------------------------------------------------------------------------------------------- |
| `keep` | The payment becomes `succeeded` for what was collected (`amount_paid`), already on your balance. The unpaid tranches are dropped |
| `refund` | The same, then a refund of everything collected is opened at once |
`payment.succeeded` is sent once, as for a payment paid in full; refunds and the `refunded` status
then count against what was collected. A close while a tranche is with the payer answers `409`
`payment_in_progress`, and `DELETE /payments/{id}` refuses a payment with tranches already paid
(`409` `payment_partly_paid`): close it instead.
Each tranche has to fit under the per-transaction ceiling of Mobile Money. A single charge above it
is refused with a `422`, in live and in sandbox: nothing splits a payment on its own, tranches are
your choice. A refund on a payment paid in tranches is not instant: expect it to take longer than
an ordinary refund.
## Per-connection pricing
This is the marketplace one. A payment attributed to a connection belongs to that merchant, and
your platform is credited the commission configured on the connection.
```bash title="A payment your platform earns a commission on"
curl https://api.wajub.com/payments \
-H "Authorization: sk.xxxxxxxxxxxxxxxx…" \
-H "X-Sync: acc_7Yh2MpL4tRb3nP8sZcXv" \
-H "Content-Type: application/json" \
-d '{
"amount": 50000,
"currency": "XAF",
"customer": { "email": "buyer@example.com" }
}'
```
There is no per-request override. The commission comes from the rules attached to the connection,
which the merchant accepted and which only change with their agreement, and the payload carries no
fee field at all.
[Account capabilities](https://docs.wajub.com/sync/account-types) covers how the rule is chosen and clamped.
## One payment, several sellers
A basket with three sellers can be **one payment**: the buyer authorises once, and Wajub shares the
money out when it succeeds. Create the payment with your own key, **without** `X-Sync`, and list the
parts in `shares`.
```bash title="One basket, two sellers and your own part"
curl https://api.wajub.com/payments \
-H "Authorization: sk.xxxxxxxxxxxxxxxx…" \
-H "Content-Type: application/json" \
-d '{
"amount": 30000,
"currency": "XAF",
"reference": "basket-8812",
"shares": [
{ "account": "acc_7Yh2MpL4tRb3nP8sZcXv", "amount": 18000, "reference": "basket-8812-a" },
{ "account": "acc_Gt6yU3nE8rM1kS5vX9bQ", "amount": 9000, "reference": "basket-8812-b" }
]
}'
```
| Rule | |
| ---------- | ------------------------------------------------------------------------------------------------------------------------------------------------------------------------------------------------------------------ |
| Each part | Names an active connection of yours, in any mode, with the `payments` capability and `payment_status: active`; once at most |
| The parts | Add up to the amount at most; what is left is your own part. Same currency as the payment. 50 parts at most |
| Collection | On the Wajub rail only: the money has to reach Wajub to be shared out. The rail takes no card yet: a card answers `422` with `error_code: card_not_available` ([The card reserve](https://docs.wajub.com/sync/payouts#the-card-reserve)) |
| Not with | `X-Sync`, a deferred payment, or payment in instalments |
| In live | A `lite` or `relay` part needs your approval for that mode ([Your exposure cap](https://docs.wajub.com/sync/payouts#your-exposure-cap)) |
| Held | `hold` holds every part until you release it, `shares[].hold` one part only ([Hold until delivery](https://docs.wajub.com/sync/holds)) |
Fifty parts are shared out as fast as one: each part is passed to its seller on its own, without
waiting for the others.
When the payment succeeds, each part goes to its seller as if they had sold it alone: Wajub's fee
is shared out in proportion to the parts (yours included), and your commission comes from that
connection's `pricing`, applied to the part.
| The part's mode | What the seller gets |
| ------------------ | --------------------------------------------------------------------------------------------------------------------------------------------- |
| `direct` or `lite` | The part, less its fee share and your commission, on their balance, under the sale's retention. A `lite` part also feeds the seller's reserve |
| `relay` | A due, paid out like any [Relay](https://docs.wajub.com/sync/relay) sale |
The payment is yours: its webhooks reach your platform, and it returns `shares` with each part's
`account`, `amount`, `commission`, `status` and `refunded`. A seller sees their own part only.
### Refunding a shared payment
`POST /refunds` takes `shares`, the parts to refund: `[{ "account": "acc_…", "amount": 5000 }]`.
Without it, a refund is shared out over every part in proportion, yours included; `shares: []` refunds
your own part alone. A part is never refunded beyond what it received. A refund that **empties the
payment**, without `amount` or for everything left to refund, takes back from each part everything it
still has, even a part already refunded in part, so no seller keeps a share of what the buyer gets
back: the units the earlier refunds in proportion rounded down included, so every part ends at zero.
It does so only when no other refund of the payment is still waiting to be shared out, and when what
the parts still hold fits in the refund, those roundings aside; otherwise it is shared out in
proportion. A refund never takes back from the sellers more than its own amount, beyond those
roundings: one minor unit per part, at most, for each earlier refund or lost dispute.
Each part comes back by the rules of its mode: your commission returns first, then the seller's
balance; on a `lite` part you cover what the seller no longer holds; on a `relay` part the due is
reduced, or what the seller owes is recorded. **A refund leaves only if every part it touches is
covered**: otherwise nothing is sent, and it waits with `insufficient_balance` or
`platform_balance_insufficient`, as any refund. A lost dispute is shared out in proportion and always
debited.
| `error_code` (`422` unless stated) | When |
| ----------------------------------------------------------------------------------------------------------------------------------- | --------------------------------------------------------------------------------------------------------------- |
| `too_many_shares`, `share_account_duplicated`, `shares_exceed_amount`, `share_currency_mismatch` | The list itself is wrong |
| `share_account_not_found`, `share_account_not_active`, `share_account_not_allowed` | A part names a connection that is not yours, not active, or without `payments` |
| `shares_with_sync_header`, `shares_with_deferred` | Combined with what it cannot be |
| `shares_with_installments` | `POST /payments/{id}/splits` on a shared payment: it cannot be paid in instalments |
| `sync_mode_not_approved` (`403`) | In live, a `lite` or `relay` part without your approval for that mode |
| `account_frozen` (`403`) | A part for a seller you froze with `block_payments` ([Seller risk](https://docs.wajub.com/sync/seller-risk#freezing-a-seller)) |
| `hold_not_available_for_direct`, `hold_max_days_exceeded` | A `hold` on a `direct` part, or longer than the account allows ([Hold until delivery](https://docs.wajub.com/sync/holds#hold-a-sale)) |
| `wajub_rail_required` (`409`) | The Wajub rail is not open on your account |
| `card_not_available` | The payment is charged with a card, or a wallet counted as one, which the Wajub rail does not collect yet |
| `refund_share_not_found`, `refund_share_exceeds_remaining`, `refund_shares_exceed_amount`, `refund_platform_part_exceeds_remaining` | A refund's `shares` do not match the payment |
| `payment_not_shared` | A refund's `shares` on a payment that has none |
| `shares_not_distributed` (`409`) | The payment's parts are not shared out yet: retry in a few minutes |
## Paying a merchant out is a third thing again
Neither feature moves money to a merchant's bank or wallet. Funds from a connected payment settle
into that merchant's own Wajub balance, and how they get out depends on the mode: a `direct` merchant
withdraws for themselves, a `lite` merchant is paid automatically by Wajub, and a `relay` marketplace
pays its sellers in bulk. All three are on [Paying sellers](https://docs.wajub.com/sync/payouts). Your commission,
meanwhile, has already moved to your own balance without any call on your part, and can be withdrawn
once the sale it came from clears retention.
- [Sync](https://docs.wajub.com/sync): What a connection is and where it stops.
- [Account capabilities](https://docs.wajub.com/sync/account-types): How the commission is computed and clamped.
- [Quickstart](https://docs.wajub.com/sync/quickstart): Create a connection and take your first payment on it.
- [Transfers & Payouts](https://docs.wajub.com/payouts/transfers): Move money out of a balance, connected or your own.
---
# Transfers & Payouts
URL: https://docs.wajub.com/payouts
> Send money out, what it leaves from, and what has to be true first.
This section covers money going out: to a supplier, a driver, a seller on your marketplace, or to
your own account. A payout spends funds you already hold, which is why it passes through more checks
than anything else on the API.
## What you can use
| What you need | Where |
| ----------------------------------------------------------------- | ------------------------------------------------------------------------- |
| Pay one person or business | [Transfers](https://docs.wajub.com/payouts/transfers) |
| Keep a list of people you pay often | [Beneficiaries](https://docs.wajub.com/payouts/beneficiaries) |
| Know what is available to send, and what has already been settled | [Balance & settlements](https://docs.wajub.com/payouts/balance) |
| Pay many people at once | [`POST /transfers/batch`](https://docs.wajub.com/api/transfers/batch), up to 500 lines per call |
| Pay the same person on a schedule | **Settings, Transfers, Automation**, from the Growth plan |
A batch takes up to 500 payouts in one call, on every plan. Its `Idempotency-Key` header is
required, and each line carries a `reference` unique within the batch. Every line passes the same
checks as a single payout, the currency's bounds included, and names its beneficiary by `id` only: a
phone number or an e-mail is refused with `beneficiary_not_found`. Each line succeeds or fails on its
own, so one seller without a verified destination does not stop the others.
Two things refuse a batch whole, before any line runs. A malformed line, such as a missing field, a
`currency` that is not three letters or a `reference` repeated in the batch, answers `422` for the
whole call, with the faulty line named in `errors` (`transfers.3.amount`). The other is a missing
or empty `Idempotency-Key` header. Keep that key to letters, digits and `. _ : -`.
A recurring transfer pays one beneficiary a fixed amount every hour, day, week or month. Each run
creates an ordinary payout, through every check below, and a paused schedule can be resumed.
## Where the money leaves from
Wajub holds a balance per currency for your account. Collections land in it, payouts draw from it,
and nothing reaches a recipient that the balance did not cover first.
`GET /balance`
One call answers for the environment your key belongs to, and splits the money into figures that do not
mean the same thing.
```json title="Response · 200 OK"
{
"code": 200,
"status": "OK",
"message": "Balance retrieved",
"balance": {
"total": 1325000,
"available": 1250000,
"pending": 75000,
"reserved": 0,
"credit": 0,
"currency": "XAF",
"environment": "live"
}
}
```
`available` is the only figure a payout can draw on. `pending` is money collected but not yet
settled to you, and `reserved` is money already committed to payouts in flight. Pass `?currency=`
to read the same balance converted into another currency.
> [!WARNING]
> **The balance is not real time**
>
> A payout you created a minute ago may not have moved `available` yet. Do not use it as a running
> total inside a loop: check it once before a batch, then trust the transfer calls themselves, which
> fail on insufficient funds rather than overdrawing.
## What a payout costs
On the Wajub rail, a payout is charged **from 1 %**, depending on the country and the channel, and
your plan can lower that rate. A payout to another Wajub account (`wajub`) is free, and a bank transfer (`wire`)
carries a fixed fee instead of a rate, see [Fees & pricing](https://docs.wajub.com/payouts/balance/fees). The fee is
charged when the transfer completes, but it is held with the principal at creation: sending
10 000 XAF reserves 10 100 XAF, not 10 000.
Routing to your own provider account changes that. A payout that leaves through a provider you
brought yourself is not funded from your Wajub balance, so it carries no Wajub fee and reserves
nothing. The provider bills you directly on its own terms.
## What has to be true before a payout executes
This is the part worth reading before your first live transfer. Creating one runs through a series
of checks, each of which answers `422` with its own message and its own `error_code` rather than a
generic failure. Branch on the code; the full list is in [Errors](https://docs.wajub.com/api/errors#payout-refusals).
| Check | What it looks at | `error_code` |
| ---------------------------- | ------------------------------------------------------------------------------------------------------------------------------------------------------------------------------ | --------------------------------------------------------------------------------------------------------------------- |
| Amount bounds | The minimum and maximum configured for that currency | `amount_out_of_range` |
| The beneficiary | Resolvable on your account, active, and carrying a payment method | `beneficiary_not_found`, `beneficiary_inactive`, `beneficiary_missing_payment_method` |
| The channel | A payout channel: Mobile Money, a Djamo wallet or another Wajub account through the API, and a bank account through a [payout account](https://docs.wajub.com/payouts/beneficiaries#payout-accounts) | `channel_not_supported` |
| Payouts paused platform-wide | Payouts suspended across Wajub, for everyone | `payouts_suspended` |
| Account restrictions | An active `transfers` restriction on your account | `merchant_restricted` |
| Negative balance | No payout leaves while `available` is below zero, from any currency | `negative_balance` |
| Sync Lite reserve | A Lite merchant's payout cannot dip into the slice held against refunds | `reserve_held` |
| Refund on its way | The amount of a refund sent and not yet debited stays on the balance | `refund_in_flight` |
| Sync platform reserve | A Sync platform's withdrawal cannot take its available balance below the reserve held against what Wajub paid its Lite sellers | `platform_reserve` |
| Destination verification | The payment method has been verified | `beneficiary_not_verified` |
| Destination cooling-off | A destination added or changed moments ago cannot be paid until its `payout_allowed_after` has passed | `beneficiary_cooling_off` |
| Your own daily cap | The count and the amount you set in Transfer security settings. Failed and cancelled payouts do not count | `daily_count_limit_exceeded`, `daily_amount_limit_exceeded` |
| The platform ceiling | A hard limit by KYC tier, which you cannot raise yourself | `single_payout_limit_exceeded`, `daily_payout_limit_exceeded`, `monthly_payout_limit_exceeded`, `payouts_not_enabled` |
| Channel ceiling | The per-transfer limit of that operator | `amount_above_channel_limit` |
| Channel availability | Payouts to that channel are not [temporarily unavailable](#temporarily-unavailable) | `channel_unavailable` |
| Provider availability | A payout route exists for that channel and currency | `no_provider` |
| Funds | `available` covers the amount plus the fee, on a Wajub route | `insufficient_balance` |
The order matters less than the principle: nothing is reserved until every check has passed, and a
transfer that fails one of them never existed. One thing does outlive the refusal: a beneficiary
you passed inline, as an object, is created before the checks run. It stays on your account and in
`GET /beneficiaries`, and `beneficiary.created` is sent for it. A retry with the same channel and number pays that same
beneficiary, under the name it was first created with, rather than creating a second one.
> [!CAUTION]
> **Your first live payout does not execute immediately**
>
> A payout is held for review, rather than sent, when it is one of your account's first live
> payouts, when its amount crosses a threshold you set yourself, when your account asked for
> manual confirmation of its own payouts, or when it takes your account past its hourly number or
> amount of payouts (a batch counts as one payout). Wajub can also hold a payout for its own checks.
> The lines of your first batch are reviewed together, in one decision. A held
> transfer is created with status `review`, its funds are reserved, and it waits for Wajub to
> resolve it. Plan the first one, and do not run a launch
> through an unattended loop.
The two thresholds that are yours live under **Settings, Transfers**: manual confirmation, with an
optional amount below which it does not apply, on the General tab, and the review amount and the
daily count and amount caps on the Security tab. A hold they trigger is still resolved by Wajub,
not from your own Dashboard.
The same Security tab carries two switches that apply to payouts started from the Dashboard, on
every plan. To protect API payouts, use [restricted keys and an API IP
allow-list](https://docs.wajub.com/best-practices/security#narrow-the-key-before-you-need-to). **Require 2FA** refuses a
payout unless the member entered a security verification code and passed their second factor in the
last 30 minutes.
**IP whitelist** refuses every payout as long as the team has no Dashboard IP list: the list itself
lives in [organisation security](https://docs.wajub.com/dashboard/settings/security#restrict-ip-addresses), and this
switch only makes sure it exists. Both settings are edited in live, by the owner or a member with
`manage_settings`.
## Creating one
`POST /transfers`
A transfer takes an amount, a currency, and a recipient. The recipient is either a beneficiary you
registered earlier, passed as its id, or the details themselves, in which case the beneficiary is
created as part of the call.
**Pay a beneficiary you already have**
```bash
curl https://api.wajub.com/transfers \
-H "Authorization: sk.xxxxxxxxxxxxxxxx…" \
-H "Content-Type: application/json" \
-H "Idempotency-Key: payout-892" \
-d '{
"beneficiary": "ben_7Kq2mX9vL4tRb3nP8sZc",
"amount": 10000,
"currency": "XAF",
"description": "Supplier payment #892"
}'
```
```javascript
const transfer = await wajub.transfers.create({
beneficiary: 'ben_7Kq2mX9vL4tRb3nP8sZc',
amount: 10000,
currency: 'XAF',
description: 'Supplier payment #892',
}, { idempotencyKey: 'payout-892' });
console.log(transfer.id, transfer.status);
```
```python
from wajub import RequestOptions
transfer = wajub.transfers.create({
"beneficiary": "ben_7Kq2mX9vL4tRb3nP8sZc",
"amount": 10000,
"currency": "XAF",
"description": "Supplier payment #892",
}, RequestOptions(idempotency_key="payout-892"))
print(transfer.id, transfer.status)
```
```php
use Wajub\RequestOptions;
$transfer = $wajub->transfers->create([
'beneficiary' => 'ben_7Kq2mX9vL4tRb3nP8sZc',
'amount' => 10000,
'currency' => 'XAF',
'description' => 'Supplier payment #892',
], new RequestOptions(idempotencyKey: 'payout-892'));
echo $transfer->id;
```
```go
transfer, err := client.Transfers.Create(context.Background(), map[string]any{
"beneficiary": "ben_7Kq2mX9vL4tRb3nP8sZc",
"amount": 10000,
"currency": "XAF",
"description": "Supplier payment #892",
}, &wajub.RequestOptions{IdempotencyKey: "payout-892"})
```
The answer is `201 Created` and the transfer comes back as `processing`, already on its way. Both
environments behave the same way here: a sandbox transfer draws on your sandbox balance and settles
itself a couple of seconds later, with the outcome decided by the recipient's test number.
> [!NOTE]
> **There is no cancel**
>
> The API creates, lists and retrieves transfers. It does not cancel them. Once a transfer is
> created it runs to `succeeded` or `failed`, and the only things that pause one are a review hold,
> which you do not control, and a payment method [temporarily unavailable](#temporarily-unavailable).
> Treat `POST /transfers` as irreversible and put your checks before it, not after.
### When a payment method is temporarily unavailable
An operator can be unavailable on Wajub's side for a while. If you connected a provider of your own
for that channel, it pays out instead. Otherwise Wajub does one of two things with a new payout:
- **It keeps it.** The transfer is created as usual, `processing`, its amount reserved, and
`metadata.rail_queue.queued_at` says since when it waits. It leaves on its own once the operator
is back (`metadata.rail_queue.released_at`), and the usual webhooks follow. Until then you can
cancel it from the Dashboard, which makes its amount available again; your transfer timeout still
applies.
- **It refuses it** with `422` and `error_code: channel_unavailable`. Nothing is reserved: retry
later, or use another channel.
## The resources
| Method | Endpoint | For |
| --------------------------- | --------------------------------------------------------- | --------------------------------------------- |
| `POST` `GET` | [`/transfers`](https://docs.wajub.com/api/transfers) | Create, list and retrieve a payout |
| `POST` `GET` `PUT` `DELETE` | [`/beneficiaries`](https://docs.wajub.com/api/beneficiaries) | Keep the people you pay |
| `GET` | [`/balance`](https://docs.wajub.com/api/balance) | What is available to send |
| `POST` | [`/transfers/batch`](https://docs.wajub.com/api/transfers/batch) | Pay up to 500 people in one call |
| `POST` | [`/beneficiaries/{id}/verify`](https://docs.wajub.com/api/beneficiaries/verify) | Check a wallet belongs to the name you expect |
To check the name on a wallet, use `POST /beneficiaries/{id}/verify`: it asks the operator in live
mode and returns what it holds, for information.
[Checking the name on a wallet](https://docs.wajub.com/payouts/beneficiaries/create#checking-the-name-on-a-wallet)
All of them need the secret key. A public key is refused, and so is a browser: payout routes are
the most tightly held on the API. If you are paying out on behalf of a connected account, the
`X-Sync` header selects it, which [Sync](https://docs.wajub.com/sync) covers.
- [Transfers](https://docs.wajub.com/payouts/transfers): The payout itself: statuses, routing, and what a failure means.
- [Transfers Quickstart](https://docs.wajub.com/payouts/transfers/quickstart): Send your first payout in sandbox, then live.
- [Beneficiaries](https://docs.wajub.com/payouts/beneficiaries): Register a recipient once and pay them by id.
- [Balance & settlements](https://docs.wajub.com/payouts/balance): What is available, what is pending, and what the fees were.
- [Idempotency](https://docs.wajub.com/api/idempotency): The header that makes a retried payout safe.
---
# Fees & pricing
URL: https://docs.wajub.com/payouts/balance/fees
> What Wajub charges on a collection and on a payout, and where to read it back.
Wajub charges a percentage, on both legs, and only on an operation that succeeded. A payment that
fails costs nothing, and so does a payout that never reached its recipient.
There is no fixed component on a Wajub fee and no minimum. The rate comes from your plan, and the
whole thing is a straight multiplication, rounded to the precision of the currency. In `XAF`, whose
precision is zero, a fee is a whole number of francs.
## What a collection costs
The rate is read from your plan, per channel. These are the rates configured today.
| Plan | MTN and Orange Cameroon | Every other channel |
| ------------- | ----------------------- | ------------------- |
| Pay as you go | 2.0 % | 2.0 % |
| Growth | 1.7 % | 2.0 % |
| Scale | 1.5 % | 2.0 % |
| Enterprise | 1.2 % | 2.0 % |
The second column is not a rounding of the first. The plan rate applies to `cm.mtn` and `cm.orange`
only; every other channel, Express Union and every country outside Cameroon included, is charged the
default **2 %** whatever your plan. Ask before you model margins on a
corridor outside those two.
> [!NOTE]
> **These come from the platform, not from this page**
>
> The rates above are what the plans hold right now, not a commercial commitment. Your own agreement
> can replace any of them, and the Konsole shows what is actually applied to your account.
## Who pays it
By default the merchant does: the customer is charged the amount, you are credited the amount, and
the fee is debited from you afterwards.
Passing `bearer` on `POST /payments` moves it. With `"bearer": "customer"` the payer is charged the
amount plus the fee, and you are credited the full amount you asked for. The fee is the difference,
and it never touches your balance.
```json title="Let the customer carry the fee"
{
"amount": 10000,
"currency": "XAF",
"channel": "cm.mtn",
"bearer": "customer"
}
```
The field accepts `merchant` or `customer` and nothing else. Leave it out and you get `merchant`.
## Which bucket the fee comes out of
A collection fee is not subtracted from the credit. The payment credits your balance in full, then a
separate debit takes the fee out, and that debit lands in **the same bucket the payment credited**.
That matters because a fresh collection sits in `pending` while its retention hold runs. Its fee is
taken from `pending` too, so a fee can never push `available` negative for an account whose money
has not cleared yet. [Balance](https://docs.wajub.com/payouts/balance) covers the buckets and the hold.
## What a payout costs
**From 1 %** on Mobile Money and the other operator channels, depending on the country and the
channel: the rate of each one is in your Wajub rail application. Two channels are priced
differently.
| Channel | Fee |
| --------------------------------- | ----------------------------------------------------------------------------------------------- |
| `wajub`, to another Wajub account | None. The money never leaves Wajub |
| `wire`, a bank transfer | A fixed fee per transfer instead of a percentage. Processed within 48 business hours by default |
The timing is the part that catches people. The fee is estimated and reserved with the principal the
moment you create the transfer, so sending 10 000 XAF puts 10 100 XAF out of reach immediately. It is
only charged for real when the payout reaches `succeeded`.
| The payout ends | The fee |
| --------------- | ---------------------------------------------------------------- |
| `succeeded` | Charged, and the reservation settles |
| `failed` | Never charged. Principal and estimate both return to `available` |
> [!WARNING]
> **A payout on your own provider carries no Wajub fee**
>
> The Wajub fee applies to payouts Wajub routes and funds. One that leaves through a provider you brought
> yourself is not funded from your Wajub balance, so it reserves nothing and is charged nothing
> here. That provider bills you directly, on its own terms.
## Sandbox charges 2 % on both legs
The sandbox has its own flat rate and it is not the live one. Both a sandbox collection and a
sandbox payout are charged **2 %**, which makes a sandbox payout twice as expensive as the live one
it is supposed to be rehearsing.
> [!CAUTION]
> **Do not port sandbox arithmetic to production**
>
> A sandbox payout fee is also charged on top of the amount rather than taken out of it, and it is
> not given back when the payout fails. Both differ from live. If you are writing the code that
> computes what a payout will cost you, write it against the live rules and test the numbers
> separately.
## Reading a fee back
There is no fees endpoint. Nothing on the API lists them, retrieves one, or exposes a total, and
there is no `fee` field on a payment or a transfer either.
The only programmatic surface is the `fee.charged` webhook, which fires once per fee, as it is
charged. A payment whose fee the payer paid, with `bearer` set to `customer`, sends none: nothing
was charged to you.
```json title="fee.charged, the data object"
{
"id": "9f4c2b17-6e30-4a58-b2d1-77a0c9e51f84",
"type": "platform_fee",
"amount": 100,
"currency": "XAF",
"percentage": 1,
"fixed_amount": null,
"applied_to": "transfer",
"created_at": "2026-09-12T14:31:06+00:00"
}
```
Four things about that payload are worth knowing before you build on it.
- `id` (string): A bare UUID, not a prefixed Wajub id. Fees are the exception to the `po_` and `pay_` convention.
- `percentage` (number): The rate as a percent, so `1` means one percent. Not a fraction.
- `applied_to` (string): `transaction` for a collection, `transfer` for a payout. A collection is not called a payment here.
- `fixed_amount` (null): Always `null` on a Wajub fee. Only a platform commission can carry one, see below.
The fourth thing is a gap rather than a quirk, and it will shape how you reconcile.
> [!CAUTION]
> **A payout fee does not say which payout**
>
> When the fee belongs to a collection, the event carries a `payment` object with its id. When it
> belongs to a payout, it carries nothing of the sort: you get an amount, a currency and
> `applied_to: "transfer"`, with no way to attribute it to a transfer from the event alone. Match on
> the amount and the timestamp against your own payout records, or reconcile from the Konsole.
## If you are a platform
A connected account's payment can carry a second, entirely separate fee: your own commission, taken
from the Sync pricing rule you set on that account. Its `type` is `sync_fee` rather than
`platform_fee`, and it is the one fee on the platform that can have both a percentage and a fixed
component.
It produces two events rather than one, so both sides see the same money.
| Event | Goes to | Means |
| -------------- | --------------------- | ---------------------------------------------- |
| `fee.charged` | The connected account | It was charged your commission |
| `fee.received` | You | You earned it, with the `account` it came from |
Wajub's own `platform_fee` is charged on top of that, independently. [Sync](https://docs.wajub.com/sync) covers the
pricing rules and how a connected account is set up.
- [Balance & settlements](https://docs.wajub.com/payouts/balance): The buckets a fee moves between, and the retention hold.
- [Transfer reference](https://docs.wajub.com/payouts/transfers): What a payout reserves at creation, and what releases it.
- [Webhook events](https://docs.wajub.com/developer-tools/webhooks/events): The full catalogue, including the fee events.
- [Sync](https://docs.wajub.com/sync): Connected accounts, pricing rules, and your own commission.
---
# Balance & settlements
URL: https://docs.wajub.com/payouts/balance
> What you hold, what you can send today, and when the rest becomes available.
Only one figure on your balance can pay someone, `available`: the rest is money you hold but cannot
spend yet. This page explains each figure and when collected money becomes available.
## One call
`GET /balance`
The secret key is required. A public key answers `406 Private Key Required`, like every other payout
route. There are no other balance endpoints: no history, no per-wallet read, no adjustment.
**Read the balance**
```bash
curl https://api.wajub.com/balance \
-H "Authorization: sk.xxxxxxxxxxxxxxxx…"
```
```javascript
const balance = await wajub.balance.retrieve();
console.log(balance.available, balance.currency);
```
```python
balance = wajub.balance.retrieve()
print(balance["available"], balance["currency"])
```
```php
$balance = $wajub->balance->retrieve();
echo $balance['available'];
```
```go
balance, err := client.Balance.Retrieve(context.Background())
if err != nil {
log.Fatal(err)
}
log.Println(balance["available"], balance["currency"])
```
The response carries these figures.
```json title="Response · 200 OK"
{
"code": 200,
"status": "OK",
"message": "Balance retrieved",
"balance": {
"total": 1325000,
"available": 1250000,
"pending": 75000,
"reserved": 0,
"disputed": 0,
"currency": "XAF",
"environment": "live"
}
}
```
The first five answer different questions about the same money, and the last two say how it is
being expressed. Ignore any other field.
- `total` (number): Everything you hold. `available` plus `pending` plus `reserved` plus `disputed`.
- `available` (number): Settled, past its hold, and spendable. The only figure a payout can draw on. It goes below zero when a refund, a chargeback or a fee lands after the money was paid out, and no payout leaves until new collections cover it.
- `pending` (number): Collected and settled, still inside its retention hold. Becomes available on a clock, see below.
- `reserved` (number): Committed to payouts already in flight. Not yours to spend twice.
- `disputed` (number): Held against open disputes, taken from `available` when a dispute opens. It returns to `available` if you win, and leaves if you lose.
- `currency` (string): The currency every figure above is expressed in. Not a wallet, a unit.
- `environment` (string): `live` or `sandbox`.
Amounts are in the major unit, the same convention as a transfer. `1250000` in `XAF` is one million
two hundred fifty thousand francs, not twelve thousand five hundred.
## It is not one wallet, it is all of them
`GET /balance` adds up what you hold in every currency, converted into a single one.
So `currency` is a unit of presentation, not a selection. Passing `?currency=XOF` does not show you
your XOF wallet, it shows you everything you own expressed in XOF. The underlying money does not
move and no wallet is excluded.
```bash title="The same money, expressed in another currency"
curl "https://api.wajub.com/balance?currency=USD" \
-H "Authorization: sk.xxxxxxxxxxxxxxxx…"
```
Only cURL is shown because the SDKs take no argument here: `balance.retrieve()` has no parameters in
any of them. Leave the query out and you get the currency set on your account, which is `XAF` until
someone changes it, whatever country you operate from.
`currency` takes your account's currency, or a currency Wajub has an exchange rate for, in upper or
lower case. Any other code, a typo or a currency Wajub cannot convert to, is a `422` on `currency`.
> [!CAUTION]
> **The conversion is indicative**
>
> It is not a dealt FX price: use it to read a number, never to settle an account.
## Why available is smaller than total
A collection does not land as spendable money. It is credited to `pending` and held there for a
fixed window before it moves.
The window is computed per payment, from the channel it came in on.
| Channel | Base hold |
| --------------------------------------------------------- | --------- |
| Mobile Money, including `cm.mtn`, `cm.orange` and `cm.eu` | 24 hours |
| Bank | 48 hours |
| Card | 72 hours |
| Crypto | 72 hours |
The hold can be shorter or longer than that base depending on your account's risk profile, and it
never exceeds seven days. Your plan, or an agreement with Wajub, can replace the base outright.
## What reserved means
`reserved` is money committed to payouts that have not finished. Creating a transfer moves the
amount, plus an estimate of the fee, out of `available` and into `reserved` before the operator is
ever contacted.
It leaves `reserved` on the outcome, and which way it goes decides where it lands. On
`transfer.succeeded` it is debited for real and `total` drops. On `transfer.failed` it returns to
`available` and nothing was charged. A payout held for review keeps its funds reserved for as long
as the hold lasts, which is the one case where `reserved` can sit still for hours.
## The figure is not real time
A payout you created a minute ago may not have moved `available` yet.
That makes the balance the wrong instrument for a loop. Read it once before a batch to know roughly
where you stand, then let the transfer calls themselves be the authority: a payout that cannot be
funded is refused at creation with its own `422`, rather than overdrawing you.
> [!NOTE]
> **Do not gate each payout on a balance read**
>
> Checking the balance before every call in a loop of fifty payouts gives you fifty stale answers
> and burns your rate limit. Check once, send, and handle the funding error if it comes.
## Sandbox is flat
In sandbox there is no hold, no reservation and no settlement: `total` and `available` carry the same
figure.
It also starts empty. There is no top-up endpoint and no button in the Konsole. The only thing that
credits a sandbox balance is a sandbox payment that succeeds, which is why
[Transfers Quickstart](https://docs.wajub.com/payouts/transfers/quickstart) begins by collecting money before it sends
any.
## Watching it change
Rather than polling, subscribe to `balance.updated`. It fires on every movement, and its payload is
the movement itself rather than the new balance object.
```json title="balance.updated"
{
"currency": "XAF",
"amount": 20000,
"direction": "credit",
"balance_type": "pending",
"balance_before": 1305000,
"balance_after": 1325000,
"reason": "succeeded",
"sandbox": false
}
```
`balance_type` says which bucket moved, `pending` or `available`, which is how you tell a fresh
collection from a hold that just expired. `direction` is `credit` or `debit`.
> [!NOTE]
> **Fees do not arrive as balance.updated**
>
> A fee debit is deliberately excluded from this event and published as `fee.charged` instead, so a
> reconciliation built only on `balance.updated` will find money missing. Subscribe to both.
## Settlement to your payout account
Automatic payouts are off until you turn them on, under **Settings, Transfers, Payout accounts**
([how](https://docs.wajub.com/dashboard/transfers/payout-accounts#automatic-payouts)). Until then your money stays on your
balance, and you send it with a [transfer](https://docs.wajub.com/payouts/transfers) when you choose.
Once they are on, every day at 02:00 UTC, Wajub pays out what you collected on the Wajub rail to
the [payout account](https://docs.wajub.com/payouts/beneficiaries#payout-accounts) you chose, one payout per currency. The
amount is what those payments credited, less the refunds, the fees and the lost disputes already
taken on them, and never more than your `available` balance can pay with the payout's fee on top:
money you already sent yourself is not sent again. Funds you added to your balance are never paid
out this way. Nothing is sent below 1 000 in the credited currency, and payments collected through
your own provider are never part of it. If the account you chose is archived or deactivated, nothing
is sent until you choose another one: Wajub never guesses where your money goes.
The first payout after you turn them on includes the sales already on your balance, up to what is
available.
## Adding funds, and reading your revenue
**Revenue, Fundings** tops up your live balance, with Mobile Money on `cm.mtn`, `cm.orange` or
`cm.eu`, or by bank transfer when it is offered: you send the transfer, then upload the proof on
the same page. The rest of **Revenue** reads your collected payments by channel and currency, the
processing costs Wajub charged, what went back to customers, and a balance report that shows what
is held for disputes and when recent collections should settle. It is live only, and exports to
PDF or Excel.
## There is no ledger endpoint
Nothing on the API returns the list of movements behind a balance. To reconcile a period, list the
resources that caused the movements, `GET /payments`, `GET /transfers` and `GET /refunds`, and add
the fees from your `fee.charged` events. The Konsole exports the same thing for accounting.
- [Fees & pricing](https://docs.wajub.com/payouts/balance/fees): What each operation costs, and when it is charged.
- [Transfer reference](https://docs.wajub.com/payouts/transfers): What a payout reserves, and what releases it.
- [Statuses & webhooks](https://docs.wajub.com/payouts/transfers/statuses-and-webhooks): The events that move the balance, and how to handle them.
- [Webhook events](https://docs.wajub.com/developer-tools/webhooks/events): The full catalogue, including balance and fee events.
---
# Create a beneficiary
URL: https://docs.wajub.com/payouts/beneficiaries/create
> Save a destination once: the channel that picks the operator, another Wajub account, and the name on a wallet.
`POST /beneficiaries`
- `channel` (string, required): The channel of the operator that serves the number, such as `cm.mtn` or `ke.mpesa`. In Cameroon only, `cm.mobile` lets the number decide: see below.
- `name` (string, required): The payee, as it should appear on the payout. Also used as the account holder name.
- `phone` (string): The number that receives the money. Required unless you send `account_number`. The field is `phone`, not `phone_number`.
- `account_number` (string): The destination, when it is not a phone number. One of the two is required, and `phone` fills this in when you omit it.
- `email` (string): Contact address for the payee. Not used to send anything today.
- `country_code` (string): Two letters. Defaults to the first two of the channel slug, so `cm.mtn` gives `CM`.
- `note` (string): Free text for your own reference, up to 1 000 characters.
- `metadata` (object): Your own key and value pairs, returned unchanged on every read.
Send it with the secret key. Beneficiary creation carries a tighter rate limit than the rest of the
API.
**Save a beneficiary**
```bash
curl https://api.wajub.com/beneficiaries \
-H "Authorization: sk.xxxxxxxxxxxxxxxx…" \
-H "Content-Type: application/json" \
-H "Idempotency-Key: beneficiary-amina" \
-d '{
"channel": "cm.mtn",
"name": "Amina Traoré",
"phone": "+237670000000"
}'
```
```javascript
const beneficiary = await wajub.beneficiaries.create({
channel: 'cm.mtn',
name: 'Amina Traoré',
phone: '+237670000000',
});
console.log(beneficiary.id);
```
```python
beneficiary = wajub.beneficiaries.create({
"channel": "cm.mtn",
"name": "Amina Traoré",
"phone": "+237670000000",
})
print(beneficiary.id)
```
```php
$beneficiary = $wajub->beneficiaries->create([
'channel' => 'cm.mtn',
'name' => 'Amina Traoré',
'phone' => '+237670000000',
]);
echo $beneficiary->id;
```
```go
beneficiary, err := client.Beneficiaries.Create(context.Background(), map[string]any{
"channel": "cm.mtn",
"name": "Amina Traoré",
"phone": "+237670000000",
}, nil)
```
The answer is `201 Created`. The `id` is what every payout takes, prefixed `ben_` in live and
`ben_test_` in sandbox, so the two environments can never be confused for one another.
```json title="Response · 201 Created"
{
"code": 201,
"status": "Created",
"message": "Beneficiary created successfully",
"beneficiary": {
"id": "ben_7Kq2mX9vL4tRb3nP8sZc",
"name": "Amina Traoré",
"phone": "+237670000000",
"country_code": "CM",
"note": "Retainer, paid on the 1st",
"sandbox": false,
"is_active": true,
"type": "standard",
"verified": true,
"payment_method": {
"id": "pm_4Dw8kR2xN6vQ",
"type": "mobile_money",
"name": "MTN Mobile Money"
},
"created_at": "2026-09-11T14:00:00+00:00",
"updated_at": "2026-09-11T14:00:00+00:00"
}
}
```
> [!NOTE]
> **The destination is not in the response**
>
> `payment_method` carries an id, a type and a label, never the number the money goes to. Nothing on
> the API reads a beneficiary's destination back, so if you need to show a payee where their money
> is being sent, keep your own copy at creation time.
> [!NOTE]
> **In sandbox, test numbers only**
>
> A sandbox beneficiary must already carry a test number when you create it: anything else answers
> `422` on `phone` and `account_number` with `Invalid sandbox test number. Use a Mobile Money test
> number, e.g. +237670000000 (success), +237670000001 (insufficient funds), +237670000002 (failure),
> +237670000003 (timeout), +237670000004 (canceled).` Load real numbers in live only. The test
> numbers of every operator are on [Test scenarios](https://docs.wajub.com/developer-tools/testing/test-scenarios).
## The channel decides the operator
Name the operator's channel: `ke.mpesa`, `eg.vodafone`, `cm.mtn`, `cm.orange`. Cameroon is the one
exception: when you hold a Cameroonian number but not its operator, pass `cm.mobile`, and the
operator, `cm.mtn` or `cm.orange`, is worked out from the number itself. No other country has a generic channel: `ke.mobile` or any other `{country}.mobile` is refused as an
unknown channel.
That resolution can fail, and it fails loudly rather than picking one at random.
```json title="Response · 422 when the number matches no operator"
{
"code": 422,
"status": "Unprocessable Content",
"message": "Could not determine operator from phone number for cm.mobile. Use a valid number of that country or specify the channel explicitly (e.g. cm.mtn, cm.orange). (and 1 more error)",
"errors": {
"channel": ["Could not determine operator from phone number for cm.mobile. Use a valid number of that country or specify the channel explicitly (e.g. cm.mtn, cm.orange)."],
"phone": ["Could not determine operator from this phone number for cm.mobile."]
}
}
```
If you already know the operator, name it. `cm.mobile` is there for the case where you hold a
Cameroonian number and nothing else.
> [!CAUTION]
> **The same destination twice returns the first one**
>
> Creation is keyed on the destination, not on what you send with it. If an active beneficiary
> already exists for that number on that channel, the call returns that one unchanged, with the same
> `201 Created` and the same success message as a real creation. The `name`, `email` and `note` you
> just sent are discarded. Read the `id` that comes back rather than assuming it is new, and never
> treat a `201` here as proof that a fresh record was written.
## Paying another Wajub account
When the person you pay already has a Wajub account, use the `wajub` channel and their 11-digit
account number. The money goes from your balance to theirs, with nothing to wait for.
```json title="A beneficiary on another Wajub account"
{
"name": "Boutique Ada",
"channel": "wajub",
"account_number": "12345678901"
}
```
The account has to exist, it cannot be your own, and it cannot be an account Wajub has frozen:
each is refused with `422` when you create the beneficiary, and a payout to an account frozen since
then fails on its own. Paying it is an ordinary transfer, with the same limits and the same statuses;
it simply succeeds at once, and it is **free**.
> [!NOTE]
> **In sandbox**
>
> A sandbox payout on this channel always succeeds: the test scenarios do not apply to it, so a
> failure on this channel can only be seen in live. The recipient's sandbox balance is never
> credited. Only live moves money between accounts.
## Checking the name on a wallet
`POST /beneficiaries/{id}/verify`
The call takes no body. It asks the operator whose name the wallet is registered under and compares
it with the name you declared.
On your own beneficiaries the answer is information. The beneficiary stays payable whatever comes
back, the call answers `200`, and `registered_name` carries the name the operator holds when it
matches, so you can show it to whoever is about to send the money. On a mismatch it carries only
its initials, `P*** N***`: the check confirms a payee, it does not tell who holds a number.
| `verification` | What happened | `registered_name` |
| -------------------- | --------------------------------------------------------------------------------------------------------------------------------------- | ------------------------------ |
| `verified` | The operator's name matches the one you declared | Present |
| `name_mismatch` | The operator holds the number under another name | Its initials only, `P*** N***` |
| `lookup_unavailable` | The operator could not be asked: it offers no lookup on this channel, it did not answer, or it does not know the number | Absent |
| `not_found` | The beneficiary has no payout destination to check. The call answers `422` with `This beneficiary has no payout destination to verify.` | Absent |
```json title="Response · 200 when the operator holds another name"
{
"code": 200,
"status": "OK",
"message": "The operator holds this number under another name. The beneficiary can still be paid.",
"verification": "name_mismatch",
"registered_name": "P*** N***",
"beneficiary": {
"id": "ben_7Kq2mX9vL4tRb3nP8sZc",
"name": "Amina Traoré",
"verified": true,
"verification": "name_mismatch"
}
}
```
The operators that answer today are MTN, Orange Money and Express Union in Cameroon, `cm.mtn`,
`cm.orange` and `cm.eu`, and a Wajub account, `wajub`. Every other channel returns
`lookup_unavailable`.
The beneficiary keeps the last outcome: `verification` carries it on every read, and is absent
until a check has run. `verified` is a different thing. It says whether Wajub will pay the
beneficiary in live mode, and here a `name_mismatch` does not change it. One exception: a beneficiary
left unverified, a seller the operator could not confirm while your account was on Relay for
instance, becomes payable when the names match, and is then paid under the name the operator holds.
A mismatch or an operator that cannot answer leaves it unpayable.
> [!NOTE]
> **In sandbox, the test number decides**
>
> No operator is asked from sandbox: the beneficiary's test number says what it would hold. On
> `cm.mtn`, `cm.orange` and `cm.eu`, a number ending in `000000` holds the name you declared
> (`verified`), one ending in `000002` another name (`name_mismatch`), and any other test number
> answers `lookup_unavailable`. See [Test scenarios](https://docs.wajub.com/developer-tools/testing/test-scenarios#name-check).
The call has a ceiling of its own, whatever your plan: 10 checks a minute and 200 a day per account
in live, 10 a minute in sandbox. Past it the answer is `429`. It is meant for your own payees,
checked as you add them, not for looking numbers up in bulk.
> [!NOTE]
> **Where the check decides instead of informing**
>
> On a Relay account, and on any account Wajub has set to require it, the same call is a gate. A
> beneficiary already verified is returned as it is, anything other than `verified` answers `422`,
> the beneficiary stays unpayable, and `registered_name` is not returned. In sandbox there is no
> operator to ask, so a beneficiary on such an account is created verified and the call answers
> `verified`: your handling of a `name_mismatch` can only be exercised in live. A payout account you
> added in the Dashboard is never verified by this call, on any account: verify it there.
- [Manage beneficiaries](https://docs.wajub.com/payouts/beneficiaries/manage): Change, list and delete them.
- [Providers & channels](https://docs.wajub.com/payouts/transfers/providers): The channels a payout can go to.
---
# Beneficiaries
URL: https://docs.wajub.com/payouts/beneficiaries
> Save a payout destination once, then pay it by id instead of by number.
A beneficiary is a saved payout destination: a name, a number, and the operator that serves it.
Create it once and pay it by id, without retyping the number on every payout.
> [!WARNING]
> **Mobile Money, Djamo or a Wajub account**
>
> The channel you pass has to be one of the fifty Mobile Money channels that can pay out, listed on [Providers &
> channels](https://docs.wajub.com/payouts/transfers/providers), a Djamo wallet (`ci.djamo` or `sn.djamo`), or `wajub` for
> another Wajub account. Anything else answers `422` with `The selected channel is invalid.` (`The
> selected beneficiary.channel is invalid.` for a beneficiary sent inline with a transfer). Bank destinations exist as [payout accounts](#payout-accounts), which you create in the
> Dashboard rather than through the API.
Two pages go further:
- [Create a beneficiary](https://docs.wajub.com/payouts/beneficiaries/create), the channel that picks the operator,
another Wajub account as a destination, and checking the name on a wallet.
- [Manage beneficiaries](https://docs.wajub.com/payouts/beneficiaries/manage), what you can change, retrieving, listing
and deleting them, and their statements.
## Paying one
Pass the `id` where a payout expects a recipient. Everything else about the transfer is unchanged.
`POST /transfers`
The body is the same one [Transfer reference](https://docs.wajub.com/payouts/transfers) documents, with a string where the
inline object would have been.
```json title="Pay a saved beneficiary"
{
"beneficiary": "ben_7Kq2mX9vL4tRb3nP8sZc",
"amount": 15000,
"currency": "XAF",
"description": "September retainer"
}
```
> [!NOTE]
> **Saving a payee does not make paying them safe**
>
> A beneficiary is a destination, not a guarantee against duplicates. Every `POST /transfers` still
> needs its own `Idempotency-Key`, saved payee or not, or a retried request pays twice. See
> [Idempotency](https://docs.wajub.com/api/idempotency).
## Payout accounts
A payout account is where your own money goes: the destination of the payouts you make to
yourself and, once you turn them on, of the daily
[automatic payouts](https://docs.wajub.com/payouts/balance#settlement-to-your-payout-account). You create it under **Settings, Transfers, Payout Accounts**, on Mobile Money, Djamo, a
Wajub account, or a bank account through `wire`. The API lists it as a `privileged` beneficiary,
and it starts unverified. Verifying it from the same page matches the account against the name its
operator holds. If the names cannot be matched, Wajub asks the account owner to confirm the
account. A `wire` payout carries a fixed fee and is processed within 48 business hours by default.
## What reaches your webhook
| Event | Fires when |
| ---------------------------------- | ---------------------------------------------------------------------------------------------------------------------------------------------------------------------------------------------------------------------------------------------------------------------------------------- |
| `beneficiary.created` | A record is actually written: by `POST /beneficiaries`, inline by `POST /transfers`, or as a payout account in the Dashboard. Not when [the same destination twice](https://docs.wajub.com/payouts/beneficiaries/create#the-channel-decides-the-operator) returns the first beneficiary, which creates nothing |
| `beneficiary.updated` | One of the five editable fields changes |
| `beneficiary.deleted` | A beneficiary is deleted |
| `beneficiary.receivable_recorded` | A debt is recorded against a beneficiary |
| `beneficiary.receivable_recovered` | A batch payout recovered part or all of a debt |
- [Transfers & Payouts](https://docs.wajub.com/payouts): Where payouts leave from, and what has to be true first.
- [Transfers](https://docs.wajub.com/payouts/transfers): The payout itself: statuses, routing, and failures.
- [Transfers Quickstart](https://docs.wajub.com/payouts/transfers/quickstart): Send your first payout to a beneficiary.
- [Idempotency](https://docs.wajub.com/api/idempotency): The header that makes a retried payout safe.
- [Beneficiaries API reference](https://docs.wajub.com/api/beneficiaries): Every field and the five endpoints.
---
# Manage beneficiaries
URL: https://docs.wajub.com/payouts/beneficiaries/manage
> What you can change, retrieving, listing and deleting beneficiaries, and their statements.
## What you can change, and what you cannot
`PUT /beneficiaries/{id}`
The update accepts five fields, and the destination is not among them.
| Field | Editable |
| --------------------------------------------------- | ----------------------------- |
| `name`, `email`, `country_code`, `metadata` | Yes |
| `phone` | Yes, as a contact detail only |
| `channel`, `account_number`, the payout destination | No |
> [!CAUTION]
> **Changing phone does not change where the money goes**
>
> The destination is fixed on the payment method attached when the beneficiary was created, and
> nothing on the API touches it afterwards. Updating `phone` rewrites the contact number on the
> record while the payout keeps going to the original one, with no warning and no difference in the
> response. To pay a different number, create a second beneficiary and use its id.
## Retrieving one
`GET /beneficiaries/{id}`
The same object creation returned, read back by its id. Use it to check a payee is still active
before a payout, and remember it still will not tell you the number the money goes to.
**Read a beneficiary back**
```bash
curl https://api.wajub.com/beneficiaries/ben_7Kq2mX9vL4tRb3nP8sZc \
-H "Authorization: sk.xxxxxxxxxxxxxxxx…"
```
```javascript
const beneficiary = await wajub.beneficiaries.retrieve('ben_7Kq2mX9vL4tRb3nP8sZc');
console.log(beneficiary.is_active);
```
```python
beneficiary = wajub.beneficiaries.retrieve("ben_7Kq2mX9vL4tRb3nP8sZc")
print(beneficiary["is_active"])
```
```php
$beneficiary = $wajub->beneficiaries->retrieve('ben_7Kq2mX9vL4tRb3nP8sZc');
echo $beneficiary->is_active;
```
```go
beneficiary, err := client.Beneficiaries.Retrieve(context.Background(), "ben_7Kq2mX9vL4tRb3nP8sZc")
if err != nil {
log.Fatal(err)
}
log.Println(beneficiary["is_active"])
```
A `404` covers three different situations without distinguishing them: the id does not exist, it
belongs to another account, or it belongs to the other environment. A `ben_test_` id read with a
live key is the common one.
## Listing them
`GET /beneficiaries`
Results come back newest first, twenty-five at a time unless you raise `per_page`, which caps at
100\. The envelope is `items` and `meta`, and passing `cursor` switches the pagination mode and the
shape of `meta` with it, the same way it does on transfers.
```json title="Response · 200 OK"
{
"code": 200,
"status": "OK",
"message": "Beneficiaries retrieved",
"items": [
{
"id": "ben_7Kq2mX9vL4tRb3nP8sZc",
"name": "Amina Traoré",
"type": "standard",
"is_active": true
}
],
"meta": { "current_page": 1, "per_page": 25, "total": 1 }
}
```
`search` matches the name, the email, the phone and the id.
`is_active` filters on the flag. `type` is the filter worth understanding.
| Type | Created by | Verified |
| ------------ | ------------------------------------------------------------------------------------ | -------------------------------------- |
| `standard` | Your own API calls | On creation, except on a Relay account |
| `privileged` | You, in the Dashboard, as a [payout account](https://docs.wajub.com/payouts/beneficiaries#payout-accounts) | Only once you verify it there |
The list returns `standard` only unless you ask otherwise, and that default is deliberate. A
privileged beneficiary can sit unverified, and a live payout to an unverified destination is refused
with `This beneficiary payment method has not been verified yet and cannot receive live payouts.`
Pass `type=privileged` or `type=all` when you genuinely want to see them.
Your own beneficiaries are marked verified the moment they are created, because the merchant
vouches for its own payees. That is what makes a standard beneficiary payable straight away. On a
Relay account, the seller's wallet is first matched against the name its operator holds, and
[Paying sellers](https://docs.wajub.com/sync/payouts) covers that case.
## Statements and debts
Three more routes hang off a beneficiary.
| Route | What it does |
| --------------------------------------------------------------------------------------------------- | ---------------------------------------------------------------------------------------------- |
| [`GET /beneficiaries/{id}/statement`](https://docs.wajub.com/api/beneficiaries/statement) | Everything paid to them over a period of up to a year, split into paid, in progress and failed |
| [`POST /beneficiaries/{id}/receivables`](https://docs.wajub.com/api/beneficiaries/create-receivables) | Record what they owe you back after a refund. `GET` on the same path lists those debts |
| [`POST /beneficiaries/{id}/receivables/{receivable}/settle`](https://docs.wajub.com/api/beneficiaries/receivables-settle) | Mark a debt as recovered outside Wajub |
A recorded debt sends `beneficiary.receivable_recorded`. With netting on for your account, the next
batch payout to that beneficiary is reduced by it and sends `beneficiary.receivable_recovered`.
[Paying sellers](https://docs.wajub.com/sync/payouts) walks through both.
## Deleting one
`DELETE /beneficiaries/{id}`
The answer is `200`. The record stops appearing in lists and can no longer be paid, while transfers
that already went to it keep pointing at it, so your history stays readable: their `beneficiary`
carries `deleted: true`, and `GET /beneficiaries/{id}/statement` still answers for it.
There is no restore on the API. Creating the same destination again gives you a new beneficiary with
a new `id`, not the old one back.
- [Create a beneficiary](https://docs.wajub.com/payouts/beneficiaries/create): Save a destination and check the name.
- [Beneficiaries API reference](https://docs.wajub.com/api/beneficiaries): Every beneficiary endpoint.
---
# Transfer reference
URL: https://docs.wajub.com/payouts/transfers
> The transfer object, the four calls, and what decides whether it executes.
A transfer sends money from your balance to someone else's wallet. This page is the reference for
the object and its calls; [Transfers & Payouts](https://docs.wajub.com/payouts) covers what a payout costs and what has to
be true before one executes.
Payouts need a secret key, or a restricted key whose permissions cover transfers. A publishable key
gets `406 Private Key Required`. A secret key used from a browser is refused; a restricted key used
from one sets off a security alert, and will be refused the same way later
([private keys in the browser](https://docs.wajub.com/api/authentication#private-keys-are-blocked-in-the-browser)).
## The four calls
There is nothing else. A transfer cannot be updated, cancelled or deleted through the API.
| Call | What it does |
| ----------------------- | ---------------------------------------------------------- |
| `GET /transfers` | List and filter your payouts |
| `POST /transfers` | Create one, and start it immediately |
| `POST /transfers/batch` | Create up to 500 in one call, each line started on its own |
| `GET /transfers/{id}` | Retrieve one |
`{id}` is the `po_` string the API returns. In sandbox it carries a `po_test_` prefix instead, which
is how you tell the two environments apart in a log.
## The transfer object
This is what the three single-transfer calls return, and what each accepted batch line carries
under `transfer`. `beneficiary` and `payment_method` are always present, a beneficiary deleted since
included.
```json title="Response · a payout that went through"
{
"id": "po_CSUGajfv9xh0XQ5wu2lx",
"reference": "supplier-892",
"provider_reference": "MP260912.1431.A47201",
"amount": 10000,
"currency": "XAF",
"description": "Supplier payment #892",
"reason": null,
"metadata": {
"vendor_id": "v_892",
"reservation": {
"amount": 10000,
"currency": "XAF",
"fee_estimate": 100,
"reserved_at": "2026-09-12T14:31:02+00:00"
}
},
"sandbox": false,
"status": "succeeded",
"complete": true,
"source": "api",
"provider": { "slug": "mtn_momo", "name": "MTN MoMo" },
"beneficiary": {
"id": "ben_7Kq2mX9vL4tRb3nP8sZc",
"name": "Aminata Diallo",
"phone": "+237670000000",
"email": null
},
"payment_method": { "id": "pm_3Nq8wR2kL5vT7yD4hB1e", "account_number": null, "phone": "+237670000000" },
"succeeded_at": "2026-09-12T14:31:44+00:00",
"created_at": "2026-09-12T14:31:02+00:00",
"updated_at": "2026-09-12T14:31:44+00:00"
}
```
A few of those fields do not behave the way their name suggests, and one of them is a trap.
- `id` (string): The identifier for every other call. `po_` in live, `po_test_` in sandbox.
- `reference` (string): Your own identifier, as you sent it on creation, or the line reference on a batch. `null` when you sent none.
- `provider_reference` (string): The operator's own identifier, filled in once the payout reaches it. Null before that. This is what the recipient's operator support desk asks for.
- `amount` (number): In the major unit of the currency. `10000` is ten thousand francs, not a hundred.
- `status` (enum): `processing`, `review`, `succeeded`, `failed` or `cancelled`, or `pending` for a Dashboard payout awaiting your confirmation, until you confirm or reject it in the Dashboard. `cancelled` is a payout stopped before it was sent.
- `complete` (boolean): True only on `succeeded`. A failed payout is finished and still reports `false`, so it tells you the outcome, not whether the payout is over.
- `source` (enum): `api` for anything your integration created, `dashboard` or `recurring` for a payout started from the Konsole.
- `metadata` (object): Yours, plus what Wajub writes into it. See below.
- `failure_reason` (string): Present only when `status` is `failed`, alongside `failure_message`. Absent on every other status, rather than null.
- `beneficiary` (object): `id`, `name`, `phone`, `email` and `deleted`. A beneficiary deleted after the payout stays here with `deleted: true`, and its statement stays readable.
> [!NOTE]
> **reference is yours, and it is not unique**
>
> `POST /transfers` stores the `reference` you send, up to 255 characters, and returns it on every
> read and every webhook. Wajub never checks it for uniqueness: two payouts can carry the same
> reference, so match on `id` when you need one payout for sure. Searching the list does not look at
> it either, only at the `po_` id and the description.
Wajub adds keys of its own to `metadata`, such as `reservation`. Read your own keys by name rather
than assuming you own the whole object.
## Creating one
`POST /transfers`
- `beneficiary` (string | object, required): A saved beneficiary's id, or the recipient's details inline. The two forms are detailed below.
- `amount` (number, required): In the major unit, at least `0.01` and within the bounds set for the currency.
- `currency` (string, required): Three letters, and an active currency.
- `description` (string): Free text, 255 characters. Searchable in both environments.
- `reason` (string): A second free-text field, 255 characters. Stored and returned, used for nothing else.
- `reference` (string): Up to 255 characters. Stored and returned, never checked for uniqueness.
- `metadata` (object): Free-form keys of your own, returned on every read.
The recipient goes in `beneficiary`, and there are several ways to name them. Pick the case that
matches what you hold.
| You hold | Send in `beneficiary` | Case |
| -------------------------------------------- | --------------------------------------------------------- | ------------------------------------------------------------------------- |
| A beneficiary you saved earlier | Its `id`, as a string: `"ben_…"` | [A saved beneficiary](#a-saved-beneficiary) |
| The payee's details, for a first payout | An object: `name`, `channel`, `phone` or `account_number` | [A new recipient](#a-new-recipient-created-by-the-payout) |
| Those details, for someone you already saved | The same object | [Someone already saved](#a-recipient-you-already-saved-sent-inline-again) |
| A Cameroonian number, but not its operator | The object, with `channel: "cm.mobile"` | [A number without its operator](#a-number-without-its-operator) |
| A Wajub account number | The object, with `channel: "wajub"` | [Another Wajub account](#another-wajub-account) |
Whatever the case, every payout needs its own `Idempotency-Key`: a saved beneficiary is a
destination, not a guard against paying twice.
### A saved beneficiary
Send the `id` as a string. Nothing else about the payout changes.
```json title="Pay a saved beneficiary"
{
"beneficiary": "ben_7Kq2mX9vL4tRb3nP8sZc",
"amount": 15000,
"currency": "XAF",
"description": "September retainer"
}
```
Only the `id` is matched, in the environment of your key: a sandbox beneficiary does not exist for a
live key. A phone number or an e-mail address is not matched, even though they identify the
beneficiary elsewhere on the API. Each refusal is a `422` with an `error_code`:
| When | `error_code` | Message |
| ----------------------------------------------------------------------------------------------- | ------------------------- | ------------------------------------------------------------------------------------------- |
| No beneficiary of yours has that `id` (a phone number or an e-mail included), or it was deleted | `beneficiary_not_found` | `The selected beneficiary is invalid.` |
| It is deactivated | `beneficiary_inactive` | `This beneficiary is deactivated. Reactivate it, or pay another beneficiary.` |
| It was added from the Konsole | `beneficiary_not_allowed` | `This beneficiary was added from the Konsole dashboard and cannot be paid out via the API.` |
The last one is deliberate: a leaked key must not be able to pay a destination your integration
never created.
### A new recipient, created by the payout
Send the payee's details as an object, and the beneficiary is created as part of the call. That is
what you want for a first payout, or for someone you pay once: one call instead of two. The fields
are the beneficiary's own, and [Beneficiaries](https://docs.wajub.com/payouts/beneficiaries) documents them in full.
- `beneficiary.name` (string, required): The payee, as it should appear on the payout.
- `beneficiary.channel` (string, required): The channel of the operator that serves the number, such as `cm.mtn` or `ke.mpesa`. In Cameroon only, `cm.mobile` resolves to the operator from the number itself.
- `beneficiary.phone` (string): Required unless you send `account_number`.
- `beneficiary.account_number` (string): The other half of that pair. One of the two has to be there.
- `beneficiary.email` (string): Contact address. Nothing is sent to it.
- `beneficiary.country_code` (string): Two letters. Defaults to the first two of the channel slug.
- `beneficiary.note` (string): Free text, 500 characters.
**Pay someone you will not pay again**
```bash
curl https://api.wajub.com/transfers \
-H "Authorization: sk.xxxxxxxxxxxxxxxx…" \
-H "Content-Type: application/json" \
-H "Idempotency-Key: payout-892" \
-d '{
"amount": 10000,
"currency": "XAF",
"description": "Supplier payment #892",
"metadata": { "vendor_id": "v_892" },
"beneficiary": {
"name": "Aminata Diallo",
"channel": "cm.mtn",
"phone": "+237670000000"
}
}'
```
```javascript
const transfer = await wajub.transfers.create({
amount: 10000,
currency: 'XAF',
description: 'Supplier payment #892',
metadata: { vendor_id: 'v_892' },
beneficiary: { name: 'Aminata Diallo', channel: 'cm.mtn', phone: '+237670000000' },
}, { idempotencyKey: 'payout-892' });
console.log(transfer.id, transfer.status);
```
```python
from wajub import RequestOptions
transfer = wajub.transfers.create({
"amount": 10000,
"currency": "XAF",
"description": "Supplier payment #892",
"metadata": {"vendor_id": "v_892"},
"beneficiary": {"name": "Aminata Diallo", "channel": "cm.mtn", "phone": "+237670000000"},
}, RequestOptions(idempotency_key="payout-892"))
print(transfer.id, transfer.status)
```
```php
use Wajub\RequestOptions;
$transfer = $wajub->transfers->create([
'amount' => 10000,
'currency' => 'XAF',
'description' => 'Supplier payment #892',
'metadata' => ['vendor_id' => 'v_892'],
'beneficiary' => [
'name' => 'Aminata Diallo',
'channel' => 'cm.mtn',
'phone' => '+237670000000',
],
], new RequestOptions(idempotencyKey: 'payout-892'));
echo $transfer->id;
```
```go
transfer, err := client.Transfers.Create(context.Background(), map[string]any{
"amount": 10000,
"currency": "XAF",
"description": "Supplier payment #892",
"metadata": map[string]any{"vendor_id": "v_892"},
"beneficiary": map[string]any{
"name": "Aminata Diallo",
"channel": "cm.mtn",
"phone": "+237670000000",
},
}, &wajub.RequestOptions{IdempotencyKey: "payout-892"})
```
The answer is `201 Created`, and the transfer's `beneficiary.id` is the new beneficiary's. It is a
normal one: it shows up in `GET /beneficiaries`, `beneficiary.created` is sent for it, and the next
payout to that person can send this `id` instead of the details.
### A recipient you already saved, sent inline again
Sending the details of someone you already saved does not create a second beneficiary. When an
active beneficiary of yours already uses that number on that channel, the payout goes to it: the
transfer's `beneficiary.id` is the existing one, and the `name`, `email` and `note` you just sent
are ignored, not written over the saved ones. To change them, use
[`PUT /beneficiaries/{id}`](https://docs.wajub.com/payouts/beneficiaries/manage#what-you-can-change-and-what-you-cannot).
### A number without its operator
A payout names its channel, and Cameroon is the one exception: when you hold a Cameroonian number
but not its operator, send `cm.mobile` with `phone`. The operator, `cm.mtn` or `cm.orange`, is
worked out from the number. A number that matches neither is refused with a `422` on `channel` and
`phone`, rather than sent to a guess.
```json title="Let the number pick the operator"
{
"amount": 10000,
"currency": "XAF",
"beneficiary": {
"name": "Aminata Diallo",
"channel": "cm.mobile",
"phone": "+237670000000"
}
}
```
No other country has a generic channel: `ke.mobile`, `eg.mobile` or any other `{country}.mobile` is
refused as an unknown channel. Name the operator's channel, such as `ke.mpesa` or `eg.vodafone`;
[Payout providers](https://docs.wajub.com/payouts/transfers/providers) lists them. In Cameroon too, name the operator when
you know it: `cm.mobile` is for a number and nothing else.
### Another Wajub account
To pay someone who has a Wajub account, send `channel: "wajub"` and their 11-digit account number
in `account_number`. The money goes from your balance to theirs at once, with no network in between,
and the payout is free. The account has to exist, cannot be your own, and cannot be one Wajub has
frozen. [Paying another Wajub account](https://docs.wajub.com/payouts/beneficiaries/create#paying-another-wajub-account) has the
details.
```json title="Pay another Wajub account"
{
"amount": 25000,
"currency": "XAF",
"beneficiary": {
"name": "Boutique Ada",
"channel": "wajub",
"account_number": "12345678901"
}
}
```
### Create first, pay later
You can also create the beneficiary on its own with `POST /beneficiaries`, then pay it by `id`. That
is two calls instead of one, and it is worth it when you want to:
- check the name the operator holds for a wallet before any money moves, with
[`POST /beneficiaries/{id}/verify`](https://docs.wajub.com/payouts/beneficiaries/create#checking-the-name-on-a-wallet);
- show the payee in your own interface, or have someone approve them, before the first payout.
### What the API cannot pay
- **A beneficiary added from the Konsole, a payout account included.** Pay it from the Dashboard.
- **A bank account.** The API creates Mobile Money, phone-addressed wallet (such as Djamo) and Wajub
account beneficiaries only. A bank payout goes to a `wire`
[payout account](https://docs.wajub.com/payouts/beneficiaries#payout-accounts), created and paid from the Dashboard.
- **Another platform's or the merchant's own beneficiary, through `X-Sync`.** A platform paying for a
connected account pays only the beneficiaries of that connection.
- **An inline recipient in a batch.** Each line of `POST /transfers/batch` names a saved beneficiary
by `id`; the object form is for single payouts.
## Amounts are in the major unit
A transfer's `amount` is in the currency's major unit and accepts decimals: `10000` sends ten
thousand francs. This is the opposite of an [invoice](https://docs.wajub.com/billing/invoice), whose lines are whole units
of the currency, so do not carry a conversion from one to the other.
Each currency has a floor and a ceiling, checked before anything else happens. Cross either one and
the answer is `422` naming both bounds.
| Currency | Minimum | Maximum |
| ----------------------- | ------- | ----------- |
| `XAF` `XOF` | 25 | 2 000 000 |
| `NGN` | 100 | 999 999.99 |
| `RWF` | 500 | 999 999 999 |
| `UGX` | 1 000 | 999 999 999 |
| `GHS` `KES` `USD` `EUR` | 0.50 | 999 999.99 |
These are the platform's bounds for a single call, and the rest of the ceilings are yours: the daily
cap you set yourself, the limit tied to your KYC tier, and the operator's own per-transfer ceiling.
[Transfers & Payouts](https://docs.wajub.com/payouts) lists the whole sequence.
## Idempotency is optional, and it is your only protection
Send an `Idempotency-Key` header and a retry of the same call returns the original transfer instead
of sending the money twice. Leave it out and nothing stops a duplicate, and there is no cancel to
fall back on.
The key is at most 128 characters of letters, digits, and `. _ : -`; anything else answers `422`. It
is spent for good, per account and per environment: a key that created a transfer always returns
that transfer, and never sends a second one.
> [!WARNING]
> **One key, one payout**
>
> Reusing a key with a different body answers `422 This Idempotency-Key was already used with a
> different request payload.`, or returns the original transfer without sending anything. Derive
> the key from the thing you are paying for, an order line or a payroll run with its period, so the
> same key can never describe two different payouts: `salary-amina` reused next month pays nobody.
Payout creation carries its own rate limit on top of the one your plan sets: **20 calls a minute**
per account and environment, regardless of plan, shared by `POST /transfers`, `POST /transfers/batch`, `POST /accounts/{id}/payouts`, `POST /beneficiaries`, `POST /beneficiaries/{id}/receivables` and `POST /beneficiaries/{id}/receivables/{receivable}/settle`. A loop that creates a
beneficiary and then pays it counts twice.
Under heavy concurrent load, a live payout can be refused with `429`,
`error_code: payout_queue_busy` and a `Retry-After` header. Nothing was created: send it again
after that delay, with the same `Idempotency-Key`. A batch line in that case is
rejected with the same code and can be sent again with the batch.
## What comes back, and in what state
A payout is created as `processing` and is already on its way, or as `review` when a safeguard holds
it. A payout you create is never `pending` when you read it: only a Dashboard payout awaiting your
confirmation reads `pending`. Confirmed, it is checked like a new payout and may be
[held for review](#why-a-live-payout-is-held) (`review`) or leave as `processing`; rejected, it ends
`cancelled`.
**Transfer**
`pending` (Dashboard payout to confirm) → [`transfer.processing`] `processing` (handed to the operator) → [`transfer.succeeded`] `succeeded` (complete becomes true)
States a payout can end up in instead:
- `review` (held, funds reserved)
- `failed` (read failure_reason)
`transfer.created` fires on every payout at creation, including one held for review.
[Statuses & webhooks](https://docs.wajub.com/payouts/transfers/statuses-and-webhooks) covers the five events and what to do
in each handler.
A payout stopped before anything was sent, rejected in the Dashboard or cancelled by Wajub, ends
`cancelled`, with `merchant_rejected` or `cancelled_by_wajub` as its `failure_reason`. A payout
Wajub refuses after a review ends `failed`, with `admin_rejected`.
## Why a live payout is held
A live payout that trips any of these is created as `review` instead of `processing`. Its funds are
reserved, no operator has seen it, and it waits for Wajub to release or refuse it.
| Held because | What it means |
| ------------------------------------- | ------------------------------------------------------------------------------------------------------------------------ |
| It is one of your first payouts | Your account's first live payouts may be held for review, so plan them |
| The amount crosses your own threshold | The approval amount set in Transfer security settings |
| You asked to confirm your payouts | The confirmation setting, minus whatever your auto-approve amount exempts |
| Wajub's own checks | Wajub can hold any payout for review before it leaves |
| Wajub restricted your account | A restriction such as manual approval or a payout delay holds every live payout, whatever its amount, until it is lifted |
A held payout eventually leaves `review` in one of two directions. Released, it moves to
`processing` and continues as normal. Refused, it becomes `failed` with `failure_reason:
admin_rejected` and the reservation goes back to your available balance.
> [!CAUTION]
> **You cannot list what is under review, and you cannot unblock it**
>
> The list cannot be filtered on `review`: a held payout is only visible by retrieving it, or by
> walking an unfiltered list. There is no endpoint to approve, cancel or chase it either. You learn about a hold from `transfer.created`,
> and about its resolution from `transfer.processing` or `transfer.failed`. Wait on those rather than
> polling.
Sandbox payouts are never held. This is the one behaviour you cannot rehearse before going live,
which is why your first live payout deserves a person watching it rather than an unattended
script.
## When it fails
A failed payout carries `failure_reason`, a short code, and `failure_message`, a sentence. Both are
absent on any other status, so read them behind a status check rather than assuming the keys exist.
Once a payout has reached an operator, the code can be the operator's own. Treat the field as a
label to log and to show a human, not as an enum to branch on.
| `failure_reason` | What happened |
| ----------------------------------- | --------------------------------------------------------------------------- |
| `invalid_recipient` | The destination could not be found, or the beneficiary lost its channel |
| `no_provider` | No payout route was available for that channel and currency |
| `provider_rejected` | The operator refused the payout outright, and said why in `failure_message` |
| `team_restricted` | A payout restriction landed on your account between creation and execution |
| `admin_rejected` | A held payout was refused during review |
| `failed`, or an operator's own code | The payout reached an operator and came back failed |
Sandbox is the exception: its vocabulary is fixed at `failure`, `network_error` and
`invalid_recipient`, one per test number.
On a Wajub-rail payout, a failure releases the reservation: the principal and the fee estimate both
return to `available`, and nothing was charged. You are free to create the payout again, under a new
idempotency key.
## Testing it
Sandbox payouts draw on your sandbox balance and resolve themselves about two seconds later. The
outcome is not random: it is decided by the recipient's number, which must be a recognised test
number or the call is refused outright.
| Number | Outcome |
| --------------- | --------------------------------------------------------- |
| `+237670000000` | `succeeded` |
| `+237670000001` | Refused at creation, `422`, the transfer is never created |
| `+237670000002` | `failed`, reason `failure` |
| `+237670000003` | `failed`, reason `network_error` |
| `+237670000004` | `failed`, reason `invalid_recipient` |
The suffix is what matters, not the prefix, so the same five endings work behind any operator prefix
the sandbox knows: `+2250700000002` fails the same way `+237670000002` does.
> [!NOTE]
> **Insufficient funds is not a failed payout**
>
> `…0001` models a recipient whose wallet cannot receive the money, and the sandbox answers `422`
> before creating anything. There is no transfer to retrieve and no webhook. If you are testing a
> failure handler, use `…0002` instead.
Sandbox payouts are charged a **2 %** platform fee on top of the amount, and it is not given back
when the payout fails. That rate is the sandbox's own and does not match live pricing.
## Listing
`GET /transfers`
- `status` (enum): `pending`, `processing`, `succeeded`, `failed` or `cancelled`. Not `review`.
- `search` (string): Matches the id and the description.
- `per_page` (integer, default `25`): Between 1 and 100.
- `cursor` (string): The `next_cursor` of a previous page. Sending it switches the whole response to cursor mode.
There is no date filter and no amount filter, so a reconciliation job walks the list and does its own
narrowing on `created_at`.
**Everything that failed, newest first**
```bash
curl -G https://api.wajub.com/transfers \
-H "Authorization: sk.xxxxxxxxxxxxxxxx…" \
-d status=failed \
-d per_page=50
```
```javascript
const { data, meta } = await wajub.transfers.list({
status: 'failed',
per_page: 50,
});
```
```python
page = wajub.transfers.list({
"status": "failed",
"per_page": 50,
})
```
```php
$page = $wajub->transfers->list([
'status' => 'failed',
'per_page' => 50,
]);
```
```go
page, err := client.Transfers.List(context.Background(), map[string]any{
"status": "failed",
"per_page": 50,
})
```
The list is sorted by creation date, newest first, and you cannot change that. It is paginated by
page number by default, with `meta` carrying `current_page`, `last_page`, `per_page` and `total`,
plus the `next_cursor` and `has_more` that let you go on with a cursor. Pass that `next_cursor` as
`cursor` and `meta` changes shape, to `per_page`, `next_cursor`, `prev_cursor` and `has_more`. Pick
one of the two and write your loop against it, because a handler that reads `last_page` breaks the
moment someone adds a cursor.
## Retrieving one
`GET /transfers/{id}`
Only the `po_` id resolves. A transfer that belongs to another account, or to the other environment,
answers `404 Transfer Not Found` rather than telling you it exists somewhere else.
**Read one back**
```bash
curl https://api.wajub.com/transfers/po_CSUGajfv9xh0XQ5wu2lx \
-H "Authorization: sk.xxxxxxxxxxxxxxxx…"
```
```javascript
const transfer = await wajub.transfers.retrieve('po_CSUGajfv9xh0XQ5wu2lx');
```
```python
transfer = wajub.transfers.retrieve("po_CSUGajfv9xh0XQ5wu2lx")
```
```php
$transfer = $wajub->transfers->retrieve('po_CSUGajfv9xh0XQ5wu2lx');
```
```go
transfer, err := client.Transfers.Retrieve(context.Background(), "po_CSUGajfv9xh0XQ5wu2lx")
```
Retrieving is for reconciliation and for support, not for following a payout. Wait on the webhook
instead: a payout that reaches an operator can sit there for minutes, and polling it teaches you
nothing the event would not have told you first.
- [Transfers Quickstart](https://docs.wajub.com/payouts/transfers/quickstart): Your first test payout, end to end.
- [Providers & channels](https://docs.wajub.com/payouts/transfers/providers): Every channel slug, by country and operator.
- [Statuses & webhooks](https://docs.wajub.com/payouts/transfers/statuses-and-webhooks): The five events, and what belongs in each handler.
- [Beneficiaries](https://docs.wajub.com/payouts/beneficiaries): Save a destination once and pay it by id.
- [Balance & settlements](https://docs.wajub.com/payouts/balance): What is available to send, and what is already reserved.
---
# Providers & channels
URL: https://docs.wajub.com/payouts/transfers/providers
> Which channels a payout can use, and what decides whether one is available.
A channel names an operator in a country: `cm.mtn` is MTN Cameroon, `sn.wave` is Wave Senegal. It is
set on the beneficiary, so it is fixed the day the destination is created; the list below is what
the API accepts, and what actually executes depends on your account.
## What has to line up
A channel from the list below is accepted when you name it, but a payout only executes on a channel
your account can pay out on, in that currency.
| Case | Refused with |
| -------------------------------------------------------------- | -------------------------------------------------------------------- |
| The slug is not a payout channel | `422 The selected beneficiary.channel is invalid.` |
| Your account has no payout route for that channel and currency | `422 No payout provider is available for this channel and currency.` |
## The channels the API accepts
Fifty Mobile Money channels across twenty-two countries. Any of them is a valid
`beneficiary.channel`.
| Country | Channels |
| ----------------- | -------------------------------------------------- |
| Benin | `bj.mtn` `bj.moov` |
| Burkina Faso | `bf.orange` `bf.moov` |
| Cameroon | `cm.mtn` `cm.orange` `cm.eu` |
| Congo-Brazzaville | `cg.mtn` `cg.airtel` |
| Côte d'Ivoire | `ci.mtn` `ci.orange` `ci.moov` `ci.wave` |
| DR Congo | `cd.vodacom` `cd.airtel` `cd.orange` `cd.africell` |
| Egypt | `eg.vodafone` |
| Gabon | `ga.airtel` `ga.moov` |
| Ghana | `gh.mtn` `gh.vodafone` `gh.airteltigo` |
| Guinea | `gn.mtn` `gn.orange` |
| Kenya | `ke.mpesa` `ke.airtel` |
| Liberia | `lr.mtn` |
| Malawi | `mw.airtel` `mw.tnm` |
| Mali | `ml.orange` `ml.moov` |
| Mozambique | `mz.mpesa` |
| Rwanda | `rw.mtn` `rw.airtel` |
| Senegal | `sn.orange` `sn.free` `sn.wave` |
| Sierra Leone | `sl.orange` |
| Tanzania | `tz.mpesa` `tz.airtel` `tz.tigo` `tz.halopesa` |
| Togo | `tg.tmoney` `tg.moov` |
| Uganda | `ug.mtn` `ug.airtel` |
| Zambia | `zm.mtn` `zm.airtel` `zm.zamtel` |
`cd.vodacom` and `mz.mpesa` are both M-Pesa, and `cm.eu` is Express Union.
Three more channels are valid for a beneficiary without being Mobile Money: `ci.djamo` and
`sn.djamo`, Djamo wallets paid by phone number, and `wajub`, another Wajub account paid by its
account number, which never leaves Wajub and carries no fee.
Any other channel, a bank among them, answers `422 The selected beneficiary.channel is invalid.` A
bank destination is a [payout account](https://docs.wajub.com/payouts/beneficiaries#payout-accounts) you create in the
Dashboard on the `wire` channel.
## The generic channel
A payout names its channel: the operator's own slug from that table, such as `ke.mpesa` or
`eg.vodafone`. There is one exception, Cameroon: `cm.mobile` works out from the number whether it
is `cm.mtn` or `cm.orange`. [Beneficiaries](https://docs.wajub.com/payouts/beneficiaries) covers how that resolution
behaves and how it fails.
No other country has a generic channel. `ke.mobile`, `eg.mobile` or any other `{country}.mobile` is
refused like an unknown channel, with `422` and `The selected channel is invalid.`. Even in
Cameroon, name the operator whenever you know it: a resolution that fails costs you a `422` where
an explicit slug would have gone straight through.
## Coverage belongs to your account
Every channel other than `cm.mtn`, `cm.orange` and `cm.eu` needs a payout provider connected to your
account and **approved by Wajub for live payouts**; [`GET /providers`](https://docs.wajub.com/api/providers/list) lists
what your account has. A provider connected for collections does not turn its payout side on.
> [!CAUTION]
> **Out of the box, three channels pay out**
>
> Until a payout provider is approved on your account, live payouts go out on `cm.mtn`, `cm.orange`
> and `cm.eu` only. Ask before you build a corridor into your product, rather than discovering it
> at the first live transfer.
## What the currency does, and does not, decide
Send the currency the operator settles in: `XAF` on `cm.*`, `XOF` on `ci.*`. A currency your account
cannot pay out in on that channel is refused with the same
`No payout provider is available for this channel and currency.` as any other gap in coverage.
## Which provider handles it
There is no `provider` field on a transfer and no per-call override: you name a channel. When
several payout providers connected to your account can carry it, the priority you set on each decides
the order, and a failure moves down the list. [Orchestration](https://docs.wajub.com/orchestration) covers how to set that
priority.
The transfer tells you afterwards which one ran it, in `provider`, and the operator's own identifier
lands in `provider_reference` once the payout reaches it.
- [Transfer reference](https://docs.wajub.com/payouts/transfers): The object, the four calls, and what decides whether a payout executes.
- [Beneficiaries](https://docs.wajub.com/payouts/beneficiaries): Where the channel is set, and how the generic form resolves.
- [Quickstart](https://docs.wajub.com/payouts/transfers/quickstart): A first payout in sandbox, end to end.
- [Orchestration](https://docs.wajub.com/orchestration): Priority, failover, and the circuit breaker.
---
# Quickstart
URL: https://docs.wajub.com/payouts/transfers/quickstart
> Fund a sandbox balance, send your first payout, then do the same for real.
Fund a sandbox balance, send a first payout and test its failures, then switch to live. A payout
spends funds you already hold, so the first step collects money.
> [!WARNING]
> **A sandbox balance starts at zero**
>
> There is no endpoint that tops up a sandbox balance, no button in the Konsole, and no starting
> credit. You fund it exactly the way you fund the live one, by collecting a payment. Skip step 1 and
> step 3 is refused with a `422` whose message starts with `Insufficient sandbox balance`. A balance
> that covers the amount but not the 2% fee on top is refused too:
> `Insufficient sandbox balance to send this payout and its fee of 100 XAF.`
## 1. Put money in the balance
Create a sandbox payment for more than you intend to send, then pay it yourself on its checkout page.
[Accept a payment](https://docs.wajub.com/payments/quickstart) covers this call properly; here it is only a means to an
end.
**Collect 20 000 XAF in sandbox**
```bash
curl https://api.wajub.com/payments \
-H "Authorization: sk_test.xxxxxxxxxxxxxxxx…" \
-H "Content-Type: application/json" \
-d '{
"amount": 20000,
"currency": "XAF",
"email": "you@example.com",
"description": "Funding my sandbox balance"
}'
```
```javascript
const payment = await wajub.payments.create({
amount: 20000,
currency: 'XAF',
email: 'you@example.com',
description: 'Funding my sandbox balance',
});
console.log(payment.authorization_url);
```
```python
payment = wajub.payments.create({
"amount": 20000,
"currency": "XAF",
"email": "you@example.com",
"description": "Funding my sandbox balance",
})
print(payment["authorization_url"])
```
```php
$payment = $wajub->payments->create([
'amount' => 20000,
'currency' => 'XAF',
'email' => 'you@example.com',
'description' => 'Funding my sandbox balance',
]);
echo $payment->authorization_url;
```
```go
payment, err := client.Payments.Create(context.Background(), map[string]any{
"amount": 20000,
"currency": "XAF",
"email": "you@example.com",
"description": "Funding my sandbox balance",
}, nil)
log.Println(payment.AuthorizationURL)
```
Open the `authorization_url`, pick Mobile Money, and pay with **`+237670000000`**. That number always
succeeds in sandbox. A few seconds later the payment settles and the amount reaches your balance,
minus the sandbox platform fee of 2 %: 20 000 collected leaves **19 600** to send.
## 2. Check what you can send
One call, no parameters. It answers with the balance of the environment your key belongs to, so the
same line of code reads the sandbox wallet today and the real one tomorrow.
`GET /balance`
The call takes an optional `currency` to convert the figure into another one. Leave it out and you
get your account currency.
**Read the sandbox balance**
```bash
curl https://api.wajub.com/balance \
-H "Authorization: sk_test.xxxxxxxxxxxxxxxx…"
```
```javascript
const balance = await wajub.balance.retrieve();
console.log(balance.available, balance.currency);
```
```python
balance = wajub.balance.retrieve()
print(balance["available"], balance["currency"])
```
```php
$balance = $wajub->balance->retrieve();
echo $balance['available'];
```
```go
balance, err := client.Balance.Retrieve(context.Background())
if err != nil {
log.Fatal(err)
}
log.Println(balance["available"], balance["currency"])
```
Five figures come back.
```json title="Response · 200 OK"
{
"code": 200,
"status": "OK",
"message": "Balance retrieved",
"balance": {
"total": 19600,
"available": 19600,
"pending": 0,
"reserved": 0,
"credit": 0,
"currency": "XAF",
"environment": "sandbox"
}
}
```
`available` is the only figure a payout can draw on. Check `environment` if you ever doubt which key
you used.
## 3. Send the payout
`POST /transfers`
Pass the recipient inline and Wajub creates the beneficiary along with the payout, which is what you
want for a first try. The `channel` is the operator that serves the number, and the phone number has
to be a sandbox test number or the call is refused before anything is created.
Send an `Idempotency-Key` from the very first call. It costs nothing and it is the only thing that
makes a retry safe, here and in production.
**Pay 5 000 XAF to a test number**
```bash
curl https://api.wajub.com/transfers \
-H "Authorization: sk_test.xxxxxxxxxxxxxxxx…" \
-H "Content-Type: application/json" \
-H "Idempotency-Key: first-payout-01" \
-d '{
"amount": 5000,
"currency": "XAF",
"description": "First test payout",
"beneficiary": {
"name": "Aminata Diallo",
"channel": "cm.mtn",
"phone": "+237670000000"
}
}'
```
```javascript
const transfer = await wajub.transfers.create({
amount: 5000,
currency: 'XAF',
description: 'First test payout',
beneficiary: { name: 'Aminata Diallo', channel: 'cm.mtn', phone: '+237670000000' },
}, { idempotencyKey: 'first-payout-01' });
console.log(transfer.id, transfer.status);
```
```python
from wajub import RequestOptions
transfer = wajub.transfers.create({
"amount": 5000,
"currency": "XAF",
"description": "First test payout",
"beneficiary": {"name": "Aminata Diallo", "channel": "cm.mtn", "phone": "+237670000000"},
}, RequestOptions(idempotency_key="first-payout-01"))
print(transfer["id"], transfer["status"])
```
```php
use Wajub\RequestOptions;
$transfer = $wajub->transfers->create([
'amount' => 5000,
'currency' => 'XAF',
'description' => 'First test payout',
'beneficiary' => [
'name' => 'Aminata Diallo',
'channel' => 'cm.mtn',
'phone' => '+237670000000',
],
], new RequestOptions(idempotencyKey: 'first-payout-01'));
echo $transfer->id;
```
```go
transfer, err := client.Transfers.Create(context.Background(), map[string]any{
"amount": 5000,
"currency": "XAF",
"description": "First test payout",
"beneficiary": map[string]any{
"name": "Aminata Diallo",
"channel": "cm.mtn",
"phone": "+237670000000",
},
}, &wajub.RequestOptions{IdempotencyKey: "first-payout-01"})
```
Wajub answers `201 Created` and the payout is already `processing`. Nothing is waiting for you to
confirm it.
```json title="Response · 201 Created"
{
"code": 201,
"status": "Created",
"message": "Transfer initiated",
"transfer": {
"id": "po_test_CSUGajfv9xh0XQ5wu2lx",
"amount": 5000,
"currency": "XAF",
"status": "processing",
"complete": false,
"sandbox": true,
"source": "api",
"beneficiary": {
"id": "ben_test_7Kq2mX9vL4tRb3nP8sZc",
"name": "Aminata Diallo",
"phone": "+237670000000"
},
"created_at": "2026-09-12T14:31:02+00:00"
}
}
```
Store `transfer.id`. It is the one handle that is unique: the `reference` you can send comes back as
you sent it but is never checked for uniqueness, and no call cancels a payout once it exists.
Your balance has moved twice. The 5 000 left it, and so did a sandbox payout fee of 2 %, charged on
top rather than taken out of the amount. 19 600 becomes **14 500**, and the recipient still receives
the full 5 000.
## 4. Watch it resolve
About two seconds later the payout finishes, and the recipient's number decided the outcome long
before that. The honest way to find out is the webhook, not a loop.
| Event | Fires when |
| --------------------- | -------------------------------------------- |
| `transfer.created` | The payout was recorded |
| `transfer.processing` | It was handed to the operator |
| `transfer.succeeded` | The money arrived. This is the one to act on |
| `transfer.failed` | It did not, and `failure_reason` says why |
[Statuses & webhooks](https://docs.wajub.com/payouts/transfers/statuses-and-webhooks) covers registration, signatures and
what belongs in each handler. While you are still exploring, read the payout back instead.
**Read it back**
```bash
curl https://api.wajub.com/transfers/po_test_CSUGajfv9xh0XQ5wu2lx \
-H "Authorization: sk_test.xxxxxxxxxxxxxxxx…"
```
```javascript
const transfer = await wajub.transfers.retrieve('po_test_CSUGajfv9xh0XQ5wu2lx');
console.log(transfer.status, transfer.complete);
```
```python
transfer = wajub.transfers.retrieve("po_test_CSUGajfv9xh0XQ5wu2lx")
print(transfer["status"], transfer["complete"])
```
```php
$transfer = $wajub->transfers->retrieve('po_test_CSUGajfv9xh0XQ5wu2lx');
echo $transfer->status;
```
```go
transfer, err := client.Transfers.Retrieve(context.Background(), "po_test_CSUGajfv9xh0XQ5wu2lx")
if err != nil {
log.Fatal(err)
}
log.Println(transfer["status"], transfer["complete"])
```
`status` is now `succeeded` and `complete` is `true`. Those two are not the same thing: `complete`
means it worked, not that it is over, so a failed payout is finished and still reports `false`.
## 5. Break it on purpose
A payout that always succeeds teaches you nothing about the day one does not. The ending of the
recipient's number picks the outcome, so run the same call again with each of these before you trust
your handler.
| Number | What you get |
| --------------- | -------------------------------------------------------------------------------------- |
| `+237670000000` | `succeeded` |
| `+237670000001` | `422` at creation, `error_code: insufficient_funds`. No payout and no transfer webhook |
| `+237670000002` | `failed`, `failure_reason: failure` |
| `+237670000003` | `failed`, `failure_reason: network_error` |
| `+237670000004` | `failed`, `failure_reason: invalid_recipient` |
Only the ending matters, not the operator, so the same five work behind any prefix the sandbox knows.
A number that matches none of them is refused outright.
> [!NOTE]
> **Point your failure handler at …0002, not …0001**
>
> `…0001` is a recipient whose wallet cannot take the money, and the sandbox refuses the call rather
> than creating a payout that fails. There is no transfer and no transfer event, so a handler tested
> against it is never actually called. Use `…0002` for that.
> [!WARNING]
> **A refused payout still creates its inline beneficiary**
>
> The beneficiary you pass as an object is created before the checks run, so a refused call, `…0001`
> included, leaves it on your account, listed by `GET /beneficiaries`, and sends
> `beneficiary.created` as any new beneficiary does. Running the same call again with the same
> channel and number reuses it rather than creating a second one.
## Then go live
Swap `sk_test.` for `sk.` and four things change, none of them in your code.
| In sandbox | In live |
| -------------------------------------------------------------- | ---------------------------------------------------------------------------------------------------------------------------------------- |
| The balance is funded by test payments, and a payout costs 2 % | It is funded by real collections, and a payout costs from 1 %, depending on the country and channel, held with the principal at creation |
| Any test number works | The number has to be real, and a wrong digit pays a stranger you cannot claw back from |
| The payout executes immediately | Your first ones can be **held for review** until Wajub releases them |
| Failures come from three fixed codes | They come from the operator, in its own vocabulary |
That third row is the one to plan for. A held payout is created with status `review`, its funds are
reserved, and nothing you can call releases it. Send your first live payout to yourself, for a small
amount, at a time when someone is watching, and never as the first iteration of a batch.
[Transfers & Payouts](https://docs.wajub.com/payouts) lists every check a live payout runs through, and
[Transfer reference](https://docs.wajub.com/payouts/transfers) documents the object in full.
- [Transfer reference](https://docs.wajub.com/payouts/transfers): Every field, the four calls, and what decides whether a payout executes.
- [Providers & channels](https://docs.wajub.com/payouts/transfers/providers): Every channel slug, by country and operator.
- [Statuses & webhooks](https://docs.wajub.com/payouts/transfers/statuses-and-webhooks): The five events, and what belongs in each handler.
- [Beneficiaries](https://docs.wajub.com/payouts/beneficiaries): Save a destination once and pay it by id.
---
# Statuses & webhooks
URL: https://docs.wajub.com/payouts/transfers/statuses-and-webhooks
> What a payout's status means, which events fire, and how to handle them.
A payout's status tells you where it is, and its webhooks tell you when it moved: `201 Created` is a
receipt for a request, not a confirmation that anyone was paid. This page covers what each status
means for your money, which events fire, and what a handler has to do.
## The six statuses
Three of them describe a payout that is still alive. The other three are terminal, and nothing
moves a payout out of them.
| Status | What it means | Your money |
| ------------ | ------------------------------------------------------------------------------------------- | --------------------------------- |
| `pending` | A Dashboard payout awaiting your confirmation, which you confirm or reject in the Dashboard | Nothing held until you confirm it |
| `review` | Held by Wajub before execution while a safeguard is checked | Reserved |
| `processing` | Handed to the operator. Where an API payout starts | Reserved |
| `succeeded` | The recipient has the money, and `complete` becomes `true` | Debited, fee charged |
| `failed` | It did not arrive, and `failure_reason` says why | Released, nothing charged |
| `cancelled` | Stopped before anything was sent | Released, nothing charged |
`POST /transfers` creates a payout as `processing`, or as `review` when a safeguard holds it, and
nothing else. A payout stopped before anything was sent ends `cancelled`: rejected in the
Dashboard, its `failure_reason` is `merchant_rejected`; cancelled by Wajub, `cancelled_by_wajub`.
A payout Wajub's review refuses (`admin_rejected`) or the operator declines ends `failed`.
## Which event fires, and which does not
The transfer events do not cover all six statuses, and the gaps are the part worth knowing.
| The payout reaches | You receive |
| -------------------------------------- | ---------------------------------------------- |
| `processing`, at creation | `transfer.created`, then `transfer.processing` |
| `review` | `transfer.created`, and then nothing |
| `processing`, after a hold is approved | `transfer.processing` |
| `succeeded` | `transfer.succeeded` |
| `failed` | `transfer.failed` |
| `cancelled` | `transfer.failed`, with `status: failed` |
A webhook is shaped for Wajub's current API version, not for the one you pin, which is why a cancelled
payout is announced as `transfer.failed`, with `status: failed` and the same `failure_reason`.
`transfer.created` always carries `processing` or `review`, never `pending`.
## The three sequences you will actually see
### It works
Three events, and only the last one means anything moved.
**A payout that succeeds**
- **transfer.created** (created, 14:31:02, status: processing): The payout is recorded and your balance is reserved. Nothing has left the account yet.
- **transfer.processing** (processing, 14:31:02, status: processing): Handed to MTN MoMo. The same status as the event before it, because nothing about the payout changed, only who is holding it.
- **transfer.succeeded** (succeeded, 14:31:06, status: succeeded): The recipient has the money. The reservation settles, the fee is charged, and three keys appear on the object.
- complete: true
- succeeded_at: 2026-09-12T14:31:06+00:00
- provider_reference: MP260912.1431.B84213
The first two tell you nothing your `201` did not already say. Act on `transfer.succeeded` and
ignore the rest, unless you are drawing a timeline for a support agent.
### It fails
The same two events, then a different third. A failure that happened inside Wajub before any
operator saw the payout and a failure the operator itself returned look identical on the wire: same
sequence, same timing envelope, same event name.
**A payout that fails**
- **transfer.created** (created, 14:31:02, status: processing): Identical to the successful payout. Nothing here predicts the outcome.
- **transfer.processing** (processing, 14:31:02, status: processing): Still identical. The operator has it and has not answered yet.
- **transfer.failed** (failed, 14:31:09, status: failed): The operator refused it. Your reservation is released, the fee is never charged, and two keys appear that exist on no other status.
Those two keys are the whole of what a failure tells you, and they are worth reading behind a status
check rather than assumed present.
```json title="The failure keys, inside data"
{
"status": "failed",
"complete": false,
"failure_reason": "provider_rejected",
"failure_message": "Recipient account is barred for incoming transfers."
}
```
`failure_reason` is a short code to branch on and log, `failure_message` a sentence to show a human.
[Transfer reference](https://docs.wajub.com/payouts/transfers) lists the codes. On a Wajub-rail payout, `transfer.failed` is also the moment
your reservation is released, so the principal and the fee estimate return to `available` before
your handler finishes running.
### It is held
`transfer.created` arrives with `status: "review"`, and then nothing, for minutes or hours, until
Wajub's review ends.
When the hold resolves you get one of two things: `transfer.processing`, meaning it was approved and
is now running normally, or `transfer.failed` with `failure_reason: admin_rejected`.
> [!CAUTION]
> **A review hold is silence, not a delay**
>
> A handler that treats "no `transfer.processing` within a minute" as a fault will page someone at
> three in the morning for a process working exactly as designed. Branch on
> `data.status === 'review'` inside your `transfer.created` handler, tell your own operations team,
> and stop the clock.
## What an event looks like
Every event, for every product, arrives in the same envelope. The transfer itself is the whole of
`data`, in the same shape `GET /transfers/{uid}` returns.
```json title="transfer.succeeded"
{
"id": "evt_9Lm4tQ7wRc2vZ8kN5pXbT3jH",
"event": "transfer.succeeded",
"livemode": true,
"created": "2026-09-12T14:31:06+00:00",
"api_version": "2026-10-11",
"pending_webhooks": 1,
"data": {
"id": "po_9Kdm2LpXv4tRb7nQ3sZc",
"reference": "supplier-892",
"provider_reference": "MP260912.1431.B84213",
"amount": 10000,
"currency": "XAF",
"description": "Supplier payment #892",
"reason": null,
"metadata": {
"invoice": "INV-2026-0892",
"reservation": {
"amount": 10000,
"currency": "XAF",
"fee_estimate": 100,
"reserved_at": "2026-09-12T14:31:02+00:00"
}
},
"sandbox": false,
"status": "succeeded",
"complete": true,
"source": "api",
"succeeded_at": "2026-09-12T14:31:06+00:00",
"created_at": "2026-09-12T14:31:02+00:00",
"updated_at": "2026-09-12T14:31:06+00:00",
"provider": { "slug": "mtn_momo", "name": "MTN MoMo" },
"beneficiary": {
"id": "ben_7Kq2mX9vL4tRb3nP8sZc",
"name": "Aminata Diallo",
"phone": "+237670000000",
"email": null
},
"payment_method": {
"id": "pm_3Nq8wR2kL5vT7bY4hC6d",
"account_number": null,
"phone": "+237670000000"
}
}
}
```
The envelope carries these keys.
- `id` (string): The event id, `evt_` in live and `evt_test_` in sandbox. Your deduplication key, see below.
- `event` (string): The event name. This field is called `event`, not `type`.
- `data` (object): The transfer object itself, not wrapped in anything.
- `livemode` (boolean): `false` for a sandbox payout. The one field that tells the two apart.
- `api_version` (string): The version that shaped `data`.
- `pending_webhooks` (number): How many of your endpoints this event is delivered to. Not a retry counter.
One of them is worth its own warning, because getting it wrong produces no error anywhere.
> [!CAUTION]
> **Read event, not type**
>
> The field naming the event is `event`. There is no `type` key on a Wajub envelope. Reaching for
> `event.type` out of habit gives you `undefined`, a `switch` that matches nothing, and a handler
> that returns `200` while doing absolutely nothing. It is the single most common way this
> integration fails silently.
To tie an event back to your own call, use `data.id`, or send your own `reference` when you create
the payout: it comes back as `data.reference` on every event.
Two things about `data` are worth knowing before you write against it. The beneficiary, the payment
method and the provider are always expanded, so a transfer event tells you where the money went
without a second API call. And `metadata` is not only yours: Wajub adds keys of its own, such as
`reservation`. Read the keys you put there, and never assert the exact shape of the whole.
## The handler
Three things, in this order: prove the event came from Wajub, answer, then work. Answering before
you work is not an optimisation, it is what keeps a slow database from turning into a retry storm.
**Verify and acknowledge**
```javascript
import express from 'express';
const app = express();
// The client verifies with the secret it was built with: webhookSecret,
// or WAJUB_WEBHOOK_SECRET when you pass none.
app.post('/webhooks/wajub', express.raw({ type: 'application/json' }), (req, res) => {
let event;
try {
event = wajub.webhooks.constructEvent(
req.body,
req.headers['x-wajub-signature'],
req.headers['x-wajub-timestamp'],
);
} catch {
return res.status(400).send('invalid signature');
}
res.status(200).end();
queue.push(event);
});
```
```python
from wajub import WebhookSignatureVerificationError
# The client verifies with the secret it was built with: webhook_secret,
# or WAJUB_WEBHOOK_SECRET when you pass none.
@app.post("/webhooks/wajub")
def wajub_webhook():
try:
event = wajub.webhooks.construct_event(
request.get_data(),
request.headers["X-Wajub-Signature"],
request.headers["X-Wajub-Timestamp"],
)
except WebhookSignatureVerificationError:
return "invalid signature", 400
enqueue(event)
return "", 200
```
```php
use Wajub\Exception\WebhookSignatureVerificationError;
use Wajub\Wajub;
// The client verifies with the secret it was built with: 'webhook_secret',
// or WAJUB_WEBHOOK_SECRET when you pass none.
public function __invoke(Request $request, Wajub $wajub): Response
{
try {
$event = $wajub->webhooks->constructEvent(
$request->getContent(),
$request->header('X-Wajub-Signature', ''),
$request->header('X-Wajub-Timestamp', ''),
);
} catch (WebhookSignatureVerificationError) {
return response('invalid signature', 400);
}
HandleWajubEvent::dispatch($event);
return response('', 200);
}
```
```go
func wajubWebhook(w http.ResponseWriter, r *http.Request) {
body, _ := io.ReadAll(r.Body)
// The client verifies with the secret it was built with: Config.WebhookSecret,
// or WAJUB_WEBHOOK_SECRET when you set none.
event, err := client.Webhooks.ConstructEvent(
body,
r.Header.Get("X-Wajub-Signature"),
r.Header.Get("X-Wajub-Timestamp"),
0, // 0 keeps the default 300 second window
)
if err != nil {
http.Error(w, "invalid signature", http.StatusBadRequest)
return
}
w.WriteHeader(http.StatusOK)
queue <- event
}
```
Returning `400` on a bad signature is deliberate: a replay of the same bytes would fail the same
way, so there is nothing to gain from a retry. [Signature verification](https://docs.wajub.com/developer-tools/webhooks/signature-verification)
covers the algorithm, the raw-body requirement and the five-minute timestamp window.
The work itself belongs off the request, and it branches on the event name and then on the status
inside it.
**Act on the event**
```javascript
async function handleTransferEvent(event) {
const transfer = event.data;
if (await alreadyProcessed(event.id)) {
return;
}
switch (event.event) {
case 'transfer.succeeded':
await markSupplierPaid(transfer.id, transfer.amount, transfer.currency);
break;
case 'transfer.failed':
await flagPayoutFailure(transfer.id, transfer.failure_reason);
break;
case 'transfer.created':
if (transfer.status === 'review') {
await notifyOpsPayoutHeld(transfer.id);
}
break;
}
await recordProcessed(event.id);
}
```
```python
def handle_transfer_event(event):
transfer = event["data"]
if already_processed(event["id"]):
return
name = event["event"]
if name == "transfer.succeeded":
mark_supplier_paid(transfer["id"], transfer["amount"], transfer["currency"])
elif name == "transfer.failed":
flag_payout_failure(transfer["id"], transfer.get("failure_reason"))
elif name == "transfer.created" and transfer["status"] == "review":
notify_ops_payout_held(transfer["id"])
record_processed(event["id"])
```
```php
public function handle(array $event): void
{
$transfer = $event['data'];
if ($this->alreadyProcessed($event['id'])) {
return;
}
match ($event['event']) {
'transfer.succeeded' => $this->markSupplierPaid(
$transfer['id'],
$transfer['amount'],
$transfer['currency'],
),
'transfer.failed' => $this->flagPayoutFailure(
$transfer['id'],
$transfer['failure_reason'] ?? null,
),
'transfer.created' => $transfer['status'] === 'review'
? $this->notifyOpsPayoutHeld($transfer['id'])
: null,
default => null,
};
$this->recordProcessed($event['id']);
}
```
```go
// ConstructEvent returns the decoded JSON, so every field is read by key.
func handleTransferEvent(event map[string]any) error {
eventID, _ := event["id"].(string)
transfer, _ := event["data"].(map[string]any)
transferID, _ := transfer["id"].(string)
done, err := alreadyProcessed(eventID)
if err != nil || done {
return err
}
switch event["event"] {
case "transfer.succeeded":
amount, _ := transfer["amount"].(float64)
currency, _ := transfer["currency"].(string)
err = markSupplierPaid(transferID, amount, currency)
case "transfer.failed":
reason, _ := transfer["failure_reason"].(string)
err = flagPayoutFailure(transferID, reason)
case "transfer.created":
if transfer["status"] == "review" {
err = notifyOpsPayoutHeld(transferID)
}
}
if err != nil {
return err
}
return recordProcessed(eventID)
}
```
`transfer.processing` is absent on purpose. There is nothing to do on it that is not premature: the
money has not moved, and a handler that ships an order on `processing` ships it before the payout
was ever attempted.
## The four ways this goes wrong
Every one of these produces a handler that passes review, works in staging, and pays somebody twice
in production.
| The mistake | What it costs you |
| ----------------------------------------- | ------------------------------------------------------------------------------------------------------------------------------------------------------------ |
| Trusting the order events arrive in | Deliveries are retried independently. `transfer.succeeded` can land before `transfer.processing`. Read the state from `data.status`, never from the sequence |
| Not deduplicating | The same event can be delivered more than once. Store `event.id` and check it first |
| Returning `410` when you meant "retry me" | `410 Gone` is the one answer that ends the delivery permanently. Every other failure, `4xx` included, is retried for up to 72 hours |
| Working before answering | The timeout is 30 seconds. A slow handler turns one event into repeated deliveries, and your retries pile up behind your own latency |
> [!NOTE]
> **Subscribing to everything gives you more than five events**
>
> An endpoint subscribed to `*` sees `balance.updated` when the reservation settles and
> `fee.charged` when Wajub takes its fee, on top of the five transfer events. That is correct
> behaviour, not a duplicate. Subscribe to the five you need unless you have a use for the rest.
## How long before you worry
In sandbox, about two seconds. In live, usually seconds and occasionally minutes, and a payout that
takes longer still ends with the same `transfer.succeeded` or `transfer.failed`, just later.
> [!WARNING]
> **Nothing times out on its own**
>
> A payout can stay `processing` for a long time, with nothing for you to do, and your reservation
> stays held. There is no status meaning "we gave up", and there is no expiry. Do not
> build a timeout that marks the payout failed on your side: a `processing` payout may still land
> on the recipient's phone, and you will have paid them while your books say you did not.
## When to read instead of listen
Webhooks are the answer for a payout you are waiting on. Reading is the answer for a payout you are
checking up on.
`GET /transfers/{uid}`
Use it to reconcile on a schedule, to answer a support question, and while you are still building
and have nowhere public for Wajub to reach. Do not use it as a loop around one payout waiting for
`succeeded`: reading a transfer counts against your team's general limit, 120 requests a minute
on the default plan, and not against the share kept for sending payouts, but a loop still burns it
for every other call your integration needs to make.
For an end-of-day reconciliation, list by period and compare with the events you received. Anything
you hold as `processing` that Wajub reports terminal is a delivery you missed, and
[Konsole](https://docs.wajub.com/developer-tools/konsole/log-explorer) shows you every attempt that was made to reach you.
## If you are a platform
A payout made on behalf of a connected account is delivered twice: once to that account's own
endpoints, and once to yours. Your copy carries an extra `account` object naming the merchant it
belongs to, so one endpoint can serve every connected account you have. [Sync](https://docs.wajub.com/sync) covers how
those accounts are set up.
- [Transfer reference](https://docs.wajub.com/payouts/transfers): The object, the statuses in detail, and the failure codes.
- [Signature verification](https://docs.wajub.com/developer-tools/webhooks/signature-verification): The algorithm, the raw body, and the timestamp window.
- [Retries & ordering](https://docs.wajub.com/developer-tools/webhooks/retries): What counts as a failed delivery, and why an event arrives twice.
- [Receive webhooks locally](https://docs.wajub.com/developer-tools/cli/listen): Forward real events to localhost while you build the handler.
---
# Orchestration Analytics
URL: https://docs.wajub.com/orchestration/analytics
> Where the routing numbers live, what each one counts, and over which window.
There is no single orchestration dashboard. The numbers live on four surfaces, each answering a
different question over a different window, and the most common mistake is comparing two of them
and concluding one is wrong.
| Surface | Question it answers | Window |
| --------------------------- | ------------------------------------------ | ------------------ |
| **Orchestration, Overview** | How has each connection performed for me | 7, 30 or 90 days |
| **Orchestration, Matrix** | What is happening right now, per operator | Rolling 15 minutes |
| Overview, uplift panel | What has the cascade actually recovered | 7 days |
| **Konsole, Routing Log** | Why was this exact payment routed this way | Per charge call |
All four are live only. Sandbox payments are not routed, so they are excluded from every figure on
this page, and the Orchestration section itself is available in live mode only.
## The Overview, and what each figure counts
Pick a period of 7, 30 or 90 days. Use the refresh control when you need the current value
immediately.
Per connection, you get these figures, all computed from your own transactions in that period.
The names are the labels the Dashboard shows.
- `Transactions` (count): Live payments attributed to this connection in the period.
- `Success rate` (percentage): The share of those payments actually credited to your balance. This is an acceptance rate seen from your books, so a payer who abandoned the prompt counts against it.
- `Volume` (amount): Credited volume for the period. The amounts of every currency are added together without conversion, so read it per currency when you collect in more than one.
- `Last used` (time): The most recent payment on this connection, which is how you spot a connection that has quietly stopped receiving traffic.
Above the list, the same period is aggregated across every connection, plus two figures that only
exist there. **Average time** is the average number of seconds between the payment being created
and it being credited, so it measures the payer's whole journey including the time they spent
looking for their phone, not the provider's response time. The trend shown with **Transactions**
compares the transaction count against the immediately preceding period of the same length.
> [!NOTE]
> **Two success rates, two meanings**
>
> The Overview computes success from credited transactions, so an abandoned prompt lowers it.
> Routing looks at recent reliability, which ignores payer-side failures, so an abandoned prompt
> does not touch it. A connection can sit at 72 % on the Overview and still be healthy for routing,
> and both numbers are right.
## When a connection is called degraded
One rule decides the words and colours you see: green from 95 %, amber from 80 %, red below, and
nothing below 5 payments. Each surface applies it on its own window.
| Where | Data it needs | Verdict |
| --------------------------- | --------------------------------- | -------------------------------------------------------------------------------------------------------------- |
| Overview, attention banner | The matrix below, live | A channel is listed when one of its cells is red |
| Provider page, health badge | 5 payments in the last 24 hours | Green from 95 %, amber from 80 %, red below |
| Matrix, cell colour | 5 attempts in the last 15 minutes | Green from 95 %, amber from 80 %, red below, and red whenever the circuit is open or the connection is refused |
Below the minimum, nothing is asserted. A grey cell or a missing badge means too little traffic to
judge, not a problem.
## The matrix, and the diagnosis it enables
The matrix puts your operator channels down the side and your connections across the top, and fills
each cell from a rolling 15-minute window. It exists for one distinction that a per-provider list
cannot make.
**A whole row red** means the operator itself is down. Every connection that reaches MTN Cameroon
is failing, so there is nothing to reroute to, and the answer is to wait or to stop offering that
channel until it comes back.
**One cell red while its neighbours hold** means your path to that operator is the problem, not the
operator. The traffic can be saved, because another connection on the same row is working. This is
exactly the case the cascade handles on its own, and the case where a policy on that channel pays
off immediately: **Max acceptance**, or a minimum health, puts the failing connection behind the
working one on this channel only.
Each cell also shows whether that route's circuit is open, which explains a connection that appears
to be receiving no traffic at all. When the connection's credentials are missing or rejected, the
cell turns red and shows **Connection refused** in place of the circuit badge.
## What the cascade recovered
The single figure that justifies orchestration is on the Overview, over the last 7 days: the number
of payments a fallback provider charged after the one ranked before it failed on the path, with
their volume. Only failovers inside one routing decision count: a payer who tried again on their
own after a decline started a new decision, and is not counted.
Each of those is a payment that would have been lost on a single-provider integration. The panel
also shows the volume that ran through channels currently flagged as degraded, which is the
exposure you are carrying right now rather than a result you have already banked.
> [!TIP]
> **Read it next to your single-path warnings**
>
> A high recovery count on a channel that also carries a single-path warning is the strongest
> argument for connecting a second provider: the cascade is already saving payments where it can,
> and on that channel it has nothing to save them with.
## The advisor, and which of its findings move the needle
The Overview reads your matrix and raises findings, sorted by severity and by the volume at stake.
They are deterministic, computed from your own data, and every number in them is one you can check.
The one that always leads to a real change is the **single path** warning: one channel, one
connection, no fallback, and the volume that would stop if it failed. Connecting a second provider
for that channel is the fix, and it is the single highest-value action in the whole module.
The **operator down** finding is informational and correctly so. Nothing you configure will fix an
operator outage.
The remaining finding names a connection failing on a channel while another one is healthy, and
points at that channel's policy on the Matrix page: set it to **Max acceptance**, or give it a
minimum health, and the failing connection is tried after the healthy one on that channel only. On
every payment on the channel, Wajub applies the policy to the connections no
[routing rule](https://docs.wajub.com/orchestration/routing-rules) placed. Raising the connection's `priority` instead
would move it on every channel.
## Reading one decision, or filtering many
Konsole's routing log holds one entry per charge attempt: one per call to `POST /payments/{id}`, so
a payer who tried twice on the same payment leaves two. Filtering it is how you answer questions the
aggregates cannot.
| Filter | What it isolates |
| ------------------------------------- | --------------------------------------------------------- |
| Outcome, **Had fallback** | Decisions where more than one candidate was ranked |
| Outcome, **Had circuit-breaker skip** | Decisions where a connection was paused on the channel |
| Outcome, **No eligible candidate** | Decisions where the list came back empty, the `422` cases |
| Channel | One operator rail at a time |
| Provider | Decisions this connection won: it took the payment |
| Transaction reference | One payment, end to end |
Selecting a row opens every candidate and why it was placed, alongside the attempts that followed
it: each candidate that was tried shows its outcome and its latency. That pairing, the decision next
to what happened, is the only place the two are shown together.
## Alerts
**Orchestration, Alerts** watches a figure for you and tells you when it crosses a line, on live
payments only.
| Field | What it takes |
| --------- | ----------------------------------------------------------------------------------------------------------------------------------------- |
| Metric | Success rate, error rate, transaction count, volume, webhook delivery rate, webhook failure count, funnel abandonment rate or queue depth |
| Condition | Drops below, drops to or below, rises above, rises to or above, or equals a threshold |
| Window | The last 5 minutes, 15 minutes, hour or 24 hours |
| Scope | Everything, one connection, one channel or one routing rule |
| Notify | Email addresses, a Slack webhook or your own URL |
| Cooldown | From 5 minutes to 24 hours before the same rule can fire again |
A channel scope counts the payments charged on that channel, a payment sent on `mobile` or
`cm.mobile` counting under the operator it resolved to. A rule scope counts the payments that rule
routed. The scope only narrows the payment metrics. The webhook metrics count every delivery to your
own endpoints, and the funnel metric every payment page opened. A Slack or webhook target must be an
`https` URL that does not point to a private or internal address: Wajub sends nothing to any other,
and does not follow a redirect from it. It receives a JSON body with `rule_id`, `rule_name`,
`observed_value`, `context` and `fired_at`. The last 20 alerts that fired are listed on the same
page.
## What is not measured
Knowing where the gaps are saves you looking for exports that do not exist.
**Cost is an input, not an output.** The negotiated rate you enter on a connection is used to find
the cheapest connection for each payment, and it is not aggregated back into a cost per transaction
or a spend comparison anywhere in the product. If you need that, compute it from your own
transaction exports and the rates you entered.
**None of this is on the API.** There is no endpoint for provider statistics, routing decisions,
matrix cells or advisor findings, and no CSV export of them. Orchestration analytics are read in
the Dashboard and in Konsole.
**Sandbox contributes nothing.** No decision is recorded, no attempt is counted, no cell is
updated. A quiet matrix on a busy test account is expected.
- [Payment Orchestration](https://docs.wajub.com/orchestration): How the decision behind every one of these numbers is made.
- [Waterfall & Fallback](https://docs.wajub.com/orchestration/waterfall-fallback): What the recovered payments actually went through.
- [Providers](https://docs.wajub.com/orchestration/providers): Priority, weight and negotiated rates, where you act on what you read here.
- [Routing Log](https://docs.wajub.com/developer-tools/konsole/routing-log): One decision per payment, with its full candidate list.
---
# Payment Orchestration
URL: https://docs.wajub.com/orchestration
> How Wajub picks a provider for every payment, and what you can change about it.
You never name a provider on a payment: for every live payment, Wajub ranks the connections that
could carry it, tries them from the top, and moves down the list when one fails on its way to the
operator. This page covers what shapes that list: what you control, what Wajub decides, and what
you can observe afterwards.
## Who decides what
Orchestration is not a feature you turn on. It is the only path a live payment takes, and the
division of labour never changes.
| Decision | Made by |
| ----------------------------------------------------- | ----------------------------------------------------------------------------------------------------- |
| Which providers you are connected to | You, in the Dashboard |
| Which channels each connection may carry | You |
| The order the connections are tried in | You: your routing rules first, then the channel's policy, or each connection's `priority` without one |
| How traffic splits between equals | You, through the `weight` on your rules and on your connections |
| Which connections are eligible for this exact payment | Wajub |
| Which one goes first among connections left equal | Wajub, from your costs and live success rates |
| When to stop trying | Wajub |
Nothing in that table is expressible at the call site. If you need a specific provider for a
specific case, that is a [routing rule](https://docs.wajub.com/orchestration/routing-rules), a channel policy or a
priority, set once in the Dashboard, not a parameter you send.
## The route is decided on the second call
A payment is two calls, and only the second one routes anything.
| Call | What it fixes |
| --------------------- | ---------------------------------------------------------------- |
| `POST /payments` | The amount, the currency, the customer. No provider is looked at |
| `POST /payments/{id}` | The channel and the phone number, and therefore the route |
The reason is the channel. Routing always uses the operator channel, and the operator is often only
known once the payer's number is. A request for `cm.mobile` carrying `+237 6 70 00 00 00` is routed
as `cm.mtn`, and a request that names `cm.mtn` while carrying an Orange number is refused with a
`422` that names the mismatch, rather than being quietly rerouted.
> [!WARNING]
> **Write rules against the operator channel**
>
> Routing always uses the operator channel, such as `cm.mtn` or `sn.wave`: `cm.mobile` with an MTN
> number is routed as `cm.mtn`, so write your rules against `cm.mtn`. No payment is ever routed on
> `cm.mobile`, plain `mobile`, or product words like `mobile_money`, so a routing rule written
> against `mobile_money` matches nothing.
## Which connections can take the payment
Before anything is ordered, Wajub keeps only the connections that can carry this exact payment. A
connection is tried only when all of these hold:
- the connection is active, and so is the provider: **Available** or **Beta**, not in maintenance,
coming soon or disabled;
- the provider can carry the payment's channel, and your connection's channel list admits it;
- the connection accepts the payment's currency;
- Wajub can charge through this provider (providers not yet supported are marked **Coming soon**);
- the connection is not paused on this channel after repeated failures. A paused connection is
shown as skipped in the [Routing Log](https://docs.wajub.com/developer-tools/konsole/routing-log).
A country restriction works one level up. When an active restriction on your account covers the
payer's country, the whole payment stops with `403 country_restricted`, not the `422` of an empty
list ([Restriction errors](https://docs.wajub.com/api/errors#restriction-errors)).
Two of those conditions are permissive when left empty, which surprises people the first time. A
connection with no channel list accepts every channel the provider globally supports, and a
connection with no currency list accepts every currency. Narrowing is opt-in, not the default.
## The most specific instruction goes first
The connections left are ordered in two steps. Your rules place their connections first. Every
other connection is then ordered by the channel's policy when the channel has an active one, or by
priority when it has none. So the list always reads the same way: what your rules named, then the
rest.
| Stage | What it places | How it orders them |
| ----------------- | --------------------------------------------------------------------------------------- | -------------------------------------------------------------------------------------------------------------------------------- |
| 1. Routing rules | The target of every rule that matches the payment, each followed by the rule's fallback | Higher rule priority first, then the more specific rule; rules still tied share traffic by weight |
| 2. Channel policy | Every other connection, when the channel has an active policy | Its fixed cascade order, then its objective; a connection outside a guardrail is tried after the others |
| 2. Or priority | Every other connection, when the channel has no active policy | Higher `priority` first; inside one priority, cost and recent success; weight shares traffic between the connections still equal |
### Rules go first, whatever the priority
A connection named by a matching rule is tried before every connection no rule named, whatever the
`priority` on either. That is what a rule is for: you wrote it for this case, so it wins over the
general order. The rule's [fallback provider](https://docs.wajub.com/orchestration/routing-rules#the-fallback-provider)
comes right behind its target. [Routing rules](https://docs.wajub.com/orchestration/routing-rules) covers which rule wins
when several match.
### Then the channel's policy, when it has one
A channel policy is set per operator channel, on **Orchestration, Matrix**, with the **Policy**
button on the channel's row. When it is active, it orders every connection no rule placed, and the
`priority` on your connections only separates the ones it leaves equal.
| Setting | What it does |
| ------------------- | ----------------------------------------------------------------------------------------------------------------------------------------------------------------- |
| Fixed cascade order | These connections first, in this order |
| Routing objective | Ranks the others. **Max acceptance**: best recent success rate first. **Least cost**: lowest fee for this payment first. **Fastest**: lowest recent latency first |
| Min health % | A connection whose recent success rate on this channel is below it is tried after every connection that meets it |
| Cost ceiling | A connection whose fee for this payment, in the payment's currency, is above it is tried after every connection that meets it |
A connection below your minimum health or above your cost ceiling is tried after the others,
including the connections in your cascade order.
> [!NOTE]
> **A guardrail moves a connection back, it never removes one**
>
> A connection outside a guardrail is tried after the others, not dropped. When every connection
> is above the cost ceiling, the payment still goes through on the best of them. A guardrail cannot
> cost you a payment.
### Then priority, and cost and recent success inside it
On a channel with no active policy, connections are grouped by the `priority` integer on your
connection, and the highest group is tried in full before the next one is touched. The default is
`0`, so a merchant who has never set one has every connection in a single group.
Inside one priority, Wajub favours the connection that is cheapest for this payment, from the
negotiated rates you entered on your connections (not Wajub's own pricing), and the one that has
been succeeding best recently on this channel for your account. Only failures on the provider's or
the operator's side count against recent success: a payer's empty wallet does not.
> [!CAUTION]
> **Least cost needs your rates**
>
> If you never entered what each connection costs you, Wajub cannot tell your connections apart on
> cost, and cost separates nothing. Least-cost routing only works once you have entered your
> negotiated rates. The same goes for the **Least cost** objective and the cost ceiling of a channel
> policy.
Connections still equal share traffic by their `weight`, which defaults to `100`. Set two
connections to the same priority with weights of 70 and 30 and, when nothing else separates them,
roughly seven payments in ten will open on the first. A connection at weight `0` is only tried
after the ones that have some. Weight shares traffic in the same way between connections a channel
policy leaves equal.
## One decision, read end to end
A 25 000 XAF payment on `cm.mtn`, on an account with four connections that can reach that number,
no policy on the channel, and a rule pinning country, channel and currency to CinetPay. All four
end at the same MTN wallet. What the ranking decides is which one carries it there.
**Routing decision · cm.mtn · 25 000 XAF**
Four connections reach the same wallet. One was out of rotation, the rule's target went first, the second one carried it.
1. **cinetpay** (priority 50, failed, 8.0 s, rule match, recent success): operator timed out
2. **flutterwave** (priority 100, accepted, 0.9 s, least cost, recent success): accepted
3. **pawapay** (priority 50, untried): never called
- ~~notchpay~~: Skipped (circuit open). The connection was paused on this channel after repeated failures.
Read it from the bottom. NotchPay was not in the ranking at all, because it was paused on this
channel. PawaPay was ranked but sits at priority 50 under Flutterwave's 100, so it would only have
been called if both connections above it had failed. CinetPay went first although its priority is
50 too, entirely because of the rule: a connection a matching rule names is tried before the
general order, and Flutterwave, cheaper and succeeding well recently, only came next. CinetPay then
answered that the operator had timed out, which says nothing about the payer, so the ladder moved
on and Flutterwave reached the same wallet in under a second.
[Konsole](https://docs.wajub.com/developer-tools/konsole/routing-log) shows why each payment was routed the way it was.
The API response does not.
## What stops the ladder
The cascade is not a retry policy. It is a single pass down the list, inside the
`POST /payments/{id}` call. The table says what ends it, and what moves it on.
| What happens | What the ladder does |
| -------------------------------------------------------------------------------------------------------------------------------------------------------------------------------- | --------------------------------------------------------------------------------------------- |
| A provider accepts, including accepting as `pending` | Stops. That provider owns the payment now |
| The payer refuses: empty wallet, wrong number, operator limit, prompt left to expire | Stops. A second provider would ask the same person the same question |
| The path fails: the provider answers that the operator timed out or is down, that your credentials are refused or that its float is exhausted, or the provider cannot be reached | Moves on to the next candidate, and the failure counts against that route's health |
| The request reached the provider and its outcome is unknown | Stops. The provider may have acted, so the payment stays `pending` until its outcome is known |
| Your connection has no credentials for this channel | Moves on: nothing reached that provider. The connection is flagged in the Dashboard |
| Three providers have been tried | Stops, whatever is left in the list |
A card the payer entered in a provider's own fields (Stripe, a saved Paystack card) is the
exception: only the provider that holds it can charge it, so it goes to that connection whatever
the ranking says, and never to another one. A provider's own payment window and a code or detail
the payer confirms afterwards stay with the provider that opened them in the same way
([Waterfall & fallback](https://docs.wajub.com/orchestration/waterfall-fallback#a-step-the-provider-opened-stays-with-it)).
> [!CAUTION]
> **There is no failover once the push is accepted**
>
> A mobile money provider returns `pending` the moment the operator agrees to prompt the customer,
> seconds before anyone has touched their phone. That is an acceptance, and it ends the ladder. If
> the customer then never confirms, the payment fails minutes later, long after your call
> returned, and no other provider is tried. Failing over
> at that point would prompt the same phone twice. Trying again is your decision, and it is a new
> payment.
[Waterfall & fallback](https://docs.wajub.com/orchestration/waterfall-fallback) covers which failures move a payment on,
and when a connection is paused.
## The two ways it ends badly
They are different failures with different answers, and the status code tells you which one you
have without reading the message.
An empty candidate list answers `422`. Nothing was tried, so nothing can be retried elsewhere: no
connection of yours can carry this channel and currency today, or the ones that could are all out
of rotation.
```json title="Response · 422 Unprocessable Content"
{
"code": 422,
"status": "Unprocessable Content",
"message": "No eligible payment provider found for this transaction.",
"errors": {
"channel": ["No eligible payment provider found for this transaction."]
}
}
```
A list that was walked and exhausted answers `402`, and so does a single terminal refusal such as a
decline. `error_code` carries the provider's own machine-readable reason when there is one, which
there is not when every candidate failed without saying why.
```json title="Response · 402 Payment Required"
{
"code": 402,
"status": "Payment Required",
"message": "Insufficient balance",
"error_code": "insufficient_funds",
"transaction": {
"id": "trx_CSUGajfv9xh0XQ5wu2lx",
"status": "pending"
}
}
```
Note the status in both cases. A failed attempt does not kill the payment: it goes back to
`pending`, and the payer can try again on the same payment with another number or another card.
Only your own code decides whether to offer them that.
## What the API tells you, and what it does not
Orchestration is deliberately invisible in the payment object, and knowing where the seams are
saves you looking for fields that are not there.
| Question | Answer |
| --------------------------------------------------- | ---------------------------------------------------------------------------------------------------------------------- |
| Which provider ran my payment | Not in the API. A payment carries no `provider`, no attempt count, no routing block |
| Which provider ran my payout | `provider` and `provider_reference`, on the transfer itself |
| Which connections do I have, and what do they carry | [`GET /providers`](https://docs.wajub.com/api/providers/list), which returns the connection and its channels, but not its priority or weight |
| How do I create a routing rule from code | You do not. Rules are set in the Dashboard |
| Why was this payment routed the way it was | [Konsole, Routing Log](https://docs.wajub.com/developer-tools/konsole/routing-log), which shows every candidate and why it was placed |
> [!WARNING]
> **Sandbox does not route**
>
> Sandbox payments are not routed: they don't use your connections or your rules, don't appear in
> the Routing Log and aren't counted in analytics. Connections exist in live mode only. Sandbox is
> where you test the shape of your integration. Routing is tested live, on small amounts.
- [Routing Rules](https://docs.wajub.com/orchestration/routing-rules): What a rule can pin down, and which rule wins when several match.
- [Waterfall & Fallback](https://docs.wajub.com/orchestration/waterfall-fallback): Which failures move a payment on, and when a connection is paused.
- [Routing Log](https://docs.wajub.com/developer-tools/konsole/routing-log): The decision behind a payment that already happened.
- [Orchestration Quickstart](https://docs.wajub.com/orchestration/quickstart): Shape the routing without changing a line of integration code.
---
# Providers
URL: https://docs.wajub.com/orchestration/providers
> Connect a provider, decide what it carries, and see what each field does to routing.
A provider connection is your own account with a payment provider: you sign with CinetPay,
Flutterwave or MTN, paste the credentials under **Orchestration, Providers**, and Wajub charges
through it under your contract and your negotiated rates. This page is what each field there does.
## Connecting one
The wizard is four steps, and only the first two depend on the provider you picked.
**Credentials.** Every provider declares its own fields, because a CinetPay `site_id` has no
equivalent at Stripe. The form asks for exactly what that provider needs and nothing else. Values
are encrypted at rest and never returned to you in full afterwards.
**Channels.** Which of the provider's capabilities you want to route through this connection. Leave
it untouched and you get everything the provider globally supports, minus the channels that need
the provider to switch them on for you first.
**Routing.** The four numbers this page is really about: priority, weight, and your negotiated
rate.
**Review.** Nothing is written before this step, and a connection test is available on the
connection afterwards, which calls the provider with your credentials and tells you whether they
work before a real payer depends on them.
> [!WARNING]
> **A connection is live, always**
>
> There is no sandbox copy of a connection. Connections exist in live mode only, so
> `GET /providers` with a test key returns an empty list, and nothing you connect here changes what
> a sandbox payment does. Sandbox payments are not routed: they don't use your connections or
> rules.
## What a connection is allowed to carry
Two lists narrow a connection, and both behave the same way: empty means everything, not nothing.
**Channels.** A payment goes through the connection only when the provider can technically carry
the payment's channel and your own channel list admits it. If you never set a list, every
capability the provider has is admitted. Narrowing is opt-in.
**Currencies.** Same rule. An empty currency list accepts every currency the provider can settle.
You set it in the connection wizard and on the connection's page, under **Currencies**.
The channel here is an exact slug, the operator channel payments are routed on: `cm.mtn`,
`sn.wave`, `ke.mpesa`, `card`. No payment is routed on product-level values like `mobile_money` or
`bank_transfer`, and picking a channel list is picking operator rails one by one.
> [!NOTE]
> **Some channels need the provider's agreement first**
>
> A few capabilities require the provider to enable them on your account before they will accept a
> charge. Those are excluded from the default "everything the provider supports" list, so they never
> appear by accident. Add them explicitly once the provider has confirmed, not before.
## Routing configuration
Four fields, and they do very different amounts of work.
- `priority` (integer, default `0`): Orders the connections no routing rule names, on a channel without a channel policy. Higher is tried first, and a lower tier is never touched until every connection above it has been tried and failed. On a channel with a policy, it only separates the connections the policy leaves equal.
- `weight` (integer, 0 to 100, default `100`): Shares traffic between connections that are otherwise equal, including the ones a channel policy leaves equal: 70 and 30 send roughly 70 % of those payments to the first.
- `Negotiated rate` (percentage): What this provider charges you, percent of the amount. Used to find the cheapest connection for each payment, and by a channel policy's Least cost objective and cost ceiling. With no rate entered, your connections cannot be told apart on cost.
- `Fixed fee` (amount): The per-transaction part of the same cost. Enter it in your base currency: Wajub converts it to the payment's currency when comparing costs. Both can be overridden per channel when a provider prices one rail differently.
Priority is the field to reach for when you know the answer for every payment. When the answer
depends on the country, the channel, the currency or the amount, a
[routing rule](https://docs.wajub.com/orchestration/routing-rules) says it more precisely and is applied first, and a
[channel policy](https://docs.wajub.com/orchestration#then-the-channels-policy-when-it-has-one) can order one operator
channel on its own. Without a channel policy, the other three fields only matter inside a tier,
once priority has already grouped your connections. With one, the rate and the fixed fee also feed
its **Least cost** objective and its cost ceiling, and weight shares traffic between the
connections it leaves equal.
A worked ordering: two connections both able to carry `cm.mtn`, one at priority `10` and one at
`0`, no rule and no policy on the channel. The first is always called first, whatever the second
costs and however well it is performing. Move them both to `10` and cost and recent success start
deciding, which is when your rates begin to matter.
> [!TIP]
> **Enter your rates before expecting least-cost routing**
>
> Inside one priority, Wajub favours the cheapest connection for that exact amount and channel.
> With no rates entered, your connections all look the same on cost, and cost separates nothing.
> Filling in what each provider actually costs you is what turns least-cost routing on.
## The catalogue, and what it means to be in it
The provider list in the Dashboard shows what you can connect. Three things have to line up before
a provider can carry a live payment.
| Requirement | Where it comes from |
| --------------------------------- | ------------------------------------------------------ |
| The provider is listed and active | Wajub's catalogue |
| Wajub can charge through it | Providers not yet supported are marked **Coming soon** |
| You hold credentials for it | Your own contract with the provider |
If you have connected a provider and it never appears in a routing decision, run its channel,
currency and amount through the
[routing simulator](https://docs.wajub.com/orchestration/routing-rules#the-simulator-on-the-routing-rules-page), on a
Growth plan or above: it names the reason each connection was left out.
Today you can connect 27 providers: the **Wajub rail** (by application, below), Stripe, PayPal,
Flutterwave, Flutterwave v4, Paystack, PawaPay, CinetPay, InTouch, K-PAY, FedaPay, Kkiapay, Maviance, My-CoolPay,
Monetbil, Campay, Neero, Notch Pay, Taramoney, Fapshi, MeSomb, Nokash, MTN MoMo, Orange Money, Wave,
Djamo and Express Union Mobile Money. The others in the catalogue are marked **Coming soon** and
cannot be connected yet.
MeSomb is in **Beta**: you can connect it and it takes payments, on MTN and Orange Money in
Cameroon, but it has carried little live traffic yet. Send one small payment through it before you
route real volume there.
Flutterwave v4 is a separate connection from Flutterwave, on Flutterwave's newer API, which
Flutterwave itself still calls a beta. It charges OPay and USSD in Nigeria and Mobile Money in the
countries it covers, but no cards: connect Flutterwave for those.
Connections are live, so the Dashboard refuses a provider's test or sandbox credentials when you
save:
- A key that says so itself is refused as you type it: a Stripe or Paystack key starting with
`sk_test_` or `pk_test_`, a Flutterwave key containing `_TEST`, a K-PAY key starting with
`kpay_test_`, a FedaPay key starting with `sk_sandbox_`, a Notch Pay key starting with
`sk_test.`, a Fapshi key starting with `FAK_TEST_`.
- PawaPay, PayPal, Campay, MTN MoMo and Wave keys look the same in sandbox and in production. Wajub
asks the provider's production API when you save, and refuses the credentials it answers
`401 Unauthorized` to. Any other answer, or none, saves the connection as before.
When Wajub puts a provider in **Maintenance**, routing skips every connection to it until it is
back, and the next connection takes the payment. The decision records the skip with the reason
`provider_in_maintenance`. Only an **Available** or **Beta** provider takes payments: one marked
**Coming soon** or **Disabled** is skipped the same way, with the reason `provider_unavailable`,
even if a connection to it is still active.
Providers come in six types, and the type is what tells you the shape of the thing: `aggregator`,
`mobile_money`, `card`, `wallet`, `bank`, `crypto`. An aggregator reaches many operators through
one contract, which is why one aggregator connection can fill a whole column of the
[matrix](https://docs.wajub.com/orchestration/analytics). A direct mobile money connection reaches exactly one operator's
rails.
Wajub also operates a house connection, the **Wajub rail**. It collects mobile money under Wajub's
partner agreements, with no provider contract of your own, in 14 countries: Benin, Burkina Faso,
Cameroon, Côte d'Ivoire, DR Congo, Congo, Gabon, Kenya, Rwanda, Senegal, Sierra Leone, Tanzania,
Uganda and Zambia. It pays out on the same channels, except Wave, which only collects, and to
Express Union in Cameroon.
Every country is on request. The rail is granted through an application under **Orchestration,
Wajub Rail** rather than by pasting credentials, and only once your account is verified. You pick
the countries and channels, review the proposed rates, and sign the agreement in the Dashboard.
Wajub then reviews it: the application is approved, approved for some of the channels only, or
rejected, and the signed agreement can be downloaded once it is accepted. One application is
reviewed at a time. Once in place, the rail behaves like any other connection, priority and weight
included.
The Wajub Rail page shows what your connection runs: whether it is active, the channels granted to
you by country and which of them you switched off, the countries the rail covers that you have not
requested yet, with a request link for each to members who may change the account's settings, and every application you sent. A request for more
countries or channels starts from your last business profile, so you only pick what to add.
You can pause the rail from its connection page and resume it the same way. When Wajub pauses it,
because an agreement was not signed in time or by a decision of its own, it stays paused: only Wajub
or an approved application turns it back on.
## How many you can connect
The ceiling is on your plan, and it is the one limit that shapes what orchestration can do for you.
| Plan | Connections | Routing rules |
| ------------- | ----------- | ------------- |
| Pay as you go | 2 | Not included |
| Growth | 6 | Included |
| Scale | Unlimited | Included |
| Enterprise | Unlimited | Included |
The Wajub rail does not count against that ceiling: on Pay as you go you can hold two connections
of your own and the Wajub rail.
Two connections is the minimum for a cascade to exist at all. On a single connection Wajub still
records a routing decision, but the list is one line long and a failure on the provider's side ends
the payment.
## When a connection goes bad
Two mechanisms act on their own, on different timescales, and you do not configure either.
The **health badge** on the connection reads your credited transactions through it over the last
24 hours, [green, amber or red](https://docs.wajub.com/orchestration/analytics#when-a-connection-is-called-degraded). It
is a judgement about the last day, meant for you.
The **circuit breaker** acts within minutes. When a connection keeps failing on one channel, Wajub
pauses it on that channel for a few minutes and brings it back automatically once it works again.
Only your account and that channel are affected, so a connection failing on `cm.mtn` keeps serving
`cm.orange` normally. [Waterfall & fallback](https://docs.wajub.com/orchestration/waterfall-fallback#the-circuit-breaker)
has what you see while it happens.
One thing only you can fix is flagged on the connection itself. When it has no credentials for a
channel, or the provider rejects its key, the connection shows **Connection refused** in the list,
the provider page shows the error with **Fix the connection**, and your team gets an email about
it. The flag clears when you save different credentials, when a connection test passes,
or on the next payment the connection takes. [Waterfall & fallback](https://docs.wajub.com/orchestration/waterfall-fallback#a-connection-the-provider-refuses)
covers what such a connection does to a payment.
## What your integration can see
Your connections are readable from the API, and deliberately without the routing configuration.
`GET /providers`
The response gives each active connection its id, slug, name, logo, type, an `is_active` flag,
and the channels actually available through it, which is the intersection of what the provider supports and
what you enabled. Priority, weight, rates and credentials are not in it, and there is no endpoint
that writes any of them.
Each entry of `channels` is the same object `GET /channels` returns, with every field of it, so one
connection with six channels carries six of them. The sample below is abridged to one connection
and a few fields of one channel.
```json title="Response · one connection, one channel"
{
"id": "00000000-0000-7000-8000-000000000001",
"slug": "cinetpay",
"name": "CinetPay",
"logo": "https://assets.wajub.com/img/providers/cinetpay/icon.png",
"type": "aggregator",
"is_active": true,
"sandbox": false,
"channels": [
{
"id": "chn.4ALL37uSbXWS",
"uid": "chn.4ALL37uSbXWS",
"slug": "cm.mtn",
"name": "MTN Mobile Money CM",
"type": "mobile_money",
"countries": ["CM"],
"logo": "https://assets.wajub.com/img/channels/momo.svg",
"active": true,
"collect": true,
"payout": true,
"currency": "XAF"
}
]
}
```
Changes to a connection are pushed to your webhook endpoints, which is how a backend stays in step
without polling that list.
| Event | When it fires |
| ------------------------------ | -------------------------------------------------------------- |
| `provider.activated` | A connection became active, on creation or after being resumed |
| `provider.deactivated` | A connection was paused or disconnected |
| `provider.channel_activated` | A channel became routable through a connection |
| `provider.channel_deactivated` | A channel stopped being routable through it |
Use the channel events rather than a hardcoded list if your checkout shows payment methods: they
fire on the exact set Wajub will route on.
## Asking for a provider that is not listed
Write to **[providers@wajub.com](mailto:providers@wajub.com)** with the provider, the countries and the channels you
need. The countries you name help us prioritise it.
- [Payment Orchestration](https://docs.wajub.com/orchestration): What Wajub does with priority, weight and your rates.
- [Routing Rules](https://docs.wajub.com/orchestration/routing-rules): Prefer one connection for a channel, a currency or an amount range.
- [Orchestration Analytics](https://docs.wajub.com/orchestration/analytics): How each connection is actually performing for you.
- [Payment Methods](https://docs.wajub.com/payments/payment-methods): The country, operator and currency coverage behind these channels.
---
# Quickstart
URL: https://docs.wajub.com/orchestration/quickstart
> Make the routing visible on a live payment, then move one connection and watch it move.
Orchestration needs nothing switched on and no change to your integration. This quickstart makes
the ranking of your connections visible on a live payment, then changes it once so you can watch it
move.
> [!WARNING]
> **Sandbox does not route**
>
> A sandbox payment is not routed: it does not use your connections or your rules, no decision is
> recorded, and Konsole's routing log refuses a sandbox key outright. There is no way to
> rehearse a routing decision without real money, so use the smallest amount your operator accepts
> and pay yourself.
## 1. Connect a second provider
One connection has nothing to fall back to. Wajub still records a routing decision, but the list
is one line long and a failure ends the payment.
Add a second in the dashboard under **Orchestration, Providers**. Both sides have to be live: the
provider itself, and your connection to it. An inactive provider or connection is never tried, so a
half-finished connection is invisible rather than last.
## 2. Give them an order
Every connection carries two numbers, both on the provider page under **Routing configuration**.
| Field | What it decides | Default |
| ------------ | ------------------------------------------------------------------ | ------- |
| `priority` | The order of the list. Higher first | `0` |
| `weight` (%) | How two connections share traffic when nothing else separates them | `100` |
Priority orders every connection no routing rule names, on a channel with no channel policy. A
connection in a lower tier is never tried before every connection above it has been tried and
failed, whatever it costs. A matching [routing rule](https://docs.wajub.com/orchestration/routing-rules) and a channel
policy come before it, which is why this quickstart uses neither:
[Orchestration](https://docs.wajub.com/orchestration#the-most-specific-instruction-goes-first) has the full order.
> [!NOTE]
> **Weight only splits what nothing else separates**
>
> Weight shares traffic between connections on the same priority that nothing else separates: on
> cost and recent success they look the same. On a fresh account no negotiated rates and no recent
> history separate the connections, so priority, then weight, decides.
Set one connection to `10` and leave the other at `0`. That gives you two tiers, which is the
smallest setup where the next steps show something.
## 3. Send a live payment
A payment is two calls, and this is the part most integrations get wrong: the first call does not
route. It creates the transaction, and it accepts no channel and no provider.
`POST /payments`
Pass an amount, a currency, and one way to identify the payer among `email`, `phone`, `customer_id`
and `customer`.
**Create the payment**
```bash
curl https://api.wajub.com/payments \
-H "Authorization: sk.xxxxxxxxxxxxxxxx…" \
-H "Content-Type: application/json" \
-d '{
"amount": 500,
"currency": "XAF",
"phone": "+237670000000",
"description": "Watching the router work"
}'
```
```javascript
const payment = await wajub.payments.create({
amount: 500,
currency: 'XAF',
phone: '+237670000000',
description: 'Watching the router work',
});
console.log(payment.id);
```
```python
payment = wajub.payments.create({
"amount": 500,
"currency": "XAF",
"phone": "+237670000000",
"description": "Watching the router work",
})
print(payment["id"])
```
```php
$payment = $wajub->payments->create([
'amount' => 500,
'currency' => 'XAF',
'phone' => '+237670000000',
'description' => 'Watching the router work',
]);
echo $payment->id;
```
```go
payment, err := client.Payments.Create(context.Background(), map[string]any{
"amount": 500,
"currency": "XAF",
"phone": "+237670000000",
"description": "Watching the router work",
}, nil)
log.Println(payment.ID)
```
The second call is the one that routes. It names a channel, and everything in
[Orchestration](https://docs.wajub.com/orchestration) happens inside it.
`POST /payments/{id}`
**Charge it, and let Wajub pick the connection**
```bash
curl https://api.wajub.com/payments/trx_CSUGajfv9xh0XQ5wu2lx \
-H "Authorization: sk.xxxxxxxxxxxxxxxx…" \
-H "Content-Type: application/json" \
-d '{
"channel": "cm.mobile",
"data": { "phone": "+237670000000" }
}'
```
```javascript
const result = await wajub.payments.process(payment.id, {
channel: 'cm.mobile',
data: { phone: '+237670000000' },
});
console.log(result.transaction.status);
```
```python
result = wajub.payments.process(payment["id"], {
"channel": "cm.mobile",
"data": {"phone": "+237670000000"},
})
print(result["transaction"]["status"])
```
```php
$result = $wajub->payments->process($payment->id, [
'channel' => 'cm.mobile',
'data' => ['phone' => '+237670000000'],
]);
echo $result->transaction->status;
```
```go
result, err := client.Payments.Process(context.Background(), payment.ID, map[string]any{
"channel": "cm.mobile",
"data": map[string]any{"phone": "+237670000000"},
}, nil)
log.Println(result.Transaction.Status)
```
Routing always uses the operator channel. Wajub reads the number, recognises MTN and routes the
payment as `cm.mtn`, so a connection that declares `cm.orange` and not `cm.mtn` is left out.
## 4. Read the decision
Open the payment in the dashboard. Under the timeline sits **Routing decision**, and "View routing
details" opens the ranked list, in the order the connections were to be tried.
**Routing decision · cm.mtn · 500 XAF**
Two connections, two tiers. The first one answered, so the second was never called.
1. **cinetpay** (priority 10, accepted, 1.2 s, least cost): accepted
2. **flutterwave** (priority 0, untried, least cost): never called
Both connections carry **Least cost**, and that is the expected reading on a fresh account: with no
negotiated rates entered, they cost the same as far as routing knows, and with no recent history on
this channel, neither stands out on recent success. Nothing separates them, no rule matched and the
channel has no policy, so priority is doing all the work, which is exactly what you set up in
step 2.
The same list lives in the [routing log](https://docs.wajub.com/developer-tools/konsole/routing-log), one row per charge
attempt rather than one per payment. That page is live only, for the reason in the first callout.
## 5. Move one, and watch it move
Swap the two priorities: the connection that was on `0` goes to `10`, the other drops to `0`. Send a
second payment, identical to the first.
The ladder comes back in the new order. Nothing in your code changed, no deploy happened, and the
payment request is byte for byte the one you sent five minutes ago. That is the whole point of the
feature, and it is worth doing once with your own eyes before you trust it in production.
## What the API will not tell you
The payment object has no `provider` field. `GET /payments/{id}` returns the `channel` that was
charged, never the connection that carried it, and there is no merchant endpoint that returns
priority, weight or a candidate list. Routing is visible in the dashboard and in Konsole, and
nowhere else.
> [!CAUTION]
> **A 422 on channel means the list came back empty**
>
> When no connection survives the filters, the payment answers
> `422 No eligible payment provider found for this transaction.` on the `channel` key and the
> transaction goes back to `pending`. It is an account configuration problem, not a payer problem:
> the channel, the currency or connections paused on the channel left no connection to try.
- [Payment Orchestration](https://docs.wajub.com/orchestration): Which connections qualify, then rules, channel policy and priority, in that order.
- [Routing Rules](https://docs.wajub.com/orchestration/routing-rules): Send a country, channel, currency or amount range to one connection first.
- [Waterfall & Fallback](https://docs.wajub.com/orchestration/waterfall-fallback): What walks down the list, and what stops it for good.
- [Accept a payment](https://docs.wajub.com/payments/quickstart): The full two-call flow, hosted page included.
---
# Routing Rules
URL: https://docs.wajub.com/orchestration/routing-rules
> What a rule can match, which rule wins when several do, and where it cannot help.
A routing rule names one of your connections for the payments that look a certain way: when a
payment matches, that connection is tried first, whatever the `priority`, with the rule's
[fallback provider](#the-fallback-provider) right behind it. The rest is ordered as described in
[Orchestration](https://docs.wajub.com/orchestration).
> [!NOTE]
> **Growth and above, live only**
>
> Routing rules are a paid feature. On **Pay as you go** the **Orchestration, Routing Rules** page is
> replaced by an upgrade prompt, and the whole Orchestration section is available in live mode
> only. Everything on this page assumes a live key and a Growth, Scale or Enterprise plan.
## What a rule can match
A rule has conditions, one target, an optional fallback, and two numbers of its own. Every
condition is optional, and a rule only matches a payment that meets every condition it sets. The
names below are the fields of the rule form in the Dashboard.
- `Payment channel` (channel): An exact operator channel, the one payments are routed on: cm.mtn, sn.wave, card. Empty matches every channel.
- `Currency` (ISO code): ISO code, in any case. Empty matches every currency.
- `Min Amount / Max Amount` (amount): Inclusive bounds in the currency you entered, in major units like the payment itself. Either side can be left open.
- `Country` (two letters): Redundant on a rule whose channel is an operator channel: cm.mtn already means Cameroon. It narrows a rule with no channel, or a rule on a channel without a country such as card, where it is compared with the payer's detected country. See below.
- `Route To Provider` (connection, required): The one connection this rule places. It has to be a provider you are already connected to, active, in live mode.
- `Fallback Provider` (connection): The connection tried after the target when the rule matches, or in its place when the target cannot be tried. Optional, and different from the target. See The fallback provider, below.
- `Priority` (integer, required, default `0`): Decides between matching rules: the higher one places its connection first. This is the rule's own priority and has nothing to do with the priority on your connection.
- `Weight (%)` (integer, 0 to 100, default `100`): Shares traffic between matching rules that are otherwise tied, on every payment. A rule at 0 never goes first while another one has some weight.
- `Active` (on or off, default `on`): Inactive and deleted rules never match.
### Advanced conditions
The **Advanced conditions** section of the rule form adds four more. Each one, when set, has to
hold too.
| Condition | Matches when |
| ----------------- | ------------------------------------------------------------------------------------------------------------------------------------------------------------------------------------------------------------------------------------------------------------------------------------------------- |
| Time windows | The payment happens inside one of the windows: days of the week, a start and an end time, read in the window's own timezone. A window that ends before it starts crosses midnight, so 22:00 to 04:00 runs through the night. The hours after midnight count on the next day, so tick that day too |
| Customer segments | The payer is in any of the segments picked. **VIP**: a customer tagged `vip`. **Blacklist**: a customer you blocked, or tagged `blacklist`. **First transaction**: no earlier successful payment to you. **Returning**: at least one. A payment with no customer matches neither of the last two |
| Metadata filters | Every filter holds against the `metadata` you sent on the payment. The key can be a dot path, such as `device.type`. A key missing from the payment's metadata fails the filter, except an `eq` filter saved with an empty value, which matches only the payments without that key |
| Frequency caps | None of the rule's caps is reached. See [Frequency caps](#frequency-caps) |
Customer tags are the `tags` on the [customer](https://docs.wajub.com/payments/customers/manage), set from the API or the
Dashboard. Metadata filters compare `eq` and `in` by the text of the value, so `100` typed in the
form matches `100` sent as a number or as a string, and `true` matches the boolean. `in` takes
several values separated by commas, such as `web, app`, and holds when the metadata equals one of
them. `contains` looks for the text inside a string, and `gt`, `gte`, `lt` and `lte` compare
numbers. A list or an object in your metadata only matches an identical value.
### Frequency caps
A cap stops the rule matching once it has counted enough payments in its window. The rule matches
again when the window rolls over.
| Field | What it sets |
| ------ | ----------------------------------------------------------------------------------------------------------------------------------------------------------------- |
| Window | **per minute**, **per hour** or **per day**. Calendar windows in UTC: this minute, this hour, this day |
| max | How many payments the window counts before the rule stops matching |
| Scope | **Rule**: the payments this rule routed, to its target or to its fallback. **Provider**: every payment your account sent to the rule's target, whatever routed it |
What counts is a payment a provider took: succeeded, pending, or waiting for the payer. A payment
refused on the way counts nothing.
## Which rule wins
Every active rule of yours is evaluated on every live payment, and every rule that matches places
its target. They are taken in this order.
1. The higher rule **Priority** first.
2. At equal priority, the more specific rule.
3. Rules still tied share traffic by **Weight**, on every payment. Weights of 70 and 30 put the
first rule's target first on roughly seven payments in ten.
Each rule places its target, then its fallback, then the next rule does the same.
Take an account with CinetPay and Flutterwave both connected, both at priority `0`, both able to
carry `cm.mtn` in XAF, and one rule pinning `cm.mtn` and `XAF` to CinetPay. CinetPay is placed
first by the rule. Flutterwave comes after it, ordered with every connection no rule named, and
being cheaper with a better recent success rate does not change that.
**Routing decision · cm.mtn · 12 000 XAF**
One rule, two connections. The rule's target goes first, whatever the cost or the recent success.
1. **cinetpay** (priority 0, accepted, 1.1 s, rule match): accepted
2. **flutterwave** (priority 0, untried, least cost, recent success): never called
That is the point. Once a rule matches, nothing else outvotes it: not the priority on your
connections, not their cost, not their live success rate. Write rules for cases where you know better
than the numbers, and leave the rest to the numbers.
### Splitting traffic
**By amount.** One rule per bracket, each with its own amount range and its own connection. A
payment falls in one bracket, so only one of them matches.
**By share.** Two rules with the same conditions and the same priority, each pointing at a
different connection, with weights of 70 and 30. The Routing Rules page warns about rules whose conditions
overlap, except two at the same priority that both have a weight under 100 and different targets,
which it reads as an intended split.
## The fallback provider
A rule can name a second connection, the one you want tried when its target fails. When the rule
matches a payment, the fallback is placed in one of two ways.
**The target can be tried.** The fallback comes right behind it, and it is the next connection
tried if the target fails on the provider's side.
**The target cannot be tried at all.** It is paused on this channel after repeated failures, it
does not carry the channel or the currency, or the connection is no longer active. The fallback
then takes the target's place, as if the rule had named it.
A fallback is itself a connection like any other. If it cannot carry the payment either, the rule
places nothing. In the [routing log](https://docs.wajub.com/developer-tools/konsole/routing-log), a connection placed
this way shows a **Fallback** badge.
## Where a rule cannot help
Four things make a rule inert, and all four are worth checking before you conclude the rule was
ignored.
**The target has to be a connection you hold.** The form only lets you pick from providers already
connected to your account, active, in live mode. A connection you later pause takes its rules out
of play with it, except a rule with a fallback: the fallback then stands in for it.
**The channel has to be an operator channel.** Routing always uses the operator channel:
`cm.mobile` with an MTN number is routed as `cm.mtn`, so write the rule against `cm.mtn`. A rule
written against a product word like `mobile_money`, `bank_transfer` or `mobile` matches nothing,
because no payment is ever routed on those strings.
**A capped rule sits out until its window rolls over.** Once a [frequency cap](#frequency-caps) is
reached, the rule stops matching, and the payments it would have placed follow the general order.
**A card stays with the provider that holds it.** A card the payer entered in a provider's own
fields can only be charged by that provider, so a rule pointing elsewhere does not move it. See
[Waterfall & fallback](https://docs.wajub.com/orchestration/waterfall-fallback#a-card-stays-with-its-provider).
> [!NOTE]
> **The country comes from the channel**
>
> On an operator rail the country comes from the channel: `cm.mtn` means Cameroon, whatever case
> you typed the rule's **Country** in. A rule on `cm.mtn` is already a rule about Cameroon. On a
> channel without a country, such as `card`, Wajub uses the country it detected for the payer when
> they opened the checkout, if there is one.
## A rule that has an effect
The shape worth copying is narrow on the channel, explicit on the currency, and pointed at the
connection you want for that case.
Say MTN Cameroon is your biggest rail, three connections can carry it, and one of them gives you
the best acceptance for amounts under 100 000 XAF. Write one rule.
| Field | Value |
| ----------------- | ------------------------- |
| Payment channel | `cm.mtn` |
| Currency | `XAF` |
| Max Amount | `100000` |
| Route To Provider | your preferred connection |
| Priority | `0` |
Under 100 000 XAF, that connection is tried first, whatever its priority. Above, the rule stops
matching and the three connections are ordered by the channel's policy, or by their priority, cost
and recent success, which is usually what you want for the amounts you care most about.
Amount bounds are entered in major units, the same units as the payment. `100000` means 100 000
XAF, not 1 000 XAF.
## The simulator on the Routing Rules page
The **Routing simulator** on the Routing Rules page runs a routing decision without charging
anything. Give it a channel, a currency and an amount, and it answers with the order your
connections would be tried in, the reason for each place (a rule, a rule's fallback, the channel
policy or the connection priority), any guardrail that pushed a connection back, and the
connections it left out, with why. Nothing is charged and nothing is written.
A connection is left out for one of these reasons:
| Reason | Why the connection is left out |
| ------------------------- | ------------------------------------------------------------------------------------------------------------------------- |
| `provider_in_maintenance` | Wajub put the provider in **Maintenance** |
| `provider_unavailable` | The provider is **Coming soon** or **Disabled** |
| `channel_not_served` | The provider cannot carry the channel, or your connection does not enable it |
| `currency_not_supported` | Your connection is limited to other currencies |
| `no_driver` | Wajub cannot charge through this provider yet |
| `circuit_open` | The connection is [paused on this channel](https://docs.wajub.com/orchestration/waterfall-fallback#the-circuit-breaker) after repeated failures |
It sends no customer and no metadata, so a rule with a customer segment or a metadata filter never
matches there. It sends no country either: the country only comes from a channel slug that starts
with one, so on `card` a rule with a **Country** never matches there, though it can on a real
payment. Time windows are read at the current time and frequency caps at their current counts.
Where weight shares traffic, two runs can differ. Like the rules themselves, the simulator
needs a Growth plan or above.
The rule form also previews its impact before you save. It counts your live payments of the last 7
days that match the rule's channel, currency, country (read from the channel the payment was
charged on) and amount range, and lists the connections
that carried them and would now lose them to the one the rule points at. It ignores the advanced
conditions, and it assumes the rule wins every time, so it is the ceiling of what the rule can
move, not a forecast.
- [Payment Orchestration](https://docs.wajub.com/orchestration): The filters, then rules, channel policy and priority, in that order.
- [Waterfall & Fallback](https://docs.wajub.com/orchestration/waterfall-fallback): What walks down the list, and what takes a route out of rotation.
- [Providers](https://docs.wajub.com/orchestration/providers): Priority, weight and negotiated rates, on the connection itself.
- [Routing Log](https://docs.wajub.com/developer-tools/konsole/routing-log): Which rule placed which connection, on a payment that already happened.
---
# Waterfall & Fallback
URL: https://docs.wajub.com/orchestration/waterfall-fallback
> What walks down the candidate list, what stops it, and when a connection is paused.
The waterfall is one pass down the ranked candidate list that [Orchestration](https://docs.wajub.com/orchestration)
builds, inside the `POST /payments/{id}` call, while your request is still open. There is no
separate fallback chain to configure: this page is about what moves a payment down that list, and
what stops it.
## What moves the ladder on
Only one thing does: the attempt failed in a way that says nothing about the payer.
| What the connection did | What happens next |
| -------------------------------------------------------------------------------------------------------------------------------------- | ---------------------------------------------------------------------------------------------------------------------------------- |
| The provider could not be reached | The next candidate is tried |
| The provider reported a temporary problem on its side | The next candidate is tried |
| The provider answered that the operator timed out or is unavailable, that your credentials are refused, or that its float is exhausted | The next candidate is tried, and the connection is [flagged](#a-connection-the-provider-refuses) when the credentials were refused |
| The connection had no credentials for this channel, so nothing was sent | The next candidate is tried, and the connection is [flagged](#a-connection-the-provider-refuses) |
Each of these marks the attempt failed, counts against that connection's health on this channel,
and moves down one line. The payer is not told anything, because from their side nothing has
happened yet.
> [!WARNING]
> **A request sent and left unanswered is never failed over**
>
> When the request reached the provider and no answer came back in time, the provider may have
> taken it: a USSD prompt may already be on the payer's phone. The payment stays `pending` and
> nothing else is tried until its outcome is known.
## What stops it
Besides the unanswered request above, four things, and only one of them is good news.
**A provider accepted.** That includes accepting as `pending` and as `requires_action`. The
provider owns the payment from that moment and nothing else is tried.
**A provider refused for a reason that would repeat.** An empty wallet, an unregistered number, an
operator ceiling, a declined card, a prompt the payer let expire. Wajub answers `402` on the spot
and does not touch the next candidate, because asking a second provider would ask the same person
the same question. A declined card is final, and `error_code` carries the decline code.
**A connection of yours is misconfigured in a way the provider does not call a refusal of your
credentials.** A required field absent for that channel, for example. That stops the ladder rather
than skipping to the next connection, so a single broken connection at the top of your list can
cost you every payment routed through it. Credentials are the exception: missing ones send nothing
and rejected ones are a path failure, so in both cases the next connection is tried, and the
connection is flagged, as [described below](#a-connection-the-provider-refuses).
**Three providers have been tried.** Wajub tries at most three providers per
`POST /payments/{id}` call, on every account. A candidate list ten deep is still walked three lines
at most, and the request ends with `402` even though eligible connections were left untried. A
connection passed over for missing credentials counts as one of the three.
### How long the call can take
A provider that does not answer in time is the
[unanswered request](#what-moves-the-ladder-on) above: the payment stays `pending` and nothing else
is tried. With three providers tried, `POST /payments/{id}` can stay open close to a minute. Give
your own HTTP client at least 90 seconds on that call, so that it does not give up on a payment
Wajub is still placing.
> [!WARNING]
> **A refusal is not the end of the payment**
>
> A `402` leaves the transaction at `pending`, not `failed`. The payer can try again on the same
> payment with another number or another card, and that second call routes from scratch. Whether
> you offer them that is your decision, in your own code.
## A card stays with its provider
A card the payer typed into a provider's own fields can only be charged by that provider: a
Stripe.js payment method, a saved Paystack authorization. Another provider cannot read it, and the
first one may already have debited the card.
So that connection is the only one tried, whatever the ranking put first, and a failure is never
failed over to another connection. If that connection cannot be tried at all, because it is paused
on this channel or no longer active, the payment answers the same `422` as an
[empty list](#when-the-list-was-empty-to-begin-with) rather than going to a provider that cannot
charge the card.
## A step the provider opened stays with it
Two kinds of call are made to the provider that opened them, and never fail over:
- **A provider's own payment window** (the provider's hosted page or sheet the payer completes): it is opened on the first provider of the ranking, and if that provider cannot
open it, the call fails rather than trying the next connection.
- **A confirmation** (a code, a PIN, a phone number, a birth date or an address the payer sends
after the charge started): it goes to the provider that asked for it, which holds the pending
charge. Another provider knows nothing of that charge.
## A connection the provider refuses
When a connection has no credentials for the channel, or the provider rejects the key it holds,
Wajub records it on the connection.
| Where | What you see |
| -------------------------------------------- | ---------------------------------------------------------------------------------- |
| **Orchestration, Providers**, and the Matrix | A **Connection refused** badge on the connection |
| The provider page | An alert with the error code and when it was last seen, and **Fix the connection** |
| Your team's email | An email, when email notifications are on |
The flag clears when you save different credentials, when a connection test passes, or on the next
payment the connection takes. A payment that only found connections without credentials is not
counted as a decline against the payer: the configuration was at fault, not them.
## Every attempt leaves a row
Each attempt is listed on the payment with the provider that was tried, its response, the latency
and its rank in the decision. A payment that cascaded twice shows three of them, in order.
You read them in the Dashboard on the payment itself, under the timeline, and in Konsole next to
the decision that produced them. They are the only place the attempt history exists: the payment
object returned by the API carries none of it.
**One payment, two providers**
- **attempt 1** (failed, 12:31:40, status: failed): Rank 1 in the decision, placed there by a routing rule. The provider answered that the operator had timed out, so the failure counted against this connection on this channel and the next connection was tried.
- provider: cinetpay
- response: timeout
- latency: 8.0 s
- **attempt 2** (processing, 12:31:49, status: processing): Rank 2, the first connection no rule named. The operator agreed to prompt the payer, which is an acceptance, and the ladder ended here.
- provider: flutterwave
- response: pending
- latency: 0.9 s
The second row is where most of the confusion about the cascade comes from.
> [!CAUTION]
> **Nothing fails over once the push is accepted**
>
> A mobile money provider answers `pending` the moment the operator agrees to send the prompt,
> seconds before the payer has touched their phone. That is an acceptance and it ends the ladder.
> If the payer never confirms, the payment fails minutes later, long after your call returned, and
> no other provider is tried. Most of what merchants
> read as a failed cascade is this: the cascade never ran, because the first provider said yes.
## Which failures count against a connection
Failures that come from the payer never count against a connection: an empty wallet, a wrong or
unregistered number, an operator limit, a card declined by its bank or by the provider's fraud
screen, a prompt the payer did not confirm. Another provider would get the same answer, and
counting them would slowly push your traffic away from a perfectly healthy connection.
Failures on the provider's or the operator's side do count. They lower the connection's recent
success rate on that channel, and a connection that keeps failing is paused, as described below.
## The circuit breaker
When a connection keeps failing on one channel, Wajub pauses it on that channel for a few minutes,
before it can cost you more payments, and brings it back automatically once it works again. Only
your account and that channel are affected: a connection going bad on `cm.mtn` keeps serving
`cm.orange`, and every other merchant is untouched. Payments and payouts share a connection's
health on a channel.
A paused connection is not tried, which is why a connection you expected to be tried can be absent
from the ranking entirely. It is not left out silently: Konsole shows it as
**Skipped (circuit open)**, and the Matrix shows the circuit on that connection's cell.
**Routing decision · cm.mtn · 25 000 XAF**
One connection paused, two ranked, the first one carried it.
1. **flutterwave** (priority 100, accepted, 0.9 s): accepted
2. **pawapay** (priority 100, untried): never called
- ~~cinetpay~~: Skipped (circuit open). The connection was paused on this channel after repeated failures.
If that connection was your preferred one, the effect is visible and confusing without this page:
a rule pointing at CinetPay looks ignored for a few minutes. It was not ignored, the connection was
paused and could not be placed. If the rule names a
[fallback provider](https://docs.wajub.com/orchestration/routing-rules#the-fallback-provider), that one takes CinetPay's
place for as long as the pause lasts.
## Two providers can never both charge
Within one call, Wajub stops at the first acceptance, so at most one attempt succeeds. The part
that needs care is the call itself being repeated.
Send an `Idempotency-Key` header on `POST /payments/{id}` and a repeat of the same call within 24
hours returns the same response without running a second waterfall. Without the header there is no
such protection, and a client that retries a request whose response it never saw can open a second
cascade on a payment that already succeeded.
> [!TIP]
> **One key per payment attempt**
>
> Derive the key from something stable in your own system, such as the order reference plus the
> attempt number. The key is validated as up to 128 characters of `A-Z a-z 0-9 . _ : -`, and
> reusing it with a different `channel`, `data` or split within 24 hours answers `422`. See
> [Idempotency](https://docs.wajub.com/api/idempotency#reusing-a-key-with-a-different-body).
## When the list was empty to begin with
A `422` on the `channel` key means no candidate survived the filters, so nothing was tried and
nothing can be retried elsewhere. It is an account configuration problem, not a payer problem: the
channel, the currency, a provider Wajub cannot charge through yet, or connections paused on this
channel left nothing to try. A card held by one provider whose connection cannot be tried ends here too.
```json title="Response · 422 Unprocessable Content"
{
"code": 422,
"status": "Unprocessable Content",
"message": "No eligible payment provider found for this transaction.",
"errors": {
"channel": ["No eligible payment provider found for this transaction."]
}
}
```
The fix is never in your request. The routing log shows the connections skipped because they were
paused on the channel. For the other reasons, run the same channel, currency and amount through the
[routing simulator](https://docs.wajub.com/orchestration/routing-rules#the-simulator-on-the-routing-rules-page), on a
Growth plan or above, which names the reason each connection was left out. A connection you paused
yourself, or a provider that is not active, does not appear there at all.
- [Payment Orchestration](https://docs.wajub.com/orchestration): How the candidate list is built and ordered in the first place.
- [Routing Rules](https://docs.wajub.com/orchestration/routing-rules): What a rule can pin down, and where it cannot help.
- [Orchestration Analytics](https://docs.wajub.com/orchestration/analytics): How many payments the cascade actually recovered for you.
- [Idempotency](https://docs.wajub.com/api/idempotency): The header, its window, and what counts as the same request.
---
# Configuration
URL: https://docs.wajub.com/tax/configuration
> Settings, inclusive pricing, exemptions, reverse charge and customer tax IDs.
Five settings decide how Tax behaves for your account, and two customer-level rules can override
the outcome on a given payment. This page is all of them.
## Your settings
- `enabled` (boolean, default `false`): Whether a record is written for each collected payment. Off, nothing is written and nothing is retroactive: payments collected while it was off stay out of the ledger for good.
- `inclusive` (boolean, default `false`): Whether the amounts you charge already contain tax. False means the tax is computed on top of the amount.
- `default_country` (string): Two letters. Used when the payer country could not be resolved, and as the country the reverse charge rule compares against. Defaults to your account country, then CM.
- `tax_id_type` (string, required): The kind of registration you hold, such as cm.niu, ci.ifu, ke.pin or eu.vat. Stored as given.
- `registration_number` (string, required): Your own number, never shown to your payers by Wajub. When you enable tax, it must match the format of tax_id_type or the call answers 422.
One asymmetry to know about when you script this: you write `registration_number` and you read it
back as `tax_registration_number`. The other four keep their names in both directions.
> [!NOTE]
> **Your own registration is recorded, not used**
>
> Neither field changes a single calculation. They exist so your account carries the identity you
> file under. The rate applied to a payment never depends on who you are, only on where your payer
> is.
## Inclusive or exclusive
The switch changes which of the two numbers you already know.
**Exclusive**, the default. Your amount is the base. `tax = amount × rate`, and the customer owes
`amount + tax`. On 10 000 XAF at 19.25 %, the tax is 1 925 and the total is 11 925.
**Inclusive**. Your amount is the total. `base = amount ÷ (1 + rate)` and the tax is what is left.
On 10 000 XAF at 19.25 %, the base is 8 386 and the tax is 1 614. The customer still pays 10 000.
The choice is a property of your prices, not of a payment. Pick the one that matches how you quote
and leave it alone: changing it changes what every future record means, and the past is not
recomputed.
The setting applies to the records written on your payments. `POST /tax/calculate` does not read
it: send `tax_inclusive: true` in the request when you want an inclusive calculation, otherwise it
is exclusive.
## Rounding
Tax is rounded to the currency's own precision, not to two decimals everywhere. XAF, XOF, RWF,
UGX, KMF, GNF, BIF, DJF, JPY, KRW and the other zero decimal currencies round to whole units; KWD,
BHD, OMR, JOD and TND round to three decimals; everything else rounds to two.
This is why an XAF calculation never comes back with cents, and why the same 19.25 % on the same
amount gives a different-looking figure in EUR.
## Which country the rate comes from
On a **recorded payment**, three steps in order: the country resolved from the payer's IP when the
payment page opened, then your `default_country`, then `CM`.
On **`POST /tax/calculate`**, one step: the `country` you sent. It is required, and nothing falls
back to it.
The currency is never consulted. A payer in France paying you in XAF is charged French TVA at 20 %,
because tax follows where the service is consumed.
## Exempt customers
A calculation carries `customer_exempt`, which is `false` today: no customer can be marked exempt.
The way to a zero rate for a business customer is the reverse charge below.
## Reverse charge
When it applies, the tax is zero and `reverse_charge: true` comes back: the tax is owed by your
customer in their own country, not collected by you. Three conditions, all required.
| Condition | How it is checked |
| -------------------------------------- | ------------------------------------------------------------------ |
| The customer is a business | Their `type` is `business`, not an individual |
| They hold a verified tax ID | At least one of their tax IDs has reached `verified` |
| The payment comes from another country | The country of the calculation differs from your `default_country` |
The country of the calculation is the one the rate comes from: the `country` you send to
`POST /tax/calculate`, or on a recorded payment the payer's country resolved when the payment page
opened. The customer's own country is not read. A foreign business paying you from your own country
is taxed like anyone else there.
Nothing else is looked at. In particular the economic zone is not a condition: a Cameroonian
merchant paid by a verified business from Senegal, from Germany or from Japan gets the same reverse
charge, and paid from Cameroon does not.
A tax ID only ever leads to the reverse charge, never to an exemption.
The conditions are read on the calculation, so a tax ID still pending verification gives you a
normal taxed result. Register the ID first, wait for it to verify, then calculate.
## Customer tax IDs
A tax ID belongs to a customer and is registered once, separately from any payment.
`POST /customers/{customer_id}/tax_ids`
The `type` is what decides how the value is checked, so use the real one rather than a generic
word.
```bash title="Register a customer's NIU"
curl https://api.wajub.com/customers/cus_sAaim5apjocIgtlhzJY3wQ8s/tax_ids \
-H "Authorization: sk.xxxxxxxxxxxxxxxx…" \
-H "Content-Type: application/json" \
-d '{
"type": "cm.niu",
"value": "M071512345678A",
"country_code": "CM"
}'
```
The call returns immediately with `verification_status: "pending"` and verification runs in the
background. There is no webhook for it, so read the tax ID back when you need to know. These routes
sit under `/customers`: a restricted key needs `customer.read` and `customer.write`, not the tax
permissions.
A customer's number is checked against the same list of formats as your own registration number.
| Type | Format checked |
| ---------- | ----------------------------------------------------------------------------------------------------------------------------------------------------------------------------------------------------------- |
| `cm.niu` | A letter, twelve digits, a letter |
| `ci.ifu` | Thirteen digits |
| `sn.ninea` | Eight digits, a letter, a digit |
| `ke.pin` | A letter, nine digits, a letter |
| `ng.tin` | Eight digits, a dash, four digits |
| `gh.tin` | For a business, `C`, `G`, `P`, `Q` or `V`, then `00` and eight digits (`C0001234567`). For an individual, the Ghana Card PIN: three letters, eight or nine digits and a check character (`GHA-123456789-0`) |
| `gh.vat` | The same number as `gh.tin`, which Ghana files VAT under |
| `za_vat` | `4` then nine digits |
| `gb.vat` | `GB` then nine digits |
| `us.ein` | Two digits, a dash, seven digits |
| `au_abn` | Eleven digits |
| `eu.vat` | The format of the member state its prefix names: `DE` then nine digits, `FR` then two letters or digits and nine digits, and so on. Greece is `EL` |
A number is accepted with or without the spaces, dashes, dots and slashes its format writes:
`12-3456789` and `123456789` are the same EIN. Adding the same type and number again does not add a
copy: the call answers `200` with the existing entry, back to `pending` while it is checked again.
Four statuses come out of the check.
| Status | Meaning |
| ------------- | ------------------------------------------------------------------------ |
| `pending` | Not yet checked |
| `verified` | The check passed. This is the only status the reverse charge accepts |
| `failed` | The format is wrong, or the registry says the number is invalid |
| `unavailable` | The registry could not be reached. Retry by adding the same number again |
> [!NOTE]
> **Only EU VAT is checked against a registry**
>
> An `eu.vat` number is checked against the EU's official VAT registry. Other types are checked for
> format only: Wajub does not confirm the number is registered, so verify it yourself before relying
> on the reverse charge.
## Product tax codes
A tax code says what you are selling, so that a jurisdiction can apply something other than its
standard rate to it. Pass one on a calculation, or put `tax_code` in a payment's metadata and the
record picks it up.
```bash title="Calculate with a tax code"
curl https://api.wajub.com/tax/calculate \
-H "Authorization: sk.xxxxxxxxxxxxxxxx…" \
-H "Content-Type: application/json" \
-d '{
"amount": 10000,
"currency": "XAF",
"country": "CM",
"tax_code": "txcd_10103001"
}'
```
Two behaviours are worth knowing before you rely on one. `txcd_00000000` is the nontaxable code:
when the catalogue carries it, it forces a rate of zero in every country. And a code the catalogue
has no rate for falls back to the country's standard rate, silently, with the code echoed back in
the response so the result looks like it was applied.
> [!WARNING]
> **List the catalogue before you depend on a code**
>
> `GET /tax/codes` is the only authority on which codes exist and which countries carry a rate for
> them, and `GET /tax/codes/{code}` shows that code's rates country by country. A code that is
> absent does not error, it just gives you the standard rate. Check the catalogue rather than
> assuming a code from another provider maps across.
A tax code is also ignored entirely when the reverse charge applies.
## Sub-national rates
Some countries tax at the state, county or city level rather than nationally.
`GET /tax/jurisdictions` lists what Wajub holds, filterable by country, state and level, with each
entry's rate and whether it compounds on the ones before it.
A payment is recorded at the country's standard rate, the one `POST /tax/calculate` answers with.
A payment carries no state or city, so sub-national rates are listed but not applied.
## Where you are registered
`/tax/registrations` keeps a list of the jurisdictions you are registered in, with a type among
`standard`, `simplified`, `ioss` and `oss`, your number there, and the dates it runs between.
It is a filing aid, not a switch. No calculation and no record consults it, so adding a
registration never changes a rate and removing one never stops a record from being written.
Deleting revokes the entry rather than erasing it: the entry is kept as `revoked` for your
history. There is one entry per country and state, so registering the same country and
state again answers `422`, a revoked entry included: set it back with `PUT` and `status: "active"`.
- [Tax](https://docs.wajub.com/tax): What is computed, what is recorded, and what is never charged.
- [Quickstart](https://docs.wajub.com/tax/quickstart): Turn it on, compute, charge, and read the first report.
- [Reports](https://docs.wajub.com/tax/reporting): The ledger, refunds, the export, and what is not in it.
- [Customer tax IDs](https://docs.wajub.com/payments/customers/manage#tax-ids): Add a tax ID to a business customer, and follow its check.
---
# Tax
URL: https://docs.wajub.com/tax
> What Wajub computes, what it records, and what it never does to the amount.
Tax tells you how much tax is owed on an amount in a country, and keeps a ledger of the tax on
every payment you collect, which is what you file from. It never changes what your payer is
charged.
> [!CAUTION]
> **Tax is never added to what you charge**
>
> The amount your customer pays is the amount you created the payment for, plus the platform fee
> when you pass that on to them. The tax is not in it. If your price is meant to carry tax, the
> total has to be your total: ask for the tax first, then create the payment for the sum. Wajub
> will record the tax either way, and it will record it against whatever amount you charged.
Three things happen around a payment, and only one of them moves money.
## Two things, on two timelines
Everything in this section is one or the other, and confusing them is the source of most of the
questions.
| | Calculation | Record |
| ------------------------ | ----------------------------------- | ----------------------------------------- |
| What it is | An answer to a question | A row in your tax ledger |
| When | Whenever you ask, before you charge | Automatically, once the money is credited |
| Triggered by | `POST /tax/calculate` | The payment completing |
| Depends on your settings | No, except for the customer rules | Yes, nothing is written while Tax is off |
| Changes the payment | Never | Never |
The calculation is a calculator. The record is bookkeeping. You can use one without the other: ask
for calculations and never enable Tax, or enable Tax and never call the endpoint.
## Which country's tax
Tax follows the consumption principle: the rate is the payer's, not yours. Three steps decide, in
order.
| Step | Source |
| ---- | --------------------------------------------------------------------- |
| 1 | The country resolved from the payer's IP when the payment page opened |
| 2 | Your `default_country` setting |
| 3 | `CM`, the platform's home jurisdiction |
The currency never decides. XAF is spent in six countries, and a payer in Paris can pay you in XAF
from a French IP: the rate applied is the French one. On `POST /tax/calculate` there is no
inference at all, the `country` field is required and it is the only thing read.
> [!WARNING]
> **Step one only happens on the hosted page**
>
> The payer country is resolved when the hosted checkout opens. A payment charged entirely from
> your server, with the payer never sent to a Wajub page, carries no country at all, so every one
> of its records falls to your `default_country`. If you collect from several countries through
> your own interface, set `default_country` to the one that dominates and reconcile the rest from
> your own data.
## What a record holds
One row per collected payment, in the currency the payment was made in.
| Field | What it holds |
| ---------------- | ----------------------------------------------------------------- |
| `country_code` | The country whose rate was applied |
| `tax_name` | The local name of the tax, `TVA`, `VAT`, `IVA`, `GST` |
| `rate` | The percentage applied |
| `taxable_amount` | The base the rate was applied to |
| `tax_amount` | The tax itself |
| `tax_inclusive` | Whether the base was extracted from the amount or added to it |
| `charged_at` | When the payment was credited, which is what the reports group on |
A refund writes a second row with both amounts negative, so the ledger nets out on its own. See
[Reports](https://docs.wajub.com/tax/reporting).
## What it covers
Two hundred countries carry a standard rate, maintained by Wajub and updated without anything on
your side.
| Country | Tax | Rate |
| ------------- | --- | ------- |
| Cameroon | TVA | 19.25 % |
| Côte d'Ivoire | TVA | 18 % |
| Senegal | TVA | 18 % |
| Kenya | VAT | 16 % |
| Ghana | VAT | 15 % |
| South Africa | VAT | 15 % |
| Nigeria | VAT | 7.5 % |
| France | TVA | 20 % |
Sixteen countries are carried at 0 %, either because they levy no such tax or because their system
is not a single national rate. The United States is one of them: sales tax there is set per state
and per city, and Wajub does not resolve it.
> [!NOTE]
> **One standard rate per country**
>
> There are no reduced rates, no per-product rates in effect, and no state or city level rates
> today. Whatever the country, the calculation applies its single standard rate.
> [Configuration](https://docs.wajub.com/tax/configuration) covers the two exceptions that do change the outcome, an
> exempt customer and a reverse charge.
## Live only, and on which plan
Tax is on **Growth**, **Scale** and **Enterprise**, and available as a paid add-on below that.
Without the plan or the add-on, the `/tax` endpoints answer `403` with
`error_code: feature_not_in_plan`, and no record is written on your payments any more, even with
`enabled` still `true`: a downgrade or an add-on that ends stops the ledger at that point. What was
recorded before stays as it is, readable in the Dashboard, and a refund of one of those payments
still writes its negative row.
Nothing runs in sandbox. No record is written for a test payment, and the endpoints refuse a test
key, so there is no way to rehearse a tax year. Inside the Dashboard the **Tax** section needs the
`view_tax` permission, and changing settings needs `manage_tax`.
Funding transactions, where you top up your own Wajub balance, never produce a record either.
There is no VAT on moving your own money.
## The endpoints
All of them take your private key and all of them are live only.
| Method | Endpoint | Used for |
| --------------------------- | ------------------------------------- | ----------------------------------------------------------------- |
| `GET` `PUT` | [`/tax/settings`](https://docs.wajub.com/api/tax) | The on switch, your country, inclusive pricing, your registration |
| `POST` | [`/tax/calculate`](https://docs.wajub.com/api/tax) | What is owed on an amount, before you charge it |
| `GET` | [`/tax/rates`](https://docs.wajub.com/api/tax) | The standard rate per country |
| `GET` | [`/tax/reports`](https://docs.wajub.com/api/tax) | The ledger, aggregated by country and by currency |
| `GET` | [`/tax/codes`](https://docs.wajub.com/api/tax) | The product tax code catalogue |
| `GET` | [`/tax/jurisdictions`](https://docs.wajub.com/api/tax) | Sub-national rates, where they exist |
| `GET` `POST` `PUT` `DELETE` | [`/tax/registrations`](https://docs.wajub.com/api/tax) | Where you are registered, for your own records |
| `GET` | [`/tax/thresholds`](https://docs.wajub.com/api/tax) | Registration thresholds and how close you are |
| `GET` `POST` `DELETE` | [`/customers/{id}/tax_ids`](https://docs.wajub.com/api/tax) | A customer's tax IDs, and their verification |
- [Quickstart](https://docs.wajub.com/tax/quickstart): Turn it on, compute, charge, and read the first report.
- [Configuration](https://docs.wajub.com/tax/configuration): Settings, inclusive pricing, exemptions and reverse charge.
- [Reports](https://docs.wajub.com/tax/reporting): The ledger, refunds, the export, and what is not in it.
- [Invoice](https://docs.wajub.com/billing/invoice): Where a tax line does end up on the document itself.
---
# Quickstart
URL: https://docs.wajub.com/tax/quickstart
> Turn tax on, compute it, charge it, and read the first report.
Five steps, and the third one is the one people skip. Wajub computes the tax and records it, but
charging it is yours: the amount you create the payment for is the amount your customer pays.
> [!WARNING]
> **Nothing here works in sandbox**
>
> Tax endpoints refuse a test key, and a sandbox payment writes no record. The first real number
> you see will come from a real payment, so start with a small one you make yourself.
## 1. Turn it on
Recording is off until you switch it on, and switching it on requires declaring your own tax
registration. Both fields are mandatory the moment `enabled` is true, and neither has a default.
```bash title="Enable tax recording"
curl -X PUT https://api.wajub.com/tax/settings \
-H "Authorization: sk.xxxxxxxxxxxxxxxx…" \
-H "Content-Type: application/json" \
-d '{
"enabled": true,
"inclusive": true,
"default_country": "CM",
"tax_id_type": "cm.niu",
"registration_number": "M071512345678A"
}'
```
`inclusive` says whether the amount you create a payment for already contains the tax. It is `true`
here because step 3 charges the total, tax included: when the payment is credited, Wajub takes the
tax out of the amount charged. Leave it `false` only if you charge the price before tax and nothing
on top: Wajub then computes the tax on top of the amount charged, so charging the total with
`false` records a tax on the tax. The same switch is on **Tax, Settings** in the Dashboard.
`registration_number` is checked against the format of `tax_id_type`: a Cameroonian NIU is a letter,
twelve digits and a letter, and anything else answers `422`.
## 2. Ask what is owed
The country is required. There is no inference from the phone number, the IP or the currency on
this endpoint, and your `default_country` is not used as a fallback here.
```bash title="Calculate"
curl https://api.wajub.com/tax/calculate \
-H "Authorization: sk.xxxxxxxxxxxxxxxx…" \
-H "Content-Type: application/json" \
-d '{
"amount": 10000,
"currency": "XAF",
"country": "CM"
}'
```
The answer carries the arithmetic in full, so you never have to redo it.
```json title="Response · 200 OK"
{
"code": 200,
"status": "OK",
"calculation": {
"amount": 10000,
"tax_amount": 1925,
"taxable_amount": 10000,
"total": 11925,
"rate": 19.25,
"tax_name": "TVA",
"country_code": "CM",
"currency": "XAF",
"tax_inclusive": false,
"tax_code": null,
"customer_exempt": false,
"reverse_charge": false
}
}
```
`total` is what to charge. On an exclusive calculation it is `amount + tax_amount`; on an inclusive
one it is the `amount` you sent, unchanged, and `taxable_amount` is what is left once the tax is
extracted.
This calculation does not read your `inclusive` setting. It is exclusive unless you send
`tax_inclusive: true`, and exclusive is what you want here: 10 000 XAF is your price before tax, and
the question is what to add to it. The setting describes something else, the amount you charge in
the next step.
## 3. Charge the total yourself
You do not send tax when you create a payment. Create it for the figure the calculation returned.
**Create the payment for the total**
```bash
curl https://api.wajub.com/payments \
-H "Authorization: sk.xxxxxxxxxxxxxxxx…" \
-H "Content-Type: application/json" \
-d '{
"amount": 11925,
"currency": "XAF",
"email": "client@example.com"
}'
```
```javascript
const { calculation } = await wajub.tax.calculate({
amount: 10000,
currency: 'XAF',
country: 'CM',
});
const payment = await wajub.payments.create({
amount: calculation.total,
currency: 'XAF',
email: 'client@example.com',
});
```
```python
calculation = wajub.tax.calculate({
"amount": 10000,
"currency": "XAF",
"country": "CM",
})["calculation"]
payment = wajub.payments.create({
"amount": calculation["total"],
"currency": "XAF",
"email": "client@example.com",
})
```
```php
$calculation = $wajub->tax->calculate([
'amount' => 10000,
'currency' => 'XAF',
'country' => 'CM',
])->calculation;
$payment = $wajub->payments->create([
'amount' => $calculation->total,
'currency' => 'XAF',
'email' => 'client@example.com',
]);
```
```go
calc, err := client.Tax.Calculate(context.Background(), map[string]any{
"amount": 10000,
"currency": "XAF",
"country": "CM",
})
payment, err := client.Payments.Create(context.Background(), map[string]any{
"amount": calc.Calculation.Total,
"currency": "XAF",
"email": "client@example.com",
}, nil)
```
What you charge and what `inclusive` says about it have to agree. At 19.25 %, for a price of
10 000 XAF before tax:
| You create the payment for | `inclusive` | What is recorded |
| ---------------------------- | ----------- | --------------------------------------------------------------------------------------- |
| 11 925, the total | `true` | 1 925 of tax on a base of 10 000. This is what this quickstart does |
| 10 000, the price before tax | `false` | 1 925 of tax on a base of 10 000. You collected none of it and pay it out of the 10 000 |
| 11 925, the total | `false` | 2 296 of tax on a base of 11 925: a tax on the tax |
| 10 000, the price before tax | `true` | 1 614 of tax on a base of 8 386: your price read as if it contained the tax |
The first two rows are the two ways that work. The last two are the mistakes, and nothing stops
them: the payment goes through either way, and only the record is wrong.
Skip this step and nothing breaks either. With the settings above, the payment goes through for
10 000 XAF and the record is the last row: 1 614 XAF of tax, taken out of what you collected.
## 4. The record writes itself
When the payment is credited, Wajub computes the tax on it again, from your settings and the
payer's country, and writes one row. You do nothing, and there is nothing to call.
That second computation is not the one you asked for in step 2. It uses the payer's real country
and the amount actually charged, which is why the two can differ if you charged a country you did
not calculate for.
## 5. Read what was recorded
The report aggregates the ledger over a period, by country and by currency.
`GET /tax/reports`
Narrow it to the country and the month you are filing for. `net_tax` in the summary is collections
minus reversals, which is the figure you file.
```bash title="This month, Cameroon only"
curl "https://api.wajub.com/tax/reports?period=month&country=CM" \
-H "Authorization: sk.xxxxxxxxxxxxxxxx…"
```
The same numbers are on **Tax** in the Dashboard, with a CSV export.
[Reports](https://docs.wajub.com/tax/reporting) has the full shape of both.
## If you send invoices instead
An invoice does carry a tax line, per item, and it behaves differently depending on where the
invoice was created.
| Created from | What happens to the line's tax |
| ------------- | -------------------------------------------------------------------------------------------- |
| The Dashboard | With Tax on and the line left on automatic, the country's standard rate is filled in for you |
| The API | You set `items[].tax_rate` yourself. Nothing is filled in |
Either way the item's tax is computed from the rate on the item, and the invoice total is the sum
of the lines. The country used for the automatic fill is the customer's country on the invoice,
falling back to your `default_country`.
- [Tax](https://docs.wajub.com/tax): What is computed, what is recorded, and what is never charged.
- [Configuration](https://docs.wajub.com/tax/configuration): Inclusive pricing, exemptions, reverse charge and customer tax IDs.
- [Reports](https://docs.wajub.com/tax/reporting): The ledger, refunds, the export, and what is not in it.
- [Invoice quickstart](https://docs.wajub.com/billing/invoice/quickstart): Billing a customer, with the tax line on the document.
---
# Reports
URL: https://docs.wajub.com/tax/reporting
> The ledger, how refunds net out, the export, and what is not in it.
Every collected payment leaves one row, every refund leaves a negative one, and the report is that
ledger summed over a period, at the rates that applied at the time.
## What goes into the ledger
A row is written when the payment is credited, not when it is created and not when it is attempted.
Four things stop it.
| Condition | Result |
| --------------------------------------------------- | ----------------------------------------------------- |
| Tax is off on your account | No row, and no catching up later if you switch it on |
| The payment is a sandbox one | No row, ever |
| The payment is a funding top-up of your own balance | No row |
| The computed tax is zero | No row, so a zero-rated country leaves nothing behind |
## A refund writes a negative row
Refund a payment and the ledger reverses the tax in the same proportion. Refund a third of the
amount and a third of the tax comes back, at the original rate, against the original country, with
both amounts negative.
That proportion is capped at the whole: refunding more than the recorded base still reverses at
most one hundred percent of the tax. And when the original payment left no row, the refund leaves
none either: no tax was collected on it, so none is given back. That covers a payment taken while
Tax was off, an exempt customer, a reverse-charge sale and a zero-rated product.
The payment's row alone decides, not your settings on the day of the refund. Tax recorded on a
payment was collected, so its refund reverses its share even after you switch Tax off or your plan
stops covering it. Switching Tax on later never gives a payment that has no row a reversal either.
The consequence is the one you want at filing time: the report nets collections against reversals
on its own, and you never subtract anything by hand.
## The report
`GET /tax/reports`
Five query parameters, all optional, and the two filters narrow the whole payload rather than
adding a section to it.
- `period` (enum, default `30d`): One of 7d, 30d, 90d, month, year or custom. month is the current calendar month, year the current calendar year.
- `start_date` (date): Only read when period is custom. Missing, it falls back to thirty days ago.
- `end_date` (date): The end of the window, on any period. Defaults to the end of today.
- `country` (string): Two letters. Restricts the whole report to one country.
- `currency` (string): Three letters. Restricts the whole report to one currency.
The response nests everything under `report`, and gives you the same figures three times: once as a
total, once per country, once per currency.
```json title="Response · 200 OK"
{
"code": 200,
"status": "OK",
"report": {
"period": "30d",
"start_date": "2026-08-13",
"end_date": "2026-09-12",
"summary": {
"total_tax_collected": 808500,
"total_taxable_amount": 4200000,
"total_reversals": -12300,
"net_tax": 796200,
"currency": "XAF"
},
"by_country": [
{
"country_code": "CM",
"tax_collected": 808500,
"tax_reversed": -12300,
"taxable_amount": 4200000,
"transactions": 312
}
],
"by_currency": [
{
"currency": "XAF",
"tax_collected": 808500,
"tax_reversed": -12300,
"taxable_amount": 4200000,
"transactions": 312
}
]
}
}
```
Three details matter when you reconcile against your own books. `tax_collected` counts only
positive rows and `tax_reversed` only negative ones, so `net_tax` is their sum and is the figure
you file. `transactions` counts every row in the group, reversals included, so a country with
three hundred payments and twelve refunds reports three hundred and twelve. And on a
multi-currency account, `summary` is only meaningful once you have filtered to one `currency`.
> [!TIP]
> **File country by country, one currency at a time**
>
> You owe tax to a jurisdiction in its own currency, so the report you act on is the one with both
> `country` and `currency` set. `by_country` on an unfiltered report is useful for spotting where
> you have exposure, not for filling in a return.
## The Dashboard report is not the same object
**Tax** in the Dashboard nets collections and reversals into a single figure per row, and converts
totals across currencies into your base currency. That is why a month with refunds reads lower there
than `tax_collected` does on the API. Both are right, they answer slightly different questions.
## The CSV export
**Tax**, then export, downloads the current view as a semicolon-separated CSV with a UTF-8 marker,
so Excel opens it correctly in French and Portuguese locales without an import step. It carries the
period, the totals, the base currency conversion when you trade in several, then one block per
country and one per currency.
Exports count against your plan's monthly quota: ten a month on **Pay as you go**, unlimited from
**Growth** up. There is no export on the API.
## Registration thresholds
Many jurisdictions only require you to register once your local revenue crosses a line.
`GET /tax/thresholds` lists the thresholds Wajub tracks, with the amount, the currency and the
period each is measured over.
`GET /tax/thresholds/alerts` compares them against your own recorded revenue over each threshold's
own period (the calendar year, a rolling twelve months or the quarter) and returns only what needs
attention: **approaching** from 80 % of the line, and **exceeded** at 100 %. An empty array means
nothing is close, and it is also what you get before any tax has been recorded.
Your revenue is converted into the threshold's currency at the platform's rates before it is
compared: sales in XAF count towards a threshold in GBP at their value in pounds. The `EU` threshold
counts your sales in every member state together. A threshold your revenue cannot be converted for,
a currency without a rate, is not measured and raises no alert.
A threshold set for a state rather than a whole country (one with a `state_code`, such as a US
state's economic nexus) is listed by `GET /tax/thresholds` but never comes back as an alert: a tax
row records the country, not the state, so there is nothing to measure it against.
> [!WARNING]
> **The comparison is against what Wajub recorded**
>
> Your local revenue here is the sum of `taxable_amount` on your positive tax rows, over the
> threshold's period, converted into its currency. Revenue collected before you turned Tax on is not
> in it, and neither is anything you invoiced outside Wajub. Treat the alert as a prompt to check,
> not as a legal position.
## What the ledger does not hold
Worth knowing so you do not look for exports that are not there.
**No sub-national rate.** A row is written at the country's standard rate, the one
`POST /tax/calculate` gives: a payment carries no state or city to apply a sub-national rate to.
**No mobile money levy and no digital services tax.** Mobile money levies and digital services taxes
are not recorded, shown on a payment, or added to anything. Where a country levies one, it is not in
your Wajub figures.
**One row per payment, nothing more.** A live payment that produced a record carries it as a `tax`
object on `GET /payments/{id}`: `amount`, `taxable_amount`, `rate`, `name`, `country` and
`inclusive`. A refund carries its reversal the same way. Totals and periods are read through the
report endpoint and the Dashboard, nowhere else.
**No webhook.** No event fires when a row is written or reversed.
> [!CAUTION]
> **Filing stays yours**
>
> Wajub computes a rate and keeps a ledger. It does not register you anywhere, does not file a
> return, and does not remit anything to an authority. Those obligations are yours, and the figures
> here are a starting point for your accountant rather than a filing.
- [Tax](https://docs.wajub.com/tax): What is computed, what is recorded, and what is never charged.
- [Configuration](https://docs.wajub.com/tax/configuration): Inclusive pricing, exemptions, reverse charge and customer tax IDs.
- [Quickstart](https://docs.wajub.com/tax/quickstart): Turn it on, compute, charge, and read the first report.
- [Refunds](https://docs.wajub.com/payments/refunds): The operation that writes the negative rows.
---
# Docs for AI assistants
URL: https://docs.wajub.com/developer-tools/ai-assistants
> The same documentation as plain Markdown, for ChatGPT, Claude, Cursor and your own agents.
An assistant reading these pages as HTML gets the navigation, the scripts and the styling along
with the text, and loses the code samples drawn by components. Every page is also served as plain
Markdown, and the whole documentation as one file, so you can hand an assistant exactly the text a
person reads.
## Three ways in
| URL | What it holds | Use it when |
| ---------------------------------- | ------------------------------------------------------------------------------------------------------------------------------------ | ---------------------------------------------------------------------- |
| [`/llms.txt`](https://docs.wajub.com/llms.txt) | A map: every page with its title, description and URL, grouped as in the navigation ([llmstxt.org](https://llmstxt.org)) | The assistant fetches pages itself and needs to know which one to read |
| [`/llms-full.txt`](https://docs.wajub.com/llms-full.txt) | Every page of the documentation, then the API reference, as Markdown in one file. French at [`/fr/llms-full.txt`](https://docs.wajub.com/fr/llms-full.txt) | You paste or upload the docs once, or index them in your own tool |
| `.md` | One page as Markdown | You want one topic in the context and nothing else |
Append `.md` to the URL of any page, in either language and in the API reference:
```bash title="One page, as Markdown"
curl https://docs.wajub.com/developer-tools/webhooks/signature-verification.md
curl https://docs.wajub.com/fr/payments.md
curl https://docs.wajub.com/api/transfers/create.md
```
Every HTML page also announces its Markdown version with
``, so a crawler that looks for it finds it.
## What the Markdown keeps
The text is the one on the page, written out as a person would write it by hand:
- Code samples are fenced blocks with their language, every tab of a multi-language sample included.
- Callouts are quoted blocks starting with `[!NOTE]`, `[!TIP]`, `[!WARNING]` or `[!CAUTION]`, title included.
- Steps are a numbered list, parameter tables a list of fields with their type and whether they are required.
- Diagrams such as a status flow or a routing decision become their steps in words.
- Links are absolute, so they still work once the text is pasted somewhere else.
An API reference page carries the endpoint, its parameters, its body fields, its responses and an
example response, read from the same OpenAPI document as the page.
Interactive previews and illustrations have no text to give and are left out.
> [!TIP]
> **Writing an integration with a coding agent**
>
> Pointing the agent at a page gives it facts. [Agent Skills](https://docs.wajub.com/developer-tools/cli/skills) give it
> the rules it would otherwise guess, such as `event` rather than `event.type` or verifying the
> signature before parsing the body. Use both.
## Keep in mind
- These files are rebuilt on every deploy of the documentation. An assistant that cached
`/llms-full.txt` last month may describe an API version that has changed since: fetch it again
rather than keeping a copy.
- Products still in preview and not yet published here are not in the files either.
- An assistant can still be wrong about what it read. Before you go live, check its code against
the page it came from and run it in [sandbox](https://docs.wajub.com/developer-tools/testing).
- [Agent Skills](https://docs.wajub.com/developer-tools/cli/skills): The Wajub rules, where your coding agent reads them.
- [API reference](https://docs.wajub.com/api): Every endpoint, with its parameters and responses.
- [Testing](https://docs.wajub.com/developer-tools/testing): Check what the assistant wrote against every outcome.
---
# Developer tools
URL: https://docs.wajub.com/developer-tools
> Receive events, drive the sandbox, and see what actually happened.
The tools to receive events, reach your laptop from Wajub, produce any outcome on demand, and see
what your integration actually did.
## The shortest path to a working integration
1. **Learn what you will be told, then write the handler**
Verify the signature, answer `2xx`, then queue the work. The envelope, the catalogue and five
working handlers are in [Webhooks](https://docs.wajub.com/developer-tools/webhooks).
2. **Receive a real event on your laptop**
`wajub listen --forward-to localhost:3000/webhooks/wajub`. No tunnel, no deploy, and the
signature is real. Installing it takes one command, in [CLI](https://docs.wajub.com/developer-tools/cli).
3. **Produce the outcomes you need**
`wajub trigger payment.failed`, then the refund, then the timeout. For anything the CLI cannot
trigger, a [test number](https://docs.wajub.com/developer-tools/testing) forces the outcome instead.
4. **Read back what happened**
[Konsole](https://docs.wajub.com/developer-tools/konsole) holds the request, the event and every delivery attempt
with the body your endpoint returned.
> [!TIP]
> **The two commands that replace most of a test environment**
>
> `wajub listen` and `wajub trigger`, in two terminals, give you a full event loop without
> deploying anything or touching a phone. Everything else here supports those two.
## What each one cannot do
Every part of the loop has an edge, and each of these has cost somebody a day.
| It looks like | It is not |
| --------------------------------------------- | -------------------------------------------------------------------------------------------------------------------------------------------------------------- |
| Subscribing to everything covers everything | A `*` subscription misses the Sync lifecycle deliveries |
| The CLI can produce any event | It triggers eight. The other forty nine you produce by driving the resource |
| Konsole's Send test proves your handler works | It proves the URL, the signature and the envelope. Its `event` is `webhook.test` and its `data` a placeholder, so the code behind a real event type never runs |
| A channel that works in sandbox works live | The sandbox accepts every operator it has test numbers for. In live, only the channels your account can charge are offered |
| Konsole shows every routing decision | Routing exists in live only. There is nothing to look at in sandbox |
## Pick by symptom
| Symptom | Start here |
| ---------------------------------------------- | -------------------------------------------------------------------------- |
| I do not know which events exist | [Event catalogue](https://docs.wajub.com/developer-tools/webhooks/events) |
| My signature check never passes | [Signature verification](https://docs.wajub.com/developer-tools/webhooks/signature-verification) |
| My endpoint is not reachable from the internet | [`wajub listen`](https://docs.wajub.com/developer-tools/cli/listen) |
| I need a failed payment right now | [`wajub trigger`](https://docs.wajub.com/developer-tools/cli/triggers) |
| The API returned something I do not understand | [API logs](https://docs.wajub.com/developer-tools/konsole/log-explorer) |
| The event fired but my handler never ran | [Webhook deliveries](https://docs.wajub.com/developer-tools/konsole/webhook-tester) |
| The payment went through the wrong provider | [Routing](https://docs.wajub.com/developer-tools/konsole/routing-log) |
| I want my agent to write it correctly | [Agent Skills](https://docs.wajub.com/developer-tools/cli/skills) |
- [Webhooks](https://docs.wajub.com/developer-tools/webhooks): The envelope, the signature, the retries, the catalogue.
- [CLI](https://docs.wajub.com/developer-tools/cli): Ninety one commands, of which you will use eight.
- [Konsole](https://docs.wajub.com/developer-tools/konsole): What your integration actually did.
- [Testing](https://docs.wajub.com/developer-tools/testing): Every outcome, on demand, before a real payer finds it.
---
# Advanced usage
URL: https://docs.wajub.com/developer-tools/cli/advanced
> The CLI in CI, in scripts, and when something is going wrong.
Everything here is the CLI doing work you would otherwise do by hand: proving a deploy is healthy,
producing a report, or telling you which part of your setup is broken.
## In a pipeline
There is no browser in CI, so the key comes from the environment. Every command reads
`WAJUB_API_KEY`, and when it is set it wins over any profile, `--profile` included.
```bash title="A smoke test after deploy"
#!/usr/bin/env bash
set -euo pipefail
export WAJUB_API_KEY="$WAJUB_SANDBOX_KEY" # from your CI secret store
# Fail the job if the key, the network or the account is wrong
wajub doctor --json > doctor.json
# Fail the job if the webhook endpoint disappeared
wajub webhooks list --json \
| jq -e '.items[] | select(.url == "https://example.com/webhooks/wajub")' > /dev/null
```
`--json` on every command makes the output parseable, and `jq -e` turns "no match" into a non zero
exit status, which is what makes the step actually fail.
> [!CAUTION]
> **A live key in CI is a live key in your logs**
>
> Use a sandbox key for anything that runs on every push. Reserve a live key for a deliberate,
> protected job, and never echo it, not even masked.
### Exit codes and runs without a terminal
A step fails on the exit status, so here is what the CLI returns.
| Status | When |
| ------ | -------------------------------------------------------------------------------------------------------------------------------------------------------------------------------------------------------- |
| `0` | The command did what it was asked |
| `1` | Anything that failed: an API error, a `wajub doctor` check, a confirmation that could not be asked, and a `wajub trigger` whose scenario did not end as promised |
| `2` | The command line itself is wrong: an unknown flag, a missing or extra argument, a value outside the list a flag accepts. Nothing is sent to the API, and the error ends with `See more help with --help` |
| `127` | The command does not exist, as a shell's "command not found". The CLI suggests the closest one and never runs it for you |
A pipeline has no terminal, so the CLI cannot ask anything there. A command that would ask for
confirmation (a deletion, a payment, transfer or refund with a live key, `wajub logout`) fails with
status `1` unless you pass `--yes`. `wajub skills install` needs `--scope`. A hidden prompt for a
key (`wajub config set`, `wajub login --manual`) fails too: set `WAJUB_API_KEY` instead.
## Reports from the terminal
The list commands plus `jq` replace a lot of small scripts.
```bash title="Two reports worth having"
# Yesterday's failures, with the reason
wajub payments list --status failed -f date_from=2026-01-14 -f date_to=2026-01-14 -f per_page=100 --json \
| jq -r '.items[] | [.created_at, .id, .amount, .currency, .failure_reason] | @tsv'
# Payouts still not settled
wajub transfers list --status processing --json \
| jq -r '.items[] | [.id, .amount, .currency, .created_at] | @tsv'
```
Dates go through `-f date_from` and `-f date_to`, which only payments, refunds and disputes
accept. They are whole calendar days: for a
shorter window, filter the timestamps in `jq` after listing the day.
## Environment variables
Every variable below applies to every command. Where a flag does the same job, the flag wins:
`--api-key` over `WAJUB_API_KEY`, `--profile` over `WAJUB_PROFILE`. `--profile` does not win over
`WAJUB_API_KEY`, though: a profile only supplies the key when nothing else does. The CLI uses the
first key it finds, in this order:
1. `--api-key`
2. `WAJUB_API_KEY`
3. The key of the profile named by `--profile`, otherwise by `WAJUB_PROFILE`, otherwise the
default profile
| Variable | Effect |
| ------------------- | ------------------------------------------------------------------------------------------------------------------------------------------ |
| `WAJUB_API_KEY` | The key to use. Wins over every profile, `--profile` included. Only `--api-key` wins over it |
| `WAJUB_PROFILE` | The profile to use when no `--profile` is given |
| `WAJUB_MAX_RETRIES` | How many times a failed request is retried. `0` turns retries off |
| `WAJUB_TIMEOUT_MS` | How long a request may take, in milliseconds, before it fails with `Network Error` |
| `WAJUB_NO_SKILLS` | `1` stops the CLI installing [Agent Skills](https://docs.wajub.com/developer-tools/cli/skills) on its own |
| `WAJUB_NO_LOGO` | `1` hides the Wajub logo above `wajub`, `wajub help`, `wajub version` and `wajub doctor`. It never shows in a pipe or with `--json` anyway |
## Shell completion
```bash title="Install completion for your shell"
wajub completion install
```
TAB then completes commands, flags and their values: the statuses `--status` accepts on each `list`
command, event types and `payment.*` wildcards for `wajub listen --events` (one after the other,
comma-separated), `wajub trigger` events, your profiles for `--profile` and `wajub config use`, and
API paths for `wajub get`, `post` and `delete`. It works in bash (3.2 and later, the one macOS
ships included), zsh, fish and PowerShell.
The command detects your shell, or takes `--shell bash|zsh|fish|powershell`. It adds one block,
between `# >>> wajub completion >>>` markers, to `~/.zshrc`, `~/.bashrc` (`~/.bash_profile` on
macOS) or `$PROFILE`; for fish it writes `~/.config/fish/completions/wajub.fish`. Open a new
terminal, and that is all.
```bash title="Check or remove it"
wajub completion # which shells have it, and where
wajub completion zsh # the lines to add yourself, if you keep your dotfiles by hand
wajub completion uninstall # removes the block, the fish file and the scripts
```
## Starting from a working example
```bash title="wajub samples"
$ wajub samples --list
Available samples:
webhooks Minimal webhook receiver with signature verification (Node.js, no dependencies)
quickstart-node Create a sandbox payment and verify its webhooks with the Node.js SDK
quickstart-php Create a sandbox payment and verify its webhooks with the PHP SDK
quickstart-python Create a sandbox payment and verify its webhooks with the Python SDK
quickstart-ruby Create a sandbox payment and verify its webhooks with the Ruby SDK
quickstart-go Create a sandbox payment and verify its webhooks with the Go SDK
quickstart-dotnet Create a sandbox payment and verify its webhooks with the .NET SDK
$ wajub samples webhooks my-receiver
$ wajub samples quickstart-go
```
The webhook sample is deliberately dependency free, so you can read the whole verification in one
file rather than through a framework. The quickstarts do the same job with the official Node.js, PHP,
Python, Ruby, Go and .NET SDKs, plus a sandbox payment to pay: see [Examples](https://docs.wajub.com/libraries/sdks/examples).
## Jumping to the Dashboard
```bash title="wajub open"
wajub open # the dashboard home
wajub open payments
wajub open keys
```
The pages it knows are `balance`, `customers`, `dashboard`, `disputes`, `keys`, `payments`,
`refunds`, `settings`, `transfers` and `webhooks`.
## When something is wrong
Three commands, in increasing order of how much they tell you.
```bash title="From cheapest to most thorough"
$ wajub version
@wajub/cli/1.8.0 darwin-arm64 node-v22.11.0
$ wajub status
● Wajub API is reachable — https://api.wajub.com (HTTP 200)
$ wajub doctor
Wajub CLI diagnostics
✓ Config 2 profile(s), default: sandbox
✓ Credentials key=sk_test.… env=sandbox base=https://api.wajub.com source=profile
…
```
`status` answers "is it them or me" and needs no credentials. `doctor` answers "which part of my
setup is broken", one line per check, and ends with a request id to hand to support.
| Symptom | Likely check |
| ------------------------------------------------------------------- | ----------------------------------------------------------------------------------------------- |
| `401` on every command | Credentials, and the `source` field beside it |
| Commands hit the wrong account | `source=env`, a `WAJUB_API_KEY` left exported |
| A command does not exist | `wajub help`, and remember topics use a space |
| Nothing arrives in `wajub listen` | Credentials, and whether the profile is sandbox or live |
| A stack trace on startup | Node version, 22 is the minimum |
| `wajub login` asks you to run it again | Nobody approved it within the 15 minutes a request lasts |
| The approval page says an administrator or a developer must approve | Your role cannot approve: send the page's address to the owner, an Administrator or a Developer |
| `wajub login --environment live` saved a sandbox profile | The approver left the page on Sandbox, where it always starts |
An unknown command fails clearly rather than doing something surprising. When a command is close
to what you typed, the error names it; run it yourself, the CLI never does it for you. The exit
status is `127`.
```bash title="A typo gets a suggestion, never a guess"
$ wajub paymnts list
› Error: "paymnts list" is not a wajub command. Did you mean `wajub payments list`? Run `wajub help` for the list.
```
## Telling us what is missing
```bash title="wajub feedback"
wajub feedback
```
It opens the feedback form in your browser. Pair it with the request id from `wajub doctor` and the
first two messages of a support thread are already answered.
- [API and resource commands](https://docs.wajub.com/developer-tools/cli/api-commands): The grammar these scripts are built on.
- [Agent Skills](https://docs.wajub.com/developer-tools/cli/skills): The other thing the CLI installs into your project.
- [Monitoring](https://docs.wajub.com/resources/monitoring): The same checks, running on a schedule instead of in your terminal.
- [Going live](https://docs.wajub.com/getting-started/going-live): What to verify before the first real payment.
---
# API and resource commands
URL: https://docs.wajub.com/developer-tools/cli/api-commands
> One grammar for every resource, plus a raw request when you need it.
Most commands are the same five verbs applied to eleven resources. Learn the
grammar once and you can drive the whole API without opening the reference.
```bash title="The shape"
wajub list
wajub retrieve
wajub create -d field=value
wajub update -d field=value
wajub delete
```
`payments`, `customers`, `refunds`, `transfers`, `beneficiaries`, `links`, `invoices`, `events`,
`disputes`, `accounts` and `webhooks` all answer to it, minus the verbs that make no sense for
them. There is no `refunds update`, because a refund cannot be edited. `shield`, `identity` and
`skills` have their own shape, covered at the end of this page.
`links` and `invoices` work with a live key only. With a sandbox key the CLI stops before sending
anything and exits with status `1`: `invoices is available in live mode only — use a live key (sk.).`
## Sending a body
Two ways. `-d` is for the common case, `--data-raw` for a body you already have or types you want
to set yourself. They combine: `--data-raw` is read first, then each `-d` is applied on top of it,
so a `-d` field wins over the same field in the JSON.
```bash title="Repeatable fields, or one JSON object"
# Repeatable key=value. Dots build nested objects.
wajub payments create \
-d amount=25000 \
-d currency=XAF \
-d channel=cm.mtn \
-d customer.email=amina@example.com \
-d customer.phone=+237670000000
# An array, written as inline JSON
wajub webhooks create -d url=https://example.com/webhooks/wajub -d 'events=["payment.succeeded","payment.failed"]'
# Or a body you already have
wajub webhooks create --data-raw '{
"url": "https://example.com/webhooks/wajub",
"events": ["payment.succeeded", "payment.failed"]
}'
```
A field named `phone`, ending in `_phone` (`customer.phone`, `payout_phone`), `account_number` or
`reference` is always sent as text, exactly as typed, at any depth. Any other value `-d` reads as:
- `true`, `false` and `null` as those JSON values;
- a value that starts with `[` and ends with `]`, or `{` and `}`, as inline JSON, when it parses;
- a number when it has no leading zero and at most 15 digits, so `amount=25000` is the number
`25000`, while `iban=00123` and a 19-digit order number stay text;
- anything else as text.
> [!WARNING]
> **Brackets are not arrays**
>
> `events[0]=payment.succeeded` does not build a list: brackets work like dots, and the CLI sends
> `"events": {"0": "payment.succeeded"}`, an object the API refuses. Write the array as inline JSON,
> as above. Send the body with `--data-raw` when a value must keep a type these rules do not give
> it.
## Listing
Every `list` command takes the same flags.
| Flag | Effect |
| ---------------- | -------------------------------------------------------- |
| `--page` | A specific page |
| `--all` | Follow pagination until the end, 25 items per request |
| `--limit` | With `--all`, caps the total |
| `-q`, `--search` | Full text search |
| `-f`, `--filter` | `key=value`, repeatable, sent as a query parameter as is |
| `--status` | Filter by status |
Use `-f` for `per_page`, from 1 to 100, and on payments, refunds and disputes `date_from` and
`date_to`.
```bash title="Narrowing a list"
wajub payments list -f per_page=5
wajub payments list --status failed -f date_from=2026-01-01
wajub payments list -q amina@example.com
wajub transfers list --all --limit 500 --json > transfers.json
```
`date_from` and `date_to` are whole days. The API filters on the calendar date, so there is no way
to ask for the last two hours from here. For a narrower window, list a day and filter the JSON
yourself.
## Raw requests
When a route has no dedicated command, or you want to see exactly what the API returns, three
commands take any path.
```bash title="get, post and delete"
wajub get /balance
wajub get "/payments?per_page=5&status=succeeded"
wajub get /tax/settings
wajub post /customers -d email=amina@example.com -d name="Amina Nkem"
wajub post /transfers --data-raw '{"amount":100000,"currency":"XAF","beneficiary":"ben_…"}'
wajub delete /payments/trx_CSUGajfv9xh0XQ5wu2lx
```
The path is relative to the API base, and the key comes from your profile, so there is no header
to remember and no key in your history. Quote any path containing `&`, or your shell eats it.
## Two flags that change what the request means
**`--idempotency-key`** sets the `Idempotency-Key` header. It exists on `payments create`,
`payments process`, `transfers create`, `refunds create` and `wajub post`, the calls the API makes
idempotent. Pass it when you want two invocations to be treated as the same attempt.
**`--sync`** sets the `X-Sync` header, making the call act on behalf of a connected account. It is
available on every `create` and `update`, on the action commands such as `payments process`, and
on `wajub post`. `list`, `retrieve` and `delete` do not take it.
```bash title="Retrying safely, and acting for a connected merchant"
# Run this twice: the second call returns the first result, it does not charge twice
wajub payments create -d amount=25000 -d currency=XAF --idempotency-key order-4172
# Create the payment on a connected merchant's account
wajub payments create -d amount=25000 -d currency=XAF --sync acc_7Yh2MpL4tRb3nP8sZcXv
```
## Output
Human output is a table. `--json` prints the API response envelope unchanged, so lists come back
under `items` and the balance under `balance`. That is what you pipe. One list differs:
`wajub events list --json` puts the events under `events`, as `GET /events` does, so the filter is
`jq '.events[]'`.
```bash title="Composing with jq"
wajub payments list --status failed --json \
| jq -r '.items[] | [.id, .amount, .failure_reason] | @tsv'
wajub balance --json | jq '.balance.available'
# Every failed payout of the month, as CSV
wajub transfers list --status failed --all --json \
| jq -r '.items[] | [.id, .amount, .currency, .failure_reason] | @csv'
```
## Commands that ask before acting
A command that moves money asks for confirmation when it runs with a live key; with a sandbox key
it runs at once. A command that destroys or replaces something always asks. `--yes` (or `-y`, or
the alias `--force`) skips the prompt, which is what you want in a script and nowhere else.
| Command | When it asks |
| ------------------------ | ------------------------------------------------------ |
| `transfers create` | With a live key: sends money |
| `refunds create` | With a live key: sends money back |
| `payments process` | With a live key: charges the payer |
| `webhooks rotate-secret` | Always: invalidates the secret your server is using |
| `accounts token` | Always: replaces a connected account's invitation link |
| Every `delete` | Always: removes the record |
## The read only commands
Four commands need no arguments and answer questions you would otherwise look up.
```bash title="Reference data and your own balance"
wajub balance # your balance, per currency
wajub channels # every channel slug Wajub supports
wajub countries # supported countries
wajub currencies # supported currencies
```
`wajub channels` is the one to reach for when a payment fails with an unknown channel: it lists
every slug Wajub supports, the same catalogue for every account. What your own account may use
depends on its providers, and `wajub get /providers` answers that.
## Identity and Shield
Two topics do not follow the CRUD grammar because the underlying products do not.
```bash title="Operator lookup, IBAN check and fraud controls"
# Which operator a number belongs to (sandbox key only)
wajub identity resolve -d account_number=+237670000000 -d channel=cm.mtn -d country=CM -d type=mobile
# Whether an IBAN is well formed
wajub identity validate -d iban=FR7630006000011234567890189
# Shield (live key only)
wajub shield stats
wajub shield settings
wajub shield update-settings --enabled --block-threshold 70 --review-threshold 40
wajub shield blocklist
wajub shield block +237670000000 --type phone --reason "chargeback ring"
# The id is the entry's, a UUID, as `wajub shield blocklist` shows it
wajub shield unblock 9b1f6c2e-4a7d-4f0b-8c3e-2d5a7b9e1f40
```
Both `identity` commands need the Growth, Scale or Enterprise plan. `identity resolve` answers from sandbox
data only: with a live key it returns `501`. `identity validate` checks the format and checksum of
an IBAN, not who owns it.
Every `shield` command needs a live key. With a sandbox key the CLI stops before sending anything,
exits with status `1` and says `Shield is available in live mode only — use a live key (sk.).` `--type` accepts `email`,
`phone`, `ip`, `country` and `card_bin`. `update-settings` takes `--[no-]enabled`,
`--review-threshold` and `--block-threshold` on every plan, and `--[no-]auto-3ds` and
`--[no-]blocklist`, which need Shield Advanced.
- [Advanced usage](https://docs.wajub.com/developer-tools/cli/advanced): CI, shell completion, samples, and the Dashboard shortcut.
- [Trigger events](https://docs.wajub.com/developer-tools/cli/triggers): Produce a payment instead of describing one.
- [Idempotency](https://docs.wajub.com/best-practices/idempotency): What the header actually protects you from.
- [API reference](https://docs.wajub.com/api): Every route, parameter and response.
---
# Diagnose what went wrong
URL: https://docs.wajub.com/developer-tools/cli/debug
> Ask the CLI what happened to a payment, a transfer, a refund or an event, who has to act, and what to do next.
`wajub debug` takes an id and explains the object behind it: what happened and when, why it failed
or is stuck, who has to act, and the next step with the docs page that covers it. `wajub explain`
is the same command.
> [!NOTE]
> **If your CLI does not know the command**
>
> An answer of `"debug" is not a wajub command` means your CLI predates it, and
> `npm install -g @wajub/cli` updates it.
```bash title="A paid order your server never heard about"
$ wajub debug trx_test_CSUGajfv9xh0XQ5wu2lx
Payment trx_test_CSUGajfv9xh0XQ5wu2lx succeeded (sandbox)
Nothing reliable tells your server this payment succeeded
Timeline (UTC)
2026-11-20 09:14:02 payment created 5000 XAF · reference order-4172
2026-11-20 09:14:31 event payment.succeeded evt_test_Nq8rT3vK6mX2pW9cB5jL7hYs · delivered
2026-11-20 09:14:31 last update succeeded · cm.mtn
Diagnosis
✗ Nothing reliable tells your server this payment succeeded [your integration]
Only the callback redirect tells you, and it never comes when the payer closes the tab before being sent back.
→ Subscribe an endpoint to `payment.succeeded` and fulfil from it, after retrieving the payment server-side.
https://docs.wajub.com/developer-tools/webhooks/quickstart
✗ No endpoint receives `payment.succeeded` [your integration]
1 enabled endpoint(s), none subscribed to `payment.succeeded`.
→ Add `payment.succeeded` to your endpoint's events with `wajub webhooks update --data-raw '{"events":[…]}'` (the list replaces the old one), then `wajub events resend `.
https://docs.wajub.com/developer-tools/webhooks/events
• Sandbox scenario
A sandbox number ending in 000000 succeeds: this outcome is the scenario you chose, not a bug.
https://docs.wajub.com/developer-tools/testing/test-scenarios
✓ The payer paid
```
## What it takes
One argument: an id from a response, a webhook or the Dashboard, or your own reference.
| You pass | The CLI reads |
| --------------------- | -------------------------------------------------------------------- |
| A payment, `trx_…` | The payment, its events, its refunds and your webhook endpoints |
| A transfer, `po_…` | The transfer, its events and your webhook endpoints |
| A refund, `rfd_…` | The refund and its timeline |
| An event, `evt_…` | The event, and which of your endpoints receive its type |
| A webhook endpoint id | The endpoint: whether it is enabled, and what it subscribes to |
| Your own `reference` | The newest payment that carries it, otherwise the transfer that does |
A sandbox id carries `test_`, as in `trx_test_…`. When the id and your key belong to different
environments, the command says so before calling anything, since the API would only answer `404`.
```bash title="A live id read with a sandbox key"
$ wajub debug trx_CSUGajfv9xh0XQ5wu2lx
Payment trx_CSUGajfv9xh0XQ5wu2lx (sandbox)
This id belongs to live, and you are using a sandbox key
Diagnosis
✗ This id belongs to live, and you are using a sandbox key [your integration]
trx_CSUGajfv9xh0XQ5wu2lx was created in live (its id has no `test_`), and the key in use is a sandbox key. The two share no data: the API answers 404.
→ Use a live key: `--profile ` or WAJUB_API_KEY=sk.…. If your server reads this id with the same key, it has the same problem.
https://docs.wajub.com/getting-started/environments
```
A reference that several payments carry explains the newest one and lists the others. A webhook
delivery id (`whd_…`) or an API request id cannot be read through the API: the command says so and
sends you to Konsole, where [Webhooks](https://docs.wajub.com/developer-tools/konsole/webhook-tester) and
[API logs](https://docs.wajub.com/developer-tools/konsole/log-explorer) show them.
## What it prints
The first two lines name the object, its status and its environment, then the most serious problem
found, or the state of the object when nothing is wrong. **Timeline**, in UTC, follows the object
from its creation: each event with whether your endpoints acknowledged it, the refunds, the expiry
of a pending payment, the last update.
**Diagnosis** lists the findings, the ones to fix first.
| Mark | Meaning |
| ---- | ------------------------------------------------------------- |
| `✗` | A problem to fix |
| `!` | Worth a look, without blocking anything |
| `•` | Information, such as the sandbox scenario a test number chose |
| `✓` | What went as it should |
Beside a problem, the brackets say who has to act: `[the payer]`, `[the operator]`,
`[your account settings]`, `[Wajub]` or `[your integration]`. Under it come the details, the next
step after `→`, and the docs page. A last line, `Related:`, lists the ids worth a `wajub debug` of
their own, such as the refunds of a payment.
## What it recognises
- **Payments.** A failure on the payer's side (insufficient funds, a limit, a refused PIN, no
confirmation in time) or on yours (a number the operator does not know, a missing code the payer
generates), and an operator code the CLI does not know, kept as the operator's. A pending payment
whose last attempt was refused, a payment that expired before the payer reached the checkout, a
succeeded payment no endpoint reports, a callback on `localhost`, two paid payments with the same
reference, failed refunds, and the scenario a sandbox test number picked.
- **Transfers and refunds.** Every `failure_reason` of the
[failure reasons](https://docs.wajub.com/api/failure-reasons), with what to do, and what `review` and `processing`
mean while you wait.
- **Webhooks.** No endpoint in this environment, every endpoint disabled, no endpoint subscribed to
the event, a pattern such as `payment.*` that matches nothing, a plain `http://` endpoint, and an
event your endpoint has not acknowledged, whether it is still being delivered, failing, or given
up after 72 hours, with `wajub events resend` to replay it.
- **The wrong key.** An id from one environment read with a key from the other.
The rules are fixed and run in the CLI: the same answers always give the same diagnosis, and
nothing is sent to a model.
## In scripts and coding agents
`--json` returns the diagnosis: `id`, `kind`, `found`, `environment`, `status`, `summary`,
`timeline`, `related`, the object as the API returned it, and `findings`. Each finding carries a
stable `code` to branch on, a `severity` (`error`, `warning`, `info` or `ok`), a `cause`
(`integration`, `payer`, `provider`, `account`, `wajub`, `none` or `unknown`), a `title`, and,
when it has them, `detail`, `next` and `docs`.
```bash title="Only what needs fixing"
$ wajub debug trx_test_CSUGajfv9xh0XQ5wu2lx --json | jq -r '.findings[] | select(.severity == "error") | .code'
payment.no_fulfilment_signal
webhook.not_subscribed
```
The command exits with status `0` when it found the object, whatever state the object is in, and
`1` when it found nothing for the id, an id from the other environment included.
## Which key it uses
The same key and API address as every other command: the default profile, or `--profile`,
`WAJUB_API_KEY` and `--api-base`.
[Advanced usage](https://docs.wajub.com/developer-tools/cli/advanced#environment-variables) gives the order in which the
CLI picks the key. Use a secret or restricted key: a publishable key (`pk.`) cannot read payments. For an old
object, the timeline may miss some of its events; the command then says so and points to the
[event stream](https://docs.wajub.com/developer-tools/konsole/event-stream) in Konsole.
- [Webhook troubleshooting](https://docs.wajub.com/resources/troubleshooting/webhooks): The usual reasons an endpoint does not acknowledge an event.
- [Payment troubleshooting](https://docs.wajub.com/resources/troubleshooting/payments): Failed, pending and expired payments, and what to do.
- [Test scenarios](https://docs.wajub.com/developer-tools/testing/test-scenarios): The sandbox numbers behind each outcome.
- [Receive webhooks locally](https://docs.wajub.com/developer-tools/cli/listen): Reproduce a failing delivery on your machine.
---
# Wajub CLI
URL: https://docs.wajub.com/developer-tools/cli
> The API, your webhooks and your sandbox, from the terminal.
The CLI calls the Wajub API from your terminal: it keeps your keys out of your shell history,
forwards live events to `localhost`, produces real sandbox payments on demand, and installs
Wajub's guidance into your coding agent.
```bash title="The three commands that cover the first day"
npm install -g @wajub/cli
wajub login
wajub doctor
wajub listen --forward-to localhost:3000/webhooks/wajub
```
`wajub login` waits for your team to approve it in the Dashboard: the owner, an Administrator or a
Developer (a Sandbox User too, for a sandbox key) picks the environment there, and the key the CLI
receives lasts 90 days.
[Install and authenticate](https://docs.wajub.com/developer-tools/cli/installation#approving-the-login) has the rules.
Of all its commands, you will use about eight.
## What it is good at
| You want to | Command |
| ---------------------------------------------------------- | -------------------------------------------------------------------------------- |
| Receive live events on your laptop | [`wajub listen`](https://docs.wajub.com/developer-tools/cli/listen) |
| Produce a real sandbox payment | [`wajub trigger`](https://docs.wajub.com/developer-tools/cli/triggers) |
| Read or write any resource | [`wajub payments list`, `wajub get /balance`](https://docs.wajub.com/developer-tools/cli/api-commands) |
| Find out why a payment, a transfer or a webhook went wrong | [`wajub debug`](https://docs.wajub.com/developer-tools/cli/debug) |
| Find out why nothing works | `wajub doctor` |
| Teach your coding agent the API | [`wajub skills install`](https://docs.wajub.com/developer-tools/cli/skills) |
## The command grammar
Topics are separated by a **space**, not a colon. `wajub payments list`, never
`wajub payments:list`.
```bash title="The same four verbs on every resource"
wajub payments list -f per_page=5
wajub payments retrieve trx_CSUGajfv9xh0XQ5wu2lx
wajub customers create -d email=amina@example.com -d name="Amina Nkem"
wajub customers update cus_4tRb3nP8sZcXvK2mQ9wL -d name="Amina N."
```
Every topic below answers to the same shape, so learning one teaches you the rest.
| Topic | Commands | What it covers |
| ------------------------------------------ | -------- | ----------------------------------------------------------------------------- |
| `payments` | 6 | Create, process, cancel, list, retrieve, list refunds |
| `customers` | 9 | The four verbs, plus block, unblock, activate, deactivate, delete |
| `invoices` | 8 | The four verbs, plus send, mark-paid, cancel, delete. Live key only |
| `accounts` | 6 | Sync connected accounts, including `token` |
| `disputes` | 6 | Accept, close, message, submit-evidence, list, retrieve |
| `shield` | 6 | Settings and update-settings, stats, blocklist, block, unblock. Live key only |
| `webhooks` | 6 | Endpoints, plus `rotate-secret` |
| `beneficiaries`, `links` | 5 each | The four verbs, plus delete |
| `refunds`, `transfers`, `events`, `skills` | 3 each | Create or install, list, retrieve |
| `identity` | 2 | Find a number's operator in sandbox, validate an IBAN |
| `config` | 2 | `set` and `use`, for profiles |
Alongside them sit the commands that belong to no topic: `balance`, `channels`, `countries`,
`currencies`, `listen`, `trigger`, `debug`, `login`, `logout`, `doctor`, `status`, `version`, `open`,
`samples`, `feedback`, and the raw `get`, `post` and `delete`.
## Three flags exist on every command
| Flag | Effect |
| ----------- | -------------------------------------------------------------------- |
| `--json` | Machine readable output instead of a table |
| `--profile` | Use a named profile rather than the default |
| `--api-key` | Pass a key inline. **Avoid it**: the key lands in your shell history |
The last one is hidden from `--help` on purpose. Use `wajub login`, or `WAJUB_API_KEY` in CI.
## When something is wrong, ask the CLI first
`wajub doctor` checks, in order, everything that breaks an integration: your profiles, the key and
where it comes from, the API, your account, Node.js, and whether your coding agents see the
[Agent Skills](https://docs.wajub.com/developer-tools/cli/skills). One line per check, so the count depends on your
machine, and no vagueness about which one failed.
```bash title="wajub doctor"
Wajub CLI diagnostics
✓ Config 2 profile(s), default: sandbox
✓ Credentials key=sk_test.… env=sandbox base=https://api.wajub.com source=profile
✓ API reachability https://api.wajub.com (HTTP 200)
✓ Auth API key accepted — Boutique Akwa (sandbox)
✓ Node.js v22.11.0 (≥ 22 required)
✓ Agent Skills · Claude Code sees the 10 skills in ~/.claude/skills
✓ Agent Skills · Codex sees the 10 skills in ~/.agents/skills
✓ Environment wajub-cli v1.8.0 node v22.11.0 darwin/arm64
✓ Support last request id: fbe6773e9ce64f158af89e5740fc5817 (include this if you contact support)
Everything looks good.
```
The `Support` line is the one to copy into a support message. The request id lets support find your
call in the logs without asking you for anything else.
> [!TIP]
> **Check which profile you are on before anything destructive**
>
> `wajub config` lists your profiles with the keys masked and marks the default. A `delete` or a
> `transfers create` run against the wrong profile moves real money.
- [Install and authenticate](https://docs.wajub.com/developer-tools/cli/installation): Node 22, the package managers, login, and profiles.
- [Receive webhooks locally](https://docs.wajub.com/developer-tools/cli/listen): Live events forwarded to localhost, signed.
- [Trigger events](https://docs.wajub.com/developer-tools/cli/triggers): Eight events, produced by exercising the sandbox API.
- [API and resource commands](https://docs.wajub.com/developer-tools/cli/api-commands): The CRUD grammar, raw requests, and JSON output.
---
# Install and authenticate
URL: https://docs.wajub.com/developer-tools/cli/installation
> Get the CLI on your machine, then give it a key it can keep.
The CLI is a Node package. One global install, one browser round trip, and it is ready.
## Requirements
**Node.js 22 or later.** `wajub doctor` checks it, so an older runtime fails with a clear message
rather than a stack trace.
```bash title="Check before you install"
node --version
```
## Install
```bash
npm install @wajub/cli
```
Confirm it landed, and note the runtime it reports. That line is what support will ask for.
```bash title="wajub version"
$ wajub version
@wajub/cli/1.8.0 darwin-arm64 node-v22.11.0
```
> [!TIP]
> **Without installing anything**
>
> `npx @wajub/cli listen --forward-to localhost:3000/webhooks` runs the current version and leaves
> nothing behind. Useful on a machine you do not own, or in a one-off container.
To update, install again. The CLI also warns you on its own when a newer version is published.
## Authenticate
`wajub login` opens your browser, a member of your team approves the request in the Dashboard, and
the CLI receives a key it stores locally. Nothing is typed into the terminal, so nothing lands in
your shell history.
```bash title="The normal path"
wajub login
wajub login --environment live
```
Sandbox is the default. Log in twice, once per environment, and you get two profiles you can
switch between.
| Flag | When you need it |
| --------------- | ----------------------------------------------------------------------------------------- |
| `--environment` | `sandbox` or `live`, the environment you ask for. The approver picks the one the key gets |
| `--manual` | Paste an existing key through a hidden prompt, no browser |
| `--no-browser` | Print the URL instead of opening it, for a remote shell |
| `--no-skills` | Install no [Agent Skills](https://docs.wajub.com/developer-tools/cli/skills), now or on later runs |
| `--profile` | Name the profile being created |
Credentials land in `~/.config/wajub/config.json`, readable only by you. Back it up if you like,
but treat it exactly as you would a key file, because that is what it is.
### Approving the login
The terminal prints a pairing code and the page to open, and the page shows the same code: check
that they match before you go on. The page always starts on **Sandbox**, whatever `--environment`
asked for, and the approver picks the environment there. Live is offered once the account is
verified, and never to a Sandbox User. The approver also chooses **Full access**, or **Restricted**
with the permissions the key gets.
Approving creates an API key for the team, so not every member can do it:
- The owner, an Administrator or a Developer approves, and a Sandbox User can too, for a sandbox
key. Any other member sees "An administrator or a developer must approve this", with the code:
send one of them the page's address.
- **Authorize** takes a recent security verification code (it counts for 30 minutes), as revealing
or rolling a key does. The page asks for one when needed, from your authenticator app or sent by SMS or email.
The owner and every Administrator get an email for each key a login creates, naming who approved
it, the environment, the key type and its expiry, with a link to the API keys page. A login nobody
on your team started is a reason to delete that key.
The request lasts 15 minutes. Left unapproved, the CLI stops and asks you to run `wajub login`
again. A refusal ends with `Login was denied in the browser.`, and both exit with status `1`.
### The key it creates
Your first sandbox login becomes the default profile, the one every command uses without
`--profile`. A later login does not move it: a live login never becomes the default by itself, so
the command after `wajub login --environment live` still runs in sandbox. The CLI says so when the
new profile is not the default; `wajub config use live` makes it the default, deliberately.
Without `--profile`, the profile is named after the environment the approver picked, whatever
`--environment` asked for.
The key `wajub login` creates always expires 90 days later: the approval page offers no other
lifetime for the CLI. The CLI prints the date when you log in, `wajub doctor` shows it on the
`Key expiry` line and fails during the last 7 days, when every command also warns you. Run
`wajub login` again to get a new one.
### In CI, use the environment
There is no browser in a pipeline. Set `WAJUB_API_KEY` and every command picks it up without a
profile existing at all.
```bash title="A pipeline step"
# From your CI secret store, never from the job definition
export WAJUB_API_KEY=sk.xxxxxxxxxxxxxxxx…
wajub doctor --json
wajub payments list -f per_page=5 --json
```
> [!CAUTION]
> **Never pass a key with `--api-key`**
>
> A key on the command line is written to your shell history and is visible in the
> process list to every other user on the machine. Use `wajub login` locally and `WAJUB_API_KEY` in
> CI.
## Profiles
A profile is a named credential set. The CLI ships with the concept because sandbox and live keys
must never be one typo apart.
```bash title="Create, inspect and switch"
# What do I have, and which one is default?
wajub config
# Register a key under a name, without calling the API to validate it.
# The CLI asks for the key through a hidden prompt.
wajub config set staging
# Make it the default
wajub config use staging
# Or override for a single command
wajub payments list --profile sandbox
```
`wajub config` prints keys masked. `--show-secrets` prints them in full, which is almost never
what you want on a shared screen.
An exported `WAJUB_API_KEY` wins over every profile, `--profile` included: as long as it is set,
`wajub payments list --profile sandbox` still runs with the exported key. `WAJUB_PROFILE` picks the
profile for every command of the shell, the way `--profile` does for one.
> [!WARNING]
> **`config set` does not verify the key**
>
> It writes the profile as given. A typo is discovered later, by a command failing with a `401`.
> Run `wajub doctor` after creating a profile by hand.
## Verify the whole chain
```bash title="wajub doctor"
$ wajub doctor
Wajub CLI diagnostics
✓ Config 2 profile(s), default: sandbox
✓ Credentials key=sk_test.… env=sandbox base=https://api.wajub.com source=profile
✓ Key expiry expires on 2/19/2027 (in 89 day(s))
✓ API reachability https://api.wajub.com (HTTP 200)
✓ Auth API key accepted — Boutique Akwa (sandbox)
✓ Node.js v22.11.0 (≥ 22 required)
✓ Agent Skills · Claude Code sees the 10 skills in ~/.claude/skills
! Agent Skills · Codex no skills in ~/.agents/skills — run `wajub skills install --scope user`
✓ Environment wajub-cli v1.8.0 node v22.11.0 darwin/arm64
✓ Support last request id: fbe6773e9ce64f158af89e5740fc5817 (include this if you contact support)
No failures, 1 warning(s) — see above.
```
The `source` field on the credentials line is the one people miss: it tells you whether the key
came from a profile, from `WAJUB_API_KEY`, or from a flag. When a command behaves as though it
belongs to another account, that field is the answer.
The number of lines depends on your setup. `Key expiry` appears for a key `wajub login` created.
Each coding agent found on the machine gets its own `Agent Skills` line, and a git repository that
holds project skills adds `Agent Skills (project)`. A line marked `!` is a warning: it names the
fix and never fails the run. A `✗` does, and the run then ends with
`Some checks failed — see above for details.` and exit status `1`.
## Log out
`wajub logout` revokes the key that `wajub login` created, then deletes the local profile. The
revocation is the point: deleting the file alone would leave a live key sitting on Wajub's side.
A key you put in a profile yourself (`--manual`, `wajub config set`)
stays active, and the CLI says so: revoke it in the Dashboard if it should stop working.
```bash title="Leaving cleanly"
wajub logout # the current profile
wajub logout --profile sandbox # a named one
wajub logout --all # every profile
wajub logout --keep-key # forget it locally, leave the key active
```
Use `--keep-key` only when the key is also used by something else, such as a server you configured
by copying it out of the Dashboard.
- [API and resource commands](https://docs.wajub.com/developer-tools/cli/api-commands): What to run once you are logged in.
- [Receive webhooks locally](https://docs.wajub.com/developer-tools/cli/listen): The reason most people install the CLI.
- [Agent Skills](https://docs.wajub.com/developer-tools/cli/skills): What `--no-skills` skipped, and how to add it later.
- [API keys](https://docs.wajub.com/getting-started/environments): The key types, what each one may do, and how to rotate.
---
# Receive webhooks locally
URL: https://docs.wajub.com/developer-tools/cli/listen
> Live events forwarded to localhost, signed by Wajub, with no tunnel.
`wajub listen` forwards your account's events to a local URL you choose, signed like production
deliveries, without deploying your handler or opening a tunnel.
```bash title="The whole setup"
wajub listen --forward-to localhost:3000/webhooks/wajub
```
Nothing of yours is exposed: no public URL, no inbound port.
## What you see
```bash title="wajub listen"
$ wajub listen --forward-to localhost:3000/webhooks/wajub
Ready! Streaming sandbox events for your account.
Your webhook signing secret is whsec_test_xxxxxxxxxxxxxxxx… (^C to quit)
It stays the same between runs: set WAJUB_WEBHOOK_SECRET=whsec_test_xxxxxxxxxxxxxxxx… in your app's .env once.
Forwarding to http://localhost:3000/webhooks/wajub
subscribed — waiting for events…
6:37:35 AM customer.created evt_test_Example00000000000000001 → 200 http://localhost:3000/webhooks/wajub
6:37:35 AM payment.created evt_test_Example00000000000000002 → 200 http://localhost:3000/webhooks/wajub
6:37:36 AM payment.processing evt_test_Example00000000000000003 → 200 http://localhost:3000/webhooks/wajub
6:37:39 AM payment.succeeded evt_test_Example00000000000000004 → 200 http://localhost:3000/webhooks/wajub
6:37:39 AM balance.updated evt_test_Example00000000000000005 → 200 http://localhost:3000/webhooks/wajub
6:37:39 AM fee.charged evt_test_Example00000000000000006 → 200 http://localhost:3000/webhooks/wajub
```
The number on the right is your own endpoint's answer, so a `500` there is your handler failing,
not the CLI. The run above is a single `wajub trigger payment.succeeded`: one command produced six
events, which is what a real payment produces too.
That is the fastest way to discover how many types your handler is quietly ignoring.
## The forwarded request is a real webhook
Each local delivery is signed the way a production one is, with the same body and headers.
| Header | Value |
| --------------------- | ----------------------------------------------------------------------------------- |
| `X-Wajub-Signature` | `v1=` followed by the HMAC |
| `X-Wajub-Timestamp` | Unix seconds, part of the signed string |
| `X-Wajub-Event` | The event type |
| `X-Wajub-Delivery-Id` | `whd_` followed by a UUID, the same for every delivery of an event to this listener |
So your verification code runs for real on your laptop, instead of being skipped behind an
`if (process.env.NODE_ENV === 'development')` that hides a bug until production.
```json title="What lands on your endpoint"
{
"id": "evt_test_Example00000000000000002",
"event": "payment.created",
"data": {
"id": "trx_test_Example0000000000001",
"amount": 5000,
"status": "pending",
"currency": "XAF",
"sandbox": true,
"amount_paid": 0,
"description": "Payment",
"customer": {
"id": "cus_test_Example00000000000000001",
"name": "CLI Trigger",
"email": "cli-trigger@example.com"
},
"created_at": "2026-09-14T04:37:34+00:00",
"updated_at": "2026-09-14T04:37:34+00:00"
},
"livemode": false,
"pending_webhooks": 0,
"api_version": "2026-10-11",
"request": { "id": null, "idempotency_key": "idem_Example0000000000000000000000001" },
"created": "2026-09-14T04:37:34+00:00"
}
```
Because the body is the one production sends, a handler that verifies the signature over the raw
body passes locally exactly when it will pass deployed.
The signing secret is the same every time you run `wajub listen` for this account and environment,
one for sandbox and one for live. Put it in your `.env` once and your handler verifies without any
other change. It is not a registered endpoint's secret: each endpoint keeps its own.
```bash title="Point your app at the listen secret"
export WAJUB_WEBHOOK_SECRET=$(wajub listen --print-secret)
npm run dev
```
`--print-secret` prints the secret alone and exits, so it also works in a script. With a live key,
add `--live` (`wajub listen --live --print-secret`): without it the command fails, and `$(…)` then
captures an empty secret.
> [!CAUTION]
> **`--unsigned` removes the signature entirely**
>
> The flag exists for wedging a payload into a handler that cannot verify yet. It forwards events
> **unsigned**, so your endpoint has no way to tell Wajub apart from anyone else who can reach it.
> Never leave it in a script, and never use it against an endpoint that is also deployed.
If your app answers on an `https://` address with a self-signed or local-CA certificate, such as a
local site with a self-signed certificate, add `--insecure-tls`. It skips the certificate check for
the forward to your handler only; the CLI's calls to the Wajub API stay verified. Pointing
`NODE_EXTRA_CA_CERTS` at your local CA works too.
## Flags
| Flag | Effect |
| ---------------- | ----------------------------------------------------------------------------- |
| `--forward-to` | Where to POST. `http://` is assumed when the scheme is missing |
| `--events` | Comma separated types, wildcards allowed (`payment.*`), instead of everything |
| `--live` | Required with a live key: real customers' events reach this machine |
| `--print-secret` | Print the signing secret and exit |
| `--unsigned` | Forward without the signature. See the warning above |
| `--insecure-tls` | Accept a self-signed or local-CA certificate on an `https://` forward URL |
| `--profile` | Which account and environment to stream |
```bash title="Narrowing the stream"
# Only what your handler currently implements
wajub listen \
--forward-to localhost:3000/webhooks/wajub \
--events "payment.*,refund.succeeded"
# Watch without forwarding anywhere
wajub listen
```
With no `--forward-to`, it prints events and posts nothing. That is the fastest way to find out
whether an event is being emitted at all, before you blame your handler. A malformed `--events`
value stops the command before anything starts, and Wajub only sends the types you asked for.
## Things worth knowing
**The environment comes from your profile.** A sandbox key streams sandbox events. A live key
streams live ones, and only with `--live`: real customers' data then reaches your machine.
`wajub doctor` tells you which you are on, and `--profile` overrides it for one run.
**It needs a secret key, or a restricted key with `event.read`.** The key `wajub login` creates has
full access unless you restrict it. A publishable key cannot listen, and a key revoked by
`wajub logout` stops a running stream.
**You do not need a registered endpoint.** The stream is independent of `POST /webhooks`. An
account with no endpoint at all still streams everything to `wajub listen`.
**It does not replace your registered endpoints.** If you also have a live endpoint subscribed to
the same events, it keeps receiving them. Listening does not divert anything.
**Your listeners show up in the Dashboard.** Konsole › Webhooks lists each running `wajub listen`
for the current environment, with what your handler answered to the latest events.
**It survives a sleeping laptop.** It reconnects on its own, nothing to do.
**Twenty at a time.** An account can have 20 `wajub listen` sessions open per environment; the
twenty-first is refused with `429`. Stopping a command with ^C frees its place at once.
**A `503` means the stream could not be opened.** The command stops before anything starts. Try again in a moment; if it persists, send support the request id the
CLI prints. Every other command keeps working.
**Nothing is buffered.** Events produced while the command is not running are not replayed when
you start it. To recover those, read [`wajub events list`](https://docs.wajub.com/developer-tools/cli/api-commands) and
resend the ones you want.
## The loop
Two terminals, and you never touch a phone.
```bash title="Terminal 1, then terminal 2"
# 1: forward everything to your handler
wajub listen --forward-to localhost:3000/webhooks/wajub
# 2: make something happen
wajub trigger payment.succeeded
wajub trigger payment.failed --amount 2500
```
Write the handler, save, trigger again. The loop is a few seconds long, which is the point.
- [Trigger events](https://docs.wajub.com/developer-tools/cli/triggers): The eight events you can produce on demand.
- [Signature verification](https://docs.wajub.com/developer-tools/webhooks/signature-verification): What your handler should be doing with that secret.
- [Receive a webhook](https://docs.wajub.com/developer-tools/webhooks/quickstart): The handler itself, in five languages.
- [Event catalogue](https://docs.wajub.com/developer-tools/webhooks/events): Every type you can pass to `--events`.
---
# Agent Skills
URL: https://docs.wajub.com/developer-tools/cli/skills
> Give your coding agent the Wajub rules it would otherwise guess.
Agent Skills put Wajub's integration rules where your coding agent reads them, so it stops guessing
details such as `event` rather than `event.type`, verifying the signature before parsing the body,
or amounts in major units.
You rarely need to run anything: the first command you run after installing or
upgrading the CLI copies the skills into the directories of the coding agents it finds on your
machine, and says so. `wajub login` does the same. Then **restart your coding agent**: Claude
Code, Codex and the others read their skills when a session starts, never during one.
```bash title="Commit them with a project, for the whole team"
wajub skills install --scope project
```
## What gets installed
Ten skills, each one a `SKILL.md` with a reference document beside it. An agent loads the one
whose description matches the task at hand, and ignores the rest.
| Skill | Covers |
| -------------------- | --------------------------------------------------------------------------------------- |
| `wajub-integrate` | End to end: detect the stack, pick the SDK and the checkout mode, coordinate the pieces |
| `wajub-payments` | Checkout, refunds, Hosted Checkout, Payment Links, embedded components, mobile sheets |
| `wajub-webhooks` | Signatures, raw bodies, retries, idempotency, local forwarding |
| `wajub-payouts` | Transfers, beneficiaries, payout status tracking |
| `wajub-billing` | Invoice creation, delivery, updates, marking paid, cancellation |
| `wajub-platform-api` | Accounts, customers, balance, disputes, events, raw authenticated requests |
| `wajub-shield` | Fraud controls, blocklists, risk settings, decisions |
| `wajub-tax` | Tax integrations and tax related workflows |
| `wajub-sync` | Sync synchronisation, reconciliation, event driven consistency |
| `wajub-testing` | Sandbox scenarios, the CLI, webhook forwarding, go live checks |
The suite is pinned to an API version, currently `2026-08-01`, so the guidance and the platform do
not drift apart silently.
## Where they land
Two directories per scope: `.agents/skills`, the open convention most agents read, and
`.claude/skills`, the only one Claude Code reads.
| Scope | Destinations |
| --------- | ------------------------------------------------------------------------------------- |
| `project` | `./.agents/skills`, `./.claude/skills`, at the root of the git repository |
| `user` | `~/.agents/skills`, `~/.claude/skills` (`$CLAUDE_CONFIG_DIR/skills` when that is set) |
Each agent reads its own subset.
| Agent | Project | User | From a subdirectory |
| ------------------ | ------------------------------------- | -------------------------------------------------- | ------------------- |
| Claude Code | `.claude/skills` | `~/.claude/skills`, or `$CLAUDE_CONFIG_DIR/skills` | Yes |
| Codex | `.agents/skills` | `~/.agents/skills` | Yes |
| GitHub Copilot CLI | `.agents/skills`, `.claude/skills` | `~/.agents/skills` | Yes |
| Gemini CLI | `.agents/skills`, in a trusted folder | `~/.agents/skills` | No |
| OpenCode | both | both | Yes |
| Cursor | both | both | Not checked |
| Windsurf | `.agents/skills`, `.claude/skills` | `~/.agents/skills` | Not checked |
Both scopes write both directories: no single one reaches Claude Code and Codex, and an agent you
install next week, or a teammate's, must find them too. Cursor and OpenCode read both. `--target agents` or
`--target claude` writes only one.
Project scope commits with your repository, so everyone on the team and every agent run gets the
same rules. User scope follows you across repositories. Installing both is fine, and the project
copy wins where an agent reads both.
```bash title="See what would happen before it happens"
$ wajub skills install --scope project --dry-run
Planned destinations (project):
agents: /Users/you/code/shop/.agents/skills
claude: /Users/you/code/shop/.claude/skills
✓ install wajub-integrate (agents)
✓ install wajub-payments (agents)
✓ install wajub-webhooks (agents)
…
```
## Checking what you have
`wajub doctor` answers the question that matters, agent by agent: does it see the skills, and if
not, what to run. `wajub skills status` reports every skill in every scope, with its integrity.
```bash title="wajub skills status"
$ wajub skills status
Wajub Agent Skills 1.8.0 (API 2026-08-01)
Coding agents found: Claude Code and Codex — `wajub doctor` checks which ones see the skills
current wajub-integrate project/agents
current wajub-payments project/agents
modified wajub-webhooks project/agents
absent wajub-billing project/agents
…
```
`modified` means the directory no longer matches what the CLI installed, usually because someone
edited a skill by hand. A plain `install` leaves those alone rather than overwriting your changes.
`--force` replaces them.
| Flag | Command | Effect |
| ------------- | ---------------------- | --------------------------------------------------------------- |
| `--scope` | all three | `project` or `user`. `status` also accepts `all` |
| `--target` | `install` | `all` (default), `agents` or `claude`: the directories to write |
| `--dry-run` | `install`, `uninstall` | Print the plan, write nothing |
| `--force` | `install` | Replace existing or locally modified directories |
| `--force` | `uninstall` | Also remove unmanaged directories |
| `-y`, `--yes` | `uninstall` | Skip the confirmation prompt |
| `--json` | all three | Machine readable output |
## Keeping them current
Skills ship inside the CLI package. The user scope updates itself on the first command after each
CLI upgrade, and leaves alone any skill you edited. A project scope is part of your repository, so
it changes only when you ask.
```bash title="Update a project"
npm install -g @wajub/cli
wajub skills install --scope project
```
Nothing is installed automatically in CI (when `CI` is set), for a command run with `--json`, or
once you opted out.
> [!TIP]
> **Commit the project scope**
>
> `.agents/skills` and `.claude/skills` are text. Committing them means a teammate cloning the
> repository gets the same guidance without running anything, and a code review shows exactly what
> changed when you upgrade.
## Removing them
```bash title="Uninstall"
wajub skills uninstall --scope project --dry-run
wajub skills uninstall --scope project --yes
```
Without `--force`, directories you modified are left in place, on the assumption that your edits
are worth more than a clean removal.
Removing the user scope also turns the automatic installation off, so the next command does not
put them back; `wajub skills install --scope user` turns it on again. `WAJUB_NO_SKILLS=1` and
`wajub login --no-skills` turn it off without removing anything.
## When an agent does not see them
Run `wajub doctor`: it names each agent that misses the skills and the command that fixes it.
The usual causes, in order:
- **The agent was already running.** Skills are read when a session starts. Restart it.
- **The skills were never copied.** Run `wajub skills install --scope user`.
- **Gemini CLI and a project install.** It reads project skills only in a folder it trusts, and only
in the folder it starts in, not from a subdirectory of the repository. Trust the folder when it
asks, and start it from the root, or rely on the user scope.
- **`CLAUDE_CONFIG_DIR` is set.** Claude Code then reads `$CLAUDE_CONFIG_DIR/skills` instead of
`~/.claude/skills`. Run `wajub skills install --scope user` from a shell where it is set.
- **The skill exists but the agent does not use it.** An agent loads a skill when its description
matches the request. Name the task plainly: "verify the webhook signature" rather than "fix the
endpoint".
- [Install and authenticate](https://docs.wajub.com/developer-tools/cli/installation): The first run, and the `--no-skills` flag.
- [Webhooks](https://docs.wajub.com/developer-tools/webhooks): The rules `wajub-webhooks` teaches, in prose.
- [SDKs](https://docs.wajub.com/libraries/sdks): The libraries the skills tell an agent to reach for.
- [Testing](https://docs.wajub.com/developer-tools/testing): What `wajub-testing` checks before you go live.
---
# Trigger events
URL: https://docs.wajub.com/developer-tools/cli/triggers
> Produce a real sandbox payment, and the events that follow it.
`wajub trigger` creates a real sandbox payment with the test number for the outcome you ask for, so
your handler receives exactly the events a real payer would produce.
```bash title="One command, a whole payment"
$ wajub trigger payment.succeeded
Triggering payment.succeeded …
✓ created payment trx_test_Example0000000000001
✓ dispatched cm.mtn charge (+237670000000)
✓ payment trx_test_Example0000000000001 is succeeded
```
The number it dialled is the giveaway: `+237670000000` is the sandbox MTN Cameroon prefix followed
by the success suffix. Ask for another outcome and it dials another suffix.
```bash title="The same command, the other outcome"
$ wajub trigger payment.failed --amount 2500
Triggering payment.failed …
✓ created payment trx_test_Example0000000000002
✓ dispatched cm.mtn charge (+237670000002)
✓ payment trx_test_Example0000000000002 is failed
```
## The eight events
```bash title="wajub trigger --list"
Triggerable events:
customer.created Create a customer
customer.updated Create then update a customer
payment.cancelled Create and cancel a payment (mobile money canceled)
payment.created Create a payment and leave it unpaid
payment.failed Create and fail a payment (mobile money failure)
payment.succeeded Create and complete a payment (mobile money success)
refund.failed Complete a payment whose refund deterministically fails
refund.succeeded Complete a payment then refund it (refund succeeds)
```
Eight arguments, but far more than eight events, because each one drives a real flow.
| You trigger | Number dialled | Your endpoint receives, in order |
| ------------------- | --------------- | ---------------------------------------------------------------------------------------------- |
| `payment.created` | None | `payment.created` |
| `payment.failed` | `+237670000002` | `payment.created`, `payment.processing`, `payment.failed` |
| `payment.cancelled` | `+237670000004` | `payment.created`, `payment.processing`, `payment.cancelled` |
| `payment.succeeded` | `+237670000000` | `payment.created`, `payment.processing`, `payment.succeeded`, `balance.updated`, `fee.charged` |
| `refund.succeeded` | `+237670000000` | The five above, then `refund.created`, `refund.succeeded`, `balance.updated` |
| `refund.failed` | `+237670000009` | The five payment events, then `refund.created`, `refund.failed` |
The very first trigger on an account also emits `customer.created`, because the CLI creates the
`CLI Trigger` customer it reuses afterwards.
> [!TIP]
> **The chain is the lesson, not a side effect**
>
> A real payment behaves the same way. If your handler only implements `payment.succeeded`, this is
> where you find out that four other types are already arriving and being ignored, and that
> `fee.charged` is the one your ledger was missing.
## Shaping what gets created
| Flag | Default | Effect |
| -------------- | -------- | -------------------------------------------------------------------------------------------------- |
| `--amount` | `5000` | Amount on the created resource |
| `--currency` | `XAF` | Currency |
| `--channel` | `cm.mtn` | Which rail to charge. The number dialled takes that operator's sandbox prefix and keeps its suffix |
| `--phone` | Derived | Override the payer number. Advanced, it decides the outcome |
| `-d`, `--data` | | Extra `key=value` on the created resource, repeatable |
| `--list` | | Print the list above and exit |
```bash title="Closer to your own traffic"
wajub trigger payment.succeeded --amount 250000 --currency XOF --channel ci.orange
wajub trigger customer.created -d name="Boutique Akwa" -d email=contact@example.com
wajub trigger payment.succeeded -d reference=order-4172 -d description="Order #4172"
```
Passing `-d reference=order-4172` is the trick that makes the test realistic: your handler can then
look the order up exactly as it would in production, instead of special casing the fake payment.
> [!WARNING]
> **`--phone` overrides the outcome**
>
> The number decides what the sandbox does, so `wajub trigger payment.succeeded --phone
> +237670000002` creates a payment that **fails**. Use it to reach outcomes the eight arguments do
> not cover, such as a timeout, and read
> [test scenarios](https://docs.wajub.com/developer-tools/testing/test-scenarios) for the full suffix table.
## What it cannot trigger
The list is short on purpose: an event only appears there when the CLI can produce it without
extra setup. Everything else you produce the same way you would in your own code.
| Event | How to produce it |
| ----------------- | ------------------------------------------------------------------------------- |
| `transfer.*` | `wajub beneficiaries create`, then `wajub transfers create` |
| `dispute.*` | Disputes are opened by the acquirer, not by you |
| `invoice.*` | `wajub invoices create` with a live key, since invoices do not exist in sandbox |
| `link.*` | `wajub links create` with a live key, for the same reason |
| `account.*` | `wajub accounts create`, then the merchant's onboarding, for Sync platforms |
| `payment.expired` | Let a pending payment reach the end of its window |
| `payment.split.*` | `wajub post /payments/{id}/splits` on a sandbox payment |
## Sandbox keys only
`wajub trigger` refuses any key that is not a sandbox one, before sending a single request. With a
live profile active, or a live `WAJUB_API_KEY` exported, it stops there:
```bash title="With a live key"
$ wajub trigger payment.succeeded
› Error: `wajub trigger` only works with a sandbox API key (sk_test…).
```
Pick the sandbox profile for the command, and check that no live key is exported, since
`WAJUB_API_KEY` wins over `--profile`.
```bash title="Be explicit when it matters"
wajub config # which profile is default?
wajub trigger payment.succeeded --profile sandbox
```
## The loop
```bash title="Two terminals"
# 1
wajub listen --forward-to localhost:3000/webhooks/wajub
# 2
wajub trigger payment.succeeded
wajub trigger payment.failed
wajub trigger refund.succeeded
```
Three commands cover the branches most handlers get wrong: the happy path, the failure that must
release the reservation, and the refund that must not be mistaken for a new payment.
- [Receive webhooks locally](https://docs.wajub.com/developer-tools/cli/listen): The other half of the loop.
- [Test scenarios](https://docs.wajub.com/developer-tools/testing/test-scenarios): Every sandbox number and card, and the outcome each one forces.
- [Event catalogue](https://docs.wajub.com/developer-tools/webhooks/events): What each of those types carries.
- [Sandbox mode](https://docs.wajub.com/developer-tools/testing/sandbox-mode): What sandbox simulates, and what it does not.
---
# Events
URL: https://docs.wajub.com/developer-tools/konsole/event-stream
> What the platform recorded, and which endpoints it reached.
Events are the first tab of the Webhooks view in Konsole: the record of what happened on your
account, such as a payment that succeeded or a transfer that failed. Check here that an event was
created at all before asking why your endpoint did not fire.
## What a row shows
| Column | Note |
| ----------- | ------------------------------------------------------------------------------------- |
| Event id | `evt_` in live, `evt_test_` in sandbox |
| Type | `payment.succeeded` and the rest of the [catalogue](https://docs.wajub.com/developer-tools/webhooks/events) |
| Object | The resource it is about, with its id |
| Deliveries | Up to five recent attempts, each with endpoint, status code and duration |
| Pending | How many endpoints still owe an answer |
| API version | The version the payload was built for |
The delivery column is what makes this view better than the raw event list from the API: you see
the event and its fate on the same row.
## Filters
| Filter | What it matches |
| -------------------- | ----------------------------------------------------------------------------------------- |
| Search | The event id, the type, the object id or the request id |
| Type | One exact type, chosen from the types your account has actually produced |
| Category | Everything under a prefix, for example every `payment.` type |
| Date start, date end | Whole calendar days |
| Delivery status | `delivered` means nothing pending, `pending` means at least one endpoint has not answered |
Fifty per page, newest first. The type selector is built from your own history, so it only offers
types you have really produced, which is a faster way to notice a missing one than reading the
catalogue.
## Two types that appear here and nowhere else
`payment.checkout_page_opened` and `payment.redirected_to_callback` are recorded as events and are
visible in this list, but they are never dispatched to an endpoint. They let you reconstruct a
checkout after the fact: when the payer opened the page, and whether they came back to your return
URL.
If a payment never succeeded and there is no `payment.checkout_page_opened`, the payer never
reached the page, which usually means the link or the redirect is broken rather than the payment.
## Replaying
Each delivery on the event page has its own **Resend** button, and the Deliveries tab of
[Webhooks](https://docs.wajub.com/developer-tools/konsole/webhook-tester) offers the same. What you replay is one
delivery, so the event goes again to that endpoint only: on an account with two endpoints, the
healthy one does not receive it a second time. Resends are not counted against your plan, but the
same event goes again to the same endpoint at most once every 5 minutes, from either page or from
the API: a resend inside that delay is refused with a message saying when you can try again.
> [!WARNING]
> **The replay counts as a new attempt**
>
> It keeps the same `X-Wajub-Delivery-Id` and the same event id, so a handler that deduplicates on
> either answers `200` without redoing the work if it already recorded the event. Replaying is for
> deliveries your endpoint did not accept.
## Export
The current filter set exports as CSV or JSON, and counts against your plan's
**Exports per month** allowance.
A useful one: filter to `delivery_status: pending` over the last seven days and export. That list
is exactly the set of events your integration has not finished processing.
- [Event catalogue](https://docs.wajub.com/developer-tools/webhooks/events): Every type, what triggers it, and what it carries.
- [Webhooks](https://docs.wajub.com/developer-tools/konsole/webhook-tester): The deliveries built from these events.
- [API logs](https://docs.wajub.com/developer-tools/konsole/log-explorer): The call that produced the event.
- [Retries and ordering](https://docs.wajub.com/developer-tools/webhooks/retries): Why an event can be delivered twice.
---
# Konsole
URL: https://docs.wajub.com/developer-tools/konsole
> Four views over what your integration actually did.
Konsole is the part of the Dashboard that answers "what happened?": it shows every API call,
event, webhook attempt and routing decision of your integration.
## The four views
| View | Answers |
| --------------------------------------------------- | -------------------------------------------------------------------------------------------------------------------------- |
| [Overview](https://docs.wajub.com/developer-tools/konsole/overview) | Is anything wrong right now? |
| [API logs](https://docs.wajub.com/developer-tools/konsole/log-explorer) | What exactly did I send, and what came back? |
| [Webhooks](https://docs.wajub.com/developer-tools/konsole/webhook-tester) | Did the platform record the [event](https://docs.wajub.com/developer-tools/konsole/event-stream), did my endpoint receive it, and did it answer? |
| [Routing Log](https://docs.wajub.com/developer-tools/konsole/routing-log) | Which provider took this payment, and why? Live only |
Events are not a view of their own: they are the first tab of Webhooks, next to Deliveries and
Endpoints.
## Start from the symptom
| Symptom | Go to | Look for |
| ---------------------------------------------- | -------------------- | --------------------------------------------------------------- |
| A call returned an error you do not understand | API logs | The request, the response body, the error message |
| A payment stayed pending | Webhooks, Events | Whether `payment.processing` and `payment.failed` exist |
| Your handler never ran | Webhooks, Deliveries | The status code your endpoint returned, or the absence of a row |
| A payment succeeded on the wrong rail | Routing | The candidate list and why the first one was skipped |
| Something is slow and you do not know what | Overview | The anomaly cards, then the logs behind them |
## Sandbox and live are two separate sets
Konsole shows one environment at a time, following the Dashboard switch. A sandbox payment never
appears in live logs: sandbox and live are completely separate, so there is nothing to filter and
nothing to mix up.
> [!WARNING]
> **Routing exists only in live**
>
> The Routing Log is hidden in sandbox. Sandbox payments do not go through provider selection, so
> there is no decision to record.
## Who can open it
Konsole requires the **View Webhooks** permission, and the actions inside it, creating an endpoint,
revealing a secret, replaying a delivery, running **Diagnose**, exporting logs or events, require
**Manage Webhooks**. A teammate with neither sees no Konsole at all.
## What it costs
One thing inside Konsole is metered by your plan: exporting logs or events to CSV or JSON, which
draws on **Exports per month**. It is counted per month and per team, and it is not Konsole's own:
every export of the Dashboard (payments, transfers, invoices, customers, revenue…) draws on the same
allowance. See [Limits](https://docs.wajub.com/resources/limits) for the figure on each plan.
Resending a webhook delivery by hand is not metered, on any plan. An event goes again to the same
endpoint at most once every 5 minutes, whether you resend it from Konsole or with
`POST /events/{id}/resend`.
- [Overview](https://docs.wajub.com/developer-tools/konsole/overview): The anomaly cards, and the one click diagnostic behind them.
- [API logs](https://docs.wajub.com/developer-tools/konsole/log-explorer): Every request, with the body you sent and the body you got.
- [Webhooks](https://docs.wajub.com/developer-tools/konsole/webhook-tester): Endpoints, deliveries, replays and the connectivity test.
- [Monitoring](https://docs.wajub.com/resources/monitoring): The same signals, watched automatically instead of by eye.
---
# API logs
URL: https://docs.wajub.com/developer-tools/konsole/log-explorer
> Every request you made, with both bodies and the reason it failed.
Every call to the API is recorded: the method, the path, the status, how long it took, the
headers and both bodies. When a call did not do what you expected, this is the only place that
can tell you what you actually sent.
## Filters
Nine filters, all combinable, all reflected in the URL so a filtered view can be shared.
| Filter | What it matches |
| -------------------------- | ------------------------------------------------------------------------------------------------------------- |
| Search | Full text over the URL, the request id, the IP, the method and the error message |
| Status | `success` for under 400, `error` for 400 and above, or one exact code |
| Method | `GET`, `POST`, `PUT`, `PATCH`, `DELETE` |
| Endpoint | A substring of the URL |
| IP address | A substring of the IP as Konsole shows it. The caller's address is stored in pseudonymised form, not in clear |
| Date start, date end | Whole calendar days |
| Min duration, max duration | Milliseconds, for finding the slow tail |
> [!NOTE]
> **There is no query language**
>
> Search is plain text, not a syntax. `status:5xx` matches nothing, because it is looked for
> literally. Use the status selector for codes and the search box for strings.
Results are paginated 50 at a time, newest first. Logs are kept 90 days, live and sandbox alike:
export what you need to keep beyond that.
## What a row carries
| Field | Note |
| ----------------------------- | ---------------------------------------------------------------------- |
| Request ID | The correlation id, also returned to you as `X-Request-Id` |
| Method, endpoint and full URL | The full URL includes the query string |
| Status | The code and its label |
| Duration | Server side, excluding your network |
| IP address | The caller's address, in pseudonymised form |
| Error | Present only when the call failed |
| API version | The version this call was served with |
| API key | Which key was used: its first 15 characters, as the Keys page lists it |
| Connected account | Set when the call acted on a connected account |
The key is the fastest way to find calls made by a component you forgot about: an old script still
holding a rotated key shows up under its own key.
## The detail panel
Selecting a row opens the full record: request headers, response headers, request body, response
body, user agent and, when the call failed, the error message. No stack trace is stored.
This is where you settle arguments with yourself. The body shown is what the API received, after
your framework, your HTTP client and your serialiser had their turn with it.
> [!WARNING]
> **Large bodies are not kept, and neither are bodies that are not JSON**
>
> A request body above roughly 250 KB, or a response above 500 KB, is not stored at all: in its
> place the log keeps `{"_truncated": true, "_size": …}`, the size in bytes. A response that is not
> JSON (a file, a page) is stored empty. Both are kept whole below those sizes.
## What is hidden, and what is deliberately not
Secrets are redacted before the log is written, so nothing sensitive is stored at all.
| Redacted | Kept visible |
| --------------------------------------------------------------------------------------------------------------- | ----------------------------------------- |
| Authentication headers (`Authorization`, `X-Sync`) and cookies | Every other header |
| Passwords, private keys and card security codes (`password`, `private_key`, `cvv`, `cvc`), wherever they appear | `phone`, `email`, `name`, `address` |
| PINs and card numbers: any field named as a PIN or a PAN, `card.number` at any depth, and a bare `number` field | `account_number`, `iban`, `phone_number` |
| Card expiry (`exp_month`, `exp_year`, `expiry_date`) | Amounts, currencies, metadata, references |
A field whose name looks like a PIN or a card number can show as `***REDACTED***` too.
> [!TIP]
> **Your key is never in the log**
>
> If you are looking for which key made a call, use the API key shown on the log. The `Authorization` header
> itself is stored as `***REDACTED***`.
## Correlating with your own logs
Every API response carries `X-Request-Id`. Log it on your side, and any support conversation or
Konsole search becomes a single lookup instead of a hunt through timestamps.
**Keep the request id**
```bash
curl -i https://api.wajub.com/payments \
-H "Authorization: sk.xxxxxxxxxxxxxxxx…" \
-d amount=25000 -d currency=XAF \
| grep -i x-request-id
```
```javascript
const res = await fetch('https://api.wajub.com/payments', { method: 'POST', headers, body });
logger.info({ wajubRequestId: res.headers.get('x-request-id') }, 'payment created');
```
```python
res = requests.post("https://api.wajub.com/payments", headers=headers, json=body)
logger.info("payment created", extra={"wajub_request_id": res.headers.get("X-Request-Id")})
```
```php
$response = Http::withToken($key)->post('https://api.wajub.com/payments', $body);
Log::info('payment created', [
'wajub_request_id' => $response->header('X-Request-Id'),
]);
```
```go
resp, err := client.Do(req)
if err != nil {
return err
}
defer resp.Body.Close()
log.Printf("payment created, wajub_request_id=%s", resp.Header.Get("X-Request-Id"))
```
## Export
The current filter set can be exported as CSV or JSON, capped at 10,000 rows per export. The CSV
carries the id, method, path, status, duration, pseudonymised IP, error and timestamp; the JSON
carries the full records.
Exporting takes the **Manage Webhooks** permission, not only the one that lets you read the logs.
Exports count against your plan's **Exports per month** allowance, which every export of the
Dashboard shares (payments, transfers, invoices, customers, Konsole…). Past it, the export returns
a `403` telling you so rather than a truncated file.
- [Events](https://docs.wajub.com/developer-tools/konsole/event-stream): What the platform recorded, as opposed to what you called.
- [Error handling](https://docs.wajub.com/best-practices/error-handling): What each status code means and what to do about it.
- [Limits](https://docs.wajub.com/resources/limits): Why some of those rows are 429s.
- [Overview](https://docs.wajub.com/developer-tools/konsole/overview): The cards that point at these rows.
---
# Overview
URL: https://docs.wajub.com/developer-tools/konsole/overview
> What the platform noticed about your integration before you did.
The Overview page is the first screen of Konsole. It carries five figures for the period you
select, and below them a list of anomaly cards, each one a rule that fired against your own
traffic.
## The five figures
| Figure | How it is computed |
| --------------- | ----------------------------------------------------------------------------------- |
| Requests | Every API call in the range, for the current environment |
| Errors | Calls that returned `400` or above |
| Error Rate | Errors as a share of requests |
| P95 Latency | The 95th percentile of `duration_ms`, which is the one that matches what users feel |
| Failed Webhooks | Deliveries marked `failed` in the range, out of all deliveries |
Requests carries a delta against the previous period of the same length, so a seven day view
compares itself to the seven days before it. Error Rate and P95 Latency stay empty below 20
requests in the range: on a handful of calls, one failure would read as an outage.
> [!TIP]
> **Read p95**
>
> p95 shows the tail an average would hide. If it reads 4,200 ms, one call in twenty is taking
> over four seconds, and those are the ones your customers abandon.
## The anomaly cards
Nine rules run against your account. The cards are ordered by severity and the page shows the
first three; the number beside the section title counts every card that fired. Each card links to
the view that shows the underlying rows.
| Card | Fires when |
| ---------------------------------- | --------------------------------------------------------------------------------------------- |
| High p95 latency on an endpoint | p95 above 2 s over the last 24 hours, on at least 2 calls. Marked high above 5 s |
| High error rate on an endpoint | A quarter or more of calls to that path returned an error, on at least 2 calls |
| Failed webhook deliveries | At least 3 failures to one endpoint in the last hour |
| Authentication errors | `401` responses in the last 24 hours. Marked high from 20 |
| Dormant webhook endpoint | An endpoint older than 14 days that has received nothing for 14 days |
| Unused API key | A key older than 30 days, never used or unused for 60 days |
| Signing secret older than 6 months | The endpoint's secret has not been rotated in 180 days |
| Webhook endpoint without HTTPS | A live endpoint whose URL starts with `http://`: its deliveries travel unencrypted. Live only |
| Latency degradation | Yesterday's average is materially above the 7 day baseline |
> [!NOTE]
> **Some cards are hygiene, not incidents**
>
> An unused key and a six month old secret are not outages. They are reminders that the cheapest
> moment to reduce your exposure is before anything leaks.
## The one click diagnostic
Cards about webhooks, authentication and latency carry a **Diagnose** button. It runs a bundle of
checks server side and returns a verdict rather than sending you to read logs yourself.
For a webhook endpoint, the bundle is seven checks, in this order.
1. **Endpoint exists**
It has not been deleted since the card was generated.
2. **Endpoint enabled**
A disabled endpoint receives nothing, which explains most silent endpoints.
3. **URL well formed**
A URL that does not parse is a URL that was pasted wrong.
4. **HTTPS required in live**
Live deliveries go to HTTPS only.
5. **Signing secret configured**
Without it, nothing can be signed and nothing is sent.
6. **Endpoint reachable**
An outbound `HEAD` probe from Wajub to your URL, right now.
7. **Recent failure rate**
How many of the recent attempts failed, so you can tell a blip from an outage.
The verdict counts what failed and what merely warned. A failure names something you must fix
before retrying; a warning is something to look at.
For an authentication card, the bundle counts `401` responses over the last 24 hours. For a
latency card, it checks the sample size, then lists the slowest endpoints of the last 24 hours.
## How fresh the figures are
The figures are not instant: if you have just fixed an endpoint and the card is still there, give
it a moment before concluding that the fix did not work.
- [API logs](https://docs.wajub.com/developer-tools/konsole/log-explorer): The rows behind the latency and error cards.
- [Webhooks](https://docs.wajub.com/developer-tools/konsole/webhook-tester): The endpoint the diagnostic just probed.
- [Monitoring](https://docs.wajub.com/resources/monitoring): Turning these signals into alerts you do not have to look for.
- [Limits](https://docs.wajub.com/resources/limits): The ceilings behind the rate limit errors you may be seeing.
---
# Routing
URL: https://docs.wajub.com/developer-tools/konsole/routing-log
> Which providers were considered for a payment, in order, and why.
When a payment has more than one possible provider, Wajub ranks them and tries the first. The
Routing view is the record of that ranking: every candidate and why it was placed, the ones that
were skipped, and the attempts that followed.
> [!WARNING]
> **Live only**
>
> Routing is gated to live mode. Sandbox payments do not go through provider selection, so a
> sandbox account has nothing to show here.
## Filters
| Filter | What it matches |
| -------- | --------------------------------------------------------------------------- |
| Search | The payment id |
| Channel | `cm.mtn`, `ci.orange`, and the rest |
| Provider | The one that won |
| Date | Whole calendar days |
| Outcome | **Had fallback**, **Had circuit-breaker skip** or **No eligible candidate** |
The outcome filter is the shortcut worth knowing.
| Outcome | Means |
| ---------------------------- | ----------------------------------------------------------------------------------------------------- |
| **Had fallback** | More than one candidate was ranked, so the waterfall had somewhere to fall |
| **Had circuit-breaker skip** | At least one provider was skipped because Wajub had paused it on this channel after repeated failures |
| **No eligible candidate** | Nothing was eligible. These are the payments that failed before any provider was called |
Filtering on **No eligible candidate** over a week is the fastest audit of your own configuration:
every row is a payment you could not have taken.
## What a decision shows
Select a row to open the decision. It shows the payment (its id, channel, amount and currency,
with **View payment** to open it), then, under **Why the router ranked candidates this way**, the
ranked candidates, and under them the attempts.
| What you see | What it tells you |
| -------------------------- | ---------------------------------------------------------------------------------------------------------- |
| **BLOCKED** | A country restriction on your account stopped the payment before any provider was considered |
| **Skipped (circuit open)** | Providers Wajub had paused on this channel after repeated failures, so they were not ranked |
| The ranked candidates | Every connection that could carry the payment, in the order they were to be tried. The first one is rank 1 |
| **Attempts** | The provider calls that actually happened, in order, with the outcome of each |
Each candidate shows its **Priority** and its **Score**, then badges for the reasons it was placed
where it is.
| On a candidate | What it means |
| -------------------- | ------------------------------------------------------------------------------------------------------------------------------------------------------------- |
| **Priority** | The priority of that connection on your account. A fallback standing in for its rule's target takes the higher of the two |
| **Score** | Wajub's comparison of cost and recent success. It only orders connections that share a priority, higher first, and a rule or a channel policy comes before it |
| **Rule match** | One of your routing rules placed it, as its target or as a fallback standing in for that target |
| **Fallback** | It is a rule's fallback provider, tried right after the rule's target or in its place |
| **Channel policy** | The channel's policy placed it |
| **Least cost** | It was the cheapest connection for this payment, from the rates you entered |
| Recent success badge | It has been performing well on this channel recently |
A candidate with neither **Rule match** nor **Channel policy** was ordered by its priority, then its
score, then its weight. Reading the badges tells you whether a payment took a rail because of your
rule, because of the channel's policy, because it was cheapest, or because the provider you
expected has been failing lately.
## Three things to look for
**A rank 1 you did not expect.** Read its badges first. **Rule match** means one of your routing
rules matched; open **Orchestration, Routing Rules** to see which one applies to this channel.
**Channel policy** means the channel's policy ordered it. With neither, the priority, the score and
the weight decided.
**A provider missing from the candidate list.** It was not skipped, it was never eligible. The
cause is upstream of routing: currency, channel or country support, or the provider not being
enabled on your account. The routing simulator on **Orchestration, Routing Rules**, on a Growth plan
or above, names the reason for each connection it leaves out. A connection you paused yourself, or a
provider that is not active, does not appear there at all.
**A provider under Skipped (circuit open).** Wajub had paused it on this channel because it kept
failing. It comes back on its own once it works again.
> [!NOTE]
> **BLOCKED is not a provider decision**
>
> It is an account level restriction, checked before any provider is considered. The candidate list
> is empty and no provider was ever contacted.
## The attempt chain
Under the ranking sits what actually happened: one row per provider call, in order, with the
outcome of each. A payment that succeeded on the second candidate shows the first one's failure
above it, which is the whole point of a waterfall you can audit.
- [Routing rules](https://docs.wajub.com/orchestration/routing-rules): The rules behind a Rule match badge.
- [Waterfall and fallback](https://docs.wajub.com/orchestration/waterfall-fallback): How the ranking turns into attempts.
- [Providers](https://docs.wajub.com/orchestration/providers): What makes a provider eligible in the first place.
- [API logs](https://docs.wajub.com/developer-tools/konsole/log-explorer): The request that started all this.
---
# Webhooks
URL: https://docs.wajub.com/developer-tools/konsole/webhook-tester
> Endpoints, every delivery attempt, and how to replay one.
The Webhooks view has three tabs: the **events** your account produced, the **deliveries** made
from them, and the **endpoints** they were sent to. Events have
[their own page](https://docs.wajub.com/developer-tools/konsole/event-stream); this one is about the other two.
## Deliveries
One row per attempt, not per event. A delivery retried three times is three rows sharing one
delivery id.
| Column | Note |
| ------------- | ----------------------------------------------------------------- |
| Status | `success`, `retrying` or `failed` |
| Response code | What your endpoint answered, empty on a network error |
| Duration | How long your endpoint took. A row at 30,000 ms is a timeout |
| Attempt | 1 for the first try, then one more for each retry and each replay |
| Endpoint | Which URL, when you have several |
Filters: search over the event, status, endpoint, and a date range in whole days. Fifty per page.
The detail panel carries the payload that was sent and the body your endpoint returned, which is
how you find out that your `500` came with a stack trace you can read from here.
## Replaying
Two ways, on every plan, with no monthly allowance.
| Action | Scope |
| ----------------------- | --------------------------------------------------------------------------------- |
| Resend | One delivery |
| Retry failed deliveries | Up to 100 failed deliveries at once, within a window, optionally for one endpoint |
**Retry failed deliveries** only picks up deliveries whose status is `failed`, inside the window you choose, which
defaults to the last 24 hours. Filter the list on `failed` to see the button: with rows ticked it
retries those, with none it asks for the window.
A delivery whose endpoint has since accepted the event is not sent again: a single resend says so,
and a batch skips it. An event that failed several times goes out once.
The same event goes again to the same endpoint at most once every 5 minutes, whether you resend it
from here, from the event page or with `POST /events/{id}/resend`. Inside that delay, **Resend**
says how many minutes are left. **Retry failed deliveries** skips those deliveries and counts them
in its message, or, when every delivery it finds is inside the delay, says when you can retry them.
> [!WARNING]
> **Fix the endpoint before you replay**
>
> A replay repeats the same payload against the same URL. If the handler still throws, you have
> only reproduced the failure, and that event cannot go to that endpoint again for 5 minutes.
> Deploy the fix, replay one delivery, check it went green, then bulk replay the rest.
## Endpoints
Creating one takes a URL and a list of event types.
| Field | Rule |
| ----------- | -------------------------------------------------------------------------- |
| URL | A valid URL, up to 2,048 characters, and not a private or internal address |
| Events | At least one, each from the list Konsole offers |
| Description | Free text, worth using when you have several |
> [!NOTE]
> **Check event names sent through the API**
>
> The picker only offers valid types. With `POST /webhooks`, check each name against the
> [event catalogue](https://docs.wajub.com/developer-tools/webhooks/events): a misspelled type never matches.
Private and internal addresses are refused on purpose: an endpoint pointing at `localhost` or at a
private range would let webhooks reach private networks. For local
development, use [`wajub listen`](https://docs.wajub.com/developer-tools/cli/listen).
### The secret
Each endpoint has its own signing secret, shown once at creation. Afterwards, **Reveal**
shows it again, behind a security verification code, and the action is recorded.
To rotate it, use **Roll signing secret** on the endpoint's page, in its actions menu or as **Roll**
next to the secret, behind the same security verification, or `POST /webhooks/{id}/rotate-secret` from the API. The new secret is shown once.
From the Dashboard you can keep the old secret signing for 24 hours. Every delivery then carries a
signature made with each: the new one in `X-Wajub-Signature`, the old one in
`X-Wajub-Signature-Previous`, in the same format. A handler still on the old secret goes on
accepting deliveries while you deploy the new one, as [The secret](https://docs.wajub.com/developer-tools/webhooks/signature-verification#the-secret)
explains.
Without that overlap, and always through the API, the new secret replaces the old one at once.
Every attempt sent from then on is signed with it, retries of events sent before the rotation
included: until your handler knows it, it rejects them. Have the handler accept both secrets before
you rotate, add the new one as soon as it is shown, then drop the old one. A delivery refused in
between is retried, signed with the new secret. The overview's "Signing secret older than 6 months" card counts from the
last rotation.
### Moving an endpoint to live
Sandbox and live endpoints are separate. To receive live events, switch the Dashboard to live and
create the endpoint again with the same URL and event list. It gets a **new secret**.
> [!CAUTION]
> **Update your live environment variable**
>
> The live endpoint's secret is not the sandbox one. A server still holding the old value will
> reject every live delivery with a signature error.
The page of a sandbox endpoint carries a **Copy to live** button that does this copy in one
action: it creates the live endpoint with the same URL and events, switches the Dashboard to live
and shows the new live secret once. It refuses when a live endpoint already has that URL, or when
the URL is not `https://`.
## Send test sends a real delivery, with test data
**Send test** posts one delivery to the endpoint, shaped key for key like a real one and signed with
the endpoint's real secret. It proves the URL is reachable, that your signature check passes, and
that your handler accepts the envelope. Only its content is made up: the event is `webhook.test`
and `data` is a placeholder, so it does not exercise the code behind a real event type.
```json title="What Send test posts"
{
"id": "evt_test_kZ3qP8mWvL2xR7tB5nY4hC6d",
"event": "webhook.test",
"data": { "id": "test_123", "message": "This is a test webhook from Wajub." },
"livemode": false,
"pending_webhooks": 1,
"api_version": "2026-10-11",
"request": { "id": null, "idempotency_key": null },
"created": "2026-01-15T10:30:00+00:00"
}
```
It carries the `X-Wajub-Delivery-Id` header like any delivery, `livemode` follows the environment the
Dashboard is in, and the attempt is recorded in the endpoint's deliveries as `success` or `failed`,
from your answer. It is not retried, and it is not an event: `GET /events` does not list it.
> [!TIP]
> **Answer it with a 2xx**
>
> A handler that switches on `event` should treat an unknown type, `webhook.test` included, by
> answering `200` and doing nothing. To exercise the code behind a real type, use
> [`wajub trigger`](https://docs.wajub.com/developer-tools/cli/triggers), which produces real events.
- [Retries and ordering](https://docs.wajub.com/developer-tools/webhooks/retries): Why a delivery is attempted more than once.
- [Signature verification](https://docs.wajub.com/developer-tools/webhooks/signature-verification): What to do with the secret you just revealed.
- [Trigger events](https://docs.wajub.com/developer-tools/cli/triggers): Produce a real event instead of a test payload.
- [Troubleshooting webhooks](https://docs.wajub.com/resources/troubleshooting/webhooks): Nothing arrives, or the signature never matches.
---
# Testing
URL: https://docs.wajub.com/developer-tools/testing
> Drive every outcome on demand, before a real payer ever does.
Every failure a real payer can produce, you can produce on purpose in sandbox: insufficient funds, a
refused PIN, a timeout, a declined card, a failed refund. Sandbox is the same API with its own
separate data, so the code you test is the code you ship.
## The three tools
| Tool | Use it to |
| ----------------------------------------------------------------- | ------------------------------------------------------------- |
| [Sandbox keys](https://docs.wajub.com/developer-tools/testing/sandbox-mode) | Run your whole integration against test money |
| [Test numbers and cards](https://docs.wajub.com/developer-tools/testing/test-scenarios) | Choose which outcome the sandbox produces |
| [The CLI](https://docs.wajub.com/developer-tools/cli/listen) | Receive live events on `localhost` and trigger them on demand |
## What a complete test run covers
Most integrations test the happy path and ship. These eight are what breaks afterwards, and each
one is a single input away. Your ticks are kept in this browser, so a run can span several days.
The signature test is the one almost nobody writes, and the only one that protects the money.
## The loop that makes this quick
```bash title="Two terminals, no deploy, no phone"
# 1
wajub listen --forward-to localhost:3000/webhooks/wajub
# 2
wajub trigger payment.succeeded
wajub trigger payment.failed
wajub trigger refund.succeeded
```
Each trigger drives the sandbox API end to end, so what reaches your handler is a real event chain
rather than a fixture.
Everything above is provable in sandbox. What is not provable there, live keys, restricted scopes,
alerting, belongs to the [go live checklist](https://docs.wajub.com/getting-started/going-live), which carries its own
list.
> [!WARNING]
> **Sandbox does not test your provider coverage**
>
> The sandbox accepts every channel it has test numbers for. Whether your live account may use
> `ci.wave` depends on what your live account can charge, not on your code. Check `wajub get /providers` with the live
> profile before assuming a rail is available.
- [Sandbox mode](https://docs.wajub.com/developer-tools/testing/sandbox-mode): What is simulated, what is real, and what is deliberately different.
- [Test scenarios](https://docs.wajub.com/developer-tools/testing/test-scenarios): Every number, card and account, and the outcome each one forces.
- [Testing webhooks](https://docs.wajub.com/developer-tools/testing/webhooks): Three levels, from a unit test to a replayed delivery.
- [Going live](https://docs.wajub.com/getting-started/going-live): The switch itself, and what changes with it.
---
# Sandbox mode
URL: https://docs.wajub.com/developer-tools/testing/sandbox-mode
> The same API, completely separate data, and outcomes you choose.
Sandbox is the same API, routes and validation as live, with completely separate data. No real money
moves: the outcome is decided by the test number, card or account you use.
## How the environment is chosen
By the key. There is no parameter, no header and no flag.
| Prefix | Environment |
| ---------------------------------- | ----------- |
| `pk_test.`, `sk_test.`, `rk_test.` | Sandbox |
| `pk.`, `sk.`, `rk.` | Live |
A sandbox key cannot read live data, and the reverse is equally true: sandbox and live are
completely separate. That is also why a payment you created in sandbox will never appear in your
live Konsole, and why there is nothing to filter.
> [!CAUTION]
> **Deleting sandbox data does not exist as a mistake you can make**
>
> There is no button and no endpoint that wipes an environment. But there is also no migration
> path: nothing you build up in sandbox, customers, beneficiaries, endpoints, comes with you when
> you switch to live. Recreate them deliberately.
## What is real
| Real in sandbox | Meaning |
| ------------------- | ----------------------------------------------------------------------------------------------- |
| Validation | The same rules, the same `422` messages |
| Limits | Amount floors and ceilings are enforced identically |
| Events and webhooks | Real events, real signatures, real retries |
| Idempotency | The same behaviour on a repeated key |
| Rate limits | The same ceilings, counted apart from live: a sandbox load test does not spend your live minute |
| Balance | A separate sandbox balance, credited by sandbox payments |
| Platform fees | 2% is charged on successful payments and transfers, producing `fee.charged` |
The last one surprises people: a sandbox payment of 5,000 XAF credits less than 5,000 to your
sandbox balance, exactly as a live one would.
## What is simulated
| Simulated | How |
| ---------------- | ------------------------------------------------------------------------------------------------------- |
| The operator | The test number decides the outcome, nothing is dialled |
| The card network | The test card decides the outcome |
| 3D Secure | The hosted checkout asks for a code sent by email, then the test card decides the outcome |
| The bank | The last two digits of the account decide the outcome |
| Crypto | A deposit address per outcome is generated; sending one of them as `wallet_address` decides the outcome |
| Timing | A short delay rather than a real network |
> [!WARNING]
> **Asynchronous, not instant**
>
> A sandbox payment is still `pending` when the call returns. A test that asserts `succeeded`
> immediately after creating it will fail. Wait for the webhook, or poll until the status is
> terminal.
## Outcomes are deterministic
Nothing in the sandbox is random.
| Object | What decides the outcome |
| --------------------- | ------------------------------------------------------------------------------------- |
| Payment, mobile money | The suffix of the payer number |
| Payment, card | The exact card number |
| Payment, bank | The last two digits of the account |
| Payment, crypto | Which `crypto.deposit.scenarios` address you send as `wallet_address` (none: success) |
| Refund | The original payment's card or phone |
| Transfer | The beneficiary's test number or account |
> [!NOTE]
> **Transfers are deterministic too**
>
> A sandbox transfer to a mobile money beneficiary requires a recognised test number and refuses
> anything else with a `422` that lists the valid ones. There is no probability involved.
## The sandbox balance
Payouts need money. Sandbox payments credit a sandbox balance, and transfers debit it, so the
order of your test matters: create and complete a payment before testing a payout, or the transfer
fails for insufficient funds exactly as it would in production.
A failed transfer returns the amount to the balance and charges no fee: the 2% platform fee set
aside when you created it comes back with the amount, as in live.
## Crypto is off unless asked for
The crypto channel is off in sandbox unless Wajub has switched it on. When it is on, a deposit
address is generated per scenario, the same one each time, so you can reproduce a scenario.
Nobody sends funds in sandbox, so the answer to `POST /payments/{id}` on a crypto channel also
carries a `simulator_url`, a link to a page with four buttons, `SUCCESS`, `FAILURE`, `TIMEOUT` and
`CANCELED`. Pressing one gives the payment that outcome, webhooks included. The field never exists
in live.
## 3D Secure asks for a code by email
A 3D Secure test card from [the scenarios](https://docs.wajub.com/developer-tools/testing/test-scenarios#cards) answers
`202` with `action: "confirm_3ds"`. On the hosted checkout, the payer is then asked for a six digit
code, which Wajub emails to the customer's address and to the account owner, so the challenge can
be completed even when the test customer has a placeholder email. Once it is accepted, the card number decides whether the payment succeeds or
fails.
- [Test scenarios](https://docs.wajub.com/developer-tools/testing/test-scenarios): The numbers, cards and accounts that force each outcome.
- [Environments and keys](https://docs.wajub.com/getting-started/environments): The four key types and what each may do.
- [Going live](https://docs.wajub.com/getting-started/going-live): The full checklist, in order.
- [Trigger events](https://docs.wajub.com/developer-tools/cli/triggers): Produce the sandbox payment without writing the call.
---
# Test scenarios
URL: https://docs.wajub.com/developer-tools/testing/test-scenarios
> The numbers, cards and accounts that force each outcome.
In sandbox you pick the outcome by choosing the phone number, the card, the bank account or the
wallet you pay with. This page lists them all.
## Mobile money
A test number is an **operator prefix** followed by a **six digit suffix** that names the outcome.
```text title="The formula"
number = operator_prefix + outcome_suffix
+23767 + 000002 = +237670000002
MTN Cameroon failure a payment that always fails
```
### The six suffixes
| Suffix | Outcome | What your integration sees |
| -------- | --------------------------------- | -------------------------------------------------------------------------------------------------------------------------------------------------------- |
| `000000` | Success | `payment.succeeded` |
| `000001` | Insufficient funds | A `402` on the charge itself, with `error_code: insufficient_funds`, as a live decline. The payment stays `pending` and `payment.attempt_failed` is sent |
| `000002` | Failure | `payment.failed`, refused by the operator |
| `000003` | Timeout | `payment.expired`, and the payment ends `expired` |
| `000004` | Cancelled | `payment.cancelled`, and the payment ends `cancelled` |
| `000009` | Success, then a refund that fails | `payment.succeeded`, then `refund.failed` |
> [!TIP]
> **Leading zeros are tolerated**
>
> The subscriber part may carry extra leading zeros before the suffix, so `+2376700000000` matches
> `000000` too. Anything else between the prefix and the suffix does not match, and the charge
> answers a `422` on `data.phone` that lists the numbers to use, with the prefix of the channel's
> operator: `Invalid sandbox test number. Use a test number of the channel's operator, e.g.
> +237670000000 (success), +237670000001 (insufficient funds), …`.
### Prefixes
The table gives a sandbox test prefix for every Mobile Money channel the catalogue announces, those
marked coming soon included: sixty-seven prefixes in twenty-six countries. It lists test numbers, not
what a live payment can charge; [Coverage](https://docs.wajub.com/resources/coverage) says which channels can really be
charged today. A wallet held whatever the payer's operator, such as Capitec Pay, also takes the test number of any
other operator, and its suffix still sets the outcome; a number that is no test number is refused.
OPay (`ng.opay`) has no prefix of its own: a Nigerian test number such as `+2348000000000` sets its
outcome. The sandbox settles it from that number alone: no `action: redirect` to OPay's page, as live
answers.
Benin and Gabon have the prefixes of their current numbers beside the older ones, so
`+2290190000000` and `+24177000000` succeed, and `00` can stand for the `+`.
Orange Money in Burkina Faso (`bf.orange`) also asks for the
[code the payer generates](https://docs.wajub.com/payments/direct-api#a-code-the-payer-generates): `123456` is accepted,
and any other code is refused as the operator would refuse it.
| Country | Operator | Prefix |
| --- | --- | --- |
| Cameroon | MTN MoMo | `+23767` |
| Cameroon | Orange Money | `+23769` |
| Cameroon | Express Union | `+23768` |
| Cameroon | Yoomee | `+23766` |
| Ivory Coast | MTN MoMo | `+22505` |
| Ivory Coast | Orange Money | `+22507` |
| Ivory Coast | Moov | `+22501` |
| Ivory Coast | Wave | `+22503` |
| Ivory Coast | Green | `+22509` |
| Nigeria | MTN | `+2348` |
| Nigeria | Orange | `+2347` |
| Senegal | Orange Money | `+22177` |
| Senegal | Free | `+22176` |
| Senegal | Wave | `+22178` |
| Ghana | MTN MoMo | `+23324` |
| Ghana | Vodafone | `+23320` |
| Ghana | Airtel | `+23326` |
| Ghana | AirtelTigo | `+23327` |
| Kenya | M-Pesa | `+25470` |
| Kenya | M-Pesa Till | `+25471` |
| Kenya | Airtel Till | `+25473` |
| Kenya | Equitel | `+25476` |
| Kenya | T-Kash | `+25477` |
| Kenya | Airtel | `+25478` |
| Tanzania | Airtel | `+25567` |
| Tanzania | Tigo | `+25565` |
| Tanzania | Vodafone | `+25574` |
| Tanzania | HaloPesa | `+25562` |
| Tanzania | M-Pesa | `+25576` |
| Uganda | MTN | `+25677` |
| Uganda | Airtel | `+25675` |
| Rwanda | MTN | `+25078` |
| Rwanda | Airtel | `+25073` |
| DRC | Airtel | `+24399` |
| DRC | Orange | `+24389` |
| DRC | Vodacom | `+24381` |
| DRC | Express Union | `+24382` |
| DRC | Africell | `+24390` |
| Benin | MTN | `+22990`, `+2290190` |
| Benin | Moov | `+22991`, `+2290191` |
| Benin | Glo | `+22997`, `+2290197` |
| Burkina Faso | Orange | `+22670` |
| Burkina Faso | Moov | `+22671` |
| Gabon | Airtel | `+2410`, `+24174`, `+24177` |
| Gabon | Express Union | `+2411` |
| Gabon | Moov | `+2416`, `+24162`, `+24165`, `+24166` |
| Congo | Express Union | `+24205` |
| Congo | MTN | `+24206` |
| Congo | Airtel | `+24204` |
| Chad | Express Union | `+23566` |
| Central African Republic | Express Union | `+23670` |
| Zambia | MTN | `+26096` |
| Zambia | Airtel | `+26097` |
| Zambia | Zamtel | `+26095` |
| Malawi | Airtel | `+26599` |
| Malawi | TNM | `+26588` |
| Mali | Orange | `+22370` |
| Mali | Moov | `+22366` |
| Togo | Moov | `+22899` |
| Togo | T-Money | `+22890` |
| Guinea | MTN | `+22466` |
| Guinea | Orange | `+22462` |
| Liberia | MTN | `+23188` |
| Mozambique | M-Pesa | `+25884` |
| Egypt | Vodafone Cash | `+2010` |
| Sierra Leone | Orange | `+23276` |
| South Africa | Capitec Pay | `+2761` |
### Worked examples
| Scenario | MTN Cameroon | Orange Ivory Coast | M-Pesa Kenya |
| ------------------ | --------------- | ------------------ | --------------- |
| Success | `+237670000000` | `+225070000000` | `+254700000000` |
| Insufficient funds | `+237670000001` | `+225070000001` | `+254700000001` |
| Failure | `+237670000002` | `+225070000002` | `+254700000002` |
| Timeout | `+237670000003` | `+225070000003` | `+254700000003` |
| Cancelled | `+237670000004` | `+225070000004` | `+254700000004` |
## Cards
The card number alone decides the outcome. The other fields must still be well formed, or the
charge is refused with a `422` on the field: a holder name, an expiry as `MM/YY` or `MM/YYYY` with a
year from this one to thirty years ahead, and a CVV of three or four digits. The
[Direct API](https://docs.wajub.com/payments/direct-api#cards) page shows the four fields of a sandbox card charge.
### Succeeds without 3D Secure
| Card | Network | Outcome |
| --------------------- | ---------- | -------------------------------------- |
| `4242 4242 4242 4242` | Visa | Succeeds |
| `5555 5555 5555 4444` | Mastercard | Succeeds |
| `4000 0000 0000 5423` | Visa | Succeeds, and every refund on it fails |
### Requires 3D Secure
The hosted checkout asks for a code sent by email, as described in
[Sandbox mode](https://docs.wajub.com/developer-tools/testing/sandbox-mode#3d-secure-asks-for-a-code-by-email). These
return `202` first, and the final status arrives once the challenge is resolved.
| Card | Outcome of the challenge |
| --------------------- | --------------------------------------- |
| `4000 0566 5566 5556` | Passes, payment succeeds |
| `4000 0025 0000 3155` | Passes, payment succeeds |
| `4000 0027 6000 3184` | Passes, payment succeeds |
| `4000 0025 0000 3063` | Authentication fails |
| `4000 0025 0000 3089` | Authentication fails |
| `4000 0025 0000 3018` | Authenticates, then the issuer declines |
| `4000 0025 0000 3026` | Authenticates, then the issuer declines |
| `4000 0025 0000 3034` | The payer abandons the challenge |
| `4000 0025 0000 3042` | The payer abandons the challenge |
| `4000 0025 0000 3050` | The challenge times out |
| `4000 0025 0000 3097` | The challenge times out |
### Fails without 3D Secure
| Card | Outcome |
| --------------------- | ------------------ |
| `4000 0000 0000 9995` | Insufficient funds |
| `4000 0000 0000 0002` | Declined |
| `4000 0000 0000 9987` | Declined |
| `4000 0000 0000 9979` | Declined |
| `4000 0000 0000 0069` | Declined |
| `4000 0000 0000 0127` | Declined |
| `4000 0000 0000 0119` | Declined |
| `4000 0000 0000 0341` | Declined |
| `4000 0000 0000 6975` | Declined |
| `4242 4242 4242 4241` | Declined |
> [!NOTE]
> **One decline, not ten reasons**
>
> Only `…9995` carries a distinct reason. The other nine produce the same generic decline, so use
> whichever you like when testing a failure path. A card that is not on this page is refused for
> not being a test card.
## Bank accounts
Any account number or IBAN of at least four characters is accepted. The **last two digits** choose
the outcome.
| Ends with | Outcome |
| --------- | ------------------ |
| `00` | Success |
| `01` | Insufficient funds |
| `02` | Failure |
| `03` | Timeout |
| `04` | Cancelled |
Anything else succeeds, so an account ending in `47` simply works.
## Djamo
A Djamo charge (`ci.djamo`, `sn.djamo`) takes no number, in sandbox as in live. It answers `202`
with `action: redirect`, and `action_url` opens a Wajub test page in place of Djamo's: pick
**Success**, **Failure** or **Canceled**, as the payer would. The payment ends `succeeded`, `failed`
or `cancelled` with its usual webhooks, and the payer goes back to the page they paid from, or to
your `callback`. The hosted payment page follows that redirect on its own.
## Crypto
When crypto is off in sandbox, the channel is not offered at all. When it is on, a crypto charge answers with `crypto.deposit`, and
its `scenarios` object holds one deposit address per outcome: `success`, `insufficient_funds`,
`failure`, `timeout` and `canceled`.
- Leave `wallet_address` out of the charge and the payment succeeds.
- Send one of the `scenarios` addresses as `wallet_address` and you get that outcome.
- Any other address is refused with a `422` on `data.wallet_address`.
The same test twice gives the same address. It expires after 30 minutes.
The address suffixes `_success`, `_insufficient`, `_failure`, `_timeout` and `_canceled` choose the
outcome of a **payout** to a crypto beneficiary, not of a payment.
## Refunds
A refund's outcome comes from the original payment, not from the refund call.
| The payment was made with | The refund |
| ----------------------------------------------- | ------------ |
| `4000 0000 0000 5423` | Always fails |
| A number ending `000009` | Always fails |
| A number ending `000000` | Succeeds |
| Any other card, a bank account, a crypto wallet | Succeeds |
The numbers ending `000001` to `000004` have no row because their payments never succeed, so there
is nothing to refund: `POST /refunds` answers `422` with `Transaction must be completed to be
refunded`. To test a failed refund, pay with `…000009` or the card `4000 0000 0000 5423`.
## Transfers
A payout uses the beneficiary's details, and the same suffixes apply. A mobile money beneficiary
**must** carry a recognised test number. A bank test account picks its outcome with its last two
digits, a crypto test address with its suffix, the same way.
| Suffix | The transfer | `failure_reason` |
| -------- | ----------------------------------------------------------------------------- | ------------------- |
| `000000` | `succeeded` | |
| `000001` | Refused at once: `422` with `error_code: insufficient_funds`, nothing created | |
| `000002` | `failed` | `failure` |
| `000003` | `failed` | `network_error` |
| `000004` | `failed` | `invalid_recipient` |
```json title="The 422 when it does not"
{
"code": 422,
"status": "Unprocessable Content",
"error_code": "invalid_test_number",
"message": "Invalid sandbox test number. Use a recognised Mobile Money test number, e.g. +237670000000 (success), +237670000001 (insufficient funds), +237670000002 (failure), +237670000003 (timeout), +237670000004 (canceled).",
"errors": {
"beneficiary": [
"Invalid sandbox test number. Use a recognised Mobile Money test number, e.g. +237670000000 (success), +237670000001 (insufficient funds), +237670000002 (failure), +237670000003 (timeout), +237670000004 (canceled)."
]
}
}
```
A transfer debits your sandbox balance, so run a successful payment first, or the payout fails for
lack of funds exactly as it would in live.
## Name check
[`POST /beneficiaries/{id}/verify`](https://docs.wajub.com/payouts/beneficiaries/create#checking-the-name-on-a-wallet)
asks no operator in sandbox: the beneficiary's test number says what the operator would hold. It
answers this way on `cm.mtn`, `cm.orange` and `cm.eu`, the channels whose operator answers the check
in live. Every other channel answers `lookup_unavailable`: the ones with no name check, as in live,
and a Wajub account, which is only checked in live.
| Suffix | `verification` | `registered_name` |
| --------------------- | -------------------- | ------------------------------------------------------------------ |
| `000000` | `verified` | The name you declared |
| `000002` | `name_mismatch` | The initials of another name, `S*** A*** H***`, as on any mismatch |
| Any other test number | `lookup_unavailable` | Absent |
The beneficiary stays payable whatever the answer, as in live. On an account whose beneficiaries
must be verified before they are paid, such as a Relay account, sandbox beneficiaries are created
verified and the call answers `verified` whatever the number.
- [Sandbox mode](https://docs.wajub.com/developer-tools/testing/sandbox-mode): What else differs between the two environments.
- [Trigger events](https://docs.wajub.com/developer-tools/cli/triggers): Let the CLI pick the right number for the outcome you want.
- [Testing webhooks](https://docs.wajub.com/developer-tools/testing/webhooks): Receiving what these scenarios produce.
- [Payment lifecycle](https://docs.wajub.com/payments/lifecycle): The statuses these outcomes move through.
---
# Testing webhooks
URL: https://docs.wajub.com/developer-tools/testing/webhooks
> Three levels, from a unit test to a replayed live delivery.
A webhook handler has three failure modes worth testing separately: it accepts something it should
reject, it rejects something it should accept, or it does the work twice. Each one is caught at a
different level.
| Level | Catches | Needs |
| --------- | --------------------------------------------- | ---------------------------------- |
| Unit test | A verifier that accepts a forged signature | Nothing, it is pure computation |
| The CLI | A handler that crashes on a real payload | `wajub listen` and `wajub trigger` |
| Konsole | An endpoint your server cannot actually reach | A registered endpoint |
## Level 1: sign a payload yourself
The signature is `HMAC-SHA256` over `"{timestamp}.{body}"`, so a test can produce a valid one
without any network. Write the four cases: valid, wrong secret, tampered body, old timestamp.
**Producing a valid signature in a test**
```bash
# The string that gets signed, for reference
TIMESTAMP=1748083260
BODY='{"id":"evt_test_1","event":"payment.succeeded","data":{}}'
printf '%s.%s' "$TIMESTAMP" "$BODY" \
| openssl dgst -sha256 -hmac "whsec_test_secret" -r \
| cut -d' ' -f1
```
```javascript
import { createHmac } from 'node:crypto';
function sign(body, timestamp, secret) {
return 'v1=' + createHmac('sha256', secret).update(`${timestamp}.${body}`).digest('hex');
}
test('rejects a tampered body', async () => {
const body = JSON.stringify({ id: 'evt_test_1', event: 'payment.succeeded', data: { amount: 25000 } });
const ts = Math.floor(Date.now() / 1000).toString();
const signature = sign(body, ts, 'whsec_test_secret');
const res = await post('/webhooks/wajub', body.replace('25000', '1'), {
'x-wajub-signature': signature,
'x-wajub-timestamp': ts,
});
expect(res.status).toBe(400);
});
```
```python
import hmac, hashlib, time
def sign(body: bytes, timestamp: str, secret: str) -> str:
mac = hmac.new(secret.encode(), f"{timestamp}.".encode() + body, hashlib.sha256)
return "v1=" + mac.hexdigest()
def test_rejects_old_timestamp(client):
body = b'{"id":"evt_test_1","event":"payment.succeeded","data":{}}'
old = str(int(time.time()) - 400)
res = client.post(
"/webhooks/wajub",
data=body,
headers={
"X-Wajub-Signature": sign(body, old, "whsec_test_secret"),
"X-Wajub-Timestamp": old,
},
)
assert res.status_code == 400
```
```php
function sign(string $body, string $timestamp, string $secret): string
{
return 'v1='.hash_hmac('sha256', $timestamp.'.'.$body, $secret);
}
public function test_it_rejects_a_wrong_secret(): void
{
$body = json_encode(['id' => 'evt_test_1', 'event' => 'payment.succeeded', 'data' => []]);
$timestamp = (string) time();
$this->call('POST', '/webhooks/wajub', [], [], [], [
'HTTP_X_WAJUB_SIGNATURE' => sign($body, $timestamp, 'whsec_wrong'),
'HTTP_X_WAJUB_TIMESTAMP' => $timestamp,
'CONTENT_TYPE' => 'application/json',
], $body)->assertStatus(400);
}
```
```go
func sign(body []byte, timestamp, secret string) string {
mac := hmac.New(sha256.New, []byte(secret))
mac.Write([]byte(timestamp + "."))
mac.Write(body)
return "v1=" + hex.EncodeToString(mac.Sum(nil))
}
func TestRejectsForgedSignature(t *testing.T) {
body := []byte(`{"id":"evt_test_1","event":"payment.succeeded","data":{}}`)
ts := strconv.FormatInt(time.Now().Unix(), 10)
rec := post(t, "/webhooks/wajub", body, map[string]string{
"X-Wajub-Signature": sign(body, ts, "whsec_wrong"),
"X-Wajub-Timestamp": ts,
})
if rec.Code != http.StatusBadRequest {
t.Fatalf("expected 400, got %d", rec.Code)
}
}
```
> [!WARNING]
> **Sign the raw bytes, in the test too**
>
> If your test serialises the object again before signing, it is testing a different body from the
> one it posts, and it passes for the wrong reason. Build the body string once, sign that string,
> post that string.
## Level 2: a real event on your laptop
Unit tests prove the verifier. They do not prove the handler survives a real payload, with the
fields you did not expect and the types you did not plan for.
```bash title="Two terminals"
# 1
wajub listen --forward-to localhost:3000/webhooks/wajub
# 2
wajub trigger payment.succeeded
wajub trigger payment.failed
wajub trigger refund.succeeded
```
Wajub signs what the CLI forwards with a secret that stays the same between runs, so your
verification runs for real. Set `WAJUB_WEBHOOK_SECRET` to it once (`wajub listen --print-secret`) and
nothing else in your code changes.
The `payment.succeeded` trigger alone delivers five events. If your handler only knows one of them,
the other four are landing in your default branch right now.
## Level 3: the deployed endpoint
Two different buttons in [Konsole](https://docs.wajub.com/developer-tools/konsole/webhook-tester), for two different
questions.
| Button | Proves |
| --------------------- | ------------------------------------------------------------------------------------------- |
| Send test | Wajub can reach your URL, your signature check passes and your handler accepts the envelope |
| Resend, on a delivery | Your handler now processes a real event it previously failed on |
> [!WARNING]
> **Send test does not exercise your event handlers**
>
> It is shaped and signed like a real delivery, but its `event` is `webhook.test` and its `data` a
> placeholder, so none of the code behind a real type runs. Answer it with a `2xx`, use it for
> connectivity, and `wajub trigger` for behaviour.
## The four assertions worth writing
These four run at level 1, in your own suite, with no network. Each one names the input that
produces the condition, so none of them needs a real delivery to reproduce.
| Assertion | Produce it with | Passes when |
| --------------------------------------- | -------------------------------------------------------------------------------- | -------------------------------------------------------------------- |
| A forged signature is rejected | The wrong secret, one flipped byte in the body, or no `X-Wajub-Signature` at all | Your endpoint answers `4xx` and writes nothing |
| A replayed delivery is rejected | A valid signature over a timestamp 400 seconds old | Your endpoint answers `4xx`, because the whole window is 300 seconds |
| The same event twice does the work once | The identical body and headers, posted a second time | One order, one email, one credit |
| A busy handler still answers in time | Your handler with the queue already full | The response leaves inside 30 seconds, since a slower one is retried |
The first is the only thing standing between your fulfilment code and anyone who learns your URL.
The third is the one that costs money when it is missing, because every delivery is retried for up to
72 hours.
- [Signature verification](https://docs.wajub.com/developer-tools/webhooks/signature-verification): The algorithm those tests are asserting against.
- [Retries and ordering](https://docs.wajub.com/developer-tools/webhooks/retries): Why the duplicate test matters more than it looks.
- [Receive webhooks locally](https://docs.wajub.com/developer-tools/cli/listen): Every flag on `wajub listen`.
- [Webhooks in Konsole](https://docs.wajub.com/developer-tools/konsole/webhook-tester): Deliveries, replays and the connectivity test.
---
# Event catalogue
URL: https://docs.wajub.com/developer-tools/webhooks/events
> Every event Wajub emits, what triggers it, and what arrives with it.
Every event Wajub sends, grouped by what it is about, with what to do when it lands. All of them
arrive in the [webhook envelope](https://docs.wajub.com/developer-tools/webhooks) with the full resource in `data`, except
the Sync lifecycle deliveries, which have [their own format](#sync-lifecycle-deliveries).
## How an endpoint decides to fire
Subscription matching is a plain string comparison against the `events` array you registered.
Three cases, and no fourth.
| Your `events` array | What you receive |
| ---------------------------------------- | ----------------------------------------------------------------------------------------------------------------------------------------------------------------------- |
| `["payment.succeeded", "refund.failed"]` | Exactly those two types |
| `["*"]` | Every payment, refund, transfer, customer, dispute, invoice, link, account, balance, fee, endpoint, compliance and provider event, except the Sync lifecycle deliveries |
| `[]` | The same as `["*"]` |
Prefix wildcards do not exist. From API version 2026-10-12, registering `payment.*`, or any name
that is not an event type, answers `422`; on earlier versions it is stored as a literal string that
no event is ever equal to. If you want everything under one resource, list its types, copied from
this page.
> [!WARNING]
> **`*` does not cover the Sync lifecycle deliveries**
>
> The [Sync lifecycle deliveries](#sync-lifecycle-deliveries) match subscriptions by exact name
> only: an endpoint registered with `["*"]`, or with an empty list, receives none of them. List each
> type you want. Compliance and provider events do reach `*` and an empty list.
## How the names are built
`resource.verb`, verb in the past tense, both lowercase. The verbs are stable across resources,
which makes the list shorter to remember than it looks.
| Verb | Meaning |
| ------------ | --------------------------------------- |
| `created` | The resource now exists |
| `updated` | A field changed |
| `deleted` | The resource was removed, or anonymised |
| `processing` | Handed to a provider, outcome unknown |
| `succeeded` | Terminal, it worked |
| `failed` | Terminal, it did not |
| `cancelled` | Terminal, stopped on purpose |
| `expired` | Terminal, the window closed |
Three spellings cost people an afternoon: it is `succeeded`, never `completed` or `complete`; it
is `cancelled` with two `l`; and Sync uses `deauthorized` with a `z` while everything else in the
platform is British spelling.
## Payments
The six states a payment moves through, and the attempt that fails without ending it. Only
`payment.succeeded` means money.
| Event | Fires when | What to do |
| ------------------------ | ---------------------------------------------------------------------------------- | -------------------------------------------------- |
| `payment.created` | The payment exists and is waiting for the payer | Nothing, record the id |
| `payment.processing` | The operator accepted the debit request | Show a pending state |
| `payment.succeeded` | The funds are captured | **Fulfil the order here** |
| `payment.failed` | The operator or the card issuer declined | Release the reservation, tell the customer |
| `payment.cancelled` | You called `DELETE /payments/{id}`, or the payer pressed Cancel on the hosted page | Release the reservation |
| `payment.expired` | The payment window closed before confirmation | Release the reservation |
| `payment.attempt_failed` | One attempt was refused at once and the payment is `pending` again | Let the payer try again. Nothing is over |
| `payment.review_opened` | Shield sent a collected payment to your review queue | Hold the order until you decide |
| `payment.review_closed` | You decided the payment in your review queue | Ship the order, or not if you blocked the customer |
`payment.failed` carries `failure_reason` in `data`. The field is absent, not null, when there is
no reason to give.
> [!WARNING]
> **There is no `payment.refunded`**
>
> A refund never produces a payment event. It produces `refund.*` events on the refund object. The
> payment's own `status` reads `refunded` or `partially_refunded` the next time you read it, but no
> payment event is emitted for it.
### An attempt refused at once
`payment.attempt_failed` is not an end. A provider refused one attempt on the spot, or no provider
could take it, and the payment went back to `pending`: the payer can try again on the same payment.
`payment.processing` may already have reached you for that attempt, and this is what follows it. A
refusal that comes later, from the operator, ends the payment with `payment.failed`.
`data` is the payment, plus an `attempt` object:
```json title="What payment.attempt_failed adds to the payment"
"attempt": {
"failure_code": "insufficient_funds",
"failure_message": "Insufficient funds.",
"channel": "cm.mtn"
}
```
`failure_code` is the provider's decline code when it gave one, `no_eligible_provider` when no
provider could take the attempt, and `payment_declined` otherwise. In sandbox, a number ending in
`000001` sends it. On a channel that takes
[a code the payer generates](https://docs.wajub.com/payments/direct-api#a-code-the-payer-generates), it is also sent when
that code is missing (`otp_required`) or refused (`invalid_otp`, and `otp_attempts_exceeded` the
third time); other refusals keep the provider's code. The operator refusing that code
later sends `payment.attempt_failed` too, not `payment.failed`.
### Held until delivery, for Sync platforms
A Sync platform that creates a payment with `hold` hears of its hold. `data` is the payment's `id`,
`object` and the `holds` concerned, each with its `account`, `status`, `held` and `release_at`.
[Hold until delivery](https://docs.wajub.com/sync/holds)
| Event | Fires when | What to do |
| ----------------------- | ------------------------------------------------------------------------------------ | ---------------------------------------------------------- |
| `payment.held` | The held payment succeeded; for a shared payment, once its parts reached the sellers | Ship, then release once delivered |
| `payment.released` | You released it, or its deadline did: `reason` is `platform` or `auto` | Nothing: the seller is paid on their next payout |
| `payment.hold_expiring` | The hold releases itself in three days. Sent once | Release it, or refund the buyer if the goods never arrived |
## Payment splits
Emitted when a single payment is debited in several instalments, using `split_count` or
`split_amounts` on `POST /payments/{id}/splits`.
| Event | Fires when |
| -------------------------- | --------------------------------------------------------- |
| `payment.split.processing` | One instalment was sent to the operator |
| `payment.split.succeeded` | That instalment cleared, and was credited to your balance |
| `payment.split.failed` | That instalment was declined |
`data` is the full payment, plus a `split` object naming which instalment this was.
```json title="The split object added to the payment payload"
"split": {
"id": "splt_9mWvL2xR7tB5nY4hC6dF",
"split_number": 2,
"amount": 500000,
"currency": "XAF",
"split_currency": "XAF",
"status": "succeeded",
"reference": "order-4172-2",
"provider_reference": "MP260115.1032.B41209",
"initiated_at": "2026-01-15T10:32:04+00:00",
"succeeded_at": "2026-01-15T10:32:41+00:00"
}
```
The parent payment reaches `payment.succeeded` only once every instalment has succeeded, or once
you close it with [`POST /payments/{id}/close`](https://docs.wajub.com/api/payments/close). Counting
`payment.split.succeeded` yourself to decide the order is complete is a way to ship an order that
is half paid.
Live sends them for the same calls, on Mobile Money channels. The parent payment also sends
`payment.processing` each time a tranche goes to the payer, and is `partial` between two tranches.
Neither live nor sandbox splits a payment on its own: a single charge above the per-transaction
cap of [Limits](https://docs.wajub.com/resources/limits) is refused with a `422`, and `POST /payments/{id}/splits` pays it
in tranches. [Split payments](https://docs.wajub.com/sync/split-payments#what-each-call-does) has what each call returns.
## Refunds
| Event | Fires when | What to do |
| ------------------- | ------------------------------------------------------------------------------------------------------------------------------------------------- | --------------------------------------------------------------------- |
| `refund.created` | The refund was accepted for processing | Record it, do not credit yet |
| `refund.processing` | The provider is executing it. Live only: a sandbox refund is created `processing` and never sends it | Nothing |
| `refund.succeeded` | The money left your balance | **Credit the customer here** |
| `refund.failed` | The provider rejected it | Read `failure_reason`, decide manually |
| `refund.cancelled` | Wajub stopped the refund before sending it. It arrives as `refund.failed`, with `status: failed` and `cancelled_by_wajub` as its `failure_reason` | Nothing left your balance. Refund again if the customer is still owed |
| `refund.updated` | A live refund changed lane: who sends it (`execution_mode`) or why (`manual_reason`) | Tell your team when it reads `merchant`: the refund is yours to send |
`data.transaction` is the id of the payment being refunded, as a string, not a nested object.
## Transfers
Payouts out of your balance, whether to a mobile money wallet, a bank account or a card.
| Event | Fires when | What to do |
| --------------------- | -------------------------------------------------------------------------------------------------------------------------------------------------------------------------------------------------------------------------------- | --------------------------------------------------------- |
| `transfer.created` | The transfer was accepted and debited your available balance | Record the id |
| `transfer.processing` | Handed to the payout provider | Nothing |
| `transfer.succeeded` | The beneficiary was paid | Mark the payout settled |
| `transfer.failed` | The provider could not pay | Read `failure_reason`, the amount returns to your balance |
| `transfer.cancelled` | The payout was stopped before anything was sent: rejected in the Dashboard or cancelled by Wajub. It arrives as `transfer.failed`, with `status: failed` and `merchant_rejected` or `cancelled_by_wajub` as its `failure_reason` | The amount returns to your balance |
> [!WARNING]
> **A transfer under review sends transfer.created, then waits**
>
> `review` is a real transfer status: Wajub may hold a payout for review before sending it. It sends
> `transfer.created`, with `status: review`, and nothing more while it waits. Approved, it sends
> `transfer.processing` once, then `transfer.succeeded` or `transfer.failed`. Refused, it sends
> `transfer.failed` with `admin_rejected`. Either can come hours later. Build the waiting state on
> the status, not on the silence.
## Customers
| Event | Fires when |
| ------------------ | ---------------------------------------------------------------- |
| `customer.created` | A customer record was created, including implicitly by a payment |
| `customer.updated` | Any field on the customer changed |
| `customer.deleted` | `DELETE /customers/{id}` ran, and the record was anonymised |
The payload of `customer.deleted` is the customer **after** anonymisation: the name is replaced,
and the email, phone and date of birth are gone. If you need the
original values for your own records, you must have kept them.
## Beneficiaries
| Event | Fires when |
| ---------------------------------- | ---------------------------------------------------------------------------------------------------------------------------------- |
| `beneficiary.created` | A payout destination was saved: with `POST /beneficiaries`, inline in a `POST /transfers`, or as a payout account in the Dashboard |
| `beneficiary.updated` | Its details changed |
| `beneficiary.deleted` | It was removed |
| `beneficiary.receivable_recorded` | You declared that a paid-out seller owes money back, with `POST /beneficiaries/{id}/receivables` |
| `beneficiary.receivable_recovered` | A batch payout line took part or all of that debt back |
`data` for the two receivable events is the debt itself: `id`, `beneficiary`, `reference`,
`refund`, `currency`, `amount`, `recovered`, `outstanding`, `status`, `settled_at` and
`created_at`, amounts in major units. See [the receivables endpoint](https://docs.wajub.com/api/beneficiaries/create-receivables).
## Payment links
| Event | Fires when |
| -------------- | --------------------------------------------------------------------------------------- |
| `link.created` | A payment link was created |
| `link.updated` | Its amount, expiry or state changed |
| `link.deleted` | It was deleted |
| `link.expired` | Its `expiry_date` passed: sent once, within a day, unless the link was archived by then |
A payment made through a link emits `payment.*`, not `link.*`. The link events are about the link
object itself. A link's own endpoints, set in its Webhooks tab, also get its payments, tickets,
gifts, orders and refunds: see [Webhooks of one link](https://docs.wajub.com/payments/link/tracking#webhooks-of-one-link).
## Invoices
| Event | Fires when |
| --------------------------- | ------------------------------------------------------------------------------------------------------------------------------------------------- |
| `invoice.created` | An invoice was created, as a draft: once, with its lines and totals |
| `invoice.updated` | A line, a status or a due date changed: once per `PUT /invoices/{id}`, with the lines and totals, and not at all for a `PUT` that changes nothing |
| `invoice.sent` | The invoice was sent: its status became `sent` |
| `invoice.payment_succeeded` | A payment made on the invoice's page succeeded, each instalment included |
| `invoice.paid` | The invoice is settled in full, online or with `mark-paid` |
| `invoice.cancelled` | It was cancelled |
| `invoice.deleted` | It was deleted |
> [!NOTE]
> **The payment and the invoice name each other**
>
> When a customer pays an invoice, `payment.succeeded` fires for the payment, then
> `invoice.updated` and `invoice.payment_succeeded` for the invoice, and `invoice.paid` once it is
> settled. Fulfil on `payment.succeeded`: its `data.invoice` is the `id` of the invoice it paid, and
> the invoice events carry the invoice itself.
## Disputes
Chargebacks and complaints. These are the events with the shortest deadlines attached to them.
| Event | Fires when | What to do |
| ------------------------------ | ----------------------------------------------------------------------------------------------------------------------- | ----------------------------------- |
| `dispute.created` | A dispute was opened against a payment | **Start gathering evidence** |
| `dispute.updated` | A field changed, or a message was added | Read `data.messages` |
| `dispute.closed` | The dispute ended. A loss sends it right after `dispute.lost`, a win never sends it: read `data.status` for the outcome | Nothing more, act on `dispute.lost` |
| `dispute.won` | The decision went your way | Keep the funds |
| `dispute.lost` | The decision went against you | The amount is debited |
| `dispute.deadline_approaching` | The `due_date` is two days away and the dispute is still `open` or `under_review`. Sent once | **Submit your evidence now** |
| `dispute.deleted` | The dispute record was removed | Nothing |
## Accounts, for Sync platforms
These describe a connected merchant on a Sync platform, not your own account. The ones sent by the
API arrive in the usual envelope:
| Event | Fires when |
| ----------------------------------------- | -------------------------------------------------------------------------------------------------------------------------------------------------------------------------------------------------------------------------------------------------------------------------------------------------------------------------------------------------------------------------------------------------------------------------------------------------------------------------------------------------------------------------------------------------------------------------------------------------------------------------------------------------------------------------------------------------- |
| `account.created` | You created the connection with `POST /accounts`. The merchant has not accepted it yet: that is `account.connected`, below |
| `account.updated` | The account changed, and `data` is the account as the change left it. Sent when `PUT /accounts/{id}` changes the connection (its `email`, `metadata`, `callback`, `payment_status`, payout terms, or the capabilities and pricing of a connection not yet accepted), when `POST /accounts/{id}/token` puts a cancelled invitation back to `pending`, and when Wajub sends a Lite merchant's payout, which moves `last_payout_at`. A call that changes nothing sends nothing. Neither does a proposal alone, which is `account.change_requested`, nor `DELETE`, which is `account.deauthorized`. A change of `payment_status` also sends `account.payment_activated` or `account.payment_suspended` |
| `account.deauthorized` | You ended the connection with `DELETE /accounts/{id}` |
| `account.payment_activated` | You set `payment_status` to `active` with `PUT /accounts/{id}` |
| `account.payout_limited` | A Lite or Relay payout was held back: by your exposure cap (`reason: exposure_cap`), because Wajub withdrew your approval (`reason: approval_withdrawn`), because the seller is new (`reason: new_seller`) or frozen (`reason: frozen`), or because of your balance (`reason: insufficient_balance`): on Relay it does not hold the payout, on Lite it is below zero. `data` carries `account`, `reason`, `currency`, `paid`, `held` and `since`. Sent once per episode: again only after a payout has left in full |
| `account.identity_required` | A Relay seller passed the name-only tier: the part of their payouts above it waits for `POST /accounts/{id}/identity` |
| `account.identity_verified` | Wajub approved the Relay seller's identity document: held payouts leave from the next run |
| `account.identity_rejected` | Wajub refused the document; `data` carries the reason |
| `account.risk_elevated` | The seller's risk level went from `normal` to `elevated`. Once per crossing: sent again only after the score fell at least 10 points under the threshold. [Seller risk](https://docs.wajub.com/sync/seller-risk#the-risk-score) |
| `account.risk_high` | It reached `high`; `suggestion: "freeze"`, or `frozen: true` when it froze the seller automatically |
| `account.frozen` | You froze the seller with `POST /accounts/{id}/freeze`, or their score did: `by`, `reason` (`null` without one), `block_payments` (the block in force), `frozen_at`, `still_frozen: null` |
| `account.unfrozen` | You lifted a freeze with `POST /accounts/{id}/unfreeze`: `by`, `reason`, `block_payments: false`, `frozen_at: null`, and `still_frozen`, the freeze that stays (`{ by, reason, block_payments, since }`) when only one of two was lifted, `null` when the seller is no longer frozen. [Seller risk](https://docs.wajub.com/sync/seller-risk#layered-freezes) |
| `account.payment_suspended` | You set it to `suspended` |
| `account.change_requested` | `PUT /accounts/{id}` proposed new pricing or capabilities, which the merchant has to approve |
| `account.commission_receivable_recorded` | A commission could not be taken at the source and is now owed by the merchant. Live only |
| `account.commission_receivable_collected` | That commission was taken from the merchant's Wajub balance |
Every one of them names its connection in `data.account`: the `acc_…` id, the value you send as
`X-Sync`. Read the connection there, not in `data.id`, which is not always the connection:
| Event | `data.account` | `data.id` |
| ---------------------------------------------------------------------------------------------------------------------- | -------------- | --------------------------------------------------------------------------- |
| `account.created`, `account.updated`, `account.deauthorized`, `account.payment_activated`, `account.payment_suspended` | `acc_…` | The same `acc_…`: `data` is the account, as `GET /accounts/{id}` returns it |
| `account.change_requested` | `acc_…` | Absent. The proposal is identified by `change_id` |
| `account.commission_receivable_recorded`, `account.commission_receivable_collected` | `acc_…` | `crv_…`, the commission owed |
| `account.risk_elevated`, `account.risk_high`, `account.frozen`, `account.unfrozen` | `acc_…` | Absent |
On these events `account` is the id itself, a string. On the copy of a payment, refund, transfer
or dispute event a platform receives, and on `fee.received`, `account` is an object and the id is in
`account.id`: see [Sync platforms receive a copy](#sync-platforms-receive-a-copy).
There is no `account.deleted`. `account.created` announces the invitation you created; the
merchant's acceptance is `account.connected`, below. When the merchant revokes the connection
themselves, the `account.deauthorized` you receive is the Sync-format one.
The rest of the connection's life, and the same changes when they are made from the Dashboard
rather than the API, are sent in the Sync format described in the next section:
| Event | Fires when |
| -------------------------------------------------------------------------------- | ---------------------------------------------------------------------------------------------------------------------------------------------------------------------------------------------- |
| `account.onboarding_started` | The merchant opened your onboarding link |
| `account.onboarding_email_verified` | They verified their email |
| `account.onboarding_account_selected` | They picked the Wajub account to connect |
| `account.onboarding_kyc_submitted` | They submitted their verification file |
| `account.onboarding_declined` | They declined to connect. Nothing is connected and your invitation link still works. `reason` holds their words when they gave one |
| `account.connected` | They accepted the connection. It is live from now on |
| `account.change_requested` | You proposed new terms from the Dashboard |
| `account.change_accepted` | The merchant approved them. They apply from now on |
| `account.change_declined` | The merchant refused them. Nothing changes |
| `account.payment_activated`, `account.payment_suspended`, `account.deauthorized` | The same changes, made from the Dashboard or triggered by the merchant's verification |
| `account.frozen`, `account.unfrozen` | A seller frozen or unfrozen from the Dashboard, or by Wajub. The same fields as through the API, `still_frozen` included |
| `account.dispute_evidence_submitted` | A Lite seller sent their answer to a dispute, or the cut-off sent their draft for them. [Disputes on your sellers' sales](https://docs.wajub.com/sync/disputes#the-event) |
| `platform.exposure_warning` | The exposure of a currency passed 80% of your payout cap. Live only; a failed sending is retried, so deduplicate on `X-Idempotency-Key`. [Your exposure cap](https://docs.wajub.com/sync/payouts#following-your-cap) |
| `platform.exposure_reached` | It reached 100% |
| `report.ready` | A report you asked for is ready to download. [Reports](https://docs.wajub.com/sync/reports#download-it) |
The last three are about your platform, not one connection: they carry no `account`.
## Sync lifecycle deliveries
The events of the second table do not travel like the others. They are sent to the endpoints of
the platform that owns the connection, in the environment of that connection.
- **Only an exact subscription receives them.** `*` and an empty `events` array do not match. List
each type you want.
- **The body is flat**, not the usual envelope: `event`, `account` (the connection's `acc_…` id),
`sandbox`, `timestamp`, then the fields of that event. There is no `data`: read the connection in
`account`, the key the API's own `account.*` events use under `data`. Rely only on the fields
documented here.
- **The headers are different**: `X-Sync-Event` names the event, `X-Idempotency-Key` identifies the
delivery, and `X-Sync-Signature-V1` with `X-Sync-Timestamp` carry the signature.
- **Verify the signature as for any other delivery.** `X-Sync-Signature-V1` is `v1=` followed by
the hex HMAC-SHA256 of `{timestamp}.{raw_body}`, keyed with the endpoint's signing secret, and
`X-Sync-Timestamp` is that timestamp in Unix seconds. Pass both to `constructEvent` in the SDKs,
or verify them by hand as in
[Signature verification](https://docs.wajub.com/developer-tools/webhooks/signature-verification#sync-lifecycle-deliveries),
and refuse a delivery whose timestamp is more than 300 seconds from your clock. Then record each
`X-Idempotency-Key` you have processed, and ignore a delivery whose key you have already seen.
- **Only a `2xx` is a delivery**, as for every other event: a redirect is not followed and counts as
a failure. Each attempt goes to the endpoint as it is when it is sent, signed with its current
secret, and an endpoint disabled or deleted in the meantime is sent nothing more.
- **Redelivery lasts only a few minutes**: keep the endpoint up and answer within 10 seconds. These
deliveries do not appear in the Konsole event log.
This is what `account.connected` looks like:
```json title="An account.connected delivery"
{
"event": "account.connected",
"account": "acc_7Yh2MpL4tRb3nP8sZcXv",
"sandbox": false,
"timestamp": "2026-09-16T10:32:41+00:00",
"team_name": "Boutique Akwa",
"capabilities": ["read", "payments"],
"status": "active",
"payment_status": "active"
}
```
## Balance and fees
| Event | Fires when | Payload |
| ----------------- | --------------------------------------------------------- | -------------------------------- |
| `balance.updated` | Your balance moved | The movement, not the new totals |
| `fee.charged` | Wajub debited a fee from you | The fee |
| `fee.received` | A Sync platform collected its fee on a connected merchant | The fee, plus `account` |
> [!WARNING]
> **A fee debit is not a `balance.updated`**
>
> Fee debits are deliberately excluded from `balance.updated` and surfaced as `fee.charged`
> instead. If you sum `balance.updated` movements to keep a local ledger, you will be over by
> exactly the fees. Subscribe to both.
`balance.updated` sends the movement itself, which is what you want for a ledger.
```json title="A balance.updated payload"
{
"currency": "XAF",
"amount": 24250,
"direction": "credit",
"balance_type": "available",
"balance_before": 1840000,
"balance_after": 1864250,
"reason": "payment_settlement",
"sandbox": false
}
```
The totals `GET /balance` returns are not in this payload. Call the endpoint when you need them.
## Compliance
Emitted while your account is being verified, and whenever your file changes state afterwards.
| Event | Fires when |
| ------------------------------ | ---------------------------------------------------- |
| `compliance.submitted` | Your verification file was submitted for review |
| `compliance.verified` | The account is verified, live money becomes possible |
| `compliance.rejected` | The file was refused |
| `compliance.changes_requested` | A reviewer needs something else from you |
| `compliance.inquiry.created` | A specific question was raised on your file |
| `compliance.inquiry.resolved` | That question was closed |
For a platform onboarding merchants, `compliance.verified` is the signal that a connected account
may start taking live payments. Do not infer it from anything else.
## Providers
Emitted when the set of rails available to your account changes.
| Event | Fires when |
| ------------------------------ | ------------------------------------------ |
| `provider.activated` | A provider was enabled on your account |
| `provider.deactivated` | A provider was disabled |
| `provider.channel_activated` | One channel of a provider became available |
| `provider.channel_deactivated` | One channel was withdrawn |
Worth subscribing to if you cache your account's channels rather than calling `GET /providers` on
every checkout.
## Webhook endpoints
| Event | Fires when |
| -------------------------- | --------------------------------------- |
| `webhook_endpoint.created` | An endpoint was registered |
| `webhook_endpoint.updated` | Its URL, subscriptions or state changed |
| `webhook_endpoint.deleted` | It was removed |
Useful on a platform account where several people can change the configuration. Note that the
endpoint receiving this event may be the one that was just changed.
## What `data` actually contains
`data` is the resource as its REST endpoint returns it. Three things are worth knowing.
**A field with no value can be absent or `null`.** Read every field with a default, and accept
`null`.
**An empty `metadata` arrives as `{}`**, never as `[]`.
**The payload is always in the latest API version.** Version pinning applies to your API calls, not
to webhook deliveries: the envelope's `api_version` is the platform's current version at the moment
the event was recorded, and the body is shaped for that version. Pinning your account to
`2026-08-01` does not change what your endpoint receives.
```json title="A complete payment.succeeded delivery"
{
"id": "evt_aio5DpN577tNU2vOxdmuZGhT",
"event": "payment.succeeded",
"livemode": true,
"created": "2026-01-15T10:32:41+00:00",
"api_version": "2026-10-11",
"pending_webhooks": 1,
"request": { "id": null, "idempotency_key": "idem_kZ3qP8mWvL2xR7tB5nY4hC6dF9jS1aG0" },
"data": {
"id": "trx_CSUGajfv9xh0XQ5wu2lx",
"reference": "order-4172",
"amount": 25000,
"amount_paid": 25000,
"currency": "XAF",
"status": "succeeded",
"channel": "cm.mtn",
"payment_method": { "channel": "cm.mtn", "account": "+237670000000" },
"customer": {
"id": "cus_4tRb3nP8sZcXvK2mQ9wL",
"name": "Amina Nkem",
"email": "amina@example.com",
"phone": "+237670000000"
},
"sandbox": false,
"credited_at": "2026-01-15T10:32:41+00:00",
"created_at": "2026-01-15T10:30:00+00:00",
"updated_at": "2026-01-15T10:32:41+00:00"
}
}
```
## Events people look for and do not find
| You expected | What actually exists |
| ---------------------------- | -------------------------------------------------------------------------- |
| `payment.refunded` | `refund.succeeded` |
| `payment.partially_refunded` | `refund.succeeded`, compare `data.amount` to the payment |
| `transfer.review` | `transfer.created`, with `status: review`. Nothing else until the decision |
| `payout.*` | `transfer.*`, payouts are transfers in the API |
| `subscription.*` | `invoice.*`, recurring billing emits invoice events |
| `checkout.session.completed` | `payment.succeeded` |
| `account.deleted` | `account.deauthorized` |
## Sandbox and live are separate streams
An endpoint belongs to one environment. A sandbox endpoint only ever receives sandbox events, and a
live endpoint only live ones. Two things change in the payload:
- `livemode` is `false` in sandbox and `true` in live.
- Event ids are prefixed `evt_test_` in sandbox and `evt_` in live.
A handler that hardcodes an id length or slices a prefix off will break when it meets the other
environment.
## Sync platforms receive a copy
When a payment, refund or transfer belongs to a merchant connected through Sync, or a dispute is
opened on such a payment, the event is delivered twice: once to the merchant's own endpoints, and
once to the platform's, as a separate event with its own id. The platform's copy carries an extra
`account` object so you know which connected merchant it came from. Links, invoices and
beneficiaries the connection created are not copied: `GET /events` with `X-Sync` lists their events.
```json title="What the platform copy adds to data"
"account": {
"id": "acc_7Yh2MpL4tRb3nP8sZcXv",
"reference": "boutique-akwa"
}
```
Deduplicate on the event id, not on the payment id: the two copies describe the same payment and
carry two different event ids, deliberately.
- [Webhooks](https://docs.wajub.com/developer-tools/webhooks): The envelope, the headers, and the three rules.
- [Retries and ordering](https://docs.wajub.com/developer-tools/webhooks/retries): Why the same event arrives twice, and what to key on.
- [Payment lifecycle](https://docs.wajub.com/payments/lifecycle): Which state changes emit an event, and which do not.
- [Trigger an event](https://docs.wajub.com/developer-tools/cli/triggers): Produce eight of these on demand from your terminal.
---
# Webhooks
URL: https://docs.wajub.com/developer-tools/webhooks
> How Wajub tells your server what happened, and how to trust it.
A webhook tells your server the outcome of a payment, a transfer or any other change, without you
asking for it. Three rules make an integration correct; the rest of this section details them.
| Rule | Why |
| -------------------------------------------- | -------------------------------------------- |
| Verify the signature before reading the body | Anyone can POST to your URL |
| Answer inside 30 seconds, work afterwards | A slow handler is retried, so it duplicates |
| Key on the event id | The same event can legitimately arrive twice |
## The envelope
Every delivery has the same shape. The payload never varies by event type, only `data` does.
```json title="A payment.succeeded delivery"
{
"id": "evt_test_aio5DpN577tNU2vOxdmuZGhT",
"event": "payment.succeeded",
"livemode": false,
"created": "2026-05-24T10:21:09+00:00",
"api_version": "2026-10-11",
"pending_webhooks": 1,
"request": { "id": null, "idempotency_key": "idem_kZ3qP8mWvL2xR7tB5nY4hC6dF9jS1aG0" },
"data": {
"id": "trx_CSUGajfv9xh0XQ5wu2lx",
"reference": "order-4172",
"amount": 25000,
"amount_paid": 25000,
"currency": "XAF",
"status": "succeeded",
"channel": "cm.mtn",
"customer": { "id": "cus_test_4tRb3nP8sZcXvK2mQ9wL", "email": "amina@example.com" }
}
}
```
> [!CAUTION]
> **The event type is in `event`, not `type`**
>
> Reading `event.type` gives you `undefined`, and a switch on it silently falls through to your
> default branch. The field is named `event`. The SDKs hand back this envelope unchanged, so the
> same rule applies whether you parse it yourself or not.
`data` is the full resource, byte for byte what `GET /payments/{id}` returns under `transaction`.
You never need a second call to learn what happened, though making one is a reasonable way to
re-check a payment you consider high value. Match an event to your own order through
`data.reference`, the `reference` you supplied, or `data.metadata`.
| Field | What it carries |
| ------------------ | ----------------------------------------- |
| `id` | The event id, your deduplication key |
| `event` | The type, for example `payment.succeeded` |
| `livemode` | `false` in sandbox, `true` in live |
| `created` | When the event was recorded, ISO 8601 |
| `api_version` | The version the payload was serialised at |
| `pending_webhooks` | How many endpoints this event is going to |
| `data` | The resource itself |
## The headers
```http title="What arrives with the body"
X-Wajub-Signature: v1=8f3c1b0e4a7d...
X-Wajub-Timestamp: 1748081269
X-Wajub-Event: payment.succeeded
X-Wajub-Delivery-Id: whd_7Yh2MpL4tRb3nP8sZcXv
Content-Type: application/json
```
The first two are what you verify against. `X-Wajub-Event` lets you route before parsing, and
`X-Wajub-Delivery-Id` identifies the delivery of this event to this endpoint: it stays the same on
every retry, and differs from one endpoint to the next.
## What happens end to end
1. **You register an endpoint**
A URL, in Konsole or through `POST /webhooks`. A live endpoint must use `https://`; a sandbox
endpoint may use `http://`. Each endpoint gets its own signing secret.
2. **Something happens**
A payment succeeds, a transfer fails, a dispute opens. Wajub records an event.
3. **Wajub posts it**
Signed, to every endpoint subscribed to that type, with a 30 second timeout.
4. **You answer 2xx**
Anything else, or no answer in time, and the delivery is tried again for up to 72 hours.
## Where to go next
| You want to | Read |
| -------------------------- | -------------------------------------------------------------------------- |
| Receive one on your laptop | [Quickstart](https://docs.wajub.com/developer-tools/webhooks/quickstart) |
| Prove it came from Wajub | [Signature verification](https://docs.wajub.com/developer-tools/webhooks/signature-verification) |
| Know which events exist | [Event catalogue](https://docs.wajub.com/developer-tools/webhooks/events) |
| Understand a duplicate | [Retries and failures](https://docs.wajub.com/developer-tools/webhooks/retries) |
| Decide against webhooks | [Webhooks or polling](https://docs.wajub.com/developer-tools/webhooks/polling) |
> [!TIP]
> **You do not need a public URL to start**
>
> `wajub listen --forward-to http://localhost:3000/webhooks` streams live events straight to your
> machine, signed the same way as production. The [quickstart](https://docs.wajub.com/developer-tools/webhooks/quickstart)
> starts there.
- [Quickstart](https://docs.wajub.com/developer-tools/webhooks/quickstart): A signed event on your laptop in about five minutes.
- [Signature verification](https://docs.wajub.com/developer-tools/webhooks/signature-verification): The one thing you must not skip.
- [Retries and failures](https://docs.wajub.com/developer-tools/webhooks/retries): Retries for 72 hours, and how to stay idempotent.
- [Troubleshooting webhooks](https://docs.wajub.com/resources/troubleshooting/webhooks): Nothing arrives, or the signature never matches.
---
# Webhooks or polling
URL: https://docs.wajub.com/developer-tools/webhooks/polling
> Why webhooks win, when to read the API instead, and what it costs.
A Mobile Money payment is not over when your request returns: the payer still has to confirm on
their phone. There are three ways to learn how it ended.
| Way | Mechanism | Latency | What it costs |
| ------------------ | ----------------------- | --------------------- | ----------------------- |
| Webhook | Wajub posts to your URL | As soon as it happens | A public HTTPS endpoint |
| Read one payment | `GET /payments/{id}` | Your polling interval | Rate limit budget |
| Read the event log | `GET /events` | Whenever you run it | One request per page |
Webhooks are the answer for fulfilment. The other two exist for the cases webhooks genuinely do
not cover, and this page is about telling those apart.
## Use each one for what it is good at
| Situation | Use |
| ------------------------------------------------------- | ------------------------------------ |
| Deliver the order, credit the wallet, send the receipt | **Webhook**, always |
| The payer just landed back on your return page | **One read** of `GET /payments/{id}` |
| A script, a cron, a back office tool with no public URL | **Polling**, with a deadline |
| Your endpoint was down for an hour and you need the gap | **`GET /events`**, then replay |
| A dashboard showing live status to a human | Webhook into your own push channel |
Polling is not a lighter alternative to webhooks. It is slower, it burns request budget, and it
cannot see anything that happened while your process was not running. It is a supplement.
## What polling actually costs you
`GET /payments/{id}` always returns the current status. It is also counted twice: once against your account's overall per-minute
budget, and once against the `payments` endpoint bucket, which is shared with payment creation.
| Plan | Account budget, per minute | `payments` bucket, per minute |
| ------------- | -------------------------- | ----------------------------- |
| Pay as you go | 120 | 30 |
| Growth | 360 | 90 |
| Scale | 720 | 180 |
| Enterprise | Unlimited | Unlimited |
> [!WARNING]
> **The endpoint bucket is the one that bites**
>
> Every call to a payments endpoint counts against the `payments` bucket, creation included. A
> loop polling one payment every five seconds spends 12 of those per minute, and ten concurrent
> payments spend 120, which is already over the ceiling on Pay as you go and Growth. Poll a queue of
> payments on one timer, not one timer per payment.
Over the ceiling you get a `429` with a `Retry-After` header in seconds, and the same figure in
the body.
```json title="A 429 from the payments bucket"
{
"code": 429,
"status": "Too Many Requests",
"message": "Too many requests",
"type": "endpoint",
"retry_after": 37,
"retry_after_human": "00:00:37"
}
```
`type` tells you which ceiling you hit: `team` for the account budget, `endpoint` for the bucket
above, `api_key` for the per-key limit, which is the same figure as the account budget, and `ip`
for a call made without a key.
## Polling correctly
Four rules make the difference between a poll that helps and one that gets you rate limited.
| Rule | Why |
| ------------------------------------- | -------------------------------------------------------------------------------------------------------------------------- |
| Stop at a terminal status | `succeeded`, `failed`, `cancelled` and `expired` are final. `pending`, `processing` and `partial` are not |
| Give the loop a deadline | Two minutes covers mobile money. Past that, let the webhook finish the job and tell the customer you will confirm by email |
| Back off | Start at two seconds and grow the interval. A payment that has not moved in thirty seconds will not move in the next two |
| Never poll what you were already told | A `payment.succeeded` delivery already carries the final payment. Reading it back doubles your traffic for nothing |
**A bounded poll with backoff**
```bash
# One read. The status is in .transaction.status
curl https://api.wajub.com/payments/trx_CSUGajfv9xh0XQ5wu2lx \
-H "Authorization: sk.xxxxxxxxxxxxxxxx…"
```
```javascript
const TERMINAL = new Set(['succeeded', 'failed', 'cancelled', 'expired']);
async function settle(id, { deadlineMs = 120_000 } = {}) {
const stopAt = Date.now() + deadlineMs;
let wait = 2000;
while (Date.now() < stopAt) {
const payment = await wajub.payments.retrieve(id);
if (TERMINAL.has(payment.status)) return payment;
await new Promise((r) => setTimeout(r, wait));
wait = Math.min(wait * 1.5, 15_000);
}
return null; // Still open. The webhook will bring the outcome.
}
```
```python
TERMINAL = {"succeeded", "failed", "cancelled", "expired"}
def settle(id: str, deadline: float = 120.0):
stop_at = time.monotonic() + deadline
wait = 2.0
while time.monotonic() < stop_at:
payment = wajub.payments.retrieve(id)
if payment.status in TERMINAL:
return payment
time.sleep(wait)
wait = min(wait * 1.5, 15.0)
return None # Still open. The webhook will bring the outcome.
```
```php
const TERMINAL = ['succeeded', 'failed', 'cancelled', 'expired'];
function settle(Wajub\Wajub $wajub, string $id, int $deadline = 120): ?object
{
$stopAt = time() + $deadline;
$wait = 2;
while (time() < $stopAt) {
$payment = $wajub->payments->retrieve($id);
if (in_array($payment->status, TERMINAL, true)) {
return $payment;
}
sleep($wait);
$wait = (int) min($wait * 1.5, 15);
}
return null; // Still open. The webhook will bring the outcome.
}
```
```go
var terminal = map[string]bool{"succeeded": true, "failed": true, "cancelled": true, "expired": true}
func settle(ctx context.Context, client *wajub.Client, id string, deadline time.Duration) (*wajub.Payment, error) {
ctx, cancel := context.WithTimeout(ctx, deadline)
defer cancel()
wait := 2 * time.Second
for {
payment, err := client.Payments.Retrieve(ctx, id)
if err != nil {
return nil, err
}
if terminal[payment.Status] {
return &payment, nil
}
select {
case <-ctx.Done():
return nil, nil // Still open. The webhook will bring the outcome.
case <-time.After(wait):
}
if wait = wait * 3 / 2; wait > 15*time.Second {
wait = 15 * time.Second
}
}
}
```
The SDKs return the payment itself rather than the envelope: `retrieve` hands you the payment, not
the `{ code, status, message, transaction }` wrapper you see with cURL.
## Catching up after an outage
If your endpoint was unreachable, the events still exist. `GET /events` lists everything recorded
for your account in the current environment, newest first, and `POST /events/{id}/resend` puts one
back through the normal delivery path, signed as usual. Resend each event once: the same event goes
to the same endpoint at most once every 5 minutes, and a second resend inside that delay answers
`429` (see [Limits](https://docs.wajub.com/resources/limits#webhook-delivery)).
**Read the event log and replay what you missed**
```bash
curl "https://api.wajub.com/events?type=payment.succeeded&per_page=100" \
-H "Authorization: sk.xxxxxxxxxxxxxxxx…"
curl -X POST https://api.wajub.com/events/evt_aio5DpN577tNU2vOxdmuZGhT/resend \
-H "Authorization: sk.xxxxxxxxxxxxxxxx…"
```
```javascript
const page = await wajub.events.list({ type: 'payment.succeeded', per_page: 100 });
for (const event of page.data) {
if (await alreadyHandled(event.id)) continue;
await wajub.events.resend(event.id);
}
```
```python
page = wajub.events.list({"type": "payment.succeeded", "per_page": 100})
for event in page.data:
if already_handled(event["id"]):
continue
wajub.events.resend(event["id"])
```
```php
$page = $wajub->events->list(['type' => 'payment.succeeded', 'per_page' => 100]);
foreach ($page->data as $event) {
if (alreadyHandled($event['id'])) {
continue;
}
$wajub->events->resend($event['id']);
}
```
```go
page, err := client.Events.List(ctx, map[string]any{
"type": "payment.succeeded",
"per_page": 100,
})
if err != nil {
return err
}
for _, event := range page.Data {
id, _ := event["id"].(string)
if handled(id) {
continue
}
if _, err := client.Events.Resend(ctx, id, nil); err != nil {
return err
}
}
```
Three details decide whether this works.
| Detail | What it means |
| ----------------------------------------- | --------------------------------------------------------------------- |
| Filters are `per_page`, `page` and `type` | There is no date range. Page back until the timestamps are old enough |
| Pagination is page based | `meta` carries `current_page`, `last_page`, `per_page` and `total` |
| Sandbox and live are separate | The environment comes from the key you use, not from a parameter |
Resending goes to every active endpoint subscribed to that type that has not accepted the event
yet, each getting its next attempt. An endpoint that already accepted it is not sent it again, so
on an account with two endpoints the healthy one receives no duplicate. When every endpoint has
accepted it, the call still answers `202` and sends nothing.
> [!NOTE]
> **The log holds only what an endpoint receives**
>
> The checkout timeline entries shown in Konsole [Events](https://docs.wajub.com/developer-tools/konsole/event-stream)
> are never delivered, so `GET /events` does not list them and cannot resend them.
## The return page is not a confirmation
When a payer comes back to your `callback` URL, all you know is that a browser loaded a URL. The
payment may have succeeded, failed, or still be waiting for a PIN. The URL can also be opened by
anyone who guesses it.
> [!CAUTION]
> **Never fulfil on the redirect**
>
> Read the payment server side before showing a success page, and fulfil on the webhook. A return
> page that ships the order is a return page that ships free orders to whoever loads it twice.
The shape that works in production is three layers, and each one covers the previous one's blind
spot.
1. **The webhook fulfils**
It arrives whether or not the customer ever came back, and it is the only one of the three
that is guaranteed to happen.
2. **One server side read paints the return page**
A single `GET /payments/{id}` tells you which of the three pages to render: succeeded, still
pending, or failed. No loop.
3. **A daily job reconciles**
List the payments your database still has as open, read each one, and close the gap. This step
is required. An event can reach you late, and none is sent while Wajub restricts your webhooks
([Retries](https://docs.wajub.com/developer-tools/webhooks/retries#what-wajub-guarantees)): without this job, such a
payment stays open on your side for good.
- [Receive a webhook](https://docs.wajub.com/developer-tools/webhooks/quickstart): A signed event on your laptop, without deploying anything.
- [Retries and ordering](https://docs.wajub.com/developer-tools/webhooks/retries): What happens when your endpoint is the thing that is down.
- [Limits](https://docs.wajub.com/resources/limits): Every ceiling the API enforces, and the error each one returns.
- [Monitoring](https://docs.wajub.com/resources/monitoring): The signals worth an alert, and where each one comes from.
---
# Receive a webhook
URL: https://docs.wajub.com/developer-tools/webhooks/quickstart
> A signed event on your laptop, without deploying anything.
You do not need a public URL, a tunnel service, or a deployed environment to start. The CLI streams
live sandbox events to your machine and signs them the same way production does, so the handler you
write here is the handler you ship.
## Write the endpoint
It has to do three things in this order: verify, acknowledge, then work.
**The shape every handler has**
```bash
# The request your endpoint will receive
POST /webhooks/wajub HTTP/1.1
X-Wajub-Signature: v1=9f86d081884c7d659a2feaa0c55ad015a3bf4f1b2b0b822cd15d6c15b0f00a08
X-Wajub-Timestamp: 1748083260
X-Wajub-Event: payment.succeeded
Content-Type: application/json
{"id":"evt_…","event":"payment.succeeded","data":{…}}
```
```javascript
app.post('/webhooks/wajub', express.raw({ type: 'application/json' }), (req, res) => {
let event;
try {
event = wajub.webhooks.constructEvent(
req.body,
req.headers['x-wajub-signature'],
req.headers['x-wajub-timestamp'],
);
} catch {
return res.sendStatus(400);
}
res.sendStatus(200);
queue.add('wajub-event', event);
});
```
```python
@app.post("/webhooks/wajub")
def wajub_webhook():
try:
event = wajub.webhooks.construct_event(
request.get_data(),
request.headers.get("X-Wajub-Signature", ""),
request.headers.get("X-Wajub-Timestamp", ""),
)
except WebhookSignatureVerificationError:
return "", 400
queue.enqueue(handle_event, event)
return "", 200
```
```php
Route::post('/webhooks/wajub', function (Request $request) use ($wajub) {
try {
$event = $wajub->webhooks->constructEvent(
$request->getContent(),
$request->header('X-Wajub-Signature'),
$request->header('X-Wajub-Timestamp'),
);
} catch (Wajub\Exception\WebhookSignatureVerificationError $e) {
return response()->noContent(400);
}
HandleWajubEvent::dispatch($event);
return response()->noContent(200);
});
```
```go
func webhookHandler(w http.ResponseWriter, r *http.Request) {
body, err := io.ReadAll(r.Body)
if err != nil {
http.Error(w, "bad request", http.StatusBadRequest)
return
}
event, err := client.Webhooks.ConstructEvent(
body,
r.Header.Get("X-Wajub-Signature"),
r.Header.Get("X-Wajub-Timestamp"),
0,
)
if err != nil {
http.Error(w, "invalid signature", http.StatusBadRequest)
return
}
w.WriteHeader(http.StatusOK)
go handleEvent(event)
}
```
> [!WARNING]
> **Answer first, work after**
>
> A delivery that takes longer than 30 seconds counts as failed and is retried, so a handler that
> fulfils the order before responding is a handler that fulfils it again at every retry. Acknowledge, then
> queue.
## Point the CLI at it
```bash title="Forward live sandbox events to localhost"
npm install -g @wajub/cli
wajub login
wajub listen --forward-to localhost:3000/webhooks/wajub
```
The CLI prints a signing secret when it starts, the same on every run for this account and
environment. Put it in `WAJUB_WEBHOOK_SECRET` once while you develop (`wajub listen --print-secret`
prints it alone): Wajub signs forwarded events with it, so your verification code runs for real
rather than being skipped locally.
| Flag | What it does |
| ---------------- | --------------------------------------------------------- |
| `--forward-to` | Where to POST. `http://` is assumed when you leave it off |
| `--events` | Comma-separated types, instead of everything |
| `--print-secret` | Print the signing secret and exit |
| `--live` | Required with a live key |
## Make something happen
`wajub trigger` drives the sandbox API end to end and lets the real event come back to you. It is
not a synthetic payload: a payment is actually created and processed.
```bash title="Fire an event and watch it arrive"
wajub trigger --list
wajub trigger payment.succeeded
wajub trigger payment.failed --amount 2500
wajub trigger customer.created -d name="Acme Inc"
```
Eight events can be triggered this way, and `wajub trigger --list` prints them.
| Resource | Events |
| --------- | ----------------------------------------------------------------------------- |
| Payments | `payment.created`, `payment.succeeded`, `payment.failed`, `payment.cancelled` |
| Refunds | `refund.succeeded`, `refund.failed` |
| Customers | `customer.created`, `customer.updated` |
Anything outside that list you produce the normal way: create the resource with a
[sandbox test number](https://docs.wajub.com/developer-tools/testing/test-scenarios) and let it run.
## Register the endpoint for real
The CLI covers development. Production needs a registered HTTPS endpoint, created in Konsole or
through the API.
```bash title="Create an endpoint"
curl https://api.wajub.com/webhooks \
-H "Authorization: sk.xxxxxxxxxxxxxxxx…" \
-H "Content-Type: application/json" \
-d '{
"url": "https://example.com/webhooks/wajub",
"events": ["payment.succeeded", "payment.failed", "refund.succeeded"]
}'
```
The response carries a `whsec_` secret, and that is the only time it is returned in full. Store it
before you move on. Subscribe to the events you handle rather than to everything: an endpoint
receiving types it ignores still has to answer them, and every one of them counts against your
timeout budget.
> [!TIP]
> **Check the delivery, not just your logs**
>
> Konsole keeps every attempt with its response code and body. If your handler never ran, the
> answer is in [Webhooks](https://docs.wajub.com/developer-tools/konsole/webhook-tester): a `404` means the URL is wrong,
> a timeout means you answered too late, and no row at all means the event never matched your
> subscription.
- [Signature verification](https://docs.wajub.com/developer-tools/webhooks/signature-verification): What `constructEvent` does, and how to do it by hand.
- [wajub listen](https://docs.wajub.com/developer-tools/cli/listen): Every flag on the command you just used.
- [Event catalogue](https://docs.wajub.com/developer-tools/webhooks/events): Everything you can subscribe to.
- [Test scenarios](https://docs.wajub.com/developer-tools/testing/test-scenarios): The sandbox numbers that produce each outcome.
---
# Retries & ordering
URL: https://docs.wajub.com/developer-tools/webhooks/retries
> What happens when your endpoint is down, and why an event arrives twice.
When your endpoint fails, Wajub delivers the event again, so your handler can run twice on the same
event. This page covers what Wajub guarantees and the handler shape that survives a duplicate.
## What Wajub guarantees
**At least once, not exactly once.** Every event reaches your endpoint at least one time. Some
will reach it more than once. Building for exactly-once delivery is building for something no
webhook system provides.
One rare case bends that promise: **deliveries stop while Wajub restricts your webhooks**, as part
of a restriction on your account or its closure. Events are still recorded and listed by
`GET /events`, but none is sent, to your endpoints or to `wajub listen`. The events recorded during
the restriction are **not** sent when it lifts: read them with `GET /events` and replay the ones you
need with `POST /events/{id}/resend`.
This is why a daily reconciliation is a required part of an integration, not a safety net you may
skip. See [The return page is not a confirmation](https://docs.wajub.com/developer-tools/webhooks/polling#the-return-page-is-not-a-confirmation).
**No ordering guarantee.** Events are delivered as they are produced, with retries
interleaved. A `payment.succeeded` can land before the `payment.processing` that preceded
it. Never infer a payment's state from the order events arrive in. Read the state from the event
body, or fetch the payment.
## When a delivery counts as failed
A delivery succeeds when your endpoint answers with any `2xx` inside **30 seconds**. Anything
else is a failure.
| Your response | What happens |
| ----------------------------- | ------------------------------------------------------------------------ |
| `2xx` | Delivered. Nothing more. |
| `5xx`, or a network error | Retried |
| Any `4xx` | Retried |
| `410 Gone` | **Not retried.** Your endpoint is saying it will never accept this event |
| No response within 30 seconds | Retried |
| A `3xx` redirect | Retried. Redirects are never followed, so a redirect never delivers |
> [!WARNING]
> **Only a 410 ends the delivery**
>
> A `400` or a `404` is retried like a `500`, so an endpoint that answers `404` during a deploy
> still gets the event once it is back. Return `410` only when you want Wajub to stop trying this
> delivery for good, and `2xx` once you have it.
## How long Wajub keeps trying
Wajub keeps trying for **72 hours** after the first attempt. Once the 72 hours are up, the delivery
is marked `failed` and Wajub stops. Your endpoint is **not** disabled, so the next event will still
be attempted, and you can replay the failed one by hand from Konsole or with
`POST /events/{id}/resend`. If you delete or disable the endpoint while a delivery
is still being retried, the attempts left are abandoned.
## Deduplicating on the event id
**`id` in the body**, an `evt_…` value, identifies the **event**. It is the same on every retry, a
manual resend included, and the same for every endpoint that receives this event. Store it, and
skip an event whose `id` you have already handled: shipping an order, crediting an account or
sending a receipt then happens once.
## The handler shape
Four steps, in this order. The order is the point.
**A handler that tolerates retries**
```bash
# The same event, arriving a second time after a timeout.
# Its body id is the one of the first attempt.
{"id":"evt_aio5DpN577tNU2vOxdmuZGhT","event":"payment.succeeded","data":{…}}
```
```javascript
app.post('/webhooks/wajub', express.raw({ type: 'application/json' }), async (req, res) => {
// 1. Verify before trusting anything in the body.
const event = wajub.webhooks.constructEvent(
req.body,
req.headers['x-wajub-signature'],
req.headers['x-wajub-timestamp'],
);
// 2. Acknowledge within the 30 second budget, before doing any work.
res.sendStatus(200);
// 3. Stop if this event was already handled.
if (await alreadyHandled(event.id)) return;
await markHandled(event.id);
// 4. Do the work, on your own queue if it can fail.
await enqueue(event);
});
```
```python
@app.post("/webhooks/wajub")
def webhook():
event = wajub.webhooks.construct_event(
request.get_data(),
request.headers.get("X-Wajub-Signature", ""),
request.headers.get("X-Wajub-Timestamp", ""),
)
if already_handled(event["id"]):
return "", 200
mark_handled(event["id"])
queue.enqueue(handle_event, event)
return "", 200
```
```php
$event = $wajub->webhooks->constructEvent(
$request->getContent(),
$request->header('X-Wajub-Signature'),
$request->header('X-Wajub-Timestamp'),
);
// INSERT … ON CONFLICT DO NOTHING: the unique index decides, not a read.
$claimed = DB::table('processed_events')
->insertOrIgnore(['event_id' => $event['id'], 'created_at' => now()]);
if ($claimed) {
HandleWajubEvent::dispatch($event);
}
return response()->noContent(200);
```
```go
event, err := client.Webhooks.ConstructEvent(
body,
r.Header.Get("X-Wajub-Signature"),
r.Header.Get("X-Wajub-Timestamp"),
0,
)
if err != nil {
http.Error(w, "invalid signature", http.StatusBadRequest)
return
}
w.WriteHeader(http.StatusOK)
id, _ := event["id"].(string)
if claimed, _ := claimEvent(ctx, id); claimed {
go handleEvent(event)
}
```
> [!WARNING]
> **200 means received, not processed**
>
> Acknowledge on receipt and process asynchronously. If your own processing can fail, retry it
> from your own job queue. Wajub's redeliveries are not a way to replay your business logic: they
> stop after 72 hours.
Mark the event as handled **before** doing the work, not after. If you mark it after, two retries
arriving close together can both pass the check and both run.
## Inspecting and replaying
Every attempt is recorded with its status code, response body and latency in
[Konsole](https://docs.wajub.com/developer-tools/konsole/webhook-tester). Once your endpoint is fixed you can replay a
single delivery, or up to 100 failed deliveries at once, with the original payload and a freshly
signed header.
`POST /events/{id}/resend` sends the event to every endpoint that has not accepted it yet. Replays
are not counted against your plan, but the same event goes again to the same endpoint at most once
every 5 minutes, from Konsole or from the API. An endpoint inside that delay is skipped, and when
every endpoint is, the call answers `429` with `error_code: event_resend_cooldown` and a
`Retry-After` header. That `429` is not the [rate limit](https://docs.wajub.com/api/rate-limits): resending before
`Retry-After` gets the same answer.
- [Signature verification](https://docs.wajub.com/developer-tools/webhooks/signature-verification): Verify the HMAC before you trust a payload.
- [Event catalog](https://docs.wajub.com/developer-tools/webhooks/events): Every event type Wajub emits.
- [Payment lifecycle](https://docs.wajub.com/payments/lifecycle): Which states emit an event, and which do not.
- [Testing webhooks](https://docs.wajub.com/developer-tools/testing/webhooks): Receive events locally without deploying.
---
# Signature verification
URL: https://docs.wajub.com/developer-tools/webhooks/signature-verification
> Proving a delivery came from Wajub, and was not replayed.
Your webhook URL is public, so anyone can post a well-formed `payment.succeeded` to it. Verifying the
signature is the only way to tell a real delivery from a forged one, and two headers carry it.
| Header | What it is |
| ------------------- | ------------------------------------- |
| `X-Wajub-Signature` | `v1=` followed by a hex HMAC-SHA256 |
| `X-Wajub-Timestamp` | Unix seconds, part of what was signed |
## What is signed
Not the body alone. The timestamp and the body, joined by a single dot.
```text title="The signed string"
signed = "{timestamp}.{raw_body}"
digest = hex(hmac_sha256(signed, endpoint_secret))
header = "v1=" + digest
```
The timestamp is inside the HMAC on purpose: it means a captured delivery cannot be replayed a day
later, because moving it in time breaks the signature. Comparing the timestamp to now is the second
half of that protection, and the SDKs do it for you with a 300 second window.
## With an SDK
The secret belongs to the client, not to the call.
**Verify, then act**
```bash
# What Wajub sends you
POST /webhooks/wajub HTTP/1.1
X-Wajub-Signature: v1=9f86d081884c7d659a2feaa0c55ad015a3bf4f1b2b0b822cd15d6c15b0f00a08
X-Wajub-Timestamp: 1748083260
X-Wajub-Event: payment.succeeded
X-Wajub-Delivery-Id: whd_7Yh2MpL4tRb3nP8sZcXv
Content-Type: application/json
{"id":"evt_…","event":"payment.succeeded","data":{…}}
```
```javascript
import { Wajub } from '@wajub/node';
const wajub = new Wajub({
secretKey: process.env.WAJUB_API_KEY,
webhookSecret: process.env.WAJUB_WEBHOOK_SECRET,
});
app.post('/webhooks/wajub', express.raw({ type: 'application/json' }), (req, res) => {
let event;
try {
event = wajub.webhooks.constructEvent(
req.body,
req.headers['x-wajub-signature'],
req.headers['x-wajub-timestamp'],
);
} catch {
return res.sendStatus(400);
}
res.sendStatus(200);
queue.add(event.id, event);
});
```
```python
wajub = Wajub(
api_key=os.environ["WAJUB_API_KEY"],
webhook_secret=os.environ["WAJUB_WEBHOOK_SECRET"],
)
@app.post("/webhooks/wajub")
def wajub_webhook():
try:
event = wajub.webhooks.construct_event(
request.get_data(),
request.headers.get("X-Wajub-Signature", ""),
request.headers.get("X-Wajub-Timestamp", ""),
)
except WebhookSignatureVerificationError:
return "", 400
queue.enqueue(handle_event, event)
return "", 200
```
```php
$wajub = new Wajub\Wajub([
'api_key' => env('WAJUB_API_KEY'),
'webhook_secret' => env('WAJUB_WEBHOOK_SECRET'),
]);
try {
$event = $wajub->webhooks->constructEvent(
$request->getContent(),
$request->header('X-Wajub-Signature'),
$request->header('X-Wajub-Timestamp'),
);
} catch (Wajub\Exception\WebhookSignatureVerificationError $e) {
return response()->noContent(400);
}
HandleWajubEvent::dispatch($event);
return response()->noContent(200);
```
```go
var client *wajub.Client
func init() {
c, err := wajub.New(wajub.Config{
APIKey: os.Getenv("WAJUB_API_KEY"),
WebhookSecret: os.Getenv("WAJUB_WEBHOOK_SECRET"),
})
if err != nil {
log.Fatalf("wajub: %v", err)
}
client = c
}
func handler(w http.ResponseWriter, r *http.Request) {
body, err := io.ReadAll(r.Body)
if err != nil {
http.Error(w, "bad request", http.StatusBadRequest)
return
}
event, err := client.Webhooks.ConstructEvent(
body,
r.Header.Get("X-Wajub-Signature"),
r.Header.Get("X-Wajub-Timestamp"),
0,
)
if err != nil {
http.Error(w, "invalid signature", http.StatusBadRequest)
return
}
w.WriteHeader(http.StatusOK)
go handleEvent(event)
}
```
> [!CAUTION]
> **The secret is not a fourth argument**
>
> `constructEvent` takes the payload, the signature, the timestamp and then a **tolerance**, never
> your secret: the secret goes into the client you build, once. The tolerance is in seconds, or a
> `time.Duration` in Go, a `Duration` in Java and a `TimeSpan` in C#. Go and Java require the
> argument: pass `0` in Go, or `null` in Java, for the default 300 second window.
## Without an SDK
Three steps, in this order: check the prefix, recompute the digest, compare in constant time. Only
then look at the timestamp.
**Verify by hand**
```bash
# Reproduce a signature locally from a captured delivery
TIMESTAMP=1748083260
BODY=$(cat delivery.json)
printf '%s.%s' "$TIMESTAMP" "$BODY" \
| openssl dgst -sha256 -hmac "$WAJUB_WEBHOOK_SECRET" -hex
```
```javascript
import { createHmac, timingSafeEqual } from 'node:crypto';
function verify(rawBody, signatureHeader, timestampHeader, secret) {
if (!signatureHeader?.startsWith('v1=')) return false;
const received = signatureHeader.slice(3);
const expected = createHmac('sha256', secret)
.update(`${timestampHeader}.${rawBody}`)
.digest('hex');
// timingSafeEqual throws on a length mismatch, which is exactly what a
// forged signature looks like.
if (received.length !== expected.length) return false;
if (!timingSafeEqual(Buffer.from(received), Buffer.from(expected))) return false;
return Math.abs(Date.now() / 1000 - Number(timestampHeader)) <= 300;
}
```
```python
import hashlib, hmac, time
def verify(raw_body: bytes, signature_header: str, timestamp_header: str, secret: str) -> bool:
if not signature_header.startswith("v1="):
return False
received = signature_header[3:]
signed = f"{timestamp_header}.".encode() + raw_body
expected = hmac.new(secret.encode(), signed, hashlib.sha256).hexdigest()
if not hmac.compare_digest(received, expected):
return False
return abs(time.time() - float(timestamp_header)) <= 300
```
```php
function verify(string $rawBody, string $signatureHeader, string $timestampHeader, string $secret): bool
{
if (! str_starts_with($signatureHeader, 'v1=')) {
return false;
}
$received = substr($signatureHeader, 3);
$expected = hash_hmac('sha256', $timestampHeader.'.'.$rawBody, $secret);
if (! hash_equals($expected, $received)) {
return false;
}
return abs(time() - (float) $timestampHeader) <= 300;
}
```
```go
func verify(rawBody []byte, signatureHeader, timestampHeader, secret string) bool {
if !strings.HasPrefix(signatureHeader, "v1=") {
return false
}
mac := hmac.New(sha256.New, []byte(secret))
mac.Write([]byte(timestampHeader + "."))
mac.Write(rawBody)
expected := hex.EncodeToString(mac.Sum(nil))
if !hmac.Equal([]byte(expected), []byte(signatureHeader[3:])) {
return false
}
ts, err := strconv.ParseFloat(timestampHeader, 64)
if err != nil {
return false
}
return math.Abs(float64(time.Now().Unix())-ts) <= 300
}
```
## The four ways this goes wrong
### The body was parsed before you hashed it
This is the cause of nearly every signature that will not verify. Your framework parses the JSON,
you re-serialise it to hash it, and the bytes come back in a different order or with different
spacing. The digest is over the exact bytes we sent.
| Framework | What to use |
| --------------------- | -------------------------------------------------------------- |
| Express | `express.raw({ type: 'application/json' })` on that route only |
| Flask | `request.get_data()`, never `request.json` |
| Laravel | `$request->getContent()` |
| Go | `io.ReadAll(r.Body)` before any decoder |
| Next.js route handler | `await request.text()` |
### The comparison threw instead of returning false
Node's `crypto.timingSafeEqual` raises a `RangeError` when the two buffers differ in length, and a
forged signature is usually a different length. Without a length check first, your handler crashes
on exactly the request it was meant to reject. `hash_equals` and `compare_digest` handle this
themselves.
### The event type was read from the wrong field
> [!WARNING]
> **The field is `event`**
>
> The envelope carries `event`, not `type`. A switch on `type` falls through and nothing is
> fulfilled. Read `event.event`, or route on the `X-Wajub-Event` header.
### The clock drifted
Verification allows 300 seconds between the signed timestamp and your server's clock. A container
whose clock has drifted past that rejects every delivery with a valid signature. If everything
started failing at once and nothing changed in your code, check NTP before you check the secret.
## Sync lifecycle deliveries
The onboarding and connection events a Sync platform receives, `account.connected` among them,
are signed the same way, with the same endpoint secret, under headers of their own.
| Header | What it is |
| --------------------- | ----------------------------------------------------------------- |
| `X-Sync-Signature-V1` | `v1=` followed by the hex HMAC-SHA256 of `{timestamp}.{raw_body}` |
| `X-Sync-Timestamp` | Unix seconds, part of what was signed |
Verify them like any other delivery, with the same 300 second window: pass `X-Sync-Signature-V1`
and `X-Sync-Timestamp` to `constructEvent` where you would pass the `X-Wajub-` headers, or to the
`verify` function of [Without an SDK](#without-an-sdk). Refuse a delivery whose timestamp is
outside the window, even when its signature matches. `constructEvent` returns the body as it is,
and these deliveries have a flat body rather than the usual envelope, described in
[the event catalogue](https://docs.wajub.com/developer-tools/webhooks/events#sync-lifecycle-deliveries). Then record each
`X-Idempotency-Key` you have processed, and ignore a delivery whose key you have already seen.
```text title="The headers of a Sync lifecycle delivery"
X-Sync-Event: account.connected
X-Sync-Timestamp: 1748083260
X-Sync-Signature-V1: v1=5d41f2a8c3e07b9a1f64d2e8b0c7a95e3f18d6b4a2c9e07f1b3d5a8c6e2f4b90
X-Idempotency-Key: 9b74c9897bac770ffc029102a200c5de35d0f7b1a8e7c3b6d4f2a1e0c9b8a7f6
```
## The secret
Each endpoint has its own, starting with `whsec_`, shown once when the endpoint is created and
readable afterwards in Konsole. Rotating it is a single call.
```bash title="Rotate an endpoint secret"
curl -X POST https://api.wajub.com/webhooks/9d3f6a2e-4b1c-4e8a-b7d2-5c9e1f0a3b64/rotate-secret \
-H "Authorization: sk.xxxxxxxxxxxxxxxx…"
```
Wajub generates the new secret, so you cannot deploy it ahead of time. It takes effect at once:
every attempt sent from then on is signed with it, retries of older events included, since an
attempt is signed when it is sent. Switch without losing a delivery this way:
1. Change your handler to accept a signature made with either of two secrets, and deploy it with
the current secret alone.
2. Rotate, and add the new secret, shown once, as the second one.
3. Once nothing has been refused for a while, remove the old secret.
A delivery refused during the switch is not lost: it is retried, signed with the new secret.
Rotating from the Dashboard is gentler. In Konsole, or on a payment link's Webhooks tab, you can
keep the old secret valid for 24 hours: during that time every delivery carries a second signature
made with it, in `X-Wajub-Signature-Previous` (`X-Webhook-Signature-Previous` for a payment link's
own endpoints). `X-Wajub-Signature` always carries the current secret, so a handler that verifies it
is unaffected, and one still on the old secret can verify the second header until you have switched.
A rotation through the API ends any such overlap at once.
- [Quickstart](https://docs.wajub.com/developer-tools/webhooks/quickstart): Receive a signed event on your laptop first.
- [Retries and failures](https://docs.wajub.com/developer-tools/webhooks/retries): What happens when you answer 400.
- [Troubleshooting webhooks](https://docs.wajub.com/resources/troubleshooting/webhooks): The signature never verifies, symptom by symptom.
- [Security best practices](https://docs.wajub.com/best-practices/security): Where webhook secrets sit among your other credentials.
---
# Libraries
URL: https://docs.wajub.com/libraries
> The three families of Wajub packages, and which one your layer needs.
Which Wajub package you need depends on one question: where your code runs.
- [Wajub Components](https://docs.wajub.com/libraries/components): In the browser. Hosted checkout, or payment fields you lay out yourself.
- [SDKs](https://docs.wajub.com/libraries/sdks): On your server, in your mobile app, or on the command line.
- [Plugins](https://docs.wajub.com/libraries/plugins): No code at all, for WordPress and WooCommerce.
## Where your code runs
That question decides the package. The table that answers it, from the browser to the command line,
and the rule that governs it, the secret key never leaving your server, are on
[SDKs](https://docs.wajub.com/libraries/sdks#where-your-code-runs). Most integrations use two packages: a server SDK to
create the payment, and a browser or mobile package to collect it.
## Start here
- [SDK Quickstart](https://docs.wajub.com/libraries/sdks/quickstart): A key, an install line, and one working call.
- [Choose your SDK](https://docs.wajub.com/libraries/sdks): Runtime floors and the constraints that rule one out.
- [Integration paths](https://docs.wajub.com/payments/integration-paths): Redirect, embed or your own form. Which and why.
- [Sessions & security](https://docs.wajub.com/libraries/components/sessions): Which key goes where, and what each one may do.
- [Mobile SDKs](https://docs.wajub.com/libraries/sdks/mobile): A native payment sheet, without a WebView.
- [Example projects](https://docs.wajub.com/libraries/sdks/examples): Working code, and where each piece lives.
---
# Angular
URL: https://docs.wajub.com/libraries/components/angular
> provideWajub, the service, standalone components, and the Angular SSR wiring that goes with them.
`@wajub/angular` gives you `provideWajub()`, a service, standalone components for the checkout and
each of the seven field groups, and `injectConfirmPayment()`. What every option does is documented
on [Display the checkout](https://docs.wajub.com/libraries/components/hosted-checkout) and
[Payment fields](https://docs.wajub.com/libraries/components/payment-fields). This page covers what is specific to
Angular.
**`@wajub/angular`**: version 1.8.1, GA, npm, Angular 17+ · Angular SSR
## Install
`@wajub/js` is a peer dependency, so it goes on the same line. The package needs Angular 17 or
later, `@angular/core` and `@angular/common`.
```bash
npm install @wajub/angular @wajub/js
```
It works with zone.js and in a zoneless application, and with server rendering and hydration.
## provideWajub and the service
Add `provideWajub()` to `app.config.ts` for the whole application, or to the `providers` of a
route. Without it, the components work with the defaults.
```typescript title="src/app/app.config.ts"
import { type ApplicationConfig } from '@angular/core';
import { provideWajub } from '@wajub/angular';
export const appConfig: ApplicationConfig = {
providers: [provideWajub()],
};
```
| Option | Type | Default | What it does |
| ------- | --------- | ------- | ----------------------------------------------------------------------------------- |
| `defer` | `boolean` | `false` | Loads nothing until you call `load()` on the service, for a checkout behind a click |
> [!CAUTION]
> **getRuntime() throws while Wajub.js is loading**
>
> It throws until Wajub.js has loaded, if the load failed, and always on the server. Read
> `runtime()`, a signal that holds `null` until the runtime has loaded, unless you already know it
> is there.
```typescript title="The safe form"
import { Component, Input, inject } from '@angular/core';
import { WajubService } from '@wajub/angular';
@Component({
selector: 'app-upgrade-button',
standalone: true,
template: `
`,
})
export class UpgradeButtonComponent {
@Input({ required: true }) sessionId!: string;
readonly wajub = inject(WajubService);
upgrade(): void {
this.wajub.runtime()?.wajub.open({
sessionId: this.sessionId,
onSuccess: () => window.location.assign('/account'),
});
}
}
```
The signal is `null` when the component is created and fills once Wajub.js has loaded. On the
server it stays `null`.
| Member | What it is |
| ------------------ | -------------------------------------------------------------------------------------------------- |
| `runtime` | A signal of `{ wajub, Wajub, WajubError }`, `null` until the runtime has loaded, and on the server |
| `runtime$` | The same as an observable: the current runtime at once, then each new one |
| `loading`, `error` | Signals: the runtime is loading, and why the last load failed, `null` otherwise |
| `load()` | Loads Wajub.js, with `defer`. A promise of the runtime, `null` on the server |
| `getRuntime()` | The runtime. Throws while loading, after a failed load and on the server |
## Checkout embed
``, the `WajubCheckoutEmbedComponent` class, is the hosted checkout inside
your own layout. Its inputs are `sessionId`, `minHeight`, `locale`, `appearance`, `layout`,
`loadingText` and `showLoading`. Its outputs are the eleven callbacks of
[EmbeddedConfig](https://docs.wajub.com/libraries/components/api-reference#embeddedconfig), named without `on`.
```typescript title="src/app/checkout/checkout.component.ts"
import { Component, Input } from '@angular/core';
import { WajubCheckoutEmbedComponent, type WajubError } from '@wajub/angular';
@Component({
selector: 'app-checkout',
standalone: true,
imports: [WajubCheckoutEmbedComponent],
template: `
`,
})
export class CheckoutComponent {
@Input({ required: true }) sessionId!: string;
paid(): void {
window.location.assign('/order/complete');
}
failed(error: WajubError | Record): void {
console.error(error.code, error.message);
}
}
```
| Input or output | Type | Default | What it does |
| --------------- | ------------------ | -------- | -------------------------------------------------------------------- |
| `sessionId` | `string` | Required | The `authorization_token` from `POST /payments` |
| `minHeight` | `number` | `480` | The host's minimum height in pixels, until the checkout sets its own |
| `(ready)` | `CheckoutInstance` | none | The checkout is up, with the instance to drive afterwards |
| `(resize)` | `number` | none | The checkout's new height in pixels |
The other outputs are `(success)`, `(error)`, `(loadError)`, `(cancel)`, `(expired)`,
`(stateChange)`, `(methodChange)`, `(breakdown)` and `(close)`. The host element is the container,
`display: block` and full width: put your `class` and `style` on it. The component also exposes
the mounted instance as `checkoutInstance`, `null` before it mounts, for a `viewChild` or a
template reference.
Inputs can change after mount, and a new `sessionId` loads a new checkout.
## Payment fields
Seven components render one field group each: ``, ``,
``, ``, ``, `` and
``, the classes `WajubCardComponent` to `WajubCryptoComponent`.
``, the `WajubComponentEmbedComponent` class, is the same with a required `type`
input, when the choice is made at runtime. Every option of
[ComponentConfig](https://docs.wajub.com/libraries/components/payment-fields) is an input of the same name, and every
callback an output named without `on`.
```typescript title="Your own layout, your own button"
import { Component, Input, signal } from '@angular/core';
import {
WajubAddressComponent,
WajubPaymentComponent,
injectConfirmPayment,
type ComponentInstance,
} from '@wajub/angular';
@Component({
selector: 'app-pay-form',
standalone: true,
imports: [WajubAddressComponent, WajubPaymentComponent],
template: `
`,
})
export class PayFormComponent {
@Input({ required: true }) sessionId!: string;
// A function, so that a session that changes is followed.
readonly payment = injectConfirmPayment(() => this.sessionId);
// A signal: (instance) emits null during change detection when the form goes.
readonly field = signal(null);
pay(): void {
const field = this.field();
if (field) this.payment.confirm(field);
}
}
```
| Input or output | Type | Default | What it does |
| --------------- | ----------------------------------- | ------------ | ---------------------------------------------------------------------------------------------------------------------------------------------------------- |
| `type` | `ComponentType` | Required | Only on `` |
| `loader` | `'skeleton'` or `'none'` | `'skeleton'` | `'skeleton'`: the host holds the form's height from the first render, with a placeholder in your inputs' style. `'none'`: no placeholder |
| `minHeight` | `number` | Unset | The host's minimum height in pixels. A `min-height` in the host's `style`, attribute or binding, counts the same |
| `readyTimeout` | `number` | Unset | Milliseconds to wait for the form. Past it, `(loadError)` receives a `WajubError` with the code `ready_timeout`. Unset, no limit |
| `beforeSubmit` | `() => boolean \| Promise` | none | Runs before the charge, to place your order: `false`, or an error, charges nothing. Set it from the field's first render. Called without `this`, see below |
| `(instance)` | `ComponentInstance \| null` | none | The instance once mounted, `null` once gone: a new mount, or the component destroyed |
| `(ready)` | `ComponentInstance` | none | The form is up and interactive |
| `(stateChange)` | `{ state, method }` | none | The payment moved to another step, `APPROVAL_REQUIRED` while the payer approves on the phone for example |
| `(resize)` | `{ height }` | none | The field took a new height, in pixels |
| `(redirect)` | `{ url, method }` | none | The payment continues on the provider's own page, and your page is about to go there |
The other outputs are `(change)`, `(focus)`, `(blur)`, `(success)`, `(error)`, `(loadError)` and
`(methodChange)`. The host element is `display: block` and full width: put your `class` and `style`
on it. The component exposes the mounted instance as `componentInstance`, `null` before it mounts.
`(instance)` emits `null` while the form is destroyed, during change detection. Keep the instance in
a signal, or in a field only your code reads: a plain field that a binding higher in the template
reads raises `NG0100`, ExpressionChangedAfterItHasBeenChecked, in development.
> [!WARNING]
> **beforeSubmit is called without this**
>
> Like any callback, `beforeSubmit` is called on its own, so a plain method of your class passed as
> `[beforeSubmit]="placeOrder"` cannot reach your component through `this`. Declare it as an arrow
> function in a field, `readonly placeOrder = async () => …`, or bind the method in your class. If
> it throws or rejects, nothing is charged.
## injectConfirmPayment
`injectConfirmPayment(sessionId?)` submits a field component for you. Call it in an injection
context, a field initializer or a constructor. It returns
`{ confirm(instance, options?), isConfirming }`.
| Member | What it does |
| ----------------------------- | ----------------------------------------------------------------------------------------------------------------------------------- |
| `confirm(instance, options?)` | Submits the field component it is given and resolves with the outcome. It rejects before Wajub.js has loaded, and without a session |
| `isConfirming` | A signal: a payment is under way |
Pass a signal or a function, `() => this.sessionId`, to follow a session that changes, or a plain
string, the `SessionIdSource` type. A `sessionId` in `options` wins over it.
## Types
Every type of `@wajub/js` is exported too, so one import serves both packages:
`import type { PaymentSuccess } from '@wajub/angular'` works. The inputs and outputs are typed on
the component classes, which Angular's template type checking reads.
The package adds `WajubOptions`, what `provideWajub()` takes, `SessionIdSource`, the session
`injectConfirmPayment()` takes, and `WajubConfirmPayment`, what it returns.
## Mobile Money and Card in your own checkout
Your checkout keeps its own form, its method choice and its Pay button, and each method shows only
its inputs, in your page's style. The steps, the server calls and the reason for each option are
on [Payment fields](https://docs.wajub.com/libraries/components/payment-fields#mobile-money-and-card-in-your-own-checkout).
Here, your server has prepared the payment with `deferred: true` when the checkout opened, and
handed the page its `authorization_token` and `authorization_url`.
```typescript title="payment-step.component.ts"
import { Component, Input, computed, signal } from '@angular/core';
import {
WajubCardComponent,
WajubMobileMoneyComponent,
injectConfirmPayment,
type ComponentInstance,
type WajubError,
} from '@wajub/angular';
// The payment is under way, or waits on the payer: nothing on the page may change.
const RUNNING = [
'PROCESSING', 'VERIFYING', 'PENDING', 'OTP_REQUIRED', 'PIN_REQUIRED', 'PHONE_REQUIRED',
'BIRTHDAY_REQUIRED', 'ADDRESS_REQUIRED', '3DS_REQUIRED', 'USSD_REQUIRED', 'APPROVAL_REQUIRED',
];
@Component({
selector: 'app-payment-step',
standalone: true,
imports: [WajubCardComponent, WajubMobileMoneyComponent],
template: `
@if (fallback()) {
}
`,
})
export class PaymentStepComponent {
// The prepared payment's authorization_token and authorization_url, from your server.
@Input({ required: true }) sessionId!: string;
@Input({ required: true }) hostedUrl!: string;
readonly method = signal<'mobileMoney' | 'card'>('mobileMoney');
readonly complete = signal(false);
readonly step = signal('INITIATED');
readonly fallback = signal(false);
private readonly payment = injectConfirmPayment(() => this.sessionId);
readonly locked = computed(() => this.payment.isConfirming() || RUNNING.includes(this.step()));
private component: ComponentInstance | null = null;
// Your server checks the cart, places the order and activates the payment.
// An arrow function, so that this is your component when the field calls it.
readonly placeOrder = async (): Promise => {
const response = await fetch('/checkout/place-order', { method: 'POST' });
return response.ok; // false: nothing is charged
};
// Switching method destroys one form and mounts the other: null in between.
mounted(instance: ComponentInstance | null): void {
this.component = instance;
this.complete.set(false);
}
loadFailed(error: WajubError | Record): void {
if (error.code === 'ready_timeout') this.fallback.set(true);
}
async pay(): Promise {
if (this.fallback()) {
// A prepared payment is charged only once activated: place the order first.
if (await this.placeOrder()) window.location.assign(this.hostedUrl);
return;
}
if (!this.component) return;
try {
await this.payment.confirm(this.component);
window.location.assign('/thanks');
} catch {
// The form shows the reason, and the payer can try again in it.
}
}
}
```
The fields show a declined payment themselves, and the payer tries again in them. When they do not
come up within `readyTimeout`, the Pay button places the order and then sends the payer to Wajub's
page: a prepared payment is charged only once activated. `appearance.inherit` reads a text input
of your page, its label, your main button and the background behind the fields, so render your own
form's fields before this step, or name them with
`[appearance]="{ inherit: { input: '#email', button: '#pay' } }"`. Mark the order paid on your
server, from the `payment.succeeded` webhook, never from the browser.
## Angular SSR
The session is created on your server. Nothing in this package needs a secret key, and nothing
should ever receive one.
```typescript title="server.ts"
import express from 'express';
import { Wajub } from '@wajub/node';
const wajub = new Wajub({ secretKey: process.env['WAJUB_API_KEY']! });
// On the Express app server.ts creates, before the handler that renders Angular.
app.post('/api/checkout/session', express.json(), async (req, res) => {
const { cartId } = req.body;
const payment = await wajub.payments.create(
{
amount: 25000,
currency: 'XAF',
description: `Cart ${cartId}`,
customer: { email: 'buyer@example.com' },
metadata: { cart_id: cartId },
},
{ idempotencyKey: `cart-${cartId}` },
);
res.json({ sessionId: payment.authorization_token });
});
```
> [!CAUTION]
> **src/environments is for the publishable key only**
>
> Every `environment.ts` file is compiled into the browser bundle. `pk.` belongs there, `sk.` never
> does. A secret key sent from a browser is answered `403` and its owner is emailed about it.
Three more things Angular SSR asks for:
- Nothing to skip. The components render on the server and the form mounts in the browser, so
`provideClientHydration()` needs nothing more: no `ngSkipHydration`, and no `isPlatformBrowser()`
around the components.
- Put `provideWajub()` in `app.config.ts`, so that one service serves the whole checkout flow.
- Fetch the session from your server and pass the token down as an input.
## What the package exports
The exports are listed in the
[SDK reference](https://docs.wajub.com/libraries/components/api-reference#framework-packages), the types the package adds
in [TypeScript](https://docs.wajub.com/libraries/components/typescript#framework-types).
- [Display the checkout](https://docs.wajub.com/libraries/components/hosted-checkout): Every option and callback behind the embed inputs.
- [Payment fields](https://docs.wajub.com/libraries/components/payment-fields): What each field component collects, and its limits.
- [Sessions and security](https://docs.wajub.com/libraries/components/sessions): Where the token comes from and what it may do.
- [Appearance](https://docs.wajub.com/libraries/components/appearance): Themes, colours, locale and layout.
---
# SDK reference
URL: https://docs.wajub.com/libraries/components/api-reference
> Every export, option, method, type, state and error code of @wajub/js.
Every export, option, method, type, state and error code of `@wajub/js`. The guide pages explain
when to use each piece.
## Two ways to reach the same API
The runtime is one object. You either import helpers that load it for you, or you hold it
yourself.
```typescript title="Helpers, or the runtime"
import { mount, open, checkout, components, confirmPayment } from '@wajub/js';
import { loadWajub } from '@wajub/js/pure';
const rt = await loadWajub();
rt?.wajub.mount('#checkout', { sessionId });
```
| Export from `@wajub/js` | Returns | Notes |
| --------------------------------------------------- | ------------------------------------ | ---------------------------------------------------------------------------------------------------------------------- |
| `mount(container, config)` | `Promise` | `null` on the server |
| `open(config)` | `Promise` | `null` on the server |
| `checkout(config)` | `Promise` | Redirects the page |
| `components(sessionId, options?)` | `Promise` | `null` on the server |
| `confirmPayment(options)` | `Promise<{ status, transaction? }>` | Rejects with `WajubError` |
| `fetchSession(sessionId)` | `Promise` | Works before anything is mounted |
| `signals()` | `Promise` | Device signals for a charge from your server, see [Shield](https://docs.wajub.com/risk/shield/quickstart#if-you-run-your-own-checkout) |
| `preload(sessionId, options?)` | `Promise` | Gets the checkout ready before the payer reaches it. `{ iframe: true }` also loads that session's checkout |
| `appearanceFrom(container, source?)` | `Promise` | What `appearance.inherit` would read for a component in `container`. `null` on the server |
| `componentReserveHeight(type, variant?, fields?)` | `number` | The room `loader: 'skeleton'` holds, in px |
| `componentEstimatedHeight(type, variant?, fields?)` | `number` | The same room as an estimate, identical on the server and in the browser: hold it in a server render and its hydration |
| `getVersion()` | `Promise` | The loaded runtime version |
| `loadWajub()` | `Promise` | `null` on the server |
| `WajubError` | Declared in the types only | Not exported at runtime, read it from `loadWajub()` |
## `WajubRuntime`
What `loadWajub()` resolves to, and what the script tag puts on `window`.
| Member | What it is |
| ------------ | ------------------------------- |
| `wajub` | The SDK object, the table below |
| `Wajub` | The client factory |
| `WajubError` | The error class |
### `wajub`
| Member | Signature |
| ------------------------ | -------------------------------------------------------------------------------------------- |
| `mount` | `(container, config) => CheckoutInstance` |
| `open` | `(config) => PopupInstance` |
| `checkout` | `(config) => void` |
| `components` | `(sessionId, options?) => ComponentsFactory` |
| `confirmPayment` | `(options) => Promise<{ status }>` |
| `fetchSession` | `(sessionId) => Promise` |
| `signals` | `() => Promise` |
| `preload` | `(sessionId, options?) => void` |
| `appearanceFrom` | `(container, source?) => AppearanceConfig`. `{}` when there is nothing to read, never throws |
| `componentReserveHeight` | `(type, variant?, fields?) => number`. The room `loader: 'skeleton'` holds, in px |
| `create` | The `Wajub` factory, same object |
| `version` | The runtime version string |
These are synchronous once you hold the runtime.
## `Wajub()` client
A client holds a publishable key, a session, or both, so you stop repeating them.
| Call | What you get |
| -------------------------------------- | ------------------------------------- |
| `Wajub('pk_test.…')` | A client that can `createPayment()` |
| `Wajub.session(token)` | A client bound to an existing session |
| `Wajub({ publishableKey, sessionId })` | Both at once |
| Option | What it does |
| ---------------- | ------------------------------------------ |
| `sessionId` | The `authorization_token` from your server |
| `publishableKey` | Your publishable key, `pk.` or `pk_test.` |
### Client members
| Member | What it does |
| -------------------------------------------- | ---------------------------------------------------------------------------------------------------------------- |
| `publishableKey`, `sessionId`, `environment` | What the client currently holds |
| `useSession(sessionId)` | Binds another session, returns the client |
| `createPayment(params)` | `POST /payments` with the publishable key |
| `initCheckout(options)` | Creates the payment and shows it in one call |
| `fetchSession(sessionId?)` | Session preview |
| `signals()` | Device signals for a charge from your server, see [Shield](https://docs.wajub.com/risk/shield/quickstart#if-you-run-your-own-checkout) |
| `preload(sessionId?, options?)` | Gets the checkout ready ahead of time |
| `mount`, `open`, `checkout` | The three hosted modes, session already bound |
| `components(sessionIdOrConfig?, config?)` | The fields factory |
| `appearanceFrom(container, source?)` | What `appearance.inherit` would read |
| `confirmPayment(options?)` | Submits a mounted component |
### Factory statics
| Member | What it does |
| -------------------------------------------- | ---------------------------------------------------------------------------------------------------------------- |
| `Wajub.session(sessionId, options?)` | A session bound client |
| `Wajub.parsePublishableKey(key)` | `{ key, environment }`, throws on a secret key |
| `Wajub.createPayment(key, params, options?)` | One shot, no client to keep |
| `Wajub.signals()` | Device signals for a charge from your server, see [Shield](https://docs.wajub.com/risk/shield/quickstart#if-you-run-your-own-checkout) |
## `EmbeddedConfig`
Used by `mount()`, by `CheckoutEmbed` in every framework, and as the base of `PopupConfig`.
| Option | Type | Default |
| ------------- | ------------------ | --------------------------------------------------------------------------------------------------------------- |
| `sessionId` | `string` | Required |
| `locale` | `string` | Session default |
| `layout` | `CheckoutLayout` | Session default |
| `appearance` | `AppearanceConfig` | Your Dashboard branding. `inherit` is read around the container for `mount()`, over the whole page for `open()` |
| `loadingText` | `string` | Empty |
| `showLoading` | `boolean` | `true` |
| Callback | Receives |
| ---------------- | ---------------------------------------------------------------------------------------------------------------------------------------------------------------------------------------------------------- |
| `onReady` | `CheckoutInstance` |
| `onSuccess` | [`PaymentSuccess`](#paymentsuccess) |
| `onError` | `WajubError`, a payment that failed, or `nothing_to_submit` when `submit()` had no button to press |
| `onLoadError` | `WajubError`, a checkout that never started: `session_not_found`, `session_terminal_expired` or `load_error`. Right after it, the overlay closes or the inline checkout leaves the page, without `onClose` |
| `onCancel` | Nothing |
| `onExpired` | Nothing |
| `onStateChange` | `{ state?: CheckoutState, method?: string }` |
| `onMethodChange` | `{ methodId? }` |
| `onBreakdown` | `EmbedBreakdown`, `{ subtotal, discount, tax, total, currency }` in major units |
| `onResize` | `height: number`, inline only |
| `onClose` | Nothing. The overlay was dismissed, or an inline checkout was ended by the payer's **Done** or by `close()` |
## `PopupConfig`
Everything in `EmbeddedConfig`, plus the modal.
| Option | Type | Default |
| ---------------- | --------- | ------- |
| `width` | `number` | `920` |
| `height` | `number` | `680` |
| `closeOnOverlay` | `boolean` | `false` |
| `closeOnEscape` | `boolean` | `true` |
| `closeOnSuccess` | `boolean` | `true` |
| `closeOnCancel` | `boolean` | `true` |
| `closeOnExpired` | `boolean` | `true` |
The three `closeOn` outcome flags run after your callback, never before it.
## `CheckoutInstance` and `PopupInstance`
| Method | What it does |
| ------------------------ | -------------------------------------------------------------------------------------------------------------------------------------------------------------------------------------------------------------------------------------------- |
| `mount()` | Re-attaches after `unmount()`. Does nothing while mounted, or after `destroy()` or `close()` |
| `unmount()` | Removes from the DOM, keeps the instance. On an overlay, `onClose` is not called |
| `destroy()` | Full teardown. `mount()` no longer brings it back |
| `update(partial)` | `locale`, `appearance`, `currency`, `layout`. `appearance` merges into the current one: a key given as `undefined` or `null` is cleared, and `appearance: undefined` or `null` clears it all. A new `theme` preset replaces the previous one |
| `getState()` | The current `CheckoutState` |
| `submit()` | Presses the pay button of the method the payer is on. With no button to press, nothing is pressed and `onError` receives `nothing_to_submit` |
| `cancel()` | Cancels the payment in progress |
| `retry()` | Retries after a failure |
| `selectMethod(methodId)` | Switches payment method |
| `close()` | Ends the checkout, inline or overlay, and calls `onClose`. `destroy()` ends it without a callback |
| `isOpen()` | Whether the checkout is still open, inline and overlay: `false` once it ended (success, cancel, expiry, close) |
`mount()` and `unmount()` behave the same inline and in the overlay. When a checkout comes back,
`onReady` fires once more, and the payment resumes where the session stands.
[Driving the instance](https://docs.wajub.com/libraries/components/hosted-checkout#driving-the-instance) says when
`submit()` has no button to press.
## `ComponentConfig`
Passed to `wajub.components(sessionId, options)` as defaults, and to `factory.create(type, config)`
per component.
| Option | Type | Applies to |
| ----------------- | ------------------------- | ------------------------------------------------------------------------------------------------------------------------------------------------------------------- |
| `sessionId` | `string` | Required |
| `locale` | `string` | All |
| `appearance` | `AppearanceConfig` | All |
| `layout` | `CheckoutLayout` | `payment` |
| `collectAddress` | `shipping` or `billing` | `payment` |
| `addressMode` | `shipping` or `billing` | `address` |
| `collectName` | `boolean` | `payment`, `address` |
| `fields.phone` | `always`, `auto`, `never` | `payment`, `address` |
| `fields.customer` | `auto` or `external` | All but `address` |
| `fields.country` | ISO 3166 alpha-2 | `mobileMoney`, `payment` |
| `fields.operator` | `choose` or `detect` | `mobileMoney`, `payment` |
| `variant` | `default` or `fields` | All but `address` |
| `frameTitle` | `string` | All. The frame's name for screen readers, `Wajub component` by default |
| `loader` | `none` or `skeleton` | All. `none` by default, `skeleton` in the framework packages. [Loading without a layout shift](https://docs.wajub.com/libraries/components/payment-fields#loading-without-a-layout-shift) |
| `readyTimeout` | `number`, milliseconds | All. Without `ready` in time, `onLoadError` and `loaderror` receive `ready_timeout`. `0` or absent: no limit, and no error |
| Callback | Receives |
| ------------------- | -------------------------------------------------------------------------------------------------------------------------------------------------- |
| `onBeforeSubmit` | Nothing. Return `false`, or throw, to stop the charge. Answer within 30 seconds. All but `address` |
| `onReady` | `ComponentInstance` |
| `onChange` | `ComponentChangeEvent` |
| `onFocus`, `onBlur` | Nothing |
| `onLoadError` | `WajubError`: [a code a checkout sends when it cannot start](#codes-a-checkout-sends-when-it-cannot-start), or `ready_timeout` with `readyTimeout` |
| `onSuccess` | The transaction |
| `onError` | `WajubError` |
| `onMethodChange` | `{ methodId? }` |
| `onStateChange` | `ComponentStateChangeEvent`, `{ state, method? }` |
| `onResize` | `{ height }`. The hosted checkout's `onResize` receives the number itself |
| `onRedirect` | `ComponentRedirectEvent`, `{ url, method }`. The page leaves right after, even if the callback throws |
Each callback is called just before the event of the same name. Passing one changes nothing else.
## `ComponentsFactory`
| Member | What it is |
| ----------------------- | ------------------------------------ |
| `sessionId` | The session every component inherits |
| `create(type, config?)` | A new `ComponentInstance` |
**Types.** `card`, `mobileMoney`, `bankTransfer`, `crypto`, `wallet`, `payment`, `address`.
## `ComponentInstance`
Every method except the readers returns the instance, so calls chain.
| Method | Returns |
| ---------------------------------------------------- | ----------------------------------------------------------------------------------------------------------------------------------- |
| `mount(container)` | The instance |
| `unmount()`, `destroy()` | Nothing |
| `on(event, fn)`, `off(event, fn)` | The instance |
| `update({ locale, appearance, layout, frameTitle })` | The instance. `appearance` merges as on the hosted checkout |
| `focus()`, `blur()`, `submit()` | The instance. `focus()` while a `skeleton` loader is up moves the focus in once the form is ready, unless the payer acted meanwhile |
| `selectMethod(methodId)` | The instance |
| `getState()` | `CheckoutState` |
| `isComplete()` | `boolean` |
| `getError()` | `WajubError` or `null` |
| `getValue()` | `ComponentAddressValue` or `null` |
### Events
| Event | Payload |
| --------------- | -------------------------------------------------------------------------------------------------------------------------------------------------- |
| `ready` | `ComponentInstance` |
| `change` | `ComponentChangeEvent` |
| `focus`, `blur` | Nothing |
| `loaderror` | `WajubError`: [a code a checkout sends when it cannot start](#codes-a-checkout-sends-when-it-cannot-start), or `ready_timeout` with `readyTimeout` |
| `resize` | `{ height }` |
| `success` | [`PaymentSuccess`](#paymentsuccess) |
| `error` | `WajubError` |
| `statechange` | `ComponentStateChangeEvent`, `{ state, method? }` |
| `methodchange` | `{ methodId }` |
| `redirect` | `ComponentRedirectEvent`, `{ url, method }`. Right before your page leaves for the provider's own page |
`on()` and `off()` type the payload of each event above through `ComponentEventMap`:
`card.on('statechange', (event) => event.state)` needs no cast.
`update({ frameTitle })` renames the frame for screen readers.
`error` also carries `submission_failed` when a submission you asked for, with `submit()` or
`confirmPayment()`, was refused before any charge.
## `ConfirmPaymentOptions`
| Option | Type | Default |
| ------------ | ------------------- | ---------------------------------------------------------------------------------------- |
| `sessionId` | `string` | Required |
| `components` | `ComponentInstance` | Required, one mounted component |
| `timeout` | `number` | `60000`, in milliseconds. `0` waits forever. Paused while the payment waits on the payer |
Resolves with `{ status, transaction }`, `transaction` being a [`PaymentSuccess`](#paymentsuccess).
Rejects with a `WajubError` carrying
`missing_component`, `wallet_not_supported` or `address_not_payment` before anything is submitted.
After, it rejects with `confirmation_timeout`, or with the payment's own error:
`checkout_validation`, `submission_failed`, `payment_error`, `payment_cancelled`,
`session_expired`, `component_unmounted`, a decline code, or the component's load error.
The time does not run while the payment waits on the payer (`OTP_REQUIRED`, `PIN_REQUIRED`,
`PHONE_REQUIRED`, `BIRTHDAY_REQUIRED`, `ADDRESS_REQUIRED`, `APPROVAL_REQUIRED`, `USSD_REQUIRED`,
`3DS_REQUIRED`, `PENDING`), nor once your page has left for the provider's
(`redirect`). A component removed from the page while you wait rejects with `component_unmounted`,
as `unmount()` and `destroy()` do.
`confirmation_timeout` only stops the wait. It cancels nothing: the payment goes on and can still
succeed. Before offering to pay again, listen for `success` on the component or wait for the
`payment.succeeded` webhook.
## `PaymentSuccess`
What `onSuccess`, the `success` event and `confirmPayment()` hand over. It is the checkout's own
summary, not the API's payment object, and it comes from the browser: confirm the payment on your
server, with `GET /payments/{id}` or the `payment.succeeded` webhook, before you deliver anything.
| Field | Type | What it is |
| ------------- | ----------- | --------------------------------------------------------------------------------------- |
| `id` | `string` | Wajub's id of the payment, what `GET /payments/{id}` takes |
| `reference` | `string` | Your reference, the one you sent on `POST /payments` |
| `amount` | `number` | What the payer paid, fee included when the payer bears it, in major units |
| `currency` | `string` | ISO 4217 code |
| `method` | `string` | The method family: `mobile_money`, `card`…, `unknown` when the session was already paid |
| `status` | `"success"` | Always `success` |
| `timestamp` | `string` | When the payment completed, ISO 8601 |
| `receipt_url` | `string` | The payer's hosted receipt, when you have receipts on |
Amounts are in major units, like the API: `12.5` for 12.50 EUR, `1500` for 1 500 XAF.
## `CreatePaymentParams`
What `client.createPayment()` sends. The same fields as
[POST /payments](https://docs.wajub.com/api/payments/create), narrowed to what a browser may set.
| Field | Type |
| ------------- | ------------------------------------------------------------------------------------------------------ |
| `amount` | `number`, required |
| `currency` | `string`, required |
| `reference` | `string` |
| `description` | `string` |
| `customer` | `{ email?, name?, phone?, country? }`, required with an `email` or a `phone`, or the API answers `422` |
| `bearer` | `merchant` or `customer`, who pays the fee |
| `callback` | HTTPS URL, redirect flow only |
| `metadata` | `Record` |
### `CreatePaymentResult`
| Field | What it is |
| -------------------- | -------------------------------------------- |
| `sessionId` | Pass this to `mount`, `open` or `components` |
| `authorizationToken` | The same value, under the API's name |
| `authorizationUrl` | The hosted page, or `null` |
| `transaction` | The transaction object, or `null` |
| `raw` | The untouched API response |
## `InitCheckoutOptions`
Creates the payment and shows it in one call. Everything in `EmbeddedConfig` applies too.
| Option | Type | What it does |
| ----------- | ------------------------------- | --------------------------------- |
| `mode` | `inline`, `overlay`, `redirect` | How the checkout appears |
| `container` | `string` or `HTMLElement` | Required for `inline` |
| `sessionId` | `string` | Skips `createPayment()` |
| `payment` | `CreatePaymentParams` | Used when there is no `sessionId` |
| `checkout` | `Partial` | Options for the embed itself |
It resolves with `{ session, instance }`, and throws `missing_container` when `inline` has
nowhere to go.
## `SessionPreview`
What `fetchSession(sessionId)` resolves to. Read it before mounting to show an amount, a merchant
name, or a sandbox banner.
| Field | Type |
| ----------------- | ------------------------------------------------------------------- |
| `session_id` | `string` |
| `status` | `string` |
| `environment` | `sandbox` or `live` |
| `amount` | `number`, in major units like the API |
| `currency` | `string` |
| `merchant_name` | `string` |
| `payment_methods` | `Array<{ id, type, label }>` |
| `saved_methods` | `Array<{ id, type, label }>`, returning customers your server named |
`saved_methods` lists the methods a customer paid with before, and only on a payment whose customer
your server named: one created with `POST /payments` and your secret key (or a restricted key) with
a `customer`, one activated with `POST /payments/{id}/activate`, or the payment of an invoice linked
to one of your customers. A payment link, a payment created with your publishable key and an invoice
addressed to a name only never list any, because the e-mail typed on those pages may be someone
else's. Paying with a saved method on such a payment is refused before any charge, with HTTP `422`,
the code `saved_method_not_allowed` and the message "Saved payment methods cannot be used for this
payment."
## `ClientSignals`
What `signals()` resolves to: an opaque object holding the payer's device signals, for a charge you
make from your own server. Do not build, edit or store it. How to send it is on
[Shield](https://docs.wajub.com/risk/shield/quickstart#if-you-run-your-own-checkout).
## `AppearanceConfig`
The full key list, the presets and the filtering rules are on
[Appearance](https://docs.wajub.com/libraries/components/appearance).
| Group | Keys |
| --------- | ----------------------------------------------------------------------------------------------------------------------------------------------------------------------------------------------------------- |
| Preset | `theme`: `stripe`, `night`, `flat`, `none`. `light`, `dark`, `system` or `auto` sets `colorScheme` when none is given |
| Colour | `primaryColor`, `secondaryColor`, `backgroundColor`, `buttonTextColor`, `inputBackgroundColor`, `inputBorderColor`, `textMutedColor`, `successColor`, `errorColor` |
| Shape | `fontFamily`, `borderRadius`, `shadow` |
| Behaviour | `colorScheme`, `labels`, `disableAnimations` |
| Tokens | `variables`, sixteen design token keys |
| Selectors | `rules`, `.Input` and `.Label` only |
| Your page | `inherit`: `true`, or an `InheritSource`, `{ input?, label?, button?, background? }`, each a CSS selector or an element. [Taking your page's look](https://docs.wajub.com/libraries/components/appearance#taking-your-pages-look) |
## States
`getState()` and `onStateChange` both speak this vocabulary.
```text title="CheckoutState"
INITIATED → COLLECTING_DETAILS → PROCESSING → SUCCESS
↘ OTP_REQUIRED, PIN_REQUIRED, PHONE_REQUIRED
↘ BIRTHDAY_REQUIRED, ADDRESS_REQUIRED
↘ 3DS_REQUIRED, USSD_REQUIRED, APPROVAL_REQUIRED
↘ VERIFYING, PENDING
↘ FAILED, CANCELLED, EXPIRED
```
A new instance reports `INITIATED` until the payment moves. `PIN_REQUIRED`, `PHONE_REQUIRED`,
`BIRTHDAY_REQUIRED` and `ADDRESS_REQUIRED` are the steps some payments add after the first submit: a
wallet PIN, a phone number to confirm, a date of birth, an address.
On the hosted checkout the outcome does not arrive through `onStateChange`: it arrives through
`onSuccess`, `onError`, `onCancel` or `onExpired`, and `getState()` keeps the last step before it.
## `WajubError`
Every rejection and every error callback receives one.
| Field | Type |
| -------------- | ------------------------------------------------------------------------------------------------- |
| `message` | `string`, written for a human |
| `type` | `api_error`, `authentication_error`, `invalid_request_error`, `payment_error`, `rate_limit_error` |
| `code` | `string`, the machine name |
| `decline_code` | `string` or `null`, why the payment was declined, when it was |
| `retryable` | `boolean` |
| `param` | `string` or `null`, the field at fault |
### Codes raised by the SDK itself
They are integration mistakes.
| Code | Cause |
| ------------------------- | -------------------------------------------------------------------------------------------------------------- |
| `secret_key_in_browser` | A secret key passed to `Wajub()` |
| `invalid_publishable_key` | A key that is not a publishable key |
| `invalid_init` | `Wajub()` called with neither a publishable key nor a session token |
| `missing_publishable_key` | `createPayment()` without a key |
| `missing_session_token` | `createPayment()` got an answer without a session token |
| `missing_session` | No `sessionId` on the client |
| `missing_container` | `initCheckout` in `inline` mode with nowhere to mount |
| `missing_component` | `confirmPayment` without a submittable component |
| `wallet_not_supported` | `confirmPayment` on a `wallet` component |
| `address_not_payment` | `confirmPayment` on an `address` component |
| `confirmation_timeout` | No outcome within `timeout`. The payment goes on and can still succeed |
| `ready_timeout` | A payment field sent no `ready` within `readyTimeout`. Reaches `onLoadError` and `loaderror`, and is retryable |
| `component_unmounted` | The component was unmounted, destroyed or removed from the page while `confirmPayment` waited on it |
| `components_unavailable` | The components runtime did not load |
| `load_error` | The checkout failed to load |
### Codes a checkout sends when it cannot start
`onLoadError` on the hosted checkout, and `onLoadError` or the `loaderror` event on a payment
field, receive one of these. Nothing was paid.
| Code | Cause |
| ---------------------------- | --------------------------------------------------------------------------------------------------------------------------- |
| `session_not_found` | The token is unknown, or the session could not be read |
| `session_terminal_expired` | The payment ended and its token has stopped. On a payment field, the session expired unpaid, and the field shows its notice |
| `session_terminal_cancelled` | Payment fields only, the session was already cancelled. The field shows its notice |
| `session_terminal_failed` | Payment fields only, the session already ended on a failed payment. The field shows its notice |
| `component_origin_missing` | Payment fields only, a field not mounted with Wajub.js or a framework package. Mount it with one of them |
| `invalid_component` | Payment fields only, a component type that does not exist |
| `method_unavailable` | Payment fields only, the session offers no method this component can take |
With `readyTimeout`, a payment field's `onLoadError` and `loaderror` can also receive
`ready_timeout`, which the SDK raises itself when the field is not ready in time.
For one of the three `session_terminal_` codes, start a new payment and mount the field on its
token. A field whose session is already paid shows its notice and sends `ready`, not an error.
### Codes a payment can end with
`onError`, the `error` event and a `confirmPayment()` rejection carry the decline code when there is
one, `insufficient_funds` for example. Otherwise they carry one of these.
| Code | Cause |
| -------------------------- | ------------------------------------------------------------------------------------------------------------------------------------------------------------------------------------------------------------------------------------------------------------------------------------------------------------------------------------------------------------------------------------------------------------------------------------------------- |
| `payment_declined` | The payment was declined without a more precise reason |
| `blocked` | Refused by Shield or by a restriction on your account |
| `validation_error` | A field the payer filled was refused, such as a phone number that is not valid |
| `rate_limited` | Too many payment attempts on this session. Wait a short while before offering another attempt |
| `saved_method_not_allowed` | A saved method was used on a payment that lists none, see [`SessionPreview`](#sessionpreview). Nothing was charged, and the payer can still pay with a method they enter |
| `server_error` | A temporary failure. `retryable` says whether another attempt is worth offering |
| `submission_failed` | Payment fields only. A submission you asked for with `submit()` or `confirmPayment()` was refused before any charge: a form not ready, such as a Mobile Money number that is not valid, a card left incomplete, fields still loading, a bank transfer with no IBAN or account number or a crypto payment with no asset, a card number refused, or a payment window that was closed or could not open. `message` says why, in the payer's language |
## Framework packages
`@wajub/react`, `@wajub/vue` and `@wajub/svelte` export these, each in its framework's idiom.
| Export | What it is |
| ---------------------------------------------------------------------------------------------------------------------------------------------- | -------------------------------------------------------- |
| `WajubProvider` | Loads the runtime once for a subtree |
| `CheckoutEmbed` | The hosted checkout, inline |
| `CardComponent`, `MobileMoneyComponent`, `WalletComponent`, `PaymentComponent`, `AddressComponent`, `BankTransferComponent`, `CryptoComponent` | One field group each |
| `ComponentEmbed` | The same, with `type` as a prop |
| `useWajub`, `useWajubOptional`, `useLoadWajub` | Reach the runtime |
| `useConfirmPayment` | Submit a field component |
| `WajubContext` in React, `WAJUB_INJECTION_KEY` in Vue, `getWajubContext` and `setWajubContext` in Svelte, and `useWajubContext` in all three | The raw context, for your own hook, composable or helper |
`@wajub/angular` exports these.
| Export | What it is |
| --------------------------------------------------------------------------------------------------------------------------------------------------------------------------------- | ---------------------------------------------------------------------------------------------------------------------------------------------------------------------------- |
| `provideWajub(options?)` | Provides Wajub to the application or a route, in place of `WajubProvider`. With `defer: true`, nothing loads until you call `WajubService.load()` |
| `WajubService` | Loads the runtime once: the `runtime`, `loading` and `error` signals, `runtime$`, `load()` and `getRuntime()`, in place of `useWajub`, `useWajubOptional` and `useLoadWajub` |
| `WAJUB_OPTIONS` | The injection token `provideWajub()` sets |
| `WajubCheckoutEmbedComponent` | ``, the hosted checkout, inline |
| `WajubCardComponent`, `WajubMobileMoneyComponent`, `WajubWalletComponent`, `WajubPaymentComponent`, `WajubAddressComponent`, `WajubBankTransferComponent`, `WajubCryptoComponent` | ``, ``, ``, ``, ``, ``, ``: one field group each |
| `WajubComponentEmbedComponent` | ``, the same with a `type` input |
| `injectConfirmPayment(sessionId?)` | Submits a field component, in place of `useConfirmPayment`. `isConfirming` is a signal |
| Component prop | Applies to | Default |
| ----------------------------------------------------------------------------------- | ---------------- | ----------------------------------------------------------------------------------------------------------------------------------------------------------------------- |
| `className` in React, `class` in Vue and Svelte, and on the host element in Angular | Both | none |
| `style`, in React and Vue, and on the host element in Angular | Both | none |
| `minHeight` | `CheckoutEmbed` | `480` |
| `minHeight` | Field components | Unset. With `loader: 'none'`, pass `0` to fit the inputs. [Inside your own payment method box](https://docs.wajub.com/libraries/components/payment-fields#inside-your-own-payment-method-box) |
| `loader` | Field components | `skeleton`, where `@wajub/js` itself defaults to `none` |
| `onInstance`, the `(instance)` output in Angular | Field components | none, fires with `null` on unmount |
In Angular, the props are inputs and outputs of the same names: every option is an input, every
callback an output named without `on`, such as `(loadError)` for `onLoadError`, and
`onBeforeSubmit` is the `beforeSubmit` input, since an output cannot answer.
Every option of `ComponentConfig` is a prop of the field components, the callbacks included, and a
new handler takes over without a reload. A change to `appearance`, `locale`, `layout` or
`frameTitle` applies to the mounted field without a reload. A new `sessionId`, `type`, `variant`,
`fields`, `loader`, `readyTimeout`, `collectAddress`, `addressMode` or `collectName` mounts a new
field in the same container. `CheckoutEmbed` applies `appearance`, `locale` and `layout` the same
way, and loads again for a new `sessionId`.
Each framework package also re-exports every type of `@wajub/js`, so
`import type { PaymentSuccess } from '@wajub/react'` works as well as from `@wajub/js`.
`useWajubOptional()` returns the runtime or `null` in React. It returns a ref in Vue and a store in
Svelte, both `null` until the runtime has loaded. In Angular, the `runtime` signal
of `WajubService` holds `null` until then.
Each package has its own page:
[React](https://docs.wajub.com/libraries/components/react), [Vue](https://docs.wajub.com/libraries/components/vue),
[Svelte](https://docs.wajub.com/libraries/components/svelte), [Angular](https://docs.wajub.com/libraries/components/angular).
- [TypeScript](https://docs.wajub.com/libraries/components/typescript): Every type name, and how to import it.
- [Appearance](https://docs.wajub.com/libraries/components/appearance): The styling object in full.
- [Troubleshooting](https://docs.wajub.com/libraries/components/troubleshooting): What each error code means in practice.
- [Wajub.js](https://docs.wajub.com/libraries/components/js): How to install the core package, allow it in your CSP and call it.
---
# Appearance
URL: https://docs.wajub.com/libraries/components/appearance
> Presets, colours, design tokens, field rules, locale and layout.
One `appearance` object styles everything: the hosted checkout, the overlay, and every payment
field component. It has three layers, and they apply in this order.
1. A `theme` preset, if you name one.
2. The flat keys, `primaryColor` and its neighbours.
3. `variables` and `rules`, for token level and selector level control.
Each layer wins over the one above it, so a preset is a starting point rather than a constraint.
`inherit` can put your own page's look under all three: see
[Taking your page's look](#taking-your-pages-look).
```typescript title="All three layers at once"
await mount('#checkout', {
sessionId,
appearance: {
theme: 'flat',
primaryColor: '#6366f1',
colorScheme: 'auto',
labels: 'floating',
variables: { colorText: '#0f172a', fontSizeBase: '16px' },
rules: { '.Input': { borderRadius: '8px' } },
},
});
```
> [!WARNING]
> **Anything the SDK does not recognise has no effect**
>
> An unknown key, a selector outside the short list below, or a property outside the allowed list
> is ignored. Nothing throws and nothing appears in the console, so a typo simply has no effect.
## Presets
`theme` layers a set of flat keys under yours. These are the exact values.
| Preset | What it sets |
| -------- | ---------------------------------------------------------------------------------------------------------------------------------------------------------------------------------------------------------------------------------- |
| `stripe` | `primaryColor: #0570de`, `borderRadius: 4px`, the system font stack, `shadow: low` |
| `night` | `colorScheme: dark`, `primaryColor: #7c3aed`, `backgroundColor: #0f172a`, `buttonTextColor: #f8fafc`, `inputBackgroundColor: #1e293b`, `inputBorderColor: #334155`, `textMutedColor: #94a3b8`, `borderRadius: 8px`, `shadow: none` |
| `flat` | `shadow: none`, `borderRadius: 0` |
| `none` | Nothing. Only your own keys apply |
`stripe` is the default look of a Wajub checkout, so naming it changes nothing unless you also
override part of it.
`light`, `dark`, `system` and `auto` are not presets. `theme` set to one of them, with no
`colorScheme`, sets the colour scheme, `system` meaning `auto`.
## Flat keys
The shorthand layer. Every value is a plain CSS string.
| Key | Type | What it paints |
| ---------------------- | ----------------------- | --------------------------------------------------------------------------------------------------------------------------------------------------------------------------------------- |
| `primaryColor` | CSS color | The accent, primary buttons, links |
| `secondaryColor` | CSS color | Secondary accents |
| `backgroundColor` | CSS color | The surface behind the form |
| `buttonTextColor` | CSS color | Text on primary buttons |
| `inputBackgroundColor` | CSS color | The fields' own background. The page around them keeps its own |
| `inputBorderColor` | CSS color | The fields' own border. The page's other borders keep theirs |
| `textMutedColor` | CSS color | Helper and secondary text |
| `successColor` | CSS color | Success states and badges |
| `errorColor` | CSS color | Errors and validation messages |
| `fontFamily` | CSS font stack | The whole checkout |
| `borderRadius` | CSS length | Default corner radius |
| `shadow` | `low` or `none` | Elevation |
| `colorScheme` | `light`, `dark`, `auto` | `light` or `dark` wins over the payer's device and the choice they saved on a hosted page. `auto` follows the device. Once you set it, the payer no longer sees a light and dark switch |
| `labels` | `above` or `floating` | Where field labels sit |
| `disableAnimations` | `boolean` | Removes transitions and motion |
## Variables
The token layer. Each key sets one design token, so it reaches every component that uses that token
rather than one surface.
| Key | What it sets |
| ---------------------- | ------------------------------------------------------------------------------------------------------------------- |
| `colorPrimary` | The accent colour |
| `colorBackground` | The surface behind the form |
| `colorText` | Main text, in the fields too |
| `colorTextSecondary` | Secondary text, the field labels included |
| `colorTextPlaceholder` | Placeholder text |
| `colorDanger` | Error text |
| `colorSuccess` | Success text |
| `fontFamily` | The font stack. A Google Font such as Poppins or DM Sans is loaded for you |
| `fontSizeBase` | The size of the text typed in the fields, at least 16px on a phone or a tablet. Labels and hints are a step smaller |
| `fontWeightNormal` | Regular text weight |
| `fontWeightMedium` | Medium text weight |
| `fontWeightBold` | Bold text weight |
| `spacingUnit` | The base spacing unit |
| `borderRadius` | Corner radius |
| `spacingGridRow` | The gap between rows of fields |
| `spacingGridColumn` | The gap between columns of fields |
Sixteen keys, and nothing else. Any other key has no effect.
```typescript title="Typography in one place"
appearance: {
variables: {
fontFamily: 'Inter, system-ui, sans-serif',
fontSizeBase: '15px',
fontWeightMedium: '600',
spacingUnit: '4px',
},
}
```
When a flat key and its token twin are both set, the flat key wins. Pick one and stay on it.
## Rules
The selector layer, and the narrowest one. It exists to reshape the form fields, not to restyle
the checkout.
**Selectors.** Only `.Input` and `.Label`, each with at most one of `:hover`, `:focus`,
`:focus-within`, `:disabled`, `::placeholder`, `::selection`. `.Input` is a field's box, its
border, background and corners, focused while its input is and disabled with it. `.Label` is a
field's label. The `color` and the font of a `.Input` rule also apply to the text typed in the
field.
```typescript title="Everything you can target"
appearance: {
rules: {
'.Input': { borderRadius: '8px', borderColor: '#cbd5e1', padding: '12px' },
'.Input:focus': { borderColor: '#6366f1', outline: '2px solid #c7d2fe' },
'.Input::placeholder': { color: '#94a3b8' },
'.Label': { fontWeight: '500', fontSize: '14px', letterSpacing: '0.01em' },
},
}
```
**Properties.** Thirty one, in camelCase.
| Group | Allowed |
| ------ | ----------------------------------------------------------------------------------------------------------------- |
| Colour | `color`, `backgroundColor`, `opacity` |
| Border | `border`, `borderColor`, `borderWidth`, `borderStyle`, `borderRadius` |
| Box | `padding` and its four sides, `margin` and its four sides |
| Type | `fontFamily`, `fontSize`, `fontWeight`, `fontStyle`, `lineHeight`, `letterSpacing`, `textAlign`, `textDecoration` |
| Effect | `boxShadow`, `outline`, `outlineColor`, `outlineWidth`, `outlineOffset` |
**Values.** Non-empty strings of 256 characters at most. A value that would load an external
resource or break out of its CSS declaration is refused, so background images and font imports are
not possible. The same limits apply to flat keys and `variables`.
> [!WARNING]
> **A rule that does not fit is not an error**
>
> `.Tab`, `.AccordionHeader`, `display`, `position` and a background image all pass through
> `appearance` without complaint and without effect. If a rule does nothing, check it against the
> three lists above before checking anything else.
## Taking your page's look
`appearance.inherit` gives a payment field or an embedded checkout the look of your own form: its
font, its text and field colours, its rounding, its accent and its background.
```typescript title="Found near the container, or named"
factory.create('card', { appearance: { inherit: true, labels: 'floating' } }).mount('#card-fields');
factory.create('mobileMoney', {
appearance: {
inherit: {
input: '#billing_email',
label: 'label[for=billing_email]',
button: '#place-order',
background: '.checkout-box',
},
},
});
```
`inherit: true` looks for your form near the container. When it picks the wrong elements, name
them in an `InheritSource`, as CSS selectors or as the elements themselves. Any you leave out are
still looked for.
| Element | What to name | What it gives |
| ------------ | ------------------------------- | ------------------------------------------------------------------------------------------------------------------------------------------ |
| `input` | A text field of your form | `variables.fontFamily`, `fontSizeBase`, `colorText`, `colorTextPlaceholder` and `borderRadius`, `inputBackgroundColor`, `inputBorderColor` |
| `label` | That field's label | `variables.colorTextSecondary` |
| `button` | Your form's submit button | `variables.colorPrimary` |
| `background` | The element behind the checkout | `colorScheme`, `variables.colorBackground` |
- **Your keys win.** Every key you set, and every key your `theme` preset sets, wins over what is
taken from the page.
- **The scheme follows your background**, light or dark, unless you set `colorScheme` or a dark
preset such as `night`.
- **What cannot be used is left out**, such as a colour that would not read on the background.
`inherit` never throws.
- **It is read at mount, and again on each `update({ appearance })`.** The overlay from `open()`
has no container, so it looks across the whole page.
To see what would be taken, or to adjust it before passing it yourself, call
`wajub.appearanceFrom(container, source?)`.
```typescript title="Read, adjust, pass"
const look = wajub.appearanceFrom('#card-fields'); // {} when there is nothing to read
factory
.create('card', { appearance: { ...look, variables: { ...look.variables, fontSizeBase: '16px' } } })
.mount('#card-fields');
```
`appearanceFrom()` returns `{}` when there is nothing to read, and never throws. The `Wajub()`
client has it too, and `@wajub/js` exports it as an async helper that resolves to `null` on the
server.
## Changing it after mount
What you pass at mount is fixed when the checkout loads. `update()` changes what the table below
covers, and anything else needs a remount. Both instance types take `update()`.
```typescript title="A dark mode toggle on your own page"
let checkout;
await mount('#checkout', { sessionId, onReady: (instance) => (checkout = instance) });
darkToggle.onchange = (event) =>
checkout.update({ appearance: { colorScheme: event.target.checked ? 'dark' : 'light' } });
```
| Call | Hosted checkout | Payment field |
| ------------------------ | ------------------------------------- | -------------- |
| `update({ appearance })` | Applied live | Applied live |
| `update({ locale })` | Applied live | Applied live |
| `update({ currency })` | Applied live, multi currency sessions | Not applicable |
| `update({ layout })` | Applied live | Applied live |
`update({ appearance })` merges what you give into what the checkout or the field already has. The
keys you give change, and the others stay. A key given as `undefined` or `null` is cleared.
`appearance: undefined` or `null` clears the whole of it: the checkout or the field goes back to
your Dashboard branding, and its next `mount()` starts without it.
```typescript title="Change one key, clear one, clear all"
card.update({ appearance: { borderRadius: '16px' } }); // the other keys stay
card.update({ appearance: { primaryColor: undefined } }); // clears this key
card.update({ appearance: undefined }); // back to your Dashboard branding
```
With `inherit`, each `update({ appearance })` reads the page again, and clearing `inherit` also
clears what it had read. `update({ appearance: {} })` changes no key.
A new `theme` preset replaces the previous one and everything it brought:
`update({ appearance: { theme: 'flat' } })` after `night` keeps none of the colours of `night`.
In [React](https://docs.wajub.com/libraries/components/react), [Vue](https://docs.wajub.com/libraries/components/vue),
[Svelte](https://docs.wajub.com/libraries/components/svelte) and [Angular](https://docs.wajub.com/libraries/components/angular), change the
props (the inputs, in Angular) rather than calling `update()`. A field component applies a new
`appearance`, `locale`, `layout` or `frameTitle` live, and the checkout embed does the same for
`appearance`, `locale` and `layout`. The `appearance` prop replaces the whole
appearance: a key you remove from it is cleared, and an `appearance` that becomes `undefined` or
`{}` clears all of it.
## Locale
`locale` at mount is the language the checkout or the field opens in. It wins over the language
the payer chose on an earlier visit and over the session default, and a code outside the list
below is ignored. `update({ locale })` changes it afterwards, and the payer can still switch
language inside the hosted checkout.
```typescript title="At mount, and afterwards"
await mount('#checkout', { sessionId, locale: 'fr' });
checkout.update({ locale: 'en' });
```
Supported: `fr`, `en`, `es`, `pt`, `ar`. Arabic renders right to left. Omit `locale` and the
checkout opens in the language the payer last chose in this browser, or else in the session
default, which comes from your account branding or the customer's recorded preference.
## Layout
Four ways to arrange the payment methods.
| Value | What the payer sees |
| ----------- | ---------------------------- |
| `classic` | A vertical list, the default |
| `compact` | The same list, denser |
| `tabs` | One tab per category |
| `accordion` | Collapsible sections |
```typescript title="Set it at mount"
await mount('#checkout', { sessionId, layout: 'tabs' });
```
Omit it and the session default applies. This is not the same thing as the page design chosen in
**Settings → Branding**, which picks the design of the hosted page itself.
## Server branding, or client appearance
They are not alternatives. Branding is what your checkout looks like by default, everywhere.
`appearance` is what this one embed looks like.
| Goal | Where |
| ----------------------------------------- | --------------------------------------- |
| Your logo and colours on every checkout | Dashboard branding |
| A dark mode toggle on your site | `appearance.colorScheme` and `update()` |
| One campaign, one page | `appearance` on that mount |
| A Google Font, such as Poppins or DM Sans | `appearance.variables.fontFamily` |
| Your own web font, or a background image | Not available |
Client appearance applies on top of your Dashboard branding, so you only override what you name.
What you can set in the Dashboard is on [Branding and theming](https://docs.wajub.com/libraries/components/branding).
- [Branding & theming](https://docs.wajub.com/libraries/components/branding): Account wide defaults, and where the checkout may be embedded.
- [Display the checkout](https://docs.wajub.com/libraries/components/hosted-checkout): Where the appearance object is passed.
- [Payment fields](https://docs.wajub.com/libraries/components/payment-fields): The same object, on your own layout.
- [SDK reference](https://docs.wajub.com/libraries/components/api-reference): Every type behind these tables.
---
# Branding & theming
URL: https://docs.wajub.com/libraries/components/branding
> Account wide defaults, and how they meet appearance.
Branding is what your checkout looks like before any code runs. It is set once on your account,
and it applies to the hosted page, the overlay and every payment field component.
`appearance` is the other half, covered on [Appearance](https://docs.wajub.com/libraries/components/appearance). This
page is the server side.
## Where it is configured
In the Dashboard, under Settings then Branding. There is no API for it, and there is nothing to
pass at mount time. Save it once and every session that follows carries it.
> [!NOTE]
> **Branding needs a paid plan**
>
> **Settings → Branding** is available from the **Growth** plan. On Pay as you go the checkout and
> the payment fields keep the default appearance, and `appearance` is the only way to style them.
> The list of sites allowed to embed your checkout is not part of Branding: it has its own page on
> every plan, described in [Sessions and security](https://docs.wajub.com/libraries/components/sessions#where-the-checkout-may-be-embedded).
## What you can set
**Settings → Branding** covers:
| Setting | What it changes |
| ---------------- | ---------------------------------------------------------------------------------------------- |
| Logo | The logo in the checkout header |
| Square logo | The logo where the layout is narrow |
| Icon | The icon of the checkout's browser tab |
| Colours | The accent, the background, the buttons, the fields, the text and the success and error states |
| Font | The font of the whole checkout, Inter by default |
| Corner radius | The roundness of fields and buttons, 8px by default |
| Page design | The design of the hosted page |
| Default language | The language the checkout opens in |
| Custom domain | Your own domain for the hosted page |
> [!NOTE]
> **Page design is not the SDK's layout**
>
> The page design picks the design of the hosted page. The SDK's `layout` option picks how payment
> methods are arranged, `classic`, `compact`, `tabs` or `accordion`. They are independent, and
> setting one never affects the other.
## The Wajub mention
With no logo, no primary colour and no business name, the checkout shows the Wajub brand. Add any
one of them and the checkout shows your brand, with a small Wajub mention. That mention cannot be
removed.
## Who wins
Three layers, resolved in this order.
```text title="Later wins"
Dashboard branding your account's default, on every session
↓
appearance at mount this one embed
↓
instance.update() this one embed, after it is running
```
Client keys merge on top of your Dashboard branding rather than replacing it, so naming
`primaryColor` changes the accent and leaves your logo, your font and your radius alone.
`locale` and `layout` passed at mount also override the session defaults, and `update()` changes
them afterwards, as described on
[Appearance](https://docs.wajub.com/libraries/components/appearance#changing-it-after-mount).
## Choosing a layer
| Goal | Layer |
| ----------------------------------------- | -------------------------------------------- |
| The same look on every checkout | Dashboard branding |
| A different brand per merchant, on Sync | Per account Dashboard branding |
| A dark mode toggle on your site | `appearance.colorScheme` plus `update()` |
| One campaign, one page | `appearance` on that mount |
| Field radius | `appearance.variables.borderRadius` |
| Field padding, label weight | `appearance.rules`, on `.Input` and `.Label` |
| Remove the Wajub mention | Not available |
| A Google Font, such as Poppins or DM Sans | `appearance.variables.fontFamily` |
| Your own web font, or a background image | Not available |
- [Appearance](https://docs.wajub.com/libraries/components/appearance): The client side keys, tokens and rules.
- [Display the checkout](https://docs.wajub.com/libraries/components/hosted-checkout): Where the branding shows up.
- [Sessions & security](https://docs.wajub.com/libraries/components/sessions): The session token every checkout starts from.
- [Create a payment](https://docs.wajub.com/api/payments/create): Every field POST /payments accepts.
---
# Display the checkout
URL: https://docs.wajub.com/libraries/components/hosted-checkout
> Three ways to show the Wajub payment page, and the options behind each.
Hosted checkout is the whole payment page rendered by Wajub, method selection, order summary, OTP
and 3DS, shown inline, in an overlay or after a redirect with the same configuration. Coupons and
the shipping step are not available on it, whatever the session carries.
> [!NOTE]
> **Looking for the product overview instead?**
>
> This page is the integration surface. For what the hosted page does for the payer, and when to
> prefer it over your own layout, see [Payments, hosted checkout](https://docs.wajub.com/payments/hosted-checkout).
## Which one
Inline with `mount(el, config)`, in a modal with `open(config)`, or on the hosted payment page with
`checkout(config)`. The four modes, payment fields included, are compared side by side on the
[overview](https://docs.wajub.com/libraries/components#four-ways-to-take-a-payment).
All three need a `sessionId`, which is the `authorization_token` from
[POST /payments](https://docs.wajub.com/libraries/components/sessions). None of them needs a key.
Inline and overlay frame the checkout in your page. Declare the origins that embed it in
**Settings → Checkout embedding** before you take live payments: once the list is filled, only those
origins can show it. The page is on every plan.
See [where the checkout may be embedded](https://docs.wajub.com/libraries/components/sessions#where-the-checkout-may-be-embedded).
## Inline
`mount` takes a selector or an element, and returns the instance you drive afterwards.
```typescript title="The smallest version that works"
import { mount } from '@wajub/js';
const checkout = await mount('#checkout', {
sessionId,
onSuccess: () => (window.location.href = '/order/complete'),
onError: (error) => showRetry(error),
});
```
> [!TIP]
> **You do not need to reserve the height**
>
> The checkout sizes itself. An empty `` is enough.
A missing `sessionId` or a selector that matches nothing fails at once with a plain `Error`:
`window.wajub` throws it, and the `@wajub/js` helpers reject with it.
### Configuration
| Option | Type | Default | What it does |
| ------------- | ------------------ | ----------------------- | ---------------------------------------------------------------- |
| `sessionId` | `string` | Required | The `authorization_token` from your server |
| `locale` | `string` | Session default | The language the checkout opens in: `fr`, `en`, `es`, `pt`, `ar` |
| `layout` | `CheckoutLayout` | Session default | `classic`, `compact`, `tabs`, `accordion` |
| `appearance` | `AppearanceConfig` | Your Dashboard branding | [Appearance](https://docs.wajub.com/libraries/components/appearance) |
| `loadingText` | `string` | Empty | Text inside the placeholder |
| `showLoading` | `boolean` | `true` | Set `false` to render your own skeleton |
### Callbacks
```typescript title="The ones worth wiring on day one"
await mount('#checkout', {
sessionId,
onReady: (instance) => (checkoutRef = instance),
onSuccess: (transaction) => markPaidInTheInterface(transaction),
onError: (error) => console.error(error.code, error.message),
onLoadError: (error) => showSessionExpired(error),
onBreakdown: (b) => (total.textContent = `${b.total.toLocaleString()} ${b.currency}`),
});
```
| Callback | Fires when | Receives |
| ---------------- | ----------------------------------------------------------------------------------------------------------- | ------------------------------------------------------------------------------------------------------------------- |
| `onReady` | The session loaded and the form is visible | `CheckoutInstance` |
| `onSuccess` | The payment succeeded | [`PaymentSuccess`](https://docs.wajub.com/libraries/components/api-reference#paymentsuccess): `id`, `reference`, `amount` in major units… |
| `onError` | The payment failed, or `submit()` had no button to press (`nothing_to_submit`) | `WajubError` |
| `onLoadError` | The checkout could not start: an unknown token, a token that has stopped, or an iframe that refused to load | `WajubError` |
| `onCancel` | The payer cancelled explicitly | Nothing |
| `onExpired` | The session expired under the payer | Nothing |
| `onBreakdown` | The totals changed | `{ subtotal, discount, tax, total, currency }`, in major units |
| `onStateChange` | The checkout moved to another state | `{ state, method }` |
| `onMethodChange` | The payer picked another method | `{ methodId }` |
| `onResize` | The iframe height changed, inline only | `height` in pixels |
| `onClose` | The overlay was dismissed, or the payer pressed **Done** on an inline confirmation, or you called `close()` | Nothing |
`onLoadError` carries `session_not_found` for a token Wajub does not know,
`session_terminal_expired` for one whose payment ended and whose token has stopped, and
`load_error` when the iframe itself failed. `onError` receives none of them: it is for a payment
that failed. Right after the callback, the overlay closes or the inline checkout leaves the page. `onClose` is not called: the checkout never started, so nothing was
closed. Show your own message from the callback.
> [!NOTE]
> **onResize is informational**
>
> Use this callback to move something else on the page, a sticky summary or a footer.
`onSuccess` fires in a browser, so treat it as an interface signal. The order ships on the
[webhook](https://docs.wajub.com/developer-tools/webhooks/quickstart). It receives the checkout's summary of the payment:
`id` is Wajub's id of the payment, the one `GET /payments/{id}` takes, `reference` is yours, and
`amount` is in major units like the API.
Inline, the confirmation keeps a **Done** button. When the payer presses it, `onClose` fires and
the checkout leaves the page, so put your own next step there.
### Driving the instance
```typescript title="CheckoutInstance"
checkout.getState(); // 'COLLECTING_DETAILS', 'PROCESSING', …
checkout.update({ locale: 'en' });
checkout.update({ appearance: { colorScheme: 'dark' } });
checkout.update({ currency: 'USD' }); // multi currency sessions only
checkout.selectMethod('pm_momo');
checkout.submit(); // presses the checkout's own pay button
checkout.retry();
checkout.cancel();
checkout.unmount(); // off the page, the instance is kept
checkout.mount(); // back on the page
checkout.destroy();
```
`locale`, `appearance`, `currency` and `layout` apply live, inline and in the overlay.
`appearance.inherit` gives the checkout your page's own look: `mount()` reads it around its
container, `open()` over the whole page, under the keys you set. See
[Taking your page's look](https://docs.wajub.com/libraries/components/appearance#taking-your-pages-look).
`update({ appearance })` then changes the keys you give and keeps the others: a key given as
`undefined` or `null` is cleared, and `appearance: undefined` clears it all, back to your Dashboard
branding. With `inherit`, each call reads the page again. A new `theme` preset replaces the previous
one. See [Changing it after mount](https://docs.wajub.com/libraries/components/appearance#changing-it-after-mount).
`submit()` presses the pay button of the method the payer is on. The checkout validates the form
as it does for the payer and shows its own messages, so follow the result with `onStateChange`.
When there is no button to press (before a method is chosen, on an OTP or confirmation step, on
Apple Pay and Google Pay, which only answer the payer's own tap, and while a payment is already on
its way), nothing is pressed and `onError` receives a `WajubError` with the code
`nothing_to_submit`.
`unmount()` takes the checkout off the page and keeps the instance, and `mount()` puts it back,
inline and in the overlay alike. When it returns, `onReady` fires once more, with the locale,
appearance and layout last given to `update()`. On an
overlay, `unmount()` does not call `onClose`. After `destroy()`, or `close()` on an overlay,
`mount()` does nothing.
## Overlay
Same configuration, same callbacks, same instance, plus the modal itself.
```typescript title="Pay without leaving the page"
import { open } from '@wajub/js';
const popup = await open({
sessionId,
width: 960,
closeOnOverlay: true,
onSuccess: (transaction) => fulfillOrder(transaction),
onClose: () => console.log('dismissed'),
});
popup.isOpen();
```
| Option | Default | What it does |
| ---------------- | ------- | --------------------------------------- |
| `width` | `920` | Maximum modal width in pixels |
| `height` | `680` | Modal height in pixels |
| `closeOnOverlay` | `false` | Close when the backdrop is clicked |
| `closeOnEscape` | `true` | Close on the Escape key |
| `closeOnSuccess` | `true` | Close shortly after `onSuccess` has run |
| `closeOnCancel` | `true` | Close shortly after `onCancel` has run |
| `closeOnExpired` | `true` | Close shortly after `onExpired` has run |
Closing the modal dismisses the interface only. The session stays open until it completes,
expires, or is cancelled inside the checkout, so the same token still mounts.
`onResize` never fires in overlay mode, because the modal has a fixed height.
## Redirect
The least code, and the only mode where `callback` matters.
```typescript title="Two ways to leave"
// The URL your server already received from POST /payments
window.location.href = authorizationUrl;
// Or, when the browser only has the token
import { checkout } from '@wajub/js';
await checkout({ sessionId });
```
The payer comes back to the `callback` URL you set when creating the payment, with
`?status=succeeded|cancelled|failed|expired`, `reference`, Wajub's id of the payment, and
`trxref`, your own reference, whatever the outcome. Read the payment with that `reference` on your
server: the query string is a hint. The [webhook](https://docs.wajub.com/developer-tools/webhooks/quickstart) is the
confirmation. See [Sessions and security](https://docs.wajub.com/libraries/components/sessions#the-callback-url) for the
details.
## Through a framework
In `@wajub/react`, `@wajub/vue` and `@wajub/svelte`, the inline checkout is the `CheckoutEmbed`
component, and in `@wajub/angular` it is ``. Its options are props, inputs in
Angular, beside the component's own: the session, a class, a style in React and Vue, on the host
element in Angular, and the height kept while the checkout loads, 480 pixels by default. React and
Svelte take every option of [EmbeddedConfig](https://docs.wajub.com/libraries/components/api-reference#embeddedconfig);
Vue and Angular take a closed list of them, given on [Vue](https://docs.wajub.com/libraries/components/vue#checkoutembed)
and [Angular](https://docs.wajub.com/libraries/components/angular#checkout-embed). In Angular, the callbacks are outputs.
The embed follows its props. A change to `appearance`, `appearance.inherit` included, `locale` or
`layout` applies to the mounted checkout without a reload, so an `appearance`
object written inline is fine. A top-level `appearance` key removed since the last render is
cleared, and an `appearance` that becomes `undefined` or `{}` goes back to your branding. A new
session loads a new checkout in the same container. `loadingText` and `showLoading` are read when
the checkout loads, and a new handler takes over without a reload.
**Switching the theme after mount**
```tsx title="react"
// A new value applies without a reload.
;
```
```vue title="vue"
```
```svelte title="svelte"
```
```typescript title="angular"
import { Component, Input } from '@angular/core';
import { WajubCheckoutEmbedComponent } from '@wajub/angular';
@Component({
selector: 'app-checkout',
standalone: true,
imports: [WajubCheckoutEmbedComponent],
template: `
`,
})
export class CheckoutComponent {
@Input({ required: true }) sessionId!: string;
@Input() dark = false;
}
```
The provider, the exact props and the server side wiring are on [React](https://docs.wajub.com/libraries/components/react),
[Vue](https://docs.wajub.com/libraries/components/vue), [Svelte](https://docs.wajub.com/libraries/components/svelte) and
[Angular](https://docs.wajub.com/libraries/components/angular).
## Styling
The checkout arrives already wearing your account branding, set once in the Dashboard. Pass
`appearance` only to change something for this one embed, a dark mode toggle or a campaign colour.
```typescript title="Per embed override"
await mount('#checkout', {
sessionId,
layout: 'tabs',
appearance: { theme: 'night', primaryColor: '#6366f1', labels: 'floating' },
});
```
The full key list is on [Appearance](https://docs.wajub.com/libraries/components/appearance), and the account wide
defaults are on [Branding and theming](https://docs.wajub.com/libraries/components/branding).
- [Appearance](https://docs.wajub.com/libraries/components/appearance): Every styling key, and the ones the SDK drops.
- [Payment fields](https://docs.wajub.com/libraries/components/payment-fields): When the hosted page is more than you want.
- [SDK reference](https://docs.wajub.com/libraries/components/api-reference): The full method, type and state listing.
- [Webhooks](https://docs.wajub.com/developer-tools/webhooks/quickstart): Confirm the payment on your server.
---
# Wajub Components
URL: https://docs.wajub.com/libraries/components
> Browser packages that embed Wajub checkout or compose your own payment fields.
Wajub Components put Wajub's payment interface inside your own site: `@wajub/js` on any page, and
`@wajub/react`, `@wajub/vue`, `@wajub/svelte` and `@wajub/angular` in those frameworks. They ship as
ES modules only.
## Four ways to take a payment
They differ on one question: who draws the pay button.
| Mode | Call | Who draws the pay button | You get | Pick it when |
| -------------- | -------------- | ------------------------ | ------------------------------------------------------------- | -------------------------------------- |
| Redirect | `checkout()` | Wajub | The hosted page, on a Wajub URL | You want the least front end code |
| Inline embed | `mount()` | Wajub | The hosted page inside your own layout | The checkout is the page |
| Overlay | `open()` | Wajub | The same, in a modal over your page | The checkout interrupts something else |
| Payment fields | `components()` | You | Individual fields you place yourself, then `confirmPayment()` | The layout itself is the requirement |
The first three run the whole checkout, including OTP and 3D Secure. Coupons and the shipping step
are not available on it. Payment fields give you the layout and hand back the parts Wajub must own,
with the [limits that come with it](https://docs.wajub.com/libraries/components/payment-fields#what-you-give-up).
> [!TIP]
> **Start with the inline embed**
>
> `mount()` keeps the customer on your page and costs you nothing in behaviour: the checkout still
> handles every method, every challenge and every edge case. Move to payment fields when the layout
> itself is the requirement.
There are seven field types: `card`, `mobileMoney`, `wallet`, `bankTransfer`, `crypto`, `payment`,
and `address`. Each has its own component, `CardComponent` to `CryptoComponent` in React, Vue and
Svelte, `` to `` in Angular, and `ComponentEmbed`, `` in
Angular, mounts any of them by its `type`.
## A session comes first
Nothing renders without a session token. There are two ways to get one, and they are not equally
safe.
| Where it is created | With | Cost |
| ------------------- | -------------------------------------- | -------------------------------------------------------- |
| Your server | A secret key, `sk.` | The amount is decided by code the customer cannot reach |
| The browser | A publishable key, `pk.` or `pk_test.` | One call, no backend, and the amount comes from the page |
`POST /payments` answers with `authorization_url`, `authorization_token` and the `transaction`. The
token is what the browser calls `sessionId`.
> [!CAUTION]
> **A secret key in a browser is refused and reported**
>
> A secret key must never be used from a browser: it is refused with `403`, and the key's owner is
> emailed. The block is deliberate. Use a publishable key in the
> browser, or create the session on your server and send only the token.
## Packages
[`@wajub/js`](https://docs.wajub.com/libraries/components/js) works on any page, with or without a framework.
```bash
npm install @wajub/js
```
A framework package needs `@wajub/js` installed beside it, as a peer dependency. React, Vue and
Svelte give you a `WajubProvider`, a `CheckoutEmbed` and one component per field type. Angular gives
you `provideWajub()`, a service, and a standalone component for the checkout and for each field
type.
```bash title="react"
npm install @wajub/react @wajub/js
```
```bash title="vue"
npm install @wajub/vue @wajub/js
```
```bash title="svelte"
npm install @wajub/svelte @wajub/js
```
```bash title="angular"
npm install @wajub/angular @wajub/js
```
**Install, configure and every prop**
- [React](https://docs.wajub.com/libraries/components/react): Provider, hooks and Next.js routes.
- [Vue 3](https://docs.wajub.com/libraries/components/vue): Provider, composables and Nuxt routes.
- [Svelte](https://docs.wajub.com/libraries/components/svelte): Provider, context and SvelteKit endpoints.
- [Angular](https://docs.wajub.com/libraries/components/angular): provideWajub, the service and Angular SSR routes.
Without a bundler, load the script directly, or import the module build.
```html title="From the CDN"
```
## The smallest working integration
Create the session on your server, pass the token to the page, mount.
```bash title="On your server"
curl https://api.wajub.com/payments \
-H "Authorization: sk_test.xxxxxxxxxxxxxxxx…" \
-H "Content-Type: application/json" \
-d '{
"amount": 25000,
"currency": "XAF",
"email": "buyer@example.com",
"callback": "https://shop.example.com/return"
}'
```
Send `authorization_token` to the browser, and nothing else. The token is scoped to that one
payment, so it is safe there.
```typescript title="In the browser"
import { mount } from '@wajub/js';
await mount('#checkout', {
sessionId: authorizationToken,
onSuccess: () => (window.location.href = '/thanks'),
onError: (error) => showRetry(error),
});
```
To choose when Wajub.js loads, call `loadWajub()` instead: it returns `{ wajub, Wajub, WajubError }`,
and you call `rt.wajub.mount(…)` on it.
> [!WARNING]
> **Everything resolves to null on the server**
>
> `loadWajub()` and the helpers return `null` when there is no `window`, so a server render never
> throws. Importing `@wajub/js` loads Wajub.js as a side effect: to avoid that, import from
> `@wajub/js/pure` and call `loadWajub()` when you choose.
## Where the rest is documented
| You want to | Read |
| ------------------------------------------------- | ------------------------------------------------------------- |
| See it working end to end | [Quickstart](https://docs.wajub.com/libraries/components/quickstart) |
| Create and secure the session | [Sessions and security](https://docs.wajub.com/libraries/components/sessions) |
| Mount, open or redirect, with every callback | [Display the checkout](https://docs.wajub.com/libraries/components/hosted-checkout) |
| Build your own layout around the fields | [Payment fields](https://docs.wajub.com/libraries/components/payment-fields) |
| Change colours, theme and locale from the page | [Appearance](https://docs.wajub.com/libraries/components/appearance) |
| Change the logo and the palette for every session | [Branding](https://docs.wajub.com/libraries/components/branding) |
| Read the full method and type listing | [SDK reference](https://docs.wajub.com/libraries/components/api-reference) |
| Type it correctly | [TypeScript](https://docs.wajub.com/libraries/components/typescript) |
| Copy a whole shape | [Use cases](https://docs.wajub.com/libraries/components/use-cases) |
| Work out why nothing renders | [Troubleshooting](https://docs.wajub.com/libraries/components/troubleshooting) |
- [Quickstart](https://docs.wajub.com/libraries/components/quickstart): A server session and a mounted checkout, end to end.
- [Display the checkout](https://docs.wajub.com/libraries/components/hosted-checkout): Every option and callback on mount, open and checkout.
- [Create a payment](https://docs.wajub.com/api/payments/create): The call that produces the session token.
- [Receive a webhook](https://docs.wajub.com/developer-tools/webhooks/quickstart): The only place a payment is confirmed for real.
---
# Wajub.js
URL: https://docs.wajub.com/libraries/components/js
> The core browser package, how to install it, allow it in your CSP and call it.
`@wajub/js` puts Wajub's checkout and payment fields on any page. This page covers installing it,
the Content Security Policy it needs, and the three ways to call it.
**`@wajub/js`**: version 1.8.1, GA, npm + CDN, Any modern browser (ES2020+)
## No offline build
Whether you install the npm package or use the script tag, Wajub.js loads from
`https://js.wajub.com`. There is no offline or self-hosted build: a browser that cannot reach
`js.wajub.com` has no checkout, so plan for that origin the way you plan for the API.
## Content Security Policy
A page with a strict `Content-Security-Policy` must allow these hosts. Without them the browser
blocks the checkout and reports the violation in the console.
| Directive | Host | Why |
| ------------- | ----------------------- | ------------------------------------------------------------- |
| `script-src` | `https://js.wajub.com` | Wajub.js, from npm or the script tag |
| `frame-src` | `https://pay.wajub.com` | The hosted checkout, the overlay and every payment field |
| `connect-src` | `https://pay.wajub.com` | `fetchSession()`, `signals()` and the checkout preload |
| `connect-src` | `https://api.wajub.com` | `createPayment()` and `initCheckout()` with a publishable key |
| `img-src` | `https://pay.wajub.com` | The Wajub mark in the overlay footer |
```text title="The directives to add to your own policy"
script-src https://js.wajub.com;
frame-src https://pay.wajub.com;
connect-src https://pay.wajub.com https://api.wajub.com;
img-src https://pay.wajub.com;
```
If you serve the checkout from your own verified domain, use that host wherever `pay.wajub.com`
appears. The checkout's own page sets its policy itself; yours only governs the page around it.
A payment field whose payment continues on the provider's own page, a crypto payment for example,
takes your whole page there, sometimes with a form post. If your policy sets `form-action`, it must
allow that post.
A payment field with `loader: 'skeleton'` adds one `